Installation Instructions VITOSOL-F - Viessmann
Installation Instructions VITOSOL-F - Viessmann
Installation Instructions VITOSOL-F - Viessmann
Create successful ePaper yourself
Turn your PDF publications into a flip-book with our unique Google optimized e-Paper software.
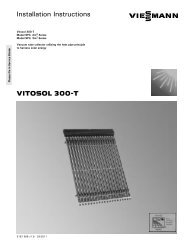
Please file in Service Binder<br />
<strong>Installation</strong> <strong>Instructions</strong><br />
for use by heating contractor<br />
Vitosol-F<br />
Models SV, SH<br />
Flat plate solar collectors for sloped roofs, flat roofs, walls<br />
and freestanding installation<br />
<strong>VITOSOL</strong>-F<br />
Vitosol 100-F<br />
Model SV1B<br />
Vitosol 200-F<br />
Model SV2A<br />
5285 710 v2.3 03/2011<br />
Vitosol 100-F<br />
Model SH1B<br />
Vitosol 200-F<br />
Model SH2A<br />
IMPORTANT<br />
Read and save these instructions<br />
for future reference.
Safety, <strong>Installation</strong> and Warranty Requirements<br />
2<br />
Safety, <strong>Installation</strong> and Warranty Requirements<br />
Please ensure that these instructions are read and understood before commencing installation. Failure to comply with the<br />
instructions listed below and details printed in this manual can cause product/property damage, severe personal injury, and/or<br />
loss of life. Ensure all requirements below are understood and fulfilled (including detailed information found in manual<br />
subsections).<br />
� Licensed professional heating<br />
contractor<br />
The installation, adjustment, service,<br />
and maintenance of this equipment<br />
must be performed by a licensed<br />
professional heating contractor.<br />
� Please see section<br />
entitled “Important<br />
Regulatory and<br />
<strong>Installation</strong><br />
Requirements”.<br />
� Product documentation<br />
Read all applicable documentation<br />
before commencing installation. Store<br />
documentation near boiler in a readily<br />
accessible location for reference in<br />
the future by service personnel.<br />
� For a listing of<br />
applicable literature,<br />
please see section<br />
entitled “Important<br />
Regulatory and Safety<br />
Requirements”.<br />
� Advice to owner<br />
Once the installation work is<br />
complete, the heating contractor must<br />
familiarize the system<br />
operator/ultimate owner with all<br />
equipment, as well as safety<br />
precautions/requirements, shut-down<br />
procedure, and the need for<br />
professional service annually.<br />
� Warranty<br />
Information contained in<br />
this and related product<br />
documentation must be<br />
read and followed. Failure<br />
to do so renders warranty<br />
null and void.<br />
� Grounding/Lightning protection of the<br />
solar system<br />
In the lower part of the building,<br />
install an electrical conductor on the<br />
piping system of the solar circuit in<br />
compliance with local regulations.<br />
Connection of the solar system to a<br />
new or existing lightning protection or<br />
the provision of local grounding should<br />
only be carried out by a licensed<br />
professional, who must take into<br />
account the prevailing conditions on<br />
site.<br />
CAUTION<br />
Observe maximum load and distance<br />
from edge before installing the<br />
substructure to the roof. If necessary,<br />
consult with a structural engineer to<br />
determine if the structure is suitable<br />
for installing solar collectors. The<br />
collectors must be securely mounted<br />
so that the mountings can withstand<br />
intense wind conditions and local<br />
snow loads.<br />
CAUTION<br />
Gloves and eye protection must be<br />
worn when handling solar panels.<br />
CAUTION<br />
Solar panel connection pipes and<br />
solar heating fluid can become hot<br />
enough to cause severe burns.<br />
Extreme caution must be taken if<br />
panels have been in a stagnant<br />
condition (no flow of fluid).<br />
CAUTION<br />
Avoid scratching or sudden shocks to<br />
glass cover of the solar panel.<br />
CAUTION<br />
Never step on collectors or solder in<br />
close proximity to the glass surface<br />
of the solar panel.<br />
� Applicability<br />
Vitosol solar collectors are designed<br />
for use in closed loop heating systems<br />
for domestic hot water heating, space<br />
heating and pool heating via a heat<br />
exchanger. The use of <strong>Viessmann</strong><br />
heat transfer medium “Tyfocor-HTL”<br />
is strongly recommended.<br />
IMPORTANT<br />
Pool water or potable water cannot be<br />
pumped directly through the Vitosol<br />
collectors. Damage to collectors caused<br />
by corrosion scaling or freeze damage<br />
will void warranty.<br />
5285 710 v2.3
5285 710 v2.3<br />
Safety Safety, <strong>Installation</strong> and Warranty Requirements . . . . . . . . . . . . 2<br />
Page<br />
Important Regulatory and <strong>Installation</strong> Requirements . . . . . 5<br />
General Information About these <strong>Instructions</strong> . . . . . . . . . . . . . . . . . . . . . . . . . . . . . . . . . . . . . . . . . . . . . . . . . . . . . . . 6<br />
Product Information . . . . . . . . . . . . . . . . . . . . . . . . . . . . . . . . . . . . . . . . . . . . . . . . . . . . . . . . . . . . . . . . 6<br />
Notes on <strong>Installation</strong> . . . . . . . . . . . . . . . . . . . . . . . . . . . . . . . . . . . . . . . . . . . . . . . . . . . . . . . . . . . . . . . 7<br />
Collector Location . . . . . . . . . . . . . . . . . . . . . . . . . . . . . . . . . . . . . . . . . . . . . . . . . . . . . . . . . . . . . . . . . . . . 7<br />
<strong>Installation</strong> on Sloped Roofs Overview of System Components . . . . . . . . . . . . . . . . . . . . . . . . . . . . . . . . . . . . . . . 8<br />
<strong>Installation</strong> on Flat Roofs or<br />
Freestanding <strong>Installation</strong><br />
Installing the Mounting Frames<br />
<strong>Installation</strong> dimensions for ten<br />
. . . . . . . . . . . . . . . . . . . . . . . . . . . . . . . . . . . . . . . . . . . 9<br />
Vitosol-F, Model SV collector panels . . . . . . . . . . . . . . . . . . . . . . . . . . . . . . . . . .<br />
<strong>Installation</strong> dimensions for ten<br />
10<br />
Vitosol-F, Model SH collector panels . . . . . . . . . . . . . . . . . . . . . . . . . . . . . . . . . . 11<br />
Installing the mounting rails . . . . . . . . . . . . . . . . . . . . . . . . . . . . . . . . . . . . . . . . . . . . . . . . . . 12<br />
Installing the Solar Collectors . . . . . . . . . . . . . . . . . . . . . . . . . . . . . . . . . . . . . . . . . . . . . . 13<br />
Overview of System Components<br />
(Vitosol-F, Model SV) . . . . . . . . . . . . . . . . . . . . . . . . . . . . . . . . . . . . . . . . . . . . . . . . . . . . . . . . . . . . . 15<br />
Overview of System Components<br />
(Vitosol-F, Model SH) . . . . . . . . . . . . . . . . . . . . . . . . . . . . . . . . . . . . . . . . . . . . . . . . . . . . . . . . . . . . . 16<br />
Determining the Collector Row Distance “z” . . . . . . . . . . . . . . . . . 17<br />
Installing the Collector Supports and Adjustment<br />
of the Angle of Inclination α . . . . . . . . . . . . . . . . . . . . . . . . . . . . . . . . . . . . . . . . . . . . . . . . . 18<br />
Installing a Freestanding <strong>Installation</strong><br />
(on substructures) . . . . . . . . . . . . . . . . . . . . . . . . . . . . . . . . . . . . . . . . . . . . . . . . . . . . . . . . . . . . . . . . . . . 19<br />
Installing a Freestanding <strong>Installation</strong><br />
(with weight inserts - for Model SH only) . . . . . . . . . . . . . . . . . . . . . . . . 21<br />
<strong>Installation</strong> on a Wall Overview of System Components<br />
(Vitosol-F, Model SH) . . . . . . . . . . . . . . . . . . . . . . . . . . . . . . . . . . . . . . . . . . . . . . . . . . . . . . . . . . . . . . 25<br />
Installing the Collector Supports and Adjusting<br />
the Angle of Inclination α . . . . . . . . . . . . . . . . . . . . . . . . . . . . . . . . . . . . . . . . . . . . . . . . . . . . . . . 26<br />
Installing the Solar Collectors . . . . . . . . . . . . . . . . . . . . . . . . . . . . . . . . . . . . . . . . . . . . . . . 27<br />
Contents<br />
3
Contents<br />
Hydronic Connections Supply and Return Piping Configuration . . . . . . . . . . . . . . . . . . . . . . . . . . . 29<br />
4<br />
Page<br />
Collector Supply and Return Piping . . . . . . . . . . . . . . . . . . . . . . . . . . . . . . . . . . . . 29<br />
Installing the General Connection Set and<br />
Collector Temperature Sensor . . . . . . . . . . . . . . . . . . . . . . . . . . . . . . . . . . . . . . . . . . . . . 30<br />
Appendix Sample System Layout . . . . . . . . . . . . . . . . . . . . . . . . . . . . . . . . . . . . . . . . . . . . . . . . . . . . . . . . . . . 31<br />
System <strong>Installation</strong> . . . . . . . . . . . . . . . . . . . . . . . . . . . . . . . . . . . . . . . . . . . . . . . . . . . . . . . . . . . . . . . . . . . 32<br />
Initial Start-up . . . . . . . . . . . . . . . . . . . . . . . . . . . . . . . . . . . . . . . . . . . . . . . . . . . . . . . . . . . . . . . . . . . . . . . . . . . . 33<br />
Commissioning and Adjustment . . . . . . . . . . . . . . . . . . . . . . . . . . . . . . . . . . . . . . . . . . . 33<br />
Post-<strong>Installation</strong> Information ... . . . . . . . . . . . . . . . . . . . . . . . . . . . . . . . . . . . . . . . . . . . 34<br />
Checklist . . . . . . . . . . . . . . . . . . . . . . . . . . . . . . . . . . . . . . . . . . . . . . . . . . . . . . . . . . . . . . . . . . . . . . . . . . . . . . . . . . . . . 34<br />
5285 710 v2.3
5285 710 v2.3<br />
Important Regulatory and <strong>Installation</strong> Requirements<br />
Codes<br />
The installation of solar heating<br />
systems might be governed by<br />
individual local rules and regulations for<br />
this type of product, which must be<br />
observed. The installation of this unit<br />
shall be in accordance with local codes.<br />
Always use latest editions of codes.<br />
Mechanical room<br />
Ensure the mechanical room complies<br />
with the requirements of the system<br />
design guideline and/or technical data<br />
manual.<br />
The solar storage tank must be installed<br />
in a mechanical room which is never<br />
subject to freezing temperatures.<br />
If not in use and danger of freezing<br />
exists in the mechanical room, ensure<br />
water in tank is drained.<br />
Working on the equipment<br />
The installation, adjustment, service,<br />
and maintenance of this equipment<br />
must be done by a licensed professional<br />
heating contractor who is qualified and<br />
experienced in the installation, service,<br />
and maintenance of solar heating<br />
systems. There are no user serviceable<br />
parts on this equipment.<br />
Ensure main power supply to<br />
equipment, the heating system, and all<br />
external controls has been deactivated.<br />
Take precautions in both instances to<br />
avoid accidental activation of power<br />
during service work.<br />
Technical literature<br />
Literature applicable to all aspects of<br />
the Vitosol:<br />
- Technical Data Manual<br />
- <strong>Installation</strong> <strong>Instructions</strong><br />
- Start-up/Service and Operating<br />
<strong>Instructions</strong><br />
- System Design Guidelines<br />
CAUTION<br />
For information regarding other<br />
<strong>Viessmann</strong> System Technology<br />
componentry, please reference<br />
documentation of the respective<br />
product.<br />
We offer frequent installation and<br />
service seminars to familiarize our<br />
partners with our products. Please<br />
inquire.<br />
Safety<br />
Carefully read this manual prior to<br />
attempting installation. Any warranty<br />
is null and void if these instructions<br />
are not followed.<br />
This product must be installed<br />
observing not only the necessary<br />
product literature (see list), but also<br />
all local provincial/state plumbing and<br />
building codes, as they apply to this<br />
product and all periphery equipment.<br />
The completeness and functionality of<br />
field supplied electrical controls and<br />
components must be verified by the<br />
heating contractor. These include<br />
pumps, valves, air vents, thermostats,<br />
temperature and pressure relief valves,<br />
etc.<br />
Leave all literature at the installation<br />
site and advise the system<br />
operator/ultimate owner where the<br />
literature can be found. Contact<br />
<strong>Viessmann</strong> for additional copies.<br />
5
General Information<br />
6<br />
About these <strong>Instructions</strong><br />
Take note of all symbols and notations intended to draw attention to potential hazards or important product<br />
information. These include ”WARNING”, ”CAUTION”, and ”IMPORTANT”. See below.<br />
Product Information<br />
WARNING<br />
Indicates an imminently hazardous<br />
situation which, if not avoided, could<br />
result in substantial product/property<br />
damage, serious injury or loss of life.<br />
CAUTION<br />
Indicates an imminently hazardous<br />
situation which, if not avoided, may<br />
result in minor injury or<br />
product/property damage.<br />
IMPORTANT<br />
Warnings draw your attention to the<br />
presence of potential hazards or<br />
important product information.<br />
Cautions draw your attention to the<br />
presence of potential hazards or<br />
important product information.<br />
Helpful hints for installation, operation<br />
or maintenance which pertain to the<br />
product.<br />
This symbol indicates that additional,<br />
pertinent information is to be found in<br />
the adjacent column.<br />
This symbol indicates that other<br />
instructions must be referenced.<br />
Please refer to the Vitosol 100-F and Vitosol 200-F Technical Data Manuals, Part No. 5354 729 and<br />
Part No. 5285 622 for complete technical information and product description.<br />
The Technical Data Manuals are available for download at www.viessmann.ca or www.viessmann-us.com.<br />
Vitosol 100-F, Models SV1B, SH1B<br />
Vitosol 200-F, Models SV2A, SH2A<br />
Flat plate solar collector<br />
Absorber area 25 ft. 2 /<br />
2.3 m 2<br />
Max. stagnation temperature 385 °F /<br />
196 °C<br />
Max. operating pressure 87 psig /<br />
6 bar<br />
5285 710 v2.3
5285 710 v2.3<br />
Notes on <strong>Installation</strong><br />
� The entire solar heating system<br />
should be installed in accordance with<br />
the accepted rules of technology,<br />
observing all relevant accident<br />
prevention regulations.<br />
� Employ suitable safety measures to<br />
prevent falls, falling objects and roof<br />
damage due to insufficient load<br />
bearing capacity, e.g. by means of<br />
scaffolding, ladders, cable ties etc.<br />
� The collectors must be securely<br />
mounted so that the mountings can<br />
withstand intense wind conditions.<br />
CAUTION<br />
Use only <strong>Viessmann</strong> supplied<br />
mounting clips and mounting<br />
hardware. Never drill or screw<br />
directly into collector side frames.<br />
� Use only stainless steel screws and<br />
bolts when fastening mounting<br />
brackets or frames.<br />
Collector Location<br />
� Although the glass collectors surfaces<br />
are hail-proof, <strong>Viessmann</strong> recomends<br />
users to include storm coverage in<br />
their building insurance. Our warranty<br />
does not cover storm related damage.<br />
� The collectors should, as far as<br />
possible, be oriented towards the<br />
south. Solar system performance<br />
drops off significantly if collectors<br />
face more than 50° off south.<br />
� The collectors should be mounted<br />
level, or with a slight ascending slope<br />
towards the high point of the piping,<br />
so that complete venting of air is<br />
assured.<br />
� An air vent valve (c/w shut-off valve)<br />
should be installed at the highest<br />
point of the solar heating system.<br />
General Information<br />
� Filling the solar heating system with<br />
<strong>Viessmann</strong> heat transfer fluid<br />
“Tyfocor-HTL” is highly<br />
recommended. Tyfocor-HTL is<br />
supplied pre-mixed and water must<br />
not be added.<br />
Other heat transfer fluids may be<br />
suitable if they have the same<br />
temperature range -31°F to 338°F<br />
(-35°C to 170°C) and are non-toxic.<br />
� In areas with extremely cold climate<br />
conditions, where outside<br />
temperatures may drop below -31°F<br />
(-35°C), the use of Tyfocor-HTL is not<br />
recommended.<br />
Use a solar propylene glycol mixture<br />
with a higher concentration of glycol<br />
that provides the level of freeze<br />
protection required for the area of the<br />
collector installation.<br />
CAUTION<br />
Pool water or potable water cannot<br />
be pumped directly through the<br />
Vitosol collectors. Damage to<br />
collectors caused by corrosion, freeze<br />
damage, or scaling will void warranty.<br />
� The piping inside and outside the<br />
building should be insulated to avoid<br />
heat loss. Use only high temperature<br />
resistant pipe insulation.<br />
Please refer to the Vitosol System Design Guidelines, for detailed information on the optimum alignment and<br />
inclination of solar collectors.<br />
Optimum alignment and inclination<br />
The solar collector provides the highest<br />
solar yield over an annual average when<br />
facing south with an inclination of<br />
approx. 30 to 45 degrees<br />
to the horizontal plane. However, the<br />
installation of a solar heating system is<br />
still viable even when the installation<br />
deviates quite significantly from the<br />
above (south-westerly to south-easterly<br />
alignment, 25 to 55 degrees<br />
inclination).<br />
7
<strong>Installation</strong> on Sloped Roofs<br />
8<br />
Overview of System Components<br />
41.6” /<br />
1056mm<br />
93.7” /<br />
2380mm<br />
Collector, Vitosol-F, Model SV1B and SV2A<br />
Collector, Vitosol-F, Model SH1B and SH2A<br />
93.7” /<br />
2380mm 41.6” /<br />
1056mm<br />
Sloped roof mounting hardware<br />
Roof bracket<br />
Joining element for mounting rail<br />
Mounting rail, 43¼” / 1098 mm or<br />
85 5 /8” / 2175 mm<br />
Washer, Ø ¼” / 8.4 mm<br />
Hexagon bolt, M 8 x 10<br />
Mounting plate<br />
Clamping bracket<br />
Locking bolt w/ threaded stud<br />
Hexagon nut<br />
Stainless steel countersunk screws,<br />
3.1” / 80 mm<br />
Hydronic connection accessories for<br />
one panel array<br />
Interconnection pipes (7248 239)<br />
General Connection Set (7248 240)<br />
consists of:<br />
Pipe clip<br />
Mounting rail end cap<br />
Connecting pipe<br />
Plugs<br />
Compression fitting (elbow),<br />
Ø ¾” / 22 mm, 90°<br />
¾” x 4” copper adaptor (part of<br />
installation fitting set 7427 617)<br />
Accessories for one solar heating<br />
system<br />
Sensor Well Set (7174 993)<br />
consists of:<br />
Compression fitting (tee), Ø ¾” /<br />
22 mm<br />
Sensor well<br />
Strain relief fitting<br />
Insulation<br />
5285 710 v2.3
5285 710 v2.3<br />
Installing the Mounting Frames<br />
<strong>Installation</strong> on Sloped Roofs<br />
Install the panel array level or slightly inclined (approximately ½” / 10 mm) towards the connection side to ensure complete<br />
venting. Always locate an air vent at the highest point in the piping.<br />
1.<br />
Correct Incorrect<br />
Source: CANSIA<br />
Lag<br />
bolt<br />
Minimum<br />
6.3 cm /<br />
2.5 in<br />
2.<br />
Drill within<br />
0.2” / 5 mm<br />
of center<br />
Source: CANSIA<br />
4.<br />
Too close<br />
to edge<br />
Washer<br />
Mounting<br />
bracket<br />
Silicone<br />
sealant<br />
5.<br />
3.<br />
Attaching roof brackets on shingled roof<br />
1. The roof brackets 1 should be laid<br />
out as close as possible to the<br />
dimensions shown in the chart on<br />
page 10 for SV collectors, and page<br />
11 for SH collectors.<br />
2. Locate the roof joist by tapping<br />
along the roof to find its general<br />
location (stud finders do not work<br />
well through shingles and roof<br />
sheathing).<br />
3. Pry up the shingles and drill small<br />
pilot holes to locate exact location<br />
of roof joist. If necessary, check<br />
where pilot hole is coming through<br />
roof from inside of attic.<br />
4. Drill pilot holes into center of joist as<br />
shown. Fill the pilot holes and coat<br />
the bottom of roof bracket with<br />
silicone sealant.<br />
5. Attach bracket to roof joist using<br />
the supplied 3.1” stainless steel<br />
screws qQ. Screws should<br />
penetrate the roof joist at least<br />
2½” / 64mm. Use longer (field<br />
supplied) screws if required to<br />
achieve necessary penetration.<br />
CAUTION<br />
The roof bracket must be securely<br />
attached to the roof joist of the<br />
structure. Only use stainless steel<br />
attachment screws.<br />
CAUTION<br />
The 3.1” / 80 mm screws supplied<br />
with the mounting kit may not be<br />
sufficient length for some roof<br />
structures. The installer must ensure<br />
screws will penetrate roof joist<br />
sufficiently, and if not, must provide<br />
longer screws or lag bolts.<br />
9
<strong>Installation</strong> on Sloped Roofs<br />
Installing the Mounting Frames (continued)<br />
<strong>Installation</strong> dimensions for ten Vitosol-F, Model SV collector panels<br />
Dimensions for Model SV collectors<br />
10<br />
6. Re-apply shingles, if required, and<br />
ensure all roof penetrations are<br />
thoroughly sealed with silicone<br />
sealant.<br />
7. Continue with mounting rail<br />
installation on page 12.<br />
Number 1 2 3 4 5 6 8 10<br />
Dim. A mm<br />
inches<br />
Dim. B mm<br />
inches<br />
Dim. C mm<br />
inches<br />
Dim. D *1 mm<br />
inches<br />
Dim. E mm<br />
inches<br />
Dim. F mm<br />
inches<br />
36¼” /<br />
923 mm<br />
6” /<br />
154 mm 36¼” /<br />
923 mm<br />
1019<br />
40<br />
1019<br />
40<br />
1019<br />
40<br />
–– –– 1077<br />
42½<br />
39.5<br />
1½<br />
1019<br />
40<br />
A<br />
1098<br />
43¼<br />
87.5<br />
3½<br />
68.5<br />
2¾<br />
2038<br />
80¼<br />
A+A<br />
2175<br />
85½<br />
87.5<br />
3½<br />
79<br />
3<br />
3115<br />
122½<br />
A+B+A<br />
3273<br />
128¾<br />
98<br />
4<br />
1019<br />
40<br />
1077<br />
42½<br />
79<br />
3<br />
4192<br />
165<br />
A+2xB+A<br />
4350<br />
171¼<br />
36¼” /<br />
923 mm<br />
98<br />
4<br />
1019<br />
40<br />
1077<br />
42½<br />
89.5<br />
3¼<br />
5269<br />
207½<br />
A+3xB+A<br />
5448<br />
214½<br />
108.5<br />
4¼<br />
1019<br />
40<br />
1077<br />
42½<br />
89.5<br />
3½<br />
6346<br />
249¾<br />
A+4xB+A<br />
75” - 82½”<br />
1900 - 2100 mm<br />
6525<br />
256¾<br />
108.5<br />
4¼<br />
1019<br />
40<br />
1077<br />
42½<br />
100<br />
4<br />
8500<br />
334½<br />
A+6xB+A<br />
8700<br />
342½<br />
119<br />
4¾<br />
1019<br />
40<br />
1077<br />
42½<br />
110<br />
4½<br />
10654<br />
419½<br />
A+8xB+A<br />
10875<br />
428<br />
129.5<br />
5<br />
*1 For static reasons, maintain the stated sequence. Maintain the dimensions A and B as far as possible. Roof brackets may also be offset<br />
if you need to locate roof joist. However, always maintain the overall dimension.<br />
5285 710 v2.3
5285 710 v2.3<br />
Installing the Mounting Frames (continued)<br />
<strong>Installation</strong> dimensions for ten Vitosol-F, Model SH collector panels<br />
86½” / 2200 mm<br />
Dimensions for Model SH collectors<br />
7¾” / 201 mm<br />
<strong>Installation</strong> on Sloped Roofs<br />
8. Follow steps 1 through 7 from<br />
Vitosol-F, Model SV (see page 9).<br />
Number 1 2 3 4 5 6 8 10<br />
Dim. A mm<br />
inches<br />
Dim. B mm<br />
inches<br />
Dim. C *1 mm<br />
inches<br />
Dim. D mm<br />
inches<br />
Dim. E mm<br />
inches<br />
Dim. F mm<br />
inches<br />
2422<br />
95¼<br />
2250<br />
88½<br />
86<br />
3½<br />
2250<br />
88½<br />
111<br />
4¼<br />
4844<br />
191<br />
4500<br />
177<br />
D+D<br />
172<br />
6¾<br />
2250<br />
88½<br />
7266<br />
286¼<br />
6901<br />
271½<br />
D+E+D<br />
182.5<br />
7¼<br />
2250<br />
88½<br />
-- -- 2401<br />
94½<br />
121.5<br />
4¾<br />
132<br />
5¼<br />
9688<br />
381½<br />
9302<br />
366<br />
D+2xE+D<br />
193<br />
7½<br />
2250<br />
88½<br />
2401<br />
94½<br />
142.5<br />
5½<br />
12110<br />
476¾<br />
11703<br />
460½<br />
D+3xE+D<br />
203<br />
8<br />
2250<br />
88½<br />
2401<br />
94½<br />
153<br />
6<br />
14532<br />
572<br />
14104<br />
555<br />
D+4xE+D<br />
214<br />
8½<br />
2250<br />
88½<br />
2401<br />
94½<br />
163.5<br />
6½<br />
19376<br />
763<br />
18906<br />
744½<br />
D+6xE+D<br />
235<br />
9¼<br />
2250<br />
88½<br />
2401<br />
94½<br />
184.5<br />
7¼<br />
24220<br />
953½<br />
23708<br />
933½<br />
D+8xE+D<br />
256<br />
10<br />
2250<br />
88½<br />
2401<br />
94½<br />
205.5<br />
8<br />
*1 For static reasons, maintain the stated sequence. Maintain the dimensions D and E as far as possible. Roof brackets may also be offset<br />
if you need to locate roof joist. However, always maintain the overall dimension.<br />
11
<strong>Installation</strong> on Sloped Roofs<br />
Installing the Mounting Frames (continued)<br />
Installing the mounting rails<br />
Note:<br />
See page 8 for numbered<br />
component description<br />
12<br />
3.<br />
2.<br />
1.<br />
IMPORTANT<br />
Turn the T-slot bolts 90° for all<br />
installation steps.<br />
1. If more than two collectors are being<br />
installed, rails must be joined<br />
together. Secure the joining elements<br />
into the mounting rails with<br />
bolt 6 and washer 5.<br />
IMPORTANT<br />
Make sure the mounting rail profile is as<br />
shown. The single slot in the rail must<br />
face upwards. Failure to install the<br />
mounting rail correctly will not allow<br />
proper mounting plate connection.<br />
2. Secure the mounting rails 4 to the<br />
roof bracket 1 with bolt 9, nut<br />
and washer 5. The locking bolt<br />
must be turned 90°.<br />
IMPORTANT<br />
Ensure the upper and lower mounting<br />
rails are square before tightening the<br />
locking bolts. Measure from opposite<br />
corners of the top and bottom rails to<br />
ensure that array is square.<br />
3. Hook the mounting plates into<br />
lower mounting rails according to<br />
the dimensions shown in the<br />
illustrations on pages 10 and 11.<br />
IMPORTANT<br />
Make sure the mounting plate is<br />
installed with the short bent edge<br />
connecting onto the bottom of the<br />
collector.<br />
5285 710 v2.3
5285 710 v2.3<br />
Installing the Solar Collectors<br />
1.<br />
¾” /<br />
21 mm<br />
Rating plate<br />
(must be on the outside of the<br />
outer collectors)<br />
Note:<br />
See page 8 for numbered component<br />
description<br />
Number of collectors 1 2 3 4 5 6 8 10<br />
Dimension r<br />
SV collector<br />
Dimension r<br />
SH collector<br />
4.<br />
inches<br />
mm<br />
inches<br />
mm<br />
3.<br />
0.8<br />
21<br />
0.8<br />
21<br />
0.8<br />
21<br />
1.2<br />
31.5<br />
1.2<br />
31.5<br />
1.7<br />
42<br />
2.<br />
1.2<br />
31.5<br />
2.1<br />
52.5<br />
3.<br />
1.7<br />
42<br />
2.5<br />
63<br />
5.<br />
1.7<br />
42<br />
2.9<br />
73.5<br />
8.<br />
4x<br />
2.1<br />
52.5<br />
3.7<br />
94.5<br />
2.5<br />
63<br />
4.5<br />
115.5<br />
<strong>Installation</strong> on Sloped Roofs<br />
CAUTION<br />
Do not stand on the collectors.<br />
IMPORTANT<br />
Interconnecting pipes must be free from<br />
damage and contamination. Lubricate all<br />
plug-in joints (O-ring seals) on the<br />
collectors. Use only the special grease<br />
supplied with the connection set.<br />
IMPORTANT<br />
On the first and last collector, the side<br />
to which the rating plate is attached<br />
must be on the outside (see page 14).<br />
Ensure that dimension “r” is maintained<br />
for first and last collector.<br />
1. Hook the collector into its mounting<br />
plates and lay down onto the<br />
mounting rails .<br />
2. Secure the collector with four<br />
clamping brackets onto the<br />
mounting rails. Tighten the two<br />
outer clamping bolts only. Turn the<br />
T-slot bolt 90°.<br />
3. Before inserting connecting pipe<br />
mark the middle of the connecting<br />
pipe with a marker or a piece of tape<br />
for reference. Insert the connecting<br />
pipe into the collector until the<br />
brass section is no longer visible.<br />
IMPORTANT<br />
Ensure interconnection pipe is centered<br />
between collectors.<br />
4. Position the second collector as in<br />
step 1.<br />
5. Carefully push the second collector<br />
against the first and insert the<br />
connecting pipes until they are<br />
centered between the collectors.<br />
Distance between the two<br />
installed collectors should be<br />
¾” / 21 mm.<br />
6. Install all additional collectors.<br />
Continued on following page.<br />
13
<strong>Installation</strong> on Sloped Roofs<br />
Installing the Solar Collectors (continued)<br />
* Arrow directions are to ensure<br />
balanced flow throughout the<br />
collectors.<br />
If the collectors are not connected as<br />
shown above, it could also result in:<br />
- Collector temperature sensor will not<br />
sense the hottest collector<br />
temperature<br />
- The fluid flow through the collector<br />
array may be imbalanced.<br />
- A decrease of the efficiency of the<br />
collectors.<br />
14<br />
Rating plate<br />
(must be on the outside of the<br />
outer collectors)<br />
Collector temperature sensor<br />
location<br />
Air vent location<br />
Supply pipe from collector<br />
Return pipe to collector<br />
Alternate location for return pipe<br />
from collector<br />
7. Tighten all clamping brackets 5.<br />
8. Press the cover caps (part of the<br />
connection set) into the mounting<br />
rails.<br />
9. Remove all labels and foil cover from<br />
glass only after the system is fully<br />
operational.<br />
CAUTION<br />
Arrows on the first and last collector<br />
in a series must point towards the<br />
outside.<br />
CAUTION<br />
<strong>Viessmann</strong> strongly recommends not<br />
removing the cover foil from the<br />
collectors until after initial start-up in<br />
order to prevent overheating.<br />
5285 710 710 v2.3
5285 710 v2.3<br />
Overview of System Components (Vitosol-F, Model SV)<br />
5 6<br />
9<br />
qP<br />
Dimensions:<br />
a Ø 0.4” / 11mm<br />
b 2” / 50mm<br />
c 4” / 100mm<br />
d 63” / 1600mm<br />
e 4” / 100mm<br />
f 71” / 1800mm<br />
g 3” / 80mm<br />
7<br />
qQ<br />
a<br />
qW<br />
b<br />
g<br />
c d<br />
e<br />
f<br />
<strong>Installation</strong> on Flat Roofs<br />
or Freestanding <strong>Installation</strong><br />
Legend:<br />
Collector support<br />
Cross brace<br />
Adjustable support, lower part<br />
Adjustable support, upper part<br />
(2-part support)<br />
Washer, ∅ 8.4mm<br />
Hexagon nut M8<br />
Hexagon bolt M8 x 20<br />
Retaining plate<br />
Clamping bracket<br />
Connecting brace<br />
Connecting tie<br />
15
<strong>Installation</strong> on Flat Roofs<br />
or Freestanding <strong>Installation</strong><br />
Overview of System Components (Vitosol-F, Model SH)<br />
Dimensions:<br />
a 2” / 50mm<br />
b Ø 0.4” / 11mm<br />
c 3.1” / 80mm<br />
d 4” / 100mm<br />
e 28.4” / 722mm<br />
f 3” / 75mm<br />
g 35.3” / 897mm<br />
16<br />
b<br />
a<br />
d<br />
c<br />
f<br />
e<br />
g<br />
d<br />
d<br />
Legend:<br />
Collector support<br />
Cross brace<br />
Adjustable support, lower part<br />
Adjustable support, upper part<br />
(2-part support)<br />
Washer, ∅ 8.4mm<br />
Hexagon nut M8<br />
Hexagon bolt M8 x 20<br />
Ballast support rails (field supplied)<br />
Retaining plate<br />
Clamping bracket<br />
Connecting brace<br />
Connecting tie<br />
Two different versions of the collector<br />
support frames are available.<br />
Collector support, angle of<br />
inclination adjustable from α 25° to<br />
45°<br />
Collector support, angle of<br />
inclination adjustable from α 50° to<br />
80°<br />
5285 710 v2.3
5285 710 v2.3<br />
Determining the Collector Row Distance “z”<br />
z =<br />
h<br />
h h<br />
Legend:<br />
z=Collector row distance<br />
h=Collector height<br />
α=Collector angle of inclination<br />
β=Solar angle<br />
z<br />
<strong>Installation</strong> on Flat Roofs<br />
or Freestanding <strong>Installation</strong><br />
IMPORTANT<br />
When installing several collectors in<br />
series, maintain a distance of “z”.<br />
Example:<br />
Model SV<br />
Toronto is located at approx. 43°<br />
latitude.<br />
1. Determine the angle of the sun β.<br />
This should be chosen so that the<br />
midday sun December 21 falls on the<br />
second row of collectors without<br />
being obstructed by shadows.<br />
Solar angle β:<br />
β= 90° - 23.5° - latitude<br />
(23.5° should be accepted as<br />
constant value for northern latitudes)<br />
β=90° - 23.5° - 43°=23.5°<br />
2. Calculating dimension “z”:<br />
h= 2380 mm (for model SH use<br />
1056 mm)<br />
α= 45°<br />
β= 23.5°<br />
2380 ⋅ sin(180° − (45° + 23.5°))<br />
z=<br />
sin 23.5°<br />
z=<br />
2380mm ⋅ sin111.5°<br />
sin 23.5°<br />
z=5553mm / 218.6”<br />
Refer to Vitosol System Design<br />
Guide for more information on<br />
calculating “z”.<br />
Note:<br />
Contact <strong>Viessmann</strong> Solar Tech Support<br />
for assistance with calculating distance<br />
“z”.<br />
17
<strong>Installation</strong> on Flat Roofs<br />
or Freestanding <strong>Installation</strong><br />
Installing the Collector Supports and Adjustment of the Angle of Inclination α<br />
Note:<br />
See page 15 or 16 (depending on<br />
model) for numbered component<br />
description.<br />
18<br />
1.<br />
2.<br />
1. Secure the adjustable support (lower)<br />
3 to the bottom cross brace 2<br />
with bolt 7, nut 6 and washer 5.<br />
2. Secure the upper and lower<br />
adjustable supports together with<br />
bolts 7, nuts 6 and washers 5, in<br />
accordance with the required angle of<br />
inclination.<br />
5285 710 v2.3
5285 710 v2.3<br />
Installing Freestanding <strong>Installation</strong> (on substructures)<br />
4.<br />
3.<br />
2.<br />
4x<br />
Substructure rails (field supplied)<br />
Note:<br />
See page 15 or 16 (depending on<br />
model) for numbered component<br />
description.<br />
Y<br />
Collector model X Y<br />
SV inches<br />
mm<br />
SH inches<br />
mm<br />
X<br />
23.5<br />
595<br />
75.6<br />
1920<br />
18.9<br />
481<br />
18.9<br />
481<br />
5.<br />
8,5<br />
6.<br />
<strong>Installation</strong> on Flat Roofs<br />
or Freestanding <strong>Installation</strong><br />
1. Mount the substructure (to be<br />
provided on site), e.g. U-channels, at<br />
right angles to and level with the<br />
installation orientation of the<br />
collectors according to the<br />
dimensions shown in the drawing.<br />
2. Position and align the collector<br />
support frames according to the<br />
dimensions shown in the drawing and<br />
secure them to the substructure<br />
using stainless steel bolts (supplied<br />
by others). Use mounting plates as<br />
templates for drilling holes.<br />
CAUTION<br />
Any welds or connections to the<br />
existing substructure must be<br />
supervised by a professional<br />
structural engineer.<br />
3. Secure retaining plates to the<br />
bottom of all collector supports; do<br />
not tighten screws yet.<br />
4. Secure connecting braces onto the<br />
retaining plates between the second<br />
and third, the fourth and fifth<br />
supports etc. Tighten all screws.<br />
5. Secure two connecting ties<br />
diagonally side by side to the<br />
adjustable supports, respectively for<br />
between one and six collectors.<br />
Note:<br />
Only one connecting tie is supplied<br />
for 1 to 6 collectors, two connecting<br />
ties for 7 to 10 collectors.<br />
6. For added stability, attach connecting<br />
ties to each other where they<br />
intersect, using field supplied nut and<br />
bolt.<br />
Continued on following page.<br />
19
<strong>Installation</strong> on Flat Roofs<br />
or Freestanding <strong>Installation</strong><br />
Installing Freestanding <strong>Installation</strong> (on substructures)<br />
*<br />
Legend<br />
Collector connection<br />
Spacer lip of the connecting brace<br />
20<br />
7.<br />
1.25”<br />
Rating plate<br />
Note:<br />
See page 15 or 16 (depending on<br />
model) for numbered component<br />
description.<br />
* See page 8 for numbered component<br />
description.<br />
8.<br />
9.1”<br />
11.<br />
10.<br />
9.<br />
7. Position the first collector into the<br />
retaining plates and push right up<br />
to the spacer lip of the connecting<br />
brace .<br />
IMPORTANT<br />
Install the collector panel so that the<br />
rating plate side of the first and last<br />
collector is on the outside (note<br />
sticker)! If only one collector is to be<br />
installed, connect the piping opposite<br />
the nameplate side. See page 14 for<br />
more information.<br />
8. Before inserting interconnection pipe<br />
mark the middle of the connecting<br />
pipe with a marker or a piece of tape<br />
for reference. Insert the inter -<br />
connection pipe * into the collector<br />
until the brass section is no longer<br />
visible.<br />
IMPORTANT<br />
Interconnecting pipes must be free from<br />
damage and contamination. Lubricate all<br />
plug-in joints (O-ring seals) on the<br />
collectors. Use only the special grease<br />
supplied with the connection set.<br />
9. Carefully push the next collector up<br />
to the spacer lip and insert the<br />
interconnection pipes as far as<br />
possible until they are centered<br />
between the collectors.<br />
IMPORTANT<br />
Ensure interconnection pipe is centered<br />
between collectors.<br />
10. Click clamping brackets into the<br />
collector edge at the top of all<br />
supports.<br />
11. Secure the connecting brace<br />
turned by 180° to the next brace<br />
using the clamping brackets between<br />
the second and third, the fourth and<br />
fifth supports, etc.<br />
12. The distance between collectors<br />
should be no greater than the width<br />
of the spacer lip on the connecting<br />
brace .<br />
13. Tighten all screws.<br />
5285 710 v2.3
5285 710 v2.3<br />
Installing a Freestanding <strong>Installation</strong> (with ballast weight inserts - for Model SH only)<br />
5.<br />
4.<br />
3.<br />
4x<br />
Collector model X Y<br />
SH inches<br />
mm<br />
75.6<br />
1920<br />
Note:<br />
See page 16 for numbered component<br />
description.<br />
Y<br />
X<br />
18.9<br />
481<br />
<strong>Installation</strong> on Flat Roofs<br />
or Freestanding <strong>Installation</strong><br />
1. Observe the max. load and distance<br />
from the edge of the roof for on-site<br />
substructure.<br />
CAUTION<br />
A structural engineer must be<br />
consulted to ensure that the existing<br />
roof structure is capable of carrying<br />
the additional weight of the<br />
collectors, insert weights and support<br />
slabs.<br />
2. Remove any gravel etc. from the<br />
installation area, cover the surface<br />
with protective building mats or foam<br />
insulation and position concrete slabs<br />
on top of the mats or insulation.<br />
3. Secure the support cross brace 2<br />
(use as drilling template) onto the<br />
concrete slabs (bolts supplied by<br />
others).<br />
4. Secure retaining plates to the<br />
bottom of all collector supports; do<br />
not yet tighten screws.<br />
5. Secure connecting braces onto<br />
the retaining plates between the<br />
second and third, the fourth and fifth<br />
supports etc.<br />
Tighten all screws.<br />
Continued on following page.<br />
21
<strong>Installation</strong> on Flat Roofs<br />
or Freestanding <strong>Installation</strong><br />
Installing Freestanding <strong>Installation</strong> (with ballast weight inserts - for Model SH only)<br />
22<br />
6.<br />
Ballast weight insert<br />
Note:<br />
See page 16 for numbered component<br />
description.<br />
8.<br />
8,5<br />
7.<br />
9.<br />
6. Secure the ballast support rails<br />
(field supplied) between the cross<br />
braces. These rails must be based on<br />
the size and shape of ballast weights.<br />
7. Apply ballast weights (see table on<br />
page 24).<br />
8. Secure two connecting ties<br />
diagonally side by side to the<br />
adjustable supports, respectively for<br />
between one and six collectors.<br />
Note:<br />
Only one connecting tie is supplied<br />
for 1 to 6 collectors, two connecting<br />
ties for 7 to 10 collectors.<br />
9. For added stability, attach connecting<br />
ties to each other where they<br />
intersect, using field supplied nut and<br />
bolt.<br />
5285 710 v2.3
5285 710 v2.3<br />
Installing Freestanding <strong>Installation</strong> (with ballast weight inserts - for Model SH only)<br />
*<br />
10.<br />
Collector connection<br />
Spacer lip on connecting brace<br />
Rating plate<br />
9.1”/<br />
232 mm<br />
11.<br />
Note:<br />
See page 16 for numbered component<br />
description.<br />
* See page 8 for numbered component<br />
description.<br />
14.<br />
13.<br />
12.<br />
<strong>Installation</strong> on Flat Roofs<br />
or Freestanding <strong>Installation</strong><br />
10.Position the first collector into the<br />
retaining plates and push right up to<br />
the spacer lip of the connecting<br />
brace. Center the distance when<br />
fitting only a single collector.<br />
IMPORTANT<br />
Install the collector panel so that the<br />
rating plate side of the first and last<br />
collector is on the outside (note<br />
sticker)! If only one collector is to be<br />
installed, connect the piping opposite<br />
the nameplate side. See page 14 for<br />
more information.<br />
11. Before inserting interconnection<br />
pipe *, mark the middle of the<br />
connecting pipe with a marker or a<br />
piece of tape for reference. Insert<br />
the interconnection pipe into the<br />
collector until the brass section is<br />
no longer visible.<br />
IMPORTANT<br />
Interconnection pipes must be free from<br />
damage and contamination. Lubricate all<br />
plug-in joints (O-ring seals) on the<br />
collectors. Use only the special grease<br />
supplied with the connection set.<br />
12. Carefully push the next collector up<br />
to the spacer lip and insert the<br />
interconnecting pipes as far as<br />
possible.<br />
IMPORTANT<br />
Ensure interconnection pipe is centered<br />
between collectors.<br />
13. Click clamping brackets into the<br />
collector edge at the top of all<br />
supports.<br />
14. Secure the connecting brace<br />
turned by 180° to the next brace<br />
using the clamping brackets<br />
between the second and third, the<br />
fourth and fifth supports, etc.<br />
15. The distance between collectors<br />
should be no greater than the width<br />
of the spacer lip on the<br />
connecting brace .<br />
16. Tighten all screws.<br />
23
<strong>Installation</strong> on Flat Roofs<br />
or Freestanding <strong>Installation</strong><br />
Installing Freestanding <strong>Installation</strong> (with ballast weight inserts - for Model SH only)<br />
Model SH Secure against slipping *1 Secure against lifting *2<br />
<strong>Installation</strong> height above<br />
ground level<br />
24<br />
ft.<br />
m<br />
Required weight at 25° lbs *3<br />
kg<br />
Required weight at 45° lbs<br />
kg<br />
5285 710 v2.3<br />
Overview of System Components (Vitosol-F, Model SH)<br />
α<br />
Dimensions:<br />
a 2” / 50mm<br />
b Ø 0.4” / 11mm<br />
c 3.1” / 80mm<br />
d 4” / 100mm<br />
e 28.4” / 722mm<br />
f 3” / 75mm<br />
g 35.3” / 897mm<br />
α=80º<br />
α=75º<br />
α=70º<br />
α=65º<br />
α=60º<br />
α=55º<br />
α=50º<br />
α=45º<br />
a<br />
b<br />
c<br />
50<br />
f<br />
e<br />
d<br />
g<br />
<strong>Installation</strong> on a Wall<br />
Legend:<br />
Collector support<br />
Cross brace<br />
Adjustable support<br />
Gusset plate with circular hole<br />
Gusset plate with slot<br />
Washer, ∅ 8.4mm<br />
Hexagon nut M8<br />
Hexagon bolt M8 x 20<br />
Retaining plate<br />
Clamping bracket<br />
Connecting brace<br />
CAUTION<br />
Wall mounting hardware is only<br />
supplied for SH series collectors.<br />
Wall mounting is not recommended<br />
for SV series collectors.<br />
25
<strong>Installation</strong> on a Wall<br />
Installing the Collector Supports and Adjusting the Angle of Inclination α<br />
Note:<br />
See page 25 for numbered component<br />
description.<br />
26<br />
1. Trim adjustable supports 3 in<br />
accordance with the required angle of<br />
inclination (see page 25).<br />
2. Secure the adjustable support 3 to<br />
the collector support 1 with bolts<br />
8, nuts 7 and washers 6.<br />
5285 710 v2.3
5285 710 v2.3<br />
Installing the Solar Collectors<br />
Legend<br />
Wall<br />
Dimensions<br />
a 19” / 481mm<br />
b 75.6” / 1920mm<br />
Note:<br />
Please see page 25 for numbered<br />
component description.<br />
a<br />
b<br />
<strong>Installation</strong> on a Wall<br />
1. Use the cross braces 2 as a drilling<br />
template.<br />
Secure the cross braces with gusset<br />
plate with circular hole 4 at the top<br />
of the wall.<br />
2. Secure the cross braces with slotted<br />
gusset plate 5 at the bottom of the<br />
wall.<br />
3. Secure retaining plates 9 to the<br />
bottom of all collector supports 1;<br />
do not tighten the screws.<br />
4. Secure the connecting brace onto<br />
the retaining plates between the<br />
second and third, the fourth and fifth<br />
collector supports 1 etc.Tighten all<br />
bolts.<br />
27
<strong>Installation</strong> on a Wall<br />
Installing the Solar Collectors (continued)<br />
*<br />
Legend<br />
Collector connection<br />
Spacer lip on connecting brace<br />
Rating plate<br />
a ≈ 9” / 230mm<br />
Note:<br />
See page 25 for numbered component<br />
description.<br />
* See page 8 for numbered component<br />
description.<br />
The top connecting brace may be<br />
omitted on larger collector arrays to<br />
ensure that the collectors stay aligned<br />
vertically.<br />
28<br />
IMPORTANT<br />
a<br />
5. Position the first collector into the<br />
retaining plates and push right up<br />
to the spacerlip of the connecting<br />
brace. Center the distance when<br />
fitting only a single collector.<br />
IMPORTANT<br />
Install the collector panel so that the<br />
rating plate side of the first and last<br />
collector is on the outside (note<br />
sticker)! If only one collector is to be<br />
installed, connect the piping opposite<br />
the nameplate side. See page 14 for<br />
more information.<br />
6. Before inserting interconnection<br />
pipe * mark the middle of the<br />
connecting pipe with a marker or a<br />
piece of tape for reference. Insert<br />
the connecting pipe into the<br />
collector until the brass section is<br />
no longer visible.<br />
IMPORTANT<br />
Interconnection pipes should not show<br />
any signs of damage.<br />
Lubricate all plug-in connectors (O-rings)<br />
found on the collectors only with the<br />
special grease supplied with the<br />
connection set.<br />
7. Carefully push the next collector up<br />
to the spacer lip and insert the<br />
interconnecting pipes as far as<br />
possible until they are centred<br />
between the collectors.<br />
8. Click clamping brackets into the<br />
collector edge at the top of all<br />
supports.<br />
9. Secure the connecting brace<br />
turned by 180° to the next brace<br />
using clamping brackets<br />
between the second and third, the<br />
fourth and fifth supports etc.<br />
10.The distance between collectors<br />
should be no greater than the width<br />
of the spacer lip on the<br />
connecting brace .<br />
11.Tighten all screws.<br />
12.Fit a snow guard on the roof above<br />
the collectors, as required.<br />
5285 710 v2.3
5285 710 v2.3<br />
Supply and Return Piping Configuration<br />
Vitosol 100-F / Vitosol 200-F<br />
Models SV, SH<br />
<strong>Installation</strong> of collectors, connection on<br />
alternate sides, max. 12 collectors.<br />
B<br />
max. 12<br />
C<br />
A<br />
Collector Supply and Return Piping<br />
� For the piping connecting the<br />
collectors to the Solar Divicon<br />
pumping station, <strong>Viessmann</strong><br />
recommends the use of commercial<br />
copper pipe and bronze fittings, or<br />
non-galvanized steel pipe. (PEX or<br />
other plastic pipes are not suitable for<br />
solar collector supply and return<br />
piping).<br />
<strong>Installation</strong> of collectors, single-sided<br />
connection, max. 10 collectors.<br />
max. 10<br />
C<br />
A<br />
B<br />
� Use only high temperature solder or<br />
brazing material when connecting the<br />
copper pipes in the collector piping.<br />
The melting temperature should be<br />
above 450°F / 232°C.<br />
� When laying out the collector array,<br />
ensure that the system can “breathe”<br />
properly. Do not route pipes above the<br />
collector array.<br />
Hydronic Connections<br />
Supply (hot)<br />
Return<br />
Air vent valve (shut-off type)<br />
CAUTION<br />
Do not use galvanized pipes,<br />
galvanized fittings or graphitized<br />
gaskets, or any type of plastic pipes.<br />
Refer to the Vitosol System<br />
Design Guidelines for<br />
required flow rates and pipe<br />
sizing parameters for<br />
Vitosol-F collectors.<br />
29
Hydronic Connections<br />
Installing the General Connection Set and Collector Temperature Sensor<br />
30<br />
1.<br />
Rating plate<br />
1.<br />
3. 2.<br />
Refer to <strong>Installation</strong><br />
<strong>Instructions</strong> Supplement:<br />
<strong>Installation</strong> fitting (5355 935)<br />
for information on air vent<br />
installation and metric pipe<br />
adaptors required for collector<br />
connections.<br />
3.<br />
Temperature Sensor from solar controller<br />
Note:<br />
Please see page 8 for numbered component<br />
description.<br />
2.<br />
6.<br />
9.<br />
4.<br />
7.<br />
8.<br />
5.<br />
When assembling the locking ring<br />
compression fittings and , observe<br />
the following:<br />
� All pipe ends must be square and<br />
deburred.<br />
� Push the union nut and the locking<br />
ring onto the pipe adaptor and lightly<br />
lubricate the threads with oil.<br />
� Push the pipe into the compression<br />
fitting as far as it will go.<br />
� Initially, turn the union nut by hand,<br />
then tighten with an open ended<br />
spanner by another ¾ turn.<br />
Do not use annealed copper pipes with<br />
compression fittings.<br />
1.Insert the plugs until they bottom<br />
out, and secure with pipe clips .<br />
2.Insert the connection pipes until<br />
they bottom out and secure them with<br />
pipe clips .<br />
3.Fit the elbow onto the return<br />
connector at the bottom of the<br />
collector.<br />
4.Fit the tee onto the supply<br />
connector at the top of the collector.<br />
5.Insert the sensor well into the tee<br />
. Hold the tee tightly.<br />
6.Insert the strain relief fitting into the<br />
sensor well.<br />
7.Insert the collector temperature sensor<br />
B (supplied with solar controller) until<br />
it bottoms out inside the sensor well,<br />
and secure with strain relief fitting.<br />
8.Insert the 4” copper adaptor into the<br />
compression fittings and make the<br />
connection between the panel array and<br />
the supply and return piping.<br />
9.Install the insulation and secure with<br />
adhesive on its cut faces.<br />
CAUTION<br />
The collectors may be damaged if the<br />
solar heating system is not filled with<br />
heat transfer medium immediately<br />
after installation. Therefore protect<br />
the collectors against insolation by<br />
covering them up.<br />
5285 710 v2.3
5285 710 v2.3<br />
Sample System Layout<br />
DHW<br />
Solar collector<br />
Solar-Divicon (pumping station)<br />
Overflow container<br />
Expansion vessel<br />
Solar manual filling pump (optional)<br />
System fill manifold valve<br />
Screw-in elbow, comes with<br />
sensor well<br />
Solar storage tank<br />
I Tank temperature sensor<br />
Air separator<br />
Solar control unit<br />
Flexible connection pipe (optional)<br />
Collector temperature sensor<br />
Fast air vent, c/w shutoff valve *1<br />
R Return to collector<br />
S Supply from collector<br />
I<br />
*1 Install at least one air vent valve at the<br />
highest point of the system.<br />
DCW<br />
S R<br />
Refer to the Vitosol System<br />
Design Guidelines for more<br />
information on other<br />
installation examples and<br />
system types.<br />
WARNING<br />
The domestic hot water temperature<br />
must be limited to 140°F / 60°C by<br />
installing a mixing device, e.g. a<br />
thermostatic anti-scald mixing valve.<br />
T<br />
T<br />
T<br />
Appendix<br />
31
32<br />
Appendix<br />
System <strong>Installation</strong><br />
Please refer to the Vitosol<br />
”System Design Guidelines”<br />
for supplementary notes on<br />
installation examples and<br />
system types.<br />
� The connecting lines must be pressure<br />
and temperature-resistant (observe<br />
the max. shutdown temperature of<br />
the collector).<br />
� To guarantee the satisfactory<br />
operation of the solar heating system,<br />
install the pipes so that complete air<br />
venting is assured.<br />
CAUTION<br />
Use only red bronze fittings, brass<br />
fittings and copper piping.<br />
Do not use galvanized pipes,<br />
galvanized fittings, graphitized<br />
gaskets or any type of plastic pipe.<br />
CAUTION<br />
Do not carry out any soldering work<br />
at or near the collector.<br />
� At least one fast-acting air vent with<br />
shut-off valve must be installed at the<br />
highest point of the system.<br />
Install an air separator in the flow of<br />
the solar circuit, upstream of the inlet<br />
to the indirect coil of the domestic hot<br />
water tank. Air separation is standard<br />
in Solar-Divicon.<br />
� The system must be equipped with an<br />
expansion tank, safety valve and<br />
circulation pump.<br />
� The Solar-Divicon is equipped with a<br />
safety valve designed for max. 87<br />
psig / 6 bar.<br />
� Use only a diaphragm expansion tank<br />
that is suitable for the application as a<br />
solar expansion tank.<br />
� The expansion tank must be approved<br />
for use in a solar heating system and<br />
must be connected via a heat<br />
insulating loop.<br />
The diaphragms and seals of the<br />
expansion tank and the safety valve<br />
must be suitable for the heat transfer<br />
medium.<br />
Please refer to the ”Service<br />
<strong>Instructions</strong>” in order to<br />
calculate the inlet pressure<br />
of the diaphragm expansion<br />
vessel.<br />
� Before filling system with solar heat<br />
transfer fluid, thoroughly flush and<br />
clean piping system to remove all dirt,<br />
oils, flux and solder residue.<br />
� Fill the solar heating system with<br />
<strong>Viessmann</strong> heat transfer medium<br />
”Tyfocor-HTL” or suitable fluid as<br />
described on page 7. The<br />
“Tyfocor-HTL” is supplied as a<br />
premixed glycol/water solution and<br />
must not be mixed. The blow-off and<br />
discharge pipes must be run to an<br />
open container capable of<br />
accommodating the total capacity of<br />
the collectors.<br />
*1 E.g. HT/Armaflex (temperature resistant up to 175 ºC) supplied by Armstrong Insulation Products<br />
CAUTION<br />
Components used must be resistant<br />
to the heat transfer medium.<br />
Insulation of external piping must be<br />
resistant to temperature *1 , UV<br />
radiation and to destruction by birds<br />
(e.g. through the use of metal<br />
sheathing).<br />
� Prior to installing pipe insulation, run a<br />
stranded and protected 18/2 AWG<br />
low voltage sensor wire from the solar<br />
controller to the collector sensor well.<br />
Ensure all wire connections are<br />
soldered and sealed with heat shrink<br />
sleeve connectors (see illustration<br />
below). Cover all wire and<br />
connections with insulation and<br />
jacket.<br />
Source: CANSIA<br />
Twisted and soldered<br />
Heat shrink sleeve<br />
Heat lightly<br />
5285 710 v2.3
5285 710 v2.3<br />
Initial Start-up<br />
Collector<br />
Pressure relief valve<br />
Solar-Divicon<br />
Diaphragm expansion vessel<br />
High-limit safety cut-out<br />
Solar storage tank<br />
Air vent c/w shut-off<br />
Overflow container<br />
T Temperature sensors<br />
Commissioning and Adjustment<br />
Appendix<br />
Refer to Vitosol Start-Up,<br />
Service and Operating<br />
<strong>Instructions</strong> for detailed<br />
information on flushing, filling, venting<br />
and setting system pressures.<br />
The collector circuit must be protected<br />
in such a way that at the highest<br />
possible collector temperature<br />
(shutdown temperature) no heat<br />
transfer fluid can escape from the<br />
safety valve, or the air vent.<br />
This is achieved by the appropriate<br />
sizing of the expansion tank and<br />
matching of the system pressure.<br />
IMPORTANT<br />
Under cold fill conditions, a minimum<br />
static pressure must be maintained. It<br />
can be calculated by the following:<br />
15 psig +0.45 psig x_____h(ft.)<br />
or<br />
1.0 bar + 0.1 x_____h(m)<br />
CAUTION<br />
The pressure relief valve must be piped<br />
to the overflow container or drain at all<br />
times, since excessively hot fluid can<br />
discharge from the system.<br />
CAUTION<br />
After de-aeration, the air vent c/w<br />
shut-off at top of system must be<br />
closed. To protect the solar system<br />
from overheating in the summer, e.g.<br />
during the holidays, do not shut off<br />
the power to the solar system.<br />
For commissioning of the solar heating system, refer to the Vitosol Start-Up, Service and Operating <strong>Instructions</strong> and<br />
Solar Divicon <strong>Installation</strong>, Start-Up and Service <strong>Instructions</strong>.<br />
33
34<br />
Appendix<br />
Post-<strong>Installation</strong> Information...<br />
Checklist<br />
� Has the solar circuit been installed in<br />
accordance with the circuit diagram<br />
and all relevant standards?<br />
� Have the collectors been installed<br />
with a slight upward gradient<br />
towards the piping side?<br />
� Have the supply and return<br />
connections been carried out and<br />
pressure tested?<br />
� Have the electrical connections been<br />
carried out correctly?<br />
� Have the sensors been installed<br />
correctly?<br />
� Have air vent valves been installed at<br />
the highest points of the system and<br />
are they open?<br />
CAUTION<br />
It is absolutely essential to close the<br />
air vent valves again when the<br />
system has been started up and<br />
de-aerated.<br />
� Have all screws, screwed pipe<br />
connections and covers been securely<br />
tightened?<br />
� Has the solar hot water tank been<br />
filled with water?<br />
� Does the maximum capacity of the<br />
expansion vessel correspond to the<br />
value stated in the System Design<br />
Guidelines?<br />
� Has the inlet pressure of the<br />
expansion vessel been adjusted to<br />
the system cold fill pressure?<br />
� Have connecting pipes been<br />
insulated and protected from the<br />
elements?<br />
5285 710 v2.3
35<br />
5285 710 v2.3
<strong>Viessmann</strong> Manufacturing Company (U.S.) Inc.<br />
45 Access Road<br />
Warwick, Rhode Island • 02886 • USA<br />
Tel. (401) 732-0667 • Fax (401) 732-0590<br />
www.viessmann-us.com • info@viessmann-us.com<br />
36<br />
<strong>Viessmann</strong> Manufacturing Company Inc.<br />
750 McMurray Road<br />
Waterloo, Ontario • N2V 2G5 • Canada<br />
Tel. (519) 885-6300 • Fax (519) 885-0887<br />
www.viessmann.ca • info@viessmann.ca<br />
5285 710 v2.3 Technical information subject to change without notice.<br />
Printed on environmentally friendly<br />
(recycled and recyclable) paper.


