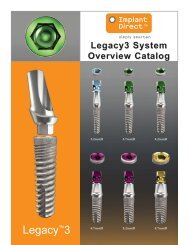
The Bicortical Implant for immediate insertion after ... - Implant Direct
The Bicortical Implant for immediate insertion after ... - Implant Direct
The Bicortical Implant for immediate insertion after ... - Implant Direct

You also want an ePaper? Increase the reach of your titles
YUMPU automatically turns print PDFs into web optimized ePapers that Google loves.
Easy, simple <strong>insertion</strong><br />
technique<br />
Preparation <strong>for</strong> <strong>insertion</strong><br />
in porous cancellous bone<br />
(anterior to sinus and mental<br />
<strong>for</strong>amen)<br />
Basic principle: <strong>The</strong> more<br />
porous the bone is, the larger<br />
should be the implant diameter.<br />
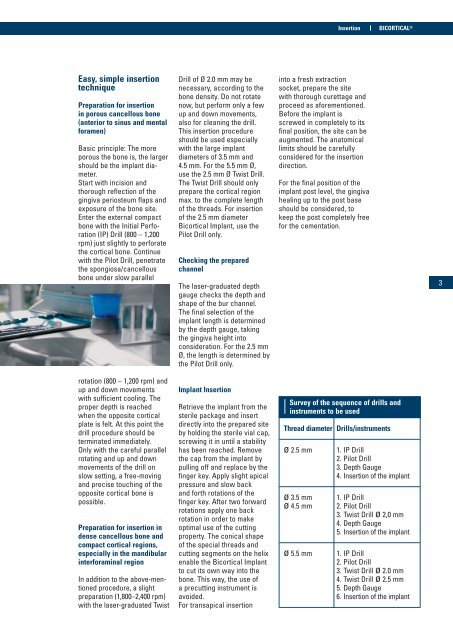
Start with incision and<br />
thorough reflection of the<br />
gingiva periosteum flaps and<br />
exposure of the bone site.<br />
Enter the external compact<br />
bone with the Initial Per<strong>for</strong>ation<br />
(IP) Drill (800 – 1, 00<br />
rpm) just slightly to per<strong>for</strong>ate<br />
the cortical bone. Continue<br />
with the Pilot Drill, penetrate<br />
the spongiosa/cancellous<br />
bone under slow parallel<br />
rotation (800 – 1, 00 rpm) and<br />
up and down movements<br />
with sufficient cooling. <strong>The</strong><br />
proper depth is reached<br />
when the opposite cortical<br />
plate is felt. At this point the<br />
drill procedure should be<br />
terminated <strong>immediate</strong>ly.<br />
Only with the careful parallel<br />
rotating and up and down<br />
movements of the drill on<br />
slow setting, a free-moving<br />
and precise touching of the<br />
opposite cortical bone is<br />
possible.<br />
Preparation <strong>for</strong> <strong>insertion</strong> in<br />
dense cancellous bone and<br />
compact cortical regions,<br />
especially in the mandibular<br />
inter<strong>for</strong>aminal region<br />
In addition to the above-mentioned<br />
procedure, a slight<br />
preparation (1,800– ,400 rpm)<br />
with the laser-graduated Twist<br />
Drill of Ø .0 mm may be<br />
necessary, according to the<br />
bone density. Do not rotate<br />
now, but per<strong>for</strong>m only a few<br />
up and down movements,<br />
also <strong>for</strong> cleaning the drill.<br />
This <strong>insertion</strong> procedure<br />
should be used especially<br />
with the large implant<br />
diameters of .5 mm and<br />
4.5 mm. For the 5.5 mm Ø,<br />
use the .5 mm Ø Twist Drill.<br />
<strong>The</strong> Twist Drill should only<br />
prepare the cortical region<br />
max. to the complete length<br />
of the threads. For <strong>insertion</strong><br />
of the .5 mm diameter<br />
<strong>Bicortical</strong> <strong>Implant</strong>, use the<br />
Pilot Drill only.<br />
Checking the prepared<br />
channel<br />
<strong>The</strong> laser-graduated depth<br />
gauge checks the depth and<br />
shape of the bur channel.<br />
<strong>The</strong> final selection of the<br />
implant length is determined<br />
by the depth gauge, taking<br />
the gingiva height into<br />
consideration. For the .5 mm<br />
Ø, the length is determined by<br />
the Pilot Drill only.<br />
<strong>Implant</strong> Insertion<br />
Retrieve the implant from the<br />
sterile package and insert<br />
directly into the prepared site<br />
by holding the sterile vial cap,<br />
screwing it in until a stability<br />
has been reached. Remove<br />
the cap from the implant by<br />
pulling off and replace by the<br />
finger key. Apply slight apical<br />
pressure and slow back<br />
and <strong>for</strong>th rotations of the<br />
finger key. After two <strong>for</strong>ward<br />
rotations apply one back<br />
rotation in order to make<br />
optimal use of the cutting<br />
property. <strong>The</strong> conical shape<br />
of the special threads and<br />
cutting segments on the helix<br />
enable the <strong>Bicortical</strong> <strong>Implant</strong><br />
to cut its own way into the<br />
bone. This way, the use of<br />
a precutting instrument is<br />
avoided.<br />
For transapical <strong>insertion</strong><br />
Insertion<br />
into a fresh extraction<br />
socket, prepare the site<br />
with thorough curettage and<br />
proceed as a<strong>for</strong>ementioned.<br />
Be<strong>for</strong>e the implant is<br />
screwed in completely to its<br />
final position, the site can be<br />
augmented. <strong>The</strong> anatomical<br />
limits should be carefully<br />
considered <strong>for</strong> the <strong>insertion</strong><br />
direction.<br />
For the final position of the<br />
implant post level, the gingiva<br />
healing up to the post base<br />
should be considered, to<br />
keep the post completely free<br />
<strong>for</strong> the cementation.<br />
BICORTICAL ®<br />
Survey of the sequence of drills and<br />
instruments to be used<br />
Thread diameter Drills/instruments<br />
ø .5 mm 1. IP Drill<br />
. Pilot Drill<br />
. Depth Gauge<br />
4. Insertion of the implant<br />
ø .5 mm 1. IP Drill<br />
ø 4.5 mm . Pilot Drill<br />
. Twist Drill ø ,0 mm<br />
4. Depth Gauge<br />
5. Insertion of the implant<br />
ø 5.5 mm 1. IP Drill<br />
. Pilot Drill<br />
. Twist Drill ø .0 mm<br />
4. Twist Drill ø .5 mm<br />
5. Depth Gauge<br />
6. Insertion of the implant