BICORTICAL® Implant with Ball Post - Implant Direct
BICORTICAL® Implant with Ball Post - Implant Direct
BICORTICAL® Implant with Ball Post - Implant Direct

Create successful ePaper yourself
Turn your PDF publications into a flip-book with our unique Google optimized e-Paper software.
ONE-PHASE<br />
SUCCESS<br />
THE ORIGINAL<br />
PURE TITANIUM<br />
SELF-CUTTING BICORTICAL<br />
BICORTICAL SUPPORT PERFECT<br />
®<br />
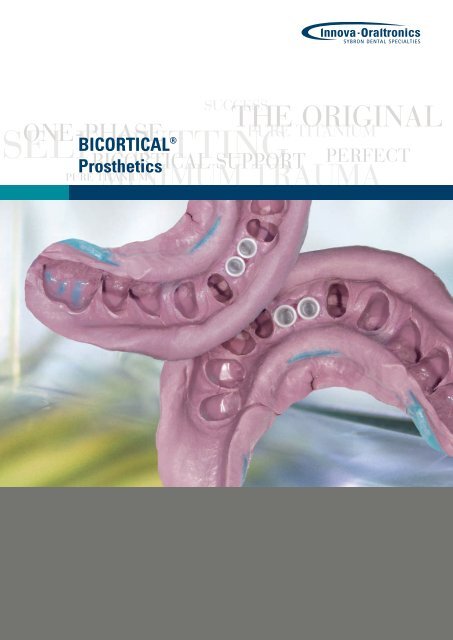
Prosthetics<br />
MINIMUM TRAUMA<br />
PURE TITANIUM
BICORTICAL ®<br />
<strong>Implant</strong>s<br />
Basic Information<br />
Indication<br />
The one-phase selftapping<br />
Bicortical <strong>Implant</strong> is indicated<br />
for multiple applications:<br />
Single crowns<br />
Bridges<br />
Bar constructions<br />
Full dentures<br />
Three different post variations<br />
for easy and perfect<br />
application:<br />
• Bicortical <strong>Implant</strong> <strong>with</strong><br />
adjustable square post for<br />
narrow interdental spaces<br />
• Bicortical <strong>Implant</strong> <strong>with</strong><br />
round post: the conical<br />
shape enables an easy<br />
insertion of long-span<br />
bridges. Also simple bar<br />
constructions can be easily<br />
cemented<br />
• Bicortical <strong>Implant</strong> <strong>with</strong> ball<br />
post for anchorage of<br />
longspan bridges<br />
Clinical Advice<br />
If an adjustment after<br />
insertion of the Bicortical<br />
<strong>Implant</strong> <strong>with</strong> square post (the<br />
ball and round posts are nonadjustable)<br />
is indicated, use<br />
the post bending pliers and<br />
the post bending stabilizer<br />
and adjust the round shaft<br />
just below the transgingival<br />
area. Be careful to prevent<br />
damage to the square post,<br />
as an impression <strong>with</strong> the<br />
impression/ modelling cap<br />
and a transfer to the master<br />
model would not be precise.<br />
Modification of the<br />
implant post<br />
In case during the preparation<br />
of the final prosthetic<br />
construction it becomes<br />
obvious that the model<br />
analog and also the corresponding<br />
original implant post<br />
after insertion have to be<br />
adjusted due to lacking
space or to divergencies,<br />
please proceed as follows:<br />
1 Prepare an individual<br />
transfer cap of acrylic<br />
material (for instance GC<br />
Pattern Resin LS ® ) on the<br />
model analog in the<br />
laboratory.<br />
Modify the post through the<br />
acrylic cap step by step,<br />
according to the required<br />
space or the insertion<br />
direction.<br />
If necessary, modify also<br />
the original impression and<br />
modelling cap accordingly<br />
transgingival area<br />
.75 mm<br />
adjustable area<br />
at the incisal/occlusal side.<br />
4 The acrylic individual<br />
transfer cap is mounted<br />
on the original implant in<br />
the patient’s mouth by<br />
the doctor who is now<br />
able to precisely reduce<br />
the protruding material<br />
accordingly.<br />
New in the<br />
Bicortical Family<br />
<strong>Ball</strong> <strong>Post</strong>s<br />
Square <strong>Post</strong> Round <strong>Post</strong> <strong>Ball</strong> <strong>Post</strong><br />
5 mm <strong>Post</strong><br />
max. Insertion Depth<br />
For an additional indication,<br />
the Bicortical <strong>Implant</strong> is now<br />
available also in a ball post<br />
version.<br />
This is an additional possibility<br />
to anchor full dentures on<br />
Bicortical <strong>Implant</strong>s.<br />
The following retention<br />
elements can be applied<br />
alternatively:<br />
• Metal ringhousing<br />
<strong>with</strong> O-ring<br />
• Retention cap Dalbo ® -PLUS<br />
elliptic<br />
7 mm <strong>Post</strong> 6 mm <strong>Post</strong><br />
Insertion Depth Insertion Depth<br />
<strong>Implant</strong>s<br />
BICORTICAL ®
4<br />
BICORTICAL ®<br />
Prosthetic Procedure<br />
Prosthetic Procedure<br />
1 Impression<br />
In the mouth the modelling/impression cap (antirotation) is mounted on<br />
the implant post and the impression taken <strong>with</strong> a stable material (e.g. Espe<br />
Impregum F ® ) in an individual impression tray.<br />
When removing the tray from the mouth, the cap remains and is retained in the<br />
impression material.<br />
<strong>Post</strong>-op situation<br />
in the mouth<br />
Single tooth replacement <strong>with</strong><br />
Bicortical <strong>Implant</strong> <strong>with</strong> round post<br />
Mounting the modelling/impression cap<br />
on the post of the Bicortical <strong>Implant</strong><br />
Impression-taking of the<br />
modelling/impression cap
Model preparation<br />
Prosthetic Procedure<br />
Place the corresponding model analog (antirotation) into the impression cap<br />
which is in the impression material.<br />
Prepare an artificial gingiva and cast the impression <strong>with</strong> a class 4 plaster.<br />
After curing of the plaster, remove the impression tray and also remove the<br />
impression cap from the impression material by using a scalpel, and clean.<br />
Insertion of the model<br />
analog into the impression<br />
BICORTICAL ®<br />
Finished model <strong>with</strong> artificial gingiva<br />
and model analog<br />
5
6<br />
BICORTICAL ®<br />
Prosthetic Procedure<br />
Modelling<br />
Remove the impression cap from the impression and use now as modelling<br />
cap. Place on the model analog (antirotation) and remove the retention part.<br />
The complete modelling (full wax-up) of the crown or bridge can now take<br />
place. Place a silicone pattern over the model and cut on the top. This will<br />
serve as orientation for the next following reduction of the wax-up to the<br />
required shape of the construction. The silicone pattern serves also an aid<br />
for modelling the artificial gingiva to ensure a precise cervical design of the<br />
crown.<br />
The impression/modelling cap is mounted<br />
on the implant analog<br />
Remove the retention<br />
The cap now serves as modelling cap<br />
Tip<br />
The cap for the square post is slightly<br />
longer than the square itself. If the crown<br />
margin is to be level <strong>with</strong> the square,<br />
shorten the cap accordingly.<br />
Complete wax-up on the modelling cap<br />
Occlusal view <strong>with</strong> antagonist jaw<br />
Preparation of the silicone pattern<br />
placed over the wax-up for orientation
Prosthetic Procedure<br />
Reduced wax-up ready for precise<br />
investment, casting and trimming<br />
Fig.<br />
Silicone pattern for control of the<br />
modellation<br />
BICORTICAL ®<br />
Silicone pattern <strong>with</strong>out modellation<br />
<strong>with</strong> reduced/adjusted artificial gingiva<br />
7
BICORTICAL ®<br />
Prosthetic Procedure<br />
4 Investing, casting and trimming<br />
The reduced wax-up is invested as usual in precision investment material.<br />
Take care that the modelling cap is filled completely <strong>with</strong> the material, avoiding<br />
blisters. We recommend to cast in a vacuum pressure casting unit. The internal<br />
contour of the modelling cap should be blasted <strong>with</strong> blast brightening pearls.<br />
When inserting the cast of a single crown on the model analog <strong>with</strong> round post,<br />
make sure that the antirotation protection is guaranteed. The final trimming of<br />
the construction should proceed as usual.<br />
5 Veneering<br />
After trial insertion of the structure, the metal structure is<br />
veneered <strong>with</strong> ceramics. The adjusted artificial gingiva serves<br />
for a precise cervical design of the crown.<br />
Metal structure ready for<br />
ceramics veneering<br />
Finished ceramics veneered crown on the<br />
model<br />
Important<br />
The basal contact surface of the crown to<br />
the gingiva should be polished and easy<br />
to clean.
6 Insertion<br />
Result<br />
Prosthetic Procedure<br />
Positioning aid fixed on<br />
crown and neighboring teeth<br />
Situation in the mouth<br />
Trial insertion of the crown<br />
using a positioning aid<br />
The final ceramics crown inserted<br />
BICORTICAL ®<br />
In order to facilitate the final insertion of the crown, we recommend that the technician prepares<br />
a positioning aid made of acrylic material. This will help to precisely fit the crown into the<br />
final position and cement the crown, by pushing the gingiva slightly.
10<br />
BICORTICAL ®<br />
Modification of the implant posts<br />
Modification of the implant posts<br />
1 Preparation<br />
Preparation of an individual transfer cap of acrylic<br />
material (e.g. GC Pattern Resin LS ® ) on the model analog<br />
in the laboratory.<br />
Situation on the model<br />
Between implant post and incisal margin<br />
of the lower incisor, there is no space for<br />
insertion of a crown.<br />
Preparation of an<br />
individual transfer cap<br />
of acrylic material (e.g. GC Pattern Resin<br />
LS ® ) on the model analog in the laboratory<br />
(here antirotation supported on the<br />
neighboring teeth)<br />
Reduction of the posts<br />
for optimal use of the available space<br />
by abrading through the transfer cap,<br />
“step by step“
If required, the original modelling/impression cap must also be<br />
shortened accordingly on the incisal/occlusal side.<br />
Transfer of the model situation to the mouth<br />
Modification of the implant posts<br />
Model situation after preparation<br />
Modification of the<br />
modelling/impression cap<br />
Situation in the mouth<br />
after modification<br />
BICORTICAL ®<br />
according to the new available space<br />
By placing the individual transfer cap<br />
onto the original implant in the mouth,<br />
the doctor has the chance to modify<br />
the model analog post by reducing the<br />
protruding parts precisely and copy this<br />
to the original implant.<br />
Now the individually custom-made crown<br />
can be cemented by using an acrylic positioning<br />
aid to a precise fit.<br />
11
1<br />
BICORTICAL ®<br />
Bicortical <strong>Ball</strong> <strong>Post</strong><br />
BICORTICAL ® <strong>Implant</strong> <strong>with</strong> <strong>Ball</strong> <strong>Post</strong><br />
1 Impression<br />
The impression of the Bicortical <strong>Implant</strong> <strong>with</strong> ball post is taken<br />
directly on the ball post.<br />
Situation in the mouth<br />
Two Bicortical <strong>Implant</strong>s <strong>with</strong> ball post in<br />
region 33/43 for anchoring a mandibular<br />
full denture<br />
Impression taking<br />
<strong>Direct</strong> impression of the ball post <strong>with</strong> an<br />
individual impression tray
Model preparation<br />
Bicortical <strong>Ball</strong> <strong>Post</strong><br />
For direct impression on the ball post, the corresponding model analog is fixed<br />
directly in the impression. The impression is casted <strong>with</strong> a Class 4 plaster<br />
material. After curing of the plaster, the impression tray is removed from the<br />
model. An artificial gingiga is not required in this case.<br />
BICORTICAL ®<br />
The model implant <strong>with</strong> ball post is placed<br />
directly into the impression<br />
Model situation of the lower jaw <strong>with</strong> two<br />
ball post Bicortical <strong>Implant</strong> model analogs<br />
in region 33/43<br />
1
14<br />
BICORTICAL ®<br />
Bicortical <strong>Ball</strong> <strong>Post</strong><br />
Wax-up<br />
After preparing a wax-up of the mandibular full denture, the trial insertion is<br />
performed in the mouth of the patient. The denture is prepared and finalized as<br />
usual (e.g. invested in a flask).<br />
4 Final insertion<br />
For anchoring the full denture, two modalities are at your choice.<br />
The wax-up is transferred to acrylic according to usual procedures.<br />
The metal ringhousing<br />
<strong>with</strong> O-ring<br />
The retention cap Dalbo ® -PLUS elliptic<br />
<strong>with</strong> lamellae retention insert
BICORTICAL ® Prosthetics<br />
Square <strong>Post</strong> Round <strong>Post</strong> <strong>Ball</strong> <strong>Post</strong><br />
ONE-PHASE<br />
SUCCESS<br />
THE ORIGINAL<br />
PURE TITANIUM<br />
SELF-CUTTING PERFECT<br />
Innovative products<br />
BICORTICAL SUPPORT<br />
MINIMUM TRAUMA<br />
PURE TITANIUM<br />
PITT-EASY ®<br />
ENDOPORE ®<br />
BICORTICAL ®<br />
BIORESORB ®<br />
CYTOPLAST ®<br />
ORALTRONICS ® Dental <strong>Implant</strong> Technology GmbH<br />
Herrlichkeit 4 · 28199 Bremen · Germany<br />
Phone +49 421 43939-0 · Fax +49 421 443936<br />
www.oraltronics.com · info@oraltronics.com<br />
INNOVA – ORALTRONICS – ATTACHMENTS<br />
A World of <strong>Implant</strong> Solutions<br />
The dental implant platform of Sybron Dental Specialties (SDS)<br />
brings over 85 years of combined experience in design and<br />
manufacturing of proprietary implant systems to the dental<br />
implant market.<br />
Delivering two of the most respected, leading-edge dental<br />
implants on the market – ENDOPORE ® and PITT-EASY ® – we<br />
are giving you access to a world of implant solutions.<br />
06-0176:11/06 HDS2-03-GB