GSM Desktop phone DPH101 - Teltonika
GSM Desktop phone DPH101 - Teltonika
GSM Desktop phone DPH101 - Teltonika
- No tags were found...

Create successful ePaper yourself
Turn your PDF publications into a flip-book with our unique Google optimized e-Paper software.
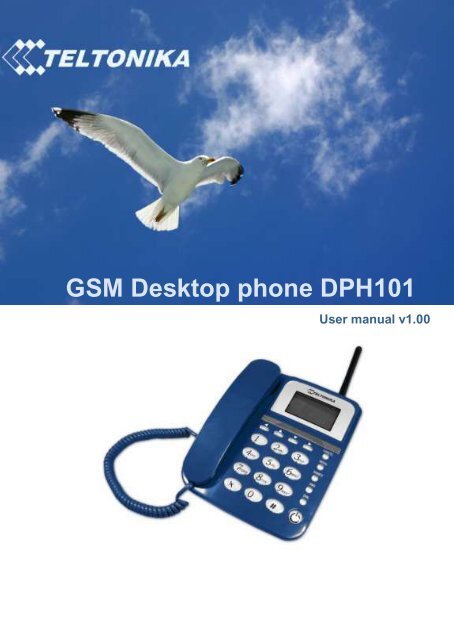
<strong>GSM</strong> <strong>Desktop</strong> <strong>phone</strong> <strong>DPH101</strong>User manual v1.00
LEGAL NOTICE<strong>Teltonika</strong> © 2011, <strong>GSM</strong> <strong>Desktop</strong> Phone <strong>DPH101</strong> User Manual v1.00Copyright © 2011 TELTONIKA Ltd. All rights reserved. Reproduction,transfer, distribution or storage of part or all of the contents in this document in anyform without the prior written permission of TELTONIKA Ltd is prohibited.Other product and company names mentioned herein may be trademarks ortrade names of their respective owners.ATTENTIONBefore using the device we strongly recommend to readthis user manual.Do not rip the device. Do not touch the device if thedevice is broken or its connecting wires are withoutisolation.All wireless devices for data transferring may besusceptible to interference, which could affectperformance.The device is not water-resistant. Keep it dry.The device requires high 230V AC voltage.IMPORTANT NOTES!It is mandatory to read the notes and manual carefully before starting to usethe device.2
<strong>Teltonika</strong> © 2011, <strong>GSM</strong> <strong>Desktop</strong> Phone <strong>DPH101</strong> User Manual v1.00Table of contents1 SAFETY INFORMATION ................................................................................. 42 GETTING STARTED ....................................................................................... 53 PHONE OVERVIEW ........................................................................................ 73.1 Description of the <strong>phone</strong> ......................................................................... 73.2 LCD screen icons .................................................................................... 83.3 <strong>DPH101</strong> menu structure .......................................................................... 84 CALL FUNCTIONS ........................................................................................ 104.1 Making calls .......................................................................................... 104.2 Receiving calls ...................................................................................... 104.3 Ending calls ........................................................................................... 105 SMS ............................................................................................................... 115.1 Read SMS ............................................................................................. 115.2 Send SMS ............................................................................................. 115.3 Delete SMS ........................................................................................... 115.4 Message Settings .................................................................................. 126 ADDITIONAL FEATURES ............................................................................. 126.1 Date and Time Settings ......................................................................... 126.2 Address Book ........................................................................................ 136.3 Speed Dialing ........................................................................................ 136.4 Audio Settings ....................................................................................... 136.5 Alarm ..................................................................................................... 146.6 Language Selection ............................................................................... 156.7 Dial delay .............................................................................................. 156.8 Baby call ................................................................................................ 156.9 Operator selection ................................................................................. 166.10 Security settings .................................................................................... 166.11 Restore Factory Defaults ....................................................................... 167 SUPPLEMENTARY SERVICES (NETWORK DEPENDENT) ........................ 177.1 Call Forwarding ..................................................................................... 177.2 Call Barring ........................................................................................... 177.3 Call Waiting ........................................................................................... 187.4 Call Transfer .......................................................................................... 187.5 Call Conference..................................................................................... 187.6 Hide Call number ................................................................................... 198 TECHNICAL SPECIFICATIONS .................................................................... 209 TROUBLESHOOTING ................................................................................... 213
<strong>Teltonika</strong> © 2011, <strong>GSM</strong> <strong>Desktop</strong> Phone <strong>DPH101</strong> User Manual v1.001 SAFETY INFORMATIONIn this document you will be instructed how to use <strong>GSM</strong> <strong>Desktop</strong> Phone safely. Wesuggest you to adhere to following recommendations to avoid any damage to person orproperty. You have to be familiar with the safety requirements before starting to use thedevice!Device requires power supply source that satisfies all safetyrequirements listed in LST EN 60950-1 standard. Each power supplysource should not exceed 15VA.Upgrade socket is used for device firmware upgrade. Onlyqualified personnel with proper equipment can upgrade the device.Do not mount or serve device during a thunderbolt.To disconnect power for the device please do the following:Plug off AC/DC power adapter from the wall outlet.Turn off using power on/off button.To avoid mechanical damage of the device it is recommended to transport thedevice packed in damage-proof pack. Protection against over currents, short circuits andearth faults should be provided as a part of the building installation. Additional two poleprotective device is required to protect from short-circuit and earth faults. The power ofconnected device should satisfy power of release device. The creepage distance betweencontacts should be no less than 3mm. While using the device, it should be placed so, that itwould be possible to plug AC/DC power adapter off from the wall outlet.Signal level of the device depends on the environment in which it is working. If thedevice starts working insufficiently only qualified personnel may repair this product. Werecommend to send it to repair centre or to manufacturers. There are no exchangeableparts inside of the device.4
2 GETTING STARTEDPackage ContentsA. Handset with cableB. Phone deviceC. External <strong>GSM</strong> AntennaD. Power supply adapterE. Quick Start Guide<strong>Teltonika</strong> © 2011, <strong>GSM</strong> <strong>Desktop</strong> Phone <strong>DPH101</strong> User Manual v1.00Note: If any of the components are missing or damaged, please contact the retaileror reseller from which this product was purchased.Inserting SIM cardNote: SIM card is mandatory for setting up connection to the <strong>GSM</strong> network. If youdon’t have s SIM card please contact your network service provider.1. Unplug the power supply adapter2. Open cover3. Flip SIM card holder and gently insert SIM card in the slot4. Close SIM card holder5
Connect handset<strong>Teltonika</strong> © 2011, <strong>GSM</strong> <strong>Desktop</strong> Phone <strong>DPH101</strong> User Manual v1.00Connect one handset cable end to the handset and another one to the <strong>phone</strong> jack.Attach antennaScrew the antenna in a clockwise direction.Position the antenna upwards at its connecting joint. This will ensure optimalreception.Turning on <strong>GSM</strong> desktop <strong>phone</strong>Before plugging power supply in make sure that:- SIM card is inserted- Antenna is attached- Handset is connected to the <strong>phone</strong>After all these operations are done you can turn the <strong>phone</strong> on by plugging powersupply in. Press On/Off button to turn the <strong>phone</strong> on if power supply is already plugged in.After the device is powered on it will start up. LCD screen will display information that the<strong>phone</strong> is starting up. Press On/Off button and hold it for 3 sec to turn the <strong>phone</strong> off.6
3 PHONE OVERVIEW3.1 Description of the <strong>phone</strong><strong>Teltonika</strong> © 2011, <strong>GSM</strong> <strong>Desktop</strong> Phone <strong>DPH101</strong> User Manual v1.00LCDArrow keys<strong>GSM</strong>antennaFunction keysOn/Off buttonNumber keypad7
3.2 LCD screen icons<strong>Teltonika</strong> © 2011, <strong>GSM</strong> <strong>Desktop</strong> Phone <strong>DPH101</strong> User Manual v1.00Signal strength -indicates strength of <strong>GSM</strong>signal. More bars indicatestronger signal.Message – Indicatesreceived SMS. Thenumber showsreceived SMS count.Alarm - indicates thatalarm clock has been set.Date and time.Speaker - indicatesthat ring volume isturned off.Ring - Indicates missedcalls. The numbershows missed callscount.3.3 <strong>DPH101</strong> menu structureUser friendly menu navigation allows reaching all <strong>GSM</strong> <strong>Desktop</strong> <strong>phone</strong> features.Menu navigationTo enter menu press MENU function keyArrow keysMenu keyMenu items are selected by using up and down arrow keys ▲▼ located below theLCD screen.To enter selected menu function press left arrow key ◄ (LCD displays OK), to exitpress right arrow key ► (LCD displays Exit).8
<strong>Teltonika</strong> © 2011, <strong>GSM</strong> <strong>Desktop</strong> Phone <strong>DPH101</strong> User Manual v1.00Menu structure is shown belowMessages: Call register: Contacts: Settings:Create messageInboxClear inboxMessage settingsMissed callsReceived callsDialed numbersClear listsPhone bookSpeed dialNew contactLanguageSoundCall servicesTime and dateSecurityOperator selectionMiscFactory reset9
4 CALL FUNCTIONS4.1 Making calls<strong>Teltonika</strong> © 2011, <strong>GSM</strong> <strong>Desktop</strong> Phone <strong>DPH101</strong> User Manual v1.00Pick up the handsetWait for dial toneEnter the <strong>phone</strong> number then press DIAL key or wait for 5s or use a Phonebook to select contact and press Call.Note: To input the “+” character press and hold “0” key.Correct entered numberTo delete one character press the Delete key onceTo delete all character press the Delete key until all digits are clearedRedial last entered numberPress the DIAL keyUse arrow keys ▲▼ to select a numberPick up the handset4.2 Receiving callsAnswering callTo answer the call, pick up the handsetReject callTo reject call press Disconn.Note: incoming call number is displayed on the LCD. The caller ID and call numberis displayed on the LCD if the number is stored in the <strong>phone</strong> book.Note: If there are missed calls the icon “Ring” on the LCD screen is displayed.Number near the icon shows how many calls where missed.4.3 Ending callsTo end a call place the handset back onto the cradle.10
<strong>Teltonika</strong> © 2011, <strong>GSM</strong> <strong>Desktop</strong> Phone <strong>DPH101</strong> User Manual v1.005 SMS<strong>GSM</strong> <strong>Desktop</strong> <strong>phone</strong> allows sending and receiving SMS text messages. Each SMSmessage can be up to 160 characters long. Contact your service provider to activate SMSservice.5.1 Read SMSRead received messageWhen a new message is received icon “Message” is displayed on the LCD screen.To read the message press Read.Read message from inboxPress the MENU keySelect Messages and press OKSelect Inbox and press OKSelect message from the list by using arrow keys ▲▼ and press ReadReply to received MessagesView the desired messagePress OptionsSelect Reply and press OKType the text using number keypad and press SendPress Send againForward text MessageView the desired messagePress OptionsSelect Forward and press OKAdd text using number keypad and press SendEnter the <strong>phone</strong> number or use Phone book to select an contactPress Send5.2 Send SMSPress SMS keyType the text using number keypad and press SendEnter the <strong>phone</strong> number or use a Phone book to select contactPress Send5.3 Delete SMSPress the MENU keySelect Messages and press OKSelect Inbox and press OKSelect message from the list and press ReadPress Options, select Delete and press OK11
5.4 Message Settings<strong>Teltonika</strong> © 2011, <strong>GSM</strong> <strong>Desktop</strong> Phone <strong>DPH101</strong> User Manual v1.00Message CenterPress the MENU keySelect Messages and press OKSelect Message settings and press OKSelect Service center by and press OKEnter the number that your service provider gave you and press OKNote: If the number is already entered, press OK.Message LifetimePress the MENU keySelect Messages and press OKSelect Message settings and press OKSelect Validity period and press OKUsing arrow keys ▲▼ select preferred message lifetime and press OKNote: Message lifetime is the amount of time that an unread message will remain onthe network server before being removed.6 ADDITIONAL FEATURES6.1 Date and Time SettingsSet the timePress the MENU keySelect Settings and press OKSelect Time and date and press OKSelect Adjust time and press OKSet time by using number keypad or arrow keys ▲▼ and press OKChange the time formatPress the MENU keySelect Settings and press OKSelect Time and date and press OKSelect Time format, select preferred time format and press OKSet the datePress the MENU keySelect Settings and press OKSelect Time and date and press OKSelect Adjust date and press OKSet date by using number keypad or arrow keys ▲▼ and press OKChange the date formatPress the MENU keySelect Settings and press OKSelect Time and date and press OKSelect Date settings and press OKSelect Date format, select date format by using arrow keys ▲▼and press OK12
<strong>Teltonika</strong> © 2011, <strong>GSM</strong> <strong>Desktop</strong> Phone <strong>DPH101</strong> User Manual v1.00Turn date display on the LCD screen On/OffPress the MENU keySelect Settings and press OKSelect Time and date and press OKSelect Date settings and press OKSelect Show date, select ON or Off and press OK6.2 Address Book<strong>GSM</strong> desktop <strong>phone</strong> stores all contacts in the SIM card. Depending on the SIM card(SIM cards may have different memory capacities) <strong>phone</strong>book is capable of storing up to240 <strong>phone</strong> numbers with names.book.Note: To dial a number from the <strong>phone</strong>book pick up the handset and press PhoneAdd new contactPress the MENU keySelect Contacts and press OKSelect New contact and press OKEnter name the by using number keypad and press OKEnter the number by using number keypad and press OKNote: To input the “+” character press and hold “0” key.Edit contact in the <strong>phone</strong> bookPress the NAMES keySelect contact by using arrow keys ▲▼Press Options, then select Edit contact and press OKEdit the name and press OK then edit the number and press OKDelete contactPress the NAMES keySelect contact by using arrow keys ▲▼Press Options, then select Delete by and press OK6.3 Speed DialingSpeed dialing function allows to quickly selecting saved number by using a numberkeypad keys (1-9). To program number keypad keys please do the following:Press the MENU keySelect Contacts and press OKSelect Speed dial and press OKSelect wanted keypad number and press OptionsSelect Edit number press OKEnter the number and press OK6.4 Audio SettingsIncrease/Decrease ring volumePress the MENU keySelect Settings and press OKSelect Sound and press OK13
<strong>Teltonika</strong> © 2011, <strong>GSM</strong> <strong>Desktop</strong> Phone <strong>DPH101</strong> User Manual v1.00Select Ring volume and press OKChange ring volume by using arrow keys ▲▼ and press OKChange ring tonePress the MENU keySelect Settings and press OKSelect Sound and press OKSelect Ring tone and press OKSelect preferred ring tone by using arrow keys ▲▼ and press OKIncrease/Decrease message volumePress the MENU keySelect Settings and press OKSelect Sound and press OKSelect Message volume and press OKChange message volume by using arrow keys ▲▼ and press OKSelect message tonePress the MENU keySelect Settings and press OKSelect Sound and press OKSelect Message tone and press OKSelect preferred melody tone by using arrow keys ▲▼ and press OKIncrease/Decrease speech volumePress the MENU keySelect Settings and press OKSelect Sound and press OKSelect Speech volume and press OKChange speech volume using arrow keys ▲▼ and press OKTurn On/Off <strong>phone</strong> keypad tonePress the MENU keySelect Settings and press OKSelect Sound and press OKSelect Key tone and press OKUsing arrow keys ▲▼ select On or Off and press OK6.5 AlarmThe alarm feature can be used as an alarm clock. Alarm time and tone can be setfor daily use or for one time only.Set alarm timePress the MENU keySelect Settings and press OKSelect Time and date and press OKSelect Alarm and press OKSelect Alarm time and press OK, then select On and press OKSet time using number keypad or by using arrow keys ▲▼ and press OKChoose repeat alarm or not (On or Off) and press OKIf repeat- select days to by repeat alarm using arrow keys ▲▼and pressing Change. When finished press OK.14
<strong>Teltonika</strong> © 2011, <strong>GSM</strong> <strong>Desktop</strong> Phone <strong>DPH101</strong> User Manual v1.00Set alarm volumePress the MENU keySelect Settings and press OKSelect Time and date and press OKSelect Alarm and press OKSelect Alarm options and press OKSelect Alarm volume and press OKChange alarm volume by using arrow keys ▲▼ and press OKSet alarm tonePress the MENU keySelect Settings and press OKSelect Time and date and press OKSelect Alarm and press OKSelect Alarm options and press OKSelect Alarm tone and press OKSelect preferred alarm melody by using arrow keys ▲▼ and press OK6.6 Language SelectionTo select the language use following instructions:Press the MENU keySelect Settings and press OKSelect Language and press OKSelect preferred language by using arrow keys ▲▼ and press OK6.7 Dial delayDial delay is the amount of time before <strong>phone</strong> automatically makes a call after dialnumber is entered. To set the time use following instructions:6.8 Baby callPress the MENU keySelect Settings and press OKSelect Call services and press OKSelect Dial delay and press OKSelect delay time by using arrow keys ▲▼ and press OKBaby call feature allows automatic calling after handset is picked up. The time andnumber are programmed. Use following instructions to enable this feature:Press the MENU keySelect Settings and press OKSelect Call services and press OKSelect Baby call and press OKSelect Baby call delay and press OKSelect delay time and press OKSelect Baby call number and press OKEnter the <strong>phone</strong> number or use a Phone book to select contactNote: to disable Baby call feature select Disable in Baby call delay menu.15
6.9 Operator selection<strong>Teltonika</strong> © 2011, <strong>GSM</strong> <strong>Desktop</strong> Phone <strong>DPH101</strong> User Manual v1.00<strong>Desktop</strong> Phone allows automatic or manual operator sellection. Select Automatic toset the device to automatically select one of the cellular networks available in your area.With manually selected network, the <strong>phone</strong> will connect only to the manually set operatornetwork.Manual operator selectionPress the MENU keySelect Settings and press OKSelect Operator selection and press OKSelect Manual and press OK. The <strong>phone</strong> will search for available networks.Select preferred network from the given list and press OKNote: you can manually select preferred network that has a roaming agreement withyour service provider when the <strong>phone</strong> is used abroad.6.10 Security settingsChange PIN codePress the MENU keySelect Settings and press OKSelect Security and press OKSelect Change PIN code and press OKEnter current PIN code and press OKEnter new PIN code and press OKNote: to change PIN code PIN code request must be enabled.Pin code requestPress the MENU keySelect Settings and press OKSelect Security and press OKSelect PIN code request and press OKEnter PIN code and press OKSelect Enable PIN request or Disable PIN request and press OKShow IMEI numberPress the MENU keySelect Settings and press OKSelect Misc and press OKSelect Show IMEI and press OKShow software versionPress the MENU keySelect Settings and press OKSelect Misc and press OKSelect Show software version and press OK6.11 Restore Factory DefaultsPress the MENU keySelect Settings and press OKSelect Factory reset and press OKConfirm resetting device to factory defaults by pressing OK16
<strong>Teltonika</strong> © 2011, <strong>GSM</strong> <strong>Desktop</strong> Phone <strong>DPH101</strong> User Manual v1.007 SUPPLEMENTARY SERVICES (NETWORK DEPENDENT)7.1 Call ForwardingCall forwarding feature allows redirecting incoming calls to another tele<strong>phone</strong> number,even when the device is turned off. Call forwarding options include:All - all callsIf busy - calls that come in when the line is busyIf no answer - calls that are not answered after a specified number of secondsIf not reachable - calls that come in when <strong>phone</strong> is not reachable (no signal or turnedoff).Turn On/Off call forwarding featurePress the MENU keySelect Settings and press OKSelect Call services and press OKSelect Call forwarding and press OKSelect the desired forwarding type and press OKUsing arrow keys ▲▼ select Enable or Disable and press OKEnter the <strong>phone</strong> number or use a Phone book to select contactCancel all call forwardingPress the MENU keySelect Settings and press OKSelect Call services and press OKSelect Call forwarding and press OKSelect All, then select Disable and press OK7.2 Call BarringCall barring feature allows barring of incoming or outgoing calls. The following callsbarring options are available:All outgoing - do not allow any calls to be made.Outgoing international - do not allow international calls.Int. ex. to home country - do not allow international calls except to home country.All incoming - do not allow any incoming calls.Incoming when roaming - do not allow any incoming calls if roomingDisable all – disable all call barring features.Turn On/Off call barring featurePress the MENU keySelect Settings and press OKSelect Call services and press OKSelect Call barring and press OKSelect the desired barring typeUsing arrow keys ▲▼ select Enable/Disable and press OK17
7.3 Call Waiting<strong>Teltonika</strong> © 2011, <strong>GSM</strong> <strong>Desktop</strong> Phone <strong>DPH101</strong> User Manual v1.00Call Waiting enables notification of incoming calls when the <strong>DPH101</strong> is on call. Torespond to Call Waiting, press Answer to answer or Reject to reject the call. PressOptions then Hold to switch between incoming calls. Contact your service provider toactivate Call Waiting feature.Turn On/Off call waiting featurePress the MENU keySelect Settings and press OKSelect Call services and press OKSelect Call waiting and press OKUsing arrow keys ▲▼ select Enable/Disable and press OK7.4 Call TransferA call transfer feature allows transferring an existing call to another <strong>phone</strong>. Contactyour service provider to activate Call Transfer feature.Call transferDuring call press Hold,Press Options, then select New call and press OKEnter the <strong>phone</strong> number and press DIAL key or use a Phone book to selectcontact and press Call.Press Options, select Transfer and press OKNote: to use a speed dialing press and hold the key for 2s.Note: to switch between calling numbers press Options then press Hold.7.5 Call ConferenceTo start conference call make a new call or answer an incoming call. Put the call onhold (press Options then Hold) and add new participants.Add new participantDuring call press Hold,Press Options, then select New call and press OKEnter the <strong>phone</strong> number and press DIAL key or use a Phone book to selectcontact and press Call.Press Options, select Join calls and press OKRelease a participantDuring call press OptionsSelect Conference list and press OKFrom the conference participants list select the one which should be releaseand press Release18
7.6 Hide Call number<strong>Teltonika</strong> © 2011, <strong>GSM</strong> <strong>Desktop</strong> Phone <strong>DPH101</strong> User Manual v1.00Hide number feature allows you to set whether your <strong>phone</strong> number is shown orhidden from the person you are calling.Turn On/Off hide number featurePress the MENU keySelect Settings and press OKSelect Call services and press OKSelect Hide number and press OKUsing arrow keys ▲▼ select Enable/Disable and press OK19
<strong>Teltonika</strong> © 2011, <strong>GSM</strong> <strong>Desktop</strong> Phone <strong>DPH101</strong> User Manual v1.008 TECHNICAL SPECIFICATIONS<strong>GSM</strong> InterfaceDual-Band <strong>GSM</strong> 900/1800 MHzOutput power:Class 4 (2 W) for <strong>GSM</strong> 900Class 1 (1 W) for <strong>GSM</strong> 1800MemoryAddress book up to 240 entries (SIM dependent)SMS memory up to 30 (SIM dependent)Call memory: 10 last dialed, 10 last received, 10 last missedPower supplyMains adaptor: 100 - 240 V AC / 5V 0.7APower consumption when talking 2W (peak)Power Consumption stand by (300mW)Temperature & humidityOperation 0 0 to 55 0 CStorage temperature -20 0 to 80 0 CHumidity 10% to 90%Storage humidity 5% to 95%Package dimensions / weightApprox. 290 x 225 x 75 mmWeight: Approx. 910 gOtherExternal omni-directional antenna (SMA)Antenna Gain 2dBiPort for firmware update20
9 TROUBLESHOOTING<strong>Teltonika</strong> © 2011, <strong>GSM</strong> <strong>Desktop</strong> Phone <strong>DPH101</strong> User Manual v1.00Messages Description SolutionNo network1. Antenna not connected2. No network signal or signallevel too low1. Connect antenna and wait until networkis found2. Contact your <strong>GSM</strong> network operatorError General error message Contact your <strong>GSM</strong> network operator ifmessage persistsNetwork timeout Request failed to execute Contact your <strong>GSM</strong> network operator ifmessage persistsError sending Error occurred while sending 1. Check Service center number underSMSMessage settings.2. Contact your <strong>GSM</strong> network operatorWrong format Format of received SMS is notsupportedSIM not inserted SIM card is not inserted Turn device Off, insert SIM card and turnSIM failuredevice OnSIM card is corrupted or missing Turn device Off, insert valid SIM card andturn device OnSIM busy SIM card is busy 1. Wait for SIM card to become available2. Insert valid SIM card3. Contact your <strong>GSM</strong> network operatorSIM wrong Wrong SIM card is inserted Turn device Off, insert valid SIM card andturn device OnEnter PIN PIN code is required 1. Enter correct PIN code2. Contact your <strong>GSM</strong> network operatorEnter PIN2 PIN2 code is required 1. Enter correct PIN2 code2. Contact your <strong>GSM</strong> network operatorEnter PUK PUK code is required 1. Enter correct PUK code2. Contact your <strong>GSM</strong> network operatorEnter PUK2 PUK2 code is required 1. Enter correct PUK2 code2. Contact your <strong>GSM</strong> network operatorService not available Service requestedis not availableContact your <strong>GSM</strong> network operator foravailable servicesService not subscribed Service requestedis not subscribedContact your <strong>GSM</strong> network operator foravailable servicesService code error Error occurred whileexecuting service requestContact your <strong>GSM</strong> network operator foravailable servicesPhone book error Error occurred duringReplace SIM card if error persistsinitialization of Phone bookInbox errorError occurred duringReplace SIM card if error persistsinitialization SMS inboxInbox full SMS inbox is full Delete some/all messages to be able toreceive new SMS messages21