Download... - Emuge UK
Download... - Emuge UK
Download... - Emuge UK
- No tags were found...
You also want an ePaper? Increase the reach of your titles
YUMPU automatically turns print PDFs into web optimized ePapers that Google loves.
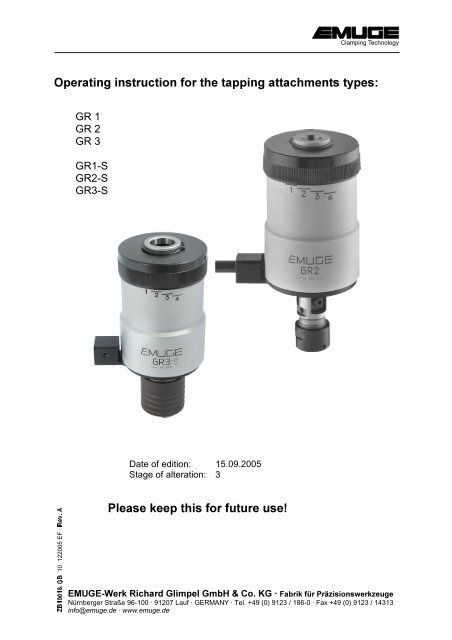
¥¡¤¢¡£¢£•2SHUDWLQJLQVWUXFWLRQIRUWKHWDSSLQJDWWDFKPHQWVW\SHV GR 1GR 2GR 3GR1-SGR2-SGR3-SDate of edition: 15.09.2005Stage of alteration: 33OHDVHNHHSWKLVIRUIXWXUHXVH¦ §¨©10 122005 EF ·(08*(:HUN5LFKDUG*OLPSHO*PE+ &R.*Â)DEULNIU3Ul]LVLRQVZHUN]HXJH Nürnberger Straße 96-100 · 91207 Lauf · GERMANY · Tel. +49 (0) 9123 / 186-0 · Fax +49 (0) 9123 / 14313LQIR#HPXJHGHÂZZZHPXJHGH
Operating instruction for the tapping attachmenttype GR and GR-S&RQWHQWV$SSOLFDWLRQUDQJHDQGWHFKQLFDOGDWD 1.1 Application range, determined use................................................................... 31.2 Safety instructions............................................................................................ 41.3 Dimensions and technical data......................................................................... 51.3.1 Tapping attachment type GR........................................................................... 51.3.2 Tapping attachment type GR-S....................................................................... 63XWWLQJWKHWDSSLQJDWWDFKPHQWLQWRRSHUDWLRQ 2.1 Unpacking ........................................................................................................ 72.2 Prepare tapping attachment ............................................................................. 72.2.1 Mount shank on types GR1/GR1-S and GR2/GR2-S...................................... 72.2.2 Mount shank on type GR3/GR3-S................................................................... 82.2.3 Mount holding bar............................................................................................ 82.3 Putting the tapping attachment into operation .................................................. 92.4 Clamp tool into tapping attachment................................................................ 102.4.1 Clamp collet and tool into the type GR .......................................................... 102.4.2 Clamp quick-change adapter into the type GR-S .......................................... 122.4.2.1 Insert tool.................................................................................................... 122.4.2.2 Insert the quick-change adapter................................................................. 132.5 Detach tool from the tapping attachment........................................................ 142.5.1 Detach tool on type GR ................................................................................. 142.5.2 Detach tool on type GR-S.............................................................................. 152.5.2.1 Detach quick-change adapter..................................................................... 152.5.2.2 Detach tool ................................................................................................. 162.6 Adjustment of overload clutch ........................................................................ 170DLQWHQDQFH 6WRUDJHZKHQQRWLQXVH &RXUVHRIDWKUHDGSURGXFLQJF\FOHEdition: 15.09.20051`
Operating instruction for tapping attachmenttype GR and GR-S:DUQLQJVLJQVV\PEROVThis operating instruction uses the following symbols:,PSRUWDQWMarks special instructions, rules and prohibitions which are important inorder to avoid any damage.Please observe these instructions!Marks application instructions and other useful information.Sectional view: Tapping attachment GR2 Edition: 15.09.2005
Operating instruction for the tapping attachmenttype GR and GR-S$SSOLFDWLRQUDQJHDQGWHFKQLFDOGDWD$SSOLFDWLRQUDQJHGHWHUPLQHGXVHThe tapping attachments type GR and GR-S are mainly used on pillar drillingmachines. The reverse of the rotation direction can be executed via the integratedturning gear mechanism by reversing the machine spindle (left-hand running). Thereis no change of the turning direction of the machine spindle. The resultingadvantages are:− Saving time by shorter cycle times− Protection of the machine− Saving energy by almost constant current receiptThe tapping attachment can only be used if it is adapted in a driven machine spindle.Being inserted in the machine, the holding bar must be secured against twisting inboth turning directions.Our GR series is available in the following designs:• 7\SH*5with tool adaptation by means of collets type Rubber-Flex. The torque istransferred by adjustable driving cams, see chapter 2.4.1, page 10.• 7\SH*56with tool adaptation by means of quick-change adapters of our EM series, seechapter 2.4.2, page 12.)XUWKHUFKDUDFWHULVWLFVDUH• Integrated length compensation on compression and tension for compensatingdifferences between spindle feed and pitch of the thread to be produced• Integrated overload clutch, see chapter 2.6, page 17• Transmission ratio advance/reversal is 1:1,6 – 1:1,75, depending on the sizeNormally, the tapping attachments are provided with morse taper shanks which mustbe ordered separately. For information regarding the assembly of the shank pleaserefer to chapter 2.2, page 7.The tapping attachments type GR and GR-S are QRW designed for internal coolantlubricantsupply.The tapping attachments type GR and GR-S are only designed for producing ULJKWKDQGWKUHDGV.For the cutting range of each type please refer to Table 1 and Table 2.7KHQRQGHWHUPLQHGXVHH[HPSWVWKHPDQXIDFWXUHUIURPDQ\OLDELOLW\Edition: 15.09.20053`
Operating instruction for tapping attachmenttype GR and GR-S6DIHW\LQVWUXFWLRQVFor all works, ie putting into operation, production or maintenance, please observethe details given in the operating instruction.All relevant safety regulations as well as local instructions are to be observed whenworking with the tapping attachments.Below please find some basic rules:- Please wear gloves during tool change to avoid injury.- Basically change the tool yourself to avoid the sudden start of thespindle caused by mis-operating.- Hold the tool when loosening the tool clamping to avoid it falling downand damaging the tool and workpiece.- Keep the tool adaptation clean.- There are maximum values for cutting speeds and feeds. Pleaseobserve such data.- Please observe the maximum tool dimensions.- Furthermore, the instructions of the tool manufacturers are valid!4 Edition: 15.09.2005
Operating instruction for the tapping attachmenttype GR and GR-S'LPHQVLRQVDQGWHFKQLFDOGDWD7DSSLQJDWWDFKPHQWW\SH*5Torque adjusting ringHolding barC: Length compensation oncompressionG: Disengaging distanceH: Free wheelT: Length compensation ontensionD2DD1Shank adaptationUniversal clampingheadLPicture 1: Dimensions of tapping attachment GRTable 1: Technical data of tapping attachment GRType Article number Cutting range ClampingrangeD 1[mm]*5 F0401999M2 – M7Nr. 2 - 1/42,5 - 6,5*5 F0402999M4 – M12Nr. 8 - 7/163,5 - 10*5 F0403999M8 - M205/16 - 3/46 - 16Collet size 1J116J117J421J422R30R32ShankadaptationB16DIN 238B16DIN 238M20TypeDD 2LCGHTMax.Speed/rpm[mm][mm][mm][mm][mm][mm][mm][min -1 ]*5 23 55 130 5 3,5 1,5 7 1500*5 28 75 156 5 4 1,5 8,5 1000*5 40 91 204 6 6 1,5 11,5 6001 These Rubber-Flex-collets are part of the deliveryEdition: 15.09.20055`
Operating instruction for tapping attachmenttype GR and GR-S7DSSLQJDWWDFKPHQWW\SH*56Torque adjusting ringHoding barC: Length compensation oncompressionG: Disengaging distanceH: Free wheelT: Length compensation ontensionD2DD1Quick change adaptationShank adaptationLPicture 2: Dimensions of tapping attachment GR-STable 2: Technical data of tapping attachment GR-SType Article number Cutting range Adapter size Shankadaptation*56*56*56F0411999F0412999F0413999M2 – M7Nr. 2 - 1/4M4 – M12Nr. 8 - 7/16M8 - M205/16 - 3/4EM00EM01EM03B16DIN 238B16DIN 238M20TypeDD 2LCGHTMax.Speed/rpm[mm][mm][mm][mm][mm][mm][mm][min -1 ]*56 25 55 139 5 3,5 1,5 7 1500*56 32 75 157 5 4 1,5 8,5 1000*56 50 91 204 6 6 1,5 11,5 6006 Edition: 15.09.2005
Operating instruction for the tapping attachmenttype GR and GR-S3XWWLQJWKHWDSSLQJDWWDFKPHQWLQWRRSHUDWLRQ− Treat the tapping attachments very careful.− Protect the tapping attachments against moisture and high temperaturedifferences.,PSRUWDQWThe tapping attachment is supplied without shank. The required morsetaper shank has to be ordered separately. Details are given in the EMUGEmain catalogue, category GR / GR-S.8QSDFNLQJ- Take the tapping attachment and accessories from the packing case- Clean the tapping attachment with a duster to remove any conservation oil,PSRUWDQWDo not use any aggressive solvents.Do not use any fibrous materials, ie steel wool.3UHSDUHWDSSLQJDWWDFKPHQW0RXQWVKDQNRQW\SHV*5*56DQG*5*565HTXLUHGWRRO:Plastic hammer1. Clean the adaptation in the tapping attachment and the shank2. Insert shank into the adaptation, see Picture 33. Fix the shank with a soft punch using a plastic hammer, see Picture 4ShankShank adaptationPicture 3: Insert shankPicture 4: Fix shankEdition: 15.09.20057`
Operating instruction for the tapping attachmenttype GR and GR-S3XWWLQJWKHWDSSLQJDWWDFKPHQWLQWRRSHUDWLRQ1. Insert the tapping attachment into the adaptation of the machine spindle,PSRUWDQW:The tool change must not be executed while the machine spindlerotates!- Only use tool shanks and tightening bolts suitable for the specificmachine.- Make sure the tool is correctly clamped.⇒ Risk of accident by spinning of the tool!- Please see also the indications in the operating instruction of yourmachine tool!2. Secure the holding bar against twisting in both directions, see Picture 8Detail XDetail XMake sure the spindle isguided over its completemovement!Picture 8: Tapping attachment secured against twistingo7KHWDSSLQJDWWDFKPHQWLVQRZUHDG\IRURSHUDWLRQEdition: 15.09.20059`
Operating instruction for tapping attachmenttype GR and GR-S&ODPSWRROLQWRWDSSLQJDWWDFKPHQW&ODPSFROOHWDQGWRROLQWRWKHW\SH*5The locking of the tool is executed via adjustable and floating-mounted driver cams,centering is carried out via a Rubber-Flex-collet, see Picture 9.Thread spindleDriver camClamping nutHexagon socket wrenchRubber-Flex-colletPicture 9: Set-up of the universal clamping head,PSRUWDQWChoose the appropriate Rubber-Flex collet for the required tool!5HTXLUHGWRRO:Open ended spannerHexagon socket wrench(part of the delivery)(part of the delivery)Clamping nutRubber-Flexcollet1. Insert Rubber-Flex-collet into theclamping nut. Make sure the collet isflush with the clamping nutClamping head2. Screw the clamping nut with collet onto the thread of the clamping headClamping nutwith collet10 Edition: 15.09.2005
Operating instruction for the tapping attachmenttype GR and GR-SClamping nutDriver cam3. Push tool into the collet and slightlytighten the clamping nut so that thetool does not fall out but may still beturnedToolThread spindle4. Clamp tool square via driver cam andthread spindleCorrectDriver camToolFalse!!,PSRUWDQW:Check and eventually correct theposition of the square throughthe visual control window in theclamping head5. Tighten the clamping nut using theopen ended spanner,PSRUWDQW:In order to avoid the damage ofparts, please support theclamping nut, when tighteningwith the wrench c, with the openended spanner d.Edition: 15.09.200511`
Operating instruction for tapping attachmenttype GR and GR-S&ODPSTXLFNFKDQJHDGDSWHUDQGWRROLQWRW\SH*56,QVHUWWRRO,PSRUWDQWChoose the appropriate quick-change adapter for the required toolQuick-change adapterGuiding bushTool1. Press guiding bush backand hold it2. Push tool into the guidingbush.Bring the square into thecorrect position by turningthe tool.3. Let go the guiding bush12 Edition: 15.09.2005
Operating instruction for tapping attachmenttype GR and GR-S'HWDFKWRROIURPWKHWDSSLQJDWWDFKPHQW'HWDFKWRRORQW\SH*5,PSRUWDQW:The tool must not be changed while the machine spindle rotates!1. Detach the nut using the open ended spanner,PSRUWDQW:In order to avoid the damage of parts in the tapping attachment, pleasesupport the clamping nut, when being detached with the wrench c, withopen ended spanner d, see chapter 2.4.1, point 5.2. Detach driver cam through thread spindle3. Remove tool4. Screw off the nut5. Remove collet from the nut6. Eventually clean the parts14 Edition: 15.09.2005
Operating instruction for the tapping attachmenttype GR and GR-S'HWDFKWRRORQW\SH*56'HWDFKTXLFNFKDQJHDGDSWHU,PSRUWDQW:The quick-change adapter must not be changed while the machine spindlerotatesFixingGrip sleeveTool1. Push grip sleeve in direction ofshank and hold itquick-change adapter isautomatically releasedQuick-change adapter2. Remove quick-change adapter3. Let go of guiding bushEdition: 15.09.200515`
Operating instruction for tapping attachmenttype GR and GR-S'HWDFKWRROQuick-change adapterGuiding bushTool1. Press guiding bush back andhold it2. Remove tool3. Let go of guiding bush16 Edition: 15.09.2005
Operating instruction for the tapping attachmenttype GR and GR-S$GMXVWPHQWRIRYHUORDGFOXWFKThe integrated overload clutch interrupts the torque transmission between machinespindle and tool during the thread producing cycle if the adjusted torque setting isexceeded. This protects the tool against breakage, ie when cutting on block withblind hole threads.1. Detach thread pin in the torqueadjusting ring.2. Set torque adjusting ring to the lowestpossible torque value = turn left as faras possible.3. Start thread cutting → clutch slipsthrough4. Increase the torque via the adjustingring and fix this adjustment bytightening the thread pin.5. Re-start thread cutting.If there is no perfect torque driving,repeat points 1 to 4.Reduction oftorqueThread pinIncrease oftorque,PSRUWDQWThe torque adjustment may only be carried out while the machine isswitched off.As the required torque depends on different parameter, ie number ofrevolutions, material to be worked, lubrication, it is not possible to indicateany torque values.Edition: 15.09.200517`
A.S. n. 1324alcune condizioni di benessere dei cani; la possibilità di effettuare operazioni diderattizzazione nelle aree protette, per motivi di salvaguardia di specie selvatiche,particolarmente minacciate da ratti; l’individuazione di modalità per laproduzione di sostanze pericolose, appartenenti alle categorie dei rodenticidi edei lumachicidi per uso domestico, civile e agricolo. Sotto il profilo redazionale,si osserva che le ultime tre materie non sono enucleate nell'alinea del comma 1 enella rubrica dell'articolo.I principii e i criteri direttivi per l'esercizio della delega sono posti dalle lettereda a) a p) del comma 1, mentre il comma 3 reca le clausole di invarianza deglioneri di finanza pubblica.Ai sensi del comma 2, i medici veterinari del Ministero della salute, chesvolgono attività di controllo nell’àmbito della tutela del benessere animale e deireati in danno degli animali, rivestono la qualifica di ufficiali di poliziagiudiziaria. Potrebbe essere ritenuto opportuno chiarire se tale norma abbiaefficacia immediata, a prescindere dall'adozione dei decreti legislativi inoggetto.Articolo 20(Modifica all’articolo 1 del regolamento di polizia veterinaria, di cui al D.P.R. 8febbraio 1954, n. 320)L'articolo 20 prevede che il Ministro della salute possa disporre, con decreti dinatura regolamentare, previo parere del Consiglio superiore di sanità, specifichemisure tecniche, diverse da quelle contemplate dal regolamento di poliziaveterinaria di cui al D.P.R. 8 febbraio 1954, n. 320, per alcune delle malattieoggetto di quest'ultimo, qualora esse abbiano assunto un carattere endemicoovvero per le stesse risultino disponibili nuove metodiche diagnostiche,terapeutiche o vaccinali. Si ricorda che il regolamento di cui al D.P.R. n. 320 del1954 riguarda le malattie degli animali a carattere infettivo e diffusivo, iviindividuate all'art. 1, e successive modificazioni. Potrebbe essere ritenutoopportuno valutare gli effetti derivanti dalla circostanza che la novella di cuiall'articolo 20 - avendo natura sostitutiva - sopprime la versione della normavigente, la quale consente che, con ordinanze del Ministro della salute 8 , si integril'elenco suddetto con altre malattie. Riguardo alla natura regolamentare deidecreti ministeriali previsti dall'articolo 20, potrebbe essere ritenuto opportunovalutare se la materia in oggetto (ai sensi dell'art. 117 della Costituzione) rientri- intendendola come riconducibile alla tutela dell'ambiente e dell'ecosistema oalla profilassi internazionale - nell'àmbito della legislazione esclusiva dello Stato(nella quale la potestà regolamentare compete appunto a quest'ultimo) oppure -intendendola come riconducibile alla tutela della salute - nell'àmbito dellalegislazione concorrente (nella quale la potestà regolamentare compete alleregioni).8 Si ricorda che il riferimento originario della norma all'Alto Commissario per l'igiene e la sanità siintende posto al Ministro della salute, ai sensi dell'art. 2 della L. 13 marzo 1958, n. 296.20
Operating instruction for the tapping attachmenttype GR and GR-S&RXUVHRIDWKUHDGSURGXFLQJF\FOH1. Insert the tapping attachment as described in chapter 2.3, page 9.2. Start thread cutting, adjust the torque as instructed in chapter 2.6, page 17.3. Retract the tool spindle after reaching the thread depth → the spindle of thetapping attachment turns the rotation direction.4. After leaving the produced thread, the tapping attachment automatically switchesback to right-hand running.10Start positionSpindle feed stopFree-wheelReversePicture 10: Course of a thread producing cycle,PSRUWDQWWhen retracting the tool spindle please check that the lengthcompensation on tension is not completely activated.Please avoid the intermittent retraction of the spindle.Edition: 15.09.200519`
Operating instruction for tapping attachmenttype GR and GR-S1RWHV20 Edition: 15.09.2005


