EM 01 â ELSE EM 03 â ELSE EM 04 â ELSE - Emuge UK
EM 01 â ELSE EM 03 â ELSE EM 04 â ELSE - Emuge UK
EM 01 â ELSE EM 03 â ELSE EM 04 â ELSE - Emuge UK

You also want an ePaper? Increase the reach of your titles
YUMPU automatically turns print PDFs into web optimized ePapers that Google loves.
¥¡<br />
¤<br />
£<br />
¡<br />
£¢<br />
£<br />
•<br />
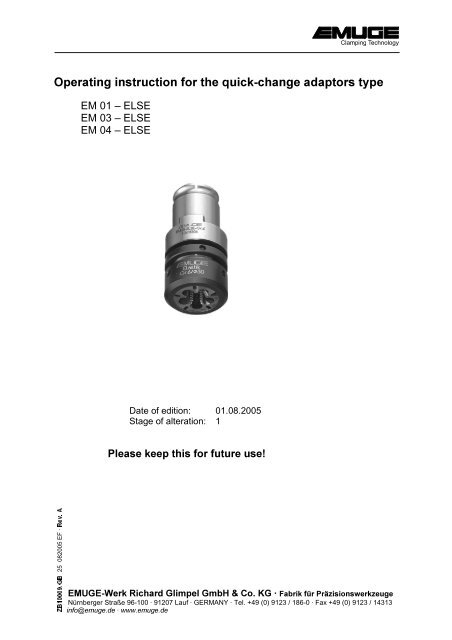
2SHUDWLQJLQVWUXFWLRQIRUWKHTXLFNFKDQJHDGDSWRUVW\SH<br />
<strong>EM</strong> <strong>01</strong> – <strong>ELSE</strong><br />
<strong>EM</strong> <strong>03</strong> – <strong>ELSE</strong><br />
<strong>EM</strong> <strong>04</strong> – <strong>ELSE</strong><br />
Date of edition: <strong>01</strong>.08.2005<br />
Stage of alteration: 1<br />
3OHDVHNHHSWKLVIRUIXWXUHXVH<br />
<br />
¦ §<br />
¨©<br />
25 082005 EF ·<br />
(08*(:HUN5LFKDUG*OLPSHO*PE+ &R.*Â)DEULNIU3Ul]LVLRQVZHUN]HXJH <br />
Nürnberger Straße 96-100 · 91207 Lauf · GERMANY · Tel. +49 (0) 9123 / 186-0 · Fax +49 (0) 9123 / 14313<br />
LQIR#HPXJHGHÂZZZHPXJHGH
Operating instruction for quick-change adapters<br />
type <strong>EM</strong>-<strong>ELSE</strong><br />
&RQWHQWV<br />
<br />
$SSOLFDWLRQUDQJHVDIHW\LQVWUXFWLRQVDQGWHFKQLFDOGDWD <br />
1.1 Application range, determined use......................................................................................... 3<br />
1.2 Safety instructions .................................................................................................................. 4<br />
1.3 Dimensions and technical data .............................................................................................. 5<br />
<br />
3XWWLQJWKHTXLFNFKDQJHDGDSWRUVLQWRRSHUDWLRQ <br />
2.1 Unpacking............................................................................................................................... 6<br />
2.2 Insert <strong>EM</strong>UGE-Elastic die....................................................................................................... 6<br />
2.3 Detach <strong>EM</strong>UGE Elastic die .................................................................................................... 8<br />
<br />
0DLQWHQDQFH <br />
3.1 Maintenance schedule............................................................................................................ 9<br />
3.2 External cleaning .................................................................................................................... 9<br />
<br />
6WRUDJHZKHQQRWLQXVH <br />
<br />
$SSOLFDWLRQDQGFKRLFHRIRWKHUTXLFNFKDQJHDGDSWRUV <br />
Edition: <strong>01</strong>.08.2005 1
Operating instruction for quick-change adaptors<br />
type <strong>EM</strong>-<strong>ELSE</strong><br />
<br />
:DUQLQJVLJQVV\PEROV<br />
This operating instruction uses the following symbols:<br />
,PSRUWDQW<br />
Marks special instructions, rules and prohibitions which are important in<br />
order to avoid any damage.<br />
Please observe these instructions!<br />
Marks application instructions and other useful information.<br />
Sectional view: Quick-change adaptor <strong>EM</strong>-<strong>ELSE</strong><br />
2 Edition: <strong>01</strong>.08.2005
Operating instruction for quick-change adapters<br />
type <strong>EM</strong>-<strong>ELSE</strong><br />
<br />
$SSOLFDWLRQUDQJHVDIHW\LQVWUXFWLRQVDQGWHFKQLFDOGDWD<br />
<br />
$SSOLFDWLRQUDQJHGHWHUPLQHGXVH<br />
Application of the adaptors:<br />
• Adaptation of <strong>EM</strong>UGE Elastic dies.<br />
The elastic die is hold by the elastic automatic sleeve and pressed against the<br />
plane surface of the holder. After tightening, the elastic automatic sleeve is locked<br />
with the check nut. Assembly and adjustment details may be found in chapter 2.2,<br />
page 6.<br />
• These adaptors are designed to be used in the following quick-change tap<br />
holders. <strong>EM</strong>UGE types:<br />
KSN KSN/HD KSN/IKZZ/MMS<br />
SFM SFM/NP SFM-L SFM-L-DZ<br />
• Cutting of external threads.<br />
The max. thread depth to be cut depends on the thread size and the sleeve size<br />
used. These values are listed in Table 1, page 5.<br />
• Cutting of right- and left-hand threads.<br />
The adaptor size is defined by the tap holder size used.<br />
The required sleeve size is defined by the cutting range.<br />
7KHQRQGHWHUPLQHGXVHH[HPSWVWKHPDQXIDFWXUHUIURPDQ\OLDELOLW\<br />
Edition: <strong>01</strong>.08.2005 3
Operating instruction for quick-change adaptors<br />
type <strong>EM</strong>-<strong>ELSE</strong><br />
<br />
6DIHW\LQVWUXFWLRQV<br />
For all works, ie putting into operation, production, maintenance please observe the<br />
details given in the operating instructions.<br />
All relevant safety regulations as well as local instructions are to be observed .<br />
Below please find some basic rules:<br />
- Please wear gloves during tool change to avoid injury.<br />
- Basically change the tool yourself to avoid the sudden start of the spindle<br />
caused by mis-operating.<br />
- Hold the tool when loosening the tool clamping to avoid it falling down<br />
and damaging the tool and the workpiece.<br />
- There are maximum values for cutting speeds and feeds for every kind of<br />
machining. Please observe such data.<br />
- Please observe the maximum tool dimensions.<br />
- Furthermore, the instructions of the tool manufacturers are valid!<br />
4 Edition: <strong>01</strong>.08.2005
Operating instruction for quick-change adapters<br />
type <strong>EM</strong>-<strong>ELSE</strong><br />
<br />
'LPHQVLRQVDQGWHFKQLFDOGDWD<br />
Check nut<br />
Elastic automatic sleeve<br />
øD<br />
ø D 1<br />
ø D 3<br />
L 2<br />
Elastic-die<br />
S<br />
= max. thread to be cut<br />
Picture 1: dimensions of quick-change adaptors <strong>EM</strong>-<strong>ELSE</strong><br />
Table 1: Technical data of quick-change adaptors <strong>EM</strong>-<strong>ELSE</strong><br />
Type<br />
Adaptor<br />
size<br />
Sleeve<br />
size<br />
Cutting range<br />
∅D<br />
[mm]<br />
∅D 1<br />
[mm]<br />
∅D 3<br />
[mm]<br />
S 1<br />
[mm]<br />
L 2<br />
[mm]<br />
<strong>EM</strong><strong>01</strong>-<strong>ELSE</strong> <strong>01</strong><br />
<strong>EM</strong><strong>03</strong>-<strong>ELSE</strong> <strong>03</strong><br />
<strong>EM</strong><strong>04</strong>-<strong>ELSE</strong> <strong>04</strong><br />
0 M1,4-M4 18 49 28,5<br />
1 M2-M6 22 52 31,5<br />
3 M5-M6 26 54 33,5<br />
4 M7-M10 25 19 32 56 36<br />
6 M10-M12 40 62 42<br />
7 M12-M16<br />
48<br />
67 (M12)<br />
36 (>M14)<br />
47<br />
3 M5-M6 26 68 34<br />
4 M7-M10 32 72 38,5<br />
6 M10-M12 40 31 40 79 45,5<br />
7 M12-M16 48 84 50,5<br />
9 M16-M20<br />
56 86 52,5<br />
6 M10-M12 40 1<strong>04</strong> 50<br />
7 M12-M16 48 109 55<br />
9 M16-M20 60 48 56 114 60<br />
10 M22-M27 67 122 68<br />
12 M30-M36<br />
80 123 69<br />
For further dimensions please refer to the <strong>EM</strong>UGE main catalogue.<br />
1 Max. thread cutting length<br />
Edition: <strong>01</strong>.08.2005 5
Operating instruction for quick-change adaptors<br />
type <strong>EM</strong>-<strong>ELSE</strong><br />
<br />
3XWWLQJWKHTXLFNFKDQJHDGDSWRUVLQWRRSHUDWLRQ<br />
<br />
8QSDFNLQJ<br />
- Take the adaptor from the packing.<br />
- Clean the adaptor with a duster to remove any conservation oil.<br />
,PSRUWDQW<br />
Do not use any aggressive solvents.<br />
Do not use any fibrous materials, ie steel wool.<br />
⇒ The quick-change adaptor is now ready for operation.<br />
<br />
,QVHUW(08*((ODVWLFGLH<br />
,PSRUWDQW<br />
Choose the appropriate quick-change adaptors for the required elastic die!<br />
Please refer to the <strong>EM</strong>UGE main catalogue for suitable hook spanners to<br />
tighten the elastic automatic sleeves and the check nuts (see „The<br />
adaptation“).<br />
1. Loosen check nut<br />
Check nut<br />
Elastic automatic sleeve<br />
2. Screw off elastic automatic<br />
sleeve<br />
Elastic-die<br />
3. Insert elastic die into elastic<br />
sleeve.<br />
Plane surface<br />
Taper surface<br />
A drop of oil at the taper<br />
surface in the sleeve and at<br />
the plane surface of the<br />
holder improves the clamping<br />
function.<br />
6 Edition: <strong>01</strong>.08.2005
Operating instruction for quick-change adapters<br />
type <strong>EM</strong>-<strong>ELSE</strong><br />
Locking pin<br />
4. Screw on the elastic<br />
automatic sleeve and<br />
tighten it<br />
Plan view:<br />
Locking pin<br />
Elastic-die<br />
Quick-change adaptor<br />
,PSRUWDQW<br />
The locking pin must be<br />
located in the V-slot of<br />
the die.<br />
5. Lock adjustment with check<br />
nut<br />
Insert the adaptor into the tap holder as described in the operating instruction of the<br />
used tap holder.<br />
1RWHVFRQFHUQLQJDGMXVWPHQW<br />
<br />
The tool receives an elastic effect by the radial slots in the elastic die. This is why the<br />
tightening force of the elastic automatic sleeves influences the tolerance range of the<br />
bolt pitch dimension. By careful adjustment the required tolerance range may be<br />
reached.<br />
After the clamping operation the first 2 – 3 cut bolts should be checked to<br />
their pitch diameter. If the dimension is not correct: Mark position of the<br />
automatic sleeve, reduce locking by detaching the check nut, adjust the<br />
sleeve and lock again using the check nut.<br />
,PSRUWDQW<br />
Before every adjustment, the clamping of the elastic-die must be completely<br />
detached!<br />
For further information on assembly and adjustment, please refer to our brochure<br />
„<strong>EM</strong>UGE Elastic dies“.<br />
Edition: <strong>01</strong>.08.2005 7
Operating instruction for quick-change adaptors<br />
type <strong>EM</strong>-<strong>ELSE</strong><br />
<br />
'HWDFK(08*((ODVWLFGLH<br />
Please refer to the <strong>EM</strong>UGE main catalogue for suitable hook spanners to<br />
detach the elastic automatic sleeves and the check nuts (see „The<br />
adaptation“).<br />
Elastic automatic sleeve<br />
1. Loosen check nut<br />
Check nut<br />
2. Screw off elastic automatic<br />
sleeve<br />
Elastic die<br />
3. Take out elastic die<br />
4. Eventually screw on elastic<br />
automatic sleeve<br />
8 Edition: <strong>01</strong>.08.2005
Operating instruction for quick-change adapters<br />
type <strong>EM</strong>-<strong>ELSE</strong><br />
<br />
0DLQWHQDQFH<br />
<br />
0DLQWHQDQFHVFKHGXOH<br />
:KDW"<br />
<br />
External cleaning<br />
:KHQ"<br />
Periodically, depending on the degree of<br />
dirt.<br />
:KR"<br />
Operator<br />
<br />
([WHUQDOFOHDQLQJ<br />
Clean the quick-change adaptor at periodic intervals with a duster, depending on how<br />
dirty the adaptor is.<br />
,PSRUWDQW<br />
Do not use any aggressive solvents.<br />
Do not use any fibrous materials, ie steel wool.<br />
<br />
6WRUDJHZKHQQRWLQXVH<br />
If the quick-change adaptor is taken out of service, please go through the following<br />
steps:<br />
1. Clean the adaptor with a duster.<br />
,PSRUWDQW<br />
Do not use any aggressive solvents.<br />
Do not use any fibrous materials, ie steel wool.<br />
2. Spray the adaptor with a preservation oil to avoid rusting and to preserve the easy<br />
running of the adaptor.<br />
,PSRUWDQW<br />
Before storage all evidence of coolant and machining residues must be<br />
removed!<br />
Edition: <strong>01</strong>.08.2005 9
Operating instruction for quick-change adaptors<br />
type <strong>EM</strong>-<strong>ELSE</strong><br />
<br />
$SSOLFDWLRQDQGFKRLFHRIRWKHUTXLFNFKDQJHDGDSWRUV<br />
Type <strong>EM</strong>..<br />
Simple type, without overload clutch.<br />
Main application range: Cutting of through threads.<br />
Type <strong>EM</strong>../IKZ<br />
Type <strong>EM</strong>..-E-Lock<br />
Type <strong>EM</strong>..-U<br />
Type <strong>EM</strong>..-U/IKZ<br />
Type <strong>EM</strong>..-L<br />
Type <strong>EM</strong>..-UL<br />
Simple type, without overload clutch, with internal coolant supply<br />
via channels in the adaptor.<br />
Main application range: Cutting of through threads with internal<br />
coolant supply<br />
Simple type, without overload clutch, locking of the tap is<br />
secured by form-fitting.<br />
The tap must be provided with a groove at one square face.<br />
Main application range: Clamping of hard metal and HSS taps<br />
With integrated, adjustable overload clutch.<br />
Main application range: Cutting of blind threads<br />
With integrated, adjustable overload clutch and channels for<br />
internal coolant supply.<br />
Main application range: Cutting of blind threads with internal<br />
coolant supply<br />
With length adjustment, without overload clutch. Serves for preadjusting<br />
the tools in the quick-change adaptors out of the<br />
machine to the correct length, ie for re-grinded taps. Main<br />
application range: Cutting of through threads on multi-spindle<br />
machines and transfer lines<br />
With overload clutch and length adjustment.<br />
Main application range: Cutting of blind threads on multi-spindle<br />
machines<br />
Type <strong>EM</strong>..-SE For adaptation of dies acc. to DIN 223.<br />
Type <strong>EM</strong>..-Z<br />
Type <strong>EM</strong>..-R<br />
With collet adaptation.<br />
Main application range: Use of hard metal or extended taps,<br />
taps with a special length, horizontal use, internal coolant supply<br />
application<br />
Reducing adaptation for all <strong>EM</strong> types<br />
⇒ the clamping range may be extended downwards<br />
10 Edition: <strong>01</strong>.08.2005
Operating instruction for quick-change adapters<br />
type <strong>EM</strong>-<strong>ELSE</strong><br />
1RWHV<br />
<br />
Edition: <strong>01</strong>.08.2005 11
Operating instruction for quick-change adaptors<br />
type <strong>EM</strong>-<strong>ELSE</strong><br />
1RWHV<br />
12 Edition: <strong>01</strong>.08.2005