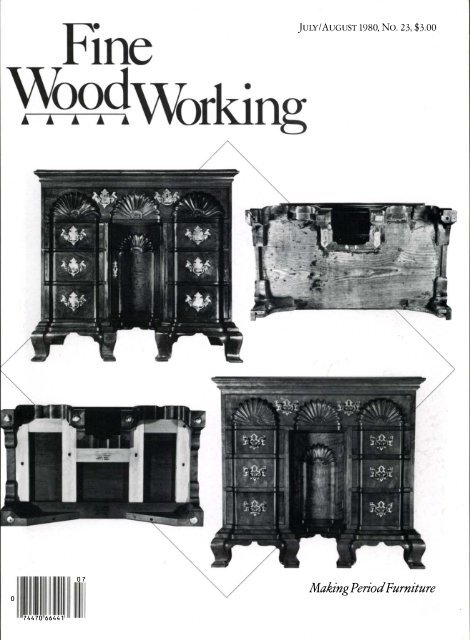
JULy/AUGUST 1980, No. 23, $3.00 Making ... - MetosExpo - Free
JULy/AUGUST 1980, No. 23, $3.00 Making ... - MetosExpo - Free
JULy/AUGUST 1980, No. 23, $3.00 Making ... - MetosExpo - Free

Create successful ePaper yourself
Turn your PDF publications into a flip-book with our unique Google optimized e-Paper software.
<strong>JULy</strong>/<strong>AUGUST</strong> <strong>1980</strong>, <strong>No</strong>. <strong>23</strong>, <strong>$3.00</strong>o744706644107<strong>Making</strong> Period Furniture
The right info rmationmakes all the difference.Here are three remarkable technical' volumes that approach their shop tasks with the samethoroughness and expertise as Fine Woodworking, but with even more depth. If you want tomake an unusual joint, work green wood or learn a special technique like cutting threads inwood, you'll find these books invaluable._ Joinery:ToolsandTec nlqut"lcN\I to . otmake the unportaA masterwooctworkts-Ifl""""' cran pletestep-bV·stepTage Frid Teaches WoodworkingJoinery: Tools and Techniquesby Tage FridThe dean of American woodworkers-and Fine Woodworking senioreditor-tells what he's learned in 50 years of cabinetmaking. His experiencecan teach you many things in this landmark step-by-stepvolume. 811z"x 11", 224 pages, 900 photographs, 365 drawings.$16 cloth, postpaidMake a Chair from a Tree:An lntrocluction to WorkingGreen Woodby John D. Alexander, Jr.What you need to know in taking wood directly from the tree andshaping it into a chair before it has a chance to dry. A nearly lost artbrought vividly back to life. 9"x9", 128 pages, 175 photographs, 75drawings.$8 paper, postpaidFine\qoQWorking. 180 ods tools and materials forp:ages o f meth , ed the f firstk select romseven iSSues 0 .weTECHNIQUES 11ser ious w ood" fo:.e r s Z,\, o od w orking magazineFine Woodworking Techniques 1A collection of all 50 technical articles from the first seven issues ofFine Woodworking magazine. It's important but hard-to-come-by information,and we want to make sure it stays in the literature. 9"x 12",192 pages, 394 photographs, 180 drawings, index. $15 cloth, postpaidEach of these books is written for the serious woodworker. To order,use the convenient order form bound into the magazine, or write to:11lnmron H:ess 52 Church Hill Road, Box 355, Newtown, CT 06470© <strong>1980</strong> The Taunton Press
EditorAISociote EditorAllistant EditorCopy EditorEditorial AISistantSenior EditorContnouting EditonCOnlulting EditorlMethodl 0/ WorkCo"elpondentl/ EnglandWeIt CoaltNew EnglandWl1Jhington, D.C.John KelseyRick MastelliJohn LivelyRuth DobsevageMaty Pringle BlaylockTage FridR. Bruce HoadleySimon WacrsGeorge FrankA. W. MarlowLelon TraylorJim RicheyRoger HolmesJohn MakepeaceAlan MarksRosanne SomelSOnRichard StarrStanley N. WellbornFine•WqqQWorJULY / <strong>AUGUST</strong> <strong>1980</strong>, NUMBER <strong>23</strong>Art DirectorAllociote Art DirectorII/ultratorArt AmitantlProduction ManagerAmitant ManagerDarkroomTypelettingMarketing DirectorPromotion ManagerSaleI/Oper. CoordSalel Dept. SecretaryAdvertiling SalelCoordAdvertising AmitantAdvertising COnlultantSublcnption ManagerMat/room ManagerAccounting ManagerSecretary to the PubltiherAlJOciate PublisherPublisherRoger BarnesDeborah FillionBetsy Levine MastelliLee HochgrafKaren PeaseJoAnn MuirCynthia LeeBarbara HannahMary Eileen McCarthyJack F. FriedmanDonald FleetJohn M. GrudzienHenrietta BuchVivian DormanCarole WeckesserGranville M. FillmoreCarole E. AndoGloria CaISOnDorothy DreherKathy Jean FullerMarie JohnsonCathy KachNancy SchochKathy SpringerViney MerrillRobert BruschiIrene ArfarasMadeline ColbyElaine YaminLois BeckJanice A. RomanPaul RomanCover: On first glance Robert Emmett's reproductionof a Newport kneehole bureaulooks like the c. 1780 orig inal, which is theone on top. The views /rom below, however,hint at how differently they are made.Emmett believes tbe old designs can't beimproved, whereas the old constructionsmust be-here he shows how he proportionsdovetails to make a stron g er drawer.More about these two pieces and about howother reproduction cabinetmakers see thequestion of whether to improve or to reproduceprecisely, on p. 32. (Newport bureaucourtesy Yale University Art Gallery, Garvancollection; photo Joseph Kugielsky.)DEPAR TMENTS4 Letters10 Methods of Work18 Questions & Answers24 Books26 Events28 Adventures in Woodworking31 ConnectionsARTIaES32 In Search of Period Furniture Makers by Rick MastelliWhat they do about what the 'old guys' did41 Plans: Newport-style and Boston-style Blockfronts45 The Blockfront by Margaretta M. LovellIts development in Boston, Newport and Connecticut47 Building Blockfronts by E. F. SchultzImproving traditional constructions50 Variations in 18th-Century Casework' by Wallace B. GuslerSome 'old masters' built better than others53 Post-and-Panel Chests byJim RicheyA 19th-century design55 The Frame and Panel by Ian j. KirbyAncient system still offers infinite possibilities59 The Legacy of Harry <strong>No</strong>hrDurable, delicate bowls of native hardwoods60 Turning Thin and Finishing with Epoxy by David Lory61 Tool Rests and Turning Tactics by Bob Gdson62 The Carousel Horse by Roger E. SchroederHollow carcase makes a sturdy beast65 An Abrasive Planer by Michael Horwitz and Michael RancourtAutomatic feed and rigid bed offer exceptional accuracy68 A Disc Sander by Donald C. Bjorkman70 Turning Thin Spindles by Mike DarlowLacemaker's bobbins demand speed and precision72 Carbide-Tipped Circular Saws by Simon WattsAlloy's hardness is its weakness76 Hardwood Plywood by Tage FndModern 'glued-up stuff saves work, money and wood79 French Fitting by John Lively<strong>Making</strong> the presentation case presentable82 The Woodcraft ScenePrescote's London Show by Roger Holmes84 The <strong>No</strong>rthwest WoodsFine Woodworking (ISSNThe Taunton Press, 10e.. Ncwrown. CT 06470, Telephone (203) 426·8171. Mcond-class postage paid at Newtown. CT0361-34)3) is published bimonthly. Janu"l" March, May, July, Septemb
Letters (continued)sharp corners, I cut one end of the spline at a 450 angle and,staning at the middle of the back of the seat, drive the splinedown. If the seat has corners I miter to match the corners. Ilearned this method from a gentleman who had used it forover 20 years. He claims he's never had a seat come back becauseof the installation. I've used it for the past six years andhaven't had one returned yet.Also, many of the press cane seats we see in our shop havebeen glued down. I pour warm vinegar in the groove to softenthe glue and then, using a screwdriver I've filed down to fitthe groove, I can pry the old spline and cane out. Clean thegroove well. Test the vinegar on the finish before using it inthe groove. -Scott McDiarmid, Charlottesvzlle, Va.I recently spent a frustrating day trying to duplicate thedowelmaker described by Trevor Robinson (F WW #8,Fall '77). Although I couldn't make it work, I discovered afar simpler and easier technique with which I turn out dowelsof any size. Proceed as follows: (1) Bore a hole the size of thedesired dowel through a block of hardwood about 2 in. thick.(2) Enlarge one end of the hole conically with a reamer, lathe,rasp, etc. The shape and finish are not imponant because thedowel blank will not touch the core. (3) Slice the top off theblock with a saw or plane until the top of the hole where itjoins the core just shows. (4) Lay a plane blade or similarsharp blade over the hole with the cutting edge just forwardof the conjunction of the hole with the cone, bevel up, andclamp the blade in place. (5) Whittle down the two ends of asquared dowel blank, chuck one end in an electric drill, andrun the blank at high RPM but slow forward speed into thecutter. A bit of experimentation should result in perfectr------------------,FREE SANDING BELTSDIRECT FROM THEMANUFACTURER(Manufactured at 642 <strong>No</strong>rth Eighth Street, Reading, Pa.)WIth your order eX one dozen or more belts. we will send you six FREE. AlI belts are aluminumoxide first quality. Our electronic presses make smooth bump-free splices.Oleck your size and how many dozen.We will ship assorted grits unlessotherwise specifiedD l"x42" -$ 9.75/doz.D l"x44" - 9.75/doz.D 3" x 18" - 10.75/doz.D 3"x21" - 1l.25/doz.D 3" x <strong>23</strong>3/4" - 11.75/doz.D3"x24" - 11.75/doz.D 3"x27" - 12.25/doz.D 4" x 213/." - 13.75/dOz.D 4" x 24" 14.25/doz.D 4" x 36" 17.95/doz.D 6" x 48" - 19.95/1/2 doz.9" X 11" Paper Sheets(100 sheets per package)D 40-0 -$25/pkg.D 50-0 - 22/pkg.D 60-0 - 20/pkg.D 80-0 - 17/pkg.D lOO-C - 15/pkg.D 120-C - 15/pkg.D 15O-C - 15/pkg.D 6OO-A- 19/pkg.(3OtherFREE)size belts on requestPrompt delivery from stock.MONEY-BACK G
Whenyouwork=youneedThe Woodworkers'_ ,:---::::,, "" _::-:: _:--::-___.We carry the fin-Store catalog . ".:::-""-=7:-':--:_::-7'I.est selection of veneers, hardwoods,inlays, mouldings, specialty hardcarvingtools, finishing materials,caning supplies,and an informativeselection of booksand plans for everyproject.This year we arecelebrating 25years of serviceto over100,000satisfiedcustomers.They havefound areliablesource ofwoodworkingsuppliesalong with the speed and service ofcatalog mail order.And when it comesto catalogs, our all 25new catalog/manual is the mostinformative and-yearseasyto understand supply bookavailable. Throughout its 112 pagesyou'll find colorful photographsand illustrations showing over 3,000carefullychosen productswith easyto understandhow-to information.To receiveyour copy of$1.00 to:the catalog/manual, sendDept. 816S-m __ nrJiTheGWood workers' St ore21801 Industrial BoulevardRogers, Mi nnesota 55374IPRESIDENT'SSUMMER SALEIt's a 10" table sawIt's a 34" lat hee It's a horizontalboring machinee It's a 16V,' variablespeed drill presselt'saI2"discsanderAll in 1 tool.Here's a wonderful opportunityfor you to get America'smost-wanted power tool at thebiggest savings of the year.As President of Shopsmith, Inc., I cordially invite you to take advantageof our special once-a-year President's Summer Sale. Mail the couponbelow and you're entitled to the biggest savings of the year, $100.00toward a purchase of the Shopsmith MARK V -the 5-in-1 power toolthat's a complete home workshop!You are probably already familiar with the MARK V from our tv and-at the biggest savings of themagazine ads, our demonstrations, or perhaps from someone you knowwho has one. ow, you can own one yourselfyear! You'll find out why thousands of satisfied customers call it "the toolto start with, the system you grow with."It's the woodworking system that's rightfor you whether you're a beginner oran expert.If you're already on our mailing list,you'll be receiving all the information onthis spectacular sale soon. But if you'renot, be sure you mail this coupon today!A savings of $100.00 is waiting for you!Sale ends August 31, <strong>1980</strong>. Mail thecoupon today! You're under no obligation. PRESIDENTSHOPSMITH, INC.----------.---Mail to:e) Shopsmith Inc.IThe Woodworking CompanyDept. 2532750 Center Drive, Vandalia, Ohio 45377o YES. please send me more information about the Shopsmith MARK V and tell mehow I can enjoy the best savings of the year with this coupon during the once-a-yearPresident's Summer Sale' I understand I am under no obligation.o I have inquired about the Shopsmith MARK V before, but want to make sure Ireceive John's $100.00 savings offer.NameAddressI City State ZiP .Ja..------______ _I7
Letters (continued)(which can be covered when the sliding feature isn't wanted)and a sturdy, accurate rip guide. I found it for $200, andagain I had to rebuild the blade guides. It's too much saw formost of the bandsawing I do, and the table doesn't tilt, butfor resawing it works fine. There are many of these old sawsaround because thousands of small butcher shops have closedin the past 10 years. I also bought a meat-cutting blade, andfind it works fine for its original purpose, too.- George Pzlling, Springvtlle, CaltfLike Ted Sittler (FWW #2 1, March 'SO, p. 6) , the first bandsaw I ever owned was an IS-in. model I built from the Gilliomkit. I had some of the same problems . .. and I have gained agood deal of experience since, so here are my suggestions.Gilliom's design can be beefed up a bit in several ways. Iadded an extra 2x4 to the left support column and used glueblocks in strategic places throughout the body of the saw. Ialso used nails and glue, and extra screws and bolts. I builtmy saw from lk-in. construction plywood and yellow pine. IfIwere to build another, I would use rock maple and veneercorebirch plywood. Perhaps some angle iron, also.There are several possible causes for the blade to belly outon thicker cuts. The main reason I found was that the upperframe, being wood, did not have the necessary rigidity.Therefore the blade could not maintain its tension. My solutionwas to add a detachable support column at the right ofthe blade-from the upper frame to the lower body of themachine. For most resawing it did not get in the way, and forcurve and panel cutting it could be removed. I had to modifythe table, however, making a part of the right-hand sectionremovable to allow for the extra piece. Most important, I hadSdo dozensof jobs betterwith amazing ForedomMiniature Power Tools• Hangup and bench • Variable speedsmodels• Hundreds of cutters,• Powerful motorpOints. abrasives,• Rugged flexible shaft special toolsforENGRAVING---....,SANDING ••••••••••••••••••••••••••O!!: ERDRllll1POLISHINGGRINDINGROUTINGDEBURRING BUFFING • SAWINGand many moreCraftsmen, model makers, hobbyistsknow Fored om's pr ofessional qualityproduces professional results. Lightweight,easy-to-hold handpieces Idealfor fast, super-precise drilling, carving,sanding, grinding, buffing and dozens ofother operations on wood, metals, plastics,ceramics, minerals.See your dealer or send now ...Special offer on machines, hand pieces,speed controls, tools described in FREECatalog File <strong>No</strong>. 280A2.\FlFOREDOM®• _ THE Bethel, FOFlEDOM CT 06801 ELECTRIC 203-792-8622 COMPANYto add a strong spring to the blade-tensioning mechanism tokeep the blade from breaking. An old automotive valvespring worked very nicely ....If the saw is built fairly well, the speed can safely be increased.I ran mine at 3,600 blade feet per minute instead ofthe 2,000 specified. Three thousand would be optimum andprobably easier on the wood frame, especially if the tires or. wheels haven't been dressed true. I simply substituted aslightly smaller motor pulley . ...Resawing takes a bit of patience and skill. Use a slow, firm,even feed speed. Let the machine do the work. Make sure thefence and the blade guides are adjusted properly and that thetires are in good shape and clean. Use enough tension. Itdoesn't go as fast as you might think, but it's still faster thana lO-in. table saw and infinitely less nerve-wracking.-James L. Wheeler, Houston, Tex.William Woodcock mentioned using propane to reduce thegelling of polyurethane varnish (Letters, FWW #22, May 'SO,p. 4). I have an easier technique. I simply cut a circle of SaranWrap the size of the inside of the can, then spread the cutcircle atop the remaining varnish and reset the can lid.-Henry Turner, Sterling, Colo.Propane gas is highly flammable in the presence of air. Even aspark, as might occur when prying open a can with a screwdriver,might set off an explosion. Propane is best left totorches and gas stoves. -Michael McCann, New York, N. Y.We very much appreciated the recent article about Japanesesaws (F WW #2 1, March 'SO). However, the editor's note im-•••••••••••••••••••••••••••You r best source for •a choice selection =of the very finest I•furniture hardware!I THE DECORATIVEJI HARDWARE STUDIO160 KING STREET, CHAPPAOUA, NEW YORK 10514Call (914) <strong>23</strong>8-5251 orwri1e for$2.00 CATALOG. Refund with first orderHINGES. SABOTS. CHUTES. CONSOLESKNOBS. PULLS. DROP RINGS. GALLERIESROSETTES. MOULDINGS. CAMPAIGNCABINET LOCKS AND MORE - HUNDREDS OFSTYLES IN SOLID BRASS, SPECIALTY FINISHES,LUCITE, LIMOGES PORCELAINDOMESTIC & FOREIGNHARDWOODSQuality stock forCabinet WorkMost all sizes from1" up to 4" in thicknessHARDWOODSASH -BASSWOODBIRCH-BUTTERNUTCHERRY -CHESTNUTEBONY -MAPLE-OAKPOPLAR-ROSEWOODTEAK -WALNUTAlso hardwood plywoodsSOFTWOODSSUGAR PINE-CYPRESSCEDAR-SPRUCEDOUGLAS FIR etc.MAURICE L. CONDON CO., INC.White248Plains,Ferris Avenue914-946-4111.y, 10603Open Saturdays 8 AM until 2 PM
Letters (continued)plies that the fIrms mentioned all offer the same Japanese sawat different prices. As you are aware, there is a wide range inprices of Japanese tools. We currently offer ryoba saws rangingin price from $13.50 to $48.10. As an indicator of quality,the following note was received from Thomas Hucker, a studentin the program in artisanry at Boston University: "I metsome Japanese carpenters doing restoration work in the BostonMuseum a few weeks ago, and with the help of an interpreter,we showed them your tools and their response was notonly were they very good tools, but the same brand that theythemselves use."-Fred Damsen, PresidentWoodlinelThe Japan Woodworker1004 Central Ave., Alameda, Calt! 94501Re T. R. Warbey's sander (FWW #21, March '80, p. 50), thefollowing suggestions: Replace the pillow blocks with selfaligningball bearings. Replace the hex-nuts of the left-handside hold-down bolts with wing nuts, and replace, if possible,the wooden drum with a steelone that has the same outsidediameter as the inside diameterofstandard PVC 6-in. gasor drainage or sewer pipe withwalls about Y4 in. thick. Cut \\ 1\\,three or four slots about Yz. in.· ... ·:-ii·.-.. _iljj:.1••• 'long and % in. wide in the right-hand end of the tube, sothey will fIt over keys mounted on the drum, for example,two wood screws side by side in a wooden drum or some Y4-in.key bar welded or bolted to a steel drum. Various sleeves ofPVC tube can be kept with different grits glued to them.I might add that I don't use wood in machine tools. Thepillow blocks in the low-tech thickness sander are presumablyfIxed with wood screws in end grain. As the drum is notdynamically balanced, sooner or later Warbey will have aclose encounter of the unpleasant kind with it. The cost of asmall electric welder and the little effort necessary to acquiresome skills are quickly repaid by the tools and structures thatcan be made for a song out of scrap iron and discardedmachine partS.-H. 1. Gosses, Leiden, The NetherlandsIn reply to Peter Kemmer's letter (F WW #20, Jan. '80) onhand work vs. machine work, I would like to make the followingobservations. I am a clinical psychologist and a sometimewoodworker bent on rapidly increasing both skills. I do notbelieve it is possible to become too philosophical about ourcrafts, nor do I believe that sanitizing emotionality out of thepractice of our crafts will improve the product.First, there is the fact that most of our time is spent in exercisingthe process. If the process is subordinated to the product,we run the danger of becoming bored with the activitiesthat occupy our time. The product occupies no time at all;only the process consumes time. Boredom will most certainlylead to a degradation of the quality of the product, and thatwill be noticed by the consumer. The issue isn't whether weshould work by hand or by machine. Do whatever turns youon. But to attempt to desensitize yourselves to any of thepleasures involved in exercising our crafts will, as surely asnight follows day, produce pieces that lack sensitivity, graceand craftsmanship ....In short, the beauty that Kemmer seeks is the end result ofa process. Ignoring that process cannot but detract from theproduct.-Harry]. Coffey, Lewisburg, W. Va.tau.cA IIWood Finishes and related items. Lacquers,sealers, fillers, strippers, veneer,reproduction hardware, clock movements.Many hard to find items.Send $1.25 for catalog. Estab. 1942.Shipped in Continental United States only.GASTON WOODDept.FINISHES,FWINC.3630 E. 10th St., P.O. Box 1246Bloomington, Indiana 47402II01you work in hardwood. this bit is one tool youmust have! Unlike other bits. the Forstner isguided by its circular rim instead the center.Bore any arc or circle and you leave a truepolished surface. Guide it in any direction, it cutssmoothly through cross-grain or knots!$11.95AVAILABLE IN THESE SIZESPRICE EA.I". 12.95 13.951/4".5/16".3/8".7116".1/2"9/16". 5/8",17/16".314".13116"I &13/16".718".15/16". 1·1/16"Add 51.50 Postage HandlingFRANK Impo,.,.". MITTERMEIER. 01 Quail' y Tool. INC. Sinc. (Eat. 1936111311)Write lor our FREECATALOG3577 E. Tremont Bronll N.Y.POWERMATIC8" JOINTERThe Model 60 8" Jointer is one ofthe many new Powermatics now instock. We also offer the completeline of Rockwell and PowermaticShaper Cutters (including Carbide),as well as Carborundum Abrasives."!UOO DS::a:O:F'S:F'ECJ:ALTJ:ESP.O. Box 1013East Middlebury, Vt. 05740802-388-7969FINE HAND TOOLSINCA POWER TOOLSEXOTIC HARDWOODSWOODCRAFT CLASSES• BOOKS & MAGAZIN ES"WOODCRAFTER'SDREAM STORE!"1#1-Sunset Magazinet::HE CUCCING EDGEBEVERLY HILLS. CALIFORNIA295 South Robe rtson Boulevardlbetween Wilshire & Olympic)213/652-6133 HOURS: Mon.·Sat. 1Oam-6pmBERKELEY. CALIFORNIA1 836 Fourth Street 415/548-6011HOURS: Mon.·Sat. 10ampmMILL YOUR WOOD WHERE IT FALLSFour precision built, lightweight models singleor double chain saw engines. Capable of millinglogs on site up to 50" wide, 3/8" to 15" thick andany length.Described in: Popular Science. June. 1978.James Krenov .. Fine Art of Cabinet <strong>Making</strong>.FOR FREE BROCHURE AND PRICES WRITE TO: SPERBER TOOL WORKS INC.BOX 1224 • WEST CALDWELL. NEW JERSEY. 07006C201l744-BllO9
Methods of WorkCut-downlid supportsCUSTOM MOULDINGSFor Every PurposeSpecializing in Victorian TypesGrindingwheelAdjustable tool restHere is an adjustable bench-grinder tool rest that's accurate,easy to use and cheap to build. Cut a 1 Ifl-in. thick pine hingeblockat the angles shown and mount it to the base withscrews from underneath. Cut down two Stanley 10-in. lidsupports to make the table-adjusting hardware. Drill out thecenter rivets and replace with screws into the 1x1 hardwoodblock. Pin the %-in. threaded rod in a mortise in the pinehinge-block. <strong>No</strong>w mount the plywood or Formica-covered,composition-board table as close to the grinding wheel as possible.Recess the hinge into the bottom of the table ifnecessary.-Mike Pern'n, Knoxvtlle, Te nn.Sanding block for lathe workFor years my woodworking students invariably burned theirfingers sanding bowls and other lathe work. Then I hit uponthe solution-sanding blocks cut from sheets of lJ2-in. thickrubbing felt. The felt sanding block shapes itself to shallowcurves and can be deliberately shaped to match any contourof a compound curve.Rubbing felt is available in I-ft. squares from H. Behlen &Bros. (Box 698, Amsterdam , N.Y. 12110) and other suppliers.A similar material, used for typewriter cushions, isavailable from office-machine suppliers. Cut the pad with arazor knife and rule. One block lasts indefinitely.-Russell Anderson, To rrington, Conn.<strong>Making</strong> little wooden ballsFaced with having to reproduce a number of Ih-in. diameterwooden balls (to replace missing ornamentation on an oldfireplace) , I discovered a virtually painless procedure using alarge belt sander. Build a box frame, open on the bottom,and clamp it to the stationary part of the sander so it sits justoff the belt. For Ifl-in. diameter balls, cut Ifl-in. cubes and tossthem in the box frame. Put a cover on the box (Plexiglas isbest) and turn on the sander. The sanding belt will throw thecubes around in the frame like dice on a game table, knockingoff their corners and edges until they're perfect spheres.If the cubes don't tumble about but rather line up neatlyagainst the far wall of the frame, glue a wedge there. If thisdoesn't work, you could vary the number of cubes, presandFurniture - MantelBeds/Coves - BaseChair Rails - Door & WindowCasings - Quarter & Half RoundsCherry -Oak - MapleBasswood - Birch - PoplarFor Information WriteRESTORATION BUILDERS, INC.189 UNION STREET, MONTCLAIR, N.J. 07042201-744-3496We also manufacture hand hewn beamsand wainscotting"MUsicalGJns'llbodSuppliesccessoriesOf The CJiinest Quality8Jew Catalogue For 1979Gurian GuitarsBox 595West Swanzey, N.H. 03469Catalogue $1.00Surprising How Much HandSanding can be Saved with aSAND-O-FLEX®CONTOUR SANDER14,000 "Sanding Fingers"per minute, eliminatestedious hand sanding.brushesFirm cushioningforce slashedgentlysive stri ps overabrashape and will notanyfineharmdetailor gougeor veneers.J iCompton, California 90224r R h:d:: : i ! Io SANDE R KIT<strong>No</strong>.4S"S brush 6"x1" wheel and 3abra· , drill csf i :f;u3::ra;1 $2495 FW I carrying and storage case. Includes postage & handling. .,-------------'BUTTERNUT, WALNUT,PINE,ROS EWOOD,CHERRY, BUCKEYE and about adozen other woods, in boards, slabs andfreeform cut ovals. Pieces up to 6" thick,3' wide and 16' long in some species. Wespecialize in coffee tables, benches, bars,carving stock, clock ovals and movements,accurately cut for you to finish. We sell bymail an d from our fantastic wood"museum," 9-5 except Sunday. Send $.25for brochure.WEIRD WOOD, Box 190FWChester, Vt. 05143, 802-875-3535Delmhorst ModeWood MoistureDetectorSOLID STATECOMPACTLIGHT WEIGHTDIRECT READING6% TO 30% WOODMOISTURE RANGEThis is an excellent instrument for thecraftsman. Moisture content is read immediatelyand directly on the meter dial.This is of great assistance in the dryingand/or purchasing of lumber as well as incontrolling wood moisture content at anystep of production. A complete line of electrodesincreases the accuracy and usefulnessof the instrument.Delmhorst Instrument Company____ 11201 /334-2557 ____ _908 Cedar Street, Boonton. New Jersey 0700510
Methods of Work (continued)Clamp frameto sanderjust above beltrtlllJ'III'lV"
Methods of Work (continued)ial by cutting crossgrain, repeat passes along the grain, thencarve out the corners by hand. Finish the surface by scrapingand sanding. -Pendleton To mpkins, San Mateo, Calt!Deep-throat clampIf you need a deep-throat clamp and none is available, substitutea conventional C-clamp and two blocks of wood arrangedas in the sketch below. Though direct pressure is less thanwith expensive specialty clamps, the system works fine forgluing inlays, guitar bridges and other simple joints.-Bob Osbahr, Tucson, Anz.Tighten clampsto applyeven pressureacross boardClamping wide boardsIn bookcase construction and other large-carcase work, It ISoften necessary to join wide boards in an H. Without specialclamps, it is difficult to achieve the necessary clampingpressure. This simple crowned caul, used with ordinary barclamps, solves the problem.To make the caul select a I-in. thick, 2-in. wide block aslong as your lumber is wide. Plane a crown on one edge, leavingthe center high and each end about a degree lower. <strong>No</strong>wlay the caul, crown edge down, across the width of the boardto be clamped. As you apply pressure to each end with barclamps, the end-gaps will close, resulting in even pressureacross the joint.-David Shaffer, Stlvercliff, Colo.Square cutsMost table-saw and radial-arm-saw blades that I've workedwith have a tendency to climb and squirm when crosscutting.The result is an out-of-square cut. I've found, quite by accident,that if the crosscut is very thin, say one half the kerf, thesaw cuts amazingly true. This approach does require that youClamp complicated or simple shapes withthis durable Ingenious tensioning tool.Starter kit contains hi-test strapping,buckles, tool and Instructlon-,..usable.Order <strong>No</strong>w!•$15 95 PlusDealer Mass. Residents Inquiries51.50 add WelcomedPOSTAGE 5% lax.HOT TooLs.SENDInc. 9 HawkesTODAYStreet.FORMarblehead,BROCHUREMass. 01945DO-ITYOURSELFFINE GRANDFATHER CLOCK KITSSTARTING UNDER$225(including movementand dial)Factory directprices• Heirloom quality• Solid %" hardwoods:black walnut,cherry, mahogany,oakEasy to assemble,parts pre-cut• Solid brass WestGerman chimingmovementsMoney backguarantee• Prompt shipmentMASTER CHARGE and BANKAMERICARDNISAACCEPTEDWrite for FREE color catalogEMPEROR®CLOCK COMPANYWORLD'S LARGEST MANUFACTUREROF GRANDFATHER CLOCKSDept. 540 Emperor Industrial ParkFairhope, Alabama 36532THE WISNER PLANEEdge Trimming BlockAn improvod Stanley #95 with fonco and shoar bladofor preciso square cutting. Hoirloom-qualityBronze-$83.50 plus $2.50 shil'ping. This tool ishandcrafted to an extraordinanly hlgh standard inlimited production. Send for details to:Wisner Tools, 259 Whaley St., <strong>Free</strong>port, NY 11520r----------------I &HARDWOODLUMBER CATALOGVENEERSI 98 Varietiesworld's rarest veneers and___lumbel' at reasonable prices. Simplifiedveneering Instructions plus full colorwood selector Included. Send for freee : o,t:.as C Ve5 !70 rry!I BOB MORGAN WOOD, Dept. F04K24l JPROFESSIONAL TURNING roOLSFittings and accessoriesSend one dollar for catalogPETER CHILDThe Old Hyde, Little Yeldham,Halstead, Essex, England.NOW' Brand yoL!r own namepermanently on wood and leatherhandcrafts' Simple to use. LongBrands full name. Guaranteed.lasting. U/L approved electric handle.FREE ILLUSTRATEDLITERATURE!I12
THE HISTORY OF CUT NAILSIN AMERICAIl' lit'll,,! ,! lth,1 ,If 1 , 1 T t,' J T \'1 1'1!11 11111-,.'_" ,,,n.l."7:",""I"" "o'U lI t'" n ••-.. t - ' : ' r J ._:'.. JCUT NAIL KITA unique collection of Tremont OldFashioned nails containing 20 varietiesand a history of Cut Nail <strong>Making</strong> inAmerica. Cut nails areideal for most nailingprojects. Nail headpatterns for decorativeSAMPLESETeffects are shown in $3.50 ppd.our Sample Set and U. S. funds onlycatalog.Mass. residents add 5 % Sales TaxSEND FOR FREE CATALOGTREMONT NAIL CO.P.O. Box III Dept. FW60Wareham, Mass. 02571AMERIC(S 7 BESTPOWER TOOL1B6" tillarbor sawcrosscuts. rips, mitres. cuts compoundangles. dadoes, coves, moldings,Less blade. motor. Rip fencefor easy alignment $6.50 addt Sailbearing model $9. 75 add'i. Takes1/3 h.p. motor or larger, standard a : s , fa t c a 7t'.!: 544.60SPrecision heavy duty sander includesa 4" x 36" sanding belt.Uses 1/3 h.p. or larger motor.V-pulley drive and multi-purposedrive spindle. Disc sander accessory,$14.50 add'i. Mitre guage,n 5 ta6 IbS.544.504 FOOT WOOD LATHE LONG BED WOOD LATHE JOINTER -PLANER•Does the job of $150 unit. Tubularsteel bed rails, screw action tailstock. Use any size motor. 4" faceplate, $2,90. 30559Ibs. f.o.b. factory.00DELUXE HEAVY DUTY LATHEDouble shielded, lubricated for life' b"rin;;' f o toO571.006.55" version of the deluxe heavyduty lathe. has ball bearing livecenter in tail stock and extra heavy?dbta 40 Ibs.ry587.50RADIAL 32"PRESSDRILLPrecision 32" radial unit has standardfeatures and many extras.Depth of throat up to 16", Head tiltsand table stays level Drills to centerof a 32" circle. Cast iron and.steel. Less motor. belt and pul-i o; I bs. I . o . 579.90b.These power tools have no chrome, embossed nameplatesor any other useless extras . . but they do the same job astools costing 2 to 3 times the price! And their performancehas been proven in the shops of literally millions of professionalsand serious amateurs.Don't be misled by AMT's low prices; these are qualitytools. They are full scale, full speed and offer top performanceand precision. There are good reasons why we areable to offer such values. Here is how we do it: 'VEngineered for simplicity: After years of engineeringrefinements. virtually all the frills have been eliminated inorder to save you money. Faster machining: Speciallydesigned automatic machining equipment cuts costs bycutting production time. Standard parts: Ordinary hardwareitems replace custom parts for enormous savings.Volume: Our own foundry. our huge massproduction facilities and our large buyingpower-all keep costs down. Direct factorypurchase: You pocket the savings but we stillv offer our two terrific guarantees!POWER SAW: Our titt arbor saw comes completelyassembled with ground cast irontable. safety guard, splitter and mitre guage.r - - -74" x 22". Cast iron and steel, precisionground adjustable tables.For planing. joints. bevels. Cuts to1/6" depth, Fence adjusts from 0"to 50° . Steel knives and dualguards .Use any motor. Precisionball bearing industrial model.n 4 b6 :y 19IbS . 554.85WOODSHAPERKIT•Makes beads. coves. moldings.tongue-and-groove joints. Accurateat high speeds. Sealed andgreased for lif ball bearings. Lesswood. Takes '/ h.p. motor or larger.standard cutters. Optl., hold downassem ., $4.50 add ' i.9 Ibs. f.o.b. factory. 53490I n addition you get a free set of cabInet base plans thatshow you how. with one sheet of 3/4" plywood. you canconvert this saw into a floor model with a big 27" x 24" top.Cabinet rip fence only $7.50 additional. And you can useyour new saw to cut out the cabinet base!BRAND NEW. ELECTRIC MOTORDevelops a full 1 h.p. (purchased separately• $44,65) 17 Ibs, I.o.b factory $39.80,AMT OFFERS TWO GUARANTEES:OUR lG-DAY MONEY BACK GUARANTEETry any of these power tools and compare it with anysimilar machine at any price. If not satisfied return it forprompt no questions asked refund! We pay the returnshipping charges.lG-YEAR•FULL SERVICE GUARANTEEAny part or parts of these AMT power tools (except motorwhich carries a one year gaurantee) which becomes inoperativefor any reason within 10 years after purchasedate will be repaired or replaced by the factory with nocharge to the purchaser other than postage.Fourth & Spring Sts .. Royersford. Pa. 19468or $5 deposit each I0 Optional hold down kit, $4 50fGeneral Electric Motors$39.80 (with other item)$44,65 (purchased separately)I___AMERICAN MACHINE & TOOL CO., 4TH AND SPRING STS., ROYERSFORD, PENNSYLVANIA 19468BUY DIRECT . . . USE THIS HANDY ORDER COUPON TODAY -American Machine &- - .,Tool Co .. Dept, FW70I , .. ., .. Please send me the units checked. Payment in full enclosed $= 'v4 .' itemStandardo LongI -.- _.- - ...enclosed, balance C,O,D, I must be fully satisfied or will return unit within 10 days forfull refund. <strong>No</strong> questions asked.III I 4 7 0 8" tilt arbor saw, $44.60 0 Long bed wood lathe, $67.50 0 Wood shaper kit, $34,90 0 rip fence, $6.50Icabinet rip fence. $7.50. '2 Set of 3, $6.50Belt sander, $44,50o 0 0Set of 6Disc sander attachment, $14.50 , $<strong>23</strong>.000 Mitre guage for sander, $2.95I 3 5 0 Jointer-planer, $54.65Visil our Royersford factory show·I I I0 12" swing , 4 ' lathe. $59.00 0 Ball bearing spindle. $14.65 room for tese same low pric .0 Deluxe bali bearing lathe,$71.00I 6tilting head, $79,90on weekdays and 9 to 12 on Sat.I0 Face plate, $2 90I 0 Ball bearing spindle. 5 9.75Turning chisels or any lathe0I NAME- - - - - - - - - - - - - -- ---- - - - - - - -o Face plate, $2.90I ADDRESS0 32" radial drill press with 4th and Sprong Sts, From 9 '0 4,30L CITY STATE ZIPIIIJ13
Methods of Work (continued)make two cuts-one to rough length (leaving a half-kerf extra)and the second to final length. Of course if the machineis out of square to begin with, all bets are off.-Pat Warner, Escondido, Calt!ASK FOR FREE CATALOGSOLD THROUGH LEADING DISTRIBUTORSWETZLER CLAMP CO., Inc.43·13 11TH STREETLON G ISLAND CITY . N.Y. 11101TE L. 212'784'2874An intensive full-time learningsituation emphasizing traditionaltechnique as well asmodern methods of woodworking.Individual level instruction.ample work areas and an industriallyfurnished machine roomprovide a stimulating and efficient learning situation for the seriouswoodworking student of limited experience. Bench spaces availablePRIMROSE CENTERforFine Woodworking and Furniture Design401 West Railroad SL Missoula, Montana 59801Phone - (406) 728-5911for September <strong>1980</strong>. For further inrormation write or call:••*•••Lumbers, Plywoods & VeneersOver 80 species available•"woodAccess to millions of board feetKILN DRIEDz ... .... envtishY_ Ro.ewoodM.p". . i • Premium 111 finest quality only..... ... 1'Ii"'1§EXOTICHARDWOOD&. HARDWOOD CREATIONS<strong>23</strong>3 N. FEDERAL HIGHWAYDANIA, FL 33004(305) 922·WOODSItu, Cocobolo ""-pie Curly EcuadorIr
Methods of Work (continued)WorkPlywood fenceMiter gaugeBraceRipfenceTwo sawbladestenon, for example, simply requires mounting the two bladeswith a Y4 -in. and a %6-in. spacer between. My set of custommachinedspacers are 2Yz-in. discs drilled to slip over the sawarbor. Spacer thicknesses range from % in. to 0.005 in. Topass the work through the blades, I use a standard mitergauge tracked in a plywood fence as shown above. This approacheliminates vertical rocking and thus is safer and moreaccurate than other methods.-Mac Campbell, Harvey Station, N. B. , CanadaSharpening jointer knivesHere is a jointer-knife sharpening jig that saves money, eliminatesfrustrating at-the-sharpening-shop delays and gives thewoodworker a bit more independence. The jig, used with adrill press and cup stone, consists of a %-in. plywood orparticle-board base and a sliding knife-holder. The holder,slotted to accept the jointer knife at the right sharpeningangle, slides in an accurately sized channel in the base. Severalthumbscrews, tightened in threaded holes, threaded in-.serts or T-nuts, lock the knife in the holder slot during grinding.(To tap wood, drill pilot holes, use a tapered tap andback the tap out often; maple and other hardwoods tap aboutlike hard brass and hold as well.)To use the fixture, chuck a medium-grit 1 Yz-in. cup stone(contact <strong>No</strong>rton Co., 1 New Bond St., Worcester, Mass.01606 for distributors) in the drill press. True the stone ifnecessary (I use an old masonry blade) . Then clamp the basein position on the drill-press table so the knife and stone arealigned as shown in the sketch. Lower the quill until the stonebarely touches the knife, lock the quill and grind the knife bysliding the holder under the stone. Lower the quill a bit andgrind again. Repeat this operation until all nicks have disappeared.When the final depth is reached on the first knife,set the drill-press stop to preserve the setting for sharpeningthe second and third knives.To avoid warping the knife by heating unevenly, take lightcuts, move the holder smoothly and use plenty of thumb-Slidingknife-holder1 Hardwoods: We carry over 30 species ofAmerican and imported hardwoods, many ofthem rare and exotic; air and kiln dried; customdimensioned and thicknessed from 1/2"through 4". We also carry "Architectural Grade"veneer core -and high density fibre -core plywoodin American and imported woods, good 1 and 2sides. For hardwood lumbers and plywoods ...we are the source.2 MaIdta Portable Power Too": Consistenthigh quality, dependable, powerful. .Routers, circular saws, planers, jointers, drills;disc, belt , finishing and polishing sanders;screwdrivers, drywall drivers; chain and mitersaws. These tools have the most compact, best builtand most powerful motors for small power tools inthe world. Designed for comfort and durability. Forprofessional portable power tools ... we are thesource. Send $1 for your Makita catalog.3 Poweraaatic Power Too": Designed bythe industry for the industry. Nationally recognizedas the leader in the manufacture of stationarywoodworking machinery. Tilt arbor tablesaws, band saws, scroll saws, jointers, planers, drillpresses, belt & disc sanders, spindle shapers,lathes. These are fine-tuned machines withsensitive and accurate adjustments you candepend on for the most subtle detail. Sensible inprice, solid in design and superb in action, thesemachines are acclaimed for strength andperformance right down the line. For stationarypower tools ... we are the source. Send $1 for yourPowermatic catalog.4Greenlee Hand &: Bench Too": Famousamong professional woodworkers fornearly 100 years. Highest quality tools and accessories:Carving and sculpturing sets; mortise,firmer, bevel-edge and paring chisels; straight,tapered, Multi-spur and auger bits; twist gimlets,screwdrivers, plug cutters, countersinks, and manyspecialty tools. For premium quality hand andbench tools and accessories ... we are the source.Send $1 for your Greenlee catalog.5Accessori- &: SuppH_: A wide assortmentof all those supplies and accessories youneed to be the best craftsman you want to be.Router and milling bits, carbide-tipped saw blades,sanding belts and papers, glues, clamps, specialtytools and supplies for particular needs. Custommaderouter bits and shaper bits; and custommademouldings in any of our species. Forprofessional accessories and supplies, and forcustom-made cutting tools and mouldings ... we arethe source.The CatalI og: An all-inclusive, complete catalog containing ourextensive selection of lumber and plywoods; profeSSionalwoodworking tools; accessories and supplies that are all shoptested on the job and quality proven by John Harra, cabinetmaker.Send $2.50 for yourCatalog and supplements<strong>1980</strong>-81... the source.John Harra Wood & Supply Co.JohnHarraWood f1 Supply Co.39 West 19th Street, New York, NY 10011 212-741-029015
Methods of Work (continued)screws to lock the knife in the holder. Long knives areespecially prone to warping, so mist them or let them coolbetween passes. -James E. Gier, Mesa, Ariz. FaceplateWorkpieceDecorating turned goodsTo produce decorative black rings on tool handles and otherlathe work, twist a dowel peg handle on each end of a 12-in.long piece of soft iron wire. Any medium-gauge wire will do.To use, scribe a shallow starting groove in the work with thepoint of a skew. Then press the wire against the startinggroove. In five or ten seconds friction will generate enoughheat to scorch the groove. The resulting fine black ring, sparinglyused, gives a tasteful decorative effect.1. Scoregroove-Larry Joseph, Alva, Okla.2. Scorchwith wireTurning ringed objectsAn effective mandrel for turning napkin rings and other annularobjects can be made as follows. Choose a suitable hardwood(such as hard maple) and mount the wood to the face-MELVIN LINDQU ISTMARK LINDQUIST16WEEKEND WORKSHOPSIntensive.ind iv idualized instruction atall levels (limited to 10 persons) in theartists' studio located in the verduredhills of New Hampshire.<strong>AUGUST</strong> WORKSHOPSAug. 1-3Aug. 8-10Turning Spalted WoodThe Art of the VaseAug. 15-17 Carbide Tipped Tool <strong>Making</strong>Aug. 22-24 Turning and Sculpting Burlsand Found WoodFor further information & schedule ofFall & Winter Woodworking & PhotographyWorkshops send for free brochure to:Lindquist Studios, Henniker, NH 03242BEAUTIFULWOOD FINISHESWatco Danish Oils provide an elegant,extremely durable penetrating finish INthe wood, not ON it! Primes, seals,hardens, protects and beautifies in onefast, easy application.Pipe plugplate with the grain oriented perpendicular to the axis. Turndown the end of the mandrel to give a slip fit with the workpiece,leaving a larger-diameter locating shoulder on the baseas shown in the sketch. Next, drill and tap the end of themandrel for a tapered pipe plug of suitable size. First selectthe recommended tap drill size for the pipe thread and drillinto the end of the mandrel 0/4 in. or so deeper than the locatingshoulder. Then tap the hole so that a pipe plug willthread in halfway. The resulting threads, though rough in appearance,are quite strong if the grain is oriented as suggested.To complete the mandrel, cut two crossed saw kerfs tothe same depth as the hole.To use, slide on the workpiece and screw the pipe plug inthe hole. The plug will expand the mandrel, gripping theworkpiece firmly. -Edward F. Grah, Napervtlle, III.and Charles E. Cohn, Clarendon Htlls, III.Methods o/ Wo rk buys readers ' tips, Jigs and tricks. Send detatls,sketches (we '/I redraw them) and photos to Methods,Fine Woodworking, Box 355, Newtown, Conn. 06470.Natural and Medium,Dark and Black Walnutcolors for all woods.WriteWatco-DennisCorp., 1756·22nd St.,Santa Monica, Calif.90404, Dept. FW-70Build a quality Grandfather Clock byKuempel that can be a true heirloomin your family for years and years.Available in easy-to-follow plans orcomplete semi-assembled handcraftedks with illustrated instructions.We'll show you how to assembleyour own at less than halfthe cost. Write for <strong>Free</strong> descriptiveliterature.KUEMPELOept. 103 -21195 Minnetonka Blvd.Excelsior, Minnesota 55331CHIME & CLOCK WORKSEXOTIC ANDPRECIIUSWOODSROSEWOODSEBONIEScoco BO LOZEBRABUBINGAPADAUKLogs, lumber, sawn veneer andmusical instrument components.Wholesale inquires only.For more information, call or write:Nazareth, Pennsylvania 18064215-759-2837
•Sterling Pond Hardwoods, Ltd."Quality Lumber-Friendly Service"Ash, Basswood, Birch, Bubinga, Butternut,Che rry, Cocobolo , Cotto nwood, Ebo ny,Curly & Bird's-Eye Maple , Red & White Oak,Pines, Poplar, Purpleheart, Walnut, Mahoganies,lroko, Teak, Rosewoods, Kingwood,Tulipwood, Pearwood, Pado uk, Ze brawood.Many thicknesses 4/4-16/4 in stock.Wood fo r furniture, flooring, paneling,carving, turning.Send S.A. S. E. for pricelist-free estimates.Visit our warehouse and showroom of finewood products representing over 70professional woodworkers .412 Pine StreetBurlington,802-863-5820 VT 05401HORTON BRASSES<strong>No</strong>oks Hill Road, P.O. Box 95FCromwell, CT 06416Tele: (203) 635-4400Mfrs. of Cabinet and FurnitureHardware for Homes and AntiquesSend $1.50 for a CatalogueEnjoygooddesignQueen Anne Highboycirca 1760The ultimate example of theCabinetmakers Art . . .Choose Cherry, Mahogany,or Walnut.Catalogue One of Seventeen$1.00 KITSoffered by•. _ I E2!P"'.,..-.-0 Dept. 161, Box 404. Grayslake. IL IlCXnJ312/2<strong>23</strong>-7655Design Book Two contains the best work in wood by 1,000 present-day woodworkers-I, 150 photos of different works, from tools and musical instrumentsto chairs, beds, tables, desks, cabinets, houses, sculpture, carving and marquetry.There are even a couple of impressive canoes. Each photograph is accompaniedby the dimensions of the work, as well as a list of the woods andprincipal techniques used. And the craftsmen themselves add useful remarkson how they work and why. There's also a directory of woodworkers, givingthe shop name, address and specialties of the professionals represented.The Biennial Design Book is already a classic, with 65,000 copies sold to date. Itincludes 600 photographs of beautiful things in wood-from the chaste eleganceof a pearwood side chair to the whimsy of a kinetic sculpture. Every workin this book, whether traditional or contemporary, is an example of the newhigher levels of craftsmanship being reached in America today. From antiqueinterpretations to ultramodern fantasies, the Biennial Design Book shows whatamazing things can be done with wood.Design Book Two:Biennial Design Book:9"xI2", 288 pages. 9"x12", 176 pages,Postpaid price: $10, paper.Postpaid price: $12, paper;$16, cloth.TO ORDER: Use the convenient order form and postage-paid envelope in the back of this magazine orsend your order with payment to: (Connecticut residents, add 7'1z% sales tax).52 Church Hill Rd., Box 355, Newtown, CT 06470© <strong>1980</strong> The Taunton PressMORESAVINGSFROMBrassWood ScrewsFinest QualitySlotted Flat or Roundheadlindicate type )II Lth Per 1000 4 $1.90 8 lJ7 $740 10 1 $6 900 195 8 1 8.70 10 11, 8301 Yo 190 8 2 97·0 10 II, 9401 }" 1.95 8 2Yo 11.55 10 1 3/.1 10951I, 2.20 8 21 , 12.50 10 2 12052 Yo 1.80 8 2r. 15.65 10 21.1 15502 195 8 3 1805 10 21 , 18552 "2 2.20 9 , 4.55 10 2, 20.802 225 9 4.50 10 3 <strong>23</strong>.052 2.55 9 4.90 10 3', 29.053 Y. 225 9 % 5.55 10 4 43 553 2.20 9 1 6.00 12 17 7703 J7 2.40 9 lY. 7.05 12 "t. 7 953 2.55 9 1 \7 8.30 12 8.753 2.80 9 1 9.50 12 '8 9.703 % 3.30 9 2 10.50 12 1 10.303 1 3.55 9 2Y. 13.15 12 lY. 10.954 Y. 1.90 9 2\7 16.05 12 1\7 12.654 2.05 9 2:r. 17.75 12 1 14.304 \7 2.25 9 3 21.15 12 2 16.054 2.45 10 \7 5. 15 12 2Y. 21.054 :r. 2.75 10 5.30 12 2\7 22.654 % 3. 15 10 5.65 12 2 27.454 1 3.30 10 % 6.20 12 3 28 .904 lY. 4.55Sandpaper4 1)1 5.305 2.55 <strong>No</strong>rton/Carborundum5 2.80Garnet or Aluminum Oxide5 3. 155 % 3.45 (indicate type)5 1 3.80 9" x 11" Sheets-Open Coat5 lY. 4.40 10 1005 1\7 5.80 Sheets25 50 Sheets6 \7 2.806 3. 156 3.306 3.806 16 lY. 5.006 1\7 6.006 1:r. 7.956 2 8.507 \7 3.204.15 3.407 3.80 4.307 1lY. 5.701 \7 6.707 1 8.757 2 9.704.75280A $1.70 $3.50 $6.55 $12.70240A 1.70 3.50 6.55 12.70220A 1.70 3.50 6.55 12.70180A 1.70 3.50 6.55 12.70150A 1.70 3.50 6.55 12.70120A 1.70 3.50 6.55 12.70looA 1.70 3.50 6.55 12.7080A 1.90 3.95 7.35 14.15150C 2.35 5.30 10.10 19.45120C 2.35 5.30 10.10 19.45looC 2.35 5.30 10.10 19.45800 2.70 5.90 11.35 21.70600 3.00 6.75 12.95 25.10500 3.45 7.75 1 4.80 28.70Aluminum Oxide-<strong>No</strong>n filling9" x 11" Sheets-Open Coat8 \7 3.45 280A 205 4.80 9.10 17.25'8 3.95 220A 2.05 4.80 9.10 17.258 4.40 180A 205 4.80 9.10 17.258 4.90 150A 2.05 4.80 9. 10 17.258 1 5.30 120A 2.05 4.80 9. 10 17.258 lY. 6.45 100A 2.05 4.80 9. 10 17.25Shipping charges, add(minimum $10 in merchandise)orders up to $ 20 -add $ 2.50$20.0 1 to $50-..<strong>$3.00</strong>$50.0 1 to $100-..$3.75Over $100-..$4.75We also accept Ma ster Charge and Visaon orders of $20 or more$1 for complete tool catalogfeaturing:DISSTONGREENLEECOLUMBIAN VISESThe To ol Works76 9th AvenueWETZLER CLAMPSand much more NY, NY 1001117
Q & AONOVERMACHINERYAddsOUfPowerto Your WoodworkingYou may know us for our line of fine hand tools.many 01 which we produce in workshop here inrural Parkman. Ohio.What many do no! know is thai we have a line of fine"honest buill" machinery, manufactured in Taiwan toour specifications. OUf machinery is of very heavy castiron construction. compelively priced, and well suitedto the small shop owner or the serious amateur.Send for our 20 page catalog which has 5 pagesdevoted to our machinery, giving complete details andspecifications.Or beller yet - stop in our show room and see all ofthe itclll in our catalog for yourselt. Our store alsostocks many other interesting items such as books ami_____________ antique tools.Dear Conover:Enclosed is 51.00 for your latest 20 _page catalog ofhanu maUL' tools and machinery.NameAddressCity __ St.t.ZipConover Woodcraft Specialities, Inc.18]25 Madison Rd. Parkman, OH 44080(216) 548·5591WOODTURNING SCHOOLBeginners and experienced turners are invited fortwo·day workshops offered throughout the year. With amaximum of two students. learn and practice bowl andspindle turning-· emphasis on cutting techniques.I do a lot of kitchen cabinets and have tn'ed various finishes-inparticular, polyurethane, lacquer thinned 50150and Watco ozl followed by wax. I Itke both the look and theworking properties of the lacquer and the ozl finishes betterthan the polyurethane, but when I'm asked about which finishis most durable, I don't know what to say. Is there any informationavazlable on the comparative durabzlity of thesefinishes? - Claire 0 'Meara, Washington, D. C.To the best of my knowledge, there's nothing in print thatdeals with the kind of durability comparison you're lookingfor. Theoretically, a good polyurethane should be the mostdurable and wear-resistant because it leaves behind a thickfilm upon drying. Polyurethanes have a higher solids contentthan either lacquer or Watco oil, which means that more materialis left on the surface when the solvent evaporates. However,polyurethane wouldn't be my first choice since youoften run into problems of poor adhesion when refinishingwith it (if refinishing is a consideration) .Lacquer (Deft) thinned 50/50 as you use it produces extremelythin coatings. I wouldn't thin it. Try using it straightfrom the can, brushing it so that laps and bristle marks don'tshow. A little thinning might be necessary, but 50/50 is waytoo much. Lacquer produces a good, wear-resistant finish,but you need two or three coats to build up a decent thickness.This will probably stand up as well for your purpose aspolyurethane, without recoating problems if you ever have torefinish the cabinets or touch them up.Watco oil penetrates more deeply than either polyurethaneor lacquer, and builds up a protective coating in the woodrather than on the surface only. Because it helps toughenand stabilize the wood, it also delivers excellent wear res istance.1'd use at least two coats, with a couple of days dryingtime between. Using wax as a final treatment over Watco is agood way to give you the luster you want, though it will eventuallysoften and pick up fingerprints and dirt and will requirecleaning and rewaxing at intervals. -Don NewellRecently I tn'ed veneen'ng and came upon an unexpectedproblem-separation and splitting of the veneer sectionsshortly after gluing. I used Elmer's Professional Acrylic ContactCement and fo llowed the instructions in gluing a fo ursectionwalnut veneer to a sheet of 1 "Is-in. particle-board(<strong>No</strong>vaply) core backed with a "Is-in. three-ply doorskin. Iscraped off the paper veneer tape about an hour after I rolleddown the veneer. About an hour later the onginally tzghtjoints began to separate as much as Y32 in., and cracks developedalong the grain.What went wrong? DidI use the wrong kind ofglue? DidIremove the tape too soon? The veneer was slzghtly lumpy before gluing. Should it have been steamed and pressed flat?-Richard E. DeSimone, Lisle, III.Because <strong>No</strong>vaply is quite stable, your problem is probably theresult of the veneer shrinking rather than the substratum expanding.To solve the problem, figure out why the veneer islosing so much moisture during the first several hours followingassembly. The veneer might have a fairly high moisturecontent in an extremely dry workshop. Was your veneerstored in a damp place such as a garage or basement?Another source of moisture could be the adhesive itself.1'm not acquainted with the particular brand of glue youused, but it sounds like a water-base emulsion. Did theveneer tend to curl (convex to the spread side) when the adhe-INthe While Myford here lathe you will which usewe and import stock from for sale. England45c RUSS ZIMMERMAN STAMPS FOR fUll O(TAllSPUTNEY. RfO 3. BOX VERMONT 57A 05346IIIFull-Size FURNITURE PLAN18th Century PINE CRADLE-'"1lll =-- w 36" z placeAuthentic 18th century design. Alljoints hand·pegged like the original'ong, 291A· high. Perfect for fire·wood. masazines. Baby, too!woodworker's delight. Plan 1120ACATALOG150 diff full·slze S 1'" only $5.00.refunded with ht order. H25 Sherman Avenue. Evanston, III.prof. ptas-$1.00 FURNITURE DESIGNS,DepI.KP-7060201NEW! THE AMAZINGf!mReproduces 3-d imensional objects inwood as easy as a key maker makingkeys. But best of all, the Dupli·Carverallows you to make extra money!Here's what it can do for youPicture These:...A 'hand carved' scroll on aGrandfather's clock•Carved oval picture framesRestored antique partsOmate claw table legsA lion's head projecting from yourfireplace mantelCustom signsA beautiful statue of theAmerican EagleA black powder gunstockExpand your workshop horizons todaywith this versatile machine. YourDupli·Carver can pay for itself with thefirst few objects carved.DUPlI·CARVERTMWrite or call todayfor more information4004 West 10th SI.Indianapolis, IN46222(317) 243·756518
ZipQ & A (continued)sive was applied? Since contact cements aren't very rigid, theshrinking of the swollen veneer as the moisture graduallydissipates could cause the glue line to creep and result in openjoints. I suggest rereading the instructions carefully to see ifthe glue is intended for solid-wood parts only. Also, tryanother type of adhesive and see if the trouble disappears.-R. Bruce HoadleyI do custom inlays and marquetry and want to know x/ there isa solvent-base glue fo r wood I have no trouble with the marquetrywhen using Titebond (aliphatic-resin glue) , but whenI inlay designs in solid wood, the glue expands the veneerenough to cause buckles, even though I use a veneer press. Iprefer not to use contact cement because it has no gap-fillingproperties. If epoxy glue is my only alternative, where can 1buy it in quarts or gallons? Also, what is Scotch glue? I'veread about it in marquetry books but have no idea what it is.-Mike C. Durbahn, Mankato, Minn.Many marquetarians and inlay craftsmen use epoxy (some formulasdissolve with lacquer thinner or acetone) , and you canget large quantities from marine suppliers, or you can order itfrom Chem-Tech, 4669 Lander Road, Chagrin Falls, Ohio44022. If you decide to use epoxy in your marquetry, it willfill gaps quite well and can be colored with aniline dyes tomatch the wood. Many woodworkers grind up some scraps ofthe wood they're using to get dust of the right color and mixit with the glue.Elmer's Carpenter's Wood Glue seems different enoughfrom Titebond to make it worth a shot. Or, if your shop iscold, rig up a tent over the work with light bulbs inside to keepthe work warm enough for plastic-resin glue (cascamite). YourHARD TO FINDWOODWORKING TOOLSCATALOGSend $1.00 for our BIG complete catalog ofhand woodworking tools and books. Youwill find our large selection of fine traditionaltools a joy to behold. It is truly thecraftsman's bible.Send for free informationon the Myford ML8lathe. It's quality throughout.FROG TOOL CO. LTD.700W. Jackson Btvd. Dept. SE Chicago ll, 60606CURLYWALNUT.& BIRDSEYEBUTTERNUT.MAPLECHERRYMost other Domestic WoodsEXTRA WIDE/EXTRA THICK STOCKSPAL TED WOODSTURNING & SCULPTING BLOCKS• SOLID SQUARESCabinet & Economy Grade LumberStock for Woodwork Flooring. PanelingNO DETAILED MINIMUM-MAIL. LISTING IIO FREIGHT {71111 SHIPMENT 942-l1li31D.A. BUCKLEY, R1, W. VALLEY, N.Y. 14171SHARP TOOLS FOR SHARP PEOPLE -Difficult applications graphically illus·trated ; money·saving hints and safetyfeatured: send $2 for BIMEX's 48·pagecatalog or Makila's 40·page catalog (or$3 for bOlh) and start selectingtools wisety.jj) , Allanta. GA 30324 BIMEX INC. 487 Armour Circle. N.E.problem might be compounded by winter dryness, makingthe wa.ter added by the glue an important factor.Scotch glue is hot hide glue. It's the traditional choice, butit's water-soluble. Tage Frid writes about hide glue in his articleon hammer veneering (FWW #10, Spring '78, p. 52).You can get some feel for its characteristics without having tobuy a glue pot by trying Franklin's liquid hide glue, althoughit's not really the same. You are wise to avoid contact cement.1 have an 8-in. jointer and am having difficulty setting theoutfeed table at the proper height in relation to the knives. 1try to set it so that it 's in exactly the same plane as the top ofthe cutting arc. But sometimes the jointed edges of myboards are concave, and sometimes they 're convex. Very seldomdo 1 get a perfectly straight edge, especially on longboards. Obviously I'm doing something wrong. What is it?-Larry Green, Bethel, Conn.To joint a perfectly straight edge on a long board requiresmore than a properly adjusted machine; it demands correcttechnique as well. You're right about the outfeed table beingthe same height as the knives at the top of their cut, but thisadjustment can be tricky, and the slightest variation will producea difference in the jointed surface. If the outfeed table islower than the knives, you'll get a concave surface (a sprungjoint); if the outfeed table is higher than the knives, the oppositewill happen. And, even if the outfeed table is set exactlyat the height of the knives, you'll get a sprung joint ifthe table, not locked firmly in its ways, angles down slightlyfrom the cutterhead. In fact, one way to produce a sprungjoint is to loosen the lock screw that bears against the gibs.This lets the outfeed table droop. Also, putting the properr--------------,Time to: test your skill.I<strong>No</strong>w you can build yourown Mason & Sullivanheirloom quality,.antiquereproduction clock.Over 20 different modelsavailable In dO·lt-yourself.pre-cut or semi-assembledform for all levels of skill.Grandfather. Grandmolher.wall, desk. mantle and morehand·matchedAll solid 3;""kiln-dried hardwood In walnut.oak, cherry or Hondurasmahogany. Imported preciSion movements and chimes.Solid brass dials. Clocksyou'll find challenging tomake and at a savings youcan appreciate. So, If you'relooking for the finest clocksaround don'l wasteanother minute BUild aMason & Sullivan It's wellworth Ihe effortSend for ournew catalog 32 page______________________today.o Please send me your new colorcalalog of lOP quality antique reproductIonclocks I can bUIldo I enclose $1.00___ __ ___for catalog.NameAddressCity/StateMason & Sullivan Co.Dept. 2112, Osterville, MA'-----------------' 0265519
Objective: Rockwell maKes jipolsthat have versati lit4 andrcapacJ!
Q & A (continued)and expensive. The finer households, whose furniture waswhat mos't was modeled after, often contained matchingpieces of clothing, jewelry and arms, difficult to replace.Since houses as a whole were not so secure as today's, the furniturehad to have locks. Often the keys to drawers, closets,larder and wine cellar would be kept in one drawer, and thekey to that carried by the master of the house, to be passed onto servants or guests when necessary. The need for secure casefurniture is one reason for dustboards; they prevented accessto other drawers by forcing open only one.I read an article in a British journal where a cabinetmakerstates that a hollow grind on a mortise chisel is wrong andrenders it useless. He claims that a correctly sharpened mortisechisel has a convex profile. Could you comment?-Barry Schwartzberg, Forest Htlls, N. Y.The profile of a monise chisel can be convex, concave orstraight. In any case, the angle of grinding can vary considerably,and this is of as much consequence as the profile. Thegrinding angle and profile, like so many decisions in workingwood, will depend on the wood that's being cut, its densityand the amount of waste to be removed. With a convex profile,the blade will be pushed away from the tissue. In cuttingMore scoop) Less scoop+large joints, such as those used in timber framing, there is aplace for this profile. Likewise, if you want to take large bitsout of the monise with each move, then the scooping actionwill be assisted by the convex profile. Under either of theseconditions, a hollow-ground blade is liable to break or wouldbe less effective in its scooping action.<strong>No</strong>w consider a Y4 -in. wide, through monise in a piece ofcherry that's "'h. in. thick. The hollow-ground chisel would beperfectly good for this. The chisel with the convex profilewould be clumsy. In either case, a straight-ground chiselwould perform well.-Ian Kirbyexcellence In wooOwoRklnqThe first professional/public show of its kind:to exhibit and sell products of fine woodworkingTrade Show Exhibits: Marketplace Exhibits: Seminars:Precision machinery, Chairs/Tables/Desks. Lectures, demonstrations,• hand and power.•Cabinetry.questions and answersSpecial-purpose tools Special-use furniture. on a variety of timelyand equipment.Decorative pieces. woodworking topics.Hand tools, all kinds. Reproductions.Conducted by well-knownWorkshop accessories, Carvings/Turnings. instructors in woodworking :workbenches, clamps. Musical instruments. including TAGE FRIO,Abrasives/ Adhesives/Sculptures.Renowned Woodworker.Finishes.Plaques.SAM MALOOF,Woods and veneers. Carved doors. Master Craftsman.Schools/Publications. Toys. ROBERT STOCKSDALE,Dean of Woodturners.__October 2-5, <strong>1980</strong> Hyatt Regency Downtown, ChicagoDon't miss this opportunity . Exhibit spaces still available:Phone or write: Marvin Park & Associates 600 Talcott Road Park Ridge IL 60068Phone: (31 2) 8<strong>23</strong> - 21 51Don't Just buy a woodworking machineBUY what the machine can really doINCA-PRECISION SWISS STATIONARYPOWER TOOLS8%" wide jointer/planer (illustration}-12, OOO vibration free cuts per minute.Will handle hardest teaks to balsa w oods to glass clean finish.Optional thicknessing attachment permits board thicknessing from 2'M1"max. to '/.0" min. to absolute perfection. Five other indusfrial qualitymachines, designed for precision production and ced for the per1ectionistcraftsman, hobbyist and cabinetmaker.If the grind is too hollow, the chisel tip may break off.-Frank KlauszI'm trying to find a tool called a gn·nder-honer. It has interchangeablestones and a special honing speed of about78 RPM. I've seen some cheap, junky models of this machine,but I want one that 's heavy, steady and produces little vibration.I need to hone and polish tiny tools to precise angles..-Stephen Litchgaren, Austin, Tex.Oliver Machinery Co. makes a machine called an oilstonegrinder. It has three speeds-1800 RPM, 700 RPM and10V." combination JOinter/planer with automatic feed thicknea_. 10" bandsawfor wood, non-ferrous metals, pla8tic. 9 blade selectlon8, 6V." depth of cut. 10"circular saw 3" depth of cut. Attachments to perform 15 addHlonal o pe ratlons.T' circular 8aw 2'/>2" depth of cut. Same attachment8 a8 10" 8aw. VERTICAL SPINDLE SHAPER, 3 8peed.See your local Home Improvement Cenler, Hardware or machinery dealer or wrileAnson Industries Inc. for information of an INCA dealer nearest you.ANSON INDUSTRIES INC.Dept. MO 4115__ __San Fernando Road, Glendale. CA 91204_Please send me the INCA precision stationary power tool catalog and price sheel. Ienclose $1.00 for first class postage and handling.NameCity________ Address__ 51. ZipDealer Information Upon Request21
Q & A (continued)300 RPM-and can do conventional grinding as well as honing.It's also equipped with a leather stropping wheel and aspecial tool holder. It costs about $1,900. The address is 445Sixth St. N.W., Grand Rapids, Mich. 49502 .-Le/on TraylorWhat's the best way to Jam chair razls to round, slightlytapered legs? My main concern is how to use a mortise-andtenonjoint and sttll get a precise fit where the shoulders 0/ therazl meet the leg. -Fredrick Lehman, Cedar Rapids, IowaThe easiest way to make a tight mortise-and-tenon joint in aturned chair leg is to cut the cheeks of the tenon in the regularway and then to cut the outer edge of the shoulders in atan angle that's a little steeper than the one made by the arc ofthe circumference of the leg. Usually the length of leg that'sinvolved in the joint is left untapered; otherwise, theshoulders of the tenon must be contoured appropriately.When pulled up in a clamp, the edges of the shoulders willcut into the leg. The best glue for this joint is epoxy because itwill fill the small gaps left berween the shoulder and the leg.-Tage FridFollow-upRe nontoxic bowl finishes (FWW #22, May 'SO, p. 24):Thank you for the recent advice on finishes for bowls. Shortlyafter writing you, I wrote to United Gilsonite Laboratories inScranton, Pa., the makers ofZAR polyurethanes. I was happyto hear that ZAR is nontoxic and suitable for bowls and otherfood utensils.- Thomas A. Laser, Springfield, Va.In reference to Frank S. Bowman's question (FWW #2 1,March 'SO, p. 24) about single-end tenoners: These machinesare a waste of money. They are designed to perform only avery specific function in connection with the mass productionof windows and doors. If you have enough quantity runs toafford the required setup time for a single-end tenoner, thenyou might as well buy a double-end tenoner, which will performmany more tasks much more economically. If not, stickto your table saws and shapers.-Walter Rich, Philadelphia, Pa.USE ON:Drill pressSmall motorLatheShopsmilhRockwellMonlgomery WardCraftsman\I," Elec. drillSIMPLEAS1•2•Sectionthrough legaciapt(-'rwill suhstitutea \4"Sleeveless DRUM SANDERNO PRE-MAOE SLEEVES TO BUYECONOMICAL·Simply ('ut sandpaperfrom standard size sheets. UNIQUE wayof holding paper to drum. Twist of keyand I"'pe, is light. SPONGE RUBBERW('ha(·king insures long wear of paper.Ilubs Ih:" bore, Price indudcs Y.z"but upon requestadapledor:l\small d'ills. ADD $2.25 PERORDR FO .!'l HANDLING.-] x 3 long . 1 $12. -2" x 3" long..$13.75-21h" x 3" long$14.40-3" x 3" long ........ .. " $15. 70ABOVE 4 DRUM' $51.202"''' x 4"''' . . ....... . .. $19.903" x 4"'" ...... . ... . ..... $21 .25Ahm (. sin's (without adapters/ alsoailablt' with 'hot 20 H.II. T Head(St.'ars. \\'ard).%H OAK-WALNUT-BIRCHbore (Shopsmith) exccpt 2nx3HSend Check or Money OrderMONEY BACK GUARANTEE•• SINGLEY SPECIAL TV CO INC.P.O. Box 771 ·FHendersonville, N.C. 28793Dust-proofWood FinishingBeauty, depth and luster of a handrubbed finish without specialequipment or tech niques .Acclaimed by craftsmen for over50 years.Write for free guide to wood finish ing .17TH CENTURY CRADLEcopied from an originalFulI·Size PlansFull·size, traceable pattern • Materials• ItOe"tailed instructions • Kit ao available.• A treasure to hand down generalions • Write for detaiPlans:JOHN GRAVES$5.95 C8lifornia•resldenrs add til' wes faxP. O. Box 3072. Olive. CA 92665• DOWELSRe George Frank's reply to Michael McCann (FWW#22, May'SO, p. 21), I congratulate Mr. Frank on his ability to developstatistics on the relative risks of being poisoned by driers andbeing hit by a construction crane at home. I don't know ofany other source for such remarkable risk estimates. Moreseriously, being hit accidentally by a crane is something overC{j'wfEt QU EN ANNECabriole LegsWalnutHondurasMahoganyPenn. Cherryfrom solid3" stock,only the "ears"are glued on.Send 25< - Catalog Wo od PartsWOODWORKS Saginaw. TX 76179ISHEScORPBox 79<strong>23</strong>8RollingswoodOutstanding new book onwood identificationWritten by an expert foreveryone who wants apractical yet scientificway to identify the majorwoods of the Eastern U.S.The manual is well illustratedand has a valuable and usefulwood identification key.Order your copy now from:Colonial Hardwoods, Inc.212 N. West StreetFalls Church, Va. 22046Choosefrom sizesranging from7'14' slipper to29" table leg ...on (refundable purchase)Send $1.00for brochure.Box 404 Dept. FW4 Grays lake. IL. 60030WoodIdentificationComHandbool>men:: iald the Eastern United \\bods States,, t"Mar$hans.Whill"Only $5.95 plus $1.50 postage and handling.Master Charge and Visa accepted.Include number and expiration date.22
Q & A (continued)which one has little control. Being poisoned by a possibletoxic drier in a salad-bowl finish, however, is completely preventable.Further, I'm not the only one concerned about thematter. A distributor of these driers also advises against usingthem with items in which food or drink may be served .-Michael McCann, Center for Occupational Hazards,5 Beekman St. , New York, N. Y. 10038Several readers have responded to the request for informationabout finding parts and an owner's manual for a Walker-Turnerlathe, and we will send a fuzzy zerox to readers who askfor one. Rockwell Manufacturing Co. bought Walker-Turnerback in the early 1950s. Some parts for Walker-Turner machinesare still available; for specific information, writeRockwell Manufacturing Co. , Power Tool Div., 400 <strong>No</strong>rthLexington Ave. , Pittsburgh, Pa. 15208.Readers want to know:Henley Optical Co. , Reading, England, makes custom metalbodiedplanes. These tools COSt between $500 and $1,000. Doyou know of anyone who has a set of these planes or who hastested them and can comment on their performance? Anyphine that costs on the order of $1 ,000 must be a godsend tothose working with wild-grained wood.-Steven Goddard, West Grove, Pa.Supplies :-Casters and hardware for rolling library ladders: PutnamRolling Ladder Co., 32 Howard St., New York, N.Y. 10013.-Musical movements for over 800 melodies plus any tune forwhich you provide score. Special-order movements cost aboutIntroducingQuality Heirlooms12"x 12"x 41'."" HighByALONZIFURNITURECOM PANY• Easy toAssemble• ImportedCremo ItalianMarble• Ageless Classic Designs• Detailed Wood Carving• Completely Different& UniqueCatalogue-$ 1.00Refundable on first order.ALONZI FurnitureDept. CBixby, 0 K 74008$75. Write for catalog: World of Music Boxes, 412 Main St.,Avon, N.]. 07719.-Custom brass castings and furniture hardware: BergenPoint Brass Foundry, 179 W. 5th St., Bayonne, N.]. 07002.-Another source for Japanese hand tools: Anzen Hardwareand Supply, 220 E. 1st St., Los Angeles, Calif. 90012.-Antique icebox hardware: The Renovator's Supply, 71<strong>No</strong>rthfield Rd., Millers Falls, Mass. 01349.Readers can't find:I'm looking for a leather embossing tool that consists of along wooden handle and an electrically heated roller with thepattern engraved on it. I used one once that also had a dispenserfor the optional use of gold-backed tape for gildedembossing. -King Young, Highland, N. C.. . measured drawings or full-size plans for a cylinder desksimilar to the ones pictured in the <strong>No</strong>v. '78 issue of FineWoodworking.- Colon McNease, Jackson, Miss.·. . die-stamped steel or brass hardware for old-time steamertrunks.-John H. Mitchell, Memphis, Te nn... decorative copper hinges that extend about 10 in. overthe lid of a chest.-Richard Riddle, Ute, Iowa. . the hardware and mechanism for a desk typewriter lift.-Lyle Pelissier, Lafayette, La.· .. copper hinges and other hardware items for old kitchencupboards.-Phzl Regier, <strong>No</strong>rth Newton, Kan.Send quen'es, comments and sources of supply to Q&A, FineWoodworking, Box 355, Newtown, Conn. 06470.If you thought "Swiss-Precision" could only befound in watchmaking, then you don't knowabout our power tools. Only you know how good your tools haveto be. When it comes to woodworkingmachinery, they should be better than you areevenif you're already on accomplishedcraftsman. Therefore, you owe it to yourself tolearn more about our Swiss-made line of INCAstationary power tools which we sell throughoutthese 50 states.Ta ke the 10" Cabinetmaker's Saw, forexample. It has a 20mm (25/32") arbor at theblade for strength and rigidity where it counts .The table castings are toug h, prec ision milledalloys and the guide ra ils are aircraft qualityextrusions. All ,he major rotating parts aredynamically balanced. The battom line is amachine that takes hig her loadings and givesyau less vibration with a truer running sowblade.If fact, every one of our INCA saws, jointers,planers and shapers are built to qualitystandards which are becoming increasingly••••••••••••••••••••••••••••••hard to find in this country. That's because they'remade with the some pride of workmanshipas the Swiss put into their watches'l_raOur catalog is agood place to beg inyour comparisons.We want you to beas good as you ."can get.iii!Garrett161Wade Company, Dept. FW-7-80Ave. of Americas. New York. N.Y. 10013________________________(National Sales)Gentlemen,Send me your INCA catalog. Enclosed is $1.o Here's another $1 lor your lOB-page cotolog01__ _ __quality hand tools.Name'Address,City__ State__Zip<strong>23</strong>
BooksThe Dory Book by John Gardner. International Marine PublishingCo., 21 Elm St. , Camden, Maine 04843, 1978. $20cloth, 275 pp.The first known reference to the dory, a flat-bottomed, keelless,lengthwise-planked small boat, is in a 1719 sea captain'sreport, but it wasn't until about 1870 that there were anydrawings of dory lines, details, or lists of particulars that enableus to describe with certainty the precise appearance ofthese boats. John Gardner, a writer for National Fishermanmagazine and teacher of boatbuilding at Mystic (Conn.) Seaport,has written extensively on the history and constructionof the dory. The first half of this book traces the gradualemergence of the Bank dory, the most well-known and ubiquitoustype, and devotes several chapters to the lines and specificconstruction procedures for building several kinds ofdory. The second half of the book has plans and offsets (hulldimensions) for <strong>23</strong> different dories, ranging from a 1O-ft.dory tender to a 32-ft. Maine river-driving batteau. The cleardrawings by Sam Manning, the variety of boats presented andthe detailed explanatory material make this book particularlyuseful to the amateur boat builder looking for a first projectthat is within his grasp, yet that also can result in a functional,salty and seaworthy traditional boat. -Roger Barnes<strong>Making</strong> Musical Instruments by Irving Sloane. E. P. Dutton, 2Park Ave. , New York, N. Y. 10016, 1978. $1 7. 95 cloth; 159 pp.Irving Sloane has written several books on guitar constructionand repair, but in this book he applies his talents to six otherinstruments-banjo, dulcimer, Hardanger fiddle, snaredrum, tambourine and recorder. As far as I know, this is theonly available source of detailed directions for making a banjoand Hardanger fiddle. The latter is a <strong>No</strong>rwegian folk violinthat has four sympathetic strings in addition to the bowedstrings, and a few other peculiarities as well. Sloane's descriptionand illustrations are very thorough and will be interestingto anyone who wants to know more about this unusual instrument,whether or not he intends to make one.Sloane does not have the field so completely to himselfwith the other four instruments, but what he has to say isworth reading. The Appalachian dulcimer is regarded as thesimplest stringed instrument to make and play. The one describedhere, though, is a top-of-the-line model-simple ascompared with banjo, guitar, or violin but still an instrumentcalling for the craftsman's best work.With the rwo percussion instruments Sloane enters territorythat has been covered previously in Jeremy Montagu's<strong>Making</strong> Early Percussion Instruments (Oxford UniversityPress, 1600 Pollitt Dr. , Fair Lawn, N.J. 07410; $9.95), butthere is room for both of them. Sloane's lavish use of illustrationsand his more expansive description of construction proceduresare easier to follow than Montagu's terser treatment.Still, Montagu has some useful things to say that Sloaneomits, and Montagu has a particular concern for reproducingmedieval and Renaissance instruments. My greatest disappointmentwith Sloane's drums is that they have metal ratherthan wooden shells. There's nothing really wrong with thatbecause after 1700 many drums were made with metal shells,but a description of making wooden ones would have been avaluable addition. Montagu isn't much help here either becausehe gives a number of general suggestions but not theNew edition of theclassic guide toold-time woodcraft--""-Going back to a time whenthe artisan, and not his tools,dominated woodworking,Alex W.Bealer presents apractical, informativereference guide tothe craft, its h istory,tools andtechniques. Thisnew editioncontains over200 line drawings,including 50new illustrations.B Iock-kn-il-ein useOLD WAYS OfWORKING WOOD:Theof aTechniquesTime-HonoredandCraftToolsRevised Edition byALEX W. BEALER$1250, now dt your bookstore, or send check toCrown Publishers, One Park Ave., N.Y., N.Y.10016. Pledse ddd $1.50 postage .md handJingA BARRE BOOKDistributed by CRONch.arge. NY and N.J. residents, add sales tax.Program in ArtisanryCertificate of masteryand undergraduate degrees.Studio Programs in: Metal Working; Wood & Fur·niture Design; Ceramics: Weaving; Jewelry; StringMusical Instruments; Textile Printing & Dyeing.Our faculty includes: Barbara Shawcroft;Barbara Wal lace; Sung-Ja Cho; Vince Ferrini;Fred Woell; James Bennett; Richard Hirsch;William Sax; John Kirk; Alphonse Mattia;Jere Osgood; Donald Warnock.The program requires concentrated studio work,courses in design. art history and business. Admissionrequires previous experience and portfolioreview. For further information, write:Boston University. Office of Admissions, Programin Artisanry, Dept. F, 121 Bay State Road, Boston,Massachusetts 022 15. Or call (617) 353·2022.Boston Boston University is an.•equal opportunity University institution.1931 S. Beretania St Honolulu, Hawaii 9682601... 'rool a Supply Co., I.CoRPM 12000Reg. $59.00Sale $48.50P.P. PrepaidNet WI.2.4 Ibs.FINISHING SANDERMOST COMPLETE SELECTIONIN CONNECTICUT25 SPECIES OFHARDWOOD · HARDWOOD PLYWOODVENEERS · MARINE LUMBERG€H€RALODDCRAFTlOOC SUNMAN STREET NEW LONDON. CONN. re320 203-442·53)1Build Your Own Family HeirloomSWINGfor our Pre-cut ROCKERFREE brochlU"e.do-it·younelf kit.Pre-sanded, ready·to-finish.8 to 8 hours assembly time.Money back guarantee.• Plans and parts available.WriteHERitAGEPHON.: (319) 465-.1270'(SIUMONTlCl:I.LO. IOWA .',,<strong>23</strong>109006 Waukegan Rd.Morton Grove, IL 60053(312) 965·4420Over 50 species.Rosewood TeakZebrawoodWalnut Oak English Yew• Bubinga • Cherry • Mahogany24
Each issue of Fine Woodworking takes a detailed look at many aspectsof our craft, in effect building a growing reference of woodcrafttechniques. And because there's always so much of interest tocover, Fine Woodworking rarely repeats itself. Small wonder onenew subscriber in 20 requests the complete set of back issues.Here's valuable information you can't find anywhere else and thatdoesn't go out of date.<strong>No</strong>. I-Checkered Bowls, Tramp Art, Hand Planes, CarvingDesign Decisions, Marquetry Cutting, Library Ladders,French Polishing, Birch Plywood, Bench Stones.<strong>No</strong>. 2-Marquetry Today, Split Turnings, Eagle Carvings,Hand Dovetails, Mechanical Desks, Textbook Mistakes,Antique Tools, Spiral Steps, Gustav Stickley, Oil/ VarnishMix, Shaker Lap Desk, Chair Woods.<strong>No</strong>. 3-Wood, Mortise and Tenon, Hand Shaping, PlaneSpeaking, Desert Cabinetry, Hidden Drawers, GreenBowls, Queen Anne, Gate-Leg Table, Stroke Sander, FurniturePlans.<strong>No</strong>. 4-Water and Wood, Hidden Beds, Exotic Woods,Veneer, Tackling Carving, Workbench, Ornamental T urning,Heat Treating, Mosaic Rosettes, Shaped Tambours.<strong>No</strong>. 5-Stacking, Carcase Construction, Dealing With Plywood,Patch-Pad Cutting, Drying Wood, Gothic Tracery,Measured Drawings, Guitar Joinery, The Bowl Gouge,English Treen, Shaper Knives.<strong>No</strong>. 6-The Wood Butcher, Wood Threads, The Scraper,California Woodworking, Bent Laminations, Dry Kiln, ExpandingTables, Stacked Plywood, Pricing Work, ServingCart, Woodworking Schools.<strong>No</strong>. 7-Glues and Gluing, Three-Legged Stool, Lute Roses,Bowl Turning, Doweling, Spalted Wood, Antiqued PineFurniture, Solar Kiln, Carving Fans, Bending a Tray.<strong>No</strong>. 8-Steam Bending, Triangle Marking, Painted Furniture,Chain-Saw Lumbering, Rip Chain, Getting Lumber,Sawing by Hand, Gaming Tables, Two ContemporaryTables, Wooden Clamps, Elegant Fakes, Aztec Drum, GoutStool, Measuring Moisture, The Aagoolet.<strong>No</strong>. 9-Repair and Restoration, Designing for Dining, TallChests, Entry Doors, Drawer Bottoms, Health Hazards inWoodworking, Basic Blacksmithing, Carving Lab, RoutedEdge Joint, Shaker Round Stand, Cutting Corners, SmallTurned Boxes.<strong>No</strong>. lO-Wooden Clockworks, Hammer Veneering, Clawand Ball Feet, Block-Front Transformed, Hot-Pipe Bending,A Two-Way Hinge, Laminated Turnings, Chain-Saw Carving,Circular Saws, Louvered Doors, Small Workbench.<strong>No</strong>. ll-Spinning Wheels, Drawers, Turning SpaltedWood, Scratch Beader, Leather on Wood, <strong>No</strong>tes on Finishing,Parsons Tables, Hanging a Door, Pencil Gauges, DulcimerPeg Box, Tiny Tools.<strong>No</strong>. l2-Greene and Greene, Holding the Work, Tambours,Stains, Dyes and Pigments, Spindle Turning, CleavingWood, Whetstones, Sharpening, Cockleshell, Dust-CollectionSystem, Sanding, Used Machinery.<strong>No</strong>. 13-Scientific Instruments of Wood, <strong>Making</strong> a Microscope,Laminated Bowls, Preparation of Stock, Tung Oil,Relief Carving, Roll-Top Desks, Shaped Tambours, CylinderDesk and Book-Case, Basic Machine Maintenance,End-Boring Jig, Scale Models, Lumber Grading.<strong>No</strong>. l4-George Nakashima, Lester Ma
Books (continued)kind of hands-on description that Sloane gives for what hedoes include.The chapter on the recorder is quite different from theothers because Sloane does not make recorders, and he doesnot really tell the reader how to make a recorder either. Whathe does is describe very well how a recorder is made at theDolmetsch factory in England. Once I got over a feeling ofbeing baited and switched, I realized that the chapter iswonhwhile all the same. It is always interesting to visit alarge, commercial shop because some of its methods can betaken over or adapted by the small-time worker. Sloane'sEventsEvents listings are free but restricted to workshops, fairs, lectures andexhibitions of direct interest to woodworkers. The next deadline isJuly7, for events beginning Sept. 15 to <strong>No</strong>v. 15.Wee)l.end Seminars-lectures and demonstrations on bentwood lamination(Art Carpenter) , solid panel cabinetmaking and handplanes (Michael Bock) , dovetailing and templates (Dale Holub) , limited-productiontechniques (Dean Santner) , exotic router joinery andair tools aim Sweeney) , inlaid wall and door treatment (AI Garvey) ,power and hand shaping of irregular forms (Don Braden) , solutions tocommon errors and imperfections (Grif Okie) and tambours, decorationsand finishing (Bruce McQuilkin) , Aug. 22-24 and Aug. 29-31,$150, sponsored by Baulines Craftsman's Guild. Contact The SignatureGallery, 127 Clement, San Francisco 94 118.The Western Edge: Designer & Production Crafts-all media, worksby California, Oregon and Washin g ton craftsmen, July 11 to Aug. 5,Brand Library Art Galleries, Glendale, Calif.Touch Wood <strong>1980</strong>-juried exhibition, trade show, a "local and internationalcelebration of the tree, forest, wood, woodworking andwoodworkers," sponsored by the Ontario Woodworkers Association,Sept. 21-28. WriteJohn Harrison, Tempo Foundation, Cavell SchoolRoute 2, Owen Sound, Onto N4K 5N4.<strong>1980</strong> Convention/Exhibition-workshops, seminar, concerts, uildof American Luthiers, July 17-20, Palace of Fine Arts, San Francisco.Write GAL, 8222 S. Park Ave., Tacoma, Wash. 98408.Marietta College Crafts National '80-juried craft and sculpture exhibition,<strong>No</strong>v. 1- 30, Grover M. Herman Fine Arts Center, Marietta Collee.Slides due Sept. 13. Write MCCN '80, Arthur Howard Winer,Dlfector, Marietta College, Marietta, Ohio 45750.Mrican Furniture and Household Objects-exhibit,July 3 to Aug. 3,Nelson Gallery, Atkins Museum, 4525 Oak St. , Kansas City, Mo.Steambending Hardwood-summer course taught by Michael Fortune,July14 to Aug. I, $180. Sheridan College, School of Crafts andDesign, 1460 S. Sheridan Way, Mississauga, Ontario L5H 127.Workshops-Photographing Crafts (Doug Long) , Aug. 15-16, $50;Shaker Furniture aohn Kassay) , Aug. 11-22, and Traditional Woodturning(Bob Brunk) , Aug. <strong>23</strong>-24, $ 15/workshop day. AppalachianCenter for Crafts, Box 5106/TIU, Cookeville, Tenn. 38501.Woodturning Workshop- beginning to advanced, taught by RudeOsolnik, Ray Huskey and J. F. Webber, July 24-26, $150 includesroom and board. Contact James R. Hall, Industrial Arts Dept. CPO758, Berea College, Berea, Ky. 40404.Pacific States Craft Fair-Aug. 7-10. Fort Mason Facilities, San Francisco.American Craft Enterprises, Box 10, New Paltz, N.Y. 12561.Boston University Certificate of Mastery <strong>1980</strong>-exhibit, works by TimMcClelland (metals) , Mary Fisher (ceramics) and Thomas Hucker(wood) , July 11 to Aug. I, Lopoukhine Nayduch Gallery, 354 CongressSt. , Boston.Connecticut Contemporary Wood Furniture-work by six Connecticutcraftsmen, to July 20. Farmington Valley Arts Center, Avon Park<strong>No</strong>rth, Avon, Conn. 0600 1.guided tour is the next best thing to being there. He also includesa measured full-scale drawing of a Dolmetsch alto recorder.<strong>No</strong> one should take seriously, though, the stated precisionof fingerhole measurements-5.7564 mm indeed!To sum up, it's a good book that fills a large gap in the literature.A lot of very good instruments should result fromfollowing Sloane's careful instructions. -Trevor RobinsonWeekend man'ner Roger Barnes is art director of this magazine;Trevor Robinson, author of The Amateur Wind InstrumentMaker, is a biochemist at the University of Massachusetts.Excellence in Woodworking-trade show, woodworking exhibit,Oct. 2-5, Hyatt Regency Hotel, Chicago. Write Marvin Park andAssociates, 600 Talcott Rd ., Park Ridge, Ill. 60068.11th Annual Peters Valley Craft Fair-outdoor exhibit, juried,July 26-27, Peters Valley, Layton, N.J.Out of the Woods-sculptural furniture by David Flatt and DavidHolmes, exhibit, July 24 to Aug. 31, Cudahy Gallery, Milwaukee ArtCenter, 750 N. Lincoln Memorial Dr. , Milwaukee, Wis.International Wood Carvers Congress-Aug. 1-10, Fairrounds, Davenport,Iowa. Write Chester Salter, Great Mississippi Valley Fair,2815 W. Locust St., Davenport, Iowa 52804.4th International Wood Carving Exhibition-Aug. 13 to Sept. 1.Canadian National Exhibition Place, Toronto. Write Ross Farr, CanadianNational Exhibition, Toronto, Onto M6K 3C3.2nd Annual Woodcarving Show-Ogle bay Wood Carvers Guild,Aug. 2-3, White Palace, Wheeling, W. Va. Write Mary Sieber, 74Crestview Dr. , Wheeling W. Va. 26003.<strong>1980</strong> Annual Exposition /Competition-work by members of theMarquetry Society of America, Sept. 1-29, World Trade Center, NewYork, N.Y. Deadline, Aug. 15. Write Gene Weinberger, 940 N.Hamilton Ave., Lindenhurst, N.Y. 11757.Workshops in Bending Wood-with Steve Foley. Bentwood I, basicform-building and design, June 30-July 11, $115; Bentwood II, designand construction of a piece, July 14-25, $115. Oregon School ofArts and Crafts, 8245 S.W. Barnes Rd., Portland, Ore. 97225.Workshops-Contemporary Residential Furniture (Stephen Crump),July 14-18; Woodturning (Palmer Sharpless) , July 21-25; WoodSculpture (Gary Singleton) , July 28 to Aug. 1. Cedar Lakes CraftsCenter, Ripley, W. Va. 25271.47th Annual Craftsmen's Fair-League of New Hampshire Craftsmen,Aug. 5-10, Mt. Sunapee State Park, Newbury, N.H.World Woodworking Expo '80-international woodworking machineryand supplies show, Aug. <strong>23</strong>-27, Georgia World Congress Center,Atlanta. Write Cahners Exposition Group, 8687 Melrose Ave., LosAngeles, Calif. 90069.Contours in Wood-sculpture by Doug Ayers, July 19 to Aug. 16,Mindscape Gallery, 1521 Sherman Ave., Evanston, Ill ..International Woodworking Machinery and Furniture Supply FairSept. 13-17, Convention Center, Louisville, Ky. Write Marvin Parkand Associates, 600 Talcott Rd. , Park Ridge, Ill. 60068.Symposia-Reproduction and Restoration, with Franklin Gottshalland Alan Miller, Aug. 1-3, andJoinery: Philosophy and Practice, withRichard Kagan and Simon Watts, Aug. 22-24; $125 each . BucksCounty Community College, Newtown, Pa. Write A. LeCoff, 2500N. Lawrence, Philadelphia, Pa. 19133.34th Annual Meeting-Forest Products Research Society, July 6-1 1,Sheraton-Boston Hotel, Boston. Details from Connie Walling, ForestProducts Research Society, 2801 Marshall Court, Madison, W is. 53705.26
___ AmoumYour homeworkshopcan pay offBIGPowerPlaner Molder SawThree power tools in oneareal money-maker for you!The BELSA W Planer/Molder/Saw isa versatile piece of machinery. Itturns out profitable precision molding,trim, flooring, furniture ... in allpopular patterns. Rips, planes, moldsseparately ... or all at once. Used byindividual home craftsman, cabinetand picture framing shops, lumberyards, contractors and carpenters.Never before has there been athree-way, heavy-duty woodworkerthat does so many jobs for so littlecost. Saws to width, planes to desiredthickness, and molds to any choice ofpatterns. Cuts any molding patternyou desire. Provides trouble-freeperformance. And is so simple tooperate even beginners can use it!30-Day FREE Trial! EXCGFCTSNO OBLIGATION-NO SALESMAN WILL CALLRUSH COUPON BELSAW 9161 POWER Field TOOLS Bldg. CO.City,TODAY! KansasMo. 64111[]8 C==> EZ?W llL:'B:asTg 64111 ____________________ __details about 30-day trial offer. <strong>No</strong>o obligation, no salesman will call.LJ NAME GW ,": . Please AOORECITYD STATE IPsend me complete facts about 0',."PLANER- MOLDER-SAW anddJ cc:::J c=J c=J GSolar Starr House Primeris a discussion of our passive solarenvelope design and building Guide· This 60 page brochure explains theblueprints · floor plans · specification· energy cost comparisons . regionalsolar map . site analysis questionnaire· the unique 47 step construction roadmap . prices · order form fo r completeGuide . blueprints . how-to books .CO. res. add 3'12%.publications and services. $10.00 ppd.Dovetail Press, Ltd.P.O. Box 1496Boulder, CO 80306303-449-2681FINE QUALITY WOODi4';"''''ff 1: {';;''...;':;.... ···;';WiPllf!t···''/;;;:;;W''···· 7 .. ·lt 8 ..;;;;• Resurface orrepair furniture• Make beautifulchess or backgammongames• Create originalwall designs• Perfect for manyother woodcraft projectsSPECIAL OFFERINGCarpathian Elm Burl - Save $22.50originally $1.20 now only 75f. sq. ft.Maple Shorts - Save $3.50originally 25f. now only 18i sq. ft.Walnut Shorts - Save $12.00originally 40e now only 16 sq. ft.Teak - Save $7.50originally 40 now only 25 sq. ft.Red or White Oak - Save $5.00originally 30e now only 20 sq. ft.(This is a limited offer, as supply lasts)(Please specify red or white)All orders"'--- 50 Sq. Ft. minimum(random lengths 1 % - 2% ft.)add $3.50 per order for postage andhandling.Send 75dNYfor ourresidents64 pg.addcatalogsales.•thattaxfeatures over 100 exotic domesticand imported woods.ARTISTRY IN VENEERSDept. FW-6 633 Montauk AveBrooklvn. N.Y. 11208Theedgecompetitiveof theGarrettbutt chiselWadethe edge itself.isIt's made fromSwedish steel , andit's fo rged by therenowned Dutchtoolmaking firm of<strong>No</strong>oitgedagt. Andit's why your edgewill stay keen, projectafter pro jeer .There's even a verycomfortable, opaqueblack handle that'sshatterproof andeasy to hold andcontrol.The GarrettWade butt chisel .Available in a setof 5, it's just onemore example ofthe thinking thatgives our tools theedge over everybodyelse's .Send for thenew Garrett Wadecatalog . It's 116 pagesof fine woodworkingtools.Offer expires September <strong>1980</strong>.Garrett Wade Co. ,Dept. FW-7-80161 Ave. of the Americas,N. Y., N. Y. 10013Please S('nd mGarrett Wadebun chisel(s). Sec of:5 (v..., ", ", I", I ¥.I") @ $2:5.00, ppd.o Please send mC!-new Garrett Wadec3ralog(s)@ SI ('ach. (<strong>Free</strong> with'butt chisel order.)enclosed. (Add sales tax (orNY Statt' residentS).Check or money order enclosed.o__________________________ •_Visal Master Charge! American Express.Card <strong>No</strong>. -"E xpiresNAMEAODRESSCITYSTATE ,..e, ZIP27
Adventures in Woodworking,How I GoT STARTEDy woodworking adventures began in the woods of BucksM County, Pa. I was looking for firewood with my newlyacquired chain saw, when I happened on buried treasure: avine-covered log, about 4 ft. in diameter and 20 ft. long.I whacked away the vines and then climbed on top, tryingto figure out where to begin. It turned out to be a large crotchsection of white oak. Once opened, it changed my whole life.Its figure was like a chest of jewels shimmering in the sunlight.I worked on that log for the next two weeks, sawing anddragging huge planks out of the woods. The farther into thelog I got, the more I was awed at its beauty. I wondered whathad happened inside that tree so long ago that made thegrain twist and erupt so. Whatever guided my saw to cutthose flitches right, I'll never know, but as long as someoneowns the furniture I eventually learned how to make fromthem, that tree will never die.The grain in that wood left an impression with me thatstarted me on a fantastic journey. I hitch-hiked to wood shopsall over Bucks County, looking at other people's work, askingfor jobs, getting ideas. I sent for tool catalogs and, well, Iwasn't sure what I should get first, but there was this set ofchisels, and who could wait for mail order? I had neverhitched to Massachusetts before, especially in a Februarysnowstorm, but that sure was a fine set of chisels.I finally landed a sanding job in a woodshop in New Hope,and just knew I'd be making furniture in a month or two. Isanded my way through several seasons, collecting more toolsalong the way. The people I met and listened to, the wood Irubbed hour after hour, the pile of fine oak sitting in mygarage waiting for me-woodworking was becoming a way oflife, a way of thinking and of expressing myself. I started tounderstand the wood and grew more conftdent with my projects,simple slab work, basic tables and benches.Two years after I had cut the oak log, an incredible itch todig in brought about a quilt box and a pair of night-stands.Since they were the first things I made from the oak, I was seton keeping them, until I spotted this 36-in. Crescent bandsaw in an old shop in Philadelphia. There was this big oldjointer-planer too, piled with grime, lurking in the corner.A lot has happened since those beginning years, but I stillget excited about a batch of new wood or an old machine oran old tool I resurrect. I've got my own shop now, and there'sthis young sander who wandered in the shop one day when hewas about six. His mom says he looks just like me, and he'sgot his eye on my chisels, too.What made me open that log, I'm not really sure, but I'llalways be glad I did. -David G riffit h, State College, Pa.fter a year or so of collecting wood from a local sawmill, IA sought out a retired wood craftsman for advice and helpto make some bookshelves. After several hours of getting toknow each other, I showed him my plans drawn up in halfscale.He made several comments and invited me to return tohis shop when I wanted. I took a week's vacation, set up myexpectations of what I wanted to accomplish, and then enteredanother world.The shop, a building 35 ft. by 20 ft., was consttucted duringthe Depression by his friends from materials that hadbeen part of his father's lumber mill. Suspended from its ceilingand walls were thousands of jigs, patterns and leftoverpieces of various projects. The tables of a jointer, table saw,shaper, drill press, band saw, and several workbenches wereimmaculate. He greeted me with a shy smile, and we began.By five 0' clock that day I knew that to enter his world I hadto leave parts of mine. I had rough-cut all the parts for sixbookcase units and in the first day I had expected to havethem fine-cut and glued up to width. But the simplest crosscutseemed to take forever. The table saw needed a coat ofwax; small tear-outs necessitated sharpening its blade; eachpiece had to be carefully clamped in a hold-down jig. By theend of the next day I had abandoned my expectations. Andgradually I began to pick up his philosophy.His first presupposition to work seemed to contradict everythingI had been taught in life. To him, there was no suchthing as time. "Is it 5:30 already?" he said one day. "Ithought I was hungry." Then I remembered the table in hisdining room which his grandfather had made: "It took allwinter to make that one . .. They just put the carving on topass the time away. " Concentration on the immediate, doingthe best one could with tool and wood, were considerationsthat seemed to obliterate time. "This has always been ahobby with me," he said one day. "Ever since my dad closedthe shop and powered automatic machines came in, I knewthat I could never make a living in wood." Whatever time ittook to do anything was what time it took. Time was notcounted, thoroughness was.His second presupposition was that tools and machines didthe work, not the craftsman. Thus he not only maintained arelatively objective perspective concerning a project, but hefocused constant attention on maintaining and upgrading histools. He showed me his first tool, a small hatchet from hisboyhood. It looked new. He had drawers of hand tools, eachkept in its original box. It was not just a matter of neatnessand order; his tools did the work and they could work only aswell as they were maintained.<strong>No</strong>ne of these presuppositions was ever directly articulated,and the last one is the most illusive for me to reconstruct.Work, machines and tools, time and materials, all thesethings were to flow together naturally and he was only thecatalyst to blend these components for the use of another person."But how will I finish the set if I tun out of wood?" Isaid one afternoon as a marginal piece of wood was rejected."It will come," he said. "I might have some, or we will findsomeone who has an extra piece."One day the door opened without a knock and I was introducedto a smiling man in his late forties. After a half hour ofsmall talk he brought in his project, some boards to be rippedand jointed. Later I was able to talk with him alone as he toldme of how the shop began during his childhood. "I was theyoungest by twenty years," he said. "There were about adozen men altogether who helped build the building, put inall the machines, tools and workbenches, even the pot-belliedstove. We each had a key. On Saturday no projects wereallowed to be worked on, that was clean-up day. They're almostall gone now, except me. An awful lot of stuff has beenmade in this shop."The fellow in his forties takes care of the shop now. LastDecember the retired craftsman passed away. I finished thebookcases his way and have made a few things since. Everytime I look over my wood to begin a project, I think of his approach.He was a quiet influence.-John S. Naugle, Masontown, Pa.28
--AT LAST! A Full-Sized Butcher BlockWorkbench At An Affordable PriceThe Workbench That Completes Your Workshop• Versatile Vise·and·Dog Clamping System• Rigid Steel·to·Steel Rod·Nut Connections• Large Butcher Block Work Surface• Solid Rock Maple Construction• Extra·Large Precision Vises• Accessories AvailableComplement your investment inworkshop tools and equipment withthe full·sized, exceptionally stable,Garden Way Butcher Block Workbench.This workbench is custom engineeredto let you make the most efficient useof al l your hand and power tools. It isthe ideal work surface for all types ofwoodworking, cabinetry, do·it·yourselfrepairs, kit building and countless otherchallenging projects.These extremely ruggedbencheswith proven work·saving features areoffered to you at lower prices thansmaller imported benches. They aremade here in Vermont of native mate·rials, and we ship direct to you with nomiddleman or import charges. All 3models have a full 1 year warranty.Round bench dogs rotateto conform to workpieceHERE ARE 4 OF THE IMPORTANT FEATURES YOU GET ON ALL OUR WORKBENCHES:SOLID ROCKMAPLE CON·STRUCTIONLaminated"Butcher Block"tops are 34"above floorbuiltsturdy foryears of use.•• SQUARE DOGBLOCKS rotatefully on roundbench dogs tosecurely hold ob·jects of nearly anysize or shape withbull dog strength.---";';;:; ... ...1NOW there are three Garden Way Workbenches to choose from.Compare, and see which is right for you.VERSATILE "FLIp·UNIQUE ROD-NUTOVER" VISESCONNECTIONSsecurely hold workclamp all benchand "flip· over" forcomponentsa convenienttogether for sturdywork·stop aboveassembly-easilysurface. Opens 8disassembled forinches. iii ilii" moving or storage.Top of the line Model A WorkbenchMassive Vermont RockMaple top, 30 x 60 x 1W'; 34"off floor. Two 9 x 18 x 1W'Flip·Over vises. Vise-and-dogclamping system. 175 Ibs. Optionaltool well and draweravailable. A truly professionaltool.. Mid·sized Model B WorkbenchHandsome butcher block top,24 x 48 x 1W' top; 34" offfloor. Two 41/, x 18 x 1W' solidmaple vises. Vise·and·dogclamping system, 120 Ibs. Optionaltool well and draweravailable. Perfect for limitedspaceshops.New Roll-Away WorkbenchHefty Rock Maple top, 20 x 30x 13/4' top, 34" off floor. 16"non-marking, semi-pneumatictires on wire spoke wheelscan't go flat. 4'12 x 18 x 13/4'solid maple vise. Vise-and-dogclamping system, 80 Ibs. Theworkbench that takes yourworkshop to the job site.I Clip and Send to:I Butcher Block WorkbenchGarden Way ResearchDept. A440WUCharlotte, Vermont 0544515 IIWorkbenches.YES! I want to COM PLETE my workshop.Please rush my FREE, full color informationdescribing all 3 Garden Way ButcherBlock (please print complete name and address)IName __________________________: StreetCityI_Ls ______ 2i ___ ;J29
CLASSIFIEDAPPRENTICE VIOLIN REPAIRMEN and restorers. Positions available,modest starting salary, rapidpromotions to good salary and benefits,excellent and demanding trainingprogram, must have professionalbackground in woodworking or relatedtrade. Contact William Webster,Bein & Fushi Rare Violins, Inc.,410 S. Michigan, Chicago, IL 60605.Experienced shop CABINETMAKERwanted for production wooden sailboatshop. Sanford Boat Company,Pleasant St., Nantucket, MA 02554.(6 17) 228-4108.CABINETWORKER/woodworkerwanted to work with craftsmanbuilding high-style reproductions.Resume to C. B. Sutton, 3830 0Huntingreen La., Winsron-Salem,NC 27106.WANTED: Author for regular columnon woodworking techniques foramateurs who wish to build cabinetryfor loudspeakers. Send resume andqualifications to Editor, SpeakerBuilder Magazine, PO Box 494,Peterborough, NH 03458.STAFF INSTRUCTORS and guestspeakers needed. Hand tools emphaSIzed: applied tech., lectures, seminars.Studio space available, reducedrent for teaching. Contact RonPhillips, c/o Chicago Academy ofFine Woodworking, 744 W. Fullerton,Chicago, IL606 14. A non-profitequal-opportunity education institunon.PRODUCTION WOODWORKING business, manufacturing patentedwooden tool. Make$25-30,000 per year working halftime. Locate anywhere. Will train.$60,000 . Brian Burns, (4 15)327-5335.RENTAL SITUATIONS. BostonCabinet-<strong>Making</strong> is accepting resumesfor experienced cabinetmakerl resrorer.27 Kingston St., Boston, MA02 111. (6 17) 338-8356.TURNING SQUARES: Cherry,maple & ash. Brochure 50'. Refundable.Cryder Creek Wood Shoppe,Box 19, Dept. FW-3, Whitesville,NY 14897.Whittling and CarvingTools and SuppliesNew <strong>1980</strong> calalog-30e (refundable).American made,quality tools, exclusively.WARREN TOOL Co., INC.Rt. I, Box 12-B, Rhinebeck,Y 12572 (914) 876·7817WoodworkingBooksHUNDREDS ofTITLES available.worlds largestselectionsend for free list,BARK Service Co.P.O. Box 637Troutman.NC28166Ve'leer SuppliescA @t cAboveSpecializing in veneersfor the Home Craftsman& Marquetarian.P<strong>Free</strong>.19,Price List'Bo'(, 139Greeburg, 19H 44<strong>23</strong>2EXOTIC TURNING POSTS: Cocobolo,guanacaste, Honduras mahoganyand rosewood, each 2 in. by 2 in.by 18 in. Full set including one each,$16.95 postpaid. Colonial Hardwoods,Inc., 212 N. West St., FallsChurch, VA 22046.BURL WOOD. Redwood, olive, fig.Clock kits. Redwood BurlEsque, POBox 207, Dept. FW-7, Lompoc, CA93438.Beautiful SPRUCE: first grade (customcut). Write Stephen Anderson,PO Box 168, Wallowa, OR 97885.EXTRA-WIDE BOARDS. Table andbar tops. Any thickness, $10 each +$ lIbd. ft. R. Skarin, Marlboro, MA01752. (6 17) 481-7330.LUMBER: ASH-ZEBRA WOOD.Call (205) 933-8246 or write SignatureHouse, Dept. FW, 1312 20th St.South, Birmingham, AL 35205.THAI & BURMA TEAK: Lumberand plywood, any quantity. QualityWoods, Ltd., Box 205, Lake Hiawatha,NJ 07034. (201) 927-0742.Quartersawn FAS WHITE OAKlumber. AD 4/4 +, 75'/bd. ft . Discounton large orders. Wayne Benjamin,Stenersen Corp., Cockeysville,MD 21030. (301) 666-1111.LUTHIER'S SUPPLIES: Importedtonewoods, tools, parts, accessoriesfor violins, violas, cellos, basses andguitars. Catalog, 25'- Credit certificateenclosed. International ViolinCompany, Ltd., Dept. W, 4026 W.Belvedere Ave., Baltimore, MD21215. (301) 542-3535.HARDWOOD PLYWOODS. Ash,Baltic birch, red, white or naturalbirch, cherry, mahogany, maple,knotty pine, red oak, white oak, walnut,teak. All items 4x8 by I. in. or0/. in. Precision cutting to size (Yl6'in.tolerance) . <strong>No</strong>t necessary to buy fullsheets. Veneer edging for all species.Call (6 17) 666- 1340 for quotations.Shipping in USA via UPS or a commoncarrier. Boulter Plywood Corp.,24 Broadway, Somerville, MA 02145.A&M WOOD SPECIALTY, Inc. , POBox 3204, Cambridge, Ont., Canada.New Items: Italian olivewood, Australianlacewood, solid thuya burl,snakewood logs, manzanita burl.CUSTOM MILLWORK. 30-in.planer, 12-in. jointer. Log conversionand resawing. Brian Burns, PaloAlto, CA. (4 15) 327-5335.CREATIVE WOODTURNING, anauthoritative manual on techniqueand design. 248 pp. , 700 high-qualityphotographs. "The best we'veseen on the subject." Money back ifnot delighted. $10. Bank Americard/MasterCharge. Cedar Graphics,Box 3475, Logan, UT 84321.CANADIANSDemonstrations and SalesFine Quality Hand ToolsInca Woodworking MachinesMyford Woodturning LathesShopsmith Multi-Purpose MachinesRockwell Machines & Power ToolsWilliams & Hussey Molder-PlanersMakita Machines & Power ToolsFor our descripcitlf! low prices literature S
marked wood blanks witha scale model in each kit. Mallets.tools and tool rolls. FREE Brochure!WOOD IS GOOD CO. DEPT: FBOX 477, CA 90714 "''''I''>.. '-'*', ...POL The VETHVlENE new wood stBbilizer Gl VeOlend chemiCIII stNIsoning Bgent.Make crack-free table tops from log cross sectionsand flawless bowls and carvings from green scrapwood. 75' for catalog.16 , 1 1.201 % 1.80The Crane Creek CompanyBox 5663 FMadison. Wisconsin 53706SHEET ROCK SCREWSflat Head - Phillips - Black16 ,1 S1.10 per i00 18 , 2Yo S3.20 per 10018 , 2'/, 4.3016 ,1% 1.30 18 ,3" 5.2018 , IP·2 Or.e 811s 45' each18 ,2" 2.60Exira Special: Buy a bel ol l,OOO-deduct an additional 10%. FREE Price lIStWe accept VISA and MG. Send check or money order and $1.75 for shippingTHE NUTTY COMPANY. INC. 10:Dept. fW70. 135 Main Street. Derby. CT 06418EXOTIC AND DOMESTIC HARDWOODSBaltic Birch. Marine Woods, Hardwoods &Plywood in stockTECH PLYWOOD & HARDWOOD LUMBER CO.110 WebbSt., Hamden, Conn. 06511ConnectionsIn CONNECTIONS we 'll publish membershipcalls fo r g udd-style organizations, lettersfrom authors compiling directories of craftsmenand appeals from readers with specialinterests looking fo r others who share them.Furniture makers are invited to submit slidesand resumes for a Midwest furniture invitationalexhibition in the fall of <strong>1980</strong> at the OctagonCenter for the Am, Ames, Iowa. Sendmaterials and a self-addressed stamped envelopeto Martha Benson, The Octagon Centerfor the Am, 427 Douglas, Ames, Iowa 50010.I am preparing to write a book about woodworking with children ages 4 to 14, focusingon craft rather than industrial arts or careereducation. During the <strong>1980</strong>-81 school y ear Iwould like to visit teachers who have developedcreative woodworking programs. If youwould like to share your experiences, writeRichard Starr, Thetford Center, Vt. 05075.I am organizing a trip for 15 woodworkers toa village in southern China, including a visitto local furniture shops and a chance to learnlocal techniques. The two-week tour will takeplace early inJanuary 1981; the cost will bearound $2,100. Write Robert Ghelerter,1411 Cypress, Berkeley, Calif. 94703.Retail sales only large complete stockWoodworkers are invited to submit slidesCome visit our large warehouse and select your own lumber.Tel. 12031 777·531 5(three views and two details of each piece) forwith this g. Moneywide...a juried turned object show that will open inPhiladelphia in the fall of <strong>1980</strong>, then tourthe U.S. and Canada. Entry fee, $5; slideswill not be returned. The best sculpture, furnitureand bowl each wins a $500 award.Contact A. LeCoff, 2500 N. Lawrence St. ,Philadelphia, Pa. 19133.NEW MODEL #FW3 HANDY SHARPENING JIGAnyone can do itback guarantee. Perfect hollow groundbevels on blades to 21/,"RIMA MFG. CO.Aluminum cons't. brass screws. Only4% ozs. $9.50 ppd. ck. or m.o. only.P.O. Box 99Ouaker Hill, Conn. 06375\ZJ... -' ..,"l.Lovers of wood and woodworking are invitedto attend the next meeting of the BaltimoreWashington Woodworkers Guild. For details,send a self-addressed stamped envelopeto Arthur Breton, 1133 William St.,Baltimore, Md. 21<strong>23</strong>0.The American Shipcarvers Guild, foundedin 1976 to foster woodcarving as an art, promotesteaching of carving techniques and encouragesgood fellowshi,e. Membership isopen, and the guild certifies carvers on fiveproficiency levels from apprentice to mastercarver. WriteJohn H. Davies, Box 482, Camden,Maine 04843.The Georgia Woodworker is a new organizationformed in order to offer a weekend seminaronce a month on the woodworking arts.Each seminar will feature lecture, demonstrationand discussion with a master craftsman;enrollment is limited to 25. ContactHerb Teeple, 5015 Spalding Dr. N.E., Atlanta,Ga. 30360. Phone (404) 394-5784.A week-long trip to England is planned for<strong>No</strong>vember <strong>1980</strong> to visit the WoodworkerShow in London, with an optional extra threedays to tourJohn Makepeace's studio in Dorset,The London College of Furniture, theAmerican Museum in Bath and the Pinto collectionin Birmingham. Limit: 40 people.Details from Russ Zimmerman, RFD 3, Box57A, Putney, Vt. 05346.The Society of American Woodworkers issponsoring a conference, Wood '80,July 25-27at the State University of New York, Purchase.For information about SA WW or theconference, write Ken Strickland, Visual AnsDept., SUNY, Purchase, N.Y. 10577.PUBLISHER'S NOTE: The introductionof Fine Homebuilding magazineannounced in our May issuehas been postponed until late thisyear to give us more time to prepare.Readers of Fine Woodworkingwill of course be given achance to be charter subscribers.Walnut pieces for grips, inlays, etc.List, 50' and SASE. Larson, 1800Shade's Cliff, Jasper, AL 35501.Complete shop of almost new woodworkingmachinery for sale. Heavydutybut all equipped with singlephasemotors. Send for list. ArthurReed, 112 Rosewell Meadow, DeWitt,NY 13214.Stanley #5 5 complete in original boxwith instructions. Never used: $350.). Marshall, Box 306, Winona P.O.,Ontario, Canada. (4 16) 643-3459.Stanley #45, new condition, neverused. In original box with <strong>23</strong> cuttersand manual. $225. R. ). Schaefer,RR I,Box 66, Shakopee, MN 55379.. (6 12) 445-4340,NY.evenings.Lurem C26 multipurpose woodworkingmachine, new condition. COSt$4, 500, sell for $2,500. HuntingtonStation, (516) 427-9710.Rockwell thickness planer, 13x6. RolfGodan, 27 Fifth Ave., Newburgh,NY 12550.Wanted to BuyInformation regarding manual,parts, accessories, etc. for a WalkerTurner lathe. G. Dease, Site II, Box82, RR 2, Windsor Jct., N.S., Can·ada BON 2VO.4-in. by 12-in. planer, Red Fox byPartington, Inc., Cincinnati, Ohio.B. Bunker, Box 295, Franconia,.NH03580.Accessories for Walker-Turner lathe:tool rest, tailstock, faceplates. ). P.Emmett, 1345-B EI Caminito Pl.,Tucson, AZ 85705 .Left-handed Milwaukee or PorterCable circular saw. B. Williams, 50Harbord St. , Toronto, Ont., Canada.(4 16) 979-2592 (collect).Stanley #65 block plane in good condition,Newman, 66 Frost Ave., Rochester,NY 14608. (7 16) 328-1577.Thickness sander· Drum sander, used.D. Hartmann, Rt. I, Box 172, Murphysboro,IL 62966. (6 18) 684-6614.Record 044 plough and Record 050combi., all cutters, 1930s-40s vintage,prime condition. Call collectevenings after 6 p.m. PST and week·ends: (2 13) 547-0010.Trade-Lion mitre trimmer for 6-in.by 48-in. wood lathe, heavy-dutyball bearing; also planer-jointer.W. Buffington, Zearing, IA 50278.Manual on ).D. Wallace combinationwoodworking e q uipment. Copiesokay. L. Woodward, 20007 DrasinDr. , Canyon COUntry, CA 91351.SITUATIONS WANTEDExperienced woodworker seeks apprenticecustom fu rniture positionwith master. I.I.E.A. tOf statehonors. Will relocate smal town.Neil). Davaz, Box 129, Priest River,ID 83856.Serious experienced cabinetmakertired of routine cabinetry desireschallenging quality position wherehe can learn art of aesthetic furnituremaking. Keith, 1318 E. Willetta,Phoenix, AZ 85006.Woodworker with tools seeks work inone·of-a-kind, limited-productionshop . 5 years experience in same.Hudson Valley or w. Mass. areas. JackKavana, Owega Hill, Dryden, NY13053.Seeking furniture! cabinetmakingapprenticeship, interested· in acareer. Have basic skills and tools,will relocate. Celia A. Szczesny, 311Pine, Rochester, MI 48063. (3 13)652·2684.Furniture! cabinetmaker apprenticeshipor work in restoration soughtanywhere in New England or NewYork. Mature, some experience, havetools. Anthony Melino, 89 WisdomAve., Providence, RI 02908.I would like to meet a wood turner inN. Y. C. area for instruction and! orpart-time work. Call Joel, (5 16)651-4427.Rent-free 2-bedroom apt. and largestudio in northern Maine coastal vdlagein exchange for some work onrest of building. Person(s) willing tomake a commitment. Call Rick Sny·derman, (207) 497-2450.RISD-trained woodworker seeks useof shop once a week in Wash. DCarea. Will pay & share my tools. CallKen Rivkin, (202) 547-4319.The CLASSIFIED rate is $3 per word,minimum ad 15 words. Paymentmust accompany order. The WOOD& TOOL EXCHANGE and SITUATIONS W ANTED rate is $2 per line,minimum three lines, maximum sixlines, limit two insertions per year.Allow 30 letters or spaces per line, includingname and address. TheWood & Tool Exchange and Situationsare for private use by individualsonly. Commercial accounts mustuse Classified. Please inquire forDISPLAY CLASSIFIED rate. Sendto: The Taunton Press, AdvertisingDept., Box 355, Newtown, CT06470. Deadlinefor ads is the 25th ofthe third month preceding publicationdate.31
Fine WqqqWorki ng __Julyl August <strong>1980</strong>In 'Search of Period Furniture MakersWhat they do about what the 'old guys' didby Rick MastelliA bout a year ago we received a letter from a reader, Grovern W. Floyd II of Knoxville, Tenn., telling about the cabinetmakerwith whom he had been studying, whom he believedto be "among the nation's finest." The letter includeda newspaper clipping about Robert G. Emmett, 77, quotinghim as having promised himself, "If I ever got to touch apiece of Goddard furniture, I never would wash my hands.But now I have seen the back of a genuine Goddard piece andits drawers. And I wash my hands. My construction is better. "It wasn't long before I had arranged a trip to Knoxville tomeet Emmett and to see his furniture. The visit turned out tobe the start of an odyssey-to the back rooms of museums, tohistoric sites and to the shops of reproduction cabinetmakers,all to gain a perspective on what Emmett was to show me.Here he was declaring his furniture construction to be betterthan that of 18th-century master craftsmen, to be "second tonone in the world."I met Floyd first, a 29-year-old Scotsman who works out ofa 500-sq. ft . shop, modestly equipped with the basicmachines, all kept in faultless tune. When I arrived he was atthe table saw, stacking and slicing arrowhead inlay banding%0 in. thick, practicing a technique he had learned from Emmett.He showed me a number of simple blanket chests,identical in design but of different sizes-experiments in proportion.Floyd is a professional cabinetmaker who earns hisliving restoring and building traditional furniture. But sincehe met Emmett, he's considered himself a student. Hebrought me to meet the teacher.Even at 77 Emmett retains a full head of white hair, neatlyparted and laid down. Along with his mustache, it frames aface styled in the 1920s, aged, but well kept. He talked of hisfuture, for which he was "hoping to put a little somethingaway," and of his desire to share what he'd learned, to helprevive the making of American furniture. And he talked ofhis past: "The main thing is the construction. I've gone intothat deeper than any man ever has. I've lived furniture. I'vedreamed it. My poor wife: a widow all these years."The furniture he showed me did not belie the devotion heclaimed. There's a Pembroke table, among ten he made inthe early 1940s in a number of different woods, most of theminlaid, some simply banded, others with shells or bleedingheans. The construction, Emmett points out, is exceptional.The width of the tabletop is marginally oversized for the skirt,so shrinkage across the grain, between the rule joints, will notstop the leaves from dropping free. The rule joints themselvesare cut over an arc slightly greater than 90·, to ensure thatthere is no space when the leaves are down through which tosee the hinges. The knuckle joint for the leaf support stops itsswing at two points instead of one. This prevents the supportfrom acting as a lever and breaking out the pivot pin. Alsothe joint is cut and the pin is driven not quite plumb, butcanted, so the leaf support swings slightly up. This ensures, inEmmett's Pembroke table is soltd satinwood with maple and pine secondary wood and vermilion, holly andebony inlay. The rule joint, right, is cut over an arc greater than 90' to keep the hinges concealed when theleaf is down. The leaf rests Y4 in. away from the skirt on a wooden button, which can be shaved down as thetop shrinks to ensure that the leafwil rest always perpendicular. The knuckle joint of the leafsupport, center,is not rounded, as is traditional, but square-sectioned, so in swin [J .ing open, the knuckles are stopped at twopoints. One is at the far side of the support, a /i ainst the outside of the skirt ; the other is in mortises cut in theskirt. These two stops keep the leaf support from acting as a lever to break out the pivot pin.32
spite of seasonal dimensional changes, that the leaf canalways be supported exactly level with the center section ofthe tabletop.Such careful attention to details characterizes all the workhe shows me. He learned, he says, by repairing older pieces inhis father's antique shop, correcting the consequences offlaws in construction. "I got so tired of repairing crackedknuckle joints and having to leave drop-leaf tables with theirleaves up because they wouldn't set down straight-thereain't nothing you can do about that once the top shrinks, exceptrebuild the whole bottom or the whole top-that I resolvednever to build anything that won't last right. I don'tcare if nobody built things this way before. Those old guysgive me a lot in the way of design and styling, I can't beatthat. But their construction, I take what they give me and goon from there." He details his experience with American antiques:the sides of highboys and lowboys, cracked becausethey were glued crossgrain to the leg posts; bracket feetcracked or missing because they were glued crossgrain to supportblocking; drawers protruding or stuck shut because carcaseshave twisted; drawers broken apart because stylishly thindovetail pins didn't hold.For 21 years, Emmett was the salaried cabinetmaker of awealthy Knoxville family. His patron provided almost unlimitedfacilities, choice woods, and put minimal constraintson time or cost. "They would come to me with a picture of aPhiladelphia highboy or a Goddard-Townsend kneehole andsay, 'Robert, make me one of these.' And I'd study up on itand figure out how to make it, and sometimes a year or solater I'd have the piece done."I left Emmett's shop with photos of his work and a list ofpreoccupying questions. How could 18th-century cabinetmakershave conceived such sophisticated designs and nothave figured that wood moves, or not have known that ifglued crossgrain it will crack? Did they know and not care? Orwas Emmett wrong: were only the shoddy pieces built thisway? Is it trUe that most 18th-century pieces have structuralproblems? And if so, what about craftsmen reproducing thosepieces today? In pursuit of stylistic authenticity, do they imitatefaulty constructions? Or do other reproduction cabinetmakersshare Emmett's devotion to improving construction?* * *Emmett's reproduction of the Townsend-Goddard kneeholebureau (front cover and next page) posed the most intriguingquestions. Built on an independent, full-blind dovetailedbracket-foot frame, with half sliding-dovetailed dustboards,the blocking and shells carved from solid curly cherry, the reproductionbegged comparison with its source. Could theoriginal be anything like this tour-de-force? I arranged tomeet with Pat Kane, curator of American decorative arts atthe Yale University Art Gallery in New Haven, Conn., wherea Newport kneehole resides. Yale's Garvan collection includessome of the best American 18th-century furniture andindeed, as we walk past them, I notice many of the highboys,lowboys and secretaries have split sides and cracked feet.The kneehole bureau, dated 1755-1785, is of Hondurasmahogany, dark with stain and patina. Thus the first impressionit makes is quite different from Emmett's curly cherry reproduction,which seems fairly on fire with color and figure.The Newport blockfront sits dark and quiet on its pedestal,its kneehole like a cave. Its age is evident from the way it hasworn and settled into itself. It has dignity. The drawer insidesDetail of Newport kneehole bureau in the Garvan collection at theYale University Art Gallery (top) and of Emmett's reproduchon(bottom) . Other photos of these pieces appear on the front cover.are a greyed, mild-grained tulip poplar, in striking contrast toEmmett's shimmering blistered poplar. But it isn't just thematerials or their newness that makes Emmett's blockfrontthe more assertive. Comparing the original closely with thephotos I have brought from Knoxville, I see that Emmett'scarving is simpler, his shaping bolder, his reliefs sharper. Atthe periphery of the concave shell, Emmett's carved line approachesa zigzag, punctuated with V-grooves not present inthe Newport shell, which curves more gently in and out.Emmett's ogee foot bulges emphatically, and his moldingsare heavier. The effect is surreal. Emmett's piece seems totake the original design and say "THIS is what I am. "I ask Kane what she thinks of Emmett's work. It is masterful,she says, but overdone. She prefers the original blockfront.I ask if she knows of any 18th-century blockfronts withcarved shells and elaborate molding in such a highly figured,difficult wood as curly cherry. Maybe some Connecticut piece,she says, but ' probably not: 18th-century craftsmen did notusually model highly figured wood, they rather displayed itin flat surfaces, as in highboy drawers.I point out the construction of Emmett's piece. She's neverseen a full-blind-dovetailed bracket foot, sometimes a splinedmiter, but generally the bracket pieces are simply mitered togetherwith a glue block behind. The direction of the glueblock's grain? Vertical, perpendicular to the grain of thebracket pieces. Does she encounter many cracked and brokenbracket feet? Yes, it's quite common. How about drawer dividers,are they full dustboards, half-dovetailed into the carcaseside? Hardly; it's usually only Philadelphia pieces (later I findout it's Williamsburg pieces too) that include full dustboards,usually dadoed into the sides. The blocking-is it appliedor carved from the solid? The blocking is usually solid,33
ut the convex shells are applied. Kane says yes, these particularshells have held up well; she has seen some cracked.Visiting a museum with the curator at your side is a wonderfulopportunity. It's my fust chance to see the inside, backand bottom of a famous piece of furniture, and, naively, I amtaken with how mundane it is. The boards are roughsawn,unfinished; the numbered drawers and the word "upper"scrawled on the upper drawer divider attest to the piece's realshoporigin. Galleries today display contemporary furniture,whose undersides are finished with the same preciousness astheir faces. (Emmett's, in that sense, is contemporary furniture.)It's good to know a great piece of furniture can have itsback nailed on. But it's not so good to know that beneath thefinely worked face are some unquestionably troublesome constructions.<strong>No</strong>t only are the glue blocks running crossgrain tothe bracket-foot members, but the bracket feet themselvesaren't even attached to the carcase. They're attached to themoldings, outside the line of gravity of the carcase. And themolding is merely nailed (on the side, crossgrain) to the carcase.I can't understand how the thing is standing there, untilI realize it's resting on its glue blocks. <strong>No</strong> wonder the feet areso vulnerable, they're only molding.I leave Yale understanding better why Emmett got absorbedin redesigning traditional construction, and I sense toohow the inner strength of his pieces came to be reflected intheir faces. <strong>No</strong>netheless, I need to know about 18th-centuryfurniture makers: What did these inconsistencies in constructionmean to them? I arrange to meet with Robert Trent, researchassociate, and Robert Walker, furniture restorer, bothat the Boston Museum of Fine Arts.* * *The kneehole bureau at the Museum of Fine Am is by EdmundTownsend (1736-1811), a grandson of Solomon, theprogenitor of 13 Townsend cabinetmakers. With the sevenGoddard cabinetmakers, related to the Townsends by marriage,they produced the remarkably consistent, well-developedNewport style. This kneehole is mahogany, like the oneat Yale, though the grain is more rowed. The curves, however,are less pronounced, and there is almost as much differencein composure between this blockfront and the one atYale as there is between the Yale blockfront and Emmett's.These convex shells are almost perfect domes, with only thebarest undulation at the periphery. The beading is softer. Theogee foot is straighter. The brasses are more sedate. The constructionis virtually the same as in the Yale blockfront.When I show my photographs and drawings of Emmett'sblockfront to Trent and Walker, they hear me out. Finally,Trent says, "Well that's fine, but it looks like he's building asuspension bridge . ... There's no question that it's possibleto improve upon the designs, but what people appreciateabout the old stuff is the fact that it was produced under pressureand with a commitment to making a profit. It's the deftnessof it-getting an effect with a reasonable input of timeand money. I know there were wealthy people supporting theTownsend-Goddard shops, but it was still a business."What about the structural weaknesses in the design, I ask."I don't think those are structural problems," says Walker, "Ithink those are atmospheric problems. People say to me, 'I'vegot this foot that keeps dropping off my chair. What can I doabout it?' They're asking the wrong question. They should beasking, 'What should I do about the environment that mychair is in? What do I do to control it?' "Bracket feet and highboy side cracked because of crossgrain construc·tion. Courtesy Yale University Art Gallery, Garvan collection.I was to hear this argument again from other curators andfurniture restorers. Wallace Gusler (p. 50) at ColonialWilliamsburg in Virginia told me most problems with 18thcenturyfurniture are 20th-century problems. Insulatedhomes with central heating have created a significantly drierwinter environment for furniture than was so for the first 150years of its existence. Cabinetmakers 200 years ago did nothave to deal with today's extremes of wood movement. Butthis only points the question: If you were reproducing an18th-century piece today, would it make any sense to duplicateconstructions that have become inadequate? "<strong>No</strong>t atali," answered Trent, "but Emmett isn't simply eliminatingweaknesses here, he's souping this thing up; it's become ashowpiece, a jewel. It's modern furniture, and I don't seehow it's economically realistic."Are structural shortcomings compromises, then, with economicreality? Trent continues, "People talk as if 18th-centurycabinetmakers were building pieces of architecture thatwere going to last forever, and that's not what they were tryingto do. I don't think they had any interest beyond the gen-Newport kneehole bureau, circa 1770, by Edmund Townsend.Courtesy Museum of Fine Arts, Boston; Karolik collection.35
Left, Gerald Curry 's rep roductionof a Queen Anne highboyin walnut. Right, DouglasCampbell at his tenoner made/rom a Sears table saw. The extensiontable is hinged at thefar end of the main table andis raised and lowered by athreaded rod. On this swingingtable is mounted a l-HPmotor belted to a saw arbor.Both this arbor and the saw'sregular one are Jitted withplywood blades (to cut thetenon shoulders) and a Searsmolding head with straightknives (to waste the wood andproduce the cheeks) . With amiter gauge and an angleblock, Campbell's tenoner canquickly make the doubleangledtenons on traditionalchair stretchers.eration it was owned in, and, of course, most of the piecesdidn't last more than a couple of generations."I leave Boston beginning to realize the variety of attitudespossible toward making period furniture. But if Emmett'swork is unrealistic, what, according to cabinetmakers whoearn their livings building reproductions, is realistic?* * *For four years, Gerald Curry has run a one-man reproductionshop in Auburn, Maine. He's built a stable business in partby paying attention to promotion. He advertises, and answersinquiries with a 20-page catalog of Queen Anne and Chippendalefurniture. In it Curry writes about the authenticity ofworking mainly with hand tools, and about the concentrationand harmony afforded by working alone on one piece at atime. It is an attractive and-to people contemplating partingwith $3,000 for a reproduction-a reassuring presentation.I am a little surprised, then, when I drive up to his shop,which has neither sign nor showroom. It is a barn with gatedoors and a noisy gas heater. The machines are few andsimple: a 6-in. jointer, a Sears shaper, no thickness planer.Curry began woodworking as a finish carpenter in Boston;then he did commercial and domestic installations. Wantingto do "something nicer" than kitchen cabinets, he hauntedthe Museum of Fine Arts to learn about proportion and whatmakes a good piece good. "At first," he says, "I went to furniturestores. That's where a lot of people go wrong. Theylook at pieces two or three times removed from the originals.Many reproductions are composites. Proportions, detailing,construction don't have much to do with what they originallywere. When I do a reproduction I try to make it as authenticand exact as possible, but I know 19BO slips in."We look at a Queen Anne highboy in walnut (above), almostfm ished. The molding, upon close inspection, retains theuniformity of the router and shaper. The flat surfaces, thoughhand-planed, are sanded fine and sealed with a contemporaryoil/varnish mix. How does this compare with his usual work?"Usually I talk to people for quite a while before beginning apiece. Different people want different things. The guy I'mmaking this highboy for is used to 20th-century perfection-smooth,machined surfaces, no rough edges. I'm talk-ing with another fellow about a similar piece and he's veryconcerned that the drawer bottoms and inside be left roughplaned.He likes the idea of its being obviously handmade." Iask why people buy reproductions. "I get people sending mephotographs of museum pieces or advertisements from antiquedealers. This Queen Anne highboy, for instance: Theoriginal is priced at $30,000. I'm doing this reproduction for$3,)00. And it's a more usable piece. The one in the advertisementhas problems. The side is cracked, it's missing abrass, it needs restoration work that may cost as much as thispiece new. And how can you feel comfortable using a piece offurniture that COStS $30,000? I know I wouldn't."I show Curry my talisman, the pictures and constructiondrawings of Emmett's curly cherry kneehole bureau. Currynods; he is well aware that many of the pieces he copies haveconstruction problems. Emmett's improvements make sense,but Curry can't expect his customers to pay for full-blinddovetailed bracket feet.* * *In search of reproduction cabinetmakers the name DouglasCampbell kept coming up. Campbell recently moved toNewport, R.I., having turned to cabinetmaking 20 years agoat age 30, when, for health, he had to quit salvage diving.Three years ago he was in Denmark, Maine, employing eightmen, drying wood in his own kiln and turning out a dozenpieces a week. ("I've got nothing against Grand Rapids," hetold me. "If it weren't for Grand Rapids, you and I wouldn'thave anything to sit on.") His business was doing well, exceptthat Maine is far away from most potential customers. An accessibleshop and showroom were in order.Campbell found that Newport, with a history of IBth-centuryprosperity and turn-of-this-century affluence, still attractspeople with money. <strong>No</strong>w he makes $1,000 worth of furniturea week, working by himself. With a year's work onorder, he's looking to open a larger shop, and wishing businessmight ease up a little in the meantime.Campbell is the sort of fellow who can grin at you and say,"I don't fool around." He's learned to work fast, he tells me,out of desperation. "It's making things work that buys thegroceries. <strong>No</strong> matter how cute some people want to be, it36
doesn't mean anything until you sell the piece. That's howyou get the opponunity to make another. . .. When 1 stanedout I knew nothing about woodworking. 1 bought a hundreddollars wonh of old hand tools, and it was ridiculous. Iworked so hard-hand-planing sugar maple boards foursides-it was pathetic. 1 still don't have a decent hand plane.But that's all right. I don't use them anymore."Campbell's work, though built fast, is not unsound. Hisjoints are monise and tenon ("I have dowels I bought 20 yearsago; 1 don't use dowels"). He stabs out his monises with ahollow-chisel moniser ("I hope I never have to cut them anyother way"), and he cuts tenons on a tenoner home built froma Sears table saw. I ask Campbell how he feels about workingin fabled Newport, just three blocks from where the buildingthat housed John Townsend's shop still stands and eightblocks from John Goddard's. "I don't mind a bit," he says."Oh, I read up on them some, but it was a business. Most ofwhat you learn isn't anything to dream on. I was reading howJohn Goddard was finishing a piece-it was on order-andsomeone walked in off the street with cash, and he sold it tohim, right there. <strong>No</strong>w that makes sense to me; I'd do that if Ineeded the money. "I debate whether there is any point in showing Campbellmy pictures of Emmett's work. There is a reproduction of aNewpon blockfront in his showroom. Its construction followsthe original, though the joinery and detailing are coarser. Thetop drawer is that of a butler's desk: the front unlatches andhinges down, revealing a writing surface arid pigeonhole gallery-alucrative idea, Campbell points out. "You could dowell converting chests of drawers to butler's desks. All you'dhave to do is have your customer send you the top drawer ofhis chest, and you could copy the materials, dimensions andfinish." I ask if he's built any kneehole bureaus. He has.Does he like them? "Actually," he says, "I hate the looks ofthe damn things." I decide not to show him the photos ofEmmett's work.* * *Harold 10nson ushered me into his shop in Westwood, Mass.,settled back against a bench and nodded the brim of his bluebaseball cap at the surroundings. "This," he said, "is where Iplay. " Do you make a living here too, I ask? "Oh no," hesays, "there isn't any money in this business, never has been.That's why all the fine custom shops died. Even when I gotout of trade school in 1938, they were dying then. You can'tcount on people's taste. All my life I made things for otherpeople, 90% of whom didn't appreciate what kind of work itwas. 1 arrived at a point in my life, at age 55, when 1 decided Iwas going to play the rest of my life and build a few things formyself. I wanted a couple of banjo clocks. It's too much settingup for just one. So I built 24. If people want to buy theones I don't want, fine, but that isn't why 1 built them."A museum curator in Boston had recommended Ionson tome as one who makes careful reproductions of the furnitureof John and Thomas Seymour. The Seymours came from Englandin 1785 and excelled here in making double-tambourdesks of mahogany and satinwood, inlaid with rosewood,ebony and ivory. They worked not in the familiar QueenAnne or Chippendale style, but in those of the Federalperiod. Their adaptations of Hepplewhite and Sheraton weredistinctly American. They alternated tambours of curly andbird's-eye maple, for instance, with mahogany, and paintedcase interiors an American robin's-egg blue. They are richHarold Ionson, above, and one ofhis 11 Seymour-style, double-tambourdesks, right. This one is in SanDomingo mahogany and mapleburl with satinwood and ebony inlay.The keyholes are bordered inivory; enamel pulls have yet to bemounted on the bottom drawers.Ionson deals with the problem ofwood movement in his cabinet sidesby making his own thick-veneeredplywood. Face- g luing the core (asshown in the drawing) orients thegrain so that maximum expansionand contraction take place in thethickness rather than in the widthof the plywood.Yo-in. sawn San Domingomahogany face veneer'f. -in. face-glued basswood core
and colorful pieces, little known to most people simiJly becausethey are now out of fashion.What attracted Ionson to Seymour? "The beauty. You puta bunch of pieces in a room and the Seymour piece will standout, even from 50 feet away-that 's a Seymour piece. Andthe workmanship is good, even inside. Most of the old pieces,you probably know, are rather rough inside: glue blocks,wedges, they really hacked them together. Before the Federalperiod, furniture depended on carving for its beauty. I'm notmuch of a carver. They were massive pieces, too. <strong>No</strong>t badlyproportioned, just large. In the Federal period, furniture becamedelicate and feminine. It got its beauty from figured veneers,inlays and exotic woods. <strong>No</strong>w a lot of people say, 'Oh,this is a veneered piece, it's cheap.' And they have good reasonto think that way. Furniture manufacturers brought thaton, veneering everything, burlap bags almost, which gaveveneered furniture a bad name. But originally, only the finestpieces were veneered-because it's ten times more work."lonson is working on one of a run of eleven folding-leaf,double-tambour desks. They are like Seymour's desks,though not copies of any particular one. Ionson's constructionis more sophisticated. He makes his lumber-core plywoodfrom %I-in. sawn San Domingo mahogany, laminatedover Honduras mahogany cross banding and a basswood core.The core is face-joined rather than edge-joined (pp. 37 and78) so that maximum expansion and contraction takes placein the thickness of the stock rather than across its width. Inspite of the dimensional stability this provides, lonson doesnot glue these panels solidly to the legs. For added insuranceagainst cracks that have occurred een in veneered panels, hemortises the legs, fixing the panel at the top and allowing itto float in oversize mortises at the bottom. All the tenons arepinned, the ones toward the bottom through elongatedholes. Veneer conceals the pins. The drawer faces are veneered,too, and rabbeted out to receive satinwood andebony banding; then cockbeaded. Even the end-grain edgesof the drawer fronts are veneered so that when the dovetailpins are cut, they contrast well with the pine drawer sides. Inshort, practically the whole piece is veneered and inlaid, yetbecause the veneer is thick, the surface is remarkably substantial.It doesn't look ready to delaminate,'it doesn't even looklike veneer. "I couldn't work this way before I retired," he remarks."I had a living to make."David Salisbury explainig 18th-century woodworking at thereconstructed Anthony Hay shop at Colonial Williamsburg.I am anxious to get 10nson's reaction to Emmett's work:The technical attention each has given the original designsseems something they have in common. Right away lonson istaken with the full-blind dovetailed bracket feet. "<strong>No</strong>wthat's not bad, that's good, that's nice." So is the rest of thepiece, he decides. The dovetatls on the drawers look too uniformfor his taste, "but I won't disagree with him. I've seenthose thin pins fail." lonson wants to know how much timeEmmett spent. I tell him 1,200 hours. Says Ionson, "That's30 weeks. There wasn't any grass growmg under his feet whilehe was doing this." I play devil's advocate and point out howeconomically unrealistic the work is. lonson replies, "Oh,that's all right. <strong>No</strong>thing's too good for me."* * *Colonial Williamsburg in Virginia is the premier restorationsite of 18th-century life in America. At least 17 cabinetmakersworked at Williamsburg between 1720 and 1776, andthe furniture they made is known for its refined constructionand restrained styling (p. 50). At the Anthony Hay shop, rebuilton its original foundation, I met David Salisbury, whocame to Williamsburg to learn 18th-century woodworking.He was reproducing four bookcases for an 18th-century interior.<strong>No</strong>t only were their style and construction authentic,but he was using only authentic tools and techniques. Thisshop does not sustain itself by the pieces it produces. Its mainpurpose is to be a living museum, and much of the craftsmen'sworkday is spent explaining to visitors how AnthonyMack Headley, ]r. , left, removes the clamps fro m one of a set of twelve sidechairs he is reproducing for Colonial Williamsburg. Below, the work of threeHeadley generations: Grandfather Boyd, Sr. 's, lowboy (right), his son MackHeadley, Sr. 's, Chippendale slipper chair (left) and Mack]r. 's, PhtladelphiaChippendale armchair (center).
Hay and his contemporaries made furniture.Mack Headley, Jr. , was master cabinetmaker here for threeyears; Salisbury had been his apprentice. When I went to seeHeadley at his shop in Winchester, Va., I learned why he hadleft. At Williamsburg he'd been able to study many fine originalpieces of furniture, and had come to understand them.<strong>No</strong>w it was time to apply what he had learned.Headley, 29, is a third-generation cabinetmaker. The familyshop produces several hundred pieces of period furniture ayear, including custom work and restorations. At its largest,when run by grandfather Boyd Headley, Sr. , the shop employed14 people. <strong>No</strong>w it's seven people, producing soundfurniture in factory , volumes and at factory prices-in theshop outside the house. "We used to build everything," saysBoyd's son, Mack, Sr. "We're a little more specialized nowthan my father was. I draw the line at Victorian stuff, hedidn't draw the line anywhere." Mack, Sr. , tells of the transformationof Empire . chests: "We used to take Empirechests-my father would get a truckload for $10 apiece-andwe'd cut off the bonnet drawer and get rid of the panel sidesand replace those turned feet with bracket feet and carve in acouple of quarter-columns and we'd have a Chippendalechest. 'Add a hundred years to . the piece and a hundreddollars to the price,' my father used to say. Once a man gotthe hang of it, he could do one in 24 hours."Mack, Jr. , did not return to the family business upon leavingWilliamsburg. "Dad and I JUSt have different ideas aboutfurniture," Mack says. "It takes me ten days to make a chair;it takes him two. We're both happier in separate shops."Mack, like his father, wa brought up using machines to makefurniture. It wasn't until he went to Williamsburg that he didmuch handwork. "In joinery and in carving especially, whenyou make an exact reproduction, you commit yourself tolearning how the maker used his tools. The better you understandthat, the better the reprodw;tion you can make. A lotof people getting started ue anxious to declare their independence,not willing to put themselves aside for awhile to studyhow early craftsmen worked. If you try to be too creativewhen you do a reproduction, you're going to miss a lot ofwhat it has to teach you; it's very much a learning experience."Headley's reproductions are each true to an individual style(see box, below) . Variety is a matter for customer relations:"What do you enjoy in your furniture?" he asks. "If a customerhasn't come to me with a particular piece in mind, orwith a photograph, I ask if it's high-style or country that appealsto him, if he wants the piece to depend on its sculpturalqualities or on its carving. You have to decide when you starta piece what you intend to be its graces. Period furnitureforms are well established. Variations within them, therefore,allow for subtle effects. One chair will stand out because of aslightly more forward cant to its legs, and this calls attentionto the splat, which can be shaped to direct the eye to a particularlydelicate crest rail. You don't appreciate a lot of thesethings until you put two chairs next to one another. Then theoverall similarities make the differences more pronounced."I show Emmett's work to Headley. He has seen full-blindTwo reproductionsThe sidechair (right) that I reproduced from a piece by Peter Scott(1694-1775) shows how strongly he was influenced by early Georgiandesign , even after he'd lived thirty years in this country. The emphasisis sculptural; the carving flat and subordinated to gently rounded,reflective surfaces. The cabriole leg satisfies a restrained and sobertaste, ending in a flattened ball and claw that suggests weight.The armchair (left) is my interpretation of a pattern popular withhigh·style Philadelphia chairmakers in the early 1770s. The curvesare freer and defined by elaborate carving that plays a larger role inthe design. The leg is curvier and stands higher and lighter on itsball. The claw itself is tense with sinews and bones, yet because thetransition to the ankle is more gradual and the final shape closer tothe original blank, this foot is easier to carve than a Scott foot.In construction, the Scott chair has the rail running behind thekneeblock rather than above it, which allows an extra :r. in. for themonise-and-tenon joint between the leg and rail . The Scott kneeblockis also supported by glueblocks absent from the later Philadelphia-stylepiece.-Mack Headley,Jr.39
Eu g ene Landon, left, among some of his 500 molding planes andother 18th-century tools. The underside of one of his reproductions, aChippendale armchair, above, reveals how closely he copies theonginal textures.dovetailed bracket feet among the more demanding constructionsat Williamsburg. He does not disagree with Emmett'stechnology, but raises the issue of context: "For extra workand extra time, you have to have a patron who is willing topay. Here in Virginia there was an old moneyed aristocracy,very conscious of what was currently fashionable in Englandand expecting the more elaborate English constructions. Sothat's what cabinetmakers here were paid to produce. In NewEngland, they had to use less time-consuming constructionsbecause the newly moneyed merchants there wouldn't payotherwise. There are records of English cabinetmakers whotried to establish themselves in Boston and just couldn't doit. The imporrant thing is to understand that there werereasons for pieces to have been produced the way they were."Later that day Mack's father put it this way: "A lot of peoplewould dearly love to be artists for a living. But I haven'tfound enough people who'll pay for pure art."* * *Almost a year after receiving the letter from Grover Floyd Idrove up to Eugene Landon's place in Montoursville, Pa. Itwas raining. The driveway was mud, and piled in the mud,uncovered to the rain, were flitches of walnut and cherry. Afew of the walnut pieces were crotches with curly sectionsmore than 15 in. wide. The cherry boards were 12 ft. long.All were dripping with rain, thoroughly wet. Most of the sapwoodhad deteriorated and was crumbling off. One cherryflitch had a check 3 ft. long, right up the middle.I'd first seen Landon's work in photos of the AppalachianCraft Center show (back cover, F WW #2 1, March '80). HisQueen Anne side chair looked intriguingly old. The surfacetexture, the joint lines, its presence seemed not typical of a reproduction,certainly not a recent one. Yet it was.After I wipe the mud off my feet, I learn that Landon hadbeen for 20 years a paint and varnish chemist, though he'dbuilt and restored furniture as a hobby and parr-time businesssince he was in high school. Six years ago he left his jobto do it full time. <strong>No</strong>w, never having adverrised, relying solelyon referrals for business, he does 40 to 50 pieces a year,about half of which are restorations. "People from all overbring me their basket cases," he says. "But I've been very fortunateto work on some of the greatest pieces of furniture inthis country. That's how I've learned. Old pieces have asoul-they'll talk to you, if you listen. It's amazing how consistentthe old guys were once they found the right way to dosomething. I find it creative to figure out how a piece wasdone, retracing the steps the maker must have gone through."He points out scribe marks on an old chair. They show howinvariably the marking-gauge fence was placed on the outsidesurfaces to ensure visual balance despite stock that was notuniform in size. "I used to work from photographs," he says,"but no photograph is going to show you the little things, themark of the hand that gives a piece its character. So the piecesI get in for restoration, they're what I copy and learn from,though if ! copied all I wanted to, I wouldn't have time to dothe work they're in here for. Actually I'd like to cut bak onmy restorations, so I can build more. But I can't, they're mysource of learning ...So I am talking to yet anotl}er student of 18th-century designand construction whose textbook is the doing of it.Emmett, unable to directly contact the furniture he was reproducing,idealized its construction. Ionson's improvementsare more modest, though no less technically modern or sophisticated.Mack Headley J r. 's craftsman-scholarship is mostsensitive to the historic and aesthetic identity of the pieces hecopies. Landon's attentions take him close to anachronism.He doesn't use sandpaper. He owns and uses more than 500wooden planes, having sold his shaper long ago because "youdon't get the little tear-out or imperfections the old guysdid." His other power tools. he expects similarly to get rid of;he uses them rarely and always obliterates their markings withtraditional hand tools. If the glue blocks in an original weresplit or hewn out with an ax, Landon gets out his 18th-centuryhatchet. The result is a piece that, as Ionson might say, israther rough inside. I ask Landon about the constructionalshorrcomings that initiated my search. Does he glue panelscrossgrain to leg posts as they originally were? Of course. Doeshe not expect them to crack? "It delights me when theycrack," he says. "It makes them more authentic."I realize I have come full circle since I met Emmett. As welook out the window of Landon's shop at the dripping flitches,I ask if that's where he dries his wood. "Well," he says, "I'vegot to move that down to the cellar. I've got 10,000 feet ofwood down there and a half-dozen walnut logs in the backyard.I saw all my own wood. What I do is throw it in a pileand leave it there for four or five years. The outside rots andyou can just kick the sapwood off with your foot. It gives thewalnut that good brown color. They used to bury wood in thebarnyard, you know. That's how the old guys did it." 0Rick Mastelli is associate editor af Fine Woodworking.40
, ,, ,_·,L_'''-_-'L_ n n nEDITOR'S NOTE: This centerfold, which we suggest you removefrom the magazine, contains completely detailed measured drawingsof two pieces of blockfront furniture at '/4 scale. On this sideof the sheet is a Newpon-style slant-top desk. On the other side isa Boston-style chest of drawers. Both are authentic reproductionsexternally, but their internal construction has been modernizedin the manner described by the designer, Eugene Schultz, in theanicle beginning on page 47.We've published Schultz's drawings this way to avoid discontinuitiesbetween pages, and to keep the scale accurate. You canpick off dimensions with dividers and a scale, and you can enlargeeither drawing to fu ll size by the usual draftsman's means, orphotographically. Full-size blueprints, made directly from theoriginal drawings, can be purchased from Schultz at Boston Cabinet-<strong>Making</strong>,Inc., 27 Kingston St. , Boston, Mass. 02111.41
IIIIIIIIIIIII----iI ,)( '\ '\II! ()1 IBLOCKFRDNTCHEST OF DRAWERSBostoq A'e ..o.-.. W" 'c l7 05*2 -2o-97842
-----i_- -_- -_- -_- _- - -_-_- -_- -_- -_- -_--_- -_- -_- -_-_- -_- -_- -_-_- -_- -_- -_- -_- -_- _ - - _- -- II----)..)r\.x-----++--+-".====P'/\L __ r--Jr- ,ILII :r--J I IL--1r---.J I ,l:_7--J , :; :( ,; I : ;iI"-r- ---(:F- , : : ; I IY. in-. =1 in.I ! :I__--I---L , t"---r--I'--r--r--'- - -43
I II IIz: :gr\.9$"" c 0 '"U' 7", I I I t I I I II-------
The BlockfrontIts development in Boston, Newport and Connecticutby Margaretta M. Lovelllockfront casepieces (chests of drawers, slant-front desks,B kneehole desks, high chests, chest-on-chests and deskand-bookcases)were made in great numbers in New Englandduring most of the 18th century. There are many variations,even within regional characteristics, but all of these blockfrontsexhibit an undulating facade made up of three verticalblocks: cwo of them convex and one concave. These act visually(along with a proportionate decrease in drawer widthsfrom the bottom to the top ' of the piece) to give thesecasepieces a sense of lift as well as a sense of plastic complexity.The blockfront is an expensive and showy design (theblocking is usually carved out of a single piece of primarywood) and many of the pieces are among the finest Americancabinetmakers have produced.Characterized by sweeping curves, rational symmetryclosed composition and a general richness of effect,blockfronts represent a distinctly native interpretation ofBaroque (or Queen Anne) aesthetic ideals. Although thegenerating design principles originated in Europe, and anumber of English casepieces exhibit a thin and tentativevariety of blocking (see M. M. Lovell, "Boston BlockfrontFurniture" in Walter Muir Whitehill, ed., Boston Furnitureof The Eighteenth Century, Colonial Society of Massachusetts,Boston, 1974), no specific prototype exists. The blockfront,it seems, is an American invention.Three areas are noted for their blockfront casepieces-Boston,Newport, R.I., and the Colchester region ofConnecticut. Each of these areas produced a distinct"school," represented by a fairly consistent set of compositionalprinciples, decorative motifs and habits of construction.The dynamics of regional characteristics are not well understoodbut clearly the ties of kinship, the phenomenon ofspecialist craftsmen and the force of apprenticeship trainingencouraged the establishment and repetition of distinct regionaldesign vocabularies.Boston seems to be where the blockfront originated, for theearliest signed and dated example (1738) was made there. Althoughnoted for their richly varied forms and decorativefeatures, Boston blockfronts nevertheless have basic things incommon. The example illustrated in figure 1 will serve as anarchetype. Its primary wood is West Indian mahogany (usuallydarker in Boston examples than in those made to thesouth) , and its secondary wood is white pine (native toMassachusetts and imported from Maine since early in theFigure 1.Figure 2.Fig. 1: Boston chest, mahogany, pine and poplar, 31'12 in. by 33% in.by 207/8 in., 1755-1790. Courtesy Yale University Art Gallery, MabelBrady Garvan collection. Fig. 2: Newport chest, mahogany andtulipwood, 34'12 in. by 364 in. by 19 in., made by John Townsend,1765. Courtesy The Metropolitan Museum of Art, Rogers Fund,1927. Fig. 3: Connecticut chest, cherry and pine, 354 in. by 40 in.b y 20 in., 1765-1790. Courtesy The Henry Francis du Pont WinterthurMuseum.Figure 3.45
Boston pieces, as at left, follow the English practice and typicallycover the slzding dovetail that joins drawer divzder to carcase sidewith a thin strip of molded wood nazled on. In most pieces thedrawer divider does not go all the way through the carcase side, andso the joint is completely concealed Newport pieces, as at right,display the sliding dovetat/. The pins of the drawer dovetads are thinand precise. Courtesy Yale University Art Gallery, Mabel Brady Garvancollection.18th century) . Its feet are of the straight bracket type(although shon cabriole legs with c1aw-and-ball feet arealmost equally common on Boston examples) . A decorativedrop, which is not found in pieces from other regions, usuallypunctuates the bottom line of the piece at its midpoint. (Thisfeature, absent on the piece pictured in figure 1 on the previouspage, is shown in the drawing below:) The drawerdividers are joined to the carcase sides with a full sliding dovetail,sometimes cut all the way through so that the end grainof the dividers is visible on the sides of the chest. Usually athin strip of mahogany, bead-molded on its inner edge an9nailed to the front edge of the carcase side conceals the joint.With the bottom drawer removed, a giant dovetail is visiblebehind the central concavity where the mahogany bottommolding is joined to the white pine carcase bottom. The juncturebetween these two parts is in one plane.By contrast, Newport blockfronts are usually made oflighter, redder mahogany, and the grain of the wood is an im-portant feature of the design (figure 2). Secondary woods arecharacteristically chestnut (on the back of the carcase) andtulip poplar (the drawer interiors) . The feet are invariably ofthe ogee bracket type; its gentle waving line complements thethree-dimensional curves above. Carved shells, a feature notfound in Boston examples, terminate the columns of blocking.The convex shells are almost always applied. Rather thanconceal the joint between the drawer dividers and the case,the neat and precise dovetails that anchor the case togetherare clearly visible on the facade-one of the rare instances ofjoinery being used for decorative effect in an 18th-century design.And instead of the thin, abrupt top common to Bostonchests, Newport cabinetmakers modified this transition fromvertical to horizontal by a series of wide compound moldings.Behind the mask of these moldings two boards of secondarywood run under the top, one at the front, the other at theback, half-blind dovetailed into the carcase sides. The top isglued to the front member and cleated to the back memberby means of a neat, sturdy butterfly, visible from the back ofmost Newport chests of drawers. This method of constructionfixes the top at the front, allowing it, without warping orcracking, to expand and contract at the back. (The tops ofBoston pieces are put on in a variety of less ingenious ways,including glue blocks, nails, and, in some cases, slidingdovetails at the top of the carcase sides.) Another obvious difference from the Boston pieces is that Newport blockfrontshave no giant dovetail in the carcase bottom. The lower rail,shaped in front to repeat the line of the blocking, is straighton its back and often buttressed with a 2-in. or 3-in. widestraight piece of secondary wood in the same plane. The actualcarcase bottom is about 2 in. below this piece, flush withthe bottom of the molding.In general, Newport blockfronts are renowned for the neatnessof their construction. Impeccable drawer dovetails havethin necks, and the complicated moldings and the beading inthe dovetailed drawer dividers are finely mitered. The consistencyin quality of craftsmanship is matched by an almostequal consistency in design. The Newport school was obviouslya tight network of individuals who-once the originalNewport formula was established-stuck to variations on themajor theme from the 1760s until the early 1800s. Althoughalmost a hundred cabinetmakers worked in Newport duringFastening of the top.Newport contructionBottom-rail/ carcase-bottom constructionCarcasebottom--+-til_---::"....Y---------Z___ IGiantdovetail-1t¥$CarcasebottomBottomrail<strong>No</strong>te: Few Newport pieces have been taken apart for examination.This drawing is partly conjectural.46IIluslratlons: Ric LopC'z
this time, all the signed or labeled blockfronts that have survivedwere made by members of the Townsend family. Thereis evidence that Edmund, John and other family memberscollaborated on blockfronts-either side-by-side in theirsmall shops or separately, each man working on his specialtyin his own shop. Almost all the Newport blockfronts bearelaborate directions (in 18th-century calligraphy) indicating"front top," "left side," etc., on the designated member, orA, B, and C on drawer series. Perhaps the craftsman neededto remind himself of his parts, but it is more likely that thesenotations were made to communicate between craftsmen.Such assembling instructions are absent from the interiors ofBoston blockfronts, which-judging by the seven signed anddocumented examples-were made by individual craftsmenin widely separated places and not linked by the tight kinshipsystem that characterized the three generations of Newport'spremier cabinetmaking family.Such cohesive cooperation is not evident in Connecticutblockfronts (figure 3), which, if we may judge from survivingexamples, were exercises in eccentric individual interpretation.In general, Connecticut blockfronts follow Newport,not Boston, in design and construction. The Newport shellcappng the blocked areas, the ogee bracket feet, the wide topmolding, the straight, internal front of the carcase bottom,are all carry-overs from Newpott to neighboring Connecticut.However, significant differences are even more apparent. Asin most Connecticut furniture, even for these expensive,showy pieces, the primary wood is cherry stained to resemblemahogany rather than the imported mahogany favored inMassachusetts and Rhode Island. The secondary woods arechestnut and tulip poplar as in Rhode Island, but pine is alsoused. Together with ogee bracket feet, short cabriole legs withclaw-and-ball feet are common. Drawer dovetails are morewidely spaced and less elegantly made, and secondary pieces(such as drawer bottoms) are often heavy and chamfered attheir edges. But most characteristic of Connecticut is the varietyof forms and arrangements attempted within the basictripartite blockfront arrangement. The piece shown in figure3 has, for instance, heavier feet than the Newport typewith an extra energetic curve on the bracket. The classical vocabularyof Palladian architecture, which underlies the proportionsand motifs of all the furniture of this period, hasbeen stretched here to produce a non-Renaissance effect. Theflanking pilasters lack both base and capital while the dentilcourse at the top is doubled; oddest of all, the base moldingis also ornamented with a dentil course.Made by and for a pragmatic people, blockfronts exhibit anunusual disregard for expensive materials and timeconsuminglabor. That they existed in such numbers anddeveloped such complex forms over such a long period oftime and over such a wide geographical area attests to thepower of the design to satisfy the self-image of a largenumber of customers, both rural and urban. The style wentthrough an adventuresome investigative period in Boston(1730 to 1780), moved into its classic phase in Newport (1760to 1800) and then experienced a second, more mannered, inventivestage in Connecticut (1770 to 1815). Throughout, itretained its original appeal as a design based on rational symmetryand plastic, tactile richness of form. 0Margaretta Lovell is an acting instructor in the Art Historydepartment at Yale University.. Building BlockfrontsImproving traditional constructionsby E. F. Schultzlockfront furniture has always been regarded by antiquariansand craftsmen alike as a unique, beautiful andBimportant American decorative-arts creation. Students of furnitureand design admire the blockfront for its boldly sculpturedform, its fine proportions and its superlative moldings.This article attempts to deal with some of the demandingconstructional features particular to Boston and Newport(R.I.) blockfront furniture. The cabinetmaker today can constructperiod reproductions either exactly like the original inevery detail or with modifications, incorporating contemporaryimprovements in the joinery without visually altering thepiece's magnificence. I choose to improve the constructionwhere time has shown the originals to have shortcomings.Before beginning, it is important to note the complexity ofthese designs and the meticulous execution they warrant. Beprepared to spend several months in a well-equipped shop tocomplete a blockfront like the ones discussed here. A timeconsuming,but indispensable, first step is to draft full-scaleplans. They indicate the relation of all the parts, their joineryand detailing, and thus prove whether or not your plannedmethod of construction will work. In effect, once you havesuccessfully completed a set of plans, you will have mentallyassembled the piece of furniture. The plans are then a recordof information often not easy to recall in the midst of actualconstruction. They also can be elaborated upon in designingmore sophisticated pieces. I prefer full-scale plans when thesize of the piece permits, as you can measure from themdirectly and use them to make and check templates.Much of the beauty of blockfront furniture is attributed toSchultz 's reproduction of a Boston block front chest of drawers,40 in. by 35% in. by 22'h in., Honduras mahogany. Plans for thispiece and fo r the Newport block/rant slant-top desk on the nextpage appear as a center insert, pp. 41-44.47
Fig. 1: Newport case constructionCarcase dovetailedtogether inusual fashionDetail of slot screwing#12 screwI----'-.::t frl "",,:::O::
feet themselves, cutting several short glue blocks instead ofone long one should keep the deleterious effect of woodmovement to a mInImum.The entire base has now been assembled as a separate unit.The bottom surface of the case and the top surface of the baseframe should now be trued with a plane and straightedgeprior to slot-screwing the base into place. I use a Starrett36-in. straightedge because of its heft and resistance to-bending.Slot the screwholes in the center and rear of the baseframe only; thus the carcase is fIxed to the base frame at thefront and allowed to expand and contract at the back.With Boston blockfronts the suggested construction for attachingthe base molding must differ somewhat from theNewport style because of the absence of a drawer divider betweenthe bottom drawer and the molding. This, along withthe absence of a drawer divider between the top drawer andthe carcase top, gives the Boston chest a more starkly linearappearance. The joinery for constructing and attaching thebase on the Boston blockfront is more complicated than withthe Newport sryle, but the principles are the same (fIgure 2).A major difference here from the Newport construction isthat the base, once installed, is not removable. The moldedbase front, incorporating its giant dovetail, is glued permanentlyto the case bottom's leading edge.' The base sides arethen glued to the front of the base with a lap miter joint.Thus the base molding is held secure to the front of the case,allowing the carcase to move in slotted screwholes from frontto back. The rear rail of this base "cradle" is fitted and lapjoinedto the base molding sides after the sides are screwed tothe bottom of the case. This sequence is followed to ensure atight fit between the case sides and the I-shaped, moldedbase sides. The bracket feet are applied to the base in thesame manner as in the Newport blockfront, using segmentedglue blocks. When completed, and even with the bottomdrawer removed, unless one looks underneath the Bostoncase, it is not possible to differentiate this type of constructionfrom the original.Because the wide boards, whose movement we have beentaking into account in our construction, must also be an integralpart of a sturdy carcase for supporting the large, sculptureddrawers, the joinery between drawer dividers and carcasesides deserves attention. Newport pieces traditionallyhave exposed sliding dovetails with cockbeading on bothdrawer dividers and carcase sides. Boston pieces usually coverthe drawer-divider dovetails with thin cockbeaded scrips ofwood the length of the carcase sides. In both Boston andNewport blockfronts there are no dust panels. The periodpieces, for the most part, have drawer runners dadoed andglue-blocked to the carcase sides, a crossgrain constructionthat can result in cracked sides.I prefer to incorporate dust panels whose frames providemore than adequate drawer support while allowing the runnersto float free of the carcase sides (figure 1). The extra timeand stock required for this construction is negligible whencompared to the sturdier, more durable and more finishedpiece that results. Figures 3 and 4 contrast the Newport andBoston-style joints between carcase side and drawer divider.The cockbeading and its mitering in both cases present aspecial challenge in fine joinery. 0Gene Schultz, 34, butlds custom furniture at Boston Cabinet<strong>Making</strong>, Inc. , in Boston, Mass.Fig. 2: Boston case constructionSectionbase SideoI ff 11 .A giant dovetall joins Boston-style base frame to carcase bottom.Fig. 3a: Stages in cuttingNewport drawer dividerFig. 3b: Stages in cutting Newport carcase sideFig. 4: Boston drawer dividerEdge stripII;1Use tenon to locate do vetail whenscribing it to carcase edge.3I,CompletedjointWith edge strip removedUse stub to locate..-".....-T.·dovetail whenscribing it tocarcase edge.IICompletedjoint49
Variations in 18th-Century CaseworkSome 'old masters' built better than othersby Wallace B. Guslerome people, in their reverence for the .. old masters,"S believe the 18th-century furniture makers knew all andcould do no wrong. Others claim that traditional excellence isa myth. The truth is that furniture construction in the 18thcentury varied almost as much as style-both constructiontechniques and style can be spread on a spectrum rangingfrom London high-style to English and American urban andprovincial, to rural, and to non-professional folk art. Thestyle and construction of a particular piece of furniture was affectedby the economic and commercial conditions prevailingat the time and place it was made, as well as by the professionaland ethnic background of the maker. Patronage was extremelyimportant-provincial furniture was supported byprovincial patrons, who were either ignorant of more sophisticatedproduction, or else unable or unwilling to pay what itwould have COSt. Generalized statements praising or criticizing18th-century furniture construction do not considerthe varieties of context, and are not very useful.In the English-speaking portion of the 18th-century world,London was the center for both stylistic and technological developmentsin cabinetmaking as in most other fields. ThoughContinental developments did shape London cabinetwork, inconsidering American furniture, it is London's leading rolethat is most important. Proclaiming American furniture superiorto English examples, as patriotic curators, dealers andstudents have done, represents an inversion of values. Themost highly developed construction in chairs and case furnitureknown from Colonial America was produced in Williamsburg,Va. -not because of any American technologicaldevelopments, but because cabinetmakers there followed thehighest levels of London style and technology. And what fosteredthis extraordinary production was the advanced economic,political and social status of Colonial Virginia.Wealthy patrons there were attuned to London's cultural lifeand demanded the latest London styles and technology.Case pieces attributed to the shop of Peter Scott(1694-1775) of Williamsburg are of outstanding construction,and possess features not found in pieces from otherA: Desk-and-bookcase, attn'buted to the Peter Scott shop in Williamsburg, Va., circa1760. Walnut, poplar, yellow pine (md beech; 900/4 in. by 44'h. in. by <strong>23</strong>'h. in.B: Carcase construction of the Scott desk-and-bookcase is modeled after English techniques,using full, thin Justboards with kicker strips below. C: Lower portion ofa Bostonchest on chest, circa 1760, has drawer runners nailed directly to sides and one fu lldustboard. A crack is visible at the bottom of the carcase side, and the dovetail ofthemiddle drawer blade has been forced out from the carcase edge; both defects are theresult of troublesome crossgrain construction.cPhoros; Delmore A.Wenzel; Counesy Colonial Williamsburg
nial Philadelphia and to some extent in other areas. During theFederal period it became common in American production.The range of construction techniques in 18th-century furniturecan also be seen in carcase base-moldings and bracketfeet. Scott of Williamsburg followed advanced London practice.He glued base moldings to a series of secondary woodblocks, which were in turn glued to the bottom of the case(photo F). The base molding is not attached directly to thecarcase, but overlaps it by Y16 in. to in.-just enough toprevent a visible gap. This arrangement allows the case to expandand contract without great stress developing betweenthe sides and the molding. The gaps between the blocks addsome flexibility, and since the blocks are smaller than thesides and bottom and made of a weaker secondary wood (pineor poplar, usually), they give way fIrst.Scott's base construction is rarely found in other areas ofColonial America. The most common systems are of twotypes, both of which present shrinkage problems. In one system,the base molding is glued and nailed directly to thesides of the carcase. In the other a wide frame is glued andnailed to the case bottom, the nails often driven through andclenched. These batten frames are sometimes made entirelyof primary wood whose edge is molded, but more commonlythe primary-wood molding is nailed and glued to a frame ofsecondary wood. Both of these systems restrict the movementof the crossgrain sides, causing them to crack.Bracket-foot construction in Scott's shop has two sophisticatedfeatures unknown in cabinetwork from other Americancities. Both features can be found in production from majorLondon establishments. The ogee bracket feet are formedfrom two-ply laminated boards, the outer portion of primarywood (walnut or mahogany) and the inner of yellow pine.This two-ply composition provides two grain patterns at theweakest point, where the ogee curve swings inward, thereforeF: Bottom of the Scott desk-and-bookcase in photo A shows the Englishmethod of applying moldin g to segmented glue blocks instead of directly tothe carcase side and front. Th is system allows the carcase sides and bottom toexpand and contract without cracking.G: Typical bracket-/oot construction, as in this view of theMassachusetts slant-top desk, (also shown in photo D) employs acomer li lue block with the grain running perpendicular to thegrain oj the bracket members. Cracked bracket fe et are common.<strong>No</strong>te that the base-molding/lue blocks run a/I the way into thecomer, unlike the glue-bloc construction shown in photo F.H: Bracket foot of a Scott bookcase, above, and of a Londonmadechina cabinet, nght, both show composite glue-blockingand laminated bracket members: pn'mary wood on theoutside and secondary on the inside. These two features, unknownin combination in American shops other than Scott's,have ensured exceptionally good sllrvival of his bracket feet.52
helping to prevent fracturing at this critical location. Additionally,the softer secondary ply provides a resilient core thatenables the foot to withstand greater shocks without breakingthan if it were constructed entirely of hardwood.The essential strength of the 18th-century bracket foot isthe glue-blocking inside its corner. In the better pieces, theweight of the case is on these glue blocks and not on thebrackets. The blocks are directly below the corners of the case,while the brackets are directly below the base molding. Inpieces where the weight is taken by the brackets, the basemolding is often broken loose, allowing the case corner toslide downward. The typical glue-blocking in bracket feet ismade up of a square, vertical piece glued into the cornerformed by the two brackets (photo G). The grain is perpendicularto the horizontal grain of the brackets. Excessive or suddenchanges in relative humidity can cause the brackets toshrink, often breaking the glue joint since the block does notshrink in like amount. In some cases the glue-block jointholds and the brackets split at their weak point where theogee swings inward. After splitting, each segment shrinksunto itself, leaving a gap at the fracture point.Another defect of this construction shows up when the caseis moved. If slid along the floor, the foot glue block is liableto catch on an uneven area and snap off.By the mid-18th century, a composite glue-blocking techniquethat solved these problems had evolved in some Londonshops. Composite glue-blocking consists of several layersof secondary wood blocks stacked one on the other to buildup a vertical foot block. All the grain in the glue blockingruns horizontally, parallel to the grain of the bracket itself. Inaddition, the blocks are stacked crossgrain, which alternatesthe grain orientation at the joint between glue-block andbracket-foot member to provide long-grain gluing surfaces toeach side of the bracket. The layers are also face-gluedtogether, producing an extremely strong foot (photo H).Scott's pieces combine this feature of foot construction withthe laminated bracket, and his is the only American shopknown to do so. Several other Williamsburg shops usedcomposite-blocked feet, as did some in <strong>No</strong>rfolk, Va., andAnnapolis, Md., but to my knowledge, this construction doesnot make a single appearance in the furniture of Boston,Newport, New York, Philadelphia or Charleston.In summary, if it is to 18th-century American furniturethat the craftsman and designer look for instruction, it is wiseto realize that there were various construction methods as wellas levels of sophistication. All American production is an offshootof the English techniques that were most highly developedin London. The transition to America involved someloss or distortion of the original systems. Cabinet shops producingfurniture closest to London in style and constructioncentered in Williamsburg. According to the degree of sophisticationin typical case constructions, the other centers range,from high-style to provincial, as follows: Charleston, Philadelphia,New York, Newport, and Boston/ Salem. Othercities should be in this list, but their production has been toolittle studied to reach definitive conclusions. 0Wallace Gusler is curator of furniture at Colonial Williamsburg.His book, Furniture of Williamsburg and EasternVirginia, 1710-1790 (Virginia Museum of Fine Arts,Box 7260, Richmond, Va. <strong>23</strong>221, $24), covers in detail theproduction of the Scott and other Virgina shops.Post-and-Panel ChestsA 19th-century designby Jim Richeyxperts on antique furniture usually advise, "Buy it andE leave it alone." They didn't see the 140-year-old chest ofdrawers we brought home. Once sturdy and clear-finished, itwas wobbly and covered with ugly paint. A previous ownerhad cured its loosened joints by driving nails through thecheeks of the mortises. Proper restoration had to start withcomplete disassembly.While rebuilding, I realized that the post-and-panel constructionof this unadorned country antique is really quitesophisticated and deserves to be better known. It is strongand handsome, and not likely to crack apart over the years.Hundreds of these chests survive: They were made throughoutthe Ohio River Valley states, of local hardwoods by villagecabinetmakers who cared more for function than for fashion.The post-and-panel chest is designed to cope with seasonalhumidity changes and long-term panel shrinkage withoutdamage. All the critical dimensions of the chest are determinedby long-grain members-posts and rails. Built like apost-and-beam barn, the chest is strong enough to handle thestrains of cross-country moving. Yet, there are disadvantages.The joinery is difficult, the material list calls for more andthicker wood than slab-sided construction and the finishedchest seems to weigh a ton.The old chest shown on the next page is 44 in. high,44Yz in. wide and 20Yz in. deep. The top, front and sides aresolid cherry. the back, drawer sides and drawer bottoms arepoplar. The side panels are 16 in. wide, cut from a singleboard. <strong>No</strong>wadays, unless you have access to unusually wide,clear stock, you would have to glue up two boards for the sidepanels. It is also perfectly acceptable to construct two (ormore) panels per side with a stile between that's mortised intothe top and bottom rails. Authentic 1830 panels are flat onthe outside, beveled on the inside. The bevels can be turnedto the outside for an attractive, if not authentic, effect. Aswith all frame-and-panel construction, the panel is leftunglued in its groove, free to move as humidity changes.If you decide to adapt the post-and-panel design to a chestproject, carefully cut and dry-fit all the joints first. The mortise-and-tenonjoints where rail meets post are crucial to astrong chest. Single tenons on the ends of the rails will work,but divided tenons mated with divided mortises are strongerand not much harder to make. Drawbore and peg the mor-.tise-and-tenon joints, if desired, to gain extra strength and toreduce the number of clamps needed for assembly. Don'tsubstitute one horizontal tenon for the two vertical tenonsshown in the sketch at the ends of the drawer dividers; a horizontaltenon here won't hold, and it will weaken the posts.Don't try to glue up the carcase all at once. First glue upthe more complex side assemblies. The drawer-guide supports(with the drawer guides yet to be screwed on) need notbe glued in; the post-and-rail frame will hold them in. Withthe side assemblies done, you can glue up the back or leave it53
Post-and-panel chest constructionDrawer-guidesupportT 10t6t 7f 9JVerticaldoubletenonPost- and-panel chest ofdrawers, cherry and poplar,circa 1840, left, and a contemporaryvanation on thetheme, n'ght, which includescentral side stlfe, panel bevelsturned out, and bracket,instead of turned, feet.unglued and fit it into the side assemblies piece by piece. Thebest way to assemble the whole carcase is to lay one of thesides on the floor and fit the back rails, panel, and frontdrawer dividers into the posts. Then fit the other side ontothe other end. Turn the carcase upright, clamp it togetherand glue in the top drawer divider, which is dovetailed intothe posts. With the carcase completed, the drawer guides canbe screwed in flush with the drawer dividers. The guides willwear in time and so should not be glued, making theirreplacement easier.Fasten the top to the frame with screws through screw-pocketscut in the top side rails. The screw holes should be largeenough to allow for some movement of the top. If the top iswarped, put the concave side down to reduce gapping at thefront. After the frame is together, cut the drawer parts to fitthe drawer openings. Use traditional drawer constructionwith dovetailed corners and solid, beveled-panel bottoms.Most antique chests have a turned foot at the bottom of thelegs ending at the floor with a ball. If you prefer moldedbracket feet to turned posts, just rabbet out a portion of theface and side at the bottom of the front posts equal to theheight of the foot. Fasten the bracket foot below the resultingshoulder with screws from the back. Since part of the posttouches the floor and backs up the feet, the arrangement isquite strong. 0Jim Richey, of Ponca City, Okla. , is Methods of Work editoraf Fine Woodworking magazine.54
The Fratne and PanelAncient system still offers inftnite possibilitiesby Ian J. KirbyIllustrations: Ian J. KirbyFig. 1: Section through frame and panel.. If1\ /...I---- "Vcarcely another system in the whole range of woodworkingS has more variation and broader application than theframe and panel. In the frame-and-panel system, pieces ofsolid wood are joined together into a structure whose overalldimensions do not change. The frame is usually rectangular,mortised and tenoned together, with a groove cut into its insideedge. The panel fits into this groove: tightly on its endssince wood does not move much in length, but with room tospare on the sides because wood moves most in width (figure 1).Wood is not uniform and as it moves in response to changingmoisture conditions, it cups, twists, springs and bows. Trappingthe panel in the groove inhibits this misbehavior.Historically, the basic technique that made possible theframe and panel is the mortise-and-tenon joint, on which Ihave already written extensively. The frame and panel is abasic unit of structure. It can be used singly (a cabinet door)or in combination (to make walls, entry doors, cabinets) . Theseveral elements of a single frame and panel may be varied almostwithout limit, and its aesthetic possibilities are infinite.The little choices made during its manufacture are aestheticchoices, and we can begin to see the interdependence ofdesign and technique. Neither the frame-and-panel systemnor its joinery can be thought of as an end in itself. Neitherhas any importance except in application, toward the end ofmaking a whole thing out of wood.To overcome the panel's tendency to distort, we make it asthin as the job will allow, while we make the frame relativelythick. By doing this we haven't significantly altered theamount by which the panel will shrink and expand, but wehave rendered it weaker so that the frame has a better chanceof holding it flat. Panels can be made as thin as 0/1 6 in. butsuch panels were uncommon before the 19th century becausewoodworking tools were not readily capable of such refinement.The thickness of the panel was dealt with in a numberof ways, the most usual being to raise and field it.Generally raising and fielding are thought (0 be the samething-the process of cutting a shoulder and a bevel on theedges of the panel and thereby elevating the field-that is,the central surface of the panel. 1'd like to distinguish betweenthese two terms. Fielding refers to any method of delineatingthe field of the panel from the frame; raising meanscutting a vertical shoulder around the field, which may ormay not be accompanied by a bevel.Given this system for maintaining panel size and shapeagainst the hygroscopic movement of wood, woodworkers inthe past found that the system's elements could be varied toproduce different aesthetic results in terms of form, color,texture, pattern value, proportion of parts, highlight andshadow (figure 2). By carving the panel, we imprint upon itrichness and grandeur. By inlaying it, we make it into a vehiclefor the decorative use of other materials, and by usingmoldings of different profiles, we change the various propor-,,-, ,, IFig. 2: Proportion and patternThe pattern possibilities are infinite. The peg holding the panel on centercan be an interesting detail for the observer to discover- don't let itbecome a cliche. It needn't be taken through to the front of the rails.55
tions within the whole. We can alter the mood of a piece bychanging the panel's attachment to its frame.Within the predetermined dimensions of the frame, therelative proportions of the rails and the stiles can vary considerably,though it is common to find the top rails in a door tobe about two-thirds the width of the bottom rail, and thestiles to be about three-fourths the width of the top rail. Thisisn't necessary to produce an acceptable appearance, butmany woodworkers build doors as though these proportionswere divinely decreed. Altering them within the limits ofstructural. necessity can produce a wholesome diversity of appearances.The proportions of the panel-the dimensions ofits field, the depth of its shoulder, the width and slope of itsbevel-are all subject to considered alteration.For showing off highly figured wood, the frame and panelis excellent. The usual way of doing this has been to resaw thefigured piece and to edge-join the halves into a bookmatchedpanel. Edward Barnsley's desk (FWW #16, May '79) exhibitshow figured wood can be enhanced by a frame. This desk, bythe way, incorporates two different types of frame-and-panelconstruction and shows the discriminating and sensitive useof a frame and panel typical of Barnsley and others, such asGimson and Vals, who were part of the Arts-and-Craftsmovement. Generally, the plainer form of paneling-overlayingit onto the frame-shows a highly figured piece ofwood to its greatest advantage. Raising and fielding can lookfussy when the wood is highly figured.The face of the panel can be treated in countless otherways. You can inlay it with mother-of-pearl, ivory, brass orother materials, or the field can serve as a ground for marquetryor wood inlay. Carving on panels has taken manyforms. English "joyners" of the 13th to 15th centuries imitatedalmost slavishly the tracery and linenfold patterns commonin stonemasonry. It was also common in this period forpanels to be painted with vibrant colors in a variety of abstractgeometric designs. In our own century, Mousey Thompsonadzed the surface of quartersawn oak panels for a mildrippled texture, subtle to touch and sight.I wish contemporary panels conveyed such vitaliry andserved the imagination as well. I'm not saying that we have topaint panels or inlay them or dress them up in other ways. Iam saying that we ought to realize that the panel is an unexploitedvehicle for expression, for there is in fact no woodworkingsystem with as great a potential for individualizationwithin its essential structural features. This invites the woodworkerto explore some of the system's possibilities. Theeasiest way to play with all of these possibilities is to make aFig. 3: Haunched mortiseand tenon is designedfor an unstoppedgroove.RailStilefull-size drawing, or several of them, to help you visualize thecritical relationships between the parts. A further survey oftraditional treatments and manufacture of the solid-woodframe and panel may help contemporary woodworkers to alivelier use of the system.The frame -Designing a frame and panel begins with asectional view of the two parts and a decision about the jointto be used in bringing the frame together. The groove is generallyplaced in the center of the frame stock. If you use asquare haunched mortise and tenon to join the frame, thenthe grooves can be plowed right through the joint without interruption(figure 3). This is no happy accident. The joint wasdesigned for the groove to be continuous, because a plowplane can't cut a stopped groove. When making thehaunched mortise and tenon by hand, the question arisesabout what to do first, plow the grooves or cut the joint. I recommendcutting the mortises and tenons first. If you plowthe groove first, you obliterate the gauge lines on the mortiseand on the inner edge of the tenon. And nothing is more agonizingthan trying to cut an accurate mortise without referenceto gauge lines. Also, it's easy to be tricked into thinkingthat you are cutting the mouth of the mortise at the sametime you plow the groove. You can in fact. But if your mortisingchisel is not exactly the same width as the groove, you'llfind it almost impossible to cut the rest of the mortise in an.accurate way. Using a chisel that is too large or too small, evenby a minute amount, makes cutting the mortise walls an exercisein guesswork and error.If you wish to use a mortise and tenon of the slopinghaunch type so that the joint shows an uninterrupted straightline, then some means of stopping the groove must beemployed. This is quite easily done on a router, shaper or circularsaw by the use of end stops.Another aspect of the frame that deserves attention is theprofile of its inner edges. Since standard shaper knives are frequentlyused to make molding and scribe cuts in rails andstiles, I'd like to describe the less common practice of chamferingthe inner edges. It creates a boundary that is decisiveand bold, not busy or blurry like poorly conceived moldings.There are three conventional ways to chamfer the inner edgesof the frame, two of which require redesigning the joints.The simplest way is to assemble the frame dry and cut a 45°chamfer with a router, using a bit with a ball-bearing pilot.The cut will be rounded in the corners (figure 4) but can besquared up if desired with a sharp chisel to form what is calleda mason's miter (figure 5). But if you want the line of thejoint and the outer edges of the chamfer to form one continuousline, then more refined joinery is called for. The firstmethod involves cutting the tenons on the rails as if you weremaking a long-and-short-shouldered joint (figures 6 and 7).Cut the mortise in the conventional fashion, and then chamferthe inner edge of the stile. To accommodate the chamfer,the long shoulder of the tenon is beveled inward from theshoulder line. A variation of this method also leaves the lineof the joint and the outer edge of the chamfer uninterrupted.But instead of beveling the underside of the long shoulder onthe rail, you remove a section from the face of the stile toaccommodate the long shoulder. Then the chamfers on bothrail and stile must be mitered to fit (figure 8). <strong>Making</strong> thisjoint requires careful measuring and marking with a mortisegauge and cutting gauge. Chiseling should be done across the56
Fig. 4: To bring the chamfer around the corner in a 90°arc, cut most of the bevel before assembly. The cornerround should be completed after gluing up because ofthe fragile short grain on the rail.Fig. 5: Mason's miter brings vertical and horizontal chamfers together.The disadvantages are that the chamfer does not line up with theshoulder of the joint and a little triangle of end grain spotlights themitered corner.Fig. 7: Plan of stile/rail joint showing original line of shoulder beforeundercutting.Scribing lineOriginal shoulder lineFig. 6: Beveled or scribed version of long-and-short-shouldered mortiseand tenon permits precise alignment of joint and chamfer lines.Fig. 8: Another variation of long"and-short-shoulderedmortise and tenon demands care in marking out to get thejoint to close properly and the miters to meet on a line.grain, and the mouth of the mortise plugged with a softwoodblock to prevent the tissue from splintering out.Don't sand the chamfer if you wish to retain its crisp edgesand the fine texture of its tooled land. Sandpaper rounds andsoftens these critical light-reflecting angles and faces. Youmay try sanding, and even get an apparently satisfactory lookuntil the finish is applied, but then you will find the crispnesslost and the clarity of the land muddied.Yet another variation in the design of the frame is not touse grooves at all, but to lay the panel in a rabbet cut into theedges of rails and stiles. The panel is retained with an appliedmolding on the show side of the work. Some might think thismethod to be a good example of bad workmanship, but it iswell suited for some types of work, including those usingmodern materials. It's worth noting that much of the traditionalframe-and-panel joinery was done this way.The panel - When thinking about the design of a panelthree possibilities are available: a fielded panel, raised or not,an unfielded panel and an overlapped panel. According tothe type of design you choose. you must consider variablessuch as the size of the field relative to the frame dimensions,the width and slope of the bevel. the depth of the shoulder,and the treatment of the field (carving, inlay, figuredwood)-all of which combine to determine the finished look.You can field a panel without raising it by cutting the bevelright through to the field and eliminating the shoulder. Butit's difficult to get good results when you define the fieldwith the bevel alone because invariably that critical line wherethe two converge will be untrue. It can be straightened outwith a hand plane, but it's not easy. Also, panels withoutshoulders look indecisive, even if the field edge is straight.It's common practice when raising a panel to cut the shoulderlines first (figure 9). This fields and raises the panel andgives you an idea of its proportions. You can accomplish thisby setting the fence on your bench saw to the width of thebevel and the blade to the depth of the shoulder, producingfour shallow cuts equidistant from the panel's edges. Saw thebevel by tilting the sawblade to the required angle and settingit to the required depth. When cutting the bevel, awedge should fall off the waste side of the cut; this meansthat pressures on the blade are equal right and left. But raised57
Fig. 9: The field is defined by saw or routercuts. You can use a nosed cutter in yourrouter to give the shoulder a softer profile.The bevel is angled at the time of sawing or itcan be cut with a bench rabbet plane.Fig. 10: A panel edge need not be beveled.Here it is rabbeted and a bead mold run downits edge. The scratch-stock must be heldfirmly and pushed away from the body. Itshould settle gently into the cut and not beforced.Fig. 11: The edges of the overlapped panel maybe treated in a variety of ways- rounded, beveledor left square. At this stage you in troducedetails that affect the highlights and shadows ofthe panel.panels are usually more delicate than this will allow. So tominimize blade vibration and consequent scoring of thebevel, use a sharp, stiff tungsten-carbide-tipped saw and feedthe work gently into the blade.However carefully you cut the bevel, its sawn face will needsome cleaning up. It can be sanded, but you'll have greatercontrol and get better results using a rabbet plane that's wideenough to clean the whole width of the bevel in a pass. Youcould also make a jig for your router and make the cuts with aproperly profiled bit, or you can obtain the fastest results witha spindle shaper. The latter should be used with great caution,and you should make three or four passes, removingonly a little stock with each.Because the whole system is designed to accommodate thehygroscopic movement of wood, it's not unusual for a panelto travel about in its grooves, sometimes being noticeably offcenter. This is easily rectified by driving two nails or woodenpegs into holes on the inner edge of the frame, top and bottom,so that they capture the panel on center (figure 2,p. 55). The pegs make interesting little details if left slightlyproud and rounded off. You can get the same result by applyinga dab of glue in the center of the grooves top and bottom,taking care during assembly to position the panel properly. Itis normal for the panel to rattle when tapped. The rattle canbe eliminated, but need not be.The panel doesn't have to be raised and fielded to be heldin the frame. One of the sweetest systems brings the groovefotward of center to create a flush panel from very thin stock.This system demands accuracy in cutting the top and bottomshoulders so they just touch the rails. The panel edges, whichmove slightly over the frame, can be molded by using ascratch-stock that you can make yourself (figure 10).The third possibility exchanges the angular, vigorous lookof the usual raised panel for the softer, more subdued look ofthe overlapped panel. Panels of this son are rarely seen becausemost woodworkers hesitate to depart from the more acceptedmethod, yet they are no more difficult to make. Thepanel is held in the frame by a set of tongues and grooves,which should not b cut too deep as a long tongue is likely tocurl back (figure 11).Given the possibilities of the frame and panel, it is surprisingto find them so lit·tle realized by contemporary cabinetmakersworking in solid wood. Industry, however, has not ignoredtheir appeal. In one method of quantity production,frame-and-panel doors are molded from a mulch of the sonused to make panicle board. After a few seconds of heat andpressure, out pops a frame and panel, raised, fielded and detailedto your requirements, ready for printing with a photocopyof wood grain. Before the offended reach for their pens,consider that if industry will apply its technical and economicresources to such an extent, there must be a strong demandfor the frame and panel. Given this market, there is a noticeablelack of frame and panel being used in a refined andexciting way by makers of hand-built, solid-wood furniture.This seems a pity since I've always felt that the cabinetmaker'sshop could be the binhplace of technical and aestheticmodels for industrial production.The sad fact of the matter is that there exists an emotionalantagonism between the designer! craftsman and the designer!executive, and little productive communication isshared between them. The craftsman suffers the most as a result,because he closes the door on salespeople, designers,decorators and others who work either with or for the largerfurniture manufacturers. It does the craftsman little good tohave a vast technical knowledge, a keen aesthetic sense and ashop full of tools if he denies himself contact with people whocan market his furniture and who can benefit from his fidelityto quality and his innovative thinking. I hope this examinationof the frame and panel will promote improved communicationbetween the craftsman in his shop and the largerworld of woodworking. 0Ian Kirby, a regular contributor to this magazine, teacheswoodworking and makes furniture in Bennington, Vt.58
The legacy of Harry <strong>No</strong>hrDurable, delicate bowls of native hardwoodsarry <strong>No</strong>hr began turning bowls from green wood inH 1960, and during the following decade he explored variousmethods of curing, tooling and finishing wooden bowls.By 1970 his experiments had come to fruition, and he beganto gain national recognition for the unparalleled beauty andunusual strength of his delicately thin bowls. Four of themwere selected by the Smithsonian Institution for its craft display,and several more found their way into permanent museumcollections. But it wasn't <strong>No</strong>hr's intention to turn outworks of art for collectors and museums. He wanted rather tomake practical and durable household objects that could beused and enjoyed without needing special care and attention.With a chain saw, <strong>No</strong>hr harvested his wood locally, nearMadison, Wis., trying to use as much figure as possible andalways looking for burls, stumps and crotches. He cut hisbowl blanks from the green logs in the usual way (FWW #16,May '79, pp. 48-)1) and then bandsawed them into plugs(bowl blanks ready for turning). He coated the plugs with alog-wax sealant, wrapped them in newspapers and storedthem in a humidity-controlled room for periods of from 4 to24 months, depending on the species. This sealant, ClearSealtite 60, can be obtained from Chapman Chemical Co. ,416 E. Brooks Rd., Memphis, Tenn. 38109.When a plug had cured to about 20% moisture content,<strong>No</strong>hr glued a mounting block to its base and screwed theblock to a faceplate. For turning the bowl to a final thicknessof 1..!J in., <strong>No</strong>hr made special tools from metal-turning bits. Heground the bits to a relief angle of 15· and fitted them intolong handles. During the turning process, <strong>No</strong>hr worked fromthe outer edge of the bowl toward its middle, maintaininglittle clearance berween the trailing edge (heel) of his tool andthe turning blank.When the turning was done, he sawed off the mountingblock and popped the bowl into an oven to bake it thoroughlydry. Then, to immortalize his creation, he painted it withfour coats of epoxy varnish, beginning with a dilute solutionand then applying it full strength. This process generally tookabout a week. Sanding, steel-wooling and rubbing with rottenstonefollowed. Because his bowls were turned so thin, theepoxy finish penetrated every cell, giving great strength andflexibility to an otherwise weak and brittle object.After <strong>No</strong>hr died in January, 1977, his wife and friends, includinghis long-time associate Bob Gilson, set up a specialinternship program so that his skills and methods could bepassed on to others. Because Gilson had acquired <strong>No</strong>hr'stechniques during a long friendship, he agreed to teach thestudents who were selected to participate in the program.David Lory, the author of the following article, was one ofthose students. <strong>No</strong>w both Lory and Gilson continue the workpioneered by <strong>No</strong>hr, although both have adapted what theylearned to their own way of doing things. Gilson, of Middleton,Wis., is a businessman who turns bowls for pleasure.Lory, who lives in Platteville, Wis., turns bowls full-time andsells them with a lifetime guarantee. -+
Turning Thin and Finishing with Epoxyby David Loryy turning tools are made from anM Armalloy alloy. I get the bits, asdid <strong>No</strong>hr, from the Richard Ela Co. , 744Williamson St., Madison, Wis. 53703. Igrind them to a 15 ° relief angle and securethem in long, square-sectionedshafts with two allen screws (photo,below). I have two tools, one a roundnoseand the other a spear-point chisel.They require honing several times duringthe course of turning a single bowl.I do all of my turning on the outboardside of the lathe. I get the block roundedat the slowest speed. Then, still workingon the outside, I shape the plug into thelargest bowl possible. Moving my toolrest around, I turn the inside. On largerand deeper bowls I use a lfl-in. electricdrill with a 2lfl-in. wood bit to drill outthe center before turning it. When turningthe inside, I cut from the rim towardthe center. This compresses the wood fibersand allows me to turn the bowl to afinished thickness of % in. I stop atstages to examine the grain, so I canwork with it and bring out the best it hasto offer. Fancy cuts detract from itsnatural flow. The interior grain generallydetermines the shape of a bowl, asthat's its most visible pan. I then returnto the outside and reshape it to followthe contour of the inside. On these lastcuts the lathe is speeded up as much aspossible without the wood chattering.To prevent checking and to reducetear-out and pecking, I turn the bowl asquickly as possible. And once I begin, Icarry through to the end without interruption.If I have to put my work asidetemporarily, I cover the bowl with a wetcloth to keep it from drying out.Bowls can fly apart while beingturned. Some break because of unseenflaws in the wood; others may breakapan if they're gouged too deeply. Excessivedryness may cause some to crackwhile being sanded. Some bowls will flyapan for no apparent reason. The turnershould take ev.ery precaution in selectinghis blanks, in controlling theirmoisture content and in properly toolingthe rotating plug.After a bowl is turned to shape, I sandthe outside, staning with 80 grit andworking up to 220. I return to the inside,make the finishing cut, and sandit. The bowl should be % in. thick at thesides and %6 in. to 1/4 in. thick at thebase. This thickness is imponant becauseits uniformity helps preventchecking when it's dried to about 0%mQisture. I cut the bowl off the glueblock with a handsaw, leaving the bottomsomewhat thicker so if it does warp Ican sand it flat without ruining thebowl. If! did a good job of turning, thebowl will not need any hand-sanding.<strong>No</strong>w the bowl is ready to be finished.Instead of the usual oils and varnishes, Iuse a heavy-duty epoxy-resin paint,<strong>No</strong>. 100 Clear Epoxy (Peterson ChemicalCorp., 1104 S. River St. , Sheboygan,Wis. 53081). It comes in twoparts-paint and hardener. When itdries it doesn't become brittle, andbowls will flex rather than break. It isclear and there is no discoloration of thewood. It meets federal requirements foruse with food, and hot (up to 250°F)and cold foods can be served withoutbad effects. This finish is resistant toacids, detergents and alcohol. To preparethe bowls for the application ofepoxy, I put them in the oven for fivehours at 150 0. Some of them will warpgreatly during the baking; all of themwill warp in different ways and to differ-Square-sectioned steel shaft securely holdsreplaceable metaleutting tool bits. Armalloyis harder than ordinary high-speed steel andwtll hold a sharp edge longer. You can grindit on a fine aluminum-oxide wheel.Using a steel-hafted chisel, Lory takes a cut off a rotating bowl blank. Tooling the alternatinglong and short-grain surfaces produces both shavings and dust.Some of Lory 's bowls turned from locallyavatlable burls and stumps. Epoxy finish,which completely penetrates the Ys-in. thickwalls, makes the bowls flexible and durable.60
ent extents. This gives each piece characterand life.After the baking, I resand the bottomson a belt sander to make them flat.Because the bowls may pick up moisture,I rebake them. Then I take a fewout of the oven at a time and epoxythem with a I-in. brush, which minimizesruns. For durability, I use four orfive coats. The first is mixed with 40 % A(paint) , 40 % B (hardener) and 20 %thinner. The thinner makes for deeperpenetration, but any more than 20%would make the mixture useless. Forsubsequent coats I use 50% A and50% B. These coats are applied everyother day with a light sanding (using320-grit aluminum-oxide paper) in becween.I apply the epoxy to the inside ofthe bowl first, and when that is dry tothe touch, I do the outside. Good ventilationand a mask are important. Thoughthe toxicity is low, it can be irritating. At75°F and 60% relative humidity, thefinish will dry dust-free in 30 minutes. Itwill dry to touch in cwo hours and curehard in seven days. To speed up curingtime, place the bowl in an oven fiveminutes after applying the finish, andbake it for 20 minutes at 1BO°F.The epoxy leaves a high-gloss finishwhen it hardens, and I feel this detractsfrom the natural beauty of the wood. Toget back the natural patina and glow ofTool Rests and Turning Tacticsby Bob Gtlsonor outboard turning, <strong>No</strong>hr showedF me how to make a tool support froma brake drum with three feet weldedonto it so it won't rock. The vertical postcan be 2-in. steel pipe with a lh-in. byI-in. by 12-in. steel tool rest welded tothe top. Make your cuts toward thelathe, from the rim to the base of thebowl, to load the wood compressivelyand reduce chatter. Good lathe speedsfor bowls are 900 RPM for a 6-in. turning,600 RPM for 12-in., and 350 RPM for18-in. bowls. At this point you will findout how solidly your lathe is mounted tothe floor or wall (yes, wall) . Sometimesit is necessary to run a brace from thelathe table behind the headstock to thewall to reduce vibration. If your lathehas enough power and is well mounted,it is possible to remove Y4 in. at a pass,but this isn't necessary. As you make thefirst cuts, the outside of the bowl will beout of round from sawing and mounting.Take care to avoid too heavy a cut on theinvisible spinning projections. Theangle of the tool relative to the cutshould remain constant, with the trailingedge clearing the work by ljl6 in. Asthe inside corners are turned, it is importantto be aware at all times of theclearance to prevent the heel of the toolfrom catching the work. The smaller theclearance without catching, the smootherthe cut. The finish cut with these tools isnot as smooth as from a regular woodturningtool, but they make possible thethin sections. When using a floor tripod,it is usually necessary to plant one ofyour own feet on it to hold it in place.The following steps will help youavoid most problems of warpage and vibrationwhen turning a bowl 12 in. orlarger. Rough out the outside of thebowl to within in. of the desiredshape. Then rough out the inside, leavinga wall thickness of 1 in. (The outsidemay be out of round at this point.)Next, sharpen the tool and take a finishcut of %6 in. on the outside. Roughsandthe outside with a glass-foam sandingblock (a respirator should be worn),and then fine-sand in stages from 120 to280 grit. <strong>No</strong>w turn the inside of thebowl 1f4 in. thick to a depth of about2% in. The wall should be slightlythicker at the end of the cut to allow forblending with the next cut. Then sandthe same as the outside.On a larger bowl another 2lh-in. stepwould be turned, but on a 12-in. bowlthe rest of the inside may now be turnedto 1f4 in. to blend with the previous cut.Start by removing the wood nearest thelip. A caliper is useful for measuringwall and bottom thicknesses. The cwocuts are blended with the sanding blockand then finish-sanded in stages. Theoutside of the bowl may be Y4 in. ormore out of round at this point as thewood dries. The bowl is then sawn offthe mounting block as close to the baseas possible. For a beginner the total timefor turning a 12-in. bowl might by 4lhhours. With experience, and a goodwood like shagbark hickory, you may cutthe time down to 2 hours. Once you takea finish cut, the bowl should be completelyturned as quickly as possible, asthere is the likelihood that it will warpovernight, even if covered with a plasticthe wood, I spend several hours rubbingdown each bowl by hand. The epoxyfinish is not easy to sand because specialcare must be taken not to sand throughthe founh layer into the third. If thishappens, a dull spot will appear and thebowl must be repainted. I rub the bowlwith 320-grit aluminum-oxide paper,00 steel wool, 0000 steel wool and thenwith rottenstone. Rubbing brings outthe true beauty of the wood. Epoxymakes the wood stronger than it was beforeand much more useful. The combinationof beauty and practicality makethe bowls truly functional pieces of art,which I believe will last well beyond mylifetime. 0j .........<strong>23</strong> 4Sequential order of turning. Centrifugal forcesmight cause the bowl to distort or even to flyapart if the rim is not cut first, leaving mass ofturning in center.bag that has moistened wood chips in it.The bowl at this time may have a 20%moisture content. Bowls that will fitinto an oven should be baked at 150 ° fortwo hours to dry them completely.Larger bowls must be left several monthsto air-dry. The remainder of the mountingblock is then sanded off and the bottomsanded flat. If there are any flaws,such as those that frequently occur in aburl, fill them with a filler, then sand.Finish the bowl with four coats ofclear epoxy varnish. After the epoxy hascured for about four weeks, sand it with240-grit paper (for light woods) or 360(for darker woods) to smooth out any irregularitiesand take off the gloss. Thencontinue to polish with steel wool andpumice followed with rottenstone. 061
The Carousel HorseHollow carcase makes a sturdy beastby Roger E. SchroederA scaled-down version of the carousel horse shows one way to join extremitiesto body. Because these legs have no sharp bends, they canbe cut entirely /rom a single piece of stock.espite their often massive and muscular appearance,D wooden carousel horses have hollow bodies. Centrifugalforces exerted by spinning carousel platforms that parade asmany as 64 horses, not to mention chariots and other encumberances,make weight important in the design and constructionof the horse. Aside from lightness, the hollow body hasanother advantage-it's less likely to develop the deep checksso common in large, solid-wood carvings and statues. Thehollow carcase makes the horse durable and able to cope withseasonal and atmospheric changes.The carousel is a European invention. The Italians gave usthe word (carosella, meaning a joust) , the French made itmechanical, the English gave it steam power, and Germancabinetmakers brought it to this country in the late 1800s.Early in our century a typical carousel shop may have employedas many as 20 to 30 workers. An apprentice started as asander, progressed to roughing out the body, then might becomethe head carver-literally carving only the heads. Workingfrom memory and a few sketches on the block, he couldrecreate anatomy and muscle tone, as well as create bold andeven flamboyant features.Today wooden horses have given way to steeds of plasticand metal. But a New York trio of carvers is reviving thebeauty and grace of the wooden carousel horse through restorationand construction. I met Jim Beatty, Gerry Holzmanand Bruno Speiser at their East <strong>No</strong>rthport shop and learnedsome of their techniques for continuing this form of folk art.Speiser, who has himself restored 25 horses, bought his firstRoger Schroeder, a woodworker, teacher and freelance writer,lives in Amityvtlle, N. Y.Gerry Holzman carves the hind leg of a rocking horse. Leg is held ina chops, a traditional English carving vise. Carousel horse andsmaller hobby horse have identical structural features.one for $25 almost two decades ago. Today a restored horsecosts between $3,500 and $5,000, depending on the companythat made it, the carver, the age of the horse, and theworkmanship. Restoration might include removing dozens ofcoats of paint (many horses were painted yearly), disassembling40 or more pieces of wood (if the joints have separated)and replacing broken pieces. Restoring a horse has its rewards.As Holzman says, "In recarving a line or muscle, youget a communication established between you and thecarver . .. who originally did it 50 or more years ago."Construction -Whether you're restoring a horse or designinga new one, it's a good idea to visit a carousel or amuseum that displays horses. Bring your camera and plentyof color slide film. Take full-view shots of the sides, the frontand the back, and take close-ups of details. Project the imagesonto a sheet of tracing paper hung on a wall and transfer theprojected lines and shadows to the paper. You determine thesize of the horse by increasing or decreasing the distance ofthe projector from the wall. Sometimes it's feasible to tracethe image of one horse and then to project the image ofanother on top of it. Designing from a composite frees youfrom the necessity of choosing one model and sticking with it.At this point you'll have to decide on which body stanceyou prefer, and the composite method is helpful here becauseyou can use a number of different horses in different positionsto produce the single posture you're after. Whetherrunning or jumping, with the head forward or down, the positionand attitude of your horse can be pieced together fromvarious models or simply copied directly from one you like.Once all of the design decisions have been made, you'll62
Coffin constructionRectangular boxconstructionCarcaseconstructionBody is reinforced with glueblocks that run the length of thecarcase. Openings at front andrear are plugged with glued-upsections of stacked lumber.Grain direction of plug andcarcase are the same.Doweled lap joint where limbs make sharp bendsenables grain to run the length of any single piece.Lapped bare-faced tenons secure legs to body.Sometimes these members were simply buttedtogether and doweled from the outside.need to superimpose on your drawings the outline of the carcaseconstruction I'll describe below. Also, it's wise at thispoint to draw in the appropriate joints that will hold the discreteparts of the body together. The body of the horse c
Head blank is tenoned and pegged into partially carved neck. Mortisesfor forelegs have already been cut in lower chest.Holzman puts finishing touches on head with carving gouge.Carving complete, the undercoat is appl£ed. Flan'ng nostnls, perkyears and tensed neck muscles impart vitality to wooden steed.doweled into the rump and made to flow into a leg where itcan be attached. This prevents it from being easily brokenoff. The tails of many horses were of real hair, not difficult toobtain when horses could still be seen on city streets. Stillothers were carved.Carousel carvers like to emphasize muscles, tendons andbone structure. Common are flaring nostrils, prominentteeth, straining heads and bodies. To reduce the difficulty ofthe undertaking, it is advisable to carve the legs, neck, headand body independently of each other. Each part should betaken to a near-completed state, leaving a couple of inchesundone where each piece will be joined to another. After thatthe pieces can be faired into each other. There are decided advantagesto working this way and not having to manipulate aglued-up horse that may be bigger than you are.It is best to bandsaw the rump and chest profiles if possible.Use a large, three-sweep fishtail gouge for roughing outthe body. Where there are depressions in the flanks, usedeeper gouges. Straps, blanket and saddle are drawn in andoutlined with a V-paning tool and carved with appropriategouges. Some carvers suggest leaving the head for last toallow time for the wood and tools to be gotten used to, especiallysince this part of the anatomy is the most difficult to do.Templates can be used to gauge symmetry and contours.More detailed photos of the head will be required than of anyother part of the body. Generally, the head was made fromtwo or four pieces of wood glued up face to face. The neck is aseparate piece, also a lamination, with the grain runningsometimes parallel to the body. This was done because maneswould not flow down but would wrap around the neck, andhorizontal grain would facilitate carving the hair. The earsshould not be carved too soon, as they are delicate and maybreak off. Once finished, the head and neck can be attachedto the body and faired in.Here is a technique used by Speiser for setting in the kindof glass eyes that can be purchased from a taxidermist. Draw arough profile of the head on a piece of stiff paper and cut asmall triangular hole for the socket. Try inserting the glass eyeedgewise through this hole. Keep making the hole larger untilthe eye falls through. Transfer the outline of this hole to thecarving. Gouge out and undercut the hole enough for the eyeto be rotated. Remove it and partially fill the cavity with plasticwood. Immediately insert the eye, rotate and press it intothe proper position. The displaced plastic wood will ooze out,and the excess can be removed. After the plastic wood hashardened, you carve the details of the eyebrows and eyelids.Once the horse has been carved and sanded smooth, aheavy-bodied paint sealer should be applied. Sand this coatlightly when it's dry and apply another coat, which this timeshould be tinted with the colors that will finish the horse.Give each separately painted area its own tinted undercoating.Choice of paints may be individual, but flat oil-basecolors flow together better. As a final step, apply a coat ofclear varnish.Additional touches might include gold leafing on the blanketfringes, harnesses and other trappings, and adding flatbackmirrored jewels to the blanket. 0EDITOR'S NOTE: Two publications about the design, constructionand lore of carousel animals are Frederick Fried's A Pictorial Historyof the Carousel ($17 .50 from A. S. Barnes and Co., Box 421, Cranbury,N.). 08512) and CarTOusel Art, a quarterly magazine ($10 ayear from Box 667, Garden Grove, Calif. 92642).64
An Abrasive PlanerAutomatic feed and rigid bed offer exceptional accuracyby Michael Horwitz and Michael Rancourttringed-instrument makers, marquetarians and boxmakersS all deal with thin stock that must be tbicknessed accurately.Luthiers in particular need to thickness tops, backs andsides often as thin as o.oso in., and to make bindings androsette components that commonly measure 0.010 in. or less.Knived planers can rarely handle stock less than in. thick,and they produce a scalloped surface. An abrasive planer increasesthe possibilities for both production and design inthin stock. Simple drum-type, hand-fed sanders (FWW #21,March 'SO) give modest results and do provide an alternativeto tedious hand-planing or to purchasing thicknessed wood.However, to the woodworker involved in light productionandlor requiring great accuracy, an automatic-feed, continuous-beltabrasive planer can prove valuable. In the sevenmachines we have built, a rigid bed provides advantages overthe conveyer bed of other abrasive planers currently available.The machine detailed here can handle with greater accuracythe most delicate pieces of wood, and its cost and size make itfeasible for the small shop. With the construction drawingson the next page, some mechanical know-how and basic machining,a superior abrasive planer can be home-built.Construction -We make our planers, a 12-in. and anIS-in. size, on a movable base. It consists of eight pieces ofangle iron and a half-lapped 2x6 maple frame. The angle ironforms a table whose legs are bolted to the frame, which rideson casters. The top surface of the angle-iron table is 31 'h in.high; from it hang the motors (the machine has two motors)and on it is mounted the machine's superstructure. This consistsof another 2x6 maple frame into which We mortise 2x4uprights, attached from beneath with lag bolts. Two crossbraces keep the uprights parallel, and two diagonal braceshold them perpendicular to the base.The machine has two belt rolls: a lower sanding roll, whichdrives the belt, and an upper belt-tensioning idler. These wemake of hardwood plywood discs, stacked and glued togetheron cold-rolled steel shafts, then turned and sanded with 50grit. Leaving the bottom roll rough gives necessary belt grab.To prevent warping, the rolls are sealed with sanding sealerand polyurethane. The upper roll is then covered with %6-in.cork (applied with contact cement) to help belt tracking. Alocking pin system keeps each roll from turning on its shaft.The bearings for the beltrolls are sealed roller-typewith double-width races,and must be press-fit ontotheir respective shafts. Thesanding-roll bearings arepressed into housings heldin place with setscrews intwo steel mounts. Themounts are I-in. thickLeft, stockthicknessed onabrasive planer, thethinnest pieces to0. 005 in. Below,Michael Horwitz atthe 12-in. model.milled forks, welded to 'h-in. steel plates bolted to the machinebase. The idler is supported by two belt-tensioningarms that pivot from the uprights on 'Y4-in. steel rod pinned tothe arms. Cutouts drilled with a circle cutter on the insides ofthe arms receive the bearings for the idler. A snug fit here ensuresconsistent belt tracking. Slots in the ends of the swingarms receive threaded rods. These pivot from steel anglebrackets bolted to the top of the uprights. Each of the two adjustmenthandles, which control both belt tension and tracking,is a homemade rod-coupler pressed and pinned into apiece of maple shaped like a giant wing nut.The bed is a piece of %-in. hot-rolled steel covered withFormica. Attached to the underside of the bed by five machinescrews is a %-in. cold-rolled steel rod, which serves as apivot mounted in oilite bearings at either end. One end of65
the pivot is in a ftxed maple block; the other adjusts to truethe bed parallel to the sanding roll. A piece of threaded rodwith a handwheel attached raises and lowers the bed to adjustdepth of cut. The rod passes at a 60 angle through a tappedblock, welded to a steel cross member. The end of the threadedrod is turned to a soft point to achieve a smaller and morepositive contact. A dead stop (rwo jam nuts on the threadedrod) keeps the bed from contacting the sanding roll.The accuracy of this machine is achieved in good part bydriving the stock past the sanding surface at a steady rate. Thethree rubber drive rolls are chain driven by a %-HP, I8-RPMgear motor. It produces a feed rate of 9 SFM. We made thedrive rolls by cutting to length 2-in. medium-hard rubber cylindersand slipping them onto the cold-rolled shafts. We thenribbed the rubber on the table saw and ftxed it to the shaftwith Y4 -in. roll pins. The feed-roll shafts rotate in oilite bearingspressed into collars welded on the end of steel swing armsthat pivot on the frame. Tension springs attached berween theFeed-roller assemblyarms and the frame provide downward pressure on the stock.Adjustable arm length compensates for chain slackening.The abrasive belt for the I8-in. machine is driven by a3-HP, I725-RPM, totally enclosed, fan-cooled motor, theI2-in. machine by a 2-HP motor. The motor's speed is reducedslightly by a 3!fl-in. pulley on the motor and a 4%-in.pulley on the roll. These produce a belt speed of 1,700 SFM.The motor is equipped with an overload button, and all electricalcomponents are mached according to motor amperage.A vacuum hood mounted directly over the space berweenthe sanding roll and the front drive roll collects dust immediatelyas it leaves the board. The entire evacuation unit, includingthe %-in. Plex.iglas guard, is hinged so it can beswung away during belt changes. For safety, Plexiglas also enclosesthe drive system and the idler.For passing many boards through the machine in succession,we designed a stacking attachment to receive stock atthe outfeed end. It is a collapsible birch-plywood shelf,steel rodRear-sprocket assemblydriveMainchain.(size 35)II nFront-sprocket assembly¥.-in. shaft14-tooth sprocketA '{4-HP gear motor dnves the three feed rolls by means of chains and sprockets, left. Sanding roll, niht, is belt-driven by 3-HP motor at nghthandside of machine. Bed-truing adjuster can be seen attached to back of 2x4 upnght.66
18-in. abrasive planerY. x2 flat-steel angle bracketDetail A: Belt·tensioning armPins lockplywoodsandingroll to1 Y,-in.steelshaft45Y,Sealedrollerbearingand ----housing 21'f.,
hinged from the rear of the base. The rear feed roll eases eachpiece down onto the stacking shelf.Operation -To install the belt, loosen the setscrews thatretain the sanding roll. Tilt the roller assembly, remove thedrive belt and then the roll itself. At the tensioning arms theidler can be removed, passed through the abrasive belt andreplaced. Then pass the lower roll through the belt andreplace it in the steel mounts. To tension and track the belt,tighten the two wooden wing nuts so that each side is firmbut not forcibly stretched. For an initial tracking check,bump the motor on and off. Final tracking is achieved withthe motor running. Keep a close eye on the belt for a while,as even a 50 turn of the wing nuts takes minutes to show up asbelt movement. Don't get the belt too tight. Tracking can beachieved by loosening as well as tightening the wing nuts.To get accurate results, the bed must be absolutely parallelto the sanding roll. After turning on the two motors and thevacuum, run narrow test boards through the machine at thesides of the roll, compare their thickness and true the bedusing the bed adjuster at the right-hand side of the machine(detail B in the drawing) . To begin sanding, lower the bed,using the handwheel at the front, beyond the thickness of theboard and pass the board under the feed roll. As the boardgoes under the sanding roll, raise the bed slowly until lightcontact is made. <strong>No</strong>w that the bed is adjusted to the board'sthickness, the depth of cut depends on grit, wood density andwidth of the board. For example, 0.050 in. can be removedfrom a lO-in. Sitka spruce board with 36 grit, 0.025 in. with60 grit. In wood as dense as Brazilian rosewood, the maximumcut might be 0.015 in . with 60 grit on an 8-in. board.Special jigs can hold eventhe shortest pieces of wood,which to guitar builders canmean the accurate thicknessingof nuts, saddles andbridge blanks . By tapingstrips of stock to supportboards, one can make custombindings and rosette components.In the repair of a rareTorres guitar, we matched theoriginal binding with maplepurfling strips measuring0.005 in ., a size thinner thanSaddle Jig with two cam clamps.those available commercially.We're working on several options to improve the machine.They include a variable-speed feed motor to accelerate takinglight cuts and a more powerful sanding motor to makeheavier cuts. Another idea is a thickness-calibration systemusing two dial indicators' that would eliminate manual measuringof stock thickness.The only maintenance necessary on this machine is an occasionaloiling of the drive chain, and keeping the machineclean. The vacuum system, which is hooked up to a shop vac,picks up 99% of the dust produced; to achieve accuracy of± 0.003 in. across the whole width of the planing surface, arelatively dust-free situation is necessary. 0And a Disc Sanderby Donald C. BjorkmanA s the price of tools becomes astronomical, I rely more and more.I1. on equipment I build in my own shop. Having been given ao/4-HP., 1 , 750-RPM motor retired from pumping well water, I felt I wason my way to the'sander of my dreams. As with many such projects,procuring parts was most demanding. The materials list at right tellswhere I got my supplies and what I paid for them last spring.As I planned to have my sander last me a long time, and because itwould COSt about one-eighth as much as a comparable commercialmachine, I felt I should go first-class on components. I also wanted asander that would satisfy as many sanding needs as possible. Withthis in mind I designed a dual 16-in. variable-speed sander with twoadjustable tables. As I use both sides of the discs, I have four discsurfaces, each with a different sanding grit: two. outboard with tiltingtables and two inboard with a stationary table.Besides the motor, the basic components include ball-bearing,self-aligning pillow blocks to guide the o/4-in. shaft, a hardwoodframe joined with mortise and tenon and %-in. Finnish birch plywoodfor the cabinet stress panels and the sander table. The 3D-in.by 44-in. table consists of three layers of plywood laminated togetherto give a strong 21-ply top, 11k in . thick. (For a simple vacuum pressto laminate this top together, see FWW #16, May '79.)Putting the motor down low in the cabinet keeps it out of thedust, allows access to both sides of the discs and makes for a morestable machine. The shaft is fitted with step pulleys. This is helpfulwhen going from rough sanding to medium and then to fine. With16-in. discs I have found that speeds over 2,000 RPM burn the woodand that speeds less than 1,000 RPM are too slow for good cutting, soI use a 3/31j,/4-in. step pulley on the motor and a 4/4'/z/5-in. steppulley on the shaft. For smaller discs, faster speed could be used.My only complaint with the machine was the lack of a dust-collectionsystem, which I have recently remedied. As shown in the drawing,the discs run in slots that prevent dust from entering the cabinet.I cut two half-circles of tempered hardboard and gluedplywood spacers around the edges. I sanded flat the mouths of twoSears corner nozzles and epoxied them over openings in the hardboard.The covers are attached with wing bolts and T- nuts, and thenozzles connected to a vacuum, which removes most of the dust.Don Bjorkman is a professor of fine woodworking and furnituredesign, industnet! design and inten'or design.DAUTHORS' NOTE: All machine components and complete machines,both the 12-in. and the IS-in. models, are available through us atWoodspirit, Hidden Valley Rd., Pownal, Vt. 05261.l!/orkman 's J6-in. disc sander incorporates ttltin g tables and uses allJour surfaces of the discs. Pulley guard removed fo r photo.68
HubY4 -in. aluminum disc3-step pulleyPillow block16-in disc sander}'. bY }'4 groove32-34QuantityFront,II1I II-_JIr-JI k-t===::::::j .=I=-Jl..-J Plywood1Height adjustments F-l spacerfor motor mountblocks1I=:-I1______-__ ---------11 I I1---- 24 ---·1Materials list1Purchased partsAp'prox. coSt(Spring, 1979)III II IIIInner disc guardThreaded rodVacuum nozzleYo-in. tempered hardboardLayout sheets of for Finnish parts from plywood two44 60cryLocal lumberyard: 02Top%x60x60 birch ply $33.00 r---5 2x2x34 maple 10.008 I 'h x 1 'hx24 maple 44 '"4 'kx4x24 hardboard0 "2 'kx8x 18 hardboard 1.00 cry TopMachinery supplier:1 Manual switch 9.0024 in. %-in. shaft w/keyway 20.00 22 22 15N2 %-in. ball-bearing pillow block 26.00 0 cry2 %-in. bore step pulley 15.00 cO y, top4 Adjustable glides 4.00Side1 V- belt 3.00 pan elsMetals company0cO cry1 Y4 xl6x32 aluminum plate 21.00 r---15SideI 1I1 '1I 1I ---- ----- l1r-----------1-1·>--- 24Hardware store:6 ft. Electrical cord 2.50 60The motor is counterbalanced on its pivot with a spring.1 Electrical plug 1.502 Cord connecrors .501 Tension spring 2.0024 in. 1 Y' 6-in. continous hinge 3.0024 in. 2-in. continuous hinge 3.004 'hx20 T-nuts 1.004 'hx20x 1 'h wing bolts 1.00Bolts, washers, screws 4.00Gilliom Mfg ., 1109 2nd St. ,St. Charles, Mo. 63301:4 Lock knobs 5.002 3 flange hubs 6.00Brookstone Co.,127 Vose Farm Rd ,Petersborough, N.H. 034584 Thread insertS %- 16 1.50Sears Roebuck2 Corner nozzles (# 14277) 3.00$176.00Upper comer bracing is set into groove in frame.Photos and Illustration: Don Bjorkman 69I
Turning Thin SpindlesLacemaker's bobbins demand speed and precisionby Mike Dar/owurning small yet clean, crisp spindles, such as bobbins forT lacemaking, requires a special technique. The professionalwoodturner who's interested in achieving both speedand quality cannot rely on complicated jigs and lathe attachmentsbecause they take time to make and set up and becausethey limit the range and versatility of his work. But with asimple driving device and a practiced method, ordinary toolscan produce the desired results.Lace bobbins are usually made from fine, straight-grainedwoods-plum, olive, boxwood and walnut were most commonlyused in the past. Bone, ivory and hard softwoods suchas yew are also ideal. Being small and slender, lace bobbinsrequire a sound turning technique, particularly with the skewchisel. Though there are varying methods of work, the oneI'll describe here is straightforward. Begin by preparing thestock for turning, sawing it into square-sectioned strips whoselengths are determined by the finished length of the bobbinplus an allowance for chucking and parting off.There are four common methods of holding the wood atthe headstock. The traditional way employs a small, prongeddriving center. One can be made by turning a piece of hardwoodto the appropriate taper and pushing it into the swallowof the headstock spindle. Start the lathe, flush off the projectingend and mark its center with the long point of a skewchisel. Next, stop the lathe, drive a brad into the center andpinch it off about 6 mm (Y4 in.) from the face of the wood.Then with the lathe running, file the brad to a slim point.<strong>No</strong>w stop the lathe and hammer in two more brads about3 mm O in.) from the center pin and diametrically oppositeto one another. Pinch them off about 3 mm (lk in.) from theface. With this method there is no need to stop the lathe inorder to remove the finished bobbin and to center a newblank. To avoid damage to both the skew and the drivecenter, part off just to the right of the drive center.The second way uses a steel driving socket on an arbor ofappropriate taper. The socket may have either a cone-shapedcavity, with an internal thread to grip the wood, or a pyramidalone. You can easily make the latter from hardwood.A third way to drive the stock is by means of a jaw chuck. Iprefer the Jacobs type because it is small in diameter and hasno dangerous projections. This method allows both ends ofthe bobbin to be finished in the lathe. And because the lefthandend of the stock is held rigidly along the lathe's axis ofrotation, the effective diameter of the turning bobbin is increasedand there is less chance of breaking it while cuttingthe long neck. The fourth and simplest method is to push theblank directly into the swallow of the headstock spindle, providingthe opening is small enough. Pressure from the ramwill keep the wood from slipping while it's being tooled.Bobbins are usually turned with their heads at the tailstockWhat bobbins doBedfordshire bobbins work a lace collar.Threads are plaited around pins stuckthrough holes in the stiff paper pattern intothe pzllow below.There are two main types of lace-needlepoint,made by sewing and oversewing witha needle and thread , using mainly buttonholestitches; and bobbin lace, which usesthe weaving and plaiting of threads. It isthis latter method of lacemaking that chieflyconcerns the wood turner, for he ptoducesmuch of the necessary equipment, most notablybobbins. Each separate length ofthread used in a piece of lace must bewound on a bobbin at each end. Hence,lacemakers refer to a number of bobbins asso many pairs and many prefer to buy theirbobbins in identical pairs. A piece of lacecan require several hundred pairs of bobbins,but thirty pairs is about average.Lace bobbins have three distinct functions.First, they store the thread, sometimesup to seven meters in length, andallow it to be fed out as required. Second,they tension the thread. The lacemaker reliesupon the weight of the bobbin (and theattached spangles) to provide this tension,and therefore all the bobbins used for a particularpiece of lace need to weigh prettymuch the same. Third, they weave and plaitthe threads without soiling them, becausethe shank of the bobbin is used as a handle.There are three main bobbin styles. Continentalbobbins follow traditional stylesthat evolved in particular European lacemakingcenters. Honiton bobbins are indigenousto southwestern England. Theyare used for a fine lace that is usually builtup from sprigs-small, complete pieces oflace representing flowers and figures, whichare then joined or set into a new ground,using the bobbins as needles. This is whyHoniton bobbins have smooth, narrowshanks with pointed ends.East Midlands Bedfordshire bobbins areslim and basically cylindrical. Most of thebobbin's weight is provided by the spangle.The turner supplies the bobbin drilled, butthe spangle is supplied and fixed by thelace maker. How this unlikely appendageoriginated is unknown, but spangles-glassbeads used as weights-were threaded into17th and 18th-century laces' as decoration.Perhaps a lacemaker wishing to increase theweight of her bobbins tied on some of thesespangles, and this evolved into the ninebeadspangle found on East Midlands bobbinsfrom the late 18th century. -M.D.70PhOlOS: Henry Strasburger; Illustration: Ric lopez
end. In the overhand turning method, which is the mostcommon, the left hand either rests on the turning tool or actsas a mobile steady with the left thumb assisting in controllingthe tool. The fingers are wrapped over and behind the bobbinto give it support. With this method it's wise to turn thelong neck at the tailstock end, as the left hand can more easilysupport the shank and is clear of the drive center.I prefer the less common underhand turning method(photo, right) in which the index finger of the left hand goesbeneath the tool rest and supports the work, while the thumband remaining three fingers grip the tool. With this methodit's best to turn with the head toward the headstock. Thisallows the bottom end of the shank to be finished off in thelathe. Finishing off is tricky but can be accomplished by passingthe last three fingers of the left hand beneath the bobbinand bracing them against the tool rest, while steadying theright-hand end of the bobbin between the thumb and forefinger.Slacken the tailstock a little to facilitate parting offwith the long point of a skew. After withdrawing the tailstockfurther, you can sand the free end of the bobbin while stillsupporting it with the thumb and forefinger. Then part offthe head. With a little practice you can catch and present thebobbin in your left hand.Once you've decided on which way to drive the stock, preparea pin gauge by drawing the bobbin full size on a piece ofwood about 13 mm (ifl in.) thick. Project main bobbin featuresonto its edge where you drive in brads that are pinchedoff to a length of %6 in. Then sharpen the brads with a file toscrewdriver-like points. When centering your stock, take carenot to force the tailstock as the wood may split, and onceyou've centered it, back off slightly on the ram. Excess axialpressure will cause the spindle to spring into a bow when thelong neck is cut.With the lathe running at its fastest speed, rough out thestock using a shallow-nosed gouge about 19 mm (0/4 in.) wideand partially ground off on its left-hand side so that you canrough right up to the headstock. A 7-mm (about Y16 in.)gouge and a 7-mm skew chisel complete the tool kit. Withthe lathe still running, lightly press the points of the pingauge into the rotating wood and then proceed to turn thespindle in the order prescribed in the diagram.On your first few attempts you may want to caliper the diameters,but it's best to train your eye to gauge them properly.It is preferable to use the skew chisel as much as possiblesince it's a less risky tool than the gouge. It is possible that thewood will climb up over the nose of the gouge and fracture.When using the gouge, turn it on its side and approach thework obliquely, using it like a skew chisel. The long neck hasto be cut with the skew chisel, while either the skew or thegouge may be used to cut the short neck.I usually sand with 180, then 220-grit aluminum-oxidepaper. Traditionally bobbins were not polished, and an attractivepatina developed during use. Some turners finish inthe lathe, either with beeswax or with a friction polish. I recommendneither, since the wax could soil the thread and thefriction polish is slow to apply and too glossy for my taste.After any required hole-drilling, I finish just by dipping in apenetrating oil, which dries completely, brings out the woodcolors and leaves an atuactive satin sheen. 0Mike Dar/ow, 36, is a professional turner and cabinetmaker inSydney, Australia.Bobbin turner's tools: wooden dnving socket, pronged dn'vingcenter, pin gauge and Jacobs chuck. <strong>No</strong>te shape oj roughing gouge,ground fro m a standard spindle gouge.Turning the long neck using the underhand method. Index finger ofleft hand reaches below tool rest to support work beneath cuttingedge of skew chisel.Order of turning with driving center(Honiton bobbin)Turn first4th: sanding and in-lathe finishingOrder of turning with Jacobs chuck(Bedfordshire bobbin)o % 1 in.Nf"8.. o .5 1 emy, .-in. hole forTurn firstBobbins, some traditional, some of author's design. The stout onesare for coarse or woolly fibers.71
Carbide-Tipped CAlloy's hardness is its weaknessiru]1ar Sawsby Simon Wattsost woodworkers now own a carbide-tipped sawblade orM have at least considered getting one. The advantages aremany. The teeth are accurately aligned so they make a cleanerand more precise cut, producing a good gluing surface directlyfrom the saw; the tooth form stays practically the same _aftereach sharpening; carbide-tipped blades can cut teak andother abrasive materials, and they last about 40 times as longbetween sharpenings as steel-toothed blades.The main disadvantage of carbide-tipped blades is the cost.<strong>No</strong>t only is the initial cost substantial-$75 to $125 for alO-in. blade-but also since you cannot file them yourselfyou have to send them out for sharpening, which now averages25' a tooth, about $15 for a 60-tooth blade. A good sawbladecan be ground more than 30 times before it has to beretipped, so you can expect to spend $450 on sharpening overthe life of the blade-three or four times your original investment.Because saw manufacturing is a highly competitivebusiness, a substantially lower price inevitably means inferiormaterials and poorer workmanship. The cheaper blade willneed more frequent sharpenings, which soon will swallow upthe original savings.Woodworkers use their saws for cutting a wide variety ofmaterials and for a number of different operations. Few of uscan afford a different saw for each use and so we usually buycombination blades, which may do everything claimed forthem, or may not. Carbide-tipped saws come in a bewilderingvariety of tooth shapes and configurations. How does onechoose the right blade for ripping and crosscutting? For hardwoodand softwood? Is price the only indication of quality? Isa retipped blade as good as new? What about cutting veneers,plywood, panicle board -and plastic laminates? Can the sameblade be used on a radial arm saw and a table saw? What arethe differences between a high-quality blade and an inferiorone, and how can one tell?Before getting into these and related questions, let's take alook at carbide itself and at how a modern carbide-tipped circularsaw is manufactured. The alloy tungsten carbide, to giveit its full name, can be made only by a process known assintering, in which powdered tungsten and carbon are mixedtogether and heated under tremendous pressure. The carbonatoms penetrate the crystal lattices of the metal, creating oneof the hardest synthetic materials known. This new alloy retainsthe granular strUcture of the original metal powder butthe individual grains now have a hardness that is second onlyto diamond.It is imponant to remember that tungsten carbide, althoughimmensely hard, is also extremely brittle. It can bechipped easily by vibration or rough handling and can beused for cutting only when backed by another metal havingthe tensile strength it lacks. It cannot be drawn to thin edgeswith very acute angles, cannot be ground thin, and must notbe left overhanging and unsupponed. It must not be vibratedagainst a grinding wheel because the panicles of carbide willbe torn out.The body of the saw (shown below in figure 1) is madefrom heat-treated alloy steel, which can be harder andtougher than an ordinary all-steel saw because the teeth don'trequire filing or setting. Slots are cut in the plate to allow itsrim to expand without buckling. To reduce the danger ofcracking, the slots end in round holes, which sometimes causean annoying whistle. This whistling can usually be stopped byplugging the holes with a soft metal such as copper. Pocketsare cut into the teeth of the saw, and the little grey blocks ofcarbide are brazed into them. The carbide tips are thenBody of saw,or platePositive hook Zero hook Negative hook00. rl",or;"nr"Fig. 1: Sawblade and tooth orientationTip-to-body clearance72
ground on a diamond abrasive wheel to the required shapeand bevel.All circular saws are subject to centrifugal forces, whichtend to make the blade fly apart. These destructive forces aredirectly proponional to the radius but increase as the squareof the speed in rotation . These rotational loads cause the sawto expand unevenly across its diameter, giving it a tendency tobuckle. If uncorrected, these forces can prevent the saw fromrunning true, cause noise and vibration, and can even crackthe saw body.To minimize these effects, all good-quality circular sawsmore than 6 in. or 8 in. in diameter are put through a manufacturingprocess known as tensioning. This consists of hammeringthe bodies to an extent determined by their thickness,diameter and operating speed. The work, done with curvedhammers on a crowned anvil, puts the middle in compressionto compensate for tension of the rim at high speed. Machiningdone on finished saws (enlarging bores, drillingmounting holes, etc.) will upset the tension and should notbe attempted by anyone unfamiliar with this technique.Warped saws can be made flat by hammering, but it is highlyskilled work and likewise should be left to the expens.The thinner the saw body, the more crucial tensioning becomes.Very thick saws have little or no tension added byhammering. Large saws, 20 in. or more, are usually tensionedthree times at different stages in their manufacture. Threecommon types of saw bodies are shown in figure 2. Thestraight body is the cheapest and most widely used. The othercwo styles have one or both sides ground away to reduce thewidth of the saw kerf and are used mainly for cutting thin,non-ferrous tubing and plastics.The most common tooth form is the flat top (figure 3) alsocalled plain tooth, rip tooth or chisel tooth. The advantagesof this tooth form are that since each tooth cuts the full widthof the kerf, it has twice as many effective teeth as a staggered-·tooth saw. Also, the cutting forces are balanced on the body,the tooth form is easier to maintain, square bottom cuts areensured and each tooth carries an equally distributed load.The disadvantages are that the chip drags the sides of the cut,reducing the freedom of the chip flow. Chisel teeth can bedamaged more easily by side thrust or cwisting of the workthan can staggered teeth, and the square corners are dulledwhen cutting abrasive materials. Tooth drag can increasepower consumption significantly. Chisel-tooth blades aregood for ripping, but when used for crosscutting, they leave aragged end-grain surface.All other basic tooth forms (except scoring saws) need morethan one tooth to complete the cut. The alternate top bevel(figure 4) , known also as a crosscut tooth or simply A.T.B.,has the tops of adjacent teeth ground at alternating angles. Itmakes a very smooth crosscut, particularly across stringy fibers.Its disadvantage is that the leading-point edge is fragileand wears relatively quickly. Also it cannot make a squarebottom cut. Crosscut-tooth blades can be used for rippingbut easily become overloaded if the work is fed too fast.To prolong the life of the blade becween sharpenings by reducingwear, a rougher tooth, or lead tooth, is introduced. Itsfunction is simply to open a path for the following rakerteeth, which take only a finishing cut on the sides of the kerf.Rougher teeth have one or both corners ground at 450• Theraker teeth are usually square, as in figure 5, but they mayhave the alternate top bevel as in figure 6. <strong>No</strong>te that the• I!IStraight body style• I, IIHOllow-ground body styleFixed-collar side is fla t ,I : IV. radiusThin-rim body styleFig. 2: Three different body styles°<strong>No</strong>te largehook angk -----rof 20Fig. 3: Typical chisel or rip tooth<strong>No</strong>te hook angle of 12 °Fig. 4: Alternate topbevet IA.T.B.IRaker\O"h••__ . toorth--zr--,f'zr '"\A.T.B. teeth/Fig. 5: A triple-chip saw design.Every other tooth has its cornersground off at 45°. This makes avery strong and durable blade.Double-45° toothFig. 6: In this saw; two A. T. 8. teeth arefollowed by a double 45 ° tooth. This designcombines the benefits of smooth cutting insensitive materials with strength and long life.Top viewFig. 7: Alternateface bevel73
Square rakertoothFig. 8: In this design two or more A. T. B.teeth are followed by a square raker.Here rougher teeth arebeveled on alternating sides.Fig. 9: Alternating corner tooth formFig. 10: Typical combina tion blade designed forboth ripping and crosscutting. Four A. T. B. teethare followed by square raker.Fig. 11: limited-feed combination bladeDistance between teeth determines maximum rate of feed.Fig. 12: A scoring saw is used for cutting thin veneers. Usually itsdepth of cut is very shallow. .rougher tooth makes a slightly deeper cut, in order to protectthe tips of the rakers.For abrasive, brittle materials like panicle board, the facesof the teeth are slanted alternately right and left (figure 7,previous page) , a configuration that reduces chipping out.This arrangement is achieved by placing the teeth in the plateat the required angle or by grinding them.There are many other possible tooth configurations. For example,every second or third tooth in an A.T.B. can be followedby a square raker (figure 8) , or the rougher tooth itselfcan be beveled first on one side and then the other, as infigure 9.Figure 10 shows a typical combination blade. It has four alternatingbeveled teeth followed by a square raker and is designedfor both ripping and crosscutting.Another general-purpose saw is shown in figure 11. It is designedto limit the feed to a predetermined chip load and canbe used in portable electric saws, table saws and radial armsaws when smoothness of cut is unimportant.Most carbide blades can be used on both radial arm sawsand table saws. However, as the hook angle increases (see figure1, p. 72) so does the danger of a radial arm saw grabbingthe work (self-feeding) . Positive hook angles of 13" to 150 areusual, although some blades designed for swing-and-pivotsaws may have a negative hook. Heavy-duty ripsaws go to theother extreme with a 250 positive hook.Figure 12 shows a scoring saw, which is designed to cutcleanly through fragile veneers. It usually cuts only about%6 in. deep.Chip loads -For a particular tooth configuration, there arefour factors that govern the performance of a circular saw:speed of rotation, number of teeth, rate of feed, and chipload. Chip load is nothing more than the thickness of thechip removed by a sawtooth. There is a simple relationshipbetween these four variables which can be expressed by thefollowing equation:Chip load (in. / tooth)feed rate (in. / min}RPM x no. of teethAs one would expect, halving the rate of feed or doubling thenumber of teeth reduces the chip load by half, and it is easyto see that a smooth cut requires a low chip load-either aslow rate of feed, lots of teeth, or both. What is not so obviousis that increasing the chip load increases the life of theblade. This is because the greatest wear on the tooth occurswhen the cutting edge strikes the work at high velocity.Therefore, the larger the chip load per tooth, the fewer timeseach tooth has to separate a chip from the material, and thefewer impacts the tooth withstands in cutting a given lengthof material. Maximum attainable chip loads are affected bythe condition of the machine, the thickness of the blade relativeto its diameter and the nature and thickness of the materialthat is being cut. Accurate alignment of the sawblade with74
the path of feed makes a considerable difference in the performanceof the blade.Choosing a blade -Once you have decided on the toothconfiguration you want, how do you select a good blade?Much of the work that goes into making a high-quality carbideblade is invisible (tensioning, for example), and it is difficultto make an intelligent choice between competingbrands. In general, the price, the terms of the warranty andthe manufacturer's reputation are the best indicators, buthere are some other things to look for: A good blade shouldbe flat. When placed on a true arbor, the total indicator runoutof the blade body should not exceed 0.005 in. for a lO-in.blade, and outside-diameter runout should not exceed0.002 in. With a hand lens, check the quality of grind on thesawteeth. If the carbide looks smooth and shiny, it's good,but if it has deep and irregular grind lines, the teeth will dullrapidly. The teeth should be notched in and neatly brazed tothe body of the saw (figure 13). There should be at least %l in.of carbide on each tooth of a 50-tooth saw.Sharpening - Carbide blades are sharpened on special machinesusing diamond grinding wheels, and only about0.005 in. of carbide should be removed each time. This requiresskill, and blade life can be considerably shortened bycareless or improper grinding. Saws sometimes come backfrom being sharpened with the tips missing carbide particleson one side because the tip was not properly supported andthe pressure between the wheel and the sawtooth producedvibration. Another common way of losing carbide particles isto use coarse-grit wheels for finish-grinding. It may cost less,but the results are expensive. The peaks and valleys left bythese wheels leave unsupported particles that can easily beknocked off during the cut, rapidly dulling the saw.Broken and damaged teeth can be replaced and ground tothe exact size and shape of the others. If properly cared for, agood blade can be sharpened 30 to 40 times before it needs tobe retipped.Retipping - When there is not enough carbide left togrind, the remains of the teeth are removed with a torch. Thenotches are ground out, new teeth are brazed on and thenground to the same shape as the original ones. Next, the bodyof the saw is checked for flatness and, if necessary, straightenedby hammering. The result should be a blade equal inquality to the original one. There will not be a great savingsin money, but you will have the satisfaction of making a smallstand against our throw-away economy.Care of blades -Ruining a carbide blade is much easierthan you think, and I have been guilty of most, if not all, ofthe following abuses. Saws are most frequently (and most seriously)damaged by overheating. This is usually caused bycontinuing to use a blade that is dull but can also happen bytrying to feed stock too fast. Saws warped by overheating haveto be straightened by hammering and sometimes retensionedas well. When the teeth are very dull they have to have morecarbide ground off to make them sharp, and this shortens thelife of the blade. Like steel saws, carbide blades gum up whencutting resinous woods. The best way to clean them is bysoaking them overnight in kerosene or paint remover.Faulty alignment is another major source of trouble. To getLike this<strong>No</strong>t like thisFig. 13: Carbide tips should be brazed in to pockets in the saw body,not stuck on the leading edge of a gullet.a clean, accurate cut, the sawblade must not only run true (nowobble) but also be parallel to the direction of feed, whichmeans parallel to the miter-gauge slots in the saw table. Gettingproper alignment (if you don't have it already) usuallyrequires loosening the trunnions and moving the arborassembly slightly.Once the sawblade is trued up with the line of feed, youshould align the rip fence with the blade, and on this thereare two schools of thought. One argues that the blade and. fence should be exactly parallel. The other maintains that thefence should be canted slightly away from the line of feed(about Y32 in. or less) on the outfeed side of the table. Thisensures that only those teeth on their downward cutting arccontact the workpiece. Too much of a cant will result in a"heel-and-toe" condition, make feeding difficult and possiblycause the blade to overheat and distort.To see whether the saw is running true, clamp a machinist'sdial indicator to the saw table. Mark a spot near the perimeterof the blade and rotate it slowly through 3600• If you cannotget a dial indicator, clamp a piece of smooth steel almost up. to the blade and check the distance between it and the bladewith feeler gauges as you rotate the blade. If the indicatedrunout exceeds 0.005 in., find out the reason. First take thesaw off the arbor and make sure the saw collars are clean andnot worn. Try the blade on another machine. If the trouble isin the blade and it is not flat, do not take a ball-peen hammerto it, but send it out for correction. Never try to put shimsbetween the saw collars and the blade. This can distort theblade and damage it permanently.Other factors that will affect a saw's performance, if not itshealth, are throat plates (table insens) that are not closeenough to the saw or not level with the table, vibration fromloose arbors or bearings, tables not flat, and mismatched orloose V-belts. Never try to slow down a saw by pressing somethingagainst its side. This can generate enough heat to distortthe body. Don't drill holes in a blade or enlarge existingholes. This will upset the tension. Keep it on a wooden peg orrack all by itself when not in use. When shipping make sure,if there is a bolt through the arbor hole, that it is not puttingpressure on the body. Finally, never lay a carbide saw (or anyother edge 'tool) down on a hard surface like a cast-iron sawtable. Remember, the teeth are made of grains of tungstencarbide bonded together-super hard but vulnerable tomIstreatment. 0Contributing editor Simon Watts prepared this article withthe help of Steven A. Segal of <strong>No</strong>rth Amen'can Products inAtlanta, Ga.75
Hardwood PlywoodModern 'glued-up stuff ' saves work, money and woodby Tage Fn"dhere is great confusion about how to buy hardwoodT plywood, about the different grades and qualities, andabout its advantages and disadvantages against solid wood.Having a good knowledge of these things makes it easy todecide when to use plywood and when to use solid stock.The advantage of plywood is that it's more stable andwon't change its dimensions, except in thickness. It's easier tomake machine joints using veneer-core plywood because thealternating direction of the plies makes for about 50% longgrainto long-grain gluing surfaces. It would be impossible tomake much modern furniture without plywood.The advantage of solid wood is that it can be shaped andcarved. Its color is usually darker and its figure more pronouncedbecause it's not cooked and steamed like veneer.The joints in solid-wood constructions can be exposed, makingan attractive addition to the design. Solid-wood surfacesare also easier to repair, something to consider when making apiece that will receive lots of wear and possible abuse.The greatest disadvantages of solid wood are that it doesn'thave much strength across its width, and its dimensions neverstabilize-it's always moving in width and thickness. The disadvantagesof plywood are that it's difficult to repair, itsjoints usually have to be hidden and its edges have to be facedwith either veneer or strips of solid wood.Many people talk about plywood and veneer as "that modernglued-up stuff. " Actually there's nothing modern aboutit, except the glues used today. Veneering, the basis for plywoodconstruction, was known to the Egyptians 3,500 yearsago. The ancient Greeks and Romans used the techniquealso, but during the Middle Ages the technology was lost,and solid-wood furniture was joined with pegs rather thanglue. In the 15th century the Italians rediscovered the techniqueof veneering and the art spread throughout Europe,reaching its climax of skill and artistry in 18th-centuryEngland and France. With the introduction of machinery andthe decline in craftsmanship during the 19th century, the artof veneering again suffered. After World War I, the firstfumbling experiments were made to use plywood in furnitureconstruction, and since then it has become indispensable.The flush corners and edges of modern furniture and thedevelopment of panel constructions into plain unbroken surfaceswould have been impossible without the dimensionalstability of plywood. Architecture has been revolutionized bythe availability of standard-size sheets of wood that arestronger than ordinary lumber. Exterior-grade plywood madewith weather-resistant glue and used for decking and sidinghas changed our conception of house framing. And with theshortage of wood today, manufacturing veneer for plywood,unlike sawing boards from logs, produces little waste. Almost100% of the log is made into plywood, except for its center,which is put to other uses.Plywood means less waste for the craftsman too-there areno knots, checks or other natural defects that must be cut out.Also, more expensive species of woods, such as rosewood andteak, can be purchased in plywood form for about half thecost of an equal amount of solid stock. Generally though, thecost of one square foot of good quality %-in. hardwood plywoodis about the same as one board foot of solid stock of thesame species. Using plywood saves labor as well as materialbecause it's not necessary to glue up large panels from narrowboards or to construct frames to hold the panels. Woodworkersshould not rule out using plywood because they thinkit costs too much.Plywood veneers are cut in one of four ways, depending onthe species of the lumber and the use to which the veneer willbe put. Most veneer is rotary cut. This method requires firstcooking the log and removing its bark. Then it's placed betweencenters in a big lathe and revolved into a knife. As thelog turns, the knife automatically advances into the stock at acontrolled rate, which determines the thickness of the veneer.A cylinder six or seven inches in diameter is left over. Rotarycutveneer (FWW #12, Sept. '78, pp. 83-85) doesn't have thefine figure of sliced veneer, because when rotary cut, the veneeris peeled off the log like a sheet of wrapping paper beingpulled from a roll. Because the cuts are always parallel to theannual rings, the grain of the veneer looks unnaturallystretched and doesn 't have much character.For face veneer the finest hardwood logs are used, and theveneer is sliced instead of rotary cut. Whether cut tangentiallyor quarter-cut, there are several ways to slice veneer. Usuallythe log is rammed into a fixed knife and automatically advancedbetween cuts so each slice is the exact same thickness,usually 1J28 in. The pieces are kept in order as they come fromthe machine so they can be matched. Sliced veneers are soldin flitches, bundles containing all the stock from one log orfrom a section of a large log. This makes it possible to panel awhole room with face veneer from the same tree.Somewhat similar to sliced veneer, but cut instead on aRotary-cut veneers often lack natural-looking figure because they 'recut parallel to the growth rings.76
lathe, is half-round veneer. The log is bolted to a stay andmounted to the lathe in eccentric chucks. As the log revolves,it presents only a small arc of its circumference to the knife.Another method of getting veneer is by sawing on a band sawwith a thin blade, which makes a narrow kerf. Even so, asmuch wood is wasted as is saved. Because this way produces somuch waste, it is little used.Though most plywood is made for the building industry,there are several good products available to the craftsman,who can buy them with the face veneer already glued on orwith no face veneer at all (so he can veneer it himself). Theplywoods commonly used by the craftsman are veneer core,lumber core, particle-board core and fiber-board core. Allplywood is built up of an uneven number of plies of variousthicknesses, depending on the finished thickness of the sheetitself. But whatever the thickness and the species of lumberused, the grain direction of any ply must be at right angles tothat of the adjacent plies. This crossing of the grains givesplywood its great strength and dimensional stability.The most used and best-known plywood is veneer core.The thinner the veneer used to build up the core, the greaterthe strength of the plywood. I would never use, for example,three-ply Y4 -in. plywood. In most cases such plywood is madeof cheap materials, especially the core, so any imperfection inthe core telegraphs right through the face veneer. Assumingthat the face veneers are 1f2s in. thick, this makes the coreabout Y5 in. thick, and because the grain of the core mustcross the grain of the face veneers at right angles, the plywoodis weak along its length and easy to break. If %-in. plywood ismade out of five plies, the center ply and the face veneers runin the same direction, and with the rwo crossbands, it'sstronger and more stable.The quality of veneer-core plywood varies greatly. Cheaperplywood contains voids and unsound knots in its inner plies.Voids in the crossband, the plies directly below the face plies;make the face veneers weak in those places because there'snothing to back them up, and they can break through. A betterveneer-core plywood is a Russian product called Balticbirch. The quality of the wood is good, but the plywood itselftends to rwist, and lately I've found that the layers sometimesseparate. Most Baltic birch plywood is made to metric dimensions-standardsheets are 150 cm by 150 cm (roughly 5 ft.square) and the thickness also is in millimeters. Another verygood veneer core is made in the Philippines and is sold underthe general commercial name lauan. It is very stable and thecore is good. Its color is close to mahogany.Lumber-core plywood is made up of rwo face veneers, rwocrossbands and a solid-wood core. Because the core is muchthicker than the crossbands and its grain runs in the same directionas the face veneers, it has great strength lengthwise.Most lumber-core plywood is made up of edge-joined stripsin its center; poplar and basswood are common, thoughmahogany is better. These strips vary in width, but 3 in. isusually the maximum. The strips are glued together and thendressed to the necessary thickness. Next the cross bands andface veneers are glued on. Lumber-core plywood can rwist becausethe glued-up core acts like one piece of wood.Imported lauan plywood is also available in lumber core.The difference berween the lauan lumber core and the ordinarycommercial kind is that the core strips in the lauan arenot glued up into one solid sheet. They're held together bythe crossband plies with small spaces between the strips. ThisThe three-ply matenal, top, is weaker than the more expensive fiveplymatenal, bottom. Defects in the three-ply core will telegraphthrough the face veneer.Three·ply '14-in. plywood breaks easily, especially if it is used in narrowstnjJS.Voids in cheap plywood weaken the entire sheet and make the faceveneers vulnerable because there 's nothing to back them up.Baltic birch plywood, a RUSSIan import, contains no voids and has exceptionalstrength and good working properties. Though it sometimestwists and delaminates, it 's generally a supenor product.77
--=-===-Lumber-coreplywoodCrossbands Face veneersCoreTwo bookmatched veneers. When taken fro m the flitch, one piece isflipped over, as you would open a book.Slipmatched veneers have a different look because there 's no mirrorimageeffect.allows each core strip to move independently, making theplywood more stable and more suitable for cabinetmaking.This lumber-core plywood is available without face veneers in4x8 sheets that the craftsman himself can veneer ..When veneering plywood yourself, take the pieces of veneerfrom either the top of the flitch or the bottom. Don'tpull them out of the center or any other place in the bundlebecause that splits up the flitch and makes it impossible tomatch the figure later on. There are two ways to match veneeron a panel. One is called bookmatching, because the piece ontop is flipped over, as though you were opening the cover of abook. Bookmatching can be done with more than two piecesof veneer, and this is usually how good-quality sheets ofplywood are faced. The other way of matching is to useveneers in the order they come from the flitch, only withoutflipping them. This is called slipmatching.When working plywood of any type, the cardinal rule isthat what you do to one side you must do to the other.Whether you veneer your own plywood blanks or buy themwith the face veneers already glued on, make sure that theface ply and the back ply are the same species. If two differentface veneers are used, for example, walnut on the front andpoplar on the back, the two will expand and contract at differentrates. There are plywoods available with plies of thesame species on the front and back, though usually the qualityof the front veneer is better and allows for fewer defects.There are other materials that can be veneered or that comealready faced with veneer. These are sold under the commercialnames of particle board and fiber board and are usuallyless expensive but not nearly as strong as plywood. The greatestadvantage in using these materials is that because they'remade out of sawdust or fibers they don't have any grain direction,so the veneer can be applied with its grain going in any. direction. The greatest disadvantage of this type of material isthat it doesn't have much strength and that it's not easy tojoin together, because the joints must be reinforced withsplines made of some other material. Another disadvantageof particle board is that it will bow if it's used to make doorsthat slide in a track on the bottom. This is because there's nograin direction to support the weight. To prevent this fromhappening, either put a wide facing on the edges of the doorsor hang them from a frame at the top .The U. S. Department of Commerce has established voluntaryproduct standards for grading hardwood plywood. Thisgrading system is different from the one used to grade softwoodplywood, and the two should not be confused. Premium-gradeveneers are given the symbol A, while otherquality veneers are designated by a number: good grade- I,sound grade-2, utility grade-3, backing grade-4, and aspecialty grade-SP. Any combination is possible, the firstsymbol representing the quality of the face veneer and thesecond the quality of the back veneer. Plywood grade A-3, forexample, has a premium-quality face veneer and a utilitygradeback veneer. The absolute best would be A-A. Oftenthe back veneer is a different species from the front veneer, soit's a good idea to ask about this when ordering because thegrading system doesn't take this into account. For more information,write the Hardwood Plywood Manufacturers Association,Box 2789, Reston, Va. 22090. 0Tage Fn"d, professor emen'tus at Rhode Island School ofDesign, is senior editor af Fine Woodworking magazine.78
French Fitting<strong>Making</strong> the presentation case presentableby John Livelyhough the term is most often applied to arms cases, a box,T. a drawer or a chest can be French-fitted to hold almostanything. Drafting, optical and photographic equipment,large pieces of jewelry, hand tools and musical instrumentsare but a few of the items that can benefit from being snuggledinto a closely fitting, leather-lined recess. The method Iwill describe deals specifically with cases for handguns.In the last quarter of the 18th century, a gentleman's purchaseof a pair of new pistols was no casual matter. As muchobjects of art as instruments of defense, the custom-built pistolsof Georgian times involved the cooperative effons ofmany skilled artisans. Master gunsmiths, acting much likegeneral contractors, retained the services of independentfounders, barrelmakers, lockmakers, woodcarvers, goldsmiths,silversmiths and engravers. After designing the pansand farming out the various jobs, the gunsmith's work wasdone, except for collecting and assembling the finishedpieces. Then the pistols were delivered to one more specialist-thecasemaker. It is the work of these casemakers that hasensured the survival into our time of so many splendid examplesof 18th-century gunsmithing. Thanks to them, it isnot unusual for an auctioneer's bulletin to describe the conditionof 200-year-old firearms as "excellent" or "original."Though these cases served well enough for storage and display,they were designed for traveling by coach. They wereusually shallow, rectangular boxes in sturdy oak or mahogany,dovetailed together, with their flush-fitting lids secured byhinges at the rear and an inlet, keyed lock at the front. Onthe outside, these cases were paradigms of unadorned simplicity,relying on the wood's figure and color for decoration.Yet on the inside, things were not so simple. Muzzle-loadingarms required a number of accessory tools that had also tobe fitted into the case, and all the pieces had to be kept fromcoming into damaging and possibly dangerous contact withone another. Two distinct methods of casefitting arose to addressthis necessity-the English and the French. Englishcasemakers found it expedient to divide the case into straightsided,cloth-lined compartments, each conforming, more orless, to the shape of the piece it contained. The inside of thetypical English case appears labyrinthine. The French casemakerschose instead to fashion compartments in the preciseshape of the pieces. They created these negative spaces eitherby cutting the shapes into a solid panel of wood or by makingmolded impressions. In either event, they usually glued clothinside the impressions as well as to the ground surface above,so it covered the entire inside of the case. Though elevationsvary from case to case, the typical French-fitted box presentsits contents in half relief, the metal of the pistols contrastingnicely with the cloth-covered ground.The fitted pistol case remained an indispensable part of agentleman's traveling gear until the advent of repeating armsand pocket pistols toward the middle of the 19th century.The wooden carrying case then gave way to the leather holsterand the vest pocket. But as a presentation case for custommadeor special-issue arms, the fitted wooden case continuedto be made, and even today the major arms manufacturerssell them as accessories. Their cases are inferior, however, andin recent years the interest of collectors in black-powder andreproduction firearms has created a new demand for customfittedpresentation cases. The woodworker is in a good positionto compete. Too, the marketplace is accessible via thewell-attended gun shows held several times a year in mostBlack walnut main case holds Colt dragoon revolver andpowder flask, whtle cleaning and bullet-making toolsfit into lidded inner box at nght.French-fitted presentation case, 21 in. by 18 in. by 5 in., is made 0/ mahoganywith pad auk molding inside, and red leather lining. An inner lid (not shown) restsatop the molding inside the case.Photos: John Barr([to; U1uS[ration: Ric Lopez 79
major cities. With samples to show, the casemaker is sure togenerate considerable interest.Before proceeding, I have to point out that my fittingmethod differs in several significant respects from the traditionaltreatment. First, I line the case with leather instead ofcloth. I've found that fabric wears quickly where it contactsthe pieces, and it eventually becomes grimy from gun oil andother residues. Also, it is almost impossible to line the cavitieswith abric without unsightly wrinkles. Second, I don't makea molded impression of the pieces, but rather I cut the shapesinto a solid panel of wood (called an inset panel) , line theirinner edges with leather, and secure the panel above aleather-covered cushion that fills the bottom of the case.Using wood rather than cloth as the visible ground not onlyallows me greater opportunity to create visual effects, but alsomakes for a more durable interior. And because it is small,the inset panel is the perfect place for using a nicely figuredscrap from the stash under my bench.<strong>Making</strong> the inset panel -French fitting begins wherecasework ordinarily leaves off, though it's good to have all thematerials on hand before starting the case itself. If you wantto use several different species of wood on the interior, youwill need to coordinate these with the color of the lining material.Leather comes in lots of colors, but they may not all beavailable all of the time. At a leathercraft supply store, selectupholstery leather that is finished on one side but left unfinishedor sueded on the other. Buy enough to cover doublethe bottom surface area of the case.Finished upholstery leather is many times more durablethan cloth, its finished surface will not soak up oil and dirt,and it can be cleaned with a damp cloth. The leather's unfinishedside has just the right texture for gluing to wood withcontact adhesive, and its finished side will resist glue penetration.You can wipe off glue smears with your finger.Once the case is made, cut four cleats 0/4 in. square by itsinner dimensions. Miter them to length and glue them to thebottom and inner sides of the case. Next, obtain a piece ofmedium-density upholstery foam exactly 1 in. thick, and cutit to fit snugly between the cleats. As you will see later, theY4 -in. difference between the thickness of the foam and thethickness of the cleats is important. <strong>No</strong>w cut a piece of leatherto the inner dimensions of the case and tack it securely alongSection through caseBrassscrew,),. ·in. solidinset panel1-in. medium-densityupholsteryLeatherfoam__ 1\ .. ."Tack --+2a ::::l _ ..CleatLidOptional inner lid,;. . d·.i:'·i··.:·.:T : . · ·:·_:-'Q;ii;,im'lil'tllmm;@mY.-in. plywoodbottom panelits edges to the top of the cleats, one tack every 1 %. in. Theleather should be taut, but not stretched across the cushion.When the leather is tacked down, there must be no wrinklesor bulges caused by uneven tension.Start by making templates from the pistols or whatever is tobe fitted. This requires tracing around the contours so thatthe completed outline is larger than the object piece by thethickness of the leather. Leather does not come uniformly offthe cow, but if your outline is YI6 in. larger than the piece youare fitting, your template will be close enough. To make thistracing, clamp the object over a piece of poster board. I use abench holdfast with a pad of foam and a small scrap of wood.To produce the slightly enlarged outline, use a device similarto the one described by Carli'sle Lynch (FWW #18, Sept. '79,p. 83). But make yours with a V-shaped base (because it mustfollow tight curves) and a tracer positioned YI6 in. in advanceof the scribing tool.Once you have completed the template, dimension thestock you have chosen to the inside measurements of yourcase, and at least half as thick as the object you are fitting-0/4in. does well for pistols. Lay the template on thestock and move it around until you are satisfied; if more thanone object must fit, try different arrangements until you findone that is both pleasing and practical. Trace the outline ofthe templates onto the bottom face of the panel. If you have ajigsaw, drill starter holes and cut out the shapes, being carefulnot to stray beyond the inside edge of the traced lines. Don'trisk ruination by sawing too close to tight corners. These areaswill be properly enlarged by ftling later.Rather than jigsawing, I prefer the band saw. But insteadof attempting to weld a blade threaded through a pilot hole,I simply rip the panel in two so the saw kerf passes through allthe proposed negative spaces at once. Joint the sawn edges,dry-clamp the two pieces together, and reposition the templateson the top surface to make new tracings correspondingto the ones on the bottom. This is necessary because the rippingdestroys the original proportions. Then I unclamp, sawout the spaces, and glue the two parts back together. You willprobably need to clamp from the inner edges of the sawn-outspaces, using several small handscrews, along with bar clampsat either end of the panel. Different panels will call for differentstrategies.Before proceeding any further, saw a slot along each endgrainedge to receive a spline 1/4 in. thick by at least "h. in.wide, the full width of the panel. Rip the two splines fromsolid material. They should seat tightly enough to require afew gentle taps with hammer and block. Do not omit thisstep or postpone it; without reinforcement, the short-grainportions of the panel won't stand up to subsequent handling,and it will crack the first time you give it a hard look. I usuallytake the additional precaution of boring through narrowshort-grain walls and gluing in bits of 1/4-in. dowel.<strong>No</strong>w you should begin to clean up the bandsawn inneredges with bastard files-a half-round, a triangular and asmall round. Assuming the entire width of your traced outlineis still visible, as it should be, you will want to file thesawn-out spaces just to the other edge of the line. Do not obliteratethe line, but leave a visible trace of it all around.The next steps are quick and easy. Make sure the panel fitseasily in the case, bearing in mind probable movement acrossthe grain. With a marking gauge, scribe the panel's upperface % in. in from all fout edges. Then mark equidistant80
Halved panel stock is reassembled after spaces are bandsawn.Leather is cemented into place. <strong>No</strong>te reinforcing spline in panel's edge.centers for pilot holes, three of them along the length andtwo on the width. Bore and counterbore on these centers for1 Y4 -in. by #8 wood screws. If you anticipate more thannegligible movement, slot appropriate holes to allow for it.Transfer the centers to the leather-covered cleats on the bottomof the case, and bore pilot holes in them, too.Lining the spaces -At last it is time for an initial fitting.Return the panel to the case and screw it down. Since thefoam cushion is higher than the cleats, it will be compressed.Tighten the panel as you would tighten a drum-head-not allat once on any one side, but in even stages all around. Whenit is firmly seated, you will see that the covering has welled upinto the cavities, forming a firm, neatly crowned pillow. <strong>No</strong>wyou can nestle the items into their compartments. Cut several·patches of leather and slip them between the edges of the cutoutand the object pieces at various places along their contours.Then study the unfilled spaces to determine whether aproper fit will be achieved once the entire inner edge is linedwith leather. Remember that you want a smooth fit, but notone that is tight. Whatever you are fitting should settle intoits compartment by its own weight. Once settled in, thereshould be an absolute minimum of slop. If you try to wiggleit around, it should not move more than Y3 2 in. in any directionand preferably it should remain dead still. Shade thetight spots with a pencil, remove the panel from the case andfile some more. Then test it again.When the fit is correct, seal the surfaces of the panel so thatthey will resist the glue you will apply inside the cavities later.Take care to prevent the finish from dripping over the edgesof the cut-outs, as this will interfere with gluing the leather.When the faces of the panel are sealed, you are ready toline its inner contours with leather, which should be cut(straightedge and sharp knife) into long strips a uniform 1 in.wide. These strips must be long enough to run the entire distance-anyattempt to splice will leave ugly gaps. <strong>No</strong>w lay thestrips face down and apply three coats of contact cement totheir unfinished sides, waiting for each coat to dry. Do thesame to the inner edges of the panel. When the final coatshave dried, clamp the panel in a vise and begin sticking thestrips of leather to the contoured edges, allowing the strips tooverhang about in. to each side. Begin and end in the samecorner to make the junction as unobtrusive as possible.Press the leather firmly into place with your fingers. Forthose tight little curves and culs-de-sac, use a round screwdrivershaft or the like to put pressure where it belongs. Don'ttush this operation, and don't permit the leather to touch thetacky surfaces ahead of the spot you are working on. If it sticksto the wrong place and you try to pull it loose, half of theleather Strip will remain stuck to the wood. Should this happen,pull all the leather loose and clean up the mess with lacquerthinner, which will probably also dissolve the finish onthe panel's face. Be assured of a nasty tussle if you let theleather stick where it doesn't belong.When the inner edges are lined, take a pair of manicurescissors and trim the leather flush with the top and bottomsurfaces of the panel. Before going further, you need to workin a bead of yellow glue with your fingertip to stiffen the rawedges of the leather so that they will not roll over in use.When the glue has hardened, sand the face of the panel with220-grit paper. A subsequent sanding with 400-grit paperwill leave the panel ready for final finishing, which should bedone before it is fastened to the cleats.The final step is to design and make a molding to trim outthe inside corners of the case. The only requirement of thedesign is that the base of the molding be thick enough to obscurethe heads of the screws that fasten the inset panel. Youmight attach this molding with small brass screws, so you canremove the panel should the need for repair arise.Having said little about the design of the case itself, Iwould like to close with a few prejudicial remarks. For a contemporarycollector, a presentation case is seldom used as atraveling container. It's an article of household furniture withthe specific function of preserving and displaying objects ofsignificance and value. Though it may be carried about fromtime to time, there is no need to feel restricted by the designrequirements of a traveling case. Apart from structuralnecessities, your design should be aimed at achieving harmony,balance and continuity between the case and its contents,so that the two can be perceived as one thing. 0John Lively, 35, has joined Fine Woodworking magazine asassistant editor. He used to make cabinets and bz/liard tablesin Dallas, Tex.81
The Woodcraft Sceneby Roger HolmesPREsCOlE'S loNDON SHOW British woodworkers stretch traditional formsritish designesJ makers almostB always use tradi.u.onal forms of construction,and their designs push theseforms to their limits, and sometimesbeyond. This traditional impetus canbe traced back to the Arts and Craftsfoundations, established early in thiscentury by Ernest Gimson and Sidneyand Ernest Barnsley. So far there hasbeen little experimentation with sculpturalforms worked from solid blocks orstacked laminations in the mode ofAmerican furniture sculptors, thoughthis is not to say that there has been noinnovation. If the successes of the Britishare often less spectacular than thoseof their American contemporaries, sothen are their failures less disastrous.British craft furniture is still made essentiallyfor use, and, as this exhibitionshows for better or worse, the craftsmanstill prevails over the artist.Ann Hartree, who operates the PrescoteGallery in Oxfordshire (Cropredy,Banbury, Oxon OX17 IPF, England,telephone 0295.75.660), produces anannual show in London. For this year(March 4-28) she assembled an impressivearray of contemporary craft furniture.Accompanied by wall hangings,rugs, calligraphy and books bound bymembers of the Society of DesignerBookbinders, the exhibition includedthe work of over 50 craftsmen, half ofwhom were woodworkers. Most of themajor pieces were commissioned worksshown on loan.Other shows at the Prescote Galleryinclud ' e Furniture Makers <strong>1980</strong>Oune 1-28), which exhibited pieces offurniture that were begun no later thantwo years ago, and the Edinburgh Festival(Aug. 17 to Sept. 9) , a major showingof wood furniture and crafts inother media. 0Ashley Cartwrights 's elm garden table and chairs welcomedvisitors and set the tone for the first of the exhibition 's threespacious rooms. The table, 25 'h in. square and 28'h in. high, andthe chairs, 13 in. square and 18 in. high, have fo ur-board tops thatare joined together by square-section pegs.Edward Barnsley 's rosewood chair and dining table, skillfully executed byGeorge Taylor. The tabletop is inlaid with a sycamore banding, and itscurved trestle legs are laminated from 'la-in. thick resawn strips, bent andglued together in the same order they were sawn from the stock. Thestretcher is also laminated, though the trestle feet and tops are solid.Below, Richard La Trobe Bateman 's elm dining table, 36 in. wide, 84 in. lon g and 30 in. high, along with hissmoker's chair, have somewhat of a self conscious count7fe el about them, due in large measure to the adzedsurfaces of the chair seat and tabletop. Right, high stoo , also by Bateman, is made of elm and has a scoopedand adzed seat. The back is sawn, not bent.82
Sharing a smallroom with other, more conventional pieceswas Fred Baier's pastel pink and green desk, above.Baier's work IS about as close as Bn'tlsh craftsmen get tofantasy furniture, thou g h thIs piece stIli serves a practicalfunction even If it IS a bit whimsical in design. Made ofs J camoreand colored with translucent dy es that allow the grain oj the woodto show through under a clear lacquer top coat, the construction ofthe desk IS dominated by its central pedestal. Branching out fromthIs are the fe et and the supporting arms that run beneath thewn'ting surface, whose plane IS intersected at either end by storageboxes. CommIssioned along with Cartwri g ht's garden furniture fora book on fu rniture making, the desk lacks the technical virtuositythat seems to overwhelm some of the other pieces.Martin Gn"erson 's cabinet, right, in shedua and pear, 150/4 in. deep, 44 in.wide and 72 in. high, IS made entirely fro m solid stock except for the back, which IS veneered. <strong>No</strong>tehow the panels in the doors and sides are raised and fielded but not accompanied by the usual bevel. The bandthat sets off the field from the frame IS fiat, producing a deep and pleasing shadow. The edges of the field, as well as theedges of the frame members, are gently rounded. ThIs softens the appearance of what IS otherwIse a very imposing, megalithic structure.Exemplary construction and idiosyncratic designmark Richard Heatley 's Amencan walnut desk,22 in . WIde, 49 in. long and 29 in. high. Its drawersfit with the close precIsion of machine parts, and I'tSthin frame and articulate joints look like bone structure.The carcase IS veneered, the top made of bookmatchedpieces with sycamore bandi. The frame,le g s, foil front and drawer fronts are 0 solid walnut,while the drawer SIdes are ofEnglzs oak. Thoughthe whole piece IS sy mmetn"cal, its indivIdual partsare not, producing a vigorous, orgamc look.83
Plow of oak, koa, ash, walnut, rosewood and bubinga is by David Watson, a truck dn'ver by trade, ofLakeuJood, Wash. What appears to be a motorcycle engine, left, is connected via a wooden chain to adn've wheel, although nothing actually moves. Wh en asked what fu nction the piece serves,Watson replied, 'It sort of divides the shag carpet in my living room.'The <strong>No</strong>rthwest W oodsAt the end of its first year of operation, the Oregon School of Artsand Crafts in Portland organized a juried exhibition by <strong>No</strong>rthwestwoodworkers, and a wood conference for professionals and amateurs.Both the show and the mid-April conference pinpointed the issue ofhow to marry innovative design and sound technique. Onecabinetmaker summed it up: "I'd almost rather see something badlydesigned but well-crafted than something well designed but badlycrafted ." Another countered, "Up to now I've concentrated ontechnique, bur now I'm asking myself, 'Where do I go from here?' "The Oregon school, which teaches ten major crafts, is becoming acenter for craft education and promotion . Its success can be gaugedby how many times a conference participant said, "I never knew somany people were doing this kind of work in the <strong>No</strong>rthwest. I'vebeen working in isolation too long."-Curtis ErpeldingRocking horse in oak, hollyand vermzlion by toymakerRichard Showalter ofMcKenzie Bn'dge, Ore.Threaded wooden boltsenable the horse tobe knocked downfo r shipping.Cherry secretary byStephen Barney of Seattle.Barney apprenticed inJapan and uses Onentaltools and techniques.Through dovetads jointhe carcase, which sitsfreely on its stand. Therounded edge of thedropleaf closes into acove in the carcase.Drawer sides are lap dovetaded in basswood;, hardware is hand-forged.