Woodsmith 154 - MetosExpo - Free
Woodsmith 154 - MetosExpo - Free
Woodsmith 154 - MetosExpo - Free
- No tags were found...

Create successful ePaper yourself
Turn your PDF publications into a flip-book with our unique Google optimized e-Paper software.
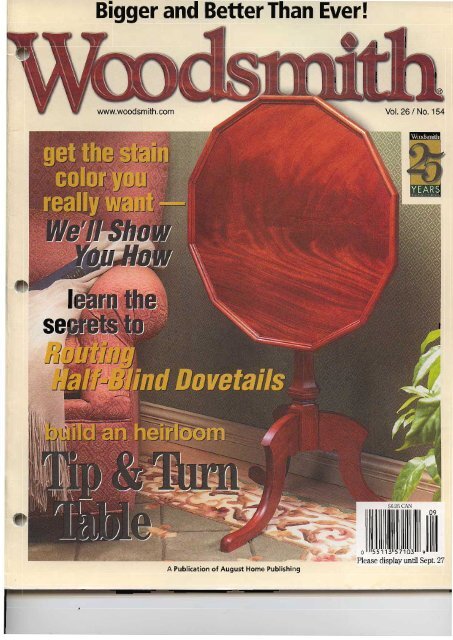
Bigger and Better Than Ever!A Publication of august Home Publishing^ ,.dPlease display until S€pL 27
-Iilookin insideTable Contendepartmentstools of the tradeRouterTablejoinery ........,.. 40rrom our reaoersWe tried out some jolnery bit5 wth great results.Tips & Techniques. . .. .. .. .. .. .. . 4smal shop solutionsal aooulTask Lighting .........42Buying Veneer .......,..8F ve nexpensive lamps that shed new light onNot sure what to expect when mai-ordering your shop and woodworking projects.vefeer? Learn how to get what you want.workrng with too sjigs and fixturesPerfect Pieces on the Table Saw . . . . 44RoutingDovetails .............. 10 Accurate, conslstent resLrlts everytirae.We 'l show you whar ro oofo r d dovetdilj gand some tips on getting perfectjtting joints. t nish ng roomMixingYour Own Stain.,........ 45techniques from our shopCani {nd rl^ar pe'".t wood.ta n LolorT -eor'to mlx your own and gethe coloryou want.WorkingwithGlass............. 14A few tools and some proven technlques takethe mystery out of cuttifg and shaping glass. in the mai boxQ&A... ............4t ps from our shopShop Notebook. ......28hardware and supplesSources.. ............49No-Miter Picture Frames-Iip & Turn Table pase30No. <strong>154</strong>
featuresweekend projectNo-Miter Picture Frames .. .... ... 16Ihese stylish ffames ieature simplejoinery andwon't take a lot oftime or materials.designer series projectCorner MediaCabinet........... 20Make the most ofyour comers.This cornet rnediacabinet holds a large'screen ry but doesn't takeuD the whoie room in the ptocess.l|t|erl|io oorheirloom oroiectTipandTurnTable .............. 30There! no m slakino ihe c assic looL of this table.It5 standoutfeatures include striking veneei a"birdcaqe"mechanism. and a pedestalbaseDrltecl| raorEoordetarls of craftsmanshipATapered Sliding Dovetail. .. .. .. 50We'llsho\,! yod why we used this dnique, lockingjoint on the tip and tum table and how you canput it to use in your projects.editor's noteSawdustne of the things I like about woodworking is that th€re'salmost always more than on€ way to go about a job. A pe €ctexample of this is the tip and tum table on page 30.When we werc plarudng the table, w€ spent a lot of time discussingwhat kind of top to make. And I think tlrc tw€lve€ided,veneered p\,wood top we came up with looks gieat. (You can seeit on the cov€.) But shortly aJter we finished building and Photographing the table for this issue, Ted Raife, one of our editors,came to me with an id€a for making a rourd, dish€d toP out ofsold wood using a router.Ted's procedure involved using a trammel along with therorter to cr€at€ th€ molded edSe of the top. Then the router ismounted on a sled that alows you to dish out the cent€r of thetop. I have to admit that it sound€d pr€tty intriSuing. But unJortunately,as interesting as Ted's idea was, there just wasnl enoughspace in the nagazine to indude it as Part of the table adideNow a couple of years a8o, that would have be€n the end of thestory But that's no longer the case. with th€ intemet, we nowhav€ a way to give you aI the additional inJormation and litde"extras" tllat there never s€emed to be room for b€forc So, dShtnow you can vjsit our w€bsite at www.Woodsrniih.com and actuarywatch a video of r€d *"h"c th" -*4 &)tla\tHbp_fffiffiffiCorner Media Cabinet page zolhese two symbols let you know there's more infolmation online atwww.<strong>Woodsmith</strong>.com. There you'll see step-by'step videos, techniqueand project animation, bonus cutting diagrams, and a lot mofe.\i,v/w.woodsmi0r.com<strong>Woodsmith</strong>
from our readersTips & Techniquesllond Sow Pegboord StorogeAlthough mytable sawand band saw do most ofthecutting in my shop,forsomejobs, a hand saw is quickerand easier. The problem isfinding a placetostoreth€mwithin easy reach. My solution is a simple rack that frtson the pegboard mounted above my workbench, asshown in the photo at left.The rack is m6de up ot two parts. The curued sawhandles rest on a dowel slipped over a pair of longpegboard hooks. The blades ofthe s6ws are securedin a piece of hardwood with slots cut in it. A pair olholes drilled in the back fit over short, L-shapedhooks, as in the drawing below You can size the rackto hold almostany number 1or size) of saws.RthqdTwhbsnuUe, GedEiaAJcSUBINII YOUR flPSlf you have an o.iginal shop tip, we would liketo hear from you and consider publishing yourtio in one or more of our Dublications. Just wdtedown your tip and mail it to: <strong>Woodsmith</strong>, lipsand Techniques, 2200 Grand Avsnue, DesMoines, low6 50312. Please include vour name.address. and daytime phone numbsr in case weh6ve any questions. lf you would like, FAX it tous at 515-282-6741 or send us an email messageat woodsmith@woodsmith.com. We willpay up to $200 if we publish your tip.Iu<strong>Woodsmith</strong> No. <strong>154</strong>
_Drill Press ilortisingvvn|e our orng some doors recenfly, Ineedecl a way to cut the mo(ises for thehinges. l've tried using a hand,hetd routerin the past. The router makes clean cutsand it's easyio sefthe deprh precisetv, burSplirter tet-Up figUsing 3 splitter on the table saw is animportant safety siep. lt keeps the work,piecefiom binding againstrhe btade, caus,ing kickback.The problem is itcan besucha hassre to put the splitter on and get itpropedyaligned with rheblade. Even if it,soff by a small amounr, the workpjece cancatch during a cutand spoilthe edge.To get around this problem, tmade asimple set-up jig. As you can see in theit can be difficu tto see what's going on. Solcame up with a differenttechnique.Instead of using the router, lchucked arl" dia. straight bit in my drill press, asillustrated in the drawing at efi. Now lcan see whafs happeningand still get ihe sanre,clean cut and preciseFor best resLrlrs, You'lneed to set the drill pressto the highest possiblespeed. And c amped arence and stop block inplace to guide the workpiece as the moriise is c!r.Then you can setthe depthol the bit and turn on thedri press. Slowly slide theworkpiece ;nio the bir androut outthe mo.tise.cd,rr.!/)h!,(inrsor (rrriDh a,firJrphoto below, it's on y a long piece of p ywood with a saw ked cut in it.To use it, lslip the b ade in rhe kerf sothe jig extends past the end of rhe sawtable (make sure the saw is unptugged).Then I slide the splitter through rhe kertand lock it in pace. Now lr's perfecttyaiigned and readyto go.lim r.lrt/),,.i(,hd, IliituANo. 15,f August/Seprembcr, 200PublisherldilorConrrib. EditorscRIATMDonakt B. PeschtcTerry J. StrohmanTed RaifePhil HuberBrvan NelsonTodd LanrbirthLl.\'id KrcvlingDirkVcrSieeg]lnrlan V ClarkDa! e KallcmynRESOfiRCtSSPECIAf, PU RLICATIONSCIRCULATIONCOR PORr\TE STRVIC[5rild D r ,n . r. r ". t ",.Onlin€ Custoncr Sen i.e,wsw$roods'nith..onr. Ch!.(. subsdi idrFr\nenLt Tell us it!o! \'e nrissrdrn iss!e. ChanF.rou.nrJilnr8 or.nuil addrcss. llen€( r.ur subr.,\rtnuss1|Woodsmifi.comEnail:\roods.nth(tre sm1th..!ml\ntr tu lh{)drrrrl, tr() Bo\!12, D.slvoines,lA5010.1 e!r,r or.all I 8|lrl33 507a, tur.rm to 5:00rD, Crnk.l line,w€ekdr\s Orsenddcmaii n,:Aup*"9.1Ilp"Wrnnr.d nLr.s.A
more tios from our readers€b'flnotter Bit Slorlge n!.kA good router bit storage systemshould do two things. First, it shouldmake iteasyto locate and pick outthe bityou need. Second, the rackshould keepthe cutting edgesf rom knocking togethet whichcould causethemto chip.Itried drilling holes in ahardwood block to make asimpl€ rack. But seasonalchanges would treeze the bitsin place, making them difflcultoremove. While oversize holesleave the bits too wobbly.Working in the kitchen. lcameup with the solution - a rackmade from a pi€ce of plastic cuttingboard, as you can see in thephoto at right. The cutting boardplastic doesn't expand ancl contractand is naturally slippery sothe bitseasilyslide in and out.I bought a new one at a grocerystore and cut it to the size Ineeded. A series of holes drilled init fits bothrr"dia. and %'Ldia. bits.the cutting boardrack to a pi€ce ofhardwoodwith screws andsome nylon spacers, as shown indeta il 'a.' The spacers keep the bitsfrom tipping over. The rack issmall enough to 1et me take itwherever I need to go.ALaBneuPfand@, Eftdari!lorgc-Cirrle (onposscrEveryonce in awhile inthe shop. Ineed to layout a la rge-diameter circleorarc. Sinco ldidn't have a largecompass, I made 6 pairof myown out of somescraps and a few pieces of hardware, as you can see in the photobelow They easily handle most ofmyckcl€ and arc layout needs. Onecompasswillay outcircles upto 2'in diameter. The largeronecan markup to a 4'-dia. circle.The legs of tho small compassare made from a couple ofstraight 16" lengths ofrdlsquare stockthat's cut to length. The legs 8resecured at one end with a machlnescrew. awasher, and a wing nut.The legs of the large compassare 14'Lsquare stockthat is cut 28'long. To hold the partstogethertorthis one. I substituted the machinescrew for a largercarriage bolt.Onthe business end ofeach leg.ldrilled a hole. One is for a pencilstub to fit in. on the other leg, Idrilled a sm6ller hole andtappedin a cut'off nail. To mak€ it morecom{ortable to hold the largercompass, I chamfered the endsnear the nail 6nd pencil. That'sreally allthere is to it.Like any compass, I use a rulerto set the radius and then tightenthe wing nut. (Sometimes, I usepliers to applya ljttle exra force tokeep th€ legs from slipping.)TettRrifeD6MdM,IMNo. <strong>154</strong>
IIrIllis JigThis spring, I was making some trellises forour yard. After cutting all the parts to size, Iwas ready to start assembling the pieces anddiscovered two problems. First, there was noeasy way to keep the spacing of the partsconsistent. And second, I needed a way tomake sure the assembly stayed square as theparts were fastened together.So to accomplish these goals, I made alayout and assembly table, as you can see inthe drawing below. lt's nothing more than aNOTE: Jiqmade fr6m3/a"plwood with1/a' hardboard topWNTFrrsBruDGE CruvBrncKPtqNB+.tFinishedtrellissheet of 3lq" plywood with a 1/a" hardboardtop that I set up on a pair of sawhorses. I cuta grid of dadoes in the table to keep the latticeparts in place. One set is cut twice asdeep as the other so the pieces cross andstay aligned, as in the detail below. The sizeof the dadoes depends on the trellis stockyou are using l1lz" x 1" in my case). Thedadoes are located 6" on center.DavidSclwwttrringMissoula, MortmaSpace dadoesto matchtrellis layoutNOTE: Use twofasteners at each' ioint to keeo trellisfrom collapsingThat's right, send us your shop tips. lf yourwoodworking tip or technique is selected asthe featured reader's tip, you'll win a BridgeCity Block Plane just like the one shownhere. Send your tips and techniques to:<strong>Woodsmith</strong>, Tips and Techniques, 2200 Grand Avenue, Des Moines, lowa 50312.Or send us an email message at: woodsmith@woodsmith.com.QuiokTip"SHOP YICUUT HOSI CIPSawdust ends up covering mytoolboxes,tools, and places wheresmall parts are stored. To solve thisclean-up problem, I drilled %" holesin the cap of a spray paint can andplaced it over the end of the 2112"-dia. hose on my shop vacuum. Thesuction keeps it in place and nothingbutsawdust enters myvacuum.Jeff Bricl
all aboutbuying veneerWhat You Need to KnowIBuying veneer is easier than you thrnk,The secretis knowing what to expect before you order.When it cme to building the tip mdtlm iable on page 30, I knew thai Iwmted to use a ven*r that wouldgive the top a special look. So, Idecided to order fiom a sp€cialtyveneer dealer But whni I didn't realizewas how many questions Iwould be asked when I called in myorder for $e veneerWelI, ii didn't take long for me iounderstmd why the dealer had somany questions for me. Each of thequestions is important. Becauseafter gathering information aboutmy project, the veneer specialistgoes through then inventory andhmd-picks what I'll need. Thatwas a s€rvi.e I hadn'i exp€cted.Fi.si, it's important to have themeasuremenis of the area io becovered with veneer ready. Thenyour specialisi can help you findenough veneer to nrsure adequatecoverage and a good match forYou']l nexi need to give somethought to the tlpe of veneer youwmt to wolk wifi. I was surprisedat how mmy options I had to considerYou tust decision is whetherio work withback€d veneer. I chose to go withraw \€neer for the table top.RAW YEIIEIRRaw veneer requires the mositime and eqr.ripmento work withbut it also gives you some of ihemost beautituI results.You'Il have the option of choosing from crotches, bufls, figures,and beautitul exotic woods. Theraw malogany crotch veneer that Ipicked for the tip and tum table is{
On€ of tlrc Adngs you'[ soon discoveris tltat deater availabfity ofdiffer€nt ven€ers can vary fromday to day. So, if you can't findwhat you want, dl€c-k witr anoiherv€rdor or call back in a few dayB.Because raw veneer is a singlethicl(less (1-pl, you,ll re.€ive it ina flat package. It'll o{ten arrivewdnkled, with splib, or elcn holesin it. Some ordeB vrill come tio youwith nicely trimmed edges andothers Eray come to you a bitmgged. Burls and crotches areoddly shaped so they may anive ina variety of ledgtbe.You can order raw veneer in variousgheet sizes. But aB sho n inthe above illustratio& don't counton a[ of the ar€i beinS usable.tlflGD v:t{:lttIf raw veneer iEn't for you, thele'splenty of grcat-looking backedRaw wteer Alwats cnder mde than yw think yu ne€d. Ite wiett/ of d:a'€5and snall def48 trQy not give you a standard sheet size.vene€rs available. They're €asy touse and will save you Bone time.Backed vmeers are conshucdof a face veneer with a s€condma€rial on the back to give itstrength and to help it to lie flat.You'il ffnd them a bit easier to uBebecaus€ of this backing. Butyou'renot likely to 6nd as manycrotches or burlB to(losll|l0llc. As sho14nin the ilhstratio& a faceveneer is backed with aless expensive woodCrcssbanded vene€r fhehceven@rbffiat"to a /esr expeaslu€ specie'Bonding at 90" gives itadded nrcngth.species that is aligned 90" to theglain for extra strength. It's a lotlike working with a v€ry thin 2-plypltryood tbat com$ in a roll.P Pn-m({tD, The paper-bac}edv€nre€r has a paper layer bonded tothe veneei You'll receive it withfew iJ any defects b€caus€ th€vsding codrPany does dle cutting,fittin& and patchirg before it'sshipped to you. The ba&ing addsstrenSth but the veneer itseff youwi 6nd irquite ftinPaper-backed vmeer is easy toffnd in a number of wood species.You c€n order it in rolls that &e 18"to 48" wide and g long or longer.So, you see the key to successtuIybuying veneer i6 to knowwhat youlr want Then you'[ finddealers eager to h€lp you.NsPtc|llrYYElIEIRDEIIERS716-65tO206tu2-225-*55One of the easiest vene€rs you canwork with is dl€ adhesive-baclGdveness or as most p€opl€ r€fer tothem - "Peel-and-Stick" vene€rs.When you ue€ these veneers youwdll need to have any sp€cial tools,€quipmmt, or skilb to achieve Fofesional-lookingr€sults.One of the great time save$ isthat you can cut this vm€er to sizeand shape with just a pair of scissorsor a razor bladeYoult find peel-and+ticl veneerin a variety of wood species. Th€ycan be ordei€d in 16'-wide sh€€tsin lmgths of 24",48", a d".Edging Btrips ar€ also available in8' m[s of 11 11lr", and 2" widt]'s.lvhen it comes to applying tldsvene€r, you'I 6nd that it's almostfoolproof. Just pe€l off th€ r€leas€paper on the back of th€ v€ne€rand then stick it down on any d€andusln€e sudace (plloto at dght).But b€ awarc. Adhesiveback€dven€en som€tim€s don't stick welto bar€ wood sudaces. So, you'[want to finish th€ bal€ wood with acouple of coats of paint or vamiehbefor€ you apply th€ veneer toyour prcject surfac€.Usint pe€l-and-stick vene€rs issimple. A[ you ne€d is a few basictools and ft€y look g€at.^ When you peeloff the paper on the back of the veneelyou'll frnd adhesive rftterial bonded to the back of theface veneer Ther, carcfully place the veneer on the preparcdsuiace and press it in place,wvrw. <strong>Woodsmith</strong>.com<strong>Woodsmith</strong>
ureslearn the secrets toRouting Dovetailsit easy. And with just a few simple trps,lenplate pasition detetmin*It's hard to think of a woodworkingjoint you can cui fasier than a halfblinddoletail - boft parls of thejoint are cut at ihe sme time with ahand held router ald a haf-biinddovetail jig (photo above).The real challenge is sening up adovetail jig so that routfi8 dle jointis fast, easy, and accunie. Anddoing that depends on fte style ofdovetaii jig you have (or might beLhinldng aboui getiing).A tAtt 0I nvo JlGt. Page through anumber of woodworking catalogsand it miSht seem like ihere areover a dozen different dovetail jigs.But ifyou look closely, you'il noticethat mosi of d1em resemble one ofthe half-blnd dovetail jigs at left.What's the difference? On ihejig at the far left, the depih of thesocket that accepts ihe tail isNo. <strong>154</strong>
established wh€n a bushingreaches the end of the slot on thetemplat€. O':r the other ji8, the baseof the router contacts an adjustablefence io limit the cutting depth. Thebushing simply guid€s the router inand out of the templat€ slots.I know this do€sn't sound likemuch of a difference. But to be honest,the dovetail jig wift the fencetook me a littl€ longer to "t!veak"before I was able to rout perfecthaff-blind dovetails.lflt TEIILAT!. Another diff€renceworth mentioning is th€ tempiatethat comes with the jig. A ii8 with ametal template wi probably bemore expensive (around $100).While a jig with the plastic template can be foud for 950.I prefer a metal iamplate sinceit's iess likely to sag. As you'rerouting, itjust feels more secure. Toprovide solid support on the plastictemplate, I had to slip a scrappiece in place to support the opposite end. You can see this in themain photo on the opposite page.Note: A couple scrap pieces are agood idea with ei*Er jig since *Ieyaliow the clamp bais to hold theworkpieces more seflIelyA more important considerationregarding the template is how itcontrols the spacing of the dovetails.Mo€t templates are desiSned to cutr/,'rwide dovetails spaced 7/s'apart. Otherjigs spac€ fie dovetaijs 1,, or 1,/s,, apan. (Weuse rhe 7/s spacingWIy is that important? Thespacing determines the width(height) of the drawers. Thedrawer heights should be a multiple of t}le spacing. This way, you'[be sure to end uP with a joint that'ssymmetri€al - a perfect haff pinon both the toP and the bottom, astITIllG UP IHI llc. There are a fewkey steps you'll need to be con'cemed with when you initialy setup a half blind dovetailjig. You cansee how I did &is for a dovetail iigwith a fence in the How-To at right.Noie: When you're making adrawer or box, half th€ joints arecut on ihe left side of the jig andhalf are cut on the iight. So you'nneed to repeat the setup for thestop at the other €nd of the jig onceyou've compieted the initial setup.The process for setting up theother dovetail jig is virtuallyidentical. Since there's no fence,the template simply has to bepositioned according to theinstructions that come with thejig. Most often this isjust a matterof measuring from the ba.k of atemplate slot to the end of th€llc lllsTlu(Trcils. There is onething to meniion about the instruc'tions that come with some of thefence style dovetail jigs. Whii€ ihejigs work great once they're s€t up,I felt that the instructions that camewith the dovetail jig weren't asclear as I thought they codd be.Ifs always best to thin]( througheach step of the process and do alittle "common sense check" beforemaking any changes. And alwaysmake a "dry run" with the routeroff before actually routing anyworkpieces. This way, you won'tinadvertently €ut into the workpiece,template, or jig. (B€lieveme, it's easy to do.)(Un c 0IPIH. Finally, the last thingio do tefor€ making any test culs is !oinstal the bushing and dovetail bitieconmended by the llmuJactuer.For the depth ot cut most manuJacturerssuggest an initial settinSamuid r/r' to e/r6,. rve romd thatto be a good starting point.How-Tor SetUthePosition Side. For a symmetrical dovetail layout,position the ide of the dtawer so the edges are centercdin the open slob of the template.Set tte Stop ivex4 .d/ite the stap agaid the drav"erside and bck it in ph.e. Iherr, adjusthe drav,'pr fr@t asrcquited so it s also tbht againsthe W.set the lemphte. Herc the template is Nsilanedslightly back ( h6') frcin the face of the dtawer side. arabbeted set-uD bl&k makes this auick and accuate.Position Fenae. A{ter a liftle math calculatlon (perthe jig instrudions), set both ends of the fence usitg acombinatbn sorEre ta ensure the fence is paralleLB1w.Woodsnith.corn
ouling fieDovrrnmNow that the jig s€ttings arc "in thebalpark," you're ready to stan malingsome test cuts and twealing thesettings one by one to Bet a perfect 6t.ItsI ors- The template may conilolthe spacing of the dovetails, butthe settings you've made are whatreally €ontrol the fit of the joint.The fit probably won't be perf
-iA. Ofiset stopthe router more stable andly level, yet flips out ofway when it's not needed.workpiece is fast and easy withaccess right up front.;8,,smooth movementasYou workin and out of the template.o cul obove wilh fieWoooltAvEn Dovrrnt fEC. Cld-nipspieceforsolid support, likethe optionalKamtite clamps shown here.I mentioned earlier that there areh^/o basic styl€s of ha]J-blind dovetail iigs. WeI, that's not exactly trueTherc's arcth€r one that's in a classallby ilsell And &rafs Ere woodlarurDo?,stdil /8 shown above.The Wordlu.'sn jig is one of ftebest and easiest haf-blind dovetailiigs I'v€ ever used. I was able to 8eta perfect haf-blind dovetail iointafter making only two test cuts.Iir?t II. The 3/a'-thick Phenolictemplate features two diffeientdovetail spacings. Besides the 7/s"sPacing that I use most often, theopposite side of the temPlat€alows you to cut 3/a'-wide dovetailsspa.ed 11/z aPad - analnost hand-crlt look.RoUItr sll lnstead of using abushing in your router base townv.<strong>Woodsmith</strong>-conguide the bit aroud the temPlate, use it on your router table SimPlYthe bit provided with the kit has a reassemble the toP clamP bar totop-mounted bearing The bearing flip th€ l,3!obs"inside."provides a v€ry smooth achon as OPII0XAL Itil?tfiEs. OPtional templatesexpand ih€ caPabilitY of dleyou folow th€ temPlate.(rA PlilG. The clamPing mechanismon the Woodlu"en feels more second template that allows You ioWoodhaeen jiA turther' Ther€'s asecure than any other l've used cut 1/4' or 3/s" luff-blind dovetails.That's because the ph€nolic clamP Anothei template allow€ you to clttbars are slotted, alowing You to r/2" or 3/4" box joints. Final,position the clamP knobs (or thrcugh dov€tails arc Possible withopnor.al Kimtite clamPs shown rhe K"UPI Dovetail Kitabov€) right next to the workPiece. Alttrcugh aI dtis ve$atility andROUTER SUPPORI lAR. You 11 also feel capability comes at a Price, it's amor€ secure as you rout the work_ perfect example of g€tting whatpieces. That's because lvoodndtrtr you pay for. The basic ji8 starts atadded a router suPPort bar that $190. Other kit .ombinations areflips down when you need it and available, induding The Wo*s Kitout of the way when You don't that indudes a]l the diff€r€nt templatesand rcuter bits for M70. ForlLTtRilATt OPIlATlOlt. A featureunique to this jig is that You can ;ourc€s, refer to page 49 N13
techniues from our sholearning the basics ofWorking with Glass'JWorking with glass doesn't have to be a shattenng experience.Here's a crash course on evefihing you need to knowUIhcL\cr it's for a pichrre frane, aglass l'mel for a cabnlci door or justreplacnlg a brokcn windor\,, sooneror latcr, you'I probably bc iacel $'idlthc iask of cuitmg a piece of glass.Foriunately, dlis isn't difficult. In faci,lvorkirrgwi$ glass is actually kin.lof fun once you learn thebasics.rc01s. fhe tools vou need lo cutSlass aren'i very complicaied orexpensive. To stari with, you'llnced a glasscuitcr Tlns krol is a bitlike a mniahrre pizza cutier lt hasa iinv, sieel cutiinS wheei at oneend to score the glass. (Class criters typicallv cosi less than $a atnrost har ci$trr€ stor€s).Aling with the glass cutter,you']] nced a straightc.lgc tohclp guidc the otter and someoil kr kccp ihc cuiting whccllubricaied. You'll also need a pairof leather gloves to proiect yourhands fronr the sharp edges of th€glass And some safety glasses hrshield your eyes tron arl) sDullshards of flvnr8 8lass.If yo rc going bbc cuitng a ioioi 8lass, L\cre arc somc other toolsyolr nrighilvani lo consider buvirl8(see box on opposite page). Buithese aren't absoluielyHoW llWo[(S. Tcc]Dically speaking,you don't rcally "cut" glass.Rathcr you scorc a shallo$' lineacross thc surface of fic glass. Th.'nyou apply pressurc io ihe glassuntil it fractures or "runs" alonEthe score line. These iwo steps -scoring and running-are ail thereYou can safelv cui sian.lard flatglass up kr aboui '/6 thck. But if),our projcci calls for
,tglass, saJety tlass, or thick Plateglass, you'[ need to cal on theservices of a glass shop.rRlPtiAIloX. Before 8€ttin8 started,mal
Weekend Prono-miterPictrneFramesThese simple frames feature basic joinery which means you can builda bunch of them in a shortime and they won'take a lot of material.Sometimes a quick and easy pmjectcan be just as €njoyable to build asone that's large and complicated.Maybe it's beca$e you can mal€something that looks good withouta huge investment in time or materials.Thals the case with lhe pictur€hames you see in the photo above.In tuct, you can make s€verdl of th€min a weekend. You should be able tofind plenty of matefal for makinSeach one in yoff scrap box.And you don't have to woiryabout miteis. Leaving out th€miters doesn't mean there isn'tanything inteiesting about thesefram€s. To build tlrcm, I chosesome basic woodworking joineryteclmiques (with a few twists) -tongue and gmove and dowels.There's one other featur€ of thesefram€s tllat I thinl you'[ Iike. theya have unique ways to easilyswap out th€ photos.longue & grooveThr'JnnmThe frame shoM in drc photo at lefthas a few interesting details thatmale it stand out. For one, it holdsthrc€ 5" x 7'photo6. You'[ also noticethat the bottom rail is slighdy widerthan the top rail, which gives theframe a window-like look. Finaly,the stiles and rails ar€n't the samethicl,ness. This gives you a chance totry some offsetjoineryTo build the frame, stan by c!thr.gtl\ersils 6, B) a d stiles (C, D)to size, as shown in ihe drawing onthe opposite page.$Aittt DtTAlt. B€for€ cutting ihejoinery on the frame parts, there'sNo. <strong>154</strong>
@11IIO)SECIIONIone detail .rdded to the rails. Irouted a .hamter on the frontlEkle edges.i ihe top.ncl bottonlf.i1s. lhis !rltens the transitionLr.hfccn lhc nils.n.l stiles.ollgtT IollCUl A D GRoOVE. TheiliDr! pafis ar. assembl€.1 rvithi(Dguc and groove joints. Eecausrthr rails arc ihick€r than the sfil.s,\!r1ll nce.l io make the gfoovcs inthr.ails ofi center so that thc stilcsanrt rails afe flush h the back. Yc,ucdl ican nnre about how I cut thejoncf" usjng a dado blade in thctablc sa$t in the bor beloh.r\iicr ihc grooves are cut in thc..ils, vou .an noN cut matclingtongu.s on the iolrr stil€s (ccntcrrro\ beloh)and gluc ih. iraDretog€iher Th€ tonglcs arc ccntcrcdon ihe stiles so that thev tr,ill cndup flush !r the b.ck.RoUT RA08ET ton G[A!S PANt. LlorLlcr ior the fra.re to hol.l phoios,you'll need to nr.ke roon for thcslass lo fii in the frame. To do ihat,I route.l n deep rabbet jn ihc trackoi each opening, as illustfaicd inihe rightdr.iling bei.,wSince the bit ryon'i bc atrlc iorcach inio the comcrs oi ihciranes, I n'ent Lrack an.l squ.rcdup ihe corners with,l chisel.ATTA(H[iG rHr 8a(x. Aftcr the rabrrctsare complet€/ you cai crit ihcpl)yood l,arts lE) to fiicachrcccss.How-To: Frame Detailslo keep the lilass, phoio, and backiD plrce, I scr€wed metal iunlrutionson the back side of thc toamc.You can then have glass cui to fiithe frame or do it vourself. Forsome tips on ('orking with gtass,hrrn io ihe articleon page 1.1.To mouni the frame to the rvall,laitached a p.ir of D rings andsome wrre to the trame.ENORoutGbbetin ba.kafter fftne is asenbled. f,"?\i^uOffset Grcoves. Cut the qrooves inthe rails aftet routing a chamfer. Thegroaves in the rails are offset so thatthe stiles and rails willend up flush.ww.\Voodsmith.comCentered Tongues. At'ter cutting thegraaves, the tangues can be cut onthe stiles FIip the workpiece after thefist cut to center the tangue.Rabbet the Ba.k. Raut a rabbet inthe back of the frame (in severalpasses) to create a place for the glass,phato, and back ta sit.1,7
converfible formollUlnnrrr tnnmtl YoLr'llfind it's pretty easy io changethe horizonta frame 1o a v€rticalframe. A you need to do ischangea few dirnens ons. The top and bottom pieces are shortened and thesides are lengthened.What makes this mantel frameunique is its ability io stand on iisorvn. Most free-standing frames liketlis are realy just wall frames wirha wobbl, hinged flap to hold it up.This frame r€sts on a solid base. Anda removable top makes it easy to 8etat dE picture inside.TWo nAfitS llt olt. Bui iheseframes have a couple of other featuresthat are worth mentioning.First, ihese frames don't have asolid back. B€cause there's a glasspane in the front and the ba&, youcan actually djsplay two photos inone frame ai the same time.The other feature is that iheframe can be easlly modified to beeither vertical or horizontal, as youcan see in the photo above. Thedeiails for both are the same, onrythe lengths of the parts change.You €an find the changes in the&awing at left.I started building ihis framefrom the botiom uP. The botton (A)is simply a piece of 5/s'-thick siockcut to size with a slight (10') bevelcut on all four edges.Safety Note: Since the size of theparts are so smal, I did most of theshaping of dre botiom, sides, andtop on extralong blanks.Axlxc THt slDts. Nexi, I made thesidrs (B). They have two details otin them. Fnst, a gmove to hold thepictures. Second, bevets to matchthe boitom and top (made later).The ftst step in making the sidesis to cut the centered groove. Isized the groove to hold two piecesof glass and two phoios, as you cansee in detail 'a' on the oppositepage. The groove is cut in twopas.ses on the table saw(U lilG THt StVtLSr Once th€grooves de cut, the next siep is tocut the bevels on each face. You cans€e how I did ihis in the box on thebottom of the opposite page. Itilted the saw blade 10' and creptup on the final fence setting. Theblade just shaves the top comer ofihe blank withoui leaving a flatspot on the edge.'Ihen you can fiiPthe workpiece around and €ut iheother side. The sides can then becut to final length.618 No. <strong>154</strong>
Ilast piece ro make is iher€novabic rdl (Cl. Ir shares thesane belel clera ilnrg as tlEbortom.The Lrnlv diffcr€nce is thar the topisI'Th€ '/s drick,,rshdlnjn detait,b,AsstiltlrilG r|r rRAfit. tviih dlt theparts ftrcie, tou can norv ass.mblethem inio theliarnc.Iused rwo dii_rerent meurocts ior joning thc top.nd bottonr icr rtre sicics, as shorrTo securc tlle botk)m, I snnFl).used scr€rvs. Ttr€ reason for this isthc.joint hdr.is end granr, lvhichDaKes a poor Btue jonrt. I srarrcdn] marking and drilting shankh0lcs nr ih€ boftom. Nexi, laitached the si.les ro ihc bofton$1rn sone.arFet raPe and markedthe sffew hotes wirh a brad porrirrt (centcr dralrins). Then remo\ethe sidcs nncl clri ihc Filot hotcsror the sffews. Thc dimpies tcft byUre trrad ponrt bit wilt atso kecp thelrit from wanderingADltrtc Tltt rop. Ior the top, iLneedecl io bc easitv r€oiovcd b scraL rhc photus inside. To do thai, Ialtached it $,ith dorfels. A pair oi.loncls is lllu€d in the franre sidesA p.ir of hotes in Lhe rop tir o\.crthe.lonels and kecp it in ltace.rne hrst step is kr mark and.lritlhotcs in rhe si.les. Th€n I use.lLlo\relccrrcrs to mark rhe lo.ariontorule holes in th€ top. Fina )ryolr.an gruc short pieces of dolvet nrthe sid€s (.tcrait ,b,) .nd rhe 6.mcb read\' ior pichtres. [lHow-To: Asembl Details6l,, | \,"'1! 1"Lof^-.ll lll llpror.'b.2/i\-/rlLlo't'tisafEfY NOIE: se.aure pansare thar. shape p.rtson ettra-ton9 btanksIISIDEEC'|ONt',de_w,rh-.p"r r,pq-fl,l\_i,,1tni,1ii !hl-- ;;;;i.;;ti;\Beveled 'ides. After cutting the cen-(etedAttachinggrcave,the Bottom.cut SbG,rtthe beveledbvside. dnlling a shank5n, e1[. holeupnon the fencethe boftam.setting so that ln,en use atnebqd pontobde Just qrazesbtt to marl,thethecarnpr p or nole location in the sdes"1|T.lYoodsmittt.comMounting the Top. Ta attach the toD.drill hales in the stdes to hold dawels;.Then- use dawel centers to nark iietop tot matching holes.19
Materials, Supplies, & Cutting Diagram No. <strong>154</strong>Tri-FrameA Top Rail (1) #/4 x 1 - 19B Bottom Rail (1) #/4 x 1!/2 - 19C End Stiles (2) %/8 x 1 - 7!/2D Middle Stiles (2) %/8 x 1 - 7!/2D Back (3) !/4 ply. - 5!/2 x 7!/2• (12) &/8" Metal Turn Buttons w/Screws• (2) D-Rings w/Screws• (3) !/8"-thick Glass PanelsMantel FrameA Bottom (1) %/8 x 2 rgh. – 8#/4 rgh.B Sides (2) 1!/4 x 1!/4 – 4C Top (1) #/8 x 1&/8 – 8%/8• (2) #8 x 1!/4" Fh Woodscrews• (2) !/4"-dia. x 1" Dowels• (2) !/8"-thick Glass Panels#/4"x 4" - 30" Riftsawn Oak (.8 B d. F t.)BACCALSO NEEDED: One 24" x 24" sheet of !/4"oak plywoodDD
ffill The separate upper cablnet is built usingthe same joinery and techniques. And itsirnply rcrts on the ower cabinet.Builto carry the heavy load of today's largeTVs. this cabinet still fits neatly into a cornenIt se€rlls to me that TVs are ge$ing bigger by the day. But udortunately,the space we have to put them h doesn't grow along with them. So what'sthe answer? How about the comer media cabinet in the photo above. It'sdesiSned to fit into the comer of a room while stil giving you plenty of spaceto hold a bi8 screen TV and a[ the extras that go with it.The ded lin€s of this cabinet with its reeded glass doors and simplehaidwar€, make it a standout piece on its own. But then adding theoptional upper cabinet you see in the photo at left gives you a slightly differmtlook. And that's not all If you prefer a h aditionai style cabinet withtumed leBs and pdel doors, check out Designer's Notebook on page 27.$120 Woodsniih No- <strong>154</strong>
NO'l: Doorfrcnes are.o nstu.t e d with n o rt i t eiltar GONSilIIUCTIOI{OVEBALL DTMENSIONS: 46"W x 29h"D x 28%"HIOWER FROI{TCORT{ER DEIAILl,lDEi tact(ooi Ei DEtat!$vrw. <strong>Woodsmith</strong>.com <strong>Woodsmith</strong> 2l
Ir{@a'- I1 INorE: Divider and edoino-fit llush to .ase ftant-' NOTE: Cate sidet, top, battonand divider are cut ian !a" plywoadbuilding the CnsrThe TV I had in mind to sit on discabinet was pretty hefty, so I wetedto make sure the case was up to drctask. I decided on 3/{ pl}ryood forthe case parts with some simple butsolid joinery to comNt them.GITTIIG 9TARIID. If you tak€ a lookabove, you'll see that ihc fooiprintof the case is just a rectmgle withthe two back comers angied at 45'.There's really nothinS difficultabout creating this shape, it justiakes the right approach. And forme, this siarted with making thetwo.dss s.idcs (,4). Once ftc* are inhand, you can simply use theirbevelcd back edges to show youwheie to cut the comers off of theiop and botiom panels.A SEV[llD nA!8tT. After cuihng thebevel on ihe back edges of thesides, you'll want to stay at thetable saw fof ihe next task. A lookat detail 'a' shows how the beveledback edges of the sides are rabbetedto hold the Yr' p]!'wood backsidc paneis. This beveled rabbetallows the back side panel to fo1-low ihe shape of the case. The boxbelow gives you the step-by-step.loilGut AID DADo. This case callsfor some solid joinery and ihcHow-To: Cuta Beveled Rabbetton8ue and dado shown in deiail'b' fills the bill. This joint is botheasy to makc drd assemble and willcreate a very rigid case.loP AiD 80Tr0fl. Once the dadoesare.utin ihe two sides, youcansetihem aside and move on to thecaseiop and boitom. These two pieceswi give the case its unique shape.And foriunatelt they're prettyeasy to male. You really have twogoals here. The first is to gei a goodfit where the bevel of the sidemeets the angle of the top and bottomas shown in deiail 'a.'Second,you want to get an exact maich nrCut to Depti. 6et5tarted by meaking up onthe depth of the rabbet until it natches thethkkness of the plywaod back panel.squarc the Rabbet. ^bw flip the side over tosquare the rabbet. Readjusthe fence and thehetght of the hlade before making the.ut.1 The beveled rabbet cut into theback edge of the two sides capturesthe side back panels.22woodsmith No. <strong>154</strong>
,nihe shapc of ihe iop and the boitom. If you gei these tiqo simpledeia s nghi, ihe ihree back panelsshould go on ivithout. hitch.Ii {orkcd lYell lor me to cut thetongu€s on ihc krp an.l bottompanels befor I wo[ie.] about cuFting off the corncrs. This allowsvou to ctrt/ assenblc the case andm.rk dght wherc the top and bottom ancl ihe sidcs shoul.l meet.Th€ box below shows you where toiak€ it fron ihere. As the finalctrawmg shos's, I cui dle bottom toshap€ and then uscd it to get a perfect match to the toP.ont loliltRY. Nos'you have theta.o sides and th€ top md bottomcut io shape and the joincry compleieLl.A couple more iasks andyou're ready to begin the assembly.First, I decided io use a piece of3/] pl\,wood capturcd m a rabb€tin the case top and botiom ibr thecenter back panel (detail'a'). Thiswill Bive the case iop some exirasuppori across the back.Ncxi, vou can cut the joinery fora shori .rsd dii,rddr (C) thai reinforcesfie iop and also alo(s youto add a couple ofshelv€s.AtSt ltY. Once the dadoes for tlrcdivider are cut vou can assenblethc case an.l fit ihe divider ,\ hardwoodsl,.fsiop (E) adds more rcnforcemeniio the case and provi.tesa spot to mount a power sirip(detail'c' on precedinB page).1Perfect Fitand MatchBA(( PAlitLt. Afier drilling a cordaccess hole bchind the shelf stop,the thr€e back panels are next onihe ag€nda. First comes the r/f plyrlood csrn r &rr.* ta,lli (F). Alook aidetail 'a' above shows how ihepanel fits into th€ rabbeb nl the topand trottom. Aid beforc Slu g$epanel in place I made a large cutouilor wires and cords.The two Yr" plylvood s;d. trn.ktd,e1s (G) fit inio the bevele.i rabbet you cut in thc sidcs and thenlap over the top, botiom, dd centerback panel (detail 'a'). V,u'llnccd tobevelthe back €dgcs beforegluing an.l nailing th€m in placc.Level Shelvet. Ta ensure that the shelve sitflat and level an the shelf ptns, I used a plywaad template to lo.ate and drill the holes.fhe Comer Cut. Fist, mark the start ofthe 45" cut and then use a combinationsquare ta camplete the line.Smooth Trim. After removing the carneswith a jig saw use a router with a stnightedgeand flush tim bit ta smooth the cut.Peiect Match. Once the bottom istrimmed to size, it can be used to flushtrim the top far a peie.:t maxh.$'T.<strong>Woodsmith</strong>.com<strong>Woodsmith</strong> 23
Io o -@oFACESNLEo_1-,1.complefing the clglNrrAt this point, vou hal,e a stur.ly.ascassembled. So now you can krcuson adding a facc fiame, a iop mdshcLves. And finally, som€ trimandthe doors to cap things oft.fA(t fRA t. Fifst, you want ioiackle ih€ face frame. And as )'oucan see abovc, this is pretiy standard consiruction. The h{o siilesand the iop and ihe botton rail ar€A Clam Frameconnecicd r!ith a nbrtise an.it€non (dctail'a'). This solidlvjoined frame i{ill heLp mak€ thecase a littlc more rigidThe r€al trick to a.lding ihe faceframe rlas figuring oui how toclamp ii io a case slthoui squareback comers. But aflcr a Little irialand errcr,I came up iviih the tech'nique shown in the box belowwith no square corners at theback of lhe case 1l] camp to,had to come up wth a dltterentway to atiach the face fram€.The answer was a 9 mpe clampng frame made fron-r 2x4sAs you can see, tlvo Long sectons of 'two-by' on a coupe olsawhorses gupporthe case onts back Two 5hort sections ol"two by" are attarhed crosswseposil oned them d rect jrbeneath the sides of the cabinetTh s d lows you to aPPIJr Plen\r otcarnp ng pressure wnen g u ngthe face fram€ to the caspTHt IoP. \{ith the face lrame successfully Blucd in place, I startede,ork on adding a top to ihe cabinet.You can sce above that the toPis jl,st a % plvwood Panel $'ith a{ ide hardlvood border attach€d. Ithas a preLiy fair overhang on thefront and sides, buisits flush to Ureba.k of the cdse. And to make thcassembly a little easief as ('ell asthe joini a little sironger, I joinedthe top panel and ihe border withhardboad splines (dciail'b').I fornd that ii rlork€d best toapply fie border Pieces to the centerpancl before cutting the an81con tlrback corners. Jusileave a littleextra length on the side bordcrpieccs so thaiyou can tnm the bor_der and cenier paneL all at once.This way yollll end uP $'ith a rocesmooih cut and you'll save your'self a little time an.1work.IHt lnlfl. After the top $'asscre('ed io the case, ncxi uP lvercthe top md bottom h-im. First,l sctmv sighis on the top trinA look at detail 'a' on the nextpagc gnes vou the idea. Thisbevcled trim can be made on thetatrlc sa$. The du€epieces are thenq{t1No.151
I,mlt€rcd to fit and glued nl aceb€n€ath ihe top as shown at.ighr.Oncc the top t.nn 's nr placc, voucan tum r'injr aiicniidr to thc simple basc lfi'n. Itcrcates. tri$iiionbehveen ihe case and the legs burmore ,nlPoftantl), givcs the lcgs arc.llrsoli.i iooting. A.luick look aid.iail '1" sho('s how the b,ise L|imsits ,/r'proull oi thc case. Againthcse piec.s ar€ just miierel:l,klfirand then glue.l in place.ADo IHt Ltcs. Wiih lhe basc irimconrplete, xrsLrlling ihe adjusiablelcgs cones ne\t. Four legs is iheusual, but tlis case ncc.ls five. Thefilih le8 at ihc back of the case pro-\ni.s a littlc c\tra support ighlhhcfc it's nccded. You'll need ioadd a suppori blo.k, as shown nldeiail'b, befo.e aitachhg this lcg.rHt GtAss D00R5. Notr ihe cabincris rcadv for a colple oi cloors. AsyorL see in ihc.lr.hing below ardin dctail 'c,' thc constructun uscssimplc but scnid mortise alcl tenonjoincrv Blt what Bives ihe doorsiheif rcal intercsi are rhc reededgl.ss paneb I hsiall€dYou'll wani io pui ihe doortrames iogether first. And once theth€trrc assemlrlcd, use a rabberingbit in ihe routcr to c.eaic rhe yrd€€p"pock€t" ihat holds ilE glass.tsut hold off on installing the glirssunhl you've applicd the finish.lflslAltlxG IHt D00Rs. As.icrail ,.1'shows, the doors hi lllsh lriti theNO|E: Beveled top ttinaniace hame. I took the sinpie rol,reancl hsialled thcm with no-mortisehinges. the ctoors are hcld closedw'th magnefic caiches noulred onttocks nside thc face frame (drawing belos anct detail'c1'). LonS birrhandles make them easy ro open.III GlA9t. After applving the finish, all ihe ..binet needs is someBAfi;liyilrlM:T.t:oG)oI1 LEG SUPPORT BLOCK.Ei ot/) ,3k" t/.,-thick no(k)glass fo. the .l{)c,Is. The chanrlcredglass siop you see in detail'd'gersihe job of holding it in place. Imitered it to fit thc openings anclthen raiher than takc a risk }\,iih alnmmer and nails,I just sPotgluedrt nrio the rabbets. Now you canreinsiall the doors on the cabinetand fill up vour empty .omer N.2LIffi@5roP5 , @Jil1ffixrrrrllilltrLlll rlll li''lllriil,ilil11illtiI r:ljil_1:7@€Ran mottises are (ehteredan Giland atelA thtckNO|E: Railt and ttiles.renade frcn t/r' thi.k no.kahd are 21,' widewws:$ixxlsnrilh conl25
Online ExtrasMaterials, Supplies, & Cutting Diagram No. <strong>154</strong>Traditional Corner Media Cabinet — Lower CabinetA Case Sides (2) #/4 ply. - 17 rgh. x 22B Case Top/Bottom (2) #/4 ply. - 27!/4 x 42C Case Divider (1) #/4 ply. - 15#/4 x 19#/4D Divider Edging (1) !/4 x #/4 - 19#/4E Shelf Stop (1) #/4 x 4 - 19!/4F Center Back Panel (1) #/4 ply. - 21 rgh. x 19#/4G Side Back Panels (2) !/4 ply. - 17 rgh. x 22H Skirt Filler (1) 1!/4 x 3!/2 - 144I Face Frame Stiles (2) #/4 x 1!/2 - 22J Face Frame Top/Bottom Rails (2) #/4 x 2 - 42K Top Center Panel (1) #/4 ply. - 26!/2 x 40L Top Front Border (1) #/4 x 3 - 46M Top Side Border (2) #/4 x 3 - 21 rgh.N Shelves (2) #/4 ply. - 15#/4 x 20!/4O Shelf Edging (2) !/4 x #/4 - 20!/4P Top Front Trim (1) #/4 x #/4 - 44!/2Q Top Side Trim (2) #/4 x #/4 - 18 rgh.R Base Front Trim (1) #/4 x 3!/2 - 43!/2S Base Side Trim (2) #/4 x 3!/2 - 21 rgh.T Leg Support Block (1) #/4 x 3!/2 - 3!/2U Door Stiles (4) #/4 x 2!/2 - 18V Door Rails (4) #/4 x 2!/2 - 17W Door Dividers (2) #/4 x 2!/2 - 15X Door Panels (4) !/2 x 6&/8 - 13%/8Y Panel Stop (2) !/4 x !/4 - 96 rgh.Z Door Strike Blocks (2) #/4 x 2 - 2• (2 pr.) 2" Nickel-Plated No-mortise Hinges w/Screws• (2) 1!/4"-dia. Nickel-Plated Knobs• (5) 3!/2"-dia. Tulip-Style Wood Legs• (5) %/16"-18 Threaded Inserts• (2) #/8"-dia. Rare-Earth Magnets• (2) !/2"-dia. Magnet Cups• (2) !/2"-dia. Magnet Washers• (8) !/4" Nickel-Plated Spoon-Style Shelf Pins• (8) #4 x !/2" Fh Woodscrews• (12) #8 x 1!/4" Fh Woodscrews• (3) #8 x 2" Fh Woodscrews• (100) !/2" Wire BradsNOTE: Tulip-style legs (#70410), knobs (#42988), and threaded brass inserts ( #33191)can be purchased from Rockler1 !/4" x 4"- 72" Poplar (2 Boards @ 3.0 Bd. Ft.)#/4" x 4"- 96" Hard Maple (2.7 Bd. Ft.)HALSO NEEDED: !/8" hardboardfor splinesRSS#/4" x 5 !/2"- 96" Hard Maple (3.7 Bd. Ft.)UU U UV V V VE#/4" x 6"- 96" Hard Maple (4.0 Bd. Ft.)L M MJJT#/4" x 6"- 96" Hard Maple (4.0 Bd. Ft.)IIQQWWDOZZ!/2" x 7"- 60" Hard Maple (2.9 Sq. Ft.)PYX X X X#/4" - 48" x 96" Maple Plywood #/4" - 48" x 48" Maple Plywood!/4" - 24" x 48" Maple PlywoodAANNKGGBBFC
Online ExtrasMaterials, Supplies, & Cutting Diagram No. <strong>154</strong>Corner Media CabinetA Case Sides (2) #/4 ply. - 17 rgh. x 22B Case Top/Bottom (2) #/4 ply. - 27!/4 x 42C Case Divider (1) #/4 ply. - 15#/4 x 19#/4D Divider Edging (1) !/4 x #/4 - 19#/4E Shelf Stop (1) #/4 x 4 - 19!/4F Center Back Panel (1) #/4 ply. - 21 rgh. x 19#/4G Side Back Panels (2) !/4 ply. - 17 rgh. x 22H Skirt Filler (1) 1!/4 x 3!/2 - 144I Face Frame Stiles (2) #/4 x 1!/2 - 22J Face Frame Top/Bottom Rails (2) #/4 x 2 - 42K Top Center Panel (1) #/4 ply. - 26!/2 x 40L Top Front Border (1) #/4 x 3 - 46M Top Side Border (2) #/4 x 3 - 21 rgh.N Shelves (2) #/4 ply. - 15#/4 x 20!/4O Shelf Edging (2) !/4 x #/4 - 20!/4P Top Front Trim (1) !/2 x 1!/4 - 45!/2Q Top Side Trim (2) !/2 x 1!/4 - 18 rgh.R Base Front Trim (1) #/4 x 3!/2 - 43!/2S Base Side Trim (2) #/4 x 3!/2 - 21 rgh.T Leg Support Block (1) #/4 x 3!/2 - 3!/2U Door Stiles (4) #/4 x 2!/2 - 18V Door Rails (4) #/4 x 2!/2 - 17W Door Dividers (2) #/4 x 2!/2 - 15X Glass Stop (2) !/4 x !/4 - 96 rgh.Y Door Strike Blocks (2) #/4 x 2 - 2• (2 pr.) 2" Nickel-Plated No-mortise Hinges w/Screws• (2) 232mm Stainless Steel Bar Handles w/Screws• (5) Adjustable Aluminum Legs• (2) #/8"-dia. Rare-Earth Magnets• (2) !/2"-dia. Magnet Cups• (2) !/2"-dia. Magnet Washers• (8) !/4" Nickel-Plated Spoon-Style Shelf Pins• (8) #4 x !/2" Fh Woodscrews• (20) #8 x #/4" Ph Woodscrews• (12) #8 x 1!/4" Fh Woodscrews• (3) #8 x 2" Fh Woodscrews• (100) !/2" Wire Brads• (4) #/16"-thick Reeded Glass (7" x 13%/8")
odding 0nUpprn CnnrrurrWith an dentical footprint and the samejoinery building it will be a breeze.Builcl ing the uPpcr cabin€t is Frett*much a repeat of whai r'ou di.l 0nihe lo('er cabinet. Ii's ialler, so somecd th€ dimensions 6ill chnnge, butthe iorEr].and tcdmql'€s are thes.me. Bui thcrc arc several minordif ferenccs to nention.a flut| B0ll0ll. First, the.ase bottomof ihc upper cdblnet is tlushwiih ihe toitom €dge of the siLlesas shown in dctail'4.'This meansth.t ihe botlon of th€ upper cabinetn'ill sii soliLilr on the top ot thelower cabhct. And then of course,vou ilon'ihav€ ani bottom irin orlegs io wony aboL'there.IA(t lRAMl. Th€ face kame is consi.ucied just ihe same as ihat forthe lo$'cr cabji€t, but youcan lcavc out ih€ Llottomrail Insicad, I just glL,ed anedging ship tLr the froni ofihc case bottorn. As youcan see in the phoio, Lhch{o doo.s are sizcLl n)swing j!st nbole ihc top ofN0 DlVlDtR. And iinalh,fof olrviLrus r€asons, thcrt'sno ccntcr dilid€r or slich cs n1 thcuppcr c.tbjn€t. This spacc js allrcser!€d for a l.rr8e screcn TV, so itneeds to be rvicle opcn. rhd you'11or y ne€d a smallcunNt at thc bottuni of ihe ba.k ccntcr pancL to runvour wlres io th. cabinct tjelo\!. g,{fG}roPG@o9t/i wide .utaLt itcenteted an ba.k panett-- 1!lil' .riliililit Ill,lL lt{fNo. r54
Online ExtrasMaterials, Supplies, & Cutting Diagram No. <strong>154</strong>Traditional Corner Media Cabinet — Upper CabinetA Case Sides (2) #/4 ply. - 17 rgh. x 31B Case Top (1) #/4 ply. - 27!/4 x 42C Case Bottom (1) #/4 ply. - 27 x 42D Case Bottom Edging (1) #/4 x !/4 - 42E Center Back Panel (1) #/4 x 21 rgh. - 30F Side Back Panel (2) !/4 ply. - 17 rgh. x 30G Face Frame Stile (2) #/4 x 1!/2 - 31H Face Frame Top Rail (1) #/4 x 2 - 42I Top Center Panel (1) #/4 ply. - 26!/2 x 40J Top Front Border (1) #/4 x 3 - 46K Top Side Border (2) #/4 x 3 - 21 rgh.L Top Front Trim (1) #/4 x #/4 - 44!/2M Top Side Trim (2) #/4 x #/4 - 18 rgh.N Door Stile (4) #/4 x 2!/2 - 29O Door Top/Bottom Rails (4) #/4 x 2!/2 - 17P Door Dividers (2) #/4 x 2!/2 - 26Q Door Panels (4) !/2 x 6&/8 - 24#/4R Panel Stop (3) !/4 x !/4 - 96 rgh.S Door Strike Block (1) #/4 x 2 - 5• (2 pr.) 2" Nickel-Plated No-mortise Hinges w/Screws• (2) 1!/4"-dia. Nickel-Plated Knobs• (2) #/8"-dia. Rare-Earth Magnets• (2) !/2"-dia. Magnet Cups• (2) !/2"-dia. Magnet Washers• (12) #8 x 1!/4" Fh WoodscrewsNOTE: Nickel-plated knobs (#42988) can be purchased from Rockler#/4" x 6"- 96" Hard Maple (4.0 Bd. Ft.)JKKSPPH#/4" x 5 !/2"- 96" Hard Maple (3.7 Bd. Ft.)NDN O ONN O O#/4" x 4"- 96" Hard Maple (2.7 Bd. Ft.)GLGMM!/2" x 7"- 60" Hard Maple (2 Boards @ 2.9 Sq. Ft.)RQQ#/4" - 48" x 96" Maple Plywood #/4" - 48" x 48" Maple Plywood !/4" - 48" x 48" Maple PlywoodAAIFFBCEALSO NEEDED: !/8" hardboard for splines
Online ExtrasMaterials, Supplies, & Cutting Diagram No. <strong>154</strong>Corner Media Cabinet — Upper CabinetA Case Sides (2) #/4 ply. - 17 rgh. x 31B Case Top (1) #/4 ply. - 27!/4 x 42C Case Bottom (1) #/4 ply. - 27 x 42D Case Bottom Edging (1) #/4 x !/4 - 42E Center Back Panel (1) #/4 x 21 rgh. - 30F Side Back Panel (2) !/4 ply. - 17 rgh. x 30G Face Frame Stile (2) #/4 x 1!/2 - 31H Face Frame Top Rail (1) #/4 x 2 - 42I Top Center Panel (1) #/4 ply. - 26!/2 x 40J Top Front Border (1) #/4 x 3 - 46K Top Side Border (2) #/4 x 3 - 21 rgh.L Top Front Trim (1) !/2 x 1!/4 - 44!/2M Top Side Trim (2) !/2 x 1!/4 - 18 rgh.N Door Stile (4) #/4 x 2!/2 - 29O Door Top/Bottom Rails (4) #/4 x 2!/2 - 17P Door Divider (2) #/4 x 2!/2 - 26Q Glass Stop (3) !/4 x !/4 - 96 rgh.R Door Strike Block (1) #/4 x 2 - 5• (2 pr.) 2" Nickel-Plated No-mortise Hinges w/Screws• (2) 232mm Stainless Steel Bar Handles w/Screws• (2) #/8"-dia. Rare-Earth Magnets• (2) !/2"-dia. Magnet Cups• (2) !/2"-dia. Magnet Washers• (12) #8 x 1!/4" Fh Woodscrews• (100) !/2" Wire Brads• (4) #/16"-thick Reeded Glass (7" x 24%/8")#/4" x 6"- 96" Hard Maple (4.0 Bd. Ft.)JKKRPPH#/4" x 5 !/2"- 96" Hard Maple (3.7 Bd. Ft.)NDN O ONN O O#/4" x 4"- 96" Hard Maple (2.7 Bd. Ft.)GLGMM#/4" - 48" x 96" Maple Plywood #/4" - 48" x 48" Maple Plywood !/4" - 48" x 48" Maple PlywoodQAAIFFBCEALSO NEEDED: !/8" hardboard for splines
A TraditonalstyIN never fail. l,/c atrtaza me. Makinq iuol,a few charqea ta a Wqec| cari oame-Limeo aompletely chan^e the loak, fhe'\raailiana" corner cabinalyot-) see inthe afawinL at, riqht io a qaod example.Ihe aifierehaee are in Lhe aeLaile.The liroN i. lhe fia6l no,iceable. I.eplace^ Lhe qlao6 irt the aaare wil,h"rai.eA" ^olld-waod pado. A,ha I r.edround pu le lnoleaa af the lorq handleo.NerI I owitohea orllhe alur.inv.leTa wllh "Lullp-.ly1e" wooa one6 NhalI purchaoed. A,na ther I deaiaa+ thaito aom?lete l:,he oak, I heede+ a Aifferentta? trin. ea I put a .imple aovemoldinq ir place af Lhe beveled trim,Io download a materials lisiand .utting d agGrn Ior thisIraditional Corner C.binetgo to: r ,lvlv.<strong>Woodsmith</strong>,comTfilterJ"1I
---from our shotuperedDovrrnr JrcVIEW.ariiaAe boltBONOMare Y2' plwood, etcepttenplate whi
IIf,ry-Tol Fithe SockerTest Template. Use a eq fratn thc: tabte to cheitrte nt! atangte atthe not h Thordes of the nat h shouhl can_ra.t the enttre lenqttjot' the dawtajtan the tegcolumnPnonuJroCuttirs thprofile on the cotun]rr's a job ibf ihe Lrand sa!,r Ir ontvproblc'n js thar bccause rhc colunrnbl.Dk issi\ sided,r,ou hay€to hold the bt.rfk on cdge Lhite'}Itri cut thcfrcrite on.a.h face.Indrlrr t. m.rl tir iorrd Ttrr ilrthe!g\ru \Le,f Lne pr,L,i..rh \ r li.r.t\ ij.r r, rd ei tr the(,,t_unr) bl.nk. hotding it \1.trile you make thc Drotil.cuis And a hirdboard tcrrplate on too ofthc jigs€.\cs ns i cufting guide.As ro! Gn re D thc draNhS bctor,, rhr€nds ot thc jig nre stoitc.l for a .olpte of +oDblocks th.rt hot.l the blant ngat"si n poi. or.il'nrrnln .ngle corners t.hc tenrplaie isnl.de ac.otriurg to the pnticrn shown in ih..1argin. A col, e of locaringpnls nn)unted nr theends of thc jtg hold ihcaur anJl stde phy.tasidefndoesn,t, you canchangetheopentng srghuy by sanding the sides of the nat.tlTo !s. thc jig, stidc th.stops.rgatnsi rhc blank.t hcn sl4r the re,npt.rco\.r thc jig ind .ut ttlcptui'le on rhc fifsi face oftlre cohrnrr lhe ienplrtc's thcre simplv ns a gui.Jc- vou |1(lr r $,nnr ro clrt inro ir Afrer cunineihe i'rst face, rcrate rhe cotrmn an,t cut tl,:frcfilc on ih., orhcr fj\c faccs. [tISet Length. Atier rauting .he ,rst soctel / useo .r .eslptece), check the tit wtth the leq Back aut the catta.le baltif necessary 1o ncrease the soclet iengtbtFinal Fit.,.fhe teg.shoujd fn snuq tnto the socr-t wrttt ontyaDauL ". \" extendng past the bottom of the catt.tmt ) Afterappltng giue, dnve ttr: teg home wjth a rnaletqlvB:\\a)odsrDirh.co,llEND SECIION VIEW
tip and turnThbleovEMLL Dr'MENSIONS: 251h.W x ZSU|"pt a 2gth..tlWlen ) ou se€ thjs rabte for Lhe fijst rime, il,s hard to tctowwj)ere to rocus your attennon. B€tween the figured v€ne€ror me top, the gracetul cunes of rhe tegs, dnd the sDi_sdedlllTTl ler a|e plmty of rhinss ro carcl yo|.lr eye. Burme most m reresring Feature is one rha t you jon.t see righLod the bat. If y-ou took und€r the rop or rile bable, you.Uaiindsmart bor-lik€ assembly caled d ,.birdcag€,, (s€€ detail:o:1. td lls rrlls bMcdse thar rndl(es fie tabl€ rcajrysp€aar - rt drows the rop of rhe rable rjo borh rip d,,/ tum.rs lhis€ big,whydeal? To answer thaL, it helps to tqlowa ufte about th€ hishory of tI s t}?e of tabl€. .Iip dnd tum:::"1"T1":.p"p'ryL' the 1700., when d;nknswa8tedrn€ height of fashion. tnstead or jrlsr hdndinS iour8u€st,a€up of tea, you woutd set the cup on topraDie (wrthot thea sduc€r, ot course) and rh€n g;ntly robareroprheuntrl rhe tea cup was in rmnt of yo;r guesr. WhenFaume was over)ou coltld rilt the bop up;d stoletabtetheagainst a wa[, out oI t]re wawSIRXAGT$ctollvttwNOfE:wwv.<strong>Woodsmith</strong>.comlryoodsmidr
-Ali'1\-Lre rimnl| ,^r,* ooonf. --*o"*.ishoping ftehosThe first step in building Orc tableis to male the legs. Aside fmmthe shap€, one of the inter€stingthings about these l€gs is th€dovetail joint that corne.ts themto ihe colurm of the table (seedrawing above). fI talk more aboutthat later. But for dght now, I€t'sfocus on the shape of the legs.Traditional, tableB lile t]usone were built with hand-carv€d:MakinCurvedlegs. But carving aI thi€€ legs isa timeronsuming process r€quninga fair amormt of skjll. Tokeep thingB simple, I decided toband saw tirc legs out of flatsto€k. Thjs way, you stif 8et thegrac€fii appearance of a curv€dleg without all the effod thatgo€s into carving them bY handleftr|ITIRil. To make the 1e8s (A), youcan use the Pattem sho'ltn at uPPerto lay out the profil€ on eachleg blant. Ther€ are just a couPlethings to Point out. First, You wantto rnake sur€ that the blar*s for lhelegs are the same thicknessOtherwise you'[ have some difficultywh€n it comes to fittilg th€dovetails on th€ ends of the legs.Second, in order to get thestrong€st posBible l€gs, Youshould lay out €ach I€g so th€dLayout, UitE the patbrn shcln in the cornerafure, lay aut the lqs. A haming squarehelps to make sure your layout is square.32Dtill tlole. To qeate the tight radius on theinside of the leg, drill a hole in the bhnkbefore.utting the leg to shape.Ched
))I$aln ruI15 diaBonaly (see box onopposite page). And finatt, it,s agood idea to ma1
IT--{,.t.. \.lD@lmokinq the9 iMOL,QING ItotumnOnce ihc L'gs irc fnished, ihe nexipart ot ilt table it) make is tlt column. Originnlh, most iiP and lunltabl€s likc tlis onehad colums th.irvcie tllnr.d on a lathc. But likc thelcgs, J cho{ another ntilroLl in orderto snnplif! ihe conshrction a bitinstead of turnng a round colunrn, I uscd the tabLe s.('k, createn hexagonal column. lhcn I cutln.tchng profil.s on each face oiihe colunn with.r banLl sawFinalht ihree tapcred do!etailsocleis ar. routeLl ai ihe botkrnr ofihe coluDxl to hold th€ legslo nale tht.dlrrrrr(otuMli BLAllX.(B), staft by gluing LrL' a tri.nk ln.d-" m)' blrrk .rha long (.bot'i2.r') so ihat llLould halc crlodghHow.To: Make a HexatonalColumncrfa io rLse rs .1 tcst P1ec. wnenmaknrg ihc do!et.il sockets.lnstead .t glunlg !P a soLidbl.tnk, I nade the column Hankout of fi)ur separate Pieces ofwood, lea! g d square hole righifto!8h fic center (sce cirawmg atleit an.ttox belor!).Th€ reasctr iof ihis has to.losith ihr bP of ihe iablc. Thetot is supfort.d on a rolrndFost (a do{el) ihat is Slued inn)the end of ihc .olunn Buiinst€aLl c'f trying io.lrill a hol€ill the cnd oi ihc colLrmn ior thedo('€I. I folrnd ii . lot casier iolea\e al openulg in thc blafkWllcn vo!'rc gll,ing uP the col-L,mn, a snlalL scr.p Piecc is glucdflclue up the Blank. The blank for the catumn is glued up aut of fou pie
'ft,inside the opening to scrve as astop for th.' post. (The post won'igci a.lded uniil later, \yhen youmak€ the bndcage.)tflAPrlic IHI (0LUM!. After the blar*is glucd up, you'll need ro makesome beleled cuts to creaie thehexagonal shapc. Then ),ou can goah€ad and cut tl1e blanl b length.(R€mcmber to save the cur-off endto use laier as your tesipiece.)Bcfore you start shaping iheblank on the band sar', vou']]nee.l to cut a corple of A widcdadoes on all six faccs of thcbldr*. These lvill be uscd io holdsomc bead molding. Al$ough tlrbead molding lvon t bc addeduntil later, it's a lot easier to cutthe dadoes norlt before ihe profilehas bcen cut on the faces.(UTTlllcIllt PRorttE. At ihis poirr,vou re readv to start shaping ihecolrtmn by cuitirrg the profil€ oneach iace of theblank. To do this,Imadc a simple jig to hold the col,umn (see first drawing in boxbelorv). The jig ctoes tllo things.Firsi, ii holds ihe blank on edg€ soihat you can band saw ihe profileon each race. Ard second, the profileon the top oi thejig sen/es as aguide to follos' while cutting eachface. For more on nakirrg andusng ilrc jig, secpag€ 29.lhc band sai{ &'illleave the surfac€sof ihe colunn a bit rough Soyo!''r'c goinB to wani to sand themcmouth $ith J s.Ir.lins drum I-ritr.hmenr on 1.", ,t,'ir p,""" I(lou ..rr remL^. the remr,tiie ,rnd Iuse tlt jrg ro n.r.r tr,.- .",-n I;.ll:"",:1tr":[:J #r.J:;l 7L'nn evcnljr A goo.l way to checkthis is b sight do$'n along e.chii:".'j-t"":;:tr;,::ilii",ill; >should run h a slraight he dor{nthe lcngth of ihecolumr.DoVnAlt so(l(tTs. After you'vesanded the colurm, you can makeihe tapcred dovciail sockcrs thdthol.t thc legs. To do this, I madeanothcL ji8 (s€e second drawingin box below). It's pretty simple,and it allows vou to fine tune thetit.,f the sockcts to naich thedovetails on the legs. You canrea.l Dro.e about making andusmg ilre jig on Page 28.BtAo MotDrltc. The last srep tocomplcte the columl is roinstail some bead nolding in rheLlacloes you cut in the column.You can make this molding byroundng olcl the edges of alvide blrnk on the rourer table.(l size.t thc thickness of thcblad( to match ihe widrh of rhcdadocs nr the column.) then jusrrip thc molding to &,i.lrh fromihe edges of ihc blanl, Like yousee in ihe box bclow.Comletethe Column^TI. The €gs should s ide atmon att the way tnto the 5ocketsn the co umn Then a couple of qht nr. er raps isa it shou d take 1o drive the €qs homeAfter naking th€ molding, hdivi.iralpicces are simply miterc.t ioiit around fte colulnnand gluedirlplace, asshown in deiaii'a'on iheopposft page and in the box belowADDrlc Tflt ttcs. B€fore moving onto making the top, the legs ncedto be addcd io the column. This issimplv a maiter of appiying a Lirilegllre to the sides of the dovctailon each le8 and then genrtydriving thc legs home widr a mal,lci (see phob above).)igs Make it Easy. A simpte jig hatds theblank in position while cufting the profile onthe six fa.es of the column. To get the bestresult, use a nanaw (/s" wide) band sawwwv.Woodsmi$.comblade. Ta raut the dovetaril so.ke6 a second jig is used alang with a route, a dovetail bit and a guide bushing. Fot mare onnaking bath these jigs, see page 28.Miter Bead Molding. To miter the shortmalding pieces, I made a tiny miter box bycutttng a rabbet in a satup piece of waad. Athin-kerf saw makes a clean, smaoth cut.
uilding thefopNOfE: veneer bath sidetol tap befote adding naldinggive the twe veelegant lookA dod..r.gor. That's thename for a twelvesided figue Like thetop of ihis iable. (lhad to look it up inthe dichonary io makesure.) But ii's not jusi theshaPe of the table toP that's appealing. Tlr highly figured grain of thewood is jusi as eye-catchrng.Traditionally, tablcs like this ones'ould have featurcd a iop canedoui of solid wood, including theedge molding. Bui finding a pieceof figured mahogany large enoughfor ihe top of the tablc would bedifficult (not to meniion expensive). So I did the nexibest tling.I made the lot fD) oui of Plywood and covered it with fiBuredvencer. Once the edge molding isapplied, ),o!l,l] be the onlY onethat knows it isn't a sold piece ols'ood. As an added bonus, youwon'i have to worrv about thetop i{aJping or cuppng overhme.tAtoUL At first glance, making atable top wiih tweive sjdcs mishtseem a bit inUmidatinS. But in realit!',it's not much diffcrent thanmaking a square toP - there arejust a f€w more comcrs. The secre!is in the layoui. And fortunately,NO|E: Top is tt' plwoadnaldineis 3hrthi.k hardwoodth€re's a simple way to lay out atwelv€ sided top that doesn'tinvolve protraciors, angles, or ade$ee in geometry. Just follow thestcps in the box belo$,.(UnlrcIo tHAtt. Once you've laidout the shape of the iop on yourblank, you can go ahead and siartcutting the iop from the blank. Idid ihis in iwo sieps. First,Icutthetop t0 rough shape using a jig saw,as you see in ihe ioP drawing onth€ opposite page. Don't wo Yaborit cutting right up to the line atdns point since you're going to becleaning up the top in the next step.With the iop roughed oui to itsbasic shape, thc next step is toclean up the edg€s. To do ihis, Iiurned to ihe router Using a@straighiedge guide and a pattemmakcr's bit,I trimmed each side ofthe iop flush i{ith iis layout line(see second drawing on oppositepage). Here'swhere you want to becaretul. Male sure drat you clamPthe fence right along ihc lay outline on each side so dri all tweh,esides are ec:tual. The clos€r you 8eito a perfecL twelve-sided top, theeasier ii $'ill be when it comes tofitting ihe molding around the top.dHow-TorStafiwith a An!e, Using a shopnade ccrnpa$ (s€e detail'a'), draw Ma* the Points. Placing the compass on the endpoints af thea 24, dia cirde on a t/a; ptt //voad blank. Then divide the cncte into diameteB you just drew mark aff the rcmaining poins af the topquattes by drawing two diamerers at a right angle.around the edge af the circle. Then dnw lines ta canne(t the poinE6<strong>Woodsmith</strong> No. <strong>154</strong>
YrlittR. Onc. vo!i c finishedshapmg\the top, you cal add thcrf !cn@r B€cause rou'l] tre able tosee ihe undersi.le of thc rop rvllenthe iable is filicd, I lenecrcLl borhsjdes of th€ top. This also heips tokeep ihe iop a ljtile morc stable,m.king it less likely ro cup ori!d+i orer rimr.There's one importani thing tokeep in mind when ad.ling rhcvencer. Because the bp will treseen lrom boih sid€s, mak€ surcthe grain of thc veneer is runningin ihe same clircction on both surfaces. After gluing thc vene€rdown, I irimmcd ii flush with theedgeof the top usmg a sharp knife.IoP IDGI Mololllc. Once all th€leneedng is oui of the r!ay, youcan siari makin8 the edge mold,ing. A router iable.nd a colrple ofrouter bits arc all vou need forthis It's just a matier of followingthe sieps nr the box beloirWhen it camc ro cutting therabbet nl the molding for the top,jnstead L,f trvinH io s 7e thL r.rbber! to fii ihc tof pcri.ril).I miLle thrrabb.'t a halr wider (rallcr) thanthe thickness of the iop. Thisaltoived m€ b sand rhe bottomedge or the molding perlectlyflush lyith thc und€rside of thetop alter it lvas glued h place.Once the molcling is niteredand glued aroun.l the iop, theody dling l€ft io .lo is roud overthe botiom ed8e. I did rhis bv1ShoCuttintheToRough Out the Top. After laying out the shape af the tap on yaur plywaadblank, cut the tap ta raugh size using a jig saw and staying about116 tat/s to the waste sideafthe layaut linesTrim the Edges Flush. Ta clean up the rough cut edges af the tap,carefully clamp a s\dightedge guide ta each layaut tine and trtm theedge tlush using a rauter and a pattern bit.turning the top upsj.le dowrl onny i{orkbench aid using a halclheld routci i{ith a round over bit,iusi like ),ou see in the box beloa,.To avoid cuttrng into th€ vcn€eri{hen routing this tuul roundover,I didn'i l.rwer the bjt to ftrU dcprh.Makethe Edte Moldintlr6tead,I l€ft a lirlle flat spor on thebotiom of the moldjng and rhensan led it to make a smooth transi,hon i{ith the veneered borlom faceof the iop. Norv you're aLnosiready to atta.h the top. But first,you have to build the birdcag€.t] . ) l'lBead and Cove. A bead andcave bit cteates the prafile onthe inside edge of the molding.wwv-Woodsmiti.conRoundover. Ta round over the Cut Rabbet. A shatlaw rabbetauter edge, you can use just the allaws the moldinq to fit tiahtfubFad Doftian at he san- b,t o,q the edgp ot ;he :€rbd;pBottom Edge. After gluing themolciing to the tap, rcund overthe battom edge of the molding.37
odding fteBrnocnorr'ftc tuP ofthe tablc r.sis on a smallborlike plaiforn that is.alled a'tndcag€." (Don'iask me how ii 8oithat narne.) From a visual stand"poini, the birdcagc may noi be ashtcrcsiing as ihe lcgs, the collrm,or clen the top of ihc table. 8ui iiplavs a very inporteirole It;1llolvsthe iable io both iipnt./ ium.Thc .ntire birdcagc assenrblYtums lr€ely on a Post momie.l itlihc cnd of the.olurm. This allorlsvou io rotite ihc ioP of the iablc.,\1d the top is hinged to the bnd_cage so that ii can be tilted upwhcn ihe table isn'tbeing use.l.(oNSIRUO|o .'Ihere isn't much tonaking ihe birdcagc. Ii's nothingmorc than four sphdles snnd-$'ichcd between h{o wood Plates.A I 'dia. hole in dlc center of eachplatc allolvs thebirdcag€ to iit ovcrihc post in the iop of ihe column(sce d-"tail 'a') Thc iop plaie has a"double" rabbei for th€ hinges thatarc us€d later hr atta.h the top (sccdeiail'a' on opposiic page).aTTA(HlilG THr BTRDGGI. AttachirrSthc birdcage to ihe cohnm is a littlcnore invoh€d, howe!,e. As imcntioned, ihe birdcag€ fits ovcra posi that's Slucd into th€ end ofihc column. It's hcld h place by ao'5@!r Eutl:J,.Qlargc woocl s'ashcr and a lvedgeihat slips through a slot in thepost, just as you s€e in thc drat{ing above and in deiail 'a.'I started b) making thc Post.ftis is nothing morc ihan a 1 -diahardwood dosel. To deternineihc lcngth of the post, inseri ii intothc colunln until it r€sts on the stoPhsidc the columl opening. Thendace ihe birdcage over ilt post todctcrmine how much vou need ioHow-Tor Make a Slot in a Dowelc . {'1trim off the end. Thc goal here isfor ihe birdcage to rcst on toP of dtcolunn noi ihc toP of the Posi.Before gluing ihe Post inio thecolunn, you'll necd io make a sloinear ihe end foi the lvedge. Thebox belo$'explaim holv to do this.$lAsfln & woct. Ther€'s not muchio making the washer an.t wedgeThe washerhas a hole in the.cnterto fit over ihe post, and a shallolvdado to hold tlt \\,edge(dctails 'b'Drill Out the waste. with the post placedin a v-block, drill a seties of overlapping holesto renave most af the waste from the slot.Taper End of Slot. lJsing a chisel, taper theend of the slat clasesto the end af the pastsa the wedge can lack against t.Add wedge and washelz ance the post isglued inta the calumn, yau can add the bid'caqe, washe| and wedge.
and "c" on page38). AJter shapinsthe w€dge ro fit rhe slot in th€;os;you. can slip rhe birdcage andwasner over the post and seclrrethem with the wedge.. rufit. B€fore adding the top,tnere s one other detail ro takecare of. A couple of cteats areattached to the bottom of the toD_Thes€ straddte the birdcage an!rake some of the strain off rhehrnges wh€n the top is rorated.. .fl,ttD|{Arl After sbining and finrsnrSthe table,I added rhe hafdware.A pair of no-mortise hinqesconnect the top with the birdcige(detail'a'). And a catch prev€nrsthe top lrom ripping when usinsthe tabte (detail,b,).Now that the table is complete,you mlght want to invitje a few ofyour friends over ro €nioy a cuDof tea (or maybe anosreibeveraeeor your choice.) ESolid Thble Top9eforethere wae plwao*,lip anaturn tableo had 6oli+ wooa tupo,otteh with inlricately carved ormotdea edqe.. lf youA lke to makethio Lype of a tnp, hercb one thaNeahallen^in\, but nottuo aitrbr;ult.Tha top gtarta out. a6 a thick,gquare blank. A rclter Mth atram_mel.i. ueeitu cutlhetapta 6hapeana to areate the ?rafila on lheea^e. fhen a etnt^hL bit ie u6e| tunibble away the wa6te from Lheaenkr of the tD?.To v/ew a videof makina theround top for rhrs tabt€. o; ro.www.<strong>Woodsmith</strong>.comsww.<strong>Woodsmith</strong>com<strong>Woodsmith</strong>coss sEcnox
tools of the trade4 greatbits forRouterTablefoineryuse by gorng 10:of,ul{E EIIRAtw.1*il':!lailEA muter table can be a Pretty handytool when it comes to cutiing jonreryDadoes, rabbets, Srooves, and othersimple cuts can easily b€ made usingstandard straight bits.But in the Past f€w Years, routerbit manufacturers have come o'rtwith sev€ral new bits that oPen uPsome r€a y interesting ioinery Possibilities.So I decided to Pick uPs€veral of thes€ bits for a trial run.And what I found in my quick tesiwas pr€tty impr€ssive.The four bits that I looked ai allallow you to quickly and accurately cut joints on the router tablethat would be iricky or next toimpossibte io do otherwise- Thekey is that each "sjngle" bit cutsboth halves of a locking joint.biis are all fairly big, soyou'll need a router with a Yr"colet and enough horsePower tohandle ihem. And I got the bestresults by slowing them downwith a variable sPeed router (Forsources, see page 49.),fbrt can take alot of the hassleout ol cuttingandassernbLingmiterjornt5.brk tirer BirI've seen lock miter bits incatalogs and on store shelves for afew years and the idea intriguedme. lusi . fttE an accuratemiter on the table saw is noeasy iob. But then You stilhave to figrre out how ioglue and clamp ihe joint arterwards.WeI, here's a router bit thatcan easily take the hassle out ofboth thes€ oPeranons.If you take a look at the Photobelow you'lIsee how it works- Thebit wil cut a 45' miter on the endsor ed8es of boards to be joinedtoSether. At the same time it cutsmatching tongues that "lock" thetwo halves of ihe ioint togetheiduring assembly. This nakes 8tuingand clamPing the joint a snaPTheseAs you can see in the drawingsbelow and the Photo above, theROUTERIAALEtt Imatching miter joint is made bYrunning one piece hortontaly andthe other piece veriica Y.To do this accurately and withbettei control, I cut an L shaPedpl)ryood guide Piece and ihanclamped the workPieces to it (Youcan see it behind the workPiece inthe photo above.) This both ba.ksup ihe cut and steadies the workpieceas you mal€ the cut^.";;;,*i l---'640No. <strong>154</strong>
Materials, Supplies, & Cutting Diagram No. <strong>154</strong>Tip & Turn TableA Legs (3) 1 x 7 - 16 rgh.B Column (1) 3 x 3&/16 - 24 rgh.C Bead Molding (1) !/4 x #/8 - 24 rgh.D Top (1) #/4 ply. - 24 x 24E Top Edge Molding (1) #/4 x 1%/16 - 96 rgh.F Birdcage Top/Bottom (2) %/8 x 5 - 5G Washer (1) #/8 x 2#/4 - 2#/4H Wedge (1) !/4 x 1 - 2#/4I Cleats (2) #/4 x 1 - 18• (2) 2" No-mortise Hinges w/Screws• (4) 1#/4" Long Gallery Spindles• (1) Tip Top Table Catch• (8) #8 x 1!/2" Fh Woodscrews• (1) 1"-dia. Dowel (12" long)
n(tf Bor Joinr Bir.- This new box join r bi r imadeDy a ftarr,8ers my award forinv€n the photo ai lefttivm€ss. It wil cur smal box iointsm material up to %" thick and Iiom3r, ro lyr" in heisht with a sin,EdSejoining boards js a pretrymmmon operarion in any shop andthis handy glue joint bir is designedto make the pro€ess a tittle easierand tlrc joint stronger.The glue joint qeated by this biroffels a couple of advantages overa simple butt joinr. As you can seein the fi$t photo at righf the shapeof the joint geatly increases theamomt of gluing surlace and giv€syou a much stmnger joint. Second,the joint becomes self atigning soltingcrGlue loint Birloinr Bitassemble, tightfittingtoint. Butmaybe best of aI,I found it a reatThe drawing atdght shows howit works. I cut one comer at a timeby flippinS one of the workpiecesupside down and then ciampingboth workpiec€s to a backupblock. Then with a single passa&ieving a smooth, Rush sufaceis aLnost foolproof (second photobelow). Anyone who has had roglue up large panels can cerrair yappreciate this feature.I At one time.or another, iusr both a mechanicai tock and a targeaDout ev€ry woodworker has amount of gluing surface. And aswished for a board srretcher. Weil, you can s€e, end-to,end joinfs are ath€ adjusrable finger joint bit in the realitjr. (Check our tlle cheny/watnutboard in drc left photo).photo at right miSht be the next bestthing. With this bit, you can rour There are iust a few simple tsickstiShdy interlocking fingers on the to ge$in8 good i€sults with this bit.€nds ofboards thar alow you rojoin First, it needs to be adjusted to thethem tog€ther. The fingers creat€ ihickness of your srock. This jusrrnvolves adding or removing cuttersand shims (right photo).Next, in order for the two facesof the workpi€ces ro end up flush,the bit has to be set to the cone.rheight in the router rable (&awingat riSht). This requir€s a tesr cut ortwo- Thm, using a backup piec€ toto give me a Litrl€ befter conrrol, Irouted one piece face up and oneface down. Once glue4 the joint issurprisingly shong. NNo. <strong>154</strong>across the bit, borh halves of rhejoint are cut simultaneously. Aft€rthe cuL just flip on€ pi€ce overand the joint will fit togerher likea hand in a glove.A match is made by adjusringthe bit to th€ proper height andthenrouting one piece face upand the second piece face down.It worked great foi me.ie eiinbox joints forsmall drawersand boxes.l A gluejoint bitstrong, selfaligningjoint.!,".3bit witcut a rightThis adlustable fingerjointfittingnterlock ng jolnt n stock from ?16, to 1rls thick4l
small sho solutionsTaskLightingI Iji5 versatile lampsyou can use tobrighten your shop.LiShting a $rla[ shoP doesn't s€emlike it wotdd tak€ mu€h Ju-st a fewstudent tampr ..n be .lamPedon tfie wo*ben.h ot modfiiedto fit in a ben.h dog holo;"Sf*i*?:H:i.Hl3I miusraue ronpwhen it comes to hjghiy detai-led W}len I'mworkingdtmy bench' th€work like fittin8 joints by hand or ov€rhead lights workjust fine mostcutting to a lin€, I Prefer to have ofthethe.Butleaningov€r0l€Pi€c€sornetiinq a little more focused. I'm working on call cause slndowsThe ti"e of tiShting I m talkin8 lhat interfeF !'tidx fine work- To solveabout h;; is cax;d -task" lishting this pmblem, I bought an inexPen-It s puttinS the ti8ht5 n8ht where siv€, flexible-arm ldmP, as you canvou need il atd rhis can be trickv see in the drawin8 aboveilut I've for:nd a few solutions that Th€se lamPs aie sometimesyou canput to use inyow shop. called "stud€nt" Iarnps and youcan find them at most dePartrnentsto€s or hom€ centeisIIGHT Wllttl IOl, illtD lT. Most ofth€se lamps have a built-in clamP.My bench is too thick for the .lamPso I modifi€d the lamP to fit in abench dog hole (detail above). Thisway, I can easily focus the lamPalrnost anywher€ on th€ bench .The lamp's swiv€l base and flexibl€arm rnal€ it easy to EPosihonthe light so ir's shining on the woikand not in your laceflrgnifitotion lomPA fl€xible-arm lighr is Sreat foradding a focus€d liSht soul!€ to yourworkbench, but as I Set old€r, it'sharder to s€e small Parts and fine1ines. Rather than use a "Sh€rlockHolmes" magnifyin8 glass, I'v€found a magnification IamP thatcombines a [ght with a magniJyhgl€ns (drawing at left). You can findthem at offic€ suPply and art stores.The thing I lile best about thes€lamps is that it keePs both handsfr€e. You're sure to find uses forthis lanlp beyond woodworkingjobs. I us€ mine lor reading manuats,repairing smal aPPliances, andrcmoving splinters.No. <strong>154</strong>
aB€sides fluoresceni and incandesceni lighrs, you haveanother q?e of light to choose from - halogen. Theylights have a coupie of advanrages. For one, ihey,resma er than fluor€scent lights, and secondly, rney useless electricity than incddes.ent bulbs. I,ve found thr€estyles that work great in my shop.Iool Srorion lightThe first sgde is sho\an in tlle drawing ar righr. Ir,s asmail, desk lamp that I found at an office supply store.li looks similar to the student lamp shom on thc oppesite page - only smaller. li has an adjusrabte alm thatmakes it easy to position the bem_ And rhe smal headmeans it won'i gei in the way of your work.To r.rse it, I mounted smal shelves on the wa! nearthe band saw, dril press, and several other rools. NowI can tale the lamp with me and set ii ciose by for extralight. You €ould also aitach rhe lamp ro a plywoodplate and mount the lamp on rhe wal, as in the derait_Honging llood LighrThe de"\ LjCht dd *\e ou, L I Bhr\ aic gred I for Lglhngr.rp a smau area with intense light. But what if you wantto lighi up a larger work space? To do ihat, I buutnr apoitable, halogen work li8hr.Ihese lights twicaly rest on the noor on a buili-intubular stand. But I mounred mine to ihe ceiling aboveihe table saw, as you can see in the diawing at dghi. Todo thal ali you need to do is s.rew in a couple screweyes to the ceiling joints and slide the lamp,s standinto them. The unit I got has a 500-watt bulb in it,which r€aly bnghtens ihings up.There's just one thing io note. These tighrs can gerPreth hol. nu\ cdn be niLe if vou're wo'tDB in anunneate.l garage on a cold day. h fact, I can break asweat just working benearh one. In any case, you,ll$anl ro mdke \u€ rhe redr8 F lrSh e.lough ror youio workcomJo ably under one. Slhts - low co$UnderGobinet lighrsThe shadows cast by ihe wallmouted cabinets in my shop makeit ditriculi to work below t}lem. Sincespace is tight, therc's just no rcomfor another twe of lamp or lighr. Sostuff ends up getting piled uderthem and forgotien.To solve this problem,I imed ioa second style of halogen lightsun.ler-cabinet lights. They'resomeiimes called "puck" Lighisbecause they look like hockeypucks. They're usually screwed tothe bottom of upper kitchen cabinets, but they work just as wellunder shop cabinets, as you cd seein the drawing at left.The puck lighis actually help memake b€tter u,ie of the space in myshop. Because ihey're tuckedmder ihe cabinet, they don't takeup much space. Yet ihey reallyliShi up the area.You can pick up these lights armost home centers. They comeeither as single units or in groups(usuauy Lhree or fiv€) and simplyplug into a waI outlet.rr,i,.woodsmid1.con<strong>Woodsmith</strong> 43
cuttingHere's how to get your next prolect offon the right foot - 4 steps for success."Start by .utling the workpiece toste." It sounds easy, doesn't ii? Butjust about every woodworketmysef included, wil admit to having goofed at this supposedly simple iask on a few occasions. A pieceof stock ends up too short, notstraight, or out of square. :bmetimesdis isn't a big deal, but other timesit comes back io bite you.So now I have a simple rouiinethai I folow when.uttin8 stock tosize on the table sas'. And for themosi pari, it limiis ihe amount ofwood that ends up in thescrap bin.SIZI AS tou G0. Usuall),, whenbuilding a proje.t, you're workingon one assembly or step at a time.For example, doors, drarvers, orcase parts. So this is how I like toapproach cuhrS paris to size.lustsize th€ pieces that you need forthe job at hmd lt's casier to keepthings siraight and you can makeminor "size" adjusiments as youwork through a pmject.A (UT LlsI. Before you start cutting,you need a goal. And for me, this isa cut list. I jot down a list of theparts that I need to cut md theirdimensions (thickness, lengtb andwidth). Even when I'm only cutting a part or two, I wnie down thedimensions.It's too easy to rcmem'ber a "wrong" measuremeni.And if you have alot of pieces to cut tosize, check them offthe list as you completethem. Then allyou'll need to do istake a quick glmce atyour cui lisi to tell ifyou have all theStaight and square. Io get startedright, yau need one straight andsq@re referenc edge to wotk fram.parts you need. You don'i want toget halfway throuSh ihe joineryand realize that you're shori onedoor rail or drawer side-RoUGH (UT. Once I know what sizepieces I need, I rough-cui the paristuom the stock at hand. Ai thispoint, a[ you're trying to do is getin the balpark. It s easier for me towork with and acccurately sizesmaller pieces. I just try not toskimp here. For exampie, ii I needa2" by24 stile,I try to give myselfabout a 2Ys by 25 piece to workwith. But the rough djmensionsyou use will depend on the stockyou're working with (end check,knois and widttL of the boards).4<strong>Woodsmith</strong> No. <strong>154</strong>
,?|0 I slnAlcHt SoUA8E IDGI. With the rcugh,sted piecesin hand, the next goal is ro gn e each piece one straighted sctuarc edge. This edge will guide your tust rip €ur.A straightLine rip jig on the table saw, a handptane or apass over the jointer wiI do ihe job. Before moving on,make a quick dreck l\'ifi a siraighredge and square andthen mark the straightened edge Oox below teft).fltE touR tftPsNow you're rcadv for the four dimetuioning cuts that yousee illush.at€d in the drawings at nghr.TWo PARAIIIL StDrs. The 6rsr step is to rip the workpiececlosc to its final width (Srep One). I never rry ro hii *Icfinal dimension right on rhe money. Tte pu+ose is justio nEke sure that both long edges are siraighi md pafaltel. An exh.a t/t" or 1/u" irl width is plenry Thisleaves enough material to a ow you to come ba.k laterand clean up this face - eLimjnating saw marks, bummarKs? or tearout trom crosscutting. And rvith shaighi,paralel edges to s'ork from, you,[ have a much easiertime geiting squale ends when you crosscur io tengrh.0il1 toUARt{0. Once you ha\,€ t1vo stfaighi edges,b€gin cutting the workpiece to length by making aclean, square crosscut on one end. Bui don'i ger carriedaway here, this is usualy just a lighftrim cut. Be sure toleave yourself enough lengih for the finai cur.The ends of the workpires are often whefe rhe joinery iakes place/ so it pays to gei ftis step righr. And thekey to accurate crosscuis is conhol of rhe workpiece.For this I rely on a miier gauge wirh a iong auxiliaryience as shown in Step Two. This gives you a solidbackinS fof ihe workpiece rhat alows a conbo ed f€eddd limiis tearout. A smooih, steady feed produces thebest cfosscuts. Too slow md the wood bums- too fastmd vou'I end up n'jth a ragged or inaccurate ot.If I've got a siack of parts ro cut io tength, I,1l squarcone end of all the pieces before curting any ro finallenglh. It's just more efficient. A mark on the squaredend lvi]] help keep things srraight (see main photo).(W I0 LtIGIfl. Now you cm male ihe final dosscut totength. And more often ihm not, yo re going ro wantio cut several pieces to identical lengrhs. Door rajls andsr'le. and fr(p ftd-e pan< dre d good e\dmptF.So raher ihan measure md cut each piece md hopefor the best, I sei up ro cut "mulriples.,, This invotvesmeasurmg and marking one piece and then using thisprcce to set up the saw for cuiting the rcmaining idenri,. Jrpicce\ ro lensrh A nop btoct on rne miLe, ddJte( dbe idiu!.d d. vol .neaN up on rhe e.rg1h oi tl-e mea*ured piece, as shown jn Srep Three. lhe lenSth of thepieces ftat foloiv $'ill be exactly the same.INt fl{AL IDGL At this point },ou workpiece is c1]t rolength md has one clean, square edge. But ir,s stil a lirtleovetridth. A light rip cut removes the exrra ,vidthand c., d,15 lhe 6n, l edBF {srep t-ou. rd mjn pnorolThart, l- lher. i- 'o :1. Ar th - pourr lh. {o-tpiece"are square and hue to sjze. Bui th€ besr thing is thai youcan move onwith one less ihing ro worryabout_ E4stefor Perfect PiecesENDV|EW a.Rip C|ose to Final Width. With the straight, squarc edgeagainsthe fence rip the workpiece close ta iE final width. Theextra width allav/s you to clean up this fa.e with the final cut.Squarc One End. Ance yau have tuvo straight paralte! edges,you .an begin crosscutting the workpiece to length. Start witha squarc, trim cut across one end of the piece.Final Length. A second crass.ut on the oppasite end gi\,es youthe final length. An auxiliary miter gauge fence with a stopblack clamped ta it makes multiple cus quick ano ac.urate.i i i ..' 1'.-A Clean Rip. Ance the piece is cut ta length, a light rip pass anthe face you cut in step ane, will give you the ftnal dimension.Any rough saw mark| burn mdrks, or tearout will be rcmoved.$w.<strong>Woodsmith</strong>.com
'= -.1'.- ---.--t;"====--jaiiBtscolorsMixingYdffiown s6in'riith. )f iYou know the sick feeling you getwhen you wipe on a srain and loowit's not what you want? The Pioblemis the color I'm looking for seernsto be in between the stains availabl€.You could buy a bunch of cansand ty mixing stains until you lindthe color you want. But I've fotmdthere's an €asier way to get the Perfectstain color - I mix mY ownI know, it sounds comPlicated.But with a few artisi's oil colorsand some boiled linseed oil, it's assimple as one-iwo-tlrc€.Bosir BrownsWhat makes mixing Yourown stains from artist's colors sogreat is you can mix smallamounts until you find just theright color to apply to your Profeci. Though you might feel a Littleintimidated by the number of colorsavailable, you can get startedwith eight colors: five basicbrowns and three accent colois.For the basic bmwns, I useVandyke Brown, Raw Sienna,Burnt Sienna, Raw Umbet andBurnt Umber. As you can se€ inthe photo at left, th€y provide abroad ran8e of wood-like colorsThe first step in mixng Yourown stain is to establish the backgroundcolor with one of the basicbrowns. For the tiP-and tum tableon page 30, I chos€ a combinationof bumt umber and bumt siennato get the backgrotmd color{rtr No. <strong>154</strong>
Arrenl ColorsOnce you've chosen theba.kSround color, you can add maccent color to reach the finalstain color H€re again, you onlyneed a few. The three that I useare Cadmium Red, CadmiumYelow, and Black (photo at riSht).Adding yelow to the mix lightensthe color for pine, maple and"goldenoak" stains. Red"warms" up the color for cherryand mahogany stains, like the hpand tum table on page 30. IvoryBlack works great for Walnut or"Ebonized" stains-It's a good idea to write downthe "recipes" as you go. Thenwhen it comes time to mix up abig batch, it's easy to reproducethe color. To keep track of th€ratios of color, I squeeze the paintonto a small scrap, as you €an seein the lower margin photo. Thismakes enough stain to get a goodidea of what the color looks like-The accent colors are a lirtleint€nse, so go easy when addingthem to your stain. It's bett€i iostart with a small amount sn€akup on the color you want.^R'"""7""*- .'Zr'A Add lusl enough boiled inseed oilto ihe artist's oil colors to makethem ealy to mix together.tix wirh oilThe final insredient tothe stain is an oil. For this, youcould use any type of oil finish,but I prefer boiled lins€ed oil. Theoil prcvides a base for miing thea$ist's oil colors together and thedrie6 add€d to th€ boiled linseedoil help the stain dry quicker.How much oil you add is rea[yup to you. Because I wanted afatuly thick srain (like shampoo),Iused just enough oil to get the colorsto mix, as you can s€e in th€photo at left. The rcason is that athick stain Sives you a longerworking time before the excessneeds to be wiped off. And thethick, gel-like consiBtency pen€tratesslowly to prevent blotching.After stirring the ingredientstogether, I wiped it on a t€st piece.DependinS on the result, you canadd more of th€ basic brown orthe acc€nt colors to do sometweaking. Or simply start ov€r.On€e you're satisfied with th€result, you can mix up a lar8erbatch based on your r€cip€ a]ld l A piece ofapply it to the project. For sometips on working with shop-madestain, take a look at the box belowAft€r the stain dries completely(usually ov€inight), you canapply the finish of your choice. Sling stick" toartistS oi colorHow-Tol Workiwith ShoMade StainoBtush on the Stain. Apply the stain in aheavy caat. A foam brush nakes h easy tosptead and can get inta cane6.w.Woodsrnith.comWipe off Excess. After severcl minutes, yaucan wipe aff the excesstain with a rag. Ihelonger tou waia the datket the color will be.Touch up the Colot A Bg noistened withpaint thinner can be used ta lift off stainfrcn end grain to even aut the color<strong>Woodsmith</strong> 47
in the mailboxauestions &AnswersRabbets onthe T?ableSawI notice that youn\a always use an auxiliaryfene with the dadoblade when you cut rabbefson the tahle saw. I'vealways cut them on theopposite edge without anauxiliary fence. Am Idoing itwrongTCmllolatsonBuslme[,Nebral
_lhardware & suppliesSourcesIIP AIID TURII ilBlEThe photo below shows most ofthe hardware and supplies you'llneed for the tip and turn table.To mount the table top to thebirdcage, I used a pair of 2" nomortisehinges (#28688) thatwere ordered from Rockler.Thespring-loaded table catch fromHorton Brasses (H-43) holds thetop down when the table is inuse but'then allows you toquickly release it and tip it upfor easy storage. The smallspindles for the birdcage mechanismcan be purchased fromRockler (#21360).\'gffoL6You'll need a couple moreitems. The mahogany crotchveneer I applied to the top ofthe table came from CertaintyWood. Their number is listed atulff:-*r*" ffiright. And finally, I used a classicalbead and cove bit fromAmana (#54108) to make themolding for the top.PICIURE TRATESThe no-miter picture frames gotogether easily in just a fewhours. And the bonus is that allthe supplies needed (hangers,turn buttons, screws, and glass)can be found at a local hardwareor home improvement store.ROUTER BITSThe router bits featured in thearticle starting on page 40 wereall purchased at the<strong>Woodsmith</strong> Store.The lockmiter bit that ltried out ismade by Freud (#99-03b)The box joint bit (#53010),the adjustable finger jointbit (#55392l,, and the gluejoint bit (#55388) are atlGIASS I001SYou can find the basic glasscuttingtools shown in thearticle on page 14 at hardwareand home improvementstores. The carbide oilcutter (SC-3) and the glass-breaking pliers(4112-prolwere ordered from theStai ned G/ass Web-Mart.WOODSIIITH PROIECI SUPP1IES\il'e nowfeafure hardware from nocr(LER.in manyof our new project kits. To order, please use our toll-freeorder line, see below. Ifs open Monday through Friday,from 8AM to 5 plvt CentralTime. Before calling, pleasehave your VISA" MasterCard, Discover, or AmericanExpress card ready.If you would prefer to mail in an order, please callthe toll-free phone number below for more informationconcerning shipping charges as well as anyapplicable sales tax.r ff#:ff1.:i;il:n:o*'flfrCORIIER TEDII CABIilETAlmost all of the hardware youneed to build the corner mediacabinet can be ordered from leeVa I ley. To insta I I the doors, you'l Ineed two pair of 2" nickel-platedno-mortise hinges (#00H51.32)and two 232mm stainless steelbar handles (#01W83.13). Tokeep the doors closed, I pickedup two 3/e"-dia. rare-earth magnets(#99K32.03), two 1/2" O.D.magnet cups (#99K32.521, andtwo 1lz" O.D. magnet washers(99K32.62). And the final itemsfrom Lee Valley are the five aluminumlegs (00581.40).You'f have to go to Rocklertoget the nickel-plated shelf-supportpins (#227731.A glass store should be ableto help you with the reededglass (mine was 3/ro" thick withthe reeds on 1/2" centers). I paida little extra and had the glasscut so that the reeded patternwas centered in my pieces.Onfine (usfomer ServfteClick on Subscriber Services otwww.wdsmilh.cotno Aces your orrounl sloin. (honge your moiling or emoiloddres. Poyour billo Renew your suhaipliono Tell us il yru've mised on isue. Find on if your pspent hm hn reteivedo "Online Extras" - Plans, Patterns, & More. Over l00WoodworkingTips Onlineo Visit Our Readers'Project Photo Gallery. Project Plans You Can Download. Catalog of Project Kits, Tools, Jigs, & Plansr Forums for Woodworking, Tools, & Classifiedso Links to OtherWoodworking Sites. Order <strong>Woodsmith</strong> & ShopNotes Back IssuesColl us 0l l'800,444'7572 or online 0l www.woodsmift.coms*# {rwttAllORDERs0uRctsSimilar projectsupplies may beordered fromthefollowingcompan?,es:Rockler800-279-MALrockler.comNo-Mortise Hinges,N ic kel- P lntpd, I{rnb s,Shclf-Suppart Pins,WoodSpind,l,es,WoodLegs<strong>Woodsmith</strong> Store800-835-5084AmnnnRouter Bits,Frsud, Router Bits,Rockler Had,umreAmana Tool800-445-0077amanatool.comRouter BitsHorton Brasses800-7s4-9L27horton-brasses.comTtpand,T\tmthbln Catrhke Valley800-871-8158leevalley.comNo-Mortise Hinges, BarH and,l,e s, Alumin u,m Leg s,Rare-Earth Mognnts,MagnatCups, MogmetWashorsCertainty Wood716-665-0206certain$vood.comSpcinltyVsnpsrsBob MorganWoodworting Supplies5o.2-225-5855morg[nwood.comRawVenca; Banked,Vew er, P eelq,rd,- StirkVetwer.The Stained GlassWeb-Mart888-452-7796glassmarLcomCarbillp An Cufter,Glnss Breahing PlizrxWoodhaven800-344-6657woodhaven.comDauetnil Jigswww.<strong>Woodsmith</strong>.com <strong>Woodsmith</strong> 49
etails of craftsmanshiIwhy use aThpered Sliding DovetaiYou won't flnd a better joint for connecting the column andthe legs ofthe "tip and turn" table.1You may be curious about why Ichos€ to use a taPer€d sliding dovetailto join the leSs to the column ofthe tip and turn table. Well, theanswer involves both a litd€ historyaiong with some modem be.lllliques.Most of the old ex.mPles of thjsstyle of table us€d a tumed, roundcolunn. And the ioint used toattach the shaped l€gs to the rcundcolumn was aLrnost always astraiSht-sided"sliding" dovetail.The basic anatomy of this joint isshown in ihe drawings at th€ toP ofthe opposite pag€. A long dovetailshaped sorket was cut into the bas€of the column. Then a matchingdovetail was cut onto th€ uPPerend of the leg. V{hen the dovetailslides into the sock€t, the leg islo&ed tighdy to the column.TIE DllWlAqG. UnJortunately, it'snot as easy as it sounds. First of all,you have to fiSure out how to fitthe legp to a round colunn As Youcan see, th€ Eolution was to relievethe should€rs of the dovetail on rheleg to match the curve of the colurm.BuL the thought of trying todo a good job at this tricky handworkG prctty intimidating.And if curv€d shoutders aren'tenough, you sti]l have to dear wifig€tting a good fit along tt€ 3" or 4"length of the ioint. If the fit geissloppt you lose tlte "buihin" 1o&and the joint's strength. The Problemis that you can't r€ally se€Woodsnith No. <strong>154</strong>
$iat's goins on insi.le thej()iri. So!1\r cnd np 1lofkins tr) fcel as vouhim a liitle here .nd i litile ihcfc.\ttrr nright get it right, but thc nrargin1or er(r is Frcttv liLh.Th.n comes th€ glu.up. Thc fiisecDls periect not k,o l(tsc orbo iight. So rrhere do vr\r pui iheglu. an.i how much? \iu n.v tieicnpt€Li io sprea!t gluc aldg lheentire tength of the Llovciail .rdthe sock€t. Bui ihcn you nrn therisk ot the gluc s\!cll'nS the i{ood!lurlng,rsscmtrl\r lllc result couldbe a l€g th.t "frcrzcs up' in itsso.ketinLl ncin'iconc ont.()r rolj coul!1 clloosc ihc opFosite |1nltennd sprcad gluc lightlv.tihc Lrotbnr of thc sock.i an.] thetop oi thedo\etail. BuLas th-..loveLrilslid€s inio its socket, the glu€ istorced oui of thc tont an.i \'olr erldLrp $ith a "drv".ssenrLrl\rYou cci thf picilrre So the qucs,tior wns, "Hos .an I n.ke apeclest.)l (Lih n ha.litio.al lNk.nc1 traclitioal joinerv $ lrLlca\ odnlg thc djfficult ch.ll€nlies?"A ftAT-tlDlD CoIUMN. for st.rrtefs, Idecided ihai .1 six srled coluDDwith flai f..cs Nould girc rnc thrrighi l(r)k drl rrake tlre cohLnn-tolcg fit a (trole lot easi.r. No(r'.trf'a jl'st.Lrtting a st'l,r. shouldef on fir do\ elril kr nntc rvi{h atht suri.cc on the.olL,n]]r.Gett the RihtFitA iaperecl sliding dovciailneecls tofii well in h\ar $ays. Firsi, the l€gdd ihe so.ket n.!d io hale dre sam€amount of taper so dut ille loint isiighi along its entirc lcngth. (leftdnwirrg). The giratcsi stress on thejoht lvill be at thc boitom. this is&iere th€ leg rvil rlani io pu ll n1\'a}hom the colunxl $I made clorblysure the fii rvas ii8ht here.When thc tap€r is righi, lou canuork on liiiing ihe leg to thc righidepth. You rvant the do\ct.il hlgrab in thc socket just before thcleg an.] cohuDl are flush.Iishouldiakea firm taporis'o irom a mnllcito i!Iy seat ihe leg (detril'.r').\wN.\Ioodsmith.conlBut this stiLl leavcs ihe proLrleot geiting a silug fit on the rrsrd. ofihejoint. And tl1is is iyhere mod€mFchnques cm make all the diffcrence. A colunm rliih flat surfacesopens !'p tlle possibiliiy of Lrsing arorter b nccuratclv cut thisjoin€fvancl ev€n improvc upon it.IAPTRIDoVITA||. It stands kr reasor that ii ihr dovetail and thcsockci arc boih tapered i:long thcnlengih, boih the fii and th€ assenrLrly rlolrl.l be easier. You ni8hLthjnk thii cuiting and fittnrg atapcrd sliLlins doletail wor d bemoc difiicult. But actuallt ihcrouicr jigs art setups i us€d nudert.rs) (scc page28).Inagnlc a tapered do\ciailhalfrviv inb iis sock€t. B€cause ihcjoint tapers in ti{'o ctirections,thcfo's no wood to $ood contact.Ii's only $hen ihc dovciail jsscatcd in the socket that ih€ h{omccl irr lock th€ leg to thc .olumn.And ihe socket rolriing jig alloivs\ou to fine tlrne the fit so that dretvo pads or ihejoiit make contaclai just the right spLrt (boxbclow).The tafer ofthejohialso takes alot oi !,ncertamt! oui ofgluing ihelegs to the column. Snlce the 1€gdoesn t snuguP until ii reaches theend or the sockci, ih. glue in thejoi.t i{on't gfnb until lhe leg isnl.rost si,ated. %u can fii the joint1"kr. ') '\\tilsnug and not havc to worry abouta leg getting siuck in dre socket.And as the dovctail slides nrtothe socket, the shoddcrs are pulledtightlv to ihe facc of the columnand the joint becomes seamless.You probably i{on'tneed clanps.It's prett), hard io natch the finecraftsmarLhip of dE past. But lvitha good siarting point and somenodem tools ard icchniques, youcan sometimes dojust lhat. D
lookinFinal DetailsRollfi,r.{ Doi,crrils. >A half blind dovetailiigcan make routingperfect fitting doverailsa snap. We'llshowyou how to getthe best results everytime. The articlebesins on pqqe 10.;Y^-- -fivL Tip dltd lirtt Tnblt. You'llfind a lot of interestingwoodworking techniques packed into this littletable-from routing tapered, s iding dovetailsand brilding a "birocdge swivel nechanisr Iomaking a twelve-sided top- But you can take itslFp-by step wilh rl^e Dlars rhal srart on page lr'< Ca n M.dia Cnl)i et. Whether you buiLd justthelowercabinet or go ailout and add the uppercabinet,you'llhave plenty ofspace fora TV and alLyoureniertainment gea. Detailed instructlons begin on rt\qe 20I