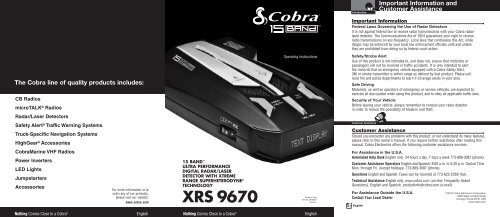
XRS 9670 Manual - Cobra Electronics
XRS 9670 Manual - Cobra Electronics
XRS 9670 Manual - Cobra Electronics
- No tags were found...
Create successful ePaper yourself
Turn your PDF publications into a flip-book with our unique Google optimized e-Paper software.
IntroductionContentsIntroductionImportant Information ............................................................................... A1Customer Assistance ................................................................................. A1Controls, Indicators, Connections and Display .......................................... A2Product Features........................................................................................ A3Your DetectorInstallation ................................................................................................ 2Getting Started ............................................................................................. 5EasySet Programming ............................................................................... 6Settings ....................................................................................................... 10IntelliShield Highway/City Modes ............................................................ 10Muting an Alert ........................................................................................ 12Auto Mute Mode ...................................................................................... 12Auxiliary Audio Jack ................................................................................ 12IntelliMute ...............................................................................................13IntelliMute Pro ......................................................................................... 16Compass .................................................................................................. 17Pop Alert .................................................................................................. 19K, Ku and X Band Detection .....................................................................19VG-2 Alert ................................................................................................ 20Spectre I & IV+ Alerts .............................................................................. 21SmartPower ............................................................................................. 22DigiView Data Display Brightness ............................................................ 23Detection ..................................................................................................... 25Signals Detected ...................................................................................... 25Audio Alerts ............................................................................................. 25Visual Display .......................................................................................... 25Instant-On Detection ................................................................................ 29Pop Detection .......................................................................................... 29Responding to Alerts ............................................................................... 29Understanding Radar and Laser ................................................................. 30Maintenance ................................................................................................ 32Specifications .............................................................................................. 33WarrantyLimited 1-Year Warranty ............................................................................. 34Customer AssistanceProduct Service .......................................................................................... 35Optional Accessories .................................................................................. 36Accessories Order Info ................................................................................ 37Trademark Acknowledgement ..................................................................... 37Nothing Comes Close to a <strong>Cobra</strong> ® 1
Your DetectorInstallationYour DetectorInstallationInstallationWhere to Mount Your UnitYou will get optimum performance from your detector if you Mount it at apoint approximately in the center of the vehicle, as low as possible on thefront windshield without obstructing the unit’s view of the road either tothe front or rear. You can also mount it directly on the dashboard.•Windshield Mounting1. Attach the rubbercups to the bracket.Windshield MountingDashboard Mounting2. Make sure the rubber cups and your windshield are clean.3. Push the bracket firmlyonto the windshield.The unit’s lens must not be blocked and the LaserEye should have a clearview out the back window to allow 360° detection.The LaserEye Should Have a Clear View4. Attach the detector tothe bracket. Check theangle of the unit.5. To adjust the angle ifnecessary, gently push orpull on the bracket to bendit. DO NOT use the detectorto bend the bracket.6. Plug the power cordinto the detector.Radar and laser signals pass through glass but not through other materialsand objects. Objects that can block or weaken incoming signals include:g Windshield wiper bladesg Mirrored sun screensg Dark tinting at the top of the windshieldg Heated windshields currently available on some vehicles(Instaclear for Ford, Electriclear for GM). Consult your dealerto see if you have this option.7. Plug the cigarette lighteradapter on the powercord into your vehicle’scigarette lighter.8. You can temporarily remove the detector whenever youwish by pressing the bracket release button and slidingit off the bracket.2 EnglishNothing Comes Close to a <strong>Cobra</strong> ®3
Your DetectorInstallationYour DetectorGetting StartedDashboard MountingGetting Started•1. Place the detector on the dashboard to find a locationwhere the unit has a clear, level view of the road.The angle can NOT be adjusted after mounting.2. Remove the paper backingfrom one side of the hookand-loopfastener.On-Off/Volume ControlRotate clockwise(away from you)3. Attach the pad to thedashboard at your chosenlocation and remove theother paper backing.4. Attach the detector to thehook-and-loop fastener.You can remove andreattach the unit asoften as you like.5. Plug the power cordinto the detector.To Turn On the Unit and Adjust the Audio VolumeRotate the On-Off/ ToneVisual DisplayVolume controlThree beepsTestingclockwise (awayfrom you).System ReadyThe display will then cyclethrough the user mode settings(city or highway, Intellimuteand SmartPower status).Power OnTestingStart-up is complete when the display shows – – h.Important: Once the compass is calibrated, the dashes willchange to one of the cardinal compass directions (N, NE, E,SE, S, SW, W, NW). See page 17 to calibrate the compass.Start-Up Complete__h4 English6. Plug the cigarette lighteradapter on the powercord into your vehicle’scigarette lighter.System ReadyNOTEIn some vehicles, power is supplied to the cigarette lighter evenwhile the ignition is Off. If this is the case with your vehicle and youhave turned the SmartPower Off, you should turn Off or unplug yourdetector when parking for lengthy periods. <strong>Cobra</strong> recommendsleaving SmartPower at the factory setting, which is On.Nothing Comes Close to a <strong>Cobra</strong> ® 5
Your DetectorEasySet ProgrammingYour DetectorEasySet ProgrammingEasySet ProgrammingAll user mode settings on your detector can be changed by usingProgram mode. When changing the settings, please keep in mind:g Buttons can have multiple functions.g All settings will be stored in memory when the power isturned Off and recalled when the power is turned back On.The procedure for using Program mode is shown on page 7.NOTEYou cannot enter Program mode during an alert. The unit will notdetect signals while in Program mode. During programming, if nobuttons are pushed for ten seconds, the unit will automatically exitProgram mode and save the last settings.Programming User ModesThe tables on pages 8 through 9 show you how to program all user modesand the settings you can choose from.NOTEOn the following pages, you will find more detailed explanationsof each setting.See page 14 for instructions on setting the IntelliMute activation point.See page 17 for instructions on calibrating the compass.See page 22 for instructions on using SmartPower.•To Use Program ModePress and hold the ToneProgram/Mute buttonThree beepsfor two seconds.While the programminginstructions arescrolling, press andrelease the Select/Dimbutton to cycle throughthe user modes.With the user mode youwish to change displayed,press and releasethe Set/City button tochange the setting.To move to the nextselection, press theSelect/Dim button again.When you have finishedprogramming any orall of the user modes,press and release theProgram/Mute buttonto exit Program mode.Or simply wait tenseconds withoutpushing any buttons.One beep witheach button pressOne or two beeps,depending on yourselectionOne beepSet/City ButtonPress and releaseSelect/Dim ButtonPress and releaseProgram/Mute ButtonPress and hold/Press and releaseVisual DisplayProgram will appear.PROGRAMThen brief programminginstructions will scroll throughthe display three times.As each mode is displayed,the current setting for thatmode will be shown.The setting you select willbe shown.When you exit Programmode, the new setting willautomatically be saved andEXIT PROGRAM and SettingsSaved! will appear in the display.EXITPROGRAMSettingsSaved!6 EnglishNothing Comes Close to a <strong>Cobra</strong> ® 7
Your DetectorEasySet Programming MenuYour DetectorEasySet Programming MenuThis EasySet Programming menu lists all of the modes and settings you canchoose from after you have entered Program mode as described on page 7.Mode Tone Visual Setting ResultSetIntelliShieldCity modedefault*IntelliMutemodeSetIntelliMuteRPMsIntelliMutePro modeAutoMutemodeSetcompassPop DetectmodeTwo beeps City X A single beep sounds when thesignal is first detected.One beepCity Xbeep OffAudio for all X band alerts are blockeduntil signal strength reaches Level 3.One beep City X+K Combines the City X mode withprevention of K band audio alertsuntil signal strength reaches Level 2.Two beeps IntelliMute On All alerts (except for strobe signalsfrom emergency vehicles) areautomatically muted below theengine rev point you set.One beep IntelliMute Off Normal operation.One beepTwo beepsOne beepSet IntelliMute(see page 14to set activationpoint)IntelliMute ProOnIntelliMute ProOffAllows you to set the enginerev point while using IntelliMute.Note: Only shown if IntelliMute is Off.All radar, VG-2 and Spectre detection isturned Off below the engine rev set point.Normal operation.Two beeps AutoMute On The audio volume of all alerts will beautomatically muted after four seconds foras long as the signal is detected.One beep AutoMute Off All alerts will sound at full volumefor as long as the signal is detected.One beep Set Compass Allows you to calibrate the compass.(see page 17 to calibrate compass)Two beeps Pop Detect On Unit will detect Pop signals.One beep Pop Detect Off Unit will not detect Pop signals.Mode Tone Visual Setting ResultVG-2 Detect Two beeps VG-2 Detect On Unit will detect VG-2 signals.modeOne beep VG-2 Detect Off Unit will not detect VG-2 signals.VG-2 Audiomode (notshown if VG-2detect is Off)SpectreDetect modeSpectreAudio mode(not shownif Spectredetect is Off)SmartPowermodeX BandDetect modeK or Ku BandDetect modeSet displayDim modedefault*Restore factorysettingsTwo beeps VG-2 Audio On With VG-2 Detect On, the unit will giveaudible alerts for VG-2 signals.One beep VG-2 Audio Off With VG-2 Detect Off, the unit will giveonly visual alerts for VG-2 signals.Two beepsOne beepTwo beepsOne beepSpectreDetect OnSpectreDetect OffSpectre AudioOnSpectre AudioOffUnit will detect Spectre I & IV+ signals.Unit will not detect Spectre I & IV+signals.With Spectre Audio On, unit will giveaudible alerts for Spectre signals.With Spectre Audio Off, unit will give onlyvisual alerts for Spectre signals.Two beeps SmartPower On SmartPower is On.One beep SmartPower Off SmartPower is Off.Two beeps X Band On Unit will detect X Band signals.One beep X Band Off Unit will not detect X Band signals.Two beeps K or Ku Band On Unit will detect K or Ku Band signals.One beep K or Ku Band Off Unit will not detect K or Ku Band signals.Two beeps Display Dim Partially dimmed for dusk or night driving.One beepDisplay Dimmer More dimmed for dusk or night driving.One beep Display Dark Display is Off.One beepRestore FactorySettingsResets user modes and settings tofactory default.Exit program One beep EXIT PROGRAM Allows you to exit Program mode.* The settings for these user modes can also be changed8 English with the one button method. See description of eachNothing Comes Close to a <strong>Cobra</strong> ®user mode (pages 10 and 24) for details.9
Your DetectorSettingsYour DetectorSettingsSettings•IntelliShield Highway/City ModesYour detector is equipped with IntelliShield false signal rejection technologywhich consists of a Highway mode and three different levels of City modes:City X, City X Beep Off and City X+K. City X mode sounds a single beep whenthe signal is first detected. City X Beep Off mode prevents all X band audioalerts until the signal strength reaches Level 3. City X+K mode combines theCity X mode with prevention of K band audio alerts until the signal strengthreads Level 2. This will reduce false alerts while you are driving in or nearurban areas where there are many sources for conflicting X or K band signalssuch as microwave towers and automatic door openers. The factory settingis Highway. The factory City mode default setting is City X.City ModeNWcSet/City ButtonPress and releaseTo Change From Highway Mode to City ModePress and release the ToneVisual DisplaySet/City button.One beepc appears in the displayNOTEWhen you change to City mode, the unit will enterwhichever city default mode is set at the time.To Change From City Mode Back to Highway ModePress and release the ToneVisual DisplaySet/City button again.Two beepsh appears in the displaySetting City DefaultYou can set the default level for City mode (City X, City X Beep Off andCity X+K) either in Program mode or directly using the Set/City button.To Set the City Mode Default Directly Using the Set/City ButtonPress and hold the Set/ ToneVisual DisplayCity button.One beep each time the Cycles – see chart abovedisplay cyclesRelease the Set/Citybutton to select thecurrent display asdefault.NoneTo Set the City Mode Default Using Program Mode(See Page 7 For Instructions on Using Program Mode)In Program mode,go to City.ToneOne beepOne beepTwo beepsCity X Beep OffSet/City ButtonPress and holdCity X+KCity X Beep Off,City X+K or City XVisual DisplayCity X Beep OffCity X+KCity XCityX+KCity XPress andhold theSet/Citybutton City XBeep OffCity XHighway ModeCity XCity X+KCity XNWhBeep Off10 EnglishNothing Comes Close to a <strong>Cobra</strong> ® 11
Your DetectorSettingsYour DetectorSettingsMuting an AlertYour detector allows you to quickly turn Off an Audio Alert by momentarilypressing the Program/Mute button. If you press the Program/Mute buttona second time during the Alert, the Audio Alert will be turned back On.Program/Mute ButtonPress and releaseTo Turn On or Off an Audio Alert Using the Program/Mute ButtonPress and release ToneVisual Displaythe Program/MuteNoneNonebutton.Auto Mute ModeAuto Mute will automatically reduce the audio volume of all alerts after four (4)seconds for as long as the signal is detected. The factory setting for Auto Mute is On.To Turn Auto Mute On or Off Using Program Mode(See Page 7 For Instructions on Using Program Mode)In Program mode,go to Auto Mute.ToneTwo beepsOne beepAuto Mute OnVisual DisplayAuto Mute OnAuto Mute OffAuto Mute OffIntelliMuteIntelliMute is a unique feature that allows you to avoid alerts you don’t need tohear because you are stopped or moving slowly. By sensing the “revs” RPMs)of your engine, IntelliMute knows when you are at low speed and automaticallymutes audio alerts (except for strobe signals from emergency vehicles).Before IntelliMute will work, you must set an activation point for your engine’srevs (see page 14). Whenever the revs are below that point, IntelliMute willbegin muting. The activation point will be stored in memory and recalledeach time the power is turned On. An i will appear in the display whenIntelliMute is On. The factory setting is IntelliMute Off.NOTEIntelliMute may not work with some vehicles because it cannot sensethe engine’s revs. In such cases, you can reduce unwanted audio alertsby using Auto Mute and City mode when appropriate.To Turn IntelliMute On or Off Using Program Mode(See Page 7 For Instructions on Using Program Mode)In Program mode,go to IntelliMute.ToneTwo beepsOne beepVisual DisplayIntelliMute On,then i appears in the displayIntelliMute OffAutoMuteAutoMuteIntelliMute OnIntelliMute OffOnOffIntelliIntelliAuxiliary Audio JackThe Auxiliary Audio Jack can beused to connect an external speakerin environments with high ambientnoise levels. The internal speakerwill be disconnected.AuxiliaryAudio JackMuteOnN Wi hMuteOff12 EnglishNothing Comes Close to a <strong>Cobra</strong> ® 13
Your DetectorSettingsYour DetectorSettingsWhat to Remember While Using IntelliMuteIntelliMute works with all City and Auto Mute modes.Whenever engine revs are below the activation point, an arrowpointing down will appear in the display. Above the activation point,an arrow pointing up will appear.Below Activation PointN W14 Englishi hAbove Activation PointN Wi hIf, for any reason, the unit stops sensing your engine’s revs,IntelliMute will indicate an error and automatically turn Off.The rev point you set will be stored in the unit’s memory whenpower is turned Off and recalled each time the power is turned On.NOTEThe rev point must be reset if you use your detector in a different vehicle.NOTEWhen initially choosing your IntelliMute activation point, a settingof approximately 300 to 600 RPMs above idle is recommended.You can reset the activation point at any time to fit your individualpreferences and driving style.Setting the IntelliMute Activation PointYour detector must be installed in your vehicle.CAUTIONDo not attempt to set the rev point while driving.Your vehicle should be parked and idling.IntelliMute must be turned On before setting the activation point.Program/Mute ButtonTo Set the IntelliMute Activation Point Using Program Mode(See Page 7 For Instructions on Using Program Mode)In Program mode, go to SetToneVisual DisplayIntelliMute.NoneSet IntelliMutePress and release the Set/City buttonto begin setting IntelliMute RPMs.Rev your engine to the level you wish toset. Rev the engine slightly above idle andhold revs steady for two seconds.At the desired rev level, press andrelease the Set/City button.Press and release either the Select/Dim button to proceed to the next usermode or the Program/Mute button toexit the Program mode.NOTEIf the unit is unable to sense usable pulseswithin three seconds or if you do not set arev point within 20 seconds of beginningthese steps, IntelliMute will indicate anerror and automatically turn Off.ToneOne beepOne beepSetting IntelliMute RPMsSet Intel...Visual DisplayIntelliMute not setPlease try againIntelliMute OffTwo beepsNoneThree beepsNonePress SET...IntelliMuteNot SetIntelliMu...Please tr...Press SET atdesired RPMs…NoneIntelliMute Set!NoneIntelliMuteSet!IntelliMute OffIntelliMuteOffSet/CityButtonSelect/DimButtonNothing Comes Close to a <strong>Cobra</strong> ® 15
Your DetectorSettingsYour DetectorSettingsIntelliMute Pro prevents detection by radar detector detectors (RDDs) suchas VG-2, Spectre I and Spectre IV+ when traveling at slower speeds. It isintended for use by experienced users only.When IntelliMute Pro is turned On, and engine RPMs are below the IntelliMuteactivation point, your detector’s radar detection circuits are turned Off toprevent detection by RDDs.Before IntelliMute Pro can be turned On, you must have turned On and Setthe IntelliMute activation point. (See pages 13 through 15.)CAUTIONWhen IntelliMute Pro is On, NO radar signals will be detected andNO alerts will be given at RPMs below the IntelliMute activation point.To Turn IntelliMute Pro On or Off Using Program Mode(See Page 7 For Instructions on Using Program Mode)In Program mode,go to IntelliMute Pro.ToneTwo beepsOne beepIntelliMute Pro OnIntelliMute ProOnVisual DisplayIntelliMute Pro On,then i blinks in the displayIntelliMute Pro Off,then i is steady in the displayIntelliMute ProOffN W i h N W i hCompassYour detector includes an internal8-point Compass that will continuouslydisplay your current direction of travel:N, NE, E, SE, S, SW, W or NW.Calibrating the Compass8-PointCompassNOTEBefore using it for the first time, you must calibrate the compass toprovide accurate indications of direction. See page 7 for instructionson using the Program mode to select Set Compass.Calibration allows the compass electronics to measure and storeinformation about the magnetic fields generated by your vehicle.The compass will remain accurately calibrated as long as your detector ismounted in the same place in your vehicle. If you change the location wherethe unit is mounted or move it to another vehicle, you must recalibrate thecompass.The compass temporarily may not provide accurate readings if you are insidea building or enclosure, or are close to a large metal tractor/trailer, truck,or train. Once you are away from such a location, the compass will workcorrectly again.NOTEWhen the instructions direct you to drive in two circles, a large parkinglot is the most convenient place to do so. It does not matter whatdirection your vehicle is pointing when you start the circles, whichdirection you go to make the circles, and it does not have to be exactlytwo circles. You do NOT have to make perfect circles. You can drive inany pattern, as long as you make two complete turns. Four three-pointturns, two small squares, or any two complete loops will work as well astwo circles. It does not matter what size the circles are, if your speed isconstant, or how fast you make the circles [but less than two minutes].Please be careful when making the circles and watch for other traffic.WNWSWNSNESEE16 EnglishNothing Comes Close to a <strong>Cobra</strong> ® 17
SettingsYour DetectorSettings18Program/Mute ButtonTo Calibrate the Compass Using Program Mode(See Page 7 For Instructions on Using Program Mode)In Program mode, go toToneSet Compass.NonePress and release the Set/City buttonto begin setting the compass.Within two minutes, drive yourvehicle in a circle twice, then pressthe Set/City button again.Press and release either the Select/Dim button to proceed to the next usermode or the Program/Mute buttonto exit Program mode.Set CompassSet Compa...ToneOne beepCalibrate CompassDrive in...Press SET...One beepThree beepsNoneNOTEIf you do not press the Set/City button within two minutes after beginningthe set compass process, compass calibration will automatically terminate.Visual DisplayCompass not set…Please try again…Compass SetCompassSet!TerminateCompass n...Please tr...Visual DisplaySet CompassDrive in 2 circles…Press SET whendone…Compass Set!For two secondsfollowed by directionof travel (N, NE, E,SE, S, SW, W or NW)NoneNWSet/CityButtonSelect/DimButtonhPop AlertThe Pop Mode Radar Gun is a single-pulse Doppler radar that is a featureof a K and Ka (Bee III Ka radar gun) band Instant-On radar gun. It usesa single, short-time pulse to measure the target vehicle’s speed.The Pop mode receiver senses Pop singles beyond the effective range ofPop radar guns. As the Pop mode receiver is so sensitive, you should limitthe use of Pop Detect mode to highway and rural driving.Pop Alert will alert you to Pop radar signals. During the alert, the unitcontinues to detect other signals. The factory setting is Pop Detect Off.To Turn Pop Detect Mode On or Off Using Program Mode(See Page 7 For Instructions on Using Program Mode)In Program mode,go to Pop Detect.ToneTwo beepsOne beepVisual DisplayPop OnPop OffK, Ku and X Band DetectionThe new Ku Band may be introduced to North America in the future. To preventfalse alerts until it is, the factory default for Ku Band detection is Off. In parts ofNorth America, annoying false alerts from door openers and similar devices aretriggered on the X Band and K Band. If desired, X Band or K Band can be turnedOff. The factory default for X Band and K Band detection is On.To Turn X, K and/or Ku Mode On or Off Using Program Mode(See Page 7 For Instructions on Using Program Mode)In Program mode, ToneVisual Displaygo to X, K or Ku band.Two beepsX-Band OnOne beepX-Band OffTwo beepsK-Band OnX-Band OnOne beepK-Band OffX-Band OffX-Band OffTwo beepsOne beepKu-Band OnKu-Band OffK-Band OnK-Band OnK-Band OffK-Band OffKu-Band OnKu-Band OnPop Detect OnPop OnPop Detect OffPop OffKu-Band OffKu-Band OffComes Close to a <strong>Cobra</strong> ® 19
Your DetectorSettingsYour DetectorSettingsThe detector is undetectable by VG-2 detection devices and will alert you whensuch a device is in use near your vehicle. During the alert, the unit continuesto detect other signals. You can choose whether or not you want your unit toshow VG-2 Alerts. With VG-2 Detect mode On, you can alsochoose whether or not you want your unit to sound audible VG-2 Alerts.The factory settings are VG-2 Detect Off and VG-2 Detect Audio Off.To Turn VG-2 Detect Mode On or Off Using Program Mode(See Page 7 For Instructions on Using Program Mode)In Program mode,go to VG-2 Detect.ToneTwo beepsOne beepVG-2 Detect OnVG2 OnVisual DisplayVG2 OnVG2 OffVG-2 Detect OffVG2 OffSpectre I & IV+ AlertsPolice use radar detector detectors (RDDs) to spot users of radar detectors.Your detector is able to identify signals from Spectre I and Spectre IV+ RDDsand can provide alerts when any of these or similar devices are in use nearyour vehicle.Your detector can be spotted by Spectre IV+ RDDs, but is invisible toSpectre I RDDs. You can choose whether or not you want your unit to showSpectre Alerts. With Spectre Detect mode On, you can also choose whether ornot you want your unit to sound audible Spectre Alerts. The factory settings areSpectre Detect Off, Spectre Audio Off.To Turn Spectre Detect Mode On or Off Using Program Mode(See Page 7 For Instructions on Using Program Mode)In Program mode,go to Spectre Detect.ToneTwo beepsOne beepVisual DisplaySpectre OnSpectre OffSpectre Detect OnSpectre Detect OffTo Turn VG-2 Audio Mode On or Off Using Program Mode(See Page 7 For Instructions on Using Program Mode)In Program mode,go to VG-2 Audio.ToneTwo beepsOne beepVG-2 Audio OnVisual DisplayVG2 Audio OnVG2 Audio Off...Audio On ...Audio OffSpectre OnSpectre OffTo Turn Spectre Mode On or Off Using Program Mode(See Page 7 For Instructions on Using Program Mode)In Program mode,go to Spectre Audio.ToneTwo beepsOne beepVisual DisplaySpectre Audio OnSpectre Audio Off...Audio On ...Audio Off20 EnglishNothing Comes Close to a <strong>Cobra</strong> ® 21
Your DetectorSettingsYour DetectorSettingsSmartPowerYour detector includes the SmartPower feature that, when activated, will putthe unit into Standby mode (low power) for about 30 minutes after the car’sengine has been turned Off. After 30 minutes in Standby mode, the unit willautomatically turn Off.SmartPower EnteringStandby ModePwr SaveBefore SmartPower enters Standby mode, you will hear onebeep and Pwr Save will appear on the display. To returnthe unit to normal Power mode or exit Standby mode, startthe car, press any button or turn the unit Off and then Onagain. The factory setting is SmartPower On.To Turn SmartPower Mode On or Off Using Program Mode(See Page 7 For Instructions on Using Program Mode)In Program mode,go to SmartPower.ToneTwo beepsOne beepVisual DisplaySmartPower OnSmartPower Off...Power On ...Power OffDigiView Data Display BrightnessYour detector has a Bright display mode (for daytime driving) and threelevels of Dim display modes (Dim for dusk driving, Dimmer for night drivingand Dark where no visual alerts will be displayed) to control the display’sbrightness levels. The factory setting is Bright. The factory Dim modedefault setting is Dimmer.Dark Indicator.To Change the Brightness to DimPress and release the ToneSelect/Dim button once.Two beepsDim DisplayDimmer DisplayDark DisplayVisual DisplayDim, Dimmer or DarkSelect/DimButtonDimDimmerDarkNOTEWhen you change to Dim mode, the unit will enterwhichever dim default mode is set at the time.To Change the Brightness to BrightPress and release the ToneSelect/Dim button again.One beepVisual DisplayBrightBright DisplayBright22 EnglishNothing Comes Close to a <strong>Cobra</strong> ® 23
Your DetectorSettingsYour DetectorDetectionSetting Dim DefaultYou can set the default level for Dim mode (Dim, Dimmer or Dark)either in Program mode or directly using the Select/Dim button.To Set the Display Dim Mode Default Directly Using the Set/Dim ButtonPress and hold theSelect/Dim button.Release the Select/Dim button to selectthe current display asdefault.ToneOne beep each time thedisplay cyclesNoneVisual DisplayCycles – see chart aboveDim, Dimmer or DarkTo Set the Display Dim Mode Default Using Program Mode(See Page 7 For Instructions on Using Program Mode)In Program mode,go to Display Dim,Dimmer or Dark.ToneTwo beepsOne beepOne beepVisual DisplayDimDimmerDarkDarkDimPressand holdSelect/DimbuttonDimmerSelect/DimButtonDetectionSignals DetectedThe tables on the following pages show you the types of Signals yourdetector will detect, as well as the visual alerts it provides for each of them.Audio AlertsA distinctly different Alert tone is used for each type of signal detected(including separate tones for each laser signal). For X, K, Ka and Ku bandradar signals, the tones will repeat faster as you approach the signalsource. The repeat rate of the tones gives you useful information aboutthe signal detected. See responding to alerts on page 29.Visual DisplayAn indication of the type of signal detected will appear in the DigiViewData Display. During X, K, Ka and Ku alerts, you will also see from oneto five vertical bars, indicating the strength of the signal detected.Signal Strength ChartSignal Strength = 1(Weakest Signal)-Signal Strength = 4- - - -Signal Strength = 2 Signal Strength = 31 - - 2 - - - 3Signal Strength = 5(Strongest Signal)4 - - - - -_ 5•24 EnglishNothing Comes Close to a <strong>Cobra</strong> ® 25
Your DetectorDetectionYour DetectorDetectionRadar Signals and Visual DisplaysType of SignalX Band RadarK Band RadarKa Band RadarKu Band RadarPop Radar ModeX Signal DetectedVisual DisplayX and Signal StrengthK and Signal StrengthKa and Signal StrengthKu and Signal StrengthPopK Signal Detected Ka Signal Detected Ku Signal DetectedX - - 2 K - - - 3 K a - - - - - _ _5 K u - - - -- 4Pop Signal DetectedLaser Signals, Voice and Visual DisplaysType of SignalVisual DisplayLTI 20-20* LTI 20-20LTI Laser*LTI LaserKustom Signals Laser 340* Kustom Laser 340Kustom Signals Laser*Kustom LaserStalker LIDAR*Stalker LidarLaser Atlanta SpeedLaser/Kustom Signals-ProLaser II* SpeedLaser...ProLaser II* Your detector provides 360° detection of these signals.NOTE Beep rate changes with different laser alerts.PopLTI 20-20LTI LaserKustom SignalsLaser 340LaserLTIKustomStrobe Alert Signals and Visual DisplaysType of SignalVisual Display2 0 / 20LaserLaser 3403M Opticom or Tomar*Emergency Vehicle (Flashing)* Your detector provides 360˚ detection of these signals.Strobe Alert Display (Flashing)Emergency...Kustom Signals LaserKustomLaserStalker LIDARStalkerLidarLaser Atlanta SpeedlaserKustome Signals ProLaser IISpeedlaserProLaser II26 EnglishNothing Comes Close to a <strong>Cobra</strong> ® 27
Your DetectorDetectionYour DetectorDetectionSafety Alert Signals and Visual DisplaysType of SignalEmergency VehiclesRoad HazardsTrainsEmergency AlertSignal DetectedEmergency...NOTEThere are different tones for each Safety Alert.Spectre AlertSignal DetectedSpectreRoad Hazard AlertSignal DetectedRoadHazardVG-2 AlertSignal DetectedVG2Visual DisplayEmergency VehicleRoad HazardTrainNOTEThere are different tones for each alert.Train Alert SignalDetectedTrainVG-2 and Spectre I & IV+ Alert Signals and Visual DisplaysType of SignalVisual DisplayVG-2 AlertSpectreVG2SpectreInstant-On DetectionYour detector is designed to detect Instant-On speed monitoring signals,which can suddenly appear at full strength.NOTEYou should take appropriate actionimmediately whenever an instant-on alert is given.Pop DetectionYour detector is designed to detect single pulse mode radars. These radarsare designed to have a low probability of detection. You should note that theseradar guns have a much shorter range while in this mode.Responding to AlertsDescriptionTone repeats slowly at first,then speeds up rapidly.Tone sounds onetime only.Tone instantly beginsrepeating rapidly.InterpretationProbably police radar.Probably a false alarm,but possibly pulsed radar,Spectre I or VG-2 nearby.Radar, Spectre I or VG-2 nearbyhas been activated suddenly.RecommendedResponseFULL ALERTExercise cautionFULL ALERTPop mode tone. Pop mode gun very close. FULL ALERTTone repeats slowly as youapproach a hill or bridge, thenspeeds up sharply as youreach it.Tone repeats slowlyfor a short period.Any type of laser alert.Any Safety Alertor Strobe Alert.Probably policeradar beyond thehill or bridge.Probably a false alarm.Laser alerts arenever false alarms.You are nearing an emergencyvehicle, railroad crossing orroad hazard (construction,accident, etc.).FULL ALERTExercise cautionFULL ALERTExercise caution28 EnglishNothing Comes Close to a <strong>Cobra</strong> ® 29
Your DetectorUnderstanding Radar and LaserYour DetectorUnderstanding Radar and LaserUnderstanding Radar and Laser•Radar Speed Monitoring SystemsThree band frequencies have been approved by the Federal CommunicationsCommission (FCC) for use by speed monitoring radar equipment:X band 10.525 GHzK band 24.150 GHzKa band 33.400 – 36.00 GHzYour detector detects signals in all three radar bands, plus Ku band (13.435 GHz),which is an approved frequency used in parts of Europe and Asia.VG-2 and Spectre I & IV+VG-2 and Spectre I & IV+ are radar detector detectors (RDDs) that work bydetecting low-level signals emitted by most radar detectors. Your detectordoes not emit signals that can be spotted by VG-2 and Spectre I RDDs.However, your detector can be spotted by Spectre IV+ RDDs. Your unitdetects signals from these or similar devices and will alert you when sucha device is in use near your vehicle.Safety Alert Traffic Warning SystemFCC-approved Safety Alert transmitters emit microwave radar signals thatindicate the presence of a safety-related concern. Depending on the frequencyof the signal emitted, it can indicate a speeding emergency vehicle or train,or a stationary road hazard.Because these microwave signals are within the K band frequency, mostconventional radar detectors will detect Safety Alert signals as standardK band radar. Your detector, however, is designed to differentiate betweenstandard K band and Safety Alert signals, and give separate alerts for each.Safety Alert technology is relatively new. Safety Alert transmitters canbe found in limited numbers in all 50 states, but the number is growing.Depending on your location, you may not receive these alerts regularlyand may often encounter emergency vehicles, trains and road hazardswithout being alerted. As the number of transmitters increases,these alerts will become more common.When you receive such an alert, please watch for emergency vehicles aheadof you, on cross streets and behind you. If you see an emergency vehicleapproaching, please pull over to the right side of the road and allow it to pass.30 EnglishStrobe AlertSpecial strobes mounted on the light bars of authorized emergencyvehicles (fire trucks, police cars, ambulances) automatically change trafficsignals as the vehicle approaches an intersection. These strobes and thespecial strobe detectors located on the traffic signals, introduced fairlyrecently by 3M and Tomar, are already in use in more than 1000 citiesnationwide. <strong>Cobra</strong>’s exclusive Strobe Alert detector will detect thesespecial strobes and give an emergency vehicle alert.When you receive such an alert, please watch for an approachingemergency vehicle and pull over to allow it to pass. To inquire aboutcoverage in your area, contact your local fire and police departments.LIDAR (Laser)The correct name for the technology that most people refer to aslaser is actually LIDAR, which stands for Light Detection and Ranging.LIDAR operates much like radar. Its signal spreads out like a radarsignal, though not as widely. Unlike radar, LIDAR must have a clearline of sight to its target vehicle throughout the entire measurementinterval. Obstructions such as sign posts, utility poles, tree branches,etc., will prevent valid speed measurement.Some common questions about LIDAR include:g Does weather have any affect on LIDAR?Yes. Rain, snow, smoke, fog or airborne dust particles will reduce theeffective range of LIDAR and can, if dense enough, prevent its operation.g Can LIDAR operate through glass?Yes. Newer LIDAR guns can obtain readings through most types of glass.However, the laser pulse also can be received through glass to triggeran alarm by your detector.g Can LIDAR operate while in motion?No. Because LIDAR operates by line of sight, the person using it cannotdrive the vehicle, aim and operate the gun all at the same time.g Is LIDAR legal to use?Yes. It is legal in all 50 states.Nothing Comes Close to a <strong>Cobra</strong> ® 31
Your DetectorUnderstanding Radar and Laserand MaintenanceYour DetectorSpecificationsPop Radar GunsThe Pop mode Radar Gun is a single pulse Doppler radar that is a featureof a K and Ka (Bee III Ka radar gun) band Instant-On radar gun. It uses asingle short time pulse to measure the target vehicle’s speed. Despite the factthat the short, single pulse makes the unit very sensitive to officer hand andvehicle movement and reduces the range of the gun in Pop mode to 50% ofits range in Continuous Wave mode, this feature is added in an attempt tomake the radar gun invisible to Radar Detectors.Although your detector can sense Pop signals beyond the effective rangeof Pop radar guns, there will be a signal to sense only if a gun is triggered.In addition, the Pop mode receiver section is more prone to false alertsbecause of its extra sensitivity. This is especially so in urban areas. As aresult, you should consider using the Pop Detect mode only in highwayand rural situations. <strong>Cobra</strong> <strong>Electronics</strong> has included a user selectable Onor Off Pop Detect mode.MaintenanceMaintenance of Your Radar DetectorYour detector is designed and built to give you years of trouble-freeperformance without the need for service. No routine Maintenanceis required.If your unit does not appear to be operating properly,please follow these troubleshooting steps:g Make sure the power cord is properly connected.g Make sure the socket of your vehicle’s cigarette lighteris clean and free of corrosion.•SpecificationsBand and FrequenciesBandFrequenciesX Band 10.525 ± 0.050 GHzK Band 24.125 ± 0.125 GHzKa Band 34.700 ± 1.300 GHzKu Band 13.435 ± 0.035 GHzVG-2 11.500 ± 0.250 GHzLaser 910 ± 50nm 100 PPS910 ± 50nm 125 PPS910 ± 50nm 130 PPS910 ± 50nm 200 PPS910 ± 50nm 238 PPS910 ± 50nm 340 PPSSpectre I 13.300 ± 0.200 GHzSpectre IV/IV+Not DisclosedSafety Alert 24.070 ± 0.010 GHzTraffic Warning 24.110 ± 0.010 GHzSystem 24.190 ± 0.010 GHz24.230 ± 0.010 GHzStrobe 700 ±300 nmThis radar detector is covered by one or more of the following U.S. patents:5,497,148; 5,594,432; 5,612,685; 6,078,279; 6,094,148. Additional patentsmay be listed inside the product or pending.g Make sure the power cord’s cigarette lighter adapteris firmly seated in your cigarette lighter.g Check the power cord fuse. (Unscrew the ribbed end cap ofthe cigarette lighter adapter and examine the fuse. If required,replace it with a 2-amp fuse only.)32 EnglishNothing Comes Close to a <strong>Cobra</strong> ® 33
WarrantyWarrantyCustomer AssistanceProduct ServiceLimited 1-Year Warranty•For Products Purchased in the U.S.A.<strong>Cobra</strong> <strong>Electronics</strong> Corporation warrants that its <strong>Cobra</strong> Radar/LaserDetectors, and the com po nent parts thereof, will be free of defects inworkmanship and materials for a period of one year from the date of firstconsumer purchase. This war ran ty may be enforced by the first consumerpur chas er, pro vid ed that the product is utilized within the U.S.A.<strong>Cobra</strong> will, without charge, repair or replace, at its option, de fec tiveRadar/Laser Detectors, products or com po nent parts upon de liv ery to the<strong>Cobra</strong> Factory Service Department, ac com pa nied by proof of the date of firstconsumer pur chase, such as a du pli cat ed copy of a sales receipt.You must pay any initial shipping charges required to ship the product forwarranty service, but the return charges will be at <strong>Cobra</strong>’s expense, if theproduct is repaired or replaced under warranty.This warranty gives you specific rights, and you may also have other rightswhich vary from state to state.Exclusions: This limited warranty does not apply:1. To any product dam aged by accident.2. In the event of misuse or abuse of the product or as a resultof un au tho rized alterations or repairs.3. If the serial number has been altered, defaced or re moved.4. If the owner of the product resides outside the U.S.A.All implied warranties, including war ran ties of mer chant abil i ty and fitness fora par tic u lar purpose are limited in duration to the length of this warranty.<strong>Cobra</strong> shall not be liable for any incidental, con se quen tial or oth er dam ag es;including, without lim i ta tion, damages re sult ing from loss of use or cost ofin stal la tion.Some states do not allow limitations on how long an implied warranty lastsand/or do not allow the ex clu sion or limitation of incidental or con se quen tialdam ag es, so the above lim itations may not apply to you.Product Service•For any questions about operating or installing this new <strong>Cobra</strong> product, or ifparts are missing…PLEASE CALL COBRA FIRST…do not return thisproduct to the store. See customer assistance on page A1.If this product should require factory service, please call <strong>Cobra</strong> first at773-889-3087 BEFORE sending the product. This will ensure the fastestturnaround time on any repair.If <strong>Cobra</strong> asks that the product be sent to its factory, the following must befurnished to have the product serviced and returned:1. Send the complete unit, including power cord. (It is not necessaryto include the mounting bracket.)2. For warranty repair, enclose some form of proof-of-purchase,such as a photocopy or carbon copy of a sales receipt. If yousend the original receipt, it cannot be returned.3. Enclose a typed or clearly written description of the problemyou are having with your unit, plus the name and address whereyou want the unit returned.4. Pack the unit securely to prevent damage during transit. If possible,use the original packing materials.5. Ship prepaid and insured using a traceable carrier such as United ParcelService (UPS), Federal Express or Priority mail with delivery confirmation.Ship to: <strong>Cobra</strong> Factory Service, <strong>Cobra</strong> <strong>Electronics</strong> Corporation, 6500 WestCortland Street, Chicago, IL 60707 U.S.A.6. Please allow three to four weeks before contacting us about the statusof your service. Call 773-889-3087 for assistance. If your unit is underwarranty, it will either be repaired or replaced upon receipt, dependingon the model. If your unit is out of warranty, you will receive a letterinforming you of the repair or replacement charge.34 EnglishNothing Comes Close to a <strong>Cobra</strong> ® 35
Customer AssistanceOptional AccessoriesOptional AccessoriesYou can find quality <strong>Cobra</strong> products and accessoriesat your local <strong>Cobra</strong> dealer, or in the U.S.A., you canorder directly from <strong>Cobra</strong>. See order info on page 37.•Straight 12V DC Power CordIncludes plug and fuseItem # 420-030-N-001Windshield Mounting BracketIncludes suction cupsItem # 545-159-N-001Coiled 12V DC Power CordIncludes plug and fuseItem # 420-026-N-001Dual Port Power AdapterIncludes adjustable plug(up to 90˚) and fuseItem # CLP-2B36 English


