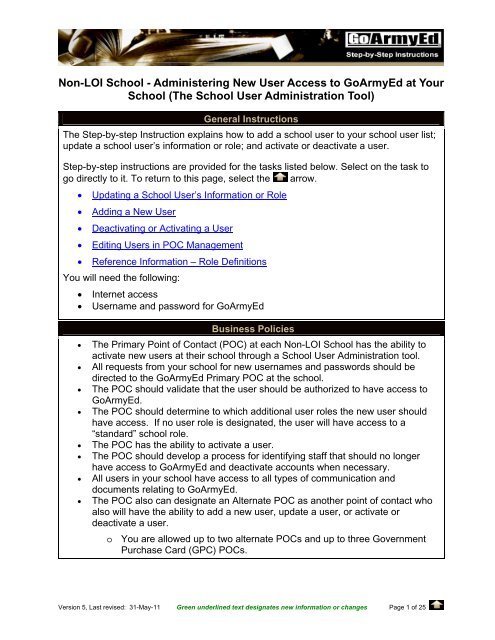
Non-LOI School - Administering New User Access to GoArmyEd at ...
Non-LOI School - Administering New User Access to GoArmyEd at ...
Non-LOI School - Administering New User Access to GoArmyEd at ...
- No tags were found...
You also want an ePaper? Increase the reach of your titles
YUMPU automatically turns print PDFs into web optimized ePapers that Google loves.
<strong>Non</strong>-<strong>LOI</strong> <strong>School</strong>s - <strong>Administering</strong> <strong>New</strong> <strong>User</strong> <strong>Access</strong> <strong>to</strong> <strong>GoArmyEd</strong> <strong>at</strong> Your <strong>School</strong>Step-by-Step Instructions for Upd<strong>at</strong>ing a <strong>School</strong> <strong>User</strong>’s Inform<strong>at</strong>ion or Role7. Select the “Upd<strong>at</strong>e” but<strong>to</strong>n if you wish <strong>to</strong> proceed with the inform<strong>at</strong>ion upd<strong>at</strong>eand/or user assignment. Select the “Cancel” but<strong>to</strong>n if you do not want <strong>to</strong> savethe inform<strong>at</strong>ion.8. A pop-up screen appears asking if you want <strong>to</strong> submit the form. Select the“OK” but<strong>to</strong>n <strong>to</strong> proceed or the “Cancel” but<strong>to</strong>n <strong>to</strong> undo the upd<strong>at</strong>es.9. The Upd<strong>at</strong>e <strong>School</strong> <strong>User</strong> page appears with a message st<strong>at</strong>ing the schooluser’s inform<strong>at</strong>ion was successfully upd<strong>at</strong>ed. Select the “<strong>School</strong> <strong>User</strong>Management” link <strong>to</strong> return <strong>to</strong> the <strong>School</strong> <strong>User</strong>s list page. Select the “Edit<strong>User</strong>s in POC Management” link <strong>to</strong> edit another user’s school role. Selectthe “Go Back <strong>to</strong> <strong>School</strong> Home” link <strong>to</strong> return the homepage.Version 5, Last revised: 31-May-11 Green underlined text design<strong>at</strong>es new inform<strong>at</strong>ion or changes Page 4 of 25
<strong>Non</strong>-<strong>LOI</strong> <strong>School</strong>s - <strong>Administering</strong> <strong>New</strong> <strong>User</strong> <strong>Access</strong> <strong>to</strong> <strong>GoArmyEd</strong> <strong>at</strong> Your <strong>School</strong>Step-by-Step Instructions for Adding a <strong>New</strong> <strong>User</strong>Use the following steps <strong>to</strong> add a new user <strong>to</strong> your school list.Note: Screen images in this document may vary slightly from the current <strong>GoArmyEd</strong> portal.1. Log in<strong>to</strong> <strong>GoArmyEd</strong> <strong>at</strong> www.goarmyed.com with your user name andpassword.2. Your <strong>GoArmyEd</strong> homepage appears.3. Select the “<strong>School</strong> <strong>User</strong> Management” link in the <strong>School</strong> <strong>User</strong> Administr<strong>at</strong>ionsection.4. The <strong>School</strong> <strong>User</strong>s list for your school page appears. Select the “Add <strong>New</strong><strong>User</strong>” link <strong>to</strong> add a new user.Version 5, Last revised: 31-May-11 Green underlined text design<strong>at</strong>es new inform<strong>at</strong>ion or changes Page 5 of 25
<strong>Non</strong>-<strong>LOI</strong> <strong>School</strong>s - <strong>Administering</strong> <strong>New</strong> <strong>User</strong> <strong>Access</strong> <strong>to</strong> <strong>GoArmyEd</strong> <strong>at</strong> Your <strong>School</strong>Step-by-Step Instructions for Adding a <strong>New</strong> <strong>User</strong>5. The Add <strong>New</strong> <strong>School</strong> <strong>User</strong> page appears.Version 5, Last revised: 31-May-11 Green underlined text design<strong>at</strong>es new inform<strong>at</strong>ion or changes Page 6 of 25
<strong>Non</strong>-<strong>LOI</strong> <strong>School</strong>s - <strong>Administering</strong> <strong>New</strong> <strong>User</strong> <strong>Access</strong> <strong>to</strong> <strong>GoArmyEd</strong> <strong>at</strong> Your <strong>School</strong>Step-by-Step Instructions for Adding a <strong>New</strong> <strong>User</strong>6. Fill in all the fields marked with asterisks with the new user’s inform<strong>at</strong>ion. Thenew user will be able <strong>to</strong> fill in the remaining inform<strong>at</strong>ion once his or her accounthas been established.7. Select the box next <strong>to</strong> the <strong>Non</strong>-<strong>LOI</strong>, <strong>Non</strong>-<strong>LOI</strong> Course Admin, <strong>Non</strong>-<strong>LOI</strong> InvoiceAdmin, or <strong>Non</strong>-<strong>LOI</strong> <strong>School</strong> Pre-certifier, if applicable, <strong>to</strong> assign a new role oradditional responsibilities <strong>to</strong> the user. You are able <strong>to</strong> assign several roles <strong>to</strong> aparticular user. If no box is selected, the user will have default access only(which includes most <strong>GoArmyEd</strong> fe<strong>at</strong>ures except those additional fe<strong>at</strong>uresassigned <strong>to</strong> the three checkboxes.)Version 5, Last revised: 31-May-11 Green underlined text design<strong>at</strong>es new inform<strong>at</strong>ion or changes Page 7 of 25
<strong>Non</strong>-<strong>LOI</strong> <strong>School</strong>s - <strong>Administering</strong> <strong>New</strong> <strong>User</strong> <strong>Access</strong> <strong>to</strong> <strong>GoArmyEd</strong> <strong>at</strong> Your <strong>School</strong>Step-by-Step Instructions for Adding a <strong>New</strong> <strong>User</strong>8. Select the “Submit” but<strong>to</strong>n if you wish <strong>to</strong> proceed with the inform<strong>at</strong>ion upd<strong>at</strong>eand/or user assignment. Select the “Cancel” but<strong>to</strong>n if you do not want <strong>to</strong> savethe inform<strong>at</strong>ion.9. A pop up screen appears asking if you want <strong>to</strong> submit this form. Select the“OK” but<strong>to</strong>n <strong>to</strong> proceed or the “Cancel” but<strong>to</strong>n <strong>to</strong> undo the upd<strong>at</strong>es.10. A Confirm<strong>at</strong>ion screen appears st<strong>at</strong>ing the user has been successfully added.The new user will receive an au<strong>to</strong>m<strong>at</strong>ed email with the username andpassword.11. Select the “<strong>School</strong> <strong>User</strong> Management” link <strong>to</strong> return <strong>to</strong> the <strong>School</strong> <strong>User</strong>s list<strong>to</strong> view the new user you added.Version 5, Last revised: 31-May-11 Green underlined text design<strong>at</strong>es new inform<strong>at</strong>ion or changes Page 8 of 25
<strong>Non</strong>-<strong>LOI</strong> <strong>School</strong>s - <strong>Administering</strong> <strong>New</strong> <strong>User</strong> <strong>Access</strong> <strong>to</strong> <strong>GoArmyEd</strong> <strong>at</strong> Your <strong>School</strong>Step-by-Step Instructions for Adding a <strong>New</strong> <strong>User</strong>12. The new user has been added <strong>to</strong> the <strong>School</strong> <strong>User</strong>s list.13. Select the “Add <strong>New</strong> <strong>User</strong>” link <strong>to</strong> add a new user.14. Select the “Edit <strong>User</strong>s in POC Management” link <strong>to</strong> design<strong>at</strong>e a new POC.15. Select the “Back” link <strong>to</strong> return <strong>to</strong> the homepage.Version 5, Last revised: 31-May-11 Green underlined text design<strong>at</strong>es new inform<strong>at</strong>ion or changes Page 9 of 25
<strong>Non</strong>-<strong>LOI</strong> <strong>School</strong>s - <strong>Administering</strong> <strong>New</strong> <strong>User</strong> <strong>Access</strong> <strong>to</strong> <strong>GoArmyEd</strong> <strong>at</strong> Your <strong>School</strong>Step-by-Step Instructions for Deactiv<strong>at</strong>ing or Activ<strong>at</strong>ing a <strong>User</strong>Use the following steps <strong>to</strong> deactiv<strong>at</strong>e or activ<strong>at</strong>e a user from your school list.Note: Screen images in this document may vary slightly from the current <strong>GoArmyEd</strong> portal.1. Log in<strong>to</strong> <strong>GoArmyEd</strong> <strong>at</strong> www.goarmyed.com with your user name andpassword.2. Your <strong>GoArmyEd</strong> homepage appears.3. Select the “<strong>School</strong> <strong>User</strong> Management” link in the <strong>School</strong> <strong>User</strong> Administr<strong>at</strong>ionsection.4. The <strong>School</strong> <strong>User</strong>s list for your school appears. If you wish <strong>to</strong> deactiv<strong>at</strong>e a userfrom your school list, select the “Deactiv<strong>at</strong>e?” link of the user.Note: Deactiv<strong>at</strong>ing a user does not remove a user from the list but doesprevent access <strong>to</strong> <strong>GoArmyEd</strong>. A deactiv<strong>at</strong>ed user can be reactiv<strong>at</strong>ed <strong>at</strong> a l<strong>at</strong>ertime.Version 5, Last revised: 31-May-11 Green underlined text design<strong>at</strong>es new inform<strong>at</strong>ion or changes Page 10 of 25
<strong>Non</strong>-<strong>LOI</strong> <strong>School</strong>s - <strong>Administering</strong> <strong>New</strong> <strong>User</strong> <strong>Access</strong> <strong>to</strong> <strong>GoArmyEd</strong> <strong>at</strong> Your <strong>School</strong>Step-by-Step Instructions for Deactiv<strong>at</strong>ing or Activ<strong>at</strong>ing a <strong>User</strong>5. The Deactiv<strong>at</strong>e <strong>User</strong> screen appears asking if you are sure you want <strong>to</strong>deactiv<strong>at</strong>e the selected user. Select the “OK” but<strong>to</strong>n if you want <strong>to</strong> proceed orselect the “Cancel” but<strong>to</strong>n if you do not.6. If the “Submit” but<strong>to</strong>n is selected, a <strong>User</strong> Upd<strong>at</strong>e Screen appears st<strong>at</strong>ing theselected user has been deactiv<strong>at</strong>ed.7. Select the “Go Back <strong>to</strong> school user inform<strong>at</strong>ion page” link <strong>to</strong> return <strong>to</strong> the<strong>School</strong> <strong>User</strong> page.8. The <strong>School</strong> <strong>User</strong>s list for your school appears and the selected user is nowdeactiv<strong>at</strong>ed.Version 5, Last revised: 31-May-11 Green underlined text design<strong>at</strong>es new inform<strong>at</strong>ion or changes Page 11 of 25
<strong>Non</strong>-<strong>LOI</strong> <strong>School</strong>s - <strong>Administering</strong> <strong>New</strong> <strong>User</strong> <strong>Access</strong> <strong>to</strong> <strong>GoArmyEd</strong> <strong>at</strong> Your <strong>School</strong>Step-by-Step Instructions for Deactiv<strong>at</strong>ing or Activ<strong>at</strong>ing a <strong>User</strong>9. Select the “Activ<strong>at</strong>e?” link <strong>to</strong> reactiv<strong>at</strong>e a user who has been deactiv<strong>at</strong>ed.10. The Active <strong>User</strong> screen appears asking if you are sure you want <strong>to</strong> activ<strong>at</strong>e theselected user. Select the “OK” but<strong>to</strong>n if you want <strong>to</strong> proceed or select the“Cancel” but<strong>to</strong>n if you do not.11. The <strong>User</strong> Upd<strong>at</strong>e Confirm<strong>at</strong>ion screen appears st<strong>at</strong>ing the selected user hasbeen activ<strong>at</strong>ed. The activ<strong>at</strong>ed user will receive an au<strong>to</strong>m<strong>at</strong>ed email with ausername and password.12. Select the “Go Back <strong>to</strong> school user inform<strong>at</strong>ion page” link <strong>to</strong> return <strong>to</strong> the<strong>School</strong> <strong>User</strong> page.Version 5, Last revised: 31-May-11 Green underlined text design<strong>at</strong>es new inform<strong>at</strong>ion or changes Page 12 of 25
<strong>Non</strong>-<strong>LOI</strong> <strong>School</strong>s - <strong>Administering</strong> <strong>New</strong> <strong>User</strong> <strong>Access</strong> <strong>to</strong> <strong>GoArmyEd</strong> <strong>at</strong> Your <strong>School</strong>Step-by-Step Instructions for Deactiv<strong>at</strong>ing or Activ<strong>at</strong>ing a <strong>User</strong>13. The <strong>School</strong> <strong>User</strong> list for your school appears, and the selected user has beenactiv<strong>at</strong>ed.14. Select the “Add <strong>New</strong> <strong>User</strong>” link <strong>to</strong> add a new user.15. Select the “Edit <strong>User</strong>s in POC Management” link <strong>to</strong> design<strong>at</strong>e a new POC.16. Select the “Back” link <strong>to</strong> return <strong>to</strong> the homepage.Version 5, Last revised: 31-May-11 Green underlined text design<strong>at</strong>es new inform<strong>at</strong>ion or changes Page 13 of 25
<strong>Non</strong>-<strong>LOI</strong> <strong>School</strong>s - <strong>Administering</strong> <strong>New</strong> <strong>User</strong> <strong>Access</strong> <strong>to</strong> <strong>GoArmyEd</strong> <strong>at</strong> Your <strong>School</strong>Step-by-Step Instructions for Editing <strong>User</strong>s in POC ManagementUse the following steps <strong>to</strong> add or remove a user’s name and design<strong>at</strong>e a new PrimaryPOC using the POC Management link. You are allowed up <strong>to</strong> two Altern<strong>at</strong>e POCs andup <strong>to</strong> three GPC POCs.IMPORTANT: When a new Primary POC is design<strong>at</strong>ed, the current Primary POC'saccount will be deactiv<strong>at</strong>ed will no longer have access <strong>to</strong> <strong>GoArmyEd</strong>.Note: Screen images in this document may vary slightly from the current <strong>GoArmyEd</strong> portal.1. Log in<strong>to</strong> <strong>GoArmyEd</strong> <strong>at</strong> www.goarmyed.com with your user name andpassword.2. Your <strong>GoArmyEd</strong> homepage appears.3. Select the “Points of Contact (POC) Management” link.Version 5, Last revised: 31-May-11 Green underlined text design<strong>at</strong>es new inform<strong>at</strong>ion or changes Page 14 of 25
<strong>Non</strong>-<strong>LOI</strong> <strong>School</strong>s - <strong>Administering</strong> <strong>New</strong> <strong>User</strong> <strong>Access</strong> <strong>to</strong> <strong>GoArmyEd</strong> <strong>at</strong> Your <strong>School</strong>Step-by-Step Instructions for Editing <strong>User</strong>s in POC Management4. The POC Management screen appears. View the Assigned Altern<strong>at</strong>e<strong>User</strong>name(s) and Assigned GPC POC(s) sections. You are allowed up <strong>to</strong> twoaltern<strong>at</strong>e POCs and up <strong>to</strong> three GPC POCs.5. Adding a user <strong>to</strong> the Points of Contact Management listSelect the drop-down arrow in the “Existing College <strong>User</strong>(s)” field for a list ofactive users <strong>at</strong> your school <strong>to</strong> select the user <strong>to</strong> add as the Altern<strong>at</strong>e POC orGPC POC role.In this example, there are the maximum of two altern<strong>at</strong>e users listed. Anotheruser can be added <strong>to</strong> the GPC POC list since three are allowed.Version 5, Last revised: 31-May-11 Green underlined text design<strong>at</strong>es new inform<strong>at</strong>ion or changes Page 15 of 25
<strong>Non</strong>-<strong>LOI</strong> <strong>School</strong>s - <strong>Administering</strong> <strong>New</strong> <strong>User</strong> <strong>Access</strong> <strong>to</strong> <strong>GoArmyEd</strong> <strong>at</strong> Your <strong>School</strong>Step-by-Step Instructions for Editing <strong>User</strong>s in POC Management6. The “Existing College <strong>User</strong>(s)” field now displays the user you selected.Select the box for the GPC POC <strong>to</strong> add this role <strong>to</strong> the selected user.7. Select the “Submit” but<strong>to</strong>n.8. A message appears st<strong>at</strong>ing the user’s account is upd<strong>at</strong>ed. Select the “Return<strong>to</strong> POC Management” link.Version 5, Last revised: 31-May-11 Green underlined text design<strong>at</strong>es new inform<strong>at</strong>ion or changes Page 16 of 25
<strong>Non</strong>-<strong>LOI</strong> <strong>School</strong>s - <strong>Administering</strong> <strong>New</strong> <strong>User</strong> <strong>Access</strong> <strong>to</strong> <strong>GoArmyEd</strong> <strong>at</strong> Your <strong>School</strong>Step-by-Step Instructions for Editing <strong>User</strong>s in POC Management11. The user, Tango Abrams, appears in the “Existing College <strong>User</strong>(s)” field withthe roles assigned. Uncheck the role <strong>to</strong> remove the user from the GPC POClist.12. Select the “Submit” but<strong>to</strong>n.13. A message appears st<strong>at</strong>ing the user’s account is upd<strong>at</strong>ed. Select the “Return<strong>to</strong> POC Management” link.Version 5, Last revised: 31-May-11 Green underlined text design<strong>at</strong>es new inform<strong>at</strong>ion or changes Page 18 of 25
<strong>Non</strong>-<strong>LOI</strong> <strong>School</strong>s - <strong>Administering</strong> <strong>New</strong> <strong>User</strong> <strong>Access</strong> <strong>to</strong> <strong>GoArmyEd</strong> <strong>at</strong> Your <strong>School</strong>Step-by-Step Instructions for Editing <strong>User</strong>s in POC Management14. The user’s name is now removed from the POC Management screen.15. Select “Home” <strong>to</strong> return <strong>to</strong> your school homepage or the “<strong>School</strong> <strong>User</strong>Management” link <strong>to</strong> return the school user list screen.Version 5, Last revised: 31-May-11 Green underlined text design<strong>at</strong>es new inform<strong>at</strong>ion or changes Page 19 of 25
<strong>Non</strong>-<strong>LOI</strong> <strong>School</strong>s - <strong>Administering</strong> <strong>New</strong> <strong>User</strong> <strong>Access</strong> <strong>to</strong> <strong>GoArmyEd</strong> <strong>at</strong> Your <strong>School</strong>Step-by-Step Instructions for Editing <strong>User</strong>s in POC Management16. Design<strong>at</strong>ing a <strong>New</strong> Primary POCIMPORTANT: When a new Primary POC is design<strong>at</strong>ed, the current PrimaryPOC's account will be deactiv<strong>at</strong>ed will no longer have access <strong>to</strong> <strong>GoArmyEd</strong>.To design<strong>at</strong>e a new Primary POC, select the “Design<strong>at</strong>e a Primary POC”link.17. Select the drop-down arrow in the “Existing College <strong>User</strong>(s)” field.Version 5, Last revised: 31-May-11 Green underlined text design<strong>at</strong>es new inform<strong>at</strong>ion or changes Page 20 of 25
<strong>Non</strong>-<strong>LOI</strong> <strong>School</strong>s - <strong>Administering</strong> <strong>New</strong> <strong>User</strong> <strong>Access</strong> <strong>to</strong> <strong>GoArmyEd</strong> <strong>at</strong> Your <strong>School</strong>Step-by-Step Instructions for Editing <strong>User</strong>s in POC Management18. Select a user from the drop-down list <strong>to</strong> serve as the new Primary POC.19. The selected user appears in the “Existing College <strong>User</strong>(s)” field. Select the“Submit” but<strong>to</strong>n <strong>to</strong> proceed <strong>to</strong> design<strong>at</strong>e the user as the new Primary POC.Select the “Cancel” but<strong>to</strong>n if you do not want <strong>to</strong> design<strong>at</strong>e the selected user.20. Are You Sure?… A pop-up window appears st<strong>at</strong>ing the current Primary POCwill be deactiv<strong>at</strong>ed and unable <strong>to</strong> access <strong>GoArmyEd</strong>. Select the “OK” but<strong>to</strong>n ifyou want <strong>to</strong> proceed or select the “Cancel” but<strong>to</strong>n if you do not.Version 5, Last revised: 31-May-11 Green underlined text design<strong>at</strong>es new inform<strong>at</strong>ion or changes Page 21 of 25
<strong>Non</strong>-<strong>LOI</strong> <strong>School</strong>s - <strong>Administering</strong> <strong>New</strong> <strong>User</strong> <strong>Access</strong> <strong>to</strong> <strong>GoArmyEd</strong> <strong>at</strong> Your <strong>School</strong>Step-by-Step Instructions for Editing <strong>User</strong>s in POC Management21. When selecting the “OK” but<strong>to</strong>n you will be logged out of <strong>GoArmyEd</strong> and nolonger have access.22. When the new Primary POC logs in<strong>to</strong> <strong>GoArmyEd</strong>, the following screenappears. The POC must select the Personal Profile tab <strong>to</strong> review and upd<strong>at</strong>etheir contact inform<strong>at</strong>ion.Version 5, Last revised: 31-May-11 Green underlined text design<strong>at</strong>es new inform<strong>at</strong>ion or changes Page 22 of 25
<strong>Non</strong>-<strong>LOI</strong> <strong>School</strong>s - <strong>Administering</strong> <strong>New</strong> <strong>User</strong> <strong>Access</strong> <strong>to</strong> <strong>GoArmyEd</strong> <strong>at</strong> Your <strong>School</strong>Step-by-Step Instructions for Editing <strong>User</strong>s in POC Management23. The <strong>School</strong> <strong>GoArmyEd</strong> Account Setup screen appears. Edit the open fields inthe Mailing Address and Contact Inform<strong>at</strong>ion sections. Enter the telephonenumber and email address. Note: Any fields proceeded by an asterisk (*) arerequired fields and must not be left blank.Version 5, Last revised: 31-May-11 Green underlined text design<strong>at</strong>es new inform<strong>at</strong>ion or changes Page 23 of 25
<strong>Non</strong>-<strong>LOI</strong> <strong>School</strong>s - <strong>Administering</strong> <strong>New</strong> <strong>User</strong> <strong>Access</strong> <strong>to</strong> <strong>GoArmyEd</strong> <strong>at</strong> Your <strong>School</strong>Step-by-Step Instructions for Editing <strong>User</strong>s in POC Management24. Select the “Upd<strong>at</strong>e Account Inform<strong>at</strong>ion” but<strong>to</strong>n <strong>at</strong> the bot<strong>to</strong>m of the screen<strong>to</strong> save your changes.25. Select the “OK” but<strong>to</strong>n <strong>to</strong> save changes made <strong>to</strong> the account inform<strong>at</strong>ionscreen.26. The tab will be marked with a green checkmark and a message appearsst<strong>at</strong>ing the account inform<strong>at</strong>ion is upd<strong>at</strong>ed. The user will not be able <strong>to</strong> accesstheir homepage until this step is done.Version 5, Last revised: 31-May-11 Green underlined text design<strong>at</strong>es new inform<strong>at</strong>ion or changes Page 24 of 25
<strong>Non</strong>-<strong>LOI</strong> <strong>School</strong>s - <strong>Administering</strong> <strong>New</strong> <strong>User</strong> <strong>Access</strong> <strong>to</strong> <strong>GoArmyEd</strong> <strong>at</strong> Your <strong>School</strong>Reference Inform<strong>at</strong>ion – Role DefinitionsUse the following additional responsibility descriptions <strong>to</strong> select the appropri<strong>at</strong>e action:• <strong>Non</strong>-<strong>LOI</strong> Course Administra<strong>to</strong>r - Posts grades for Soldiers.• <strong>Non</strong>-<strong>LOI</strong> Invoice Administra<strong>to</strong>r - Searches for and views line items eligible<strong>to</strong> be invoiced. Valid<strong>at</strong>es disputes and discounts invoice line items. Submitsvalid<strong>at</strong>ed invoice line items for payment and views his<strong>to</strong>rical invoice d<strong>at</strong>a.• <strong>Non</strong>-<strong>LOI</strong> GPC POC– Receives emails from <strong>GoArmyEd</strong> notifying him or herwhen an invoice has been approved by the Army, the amount th<strong>at</strong> has beenapproved, and a credit card number <strong>to</strong> process electronic payment.• <strong>Non</strong>-<strong>LOI</strong> Primary POC - Denotes Primary POC <strong>at</strong> the school for <strong>GoArmyEd</strong>issues.• <strong>Non</strong>-<strong>LOI</strong> Altern<strong>at</strong>e POC: Acts as Primary POC in the absence of thePrimary POC and has the ability <strong>to</strong> maintain school set-up d<strong>at</strong>a andprovide user rights <strong>to</strong> others <strong>at</strong> the school.• <strong>Non</strong>-<strong>LOI</strong> Pre-Certifiers POC: Moni<strong>to</strong>rs the <strong>School</strong> TA Request Queue dashboard on the <strong>GoArmyEd</strong> homepage for TA Request forms th<strong>at</strong> need <strong>to</strong> becertified. Reviews or edits class enrollment inform<strong>at</strong>ion on the TA Requestform requests within two business days. Adds a reason when a TA Requestform certific<strong>at</strong>ion st<strong>at</strong>us is denied.Key Points <strong>to</strong> Remember• Each <strong>Non</strong>-<strong>LOI</strong> <strong>School</strong> has a Primary POC who has the ability <strong>to</strong> upd<strong>at</strong>e a currentuser’s inform<strong>at</strong>ion, assign an additional or new role, or activ<strong>at</strong>e or deactiv<strong>at</strong>e auser <strong>at</strong> their school.• A Primary POC can design<strong>at</strong>e a user as an Altern<strong>at</strong>e Primary POC.Version 5, Last revised: 31-May-11 Green underlined text design<strong>at</strong>es new inform<strong>at</strong>ion or changes Page 25 of 25


