
You also want an ePaper? Increase the reach of your titles
YUMPU automatically turns print PDFs into web optimized ePapers that Google loves.
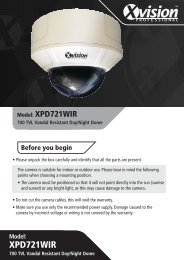
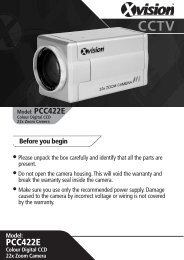
CCTVModel: <strong>PCC427</strong>Day/Night 550/600 TVL Camerawith 27x Zoom & Pelco D ControlBefore you begin• z Please unpack the box carefully and identify that all the parts are present.• z Do not open the camera housing. This will void the warranty and break thewarranty seal inside the camera.• z Make sure you use only the recommended power supply. Damage causedto the camera by incorrect voltage or wiring is not covered by the warranty.CAUTION: TO REDUCE THE RISK OF ELECTRIC SHOCK, DO NOT OPEN OR REMOVECOVER OR BACK. NO USER SERVICEABLE PARTS INSIDE.REFER SERVICING TO QUALIFIED SERVICE.Model:<strong>PCC427</strong>Day/Night 550/600 TVL Camera with27x Zoom & Pelco D Control
Thank you for purchasing this <strong>Xvision</strong> camera. Before operating this product,please read this instruction manual carefully.1. Product DescriptionThe <strong>PCC427</strong> is a high quality Colour Body Camera with a High ResolutionSony 1/4” Super HAD CCD and <strong>Xvision</strong> IXC1HQDNE DSP for great colourbalance, resulting in a naturally vibrant image. The CCTV Camera is designedfor use in high risk applications where high resolution surveillance isrequired. The camera is supplied without lens and mounting equipment, awide range of accessories are available for use with the camera, includingbrackets and housings.2. Features• z Sony 1/4” Super HAD CCD image sensor for 550 TVL resolution colourimages in the day and 600 TVL B/W images in low light• z 27x Optical Zoom Lens with Auto Iris• z Suppports Pelco D Control• z 0.5 lux low light sensitivity• z The camera can be mounted internally or externally using optionalbrackets and housings.3. Contents<strong>PCC427</strong> Camera
4. ConnectionsRear of <strong>PCC427</strong>Rear Panel ButtonsPower ON LEDVideo OutRS485 CameraControl connectionsPower InputconnectionsOn the rear of the unit you will find the following:VIDEO OUT - Allows you to connect BNC plug to enable Video.POWER INPUT CONNECTIONS- Allows you to input 12V DC power using the -and + connectors.REAR PANEL BUTTONS - Allows you to manually control the camera and itslens functions:• N (Near): Adjusts the focus for Near objects.• F (Far): Adjusts the focus for Far objects.• W (Wide Angle): Adjusts the optical zoom by zooming out.• T (Narrow Angle): Adjusts the optical zoom by zooming in.• Menu: Press to Enter/Exit the on-screen display menuRS485 Camera Control Connections - Allows the camera to be controlled bya DVR or Controller:• RS485 (+/-): Use for RS-485 Control• Z (Zoom): Dry contact control• F (Focus): Dry contact control• M (Menu): Dry contact control• C (Com): Dry contact control
5. How to Operate1. Connect the video output to the monitor or other video device through a 75Ohms type coaxial cable.2. Connect the power source with the 12V DC +/- connectors. The LED indicatorwill light up.3. Once the picture appears on the monitor, adjust the zoom, focus and menusettings to obtain the best picture using the rear panel buttons.RS485 ControlConnect the terminal connections to DVR or Controller:Video OutData CableRS485MonitorMounting the cameraDVR or ControllerFix the mount to the casing in the correct area before attaching the bracket (notsupplied). See the diagram below illustrating how the mount for the bracket can befixed to either the top or the bottom of the camera:Bottom Mount (supplied fixed)Top MountNote: Should you wish to use this camera externally you will require an <strong>Xvision</strong> external housing.
6. OSD Menu Options1234567891011121314151617181920212223242526ID SetBaud Set Zoom Speed Zoom Start Zoom Stop Focus StateStart Time Stop Time Init SetFocus Sens OSD Mode IR CutMirrorPress the MenuButton once toaccess Menu 1Shutter WB control Day / NightBrightness Sharpness NegativeMask Set No SwitchH start H end V start V end Mask Color
6. OSD Menu Options continued1 > ID Set (Set ID of Camera)The camera can be assigned a unique ID number so it can be identified ifusing a controller or managment system.2 > BAUD (Baud Rate of Camera) The camera is factory programmed to operate with Pelco D protocol. zSet the baud rate to either 2400 or 9600.3 > Zoom Speed Set the Zoom Speed to the rate you wish the camera to zoom in and out.Set the speed between 1 and 8.4 > Zoom Start Set the minimum Zoom limit between 1x and 27x.5 > Zoom Stop Set the maximum Zoom limit between 1x and 27x.6 >Focus State • FP (Triggered Focus): In this mode, if there is no motion before thecamera for 20 seconds after auto focusing, the focus will be fixed untilsomeone operates the camera via the rear panel or controller. This willhelp to avoid the focus always changing if there are moving objects infront of the camera.• MF (<strong>Manual</strong> Focus): Select MF for <strong>Manual</strong> Focus Mode.• AF (Auto Focus): Select AF for Auto Focus Mode.7 > Start Time When in Auto Zoom mode, set the start time of the zoom startingposition.8 > Stop Time When in Auto Zoom mode, set the stop time of the zoom stop position.
6. OSD Menu Options continued9 > Init Set Select this function to reset the camera position and settings.10 > Focus Sens (Focus Sensitivity) Set the Focus Sensitivity of the camera. The higher the number, the moresensitive. The focus will adjust according its sensitivity to the imagechange or moving objects in front of the camera.11 > OSD Mode • 1: Select option 1 for the menu to display in full screen with scrollingup and down through the list.• 2: Select option 2 for the menu to display one option at a time at thebottom of the screen .z• 3: Select option 3 for the menu to display across three pages with themenu options grouped 1 to 9, 10 to 18 and 19 to 26 in full screen.12 > IR Cut (Focus Sensitivity) Not available.13 > Mirror • ON: Select ON for the camera image to be reflected on screen.• OFF: Select OFF to leave the camera image unchanged.14 > ShutterSet the shutter speed of the camera to Auto or to a fraction of a second.
6. OSD Menu Options continued15 > WB Control (White Balance Control)Adjust white balance of camera, so that white and other colours appear asnatural as possible depending on particular requirements/environment.16 > Day/Night • COLOUR: Select ON for the camera image to be set to colour.• OFF:Select ON for the camera image to be set to B/W.• AUTO: Select AUTO for the camera image to automatically switchcolour to B/W depending on the light available.17 > Brightness Set the brightness of the camera.18 > Sharpness Set the brightness of the camera.19 > Negative • ON: Select ON for the camera image to be set to negative mode.• OFF: Select OFF to leave the camera image unchanged.20 > Mask Set No. There are a total of 8 optional masking areas that can be set.21 > Switch • ON: Select ON for the camera masking to be turned ON.• OFF: Select OFF for the camera masking to be turned OFF.22/23 > H Start/End. Set the Horizontal Start and End points of the Privacy Mask
6. OSD Menu Options continued24/24 > V Start/End. Set the Vertical Start and End points of the Privacy Mask26 > Mask Color. Set the colour of the Privacy Mask. Choose from 4 colours.
7. TroubleshootingProblemNo pictureButtons do not warkPictures is not clearInterference on cameraSolutionCheck power supply for correct voltage and polarityCheck LOCK Menu to check if the rear button panel hasbeen lockedCheck LENS Menu, if it is set to MF mode (manual focus),change it to AF mode (Auto Focus mode)Power supply may be faulty.Check for correct voltage and polarity.May also becaused by other electrical equipment.
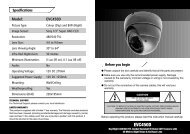
SpecificationsModel:<strong>PCC427</strong>Picture Type:Day/Night (B/W & Colour)Image Sensor:Sony 1/4” Super HAD CCDDSP:<strong>Xvision</strong> IXC1HQDNEResolution:550/600 TVLLens Viewing Angle: 1 to 60°Minimum Illumination:0.5 LuxAudio:NoOperating Voltage:12V DC 350mASuggested Power Supply:12V DC 1250mAMounting:Wall/Ceiling (bracket required)Weatherproofing:Yes (using optional housing)Dimensions:(WxHxD) 63x68x93mm
CCTVTECHNICAL SUPPORT:For Technical Support for any <strong>Xvision</strong> product please contact your local distributor.LIMITED WARRANTY:This product is supplied with a 1 Year warranty. The Warranty excludes products that have been misused,(including accidental damage) and damage caused by normal wear and tear. In the unlikely event that youencounter a problem with this product, it should be returned to the place of purchase.Manufactured exclusively for <strong>Xvision</strong> - www.x-vision.co.ukUK/Europe<strong>Xvision</strong> Group (UK)Unit 2, Valley Point,Beddington Farm Road,Croydon, SurreyCR0 4WPEmail: sales@x-vision.co.ukFar EastKyoung Am Building157-27 Samsung-dongKangnam-ku135 090 SeoulKoreaEmail: globalsales@x-vision.co.ukMiddle EastBurjuman Tower,18th FloorPO Box 121828Dubai 43659United Arab EmiratesEmail: mesales@x-vision.co.ukNorth America100 Park AvenueNew York City,New York10017United StatesEmail: usasales@x-vision.co.uk