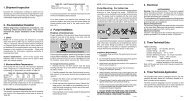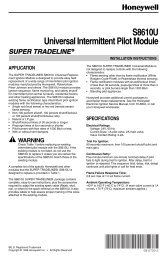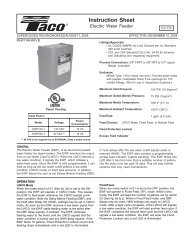
SPIROVENT INSTALLATION INSTRUCTIONS - PEX Universe
SPIROVENT INSTALLATION INSTRUCTIONS - PEX Universe
SPIROVENT INSTALLATION INSTRUCTIONS - PEX Universe

You also want an ePaper? Increase the reach of your titles
YUMPU automatically turns print PDFs into web optimized ePapers that Google loves.
SPIROTRAP® <strong>INSTALLATION</strong> and OPERATION <strong>INSTRUCTIONS</strong>DIRT SEPARATOR MODELS TDT/TDN and THT/THN®This safety alert symbol will be used to draw your attention to safety relatedinstructions. When used, this symbol means Attention! Your safety is involved!Become Alert! Failure to follow these instructions could result in a safety hazard!<strong>INSTALLATION</strong> <strong>INSTRUCTIONS</strong>It is recommended that the Spirotrap Dirt and Drain Models be installed upstream of the systemcomponents that are affected by the dirt in the system. (Please refer to Figures 1 & 2 below). Itdoes not take the place of a system strainer and should be installed after that component toensure no large construction type debris enters the unit. Please note that Spirotrap units must bemounted in a straight run of horizontal piping.The piping normally supports the weight of the Spirotrap Dirt and Drain models up to and including12”. Support legs recommended for units 14” and larger. “X” pipe diameters of straight runbefore and after the unit are not required.The flow may be directed to either side of the unit. There is NO directional arrow. Eitherconnection may be used for inlet or outlet.Figure 1 Figure 2
SERVICE <strong>INSTRUCTIONS</strong>The Spirotrap does not normally require maintenance and includes no moving parts other than themanual ball valve or optional user-installed automatic valve.The Spirotrap Dirt and Drain Models are designed for dirt and sediment separation. The ball valveon the bottom of the unit should be opened on a regular basis to purge debris from the collectionchamber. A container should be used to catch any debris.WARNING! Water Temperatures above 100°F can be very hazardous. Keepbody away from connection while open. Failure to follow these instructions may causeserious bodily injury or property damage.Frequency of purging is system dependent based upon degree of sediment in the system.Frequent purging is recommended right after installation and then scheduled as needed as thesystems clears.Units with optional removable head can be disassembled and the tube bundle removed forinspection or cleaning. The removable head is a user-specified feature and frequency ofinspection and/or cleaning is user or system dependent.WARNING! System fluid under pressure can be very hazardous. Before removingthe unit head, reduce system pressure to zero, or isolate the Spirotrap from thesystem. Allow the system to cool to below 100°F. Failure to follow these instructionsmay cause serious bodily injury or property damage.WARNING! Unit head and bundle are heavy. Keep body clear of the head andbundle when disassembling. Failure to follow these instructions may cause seriousbodily injury or property damage.1. Taking care to support the head, remove bolts and slide the bundle out. Clean the bundle usinga pressure washer or hose and reinstall the bundle in the Spirotrap unit. Be sure to check thegasket before reinstalling the head, and replace if necessary. Tighten bolts using a criss-crosspattern to proper torque. Before opening isolation valves, close ball valve.A Spiro Enterprises CompanySpirotherm, Inc.25 N. Brandon DriveGlendale Heights, IL 60139630-307-2662Fax: 630-307-3773© 2005 Spirotherm, Inc. TrapIOM-A