YSI Calibration Tips Dissolved Oxygen Excerpt - YSI.com
YSI Calibration Tips Dissolved Oxygen Excerpt - YSI.com
YSI Calibration Tips Dissolved Oxygen Excerpt - YSI.com

Create successful ePaper yourself
Turn your PDF publications into a flip-book with our unique Google optimized e-Paper software.
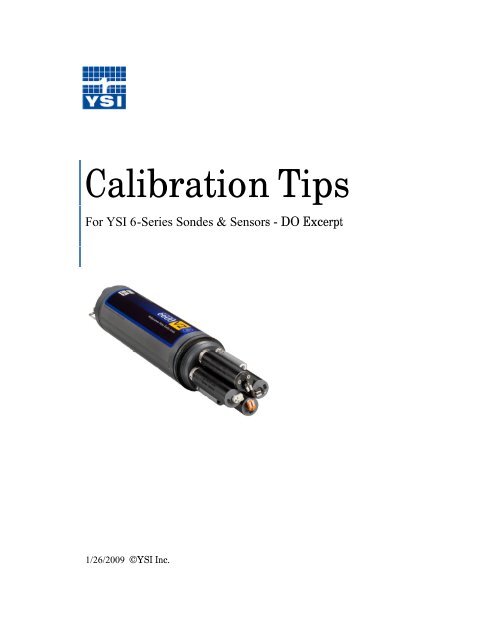
<strong>Calibration</strong> <strong>Tips</strong>For <strong>YSI</strong> 6-Series Sondes & Sensors - DO <strong>Excerpt</strong>1/26/2009 ©<strong>YSI</strong> Inc.
DISSOLVED OXYGEN CALIBRATION TIPSML 2/14/08UNATTENDED & SAMPLING DO SENSOR PREPARATION1. Inspect the DO probe anodes; recondition using the 6035 reconditioning kit if they are not bright andshiny.2. Install a new membrane, making sure that it is tightly stretched and wrinkle free.Warning: Replace the probe o-ring if it is loose or stretched out. If you remove the DO probe fromthe sonde, be sure to inspect the probe port and connectors for moisture. Remove any moisturedroplets from the connector and thread areas. Verify that the probe is clean and dry then apply asmall amount of synthetic grease to the o-ring before it is reassembled.Note: DO membranes will be slightly unstable during the first 3 to 6 hours after they are installed; itis strongly re<strong>com</strong>mended that the final calibration of a DO sensor being used in “Unattended”studies takes place after this time period.3. Go to the sonde’s Report Menu and enable the “DO Charge”. Now go to the Run Menu and start thesonde in the “Discrete Run” mode at a four-second rate. Allow the sonde to run (burn-in) for 15minutes. Record the DO charge after about 5 minutes. The charge number must be between 25 and75.4. After the burn-in is <strong>com</strong>plete, go to the sonde’s Advanced Menu and confirm that the RS-232 AutoSleep function is enabled. If the sonde is to be connected to an SDI-12 data logger, then the SDI-12Auto Sleep must be enabled as well. Wait 60 seconds before proceeding to Step 5.5. Start the probe in the “Discrete Run” mode at a four-second rate and record the first 10 DO %numbers on paper. The numbers must start at a high number and drop with each four second sample.Example: 110, 105, 102, 101.5, 101.1, 101.0, 100.8, 100.4, 100.3, 100.1It does not matter if the numbers do not reach 100%; it is only important that they have the samehigh to low trend. If you have a probe that starts at a low number and steadily climbs upwards, thenthe sensor has a problem and it must not be used.Note: Initial power up can make the first two DO % samples read low; the first two samples can bedisregarded.(continued) ©<strong>YSI</strong> Inc.4
6. The probe is now ready to be calibrated. Set the Auto Sleep RS-232 for the intended application:ON for UNATTENDED STUDIES and OFF for SAMPLING MEASUREMENTS. Set the sondeinto the calibration cup with approximately 1/8 inch of water. Do not engage the threads, and do notallow water to contact the membrane. You may also use the wet-towel method. The sonde must nowsit in this saturated environment for at least 10 minutes before the DO calibration can begin.Warning: The sonde must be idle and not in the “Run” mode for 5 minutes prior to starting the DOcalibration.Calibrate the sonde in DO %; be sure to enter your local barometric pressure in mm/hg. InUnattended mode (RS-232 Auto-Sleep ON) the DO probe will be calibrated automatically once thebarometric pressure is entered and the warm-up time counter counts down to zero. For Discrete orSampling, press the Enter key when the DO readings are stable. Wait at least 3 minutes after youenter the barometric pressure before you press the Enter key again to calibrate for Discrete/SamplingDO measurements.7. When the calibration is <strong>com</strong>pleted, go to the sonde’s Advanced Menu and then to the “CalConstants” and record the “DO Gain”. The gain should be 1.0 with a range of -0.7 to +1.4. Theprobe is now calibrated and ready to prepare for the study. As with the other parameters, anywarning messages displayed by the sonde during the calibration are a cause for concern and must beinvestigated before collecting field data with the sonde.Warning: Avoid having the DO probe membrane contact the calibration cup or sensor guard duringtransfers. Keep the DO probe in sight when removing or installing the sensor guard and cal cup.©<strong>YSI</strong> Inc.5
ROX FACTSROX OPTICAL DISSOLVED OXYGEN CALIBRATION TIPSML 01/12/09• The ROX Optical <strong>Dissolved</strong> <strong>Oxygen</strong> sensor does not require any special sonde setup or burn-in.• <strong>Calibration</strong> data is stored in the ROX so it can be calibrated in one sonde and then used in anotherwithout recalibrating the probe in the new sonde.• <strong>Calibration</strong> data is automatically transferred to the host sonde as soon as the sonde powers up theROX sensor.• The ROX has excellent long term stability and will achieve ± 1% accuracy when calibrated in a(temperature-stable) saturated water or saturated air environment.• Field DO calibrations should be avoided!• Remove the wiper when the sensor is going to be exposed to sodium sulfite (zero DO test) orFormazin-based turbidity standards.• The ROX sensor must remain hydrated at all times! See Appendix M in the 6-Series manual foradditional information.CALIBRATION METHOD – ONE-POINT “SATURATED AIR”1. Dry the temperature sensor and the ROX membrane to remove any water droplets.2. Put 1 inch of water in the calibration cup and thread onto the endcap 1/2 thread.Do not fully thread the calibration cup onto the endcap!3. Allow the sonde to sit in the calibration cup for 15 minutes to ensure that the air is 100%saturated and that the temperature is stable.4. Select ODO% and enter the barometric pressure in mm hg (inches x 25.4) and press Enter. Thesonde will do a 4 second count down and then say “Press Enter when the readings are stable”.Wait at least 30 seconds before you press the Enter button.Note: the sonde will only read 100% saturation if the barometric pressure is 760 mm hg. Todetermine the actual DO in %, divide the barometer reading by 760 and then multiply thatnumber by 100.Example: 750 /760 = 0.9868 x100 = 98.68%Check the DO Gain in the Advanced Menu. An acceptable range is 0.7 to 1.4.CALIBRATION METHOD – ONE-POINT “SATURATED WATER”1. Using a medium-size aquarium air pump and air stone, sparge a five-gallon bucket of tap waterfor 1 hour.2. Place the assembled sonde in the bucket and allow the sonde to equilibrate to the watertemperature for 5 minutes.3. Select ODO% and enter the barometric pressure in mm hg (inches x 25.4) and press Enter. Thesonde will do a four-second countdown and then say “Press Enter when the readings arestable”. Wait at least 30 seconds before you press the Enter button.(continued) ©<strong>YSI</strong> Inc.6
Note: the sonde will only read 100% saturation if the barometric pressure is 760 mm hg. Todetermine the actual DO in %, divide the barometer reading by 760 and then multiply thatnumber by 100.Example: 750 /760 = 0.9868 x100 = 98.68%Check the DO Gain in the Advanced Menu. An acceptable range is 0.7 to 1.4.CALIBRATION METHOD – TWO-POINT “AIR or WATER”Note: <strong>YSI</strong> does not re<strong>com</strong>mend the two-point calibration unless (A) you are certain that the sensor doesnot meet your accuracy requirements at low DO values and (B) you are operating under conditionswhere you are certain you can generate a medium that is truly free of oxygen!1. REMOVE THE ROX WIPER! Sodium sulfite will be absorbed into the pad and will beapplied to the ROX membrane each time the wiper is activated. This will contaminate the ROXmembrane and create a problem with the second point of the calibration.2. Mix 2 grams of sodium sulfite to 1000 milliliters of tap water 2 hours prior to use and keep itin a sealed bottle. Rapidly transfer this mixture into the sonde’s calibration cup and fill tooverflow. Install the sonde and <strong>com</strong>pletely seal the cup to prevent diffusion of air into thevessel.3. To calibrate, select ODO % Two-Point.4. The first entry for the two-point calibration will be in mg/L! Wait at least 10 to 12 minutes forthe solution to re-equilibrate and then type 0 and press Enter. Remove the sonde from thesodium sulfite and thoroughly rinse all exposed surfaces, especially the ROX membrane, withtap water. Rinse at least 4 times if using a filled calibration cup.5. Enter the barometric pressure in mm/hg for the second calibration point and press the Enter keywhen the reading is stable. Remember that you must wait 15 minutes for the air to saturate inthe cal cup or 5 minutes if the sonde is in saturated water.6. Verify that the DO Gain found in the Advanced Cal Constants menu is between 0.7 and 1.4.Note: If you believe that you have calibrated a ROX probe in error (especially the zero), then you canreturn the probe back to its original factory calibration by using the “uncal” <strong>com</strong>mand. With a PC, typethe word ‘uncal” instead of the barometric pressure and press Enter. If using a 650, at the point whereyou would type in the barometer, press the Esc and Enter keys simultaneously.©<strong>YSI</strong> Inc.7
RAPID PULSE DISSOLVED OXYGEN TROUBLESHOOTINGML 01/17/09The Rapid Pulse DO sensor used in all 6-Series instruments can be quickly tested when a problem issuspected. The three keys to proper operation are a good charge, good gain, and a successful probewarm-up test. When a problem is suspected you must determine if it is the probe, the sonde, or both. Thesteps below will take you through the actions necessary to determine the cause of the problem.HIGH DO CHARGE (ACCEPTABLE RANGE 25 TO 75)The first step is to isolate the problem. Remove the DO probe from the sonde, dry the port with aKimwipe, and confirm that the charge drops to a number that is in between -0.8 to +1.2. This numbercan fluctuate with the typical value being 0.2. A charge number greater than 1.2 would indicate that theDO port is contaminated and there is conductivity between the pins or that the circuit board ismalfunctioning. Usually connector contamination is the cause. See the cleaning instructions at the end ofthis document for corrective action.If the DO charge measured on the sonde (sensor removed) is within the acceptable range, then theproblem is in the probe. Remove the electrolyte from the sensor and rinse the electrolyte well with DIwater and dry with a Kimwipe. Now reinstall the sensor and re-test. If the charge remains outside the -0.8 to 1.2 range, then the probe has internal leakage or contamination. You can try soaking the probe perthe cleaning instructions. If this is not successful and reconditioning with the 6035 Reconditioning Kit isnot successful, then the probe must be replaced.DO WARM-UP FAILUREThe Rapid Pulse DO sensor, like other Clark DO probes, must warm up correctly for proper operation.Failure of the probe to pass the warm-up test is grounds for probe rejection. When conducting the highto low output test remember that the RS-232 Auto-Sleep function found in the sonde’s Advanced Menumust be enabled. Also remember that the first two sonde readings taken at a four-second discrete samplerate can be discounted. The first two warm-up samples can be erratic when the circuitry is first turned onafter a 60 second idle period.Examples:Good Test DO in % -44.0 104.4 99.2 97.1 95.3 94.4 93.0 92.9 92.8Bad Test DO in %- -99.9 -99.9 30.9 49.2 54.9 57.5 59.7 61.2 62.5 65.7The first step in isolating the cause of a bad DO warm-up is to test the sonde without the DO probeinstalled. With the probe removed the DO charge should be between -0.8 and +1.2. If the charge isgreater, then clean both the probe and sonde bulkhead connector per the port cleaning instructions.After cleaning, retest the sonde and probe after running the DO probe for 15 minutes in discrete mode.Let the sonde sit idle for at least 60 seconds before beginning the high to low warm-up test. If you areunsuccessful with the cleaning procedure and the probe still fails the DO warm-up test, then the probemust be rejected.(continued) ©<strong>YSI</strong> Inc.21
HIGH OR LOW DO GAIN (RANGE -0.7 TO +1.4)The DO gain number is a multiplier. It is usually out of tolerance when the DO charge or the High/Lowwarm-up fails. Corrective actions involve the same procedures used for the charge and warm-up.HOW TO TEST FOR MEMBRANE PUNCTURES BEFORE DEPLOYMENTThe easiest way to test for membrane punctures is to use a 1,000 mL beaker of saturated tap water. Aftercalibrating the sonde in a wet towel or saturated air, run the sonde in discrete mode in saturated air andrecord the value when stable. It will read less the 100% if the sonde was calibrated for UnattendedMode use.Now place the instrument in the beaker and watch the DO%. If it reads 98.2 % in saturated air and thereadings go up by one or two percent, then the membrane is leaking. The leak could be a pinhole in theTeflon or a loose-fitting o-ring. Replace both when a leak is found.A small aquarium pump with air-stone is required to saturate the water in the beaker. Give the pump 30minutes to saturate your tap water.PORT AND PROBE CLEANING PROCEDURETo remove contamination -- which can include grease, saltwater electrolyte, and calibration reagents --the probes and sonde can be submerged in hot tap water which has had a dishwashing soap (with adegreaser) added. The temperature should start at 35 to 40 degrees C. The soapy water mix must bepumped into the open sonde ports and probe connectors to be effective. Using a lab rinse bottle will helpflush out the ports. Soak the probe and affected sonde connectors for one hour. Rinse thoroughly withDI water after the soak, shake or blow out a majority of the water, and allow to air-dry overnight.In cases where severe grease contamination is an issue, a degreaser agent sold in automotive stores canbe used. Wear safety goggles and follow all the manufacturer’s precautions when working with anycleaning products.©<strong>YSI</strong> Inc.22
ROX OPTICAL DISSOLVED OXYGEN TROUBLESHOOTINGML 01/12/09POST-CALIBRATION IS LOWVerify that the ROX is in saturated environment. If yes, then remove the wiper and the DO membranewith the probe vertical while following instructions in the user manual. Inspect for moisture under themembrane inside of the o-ringed area. If water is found clean on the optics or condensed moisture isseen on the inside of the membrane surface, then rinse with DI water and dry. Inspect for damage,reassemble and retest.Note: Moisture under the membrane is usually a sign that a problem exists that will require membranereplacement.DO READS LOW IMMEDIATELY AFTER A WIPE CYCLEThis is normal! The wiper passing over the membrane will drop the reading 1.5%. The reading willreturn to normal in less than 30 seconds. See Appendix M for more details.DO READS LOW AFTER EXPOSURE TO FORMAZIN OR SODIUM SULFITEThe wiper pad will absorb these chemicals and apply it to the membrane on every wipe cycle. Removethe wipers before exposure or change the pads after exposure.©<strong>YSI</strong> Inc.23
UNATTENDED MONITORING“MAKING GOOD DO MEASUREMENTS”ML 1/08/09It is re<strong>com</strong>mended that you take the following steps prior to deployment:• Confirm that the RS-232 and SDI-12 Auto Sleep functions are enabled. Both can be found in theAdvanced Menu under Setup.• Confirm that the sonde Report Menu has been set up correctly.• Confirm that the date and time are correct.• Program the “Unattended” study and confirm that the battery voltage and system memory areadequate for the length of the deployment.• Start the sonde logging. Confirm that the sonde is logging data by going to the Status Menu andmaking sure that the sonde displays a “Logging Active” message.• Confirm that at least one sample has been logged in memory. View using “Quick View File” inthe sonde’s File Menu.FINAL PREPARATIONSNote: These instructions were written primarily for <strong>YSI</strong> sondes using the Rapid Pulse DO sensor.Sondes fitted with optical DO probes do not have the warm-up and burn-in requirements listed in thisdocument.1. Once the sonde is logging it is strongly re<strong>com</strong>mended that the instrument be placed in a saturatedwater bath prior to deployment. The data logged in a saturated water bath can be used as your predeploymentDO calibration verification. The water bath can be made with a five-gallon pail,aquarium air pump, air stone, and tap water. Run the air pump for at least one hour prior to ensurethat the water bath is <strong>com</strong>pletely saturated.To determine the DO saturation level of your water you can divide the barometric pressure by 7.6.Example: 755 mm/hg / 7.6 = 99.34%The sonde should remain in the saturated bath for at least one hour. Verify that the oxygen sensormeets the accuracy requirements. If an adjustment is needed, recalibrate in the bath between yoursamples. Do not stop the “Unattended” logging run to recalibrate.2. Once the pre-deployment DO data has been checked the sonde can be prepped for transport. Thebest way to move instruments is assembled with the sensor guard on the sonde. Removing acalibration cup in the field exposes the probes to potential damage. Wrapping the assembled sonde ina wet white towel will provide shock and vibration protection for the instrument while maintaining asaturated environment for the DO sensor. Moving the instruments in a large (vented) white igloocooler wrapped in wet towels will provide the best protection. The cooler keeps the instrumentstogether, is easy to lash down in a boat or truck, and maintains the instruments in a cooler saturatedenvironment so pre-deployment DO data can continue to be collected.(continued) ©<strong>YSI</strong> Inc.27
3. At the recovery, the process is repeated. The sonde, when recovered, would be externally wipedclean (not the sensors) and then wrapped again in the wet towel and placed back in the white cooler.The DO data now collected by the sonde will be used as part of the post calibration record. Byhaving this information recorded on the actual data set the QA will always be available for futurereference.4. The other sensors will be post-calibrated when the sonde is returned to the lab. These tests willdetermine what effect (if any) fouling might have had on the data. When the post-calibration is<strong>com</strong>pleted the sonde can be returned to the saturated water bath for a final verification.©<strong>YSI</strong> Inc.28
DISCRETE SAMPLING“MAKING GOOD DO MEASUREMENTS”ML 1/08/09Preparing a sonde for use in a spot sampling/profiling application is the same as the preparation used inunattended monitoring. The sonde must be tested and calibrated. In addition the field display (610/650or PC) must be charged and made ready for the field.Sampling can be tough on the equipment -- bounced around in small boats, temperature extremes, shock,and vibration can cause Teflon-membrane DO sensors to experience a calibration shift. The fieldtechnician needs to be aware of this and must be able to document and correct for any DO drift thatmight occur during the day.Other parameters on the sonde -- temperature, conductivity, depth, turbidity, pH, and chlorophyll -- aregenerally not affected by the above issues and do not drift during normal sampling use. The best way todetermine if DO sensor drift has occurred is to check the output under a controlled condition each timeyou get to a site. By following the steps below you can perform a pre- and post-check at each site andgreatly increase your DO data quality.Note: These instructions were written primarily for <strong>YSI</strong> sondes using the Rapid Pulse DO sensor.Sondes with optical DO probes do not have the warm-up and burn-in requirements.1. Whenever possible prepare and calibrate your equipment the day before the expected field study.Make sure that the Auto Sleep RS-232 function has been disabled for sampling applications. This isfound in the sonde’s Advanced Menu under Setup.2. Transfer of the sonde from the calibration cup to the sensor guard puts the sonde and sensors at risk.This is when most accidents to the oxygen sensor and membrane occur. To eliminate this risk takethe sonde to the field with the sensor guard installed. Instead of using the cal cup to keep sensors insaturated air, wrap the sonde in a white towel that has been saturated in tap water. The toweled sondecan be stored in a cooler or pail. The wet towel is a perfect saturation chamber. In addition it can bewrapped around the sonde to minimize shock and vibration during transit.3. When you arrive at the site, the sonde/display will be turned on and started sampling; allow it towarm up/run for approximately 5 minutes. Check the DO output; it should read saturation for yourlocal barometric pressure plus or minus the instrument’s tolerance of 2%. Record the sonde’sreading in your field shield under pre-deployment DO check. If you have a reading that is out oftolerance, then you would simply recalibrate the DO in the wet towel and then record that sample.4. Deploy the sonde. Remember to allow the sonde a few minutes to equilibrate to the watertemperature before you take your reading. Once the data has been collected, rinse the sonde with tapwater, shake dry and wrap again in the wet towel. After 5 minutes perform a DO post calibration.Again, the sonde should return to saturation, plus or minus the tolerance of 2%. If the probe fails toreturn to saturation, then the field samples should be retaken after a recalibration.5. It is strongly re<strong>com</strong>mended that you store this pre- and post-calibration data in the actual site datafile if you are logging the information; or record in your log sheet if manually collecting. Thisassures anyone who looks at the records at a later time that the sonde was calibrated and workingcorrectly. The addition of these QA steps adds very little time to the collection process and canactually save time when unexpected data is recorded.©<strong>YSI</strong> Inc.29
COMPARING ROX & RAPID PULSE SENSORSML 1/05/09The instructions and QA re<strong>com</strong>mendations on these pages will be used to set up and calibrate <strong>YSI</strong> 6-Series sondes for use in <strong>com</strong>parison measurements of optical and steady state dissolved oxygen sensors.This document is not a substitute for the <strong>YSI</strong> manual or 6150 support documentation.MINIMUM REQUIREMENTS• All <strong>YSI</strong> 6-Series sondes used in this study must be updated to firmware version 3.06.650 displays must be updated to version 1.18.• EcoWatch PC software must be updated to version 3.18.• All sondes must be tested, calibrated, and be in good working order to be part of this study.• New software /firmware available at www.ysi.<strong>com</strong>/edownloads• Review Appendix M ROX OPTICAL DO SENSOR in your manual to be<strong>com</strong>e familiar with the<strong>YSI</strong> ROX luminescent DO sensor before proceeding.• Review the 6150 Description and Instructions for Use documents for probe installationinformation.DISCRETE SAMPLING1. Install the 6150 ROX optical DO sensor into the spare optical port.2. Connect the sonde to a PC. At the <strong>com</strong>mand prompt (#) type “MDO 1”. This <strong>com</strong>mand willallow both the Rapid Pulse and the ROX DO sensors to sample simultaneously.Note: MDO = Multiple <strong>Dissolved</strong> <strong>Oxygen</strong>. (1/ enable, 0/disable)3. Enable the ROX sensor in the sonde’s Sensor Menu.4. Enable the % and mg/l outputs in the sonde’s Report Menu.5. Disable the sonde’s Auto Sleep RS-232 setting found in the Advanced Menu under “Setup”.6. Recondition and prepare the Rapid Pulse DO sensor with a new membrane and confirm that alldiagnostics -- charge, gain, and Warm-up -- meet specifications.7. Run the sonde in “Discrete Run Mode” at a four-second rate for 15 minutes to burn in the RapidPulse sensor. Run in saturated air.8. Calibrate the Rapid Pulse DO sensor in saturated air as you normally would. DO NOTCALIBRATE THE OPTICAL DO PROBE AT THIS TIME!9. Calibrate all other sensors and prepare pre-deployment and QA records.10. The <strong>YSI</strong> factory-generated ROX DO calibration coefficients will automatically be transferredinto the sonde at initial sensor power up.(continued) ©<strong>YSI</strong> Inc.30
CALIBRATION PROCEDURE FOR DISCRETE SAMPLINGThe <strong>YSI</strong> Rapid Pulse and ROX DO sensors can be calibrated in saturated air or saturated water; bothwill give the same results when done correctly. For these deployments we re<strong>com</strong>mend that you calibratein saturated water. Saturated water will allow you to check the performance of the other sensors andeliminate any chance of temperature-related calibration errors. All that is required is a clean five-gallonbucket, a good quality aquarium air pump, and two air stones.1. Fill pail to at least 75% capacity with room-temperature tap water.2. Connect air stone to pump and sparge water for at least one hour before calibration.3. Place the sonde in the water and run in “Discrete Mode” at a one second rate.4. Wait 10 minutes to ensure temperature stability.Note: The Rapid Pulse DO sensor should read very close to the saturated air reading of yourprevious air calibration. If it reads more than 2% higher than the reading in saturated air, thenyou could have a Rapid Pulse membrane problem. Check for leaks, punctures, or a loose-fittingmembrane retainer o-ring before you calibrate.5. Calibrate both the Rapid Pulse and ROX DO sensors. Record the barometric pressure at the timeof calibration.Note: Avoid having air bubbles collect on either membrane, during the calibration.6. Barometric pressure ______________mm/HgNote: pressure divided by 7.6 = calculated DOExample: 760/7.6 = 100 %7. ROX Output ________________% _____________mg/l +/- 1%8. RP Output _________________ % _____________mg/l +/- 2%9. Temperature ____________deg C, Salinity _____________ppt10. DO NOT recalibrate the ROX DO sensor in the field!11. Do your post-calibration when you return in the same saturated water bath.Stability and agreement must occur in this controlled environment or good field measurements will notbe made. The ROX and Rapid Pulse membranes must be kept in a saturated air or water duringtransportation to the field and in between readings.Notes:(continued) ©<strong>YSI</strong> Inc.31
UNATTENDED DEPLOYMENTS1. Install the 6150 ROX optical DO sensor into a spare optical sensor port.2. Connect the sonde to a PC. At the <strong>com</strong>mand prompt # type “MDO 1”. This <strong>com</strong>mand will allowboth the Rapid Pulse and the ROX DO sensors to sample simultaneously.Note: MDO = Multiple <strong>Dissolved</strong> <strong>Oxygen</strong>. (1/ enable, 0/disable)3. Enable the ROX sensor in the sonde’s Sensor Menu.4. Enable the % and mg/l outputs in the sonde’s Report Menu.5. Enable the sonde’s “Auto Sleep RS-232” and “Auto Sleep SDI-12” settings found in theAdvanced Menu under Setup.6. Confirm that the sonde’s Rapid Pulse DO warm-up time is set to 60 seconds. This is found in thesonde’s Advanced Sensor Menu.7. Recondition and prepare the Rapid Pulse DO sensor with a new membrane and confirm that alldiagnostics -- charge, gain, and Warm-up -- meet specifications.8. Run the sonde in “Discrete Run Mode” at a four-second rate for 15 minutes to burn in the RapidPulse sensor. Run in saturated air.9. Calibrate the Rapid Pulse DO sensor in saturated air as you normally would. DO NOTCALIBRATE THE OPTICAL DO PROBE AT THIS TIME!10. Calibrate all other sensors and record pre-deployment and QA data.11. The <strong>YSI</strong> factory-generated ROX DO calibration coefficients will automatically be transferredinto the sonde at initial sensor power up.12. Start the sonde logging for the “Unattended Study” and place in the saturated water bathdescribed in the next steps.13. Check logged data after one hour and record the time of your observation. If the Rapid Pulse DOsensor reads more than 2% higher than its saturated air calibration point, then you could have adefective or leaking membrane. Check for air bubbles, wrinkles, punctures, or a loose-fittingmembrane retainer o-ring.(continued) ©<strong>YSI</strong> Inc.32
CALIBRATION PROCEDURE FOR UNATTENDED DEPLOYMENTSThe <strong>YSI</strong> Rapid Pulse and ROX DO sensors can be calibrated in saturated air or saturated water; bothwill give the same results when done correctly. For these deployments we re<strong>com</strong>mend that you calibratein saturated water. Saturated water will allow you to check the performance of the other sensors andeliminate any chance of temperature-related calibration errors. All that is required is a clean five-gallonbucket, a good quality aquarium air pump, and two air stones.1. Fill pail to at least 75% capacity with room-temperature tap water.2. Connect air stone to pump and sparge water for at least one hour before calibration.3. Place the sonde in the saturated water bath and run in “Unattended Mode”. This will be the filethat the sonde is deployed with.4. Wait 60 minutes to ensure temperature stability.Notes:©<strong>YSI</strong> Inc.Note: The Rapid Pulse DO sensor should be reading very close to the saturated air reading ofyour previous air calibration. If it reads more than 2% higher than the reading in saturated air,then you could have a Rapid Pulse membrane problem. Check for leaks, punctures, or a loosefittingmembrane retainer o-ring before you calibrate.5. Calibrate both the Rapid Pulse and ROX DO sensors. Record the barometric pressure at the timeof calibration.Note: avoid letting air bubbles collect on the membranes, during calibration.6. Barometric pressure ______________mm/HgNote: pressure divided by 7.6 = calculated DOExample 760/7.6 = 100 %7. ROX Output ________________% _____________mg/l +/- 1%8. RP Output _________________ % _____________mg/l +/- 2%9. Temperature _____________deg C, Salinity ____________ppt10. Allow the sonde to sample for at least 60 more minutes in this controlled environment. This datawill serve as a pre-deployment DO verification test and will remain part of the data set.11. When the sonde is recovered, do NOT stop the “Unattended” study in the field! Return thesonde to the calibration lab and use the saturated water bath for the DO post-calibration. Thisdata will also be part of the “Unattended” data file.12. Record the barometric pressure and other parameters at recovery.13. Barometric pressure ______________mm/Hg14. ROX Output ________________% _____________mg/l +/- 1%15. RP Output _________________ % _____________mg/l +/- 2%16. Temperature _____________deg C, Salinity ____________ppt33
<strong>YSI</strong> Incorporated1700/1725 Brannum LnYellow Springs, Ohio 45387 USAEnvironmental Technical Support :800-897-4151 or +1 937-767-7241environmental@ysi.<strong>com</strong>www.ysi.<strong>com</strong>