Latitude Car Seat Adaptor - Valco Baby
Latitude Car Seat Adaptor - Valco Baby
Latitude Car Seat Adaptor - Valco Baby

You also want an ePaper? Increase the reach of your titles
YUMPU automatically turns print PDFs into web optimized ePapers that Google loves.
valco<br />
baby<br />
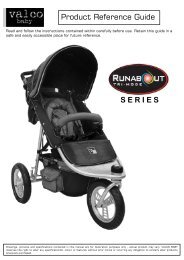
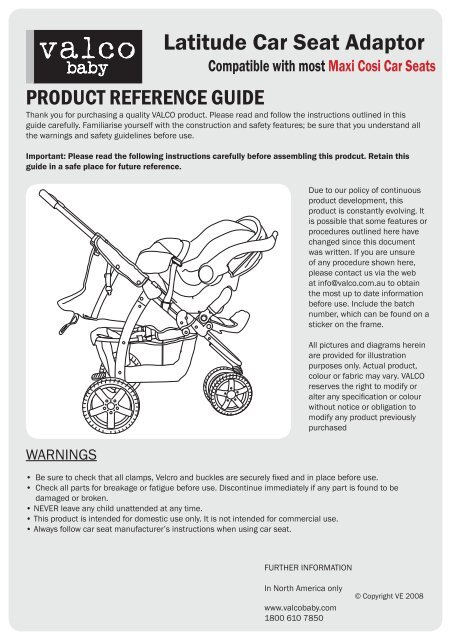
PRODUCT REFERENCE GUIDE<br />
Thank you for purchasing a quality VALCO product. Please read and follow the instructions outlined in this<br />
guide carefully. Familiarise yourself with the construction and safety features; be sure that you understand all<br />
the warnings and safety guidelines before use.<br />
Important: Please read the following instructions carefully before assembling this prodcut. Retain this<br />
guide in a safe place for future reference.<br />
WARNINGS<br />
<strong>Latitude</strong> <strong>Car</strong> <strong>Seat</strong> <strong>Adaptor</strong><br />
Compatible with most Maxi Cosi <strong>Car</strong> <strong>Seat</strong>s<br />
Due to our policy of continuous<br />
product development, this<br />
product is constantly evolving. It<br />
is possible that some features or<br />
procedures outlined here have<br />
changed since this document<br />
was written. If you are unsure<br />
of any procedure shown here,<br />
please contact us via the web<br />
at info@valco.com.au to obtain<br />
the most up to date information<br />
before use. Include the batch<br />
number, which can be found on a<br />
sticker on the frame.<br />
All pictures and diagrams herein<br />
are provided for illustration<br />
purposes only. Actual product,<br />
colour or fabric may vary. VALCO<br />
reserves the right to modify or<br />
alter any specification or colour<br />
without notice or obligation to<br />
modify any product previously<br />
purchased<br />
• Be sure to check that all clamps, Velcro and buckles are securely fixed and in place before use.<br />
• Check all parts for breakage or fatigue before use. Discontinue immediately if any part is found to be<br />
damaged or broken.<br />
• NEVER leave any child unattended at any time.<br />
• This product is intended for domestic use only. It is not intended for commercial use.<br />
• Always follow car seat manufacturer’s instructions when using car seat.<br />
FURTHER INFORMATION<br />
In North America only<br />
www.valcobaby.com<br />
1800 610 7850<br />
© Copyright VE 2008
<strong>Seat</strong> Reclined<br />
Female Buckle<br />
Male Buckle<br />
b<br />
A<br />
Select a strap to secure to stroller<br />
C<br />
Wrap the strap around side bar<br />
D<br />
GRACO/ bRITAx CAR SEAT<br />
ADAPTOR<br />
FIGURE A<br />
1. begin preparing the <strong>Latitude</strong> stroller for the <strong>Car</strong> <strong>Seat</strong><br />
by removing the canopy (hood), from the stroller, and<br />
reclining the seat to its fully reclined position.<br />
2. Locate the extra Male and Female straps, included with<br />
your original purchase.<br />
FIGURE b<br />
3. Select a strap to secure around the side bar of the<br />
<strong>Latitude</strong> stroller.<br />
FIGURE C<br />
4. Fit the strap around the side bar of the <strong>Latitude</strong> stroller.<br />
FIGURE D<br />
5. Slip the strap through the ‘opening’ of the metal loop at<br />
the end of the strap.<br />
IMPORTANT WARNING: ALWAYS TEST THAT ALL<br />
STRAPS ARE SECURELY ENGAGED BEFORE USE.
Pull up to tighten<br />
Secure on stroller<br />
E<br />
F<br />
Insert <strong>Car</strong> <strong>Seat</strong><br />
G<br />
Secure seat over front bar<br />
H<br />
Loop buckles through car seat<br />
belt hooks, and secure buckle.<br />
FIGURE E<br />
6. Once strap is through the metal loop, pull plastic end up<br />
to tighten, and secure on stroller.<br />
7. Repeat process outlined in Figures b to E on other side<br />
bar of stroller, with the other strap.<br />
FIGURE F<br />
8. Place car seat in seat portion of the stroller.<br />
TIP: bE SURE THAT SEAT IS FULLy RECLINED.<br />
FIGURE G<br />
9. Be sure car seat is securely fitted over the front bumper<br />
bar, and in the stroller seat.<br />
TIP: yOU MAy WANT TO ADJUST THE FRONT bUMPER bAR<br />
FOR MOST SECURE FIT.<br />
FIGURE H<br />
10. Locate a Male/Female strap attached to side of stroller.<br />
11. Slip strap through the car seat belt hooks on the side of<br />
the car seat.<br />
12. Repeat with the other strap.<br />
13. Insert Male clip into its Female counterpart and buckle.<br />
14. Adjust straps to tighten around car seat.
Side View<br />
1<br />
1<br />
valco<br />
baby<br />
Front View<br />
Remove strap from packaging<br />
2<br />
3<br />
I<br />
J<br />
K<br />
Secure strap around car seat bar<br />
2<br />
4<br />
L<br />
FIGURE I<br />
15. Once car seat is secured, turn stroller so you are facing<br />
the car seat front.<br />
FIGURE J<br />
16. Remove the Maxi Cosi strap, purchased seperately,<br />
from packaging.<br />
FIGURE K<br />
17. Locate the inner front bar of the car seat (FIGURE K).<br />
18. Wrap the strap around the bar in an UNDER, OVER,<br />
UNDER motion until tightly wrapped around the bar.<br />
FIGURE L<br />
19. Once tight, pull the Female clip over the front hook<br />
20. Place Male clip under the front bumper bar<br />
21. Insert the Male clip into the Female clip and buckle<br />
22. Adjust strap to tighten.<br />
1<br />
2