Razor Bumper Buggie Owners Manual - ElectricScooterParts.com
Razor Bumper Buggie Owners Manual - ElectricScooterParts.com
Razor Bumper Buggie Owners Manual - ElectricScooterParts.com

Create successful ePaper yourself
Turn your PDF publications into a flip-book with our unique Google optimized e-Paper software.
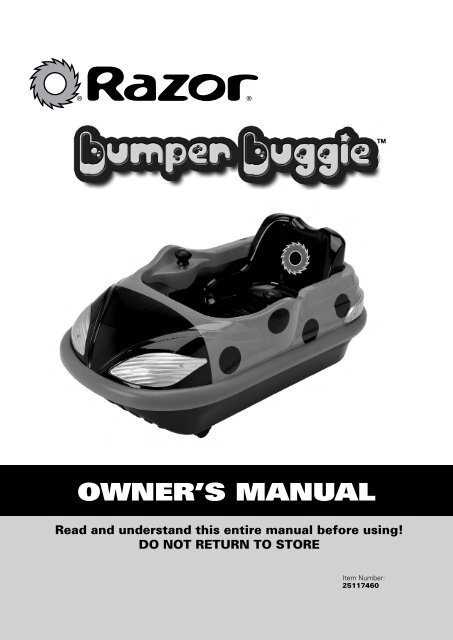
Owner’s <strong>Manual</strong>Read and understand this entire manual before using!DO NOT RETURN TO STOREItem Number:25117460
ContentsSafety Warnings............................................................. 1Before You Begin........................................................... 2Assembly and Usage..................................................... 3Repair and Maintenance................................................ 4Troubleshooting Guide................................................... 5<strong>Bumper</strong> <strong>Buggie</strong> Parts..................................................... 6Warranty......................................................................... 8Safety WarningsWARNING: Riding the <strong>Bumper</strong> <strong>Buggie</strong> TM can bea hazardous activity. Certain conditions may cause theequipment to fail without fault of the manufacturer. BECAUSETHIS PRODUCT MOVES, CHILDREN USING IT COULD GETINTO DANGEROUS SITUATIONS PRESENTING POSSIBLERISKS OF INJURY OR DEATH EVEN WHEN USED WITHPROPER SAFETY PRECAUTIONS. ADULT SUPERVISION ISNECESSARY TO PROMOTE AND ASSURE SAFE PLAY IN ABUMPER BUGGIE. USE COMMON SENSE.This manual contains many warnings and cautions concerningthe consequences of failing to maintain, inspect or properlyuse your <strong>Bumper</strong> <strong>Buggie</strong>. Because any incident can result inserious injury or even death, we do not repeat the warningof potential serious injury or death each time such a possibilityis mentioned.APPROPRIATE RIDER USE ANDPARENTAL SUPERVISIONDirect adult supervision is required at all times. This manualcontains important safety information. It is your responsibilityto review this information and make sure that all childrenobey all warnings, cautions, instructions and safety topics andassure that young riders are able to safely use this product.<strong>Razor</strong> re<strong>com</strong>mends that you periodically review and reinforcethe information in this manual with young riders, and that youinspect and maintain your children’s vehicle to insure theirsafety. The re<strong>com</strong>mended rider age of 3 years and older for<strong>Bumper</strong> <strong>Buggie</strong> is only an estimate, and can be affected by therider’s size, weight or ability. Any child unable to fit <strong>com</strong>fortablyon the <strong>Bumper</strong> <strong>Buggie</strong> should not be allowed to attempt toride it. A parent’s decision to allow his or her childto ride this product should be based on the child’smaturity, skill and ability.Do not allow any child to ride the <strong>Bumper</strong> <strong>Buggie</strong> in wetweather. The <strong>Bumper</strong> <strong>Buggie</strong> is intended for use on solid,flat, clean and dry surfaces such as pavement or level groundwithout loose debris such as rocks or gravel. Wet, slick oruneven and rough surfaces may impair traction and contributeto possible accidents. <strong>Bumper</strong> <strong>Buggie</strong> should not be riddenin mud, ice, puddles or water. <strong>Bumper</strong> <strong>Buggie</strong> should not beridden at night or when visibility is impaired.PROPER RIDING ATTIREA child should always wear shoes, never ride barefootedor in sandals, and keep shoelaces tied and out of the wayof the wheels.USING THE CHARGERThe charger supplied with the <strong>Bumper</strong> <strong>Buggie</strong> should beregularly examined for damage to the cord, plug, enclosureand other parts, and in the event of such damage, the <strong>Bumper</strong><strong>Buggie</strong> must not be charged until the charger has beenrepaired or replaced.Use only with the re<strong>com</strong>mended charger.The charger is not a toy.Always disconnect from the charger prior to wiping down andcleaning your <strong>Buggie</strong> <strong>Bumper</strong> with liquid.FAILURE TO USE COMMON SENSE AND HEED THEABOVE WARNINGS INCREASES RISK OF SERIOUSINJURY. USE WITH APPROPRIATE CAUTION ANDSERIOUS ATTENTION TO SAFE OPERATION.DO NOT EXCEED THE WEIGHT LIMIT OF 55 pounds.Rider weight does not necessarily mean a child’s size isappropriate to fit or maintain control of the <strong>Bumper</strong> <strong>Buggie</strong>.Refer to the section on safety for additional warnings.ACCEPTABLE RIDING PRACTICES ANDCONDITIONSDirect parental supervision is required at all times. The <strong>Bumper</strong><strong>Buggie</strong> is meant to be used only in controlled environmentsappropriate for young children’s play always free of potentialtraffic hazards and never on public streets. Do not allow yourchild to ride the <strong>Bumper</strong> <strong>Buggie</strong> in any areas where vehicletraffic is present. The child must remain seated at all timeswhen using the <strong>Bumper</strong> <strong>Buggie</strong>. Never allow more than onechild at a time to ride the <strong>Bumper</strong> <strong>Buggie</strong>. Never use nearsteps, sloped driveways, hills, roadways, alleys or swimmingpool areas.1
Before You BeginRemove contents from box. Remove the foam separators that protect the <strong>com</strong>ponents from damage during shipping.Inspect the contents of the box for scratches in the paint, dents or kinked cables that may have occurred duringshipping. Because the <strong>Bumper</strong> <strong>Buggie</strong> was 95 percent assembled and packed at the factory, there should not be anyproblems, even if the box has a few scars or dents.Estimated Assembly and Set-Up TimeAdult assembly required.Allow up to 15 minutes for assembly, not including initial charge time.Allow up to 12 hours for initial charge (see below for charging information).WARNING:DO NOT USE NON-RAZORPRODUCTS WITH YOURRAZOR BUMPER BUGGIE.The <strong>Bumper</strong> <strong>Buggie</strong> has beenbuilt to certain <strong>Razor</strong> designspecifications. The originalequipment supplied at the timeof sale was selected on the basisof its <strong>com</strong>patibility with the otherparts. Certain aftermarket productsmay or may not be <strong>com</strong>patible.Charging the BatteryYour <strong>Bumper</strong> <strong>Buggie</strong> may not have a fully charged battery; therefore it is a good idea to charge the battery prior to use.• Initial charge time: 12 hours• Run time: up to 40 minutes• Recharge time: up to 8 hours,• Average battery life: 250 charge/discharge cyclesdepending on the level of depletionChargerPlugWARNING: Alwaysdisconnect your <strong>Bumper</strong> <strong>Buggie</strong>from the charger before cleaningwith liquid.WARNING: Alwaysrecharge the battery once a monthwhen product is not in regular use.Failure to do so could result in abattery that will no longer accepta charge.ChargerPort1 Plug the charger port into theinput socket on the back of the<strong>Bumper</strong> <strong>Buggie</strong>. The charger workswith the power switch in either theon or off position.Battery should be charged a minimumof 8 hours after each use. When thevehicle is not in regular use rechargethe battery at least once a monthuntil normal use is resumed.2 Plug the charger plug into a walloutlet.Note: If your charger does notlook like the one illustrated,your unit has been suppliedwith an alternative charger.The specifications and chargingprocedure would not change.Chargers have built-in over-chargeprotection to prevent battery frombeing over-charged.Be sure to properly align thegroove on the charger port withthe corresponding socket onthe back of the <strong>Bumper</strong> <strong>Buggie</strong>;otherwise, no charging actionwill occur.Required ToolsWe re<strong>com</strong>mend the use of mechanic’s grade tools.Phillips ScrewdriverNeed Help? Visit our web site for updates and a list of authorized service centers at www.razor.<strong>com</strong>or call toll-free at 866-467-2967 Monday - Friday 8:00 AM - 5:00 PM Pacific Time.2
Assembly and UsageAttaching the Seat and Seat beltWARNING: The seatbelt provided is for “play” use only.It is not an ASTM-approved laprestraining device. The seat belt isnot required for normal use. Use atyour own risk.1 Align holes in seat with seatmounts inside the<strong>Bumper</strong> <strong>Buggie</strong>.2 Using a Phillips screwdriver,secure seat with the four screwsprovided.3 When installed correctly theseat belt should be able to easilybuckle around rider’s waist.Controlling Your <strong>Bumper</strong> <strong>Buggie</strong>The left and right joysticks controlboth the steering and motionof the bumper buggie.Forward MotionPush both joysticks at the sametime to the front position.Turning left or rightPush the right joystick forward tomake a left turn or push the left joystickforward to make a right turn.Backward MotionPush both joysticks at the sametime to the rear position.Spinning MotionPush both joysticks at the sametime in opposite directions.3
Repair and Maintenanceq Battery Care and DisposalDo not store the battery in temperatures above 75° or below -10° F.CONTAINS SEALED LEAD BATTERY. BATTERY MUST BE RECYCLED.Disposal: Your <strong>Razor</strong> product uses sealed lead-acid batteries which must be recycled or disposed of in anenvironmentally sound manner. Do not dispose of a lead-acid battery in a fire. The battery may explode or leak. Do notdispose of a lead-acid battery in your regular household trash. The incineration, land filling or mixing of sealed leadacidbatteries with household trash is prohibited by law in most areas. Return exhausted batteries to a federal or stateapproved lead-acid battery recycler or a local seller of automotive batteries. If you live in Florida or Minnesota, it isprohibited by law to throw away lead-acid batteries in the municipal waste stream.q ChargerThe transformer/charger supplied with the <strong>Bumper</strong> <strong>Buggie</strong> should be regularly examined for damage to the cord, plug,enclosure and other parts, and, in the event of such damage, the vehicle must not be charged until it has been repairedor replaced.Use ONLY with the re<strong>com</strong>mended charger.q Replacement PartsThe most frequently requested replacement parts (wheels, tires, tubes, batteries and chargers) are available forpurchase at some <strong>Razor</strong> retail partners or online at www.razorama.<strong>com</strong>. For other parts contact an authorized <strong>Razor</strong>repair center.q Repair CentersFor a list of authorized <strong>Razor</strong> repair centers:• Check online at www.razor.<strong>com</strong>.• Send an e-mail to customerservice@razorusa.<strong>com</strong> or call 866-467-2967 for the center nearest you.WARNING: If a batteryleak develops, avoid contact withthe leaking acid and place thedamaged battery in a plastic bag.Refer to the disposal instructions atleft. If acid <strong>com</strong>es into contact withskin or eyes, flush with cool waterfor at least 15 minutes and contacta physician.4
Troubleshooting GuideProblem Possible Cause SolutionVehicle does not run Undercharged batteryCharge the battery. A new battery should have been charged for at least 12hours before using the vehicle for the first time and up to 8 hours after eachsubsequent use.Check all connections. Make sure the charger port is tightly plugged into thecharging port on the <strong>Bumper</strong> <strong>Buggie</strong>, and that the charger is plugged securelyinto the wall.Make sure power flow to the wall outlet is on.Vehicle was running butsuddenly stoppedShort run time (less than30 minutes per charge)Vehicle runs sluggishlySometimes the vehicledoesn’t run, but othertimes it doesCharger gets warmduring useCharger is not workingLoose wires or connectorsUndercharged batteryBattery is old and will not acceptfull chargeDriving conditions are too stressfulVehicle is overloadedLoose wires or connectorsMotor or electrical switch damageNormal response to charger useYou may check to see if your charger is working by using a volt meter orasking your local <strong>Razor</strong> authorized service center to test your charger for you.Check all wires and connectors to make sure they are tight.Charge the battery. A new battery should have been charged for at least 12hours before using the vehicle for the first time and up to 8 hours after eachsubsequent use.Check all wires and connectors. Make sure the battery connector is tightlyplugged into the charger connector, and that the charger is plugged securelyinto the wall.Make sure power flow to the wall outlet is on.Even with proper care, a rechargeable battery does not last forever. Averagebattery life is 1 to 2 years depending on vehicle use and conditions. Replaceonly with a <strong>Razor</strong> replacement battery.Use only on solid, flat, clean and dry surfaces such as pavement or levelground.Make sure you do not overload the vehicle by allowing more than one riderat one time, exceeding the 55 lb. maximum weight limit, going up a hill ortowing objects behind the vehicle.Check all wires around the motor and all connectors to make sure theyare tight.Contact your local <strong>Razor</strong> authorized service center for diagnosis and repair.No action required. This is normal for some chargers and is no cause forconcern. If your charger does not get warm during use, it does not mean thatit is not working properly.Need Help? Visit our web site for updates and a list of authorized service centers at www.razor.<strong>com</strong>or call toll-free at 866-467-2967 Monday - Friday 8:00 AM - 5:00 PM Pacific Time.5
<strong>Bumper</strong> <strong>Buggie</strong> PartsKeep your <strong>Bumper</strong> <strong>Buggie</strong> running for years with genuine <strong>Razor</strong> parts. Visit our web site or e-mail us for more information on spare part availability.(Specifications subject to change without notice.)01 Faux headlight cover (right/left)02 Upper body03 Joystick switch/grip04 Faux taillight cover (right/left)05 Seat06 Seat belt07 Charger port w/ wires08 On/off switch09 <strong>Bumper</strong>10 Chassis/ Lower body11 Battery (6V/ 8Ah)11-1 Battery hold-down12 Reset button w/ wire13 Swivel caster/ Front wheel14 Rear wheel <strong>com</strong>plete15 Gear box16 Motor (6V 30W)17 Rear axle set6
DO NOT RETURN TO STOREDo not use this vehicle for the first time until youhave charged the battery for at least 12 hours.Failure to follow these instructions may damageyour vehicle and void your warranty.Warranty<strong>Razor</strong> Limited WarrantyThe manufacturer warranties this product to be free of manufacturing defectsfor a period of 90 days from date of purchase. This Limited Warranty doesnot cover normal wear and tear, tires, tubes or cables, or any damage, failureor loss caused by improper assembly, maintenance, or storage or use of the<strong>Razor</strong> <strong>Bumper</strong> <strong>Buggie</strong>.This Limited Warranty will be void if the product is ever• used in a manner other than for recreation;• modified in any way;• rented.The manufacturer is not liable for incidental or consequential loss or damagedue directly or indirectly to the use of this product.<strong>Razor</strong> does not offer an extended warranty. If you have purchased anextended warranty, it must be honored by the store at which it waspurchased.For your records, save your original sales receipt with this manual and writethe serial number below.__________________________________________Item Number:25117460Need Help? Visit our web site for updates and a list of authorized service centers at www.razor.<strong>com</strong>or call toll-free at 866-467-2967 Monday - Friday 8:00 AM - 5:00 PM Pacific Time.Patent PendingPrinted in China for:<strong>Razor</strong> USA LLCPO Box 3610Cerritos, CA 90703© Copyright 2006 <strong>Razor</strong> USA, LLC. All rights reserved.RAZOR(R) and the <strong>Razor</strong> Logo Design are among the registeredtrademarks of <strong>Razor</strong> USA LLC and/or it’s affiliated <strong>com</strong>panies inthe United States and select foreign countries. 1206078