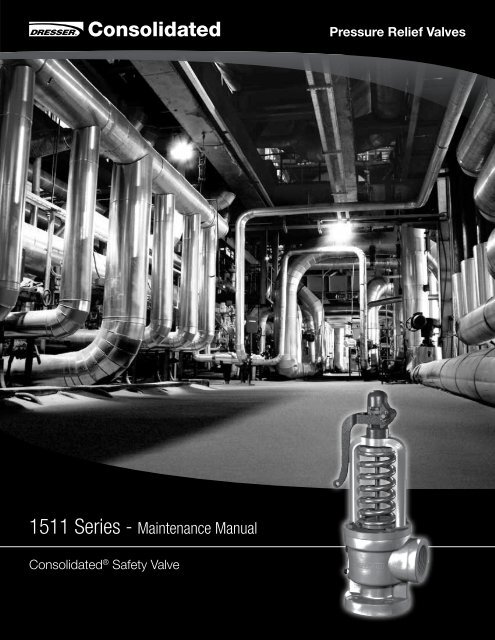
1511 Series - Maintenance Manual
1511 Series - Maintenance Manual
1511 Series - Maintenance Manual
- No tags were found...

Create successful ePaper yourself
Turn your PDF publications into a flip-book with our unique Google optimized e-Paper software.
Conversion TableAll the USCS values are converted toMetric values using the following conversion factors:USCS Unit Conversion Factor Metric Unitin. 25.4 mmlb. 0.4535924 kgin 2 6.4516 cm 2ft 3 /min 0.2831685 m 3 /mingal/min 3.785412 L/minlb/hr 0.4535924 kg/hrpsig 0.6894757 bargft lb 1.3558181 Nm°F 5/9 (°F-32) °C<strong>1511</strong> <strong>Series</strong> Safety Valve (July/2010) | 3
V. Warranty InformationWarranty Statement - Dresser warrants that its productsand work will meet all applicable specifications and otherspecific product and work requirements (including thoseof performance), if any, and will be free from defects inmaterial and workmanship. Refer to Dresser’s StandardTerms of Sale, or specific contract for complete details onwarranty and limitation of remedy and liability.Defective and nonconforming items must be held forDresser’s inspection and returned to the original F.O.B.point upon request.Incorrect Selection or Misapplication of Products- Dresser Consolidated ® cannot be responsible forcustomer’s incorrect selection or misapplication ofour products.Unauthorized Repair Work - Dresser Consolidated ®has not authorized any non-Dresser affiliated repaircompanies, contractors or individuals to perform warrantyrepair service on new products or field repaired productsof its manufacture. Therefore, customers contractingsuch repair services from unauthorized sources must doso at their own risk.Unauthorized Removal of Seals - All new valves andvalves repaired in the field by Dresser Field Service aresealed to assure the customer of our guarantee againstdefective workmanship. Unauthorized removal and/orbreakage of this seal will negate our warranty.VI. IntroductionThe “safety valve” is the final safeguard between acontrolled boiler and a catastrophic explosion. In an overpressuresituation, the pressure in the valve inlet increasesuntil the force on the disc exerted by the system pressureequals the force exerted by the spring. This causes thesafety valve to pop, or lift, relieving the excess steam untilthe system pressure is reduced to the desired level.The Consolidated Safety Valve has been a leader inthe industry since 1879, thus offering over a centuryof experience in design, engineering and productmanufacture. Dresser’s history of dependable and reliablevalve service assures that today’s products and designsare consistent with industry’s current requirements.Rigid manufacturing standards controlled by an ASMEapproved Quality Control Program insure that each valvewill be manufactured in accordance with establisheddesign criteria and tested for functional performance.This quality controlled manufacturing and test programassures that each valve manufactured will provide longand reliable service.8 | Dresser Consolidated ®
IX. Recommended Installation PracticesA. General RequirementsThe safety valve shall be connected to the boiler in a vertical position independentof any other steam connection, and attached as close as possible to the boiler.Intervening pipe or fittings shall be no longer than the face-to-face dimension of thecorresponding tee fitting of the same diameter and pressure under the correspondingAmerican Standard as set forth by the ASME.Thoroughly clean the inlet of the valve before installation and be sure that the propergasket is used. Tighten bolts evenly. Care should be taken when fastening bolts oncast iron flanges as cracking may result.The valve shall be free from external stresses transmitted from the discharge piping.Figure 3 illustrates a recommended design allowing for ample clearance to takecare of thermal expansion. The riser pipe should be large enough to accommodatethe full capacity of the valve without causing steam to escape by flowing backwardthrough the drip pan. In no case should the pipe connected to the valve be of asmaller size than the valve outlet.Know all valve exhaust/leakage points to avoidpossible severe personalinjury or death.Riser supported overheadDrain Pipe OpenTo Safe Place3/4” std. pipe &fittingsMake short as possible1/2” - NPT Drain PipeOpen To Safe Place(Valves manufacturedprior to 1987 may haveother size drain holes)Figure 3: Recommended Installation for Discharge and Vent PipingB. Outdoor Safety Valve InstallationWhen a safety valve is installed on an outdoor unit, it isadvisable to insulate the valve body, including the inletflange, up to the bottom of the yoke. The insulation willstabilize the valve body temperature preventing variationin the set pressure.Valves must be readjusted if insulation is installed.Weather shielding should be used to protect the springand to minimize rain or snow from entering the valve body.<strong>1511</strong> <strong>Series</strong> Safety Valve (July/2010) | 11
X. Hydrostatic Testing & GaggingA. General InformationDuring any hydrostatic test all safety valves on the unit must be gagged. Thisgagging procedure prevents the possibility of damage to the safety valve internalsin the event that the test pressure exceeds the safety valve set pressure.When hydrostatic pressure will exceed the set pressure of the safety valve, it isrecommended the valve be replaced with a blind flange during hydrostatic testing.Probably the most common source of safety valve trouble is overgagging. Duringhydrostatic testing, and during safety valve setting, gags should be applied onlyhand tight. During setting, overgagging could cause damage to the seating surfaceand result in leakage. In applying gags, remember that the valve spring will hold thevalve closed against its set pressure. The additional gag load applied should be onlyenough to insure that the valves do not lift at the expected over-pressure.Gags should never be applied when the boiler is cold. The spindle of the safety valveexpands considerably with the temperature increase as pressure is raised. If it is notfree to expand with this temperature change, the spindle may be damaged.Boiler pressure should be increased to 80% of the pressure of the low set valvebefore applying the gags.Hand tighten the gags of drum and superheater valves with only a light force.B. Application of Test Gags (All Pressures)1. Refer to Figures 1 & 2 on Section V. Remove lever pin and lever. Then loosencap screw and remove cap.2. Center the test gag screw in the exposed end of the spindle and hook the legsof gag under the sides of the yoke as shown in Figure 4.Do not apply the gag load until the boiler hydrostatic pressure is equalto 80% of the pressure to which the low set valve is adjusted.3. Apply the gag load by turning the gag screw clockwise. If the gag on any valvehas not been tightened sufficiently, the valve will leak.If this occurs, the hydrostatic test pressure should be reduced until thevalve becomes tight and then the gag should be tightened still further.This procedure must be followed exactly since it is very difficult to stop the leakby additional gagging once it has started. Any attempt to pinch off the leakagethrough the valve without first lowering the hydrostatic pressure may result indamage to the valve seats.4. After the hydrostatic test is completed, the gags should be removed when thehydrostatic pressure has been reduced to 85% to 90% of the low set valve.Under no circumstances should the gags be left on valves with nohydrostatic pressure on the system.Gag safety valve duringring adjustments to avoidpossible severe personalinjury or death.Figure 412 | Dresser Consolidated ®
XI. Presetting the Adjusting RingsIf the correct position of the adjusting rings (as measuredin the disassembly procedure (see Section XII) is notknown, the valve adjusting rings may be positioned usingthe information in Table 1.The lower ring may be positioned by turning the loweradjusting ring up until it contacts the disc. After choosingthe appropriate orifice size, turn the adjusting ring downthe corresponding number of notches listed in the “LowerRing” column. Then, replace the adjusting ring pin. Theadjusting ring must be free to move both directions, butnot rotate.The upper ring may be positioned by turning the upperadjusting ring down towards the nozzle bushing, until itbecomes level with the bottom of disk. Then after choosingthe appropriate orifice size, turn the adjusting ring downthe corresponding number of turns (360°), listed in the"Upper Ring" column. Then replace the adjusting ring pin.The adjusting ring must be free to move both directions,but not rotate.The adjusting rings are now in a starting position for full liftsteam testing. These adjusting ring settings will generallyprovide a blowdown greater than required by Section Iof the ASME Code, and should be adjusted for theparticular application.Adjusting Ring SettingsNOTE: It is important to note that all adjustments of adjusting rings are Dresser Consolidated ® initial adjustmentsonly, and are not intended to be final adjustments. This final adjustment must be made on the operating system withconditions approximating those that will be realized under actual operating conditions.OrificeUpper RingNo. ofNotchesLower RingNo. ofNotchesTable 1: Adjusting Ring SettingsUpper Ring Position From BeingLevel with Bottom of the DiscLower Ring Position From DiscContactH 30 24 Down Two Turns Down 2 to 6 NotchesJ 36 30 Down Two Turns Down 2 to 7 NotchesK 45 32 Down Two Turns Down 2 to 5 NotchesL 54 40 Down Two Turns Down 3 to 13 NotchesM 45 36 Down Two Turns Down 4 to 8 NotchesN 50 40 Down Two Turns Down 5 to 12 NotchesP 50 42 Down Two Turns Down 9 to 13 NotchesQ 60 48 Down Two Turns Down 9 to 15 NotchesXII. Disassembly for RepairBefore removing the valve, be sure there is no steampressure in the drum or header, then proceed as follows:1. Remove lower ring pin.2. Turn the lower ring upwards counting the number ofnotches moved until contact is made with the disc.Record this information for use during reassembly.3. Remove the lever pin and lever.4. Loosen the cap screw(s) and remove the cap.5. Remove the release nut and lock nut or cotter pin.6. Measure the distance from the top of the spindleto the top of the compression screw. Record thisfor use in reassembly to restore the correct springcompression.7. Loosen the compression screw lock nut and removethe compression screw.<strong>1511</strong> <strong>Series</strong> Safety Valve (July/2010) | 13
XII. Continued8. Remove the cap screws or stud nuts holding the yoke to the base and raise theyoke over the spindle.9. Remove the spring and spring washer assembly, record the spring numberstamped in the spring. Mark the spring and washers top and bottom.10. Lift the disc and spindle straight up to remove the disc from the valve body.Engage the drop through threads of the disc and unscrew it from the spindle.11. Measure from the top of the combination guide and upper ring to the top of thebushing seat. Record this measurement for reassembly.12. Remove the upper ring pin.13. Remove the combination guide and upper ring by turning it upwards until thethreads disengage.14. Remove the lower adjusting ring. The valve is now completely disassembled.Do not disassemble valvewith pressure in drum orheader, as this will resultin severe personal injury ordeath.XIII. InspectionA. General InformationOnce the valve is disassembled, the appropriate parts can be inspected for damageand their suitability for reuse.B. Specific Steps1. Inspect the guide inside diameter for egging, and insure the inside surface issmooth. The threads on the outside must be in good condition to insure theadjusting ring/guide will adjust when the valve is hot. If serious, large scalegalling or ridges corresponding to the grooves in the disc are present, the partshould be replaced.2. Disc :The <strong>1511</strong> Consolidated Safety Valve is designed with a Flat Solid Disc (FSD) ineither a low pressure (LP) or high pressure (HP) version.(LP)Table 2Disc<strong>1511</strong>FSD(HP)14 | Dresser Consolidated ®
XIII.B. Continued<strong>1511</strong> Flat Solid Disc Machining DimensionsJHGFFigure 5: HP Flat Solid DiscTable 3a: Replacement CriteriaOrificeH min.J min.in. mm in. mmH 1.203 30.56 .366 9.30J 1.422 36.12 .411 10.44K 1.516 38.51 .443 11.25L 1.860 47.24 .475 12.07M 1.984 50.39 .599 15.21N 2.234 56.74 .661 16.79P 2.864 72.75 .770 19.56Q 3.672 93.27 .839 21.31Note: Once a minimum dimension is met,disc is to be discarded.Table 3b: Rework / Inspection DimensionsF +.002/-.003 in.Orifice (+0.05/-0.08 mm) (Note 1)Gin. mm in. mmH .028 0.71 .062 ± .007 1.57 ± 0.18J .028 0.71 .062 ± .005 1.57 ± 0.13K .028 0.71 .062 ± .007 1.57 ± 0.18L .028 0.71 .062 ± .007 1.57 ± 0.18M .028 0.71 .062 ± .007 1.57 ± 0.18N .028 0.71 .062 ± .007 1.57 ± 0.18P .039 0.99 .078 ± .007 1.98 ± 0.18Q .039 0.99 .107 + - .003.0022.72 + - 0.080.05Note 1: When (F) dimension is reduced to .015” (0.38 mm) forH – N orifices, or .026” (0.66 mm) for P – Q orifices,restore the dimensions indicated in Table 3b. Do notre-machine once minimum (H or J) dimensions arereached. Disc is to be discarded at this point.DC45 0N15 0Figure 6: LP Flat Solid DiscAll Orifices - 124 psig & belowTable 4: Rework Inspection Dimensions (Note 1)OrificeC D Nin. mm in. mm in. mmH 1.552 ± .005 39.42 ± 0.13 1.349 ± .002 34.26 ± 0.05 .053 ± .002 1.35 ± 0.05J 1.983 ± .005 50.37 ± 0.13 1.683 ± .002 42.75 ± 0.05 .056 + - .002.003 1.42 + - 0.050.08K 2.372 ± .005 60.25 ± 0.13 1.977 ± .002 50.22 ± 0.05 .079 ± .002 2.01 ± 0.05L 2.948 ± .005 74.88 ± 0.13 2.418 ± .002 61.42 ± 0.05 .096 ± .002 2.44 ± 0.05M 3.307 ± .005 84.00 ± 0.13 2.722 ± .002 69.14 ± 0.05 .102 ± .002 2.59 ± 0.05N 3.639 ± .005 92.43 ± 0.13 3.011 ± .003 76.48 ± 0.08 .111 ± .002 2.82 ± 0.05P 4.206 ± .005 106.83 ± 0.13 3.608 ± .003 91.64 ± 0.08 .116 ± .002 2.95 ± 0.05Q 5.795 ± .005 147.19 ± 0.13 4.682 ± .003 118.92 ± 0.08 .149 ± .002 3.78 ± 0.05Note 1: All other dimensions identical to values found in Tables 3a & 3b<strong>1511</strong> <strong>Series</strong> Safety Valve (July/2010) | 15
XIII.B. Continued3. Clearance between the disc and upper ring/guide:Measure the I.D. of the guide and the O.D. of thedisc; subtract to find the cold clearance.The maximum clearance should not be greater thanthe value indicated in Table 5. Greater clearances canindicate wear and can generate alignment problemsand cause the valve not to reseat properly.OrificeminTable 5: Allowable Clearance BetweenUpper Adjusting Ring and Disc (Note 1)ClearancemaxDisc OutsideDiameterUpper AdjustingRing (InsideDiameter)in. mm in. mm in. mm in. mmH .007 0.18 .014 0.36 1.905 48.39 1.919 48.74J .007 0.18 .014 0.36 2.445 62.10 2.459 62.46K .006 0.15 .013 0.33 2.930 74.42 2.939 74.65L .007 0.18 .014 0.36 3.638 92.41 3.652 92.76M .007 0.18 .014 0.36 4.079 103.61 4.093 103.96N .012 0.30 .019 0.48 4.483 113.87 4.502 114.35P .008 0.20 .017 0.43 5.448 138.38 5.465 138.81Q .010 0.25 .019 0.48 7.137 181.28 7.156 181.76Note 1: Once clearance exceeds table values, further inspection is required for the disc and upper adjusting ring.4. Adjusting rings:If damage is present on the lower surface of the upperadjusting ring, or on the upper surfaces of the loweradjusting ring, the damaged part must be replaced.Thread damage may also be a cause for replacement,if it prevents adjustments when the valve is heated.5. Bushing Seat:Seat bushings are normally treated as part of thevalve body and should be machined when necessary,inside the valve body. (See Seat Bushing MachiningInstructions, Section XIV.B.) When the “E” dimensionis reduced by machining or lapping to the minimumgiven in Table 6b, the valve seat bushing should beremachined to the given dimension. The bushingseat can be remachined until the limiting Dimension“G” is reached as per Table 6a. See instructionsconcerning the “G” dimension in Table 6b.The bushing seat must be lapped to a mirror finishto determine if they are flat and free of nicks, cutsand scratches. (See Section XIV.C. for LappingInstructions.)GETable 6a: Seat BushingReplacement CriteriaG minOrificein.mmH .960 24.38J .960 24.38BCK 1.210 30.73FL 1.398 35.51M 1.398 35.51N 1.523 38.68P 1.773 45.03Figure 7: Bushing SeatQ 2.210 56.1316 | Dresser Consolidated ®
XIV. ContinuedC. Lapping Procedures1. General:While the finer points of lapping may be considereda mechanical art, it is possible for the averagemechanic to produce satisfactory results with somepractice. No effort has been made in this manual toestablish an exact procedure to cover each and everycase because different people can achieve the sameresults using their own techniques.The following materials will be of assistance whenlapping bushing and/or disc seats:a. Two ring laps per valveb. 1-A Clover Grinding Compoundc. 1000 grit Kwik-Ak-Shun Grinding Compoundd. Lint free wipers for cleaning2. Lapping the seat bushing or Disc Seat:Before lapping the seat bushing and disc, use afine grade sandpaper to lightly break the inner edgeand outer edge of the bushing and disc seats.This chamfer should not exceed .002” (0.05mm).If the seating surfaces require extensive lapping orreconditioning, machining should be considered priorto lapping. See Inspection Section XIII.B for criteria.Cover one flat surface of a ring lap with a thin coatingof Clover 1-A Grinding Compound and gently set thelap on the seat surface. Thick coatings tend to roundoff edges of the seat. Lap using a slight oscillatingmotion in various directions. Control the motion of thelap to prevent the inside edge or outside edge of thelap from running off the seating surface, as this maycause the seat to become scratched or uneven.3. Polishing or Finish Lapping:Wipe off all used compound from the bushing ordisc. Then use a flat, reconditioned ring lap, andlight coating of Kwik-Ak-Shun 1000 Grit GrindingCompound to lap the seat. After lapping the seat forsome time, wipe off all grinding compound from thering lap (do not wipe off the compound on the bushingor disc seat). Using only the compound remaining onthe seat, and the clean ring lap, continue to lap untilit becomes difficult to move the ring lap on the seat.Again, wipe off the grinding compound from the ringlap only, and using the remaining compound on theseat continue to lap. The seating surface will becomemirror like as the grinding compound is further brokendown. Inspect the seat for cuts and scratches, repeatprocedures as necessary to eliminate damage.Once the seat surface is flat, clear and mirror-like,wipe all traces of grinding compound from the partand begin reconditioning the other seat. Do notplace the disc in a vice to accomplish lappingprocedures, as damage can occur to disc surfacesand distortion to the seating surface.D. Reconditioning a Ring LapTo recondition a ring lap, use Clover 1-A Compound onthe lapping plate, and move the ring lap in a “figure 8”motion as shown in Figure 9. Continue lapping until allindications of wear (on both sides), are removed from thering lap and a uniform grey surface is achieved. The ringlap is ready to use on the next valve. A lap that is flatwithin one light band is considered satisfactory for use.Information on the monochromatic light and optical flat isavailable upon request from the Dresser Consolidated ®Field Service Department.Lapping PlateRing LapFigure 9<strong>1511</strong> <strong>Series</strong> Safety Valve (July/2010) | 19
XIV. ContinuedE. Spindle RunoutIt is important that the spindle be kept very straight inorder to transmit the spring force to the disc without lateralbinding. Overgagging is one of the common causes ofbent spindles. A method to check the essential workingsurfaces of the spindle is illustrated in Figure 10 below.AATable 7: Spindle Critical DimensionsC maxOrificein.mmH .004 0.10J .004 0.10K .007 0.18L .007 0.18M .007 0.18N .007 0.18P .007 0.18Q .007 0.18F. Spring and Spring WashersCB45 0Figure 10: Spindle Check StandUsing a spindle check stand (see Figure 10 as a reference),place the ball end of the spindle into a depression at thebase “B” of the stand. Lean the upper portion of thespindle against the “V” block. It should be touching thespindle just below the threads on the upper portion of thespindle. Using a machinists indicator on a 45° angle atspindle shoulder "C", rotate the spindle and read the TotalIndicator Run out on the indicator. If the TIR is less thanvalues shown in Table 7, the spindle may be returned toservice. If the TIR is greater than these values, straightenthe spindle using "V" blocks and a hydraulic press untilthe TIR is found to be acceptable.Other parts of the spindle not used as working surfacesmay run out considerably more than .007” (0.18 mm), butthis should not be regarded as unacceptable. Althoughthe upper thread end is not a working surface, excessivebending in this area could effect the accuracy of theDresser Consolidated ® Hydroset device, and/or theDresser Consolidated ® Electronic Valve Tester, if either ofthese devices is used to verify valve set pressure.Spring wire that is irregularly spaced, or the ends are notparallel, are sufficient causes for replacement. The springwashers are machined to fit the ends of the spring -there should be no more than a .030 inches clearancebetween the spring and the spring washer. If a spring isbadly damaged by corrosion (flaking, pitting, or reductionin wire diameter), replace the spring with the properspring. If the spring is unable to be identified contact theDresser Consolidated ® Field Service Department at (318)640-6055.G. Lift RestrictorOn <strong>1511</strong> valves with set pressures of 26 psig (1.79 barg)and below will have a Lift Restrictor installed on thespindle stem, located inside the spring. Measure to verifyminimum length for the appropriate orifice as per Table 8.If under the minimum length, replace the Lift Restrictor.Table 8: Lower Pressure Lift StopOrificeL minin.mmH 2.25 57.0J 2.25 57.0K 3.50 88.8L 3.50 88.8M 3.50 88.9N 3.50 88.9P 3.94 100.0Q 5.00 127.020 | Dresser Consolidated ®
XV. ReassemblyDuring reassembly, three items are of extreme importance.They are:1) Alignment2) Cleanliness3) LubricationTo achieve the correct alignment, the bearing surfacesof the compression screw/upper spring washer, spindle/lower spring washer and spindle to disc pocket shouldeach be ground together to attain a perfect match. Thisis done by applying a lapping and grinding compoundof about 500 grit on one of the surfaces and rubbingthem together until a smooth unbroken contact point isestablished on both surfaces.All bearing surfaces and threaded areas must be lubricatedusing a high quality high temperature lubricant. At thefactory, Nickel-Ease is used and is recommended. Forenvironments where corrosion is a problem, contact thefactory field service department for suggestions on specialcoating or plating procedures which will protect the parts.1. Thread the lower ring onto the seat bushing and turn itdown until it is below the seating surface. (This allowsthe disc to rest on the bushing without interferencefrom the ring).2. Thread the upper ring/guide into the valve bodyreestablishing its original relationship to the bushing,as measured in Section XII, Disassembly for Repair,step 2. Insert the upper adjusting ring pin into thevalve and tighten. The ring should now be able torock back and forth but not turn. If position is notknown, refer to Section XI.3. After inspecting both the disc and bushing seat forcleanliness, thread the spindle into the disc andinsert the disc gently into the valve until it rests on thebushing.4. Place the spring and spring washers onto the spindle.5. Place the yoke over the spindle and replace the capscrews or nuts. Care must be taken to tighten the yokedown evenly to prevent distortion and misalignment.6. Thread the compression screw into the yoke,reestablish the original relationship betweencompression screw and spindle, as measured inSection XII, Disassembly for Repair, Step 6. Thentighten the compression screw lock nut.7. Raise the lower ring until it contacts the disc thenlower it the number of notches needed to reestablishits original relationship to the disc, as measured inSection XII, Disassembly for Repair, step 2. Threadthe lower adjusting ring pin into the body and tighten.The ring should be free to rock back and forth but notturn. If position is not known, refer to Section XI.8. Thread the release nut onto the spindle and replacethe cap, lever and lever pin. Adjust the release nut sothere is from 0.125” (3.18 mm) to 0.063” (1.59 mm)clearance between the release nut and lever. Removethe lever pin, lever and cap, replace the lock nutor cotter pin, and tighten it against the release nut.Replace the cap, lever, lever pin and cotter pin andtighten the set screw. The valve is now ready forsetting and testing.XVI. Steam Testing Procedures1. Remove the caps on all valves to be set on the steamdrum and main steam line, or other pressure vessel.2. Install a “verified calibrated” pressure gauge on thedrum near the valves being set. When the main steamline valves are to be set, install the calibrated guageto read line pressure upstream of the valves to betested.3. After the pressure in the boiler has increased to 80%of the operating pressure, install gags on all valvesexcept the high set valve. Gags should be installedhand tight (no wrenches or mechanical force).4. Examine the nameplate on the high set valve. Thesymbol that is present on the nameplate will indicatethe proper standard of operation, as described inTable 9.During reassembly, the adjusting rings andcompression screw should be reset as they wereprior to disassembly. (If the correct adjusting ringspositions are not known, the adjusting rings shouldbe preset according to instructions in Section XI)Before attempting to make ring adjustments on avalve under pressure, gag the valve.<strong>1511</strong> <strong>Series</strong> Safety Valve (July/2010) | 21
XVI. ContinuedASME Boiler andPressure VesselCode Section andSymbolVCODE SYMBOLSTAMPASME Section IUVCODE SYMBOLSTAMPASME Section VIIITable 9Set Pressure Tolerance (The valve must“POP” open within the range indicatedbelow.)If valve set pressure is less than or equal to70 psig (4.83 barg):±2 psig (±0.14 barg)If valve set pressure is 71 psig (4.9 barg) upto and including 300 psig (20.68 barg):±3% of set pressureIf valve set pressure is 301 psig (20.75 barg)up to and including 1000 psig (68.95 barg):±10 psig (±0.69 barg)If valve set pressure is 1001 psig (69.02barg) or greater±1% of set pressureIf valve set pressure is less than or equal to70 psig (4.83 barg):±2 psig (±0.14 barg)If valve set pressure is 71 psig (4.9 barg) orgreater±3% of set pressureBlowdown RequirementsAfter opening, the valve must reclosewithin a range of 98% to 96%, however,if the valve set pressure is 100 psig(6.9 barg) or less the valve must reclosewithin a range of 2 to 4 psig (0.14 to 0.28barg) below set pressure.After opening the valve must reclosebefore the system pressure returns tonormal operating pressure.DRESSER RECOMMENDS THAT THE MAXIMUM OPERATING PRESSURE NEVER EXCEEDS 94% OF THE SETPRESSURE OF <strong>1511</strong> SERIES SAFETY VALVE.5 When presetting is complete, remove the gag andreplace the cap and lifting lever assembly. Attach arope to the lever and stand by to hold the valve openif necessary. Now the valve is ready to test.6. Increase the boiler pressure at a rate not to exceed2 psi (0.14 bar) per second. Note and record thepressure indicated on the pressure guage when thevalve pops open. After the valve pops open, reducethe fire in the boiler and lower the pressure until thevalve closes. Note and record the pressure when thevalve closes.7. Determine if the valve popping point and reseatingpoint comply with the ASME requirements.a. If the valve operation meets the appropriatestandard, raise the pressure in the boiler andconduct two more verification tests.b. If in raising the boiler pressure, the valve doesnot pop open within 3% overpressure (for ASMESection I valves), or 10% overpressure (for ASMESection VIII valves), reduce the fire in theboiler and pull the rope to open the valve.Release the rope and allow the valve to closewhen the boiler pressure returns to operatinglevel. Allow the boiler to reduce to approximately85% of the set pressure. Remove the cap andlifting lever assembly from the valve, and turn thecompression screw lock nut counter-clockwise(as viewed from the top of the valve) until it movesfreely. Reduce the compression in the spring byturning the adjusting screw counter clockwiseone turn (as viewed from the top of the valve).Replace the cap and lifting lever and retest thevalve. Continue repeating this procedure untilthe valve opens at, or below, the set pressurerecorded on the nameplate.c. If the valve opens at a pressure below therecorded set pressure, allow the valve to closeand the boiler pressure to reduce to 85% of setpressure. Increase the compression on the springby turning the compression screw clockwise1/6th of a turn. Tighten the adjusting screw locknut and replace the cap and lifting lever assembly.22 | Dresser Consolidated ®
XVI. ContinuedRetest the valve as described in Step 6. If thevalve continues to open below the required setpressure, calculate how many turns to move theadjusting screw to cause the valve to open at thecorrect set pressure. Adjust as necessary.d. If the valve opens and closes rapidly, (called“chattering”) hold the valve open to preventdamage to the valve. Reduce the fire in theboiler and allow the boiler pressure to reduce toapproximately 85% of the set pressure. Gag thevalve, and reset the adjusting rings according topresetting instructions, (see Section XI).e. If the valve indicates simmer at a pressure greaterthan 1% of the set pressure of the valve, allow thevalve to reseat and the boiler pressure to reduceto 85% of set pressure. Gag the valve to preventaccidental lifting while making adjustments.Remove the lower adjusting ring pin and raisethe lower adjusting ring. As viewed through thering pin hole, move the adjusting ring from leftto right one or two notches. Remove the gag,retest and note when simmer occurs and repeatas necessary.NOTE: The lower adjusting ring should be adjusted tothe notch that provides a minimum of simmerand does not interfere with the blowdown of thevalve.f. If the valve “pops” open then drops out of lift, likeit was going to close, but remains open at a verylow lift, this is called a “hang up” and indicatesthat the position of the lower adjusting ring isinterfering with the blowdown of the valve. Tocorrect a hang up, gag the valve, remove thelower ring pin and lower the adjusting ring onenotch (as viewed through the ring pin hole, movethe adjusting ring from the right to the left to lowerthe adjusting ring). Remove the gag, retest andnote the reseating pressure of the valve it shouldclose sharply at a higher pressure.g. If the valve closes sharply but the reseatingpressure is too low in comparison to the standardin Table 9, blowdown is excessive. Gag thevalve, remove the upper ring pin, raise theupper adjusting ring 10 notches, replace the ringpin, remove the gag and retest the valve. If thereseating pressure has not risen enough to meetthe blowdown standard, repeat the procedureuntil the blowdown standard is achieved.NOTE: It may be possible that in raising the upperadjusting ring to reduce the blowdown, the valvemay develop a hang up, correct it as describedin Step f. above, and then continue if necessaryto reduce the blowdown.h. If the blowdown is less than the standardrequired, the reseating pressure can be loweredby gagging the valve, removing the upper ringpin and lowering the upper adjusting ring 10notches (as viewed through the ring pin hole,move the adjusting ring from the right to the left.)Remove the gag, replace the adjusting ring pinand retest the valve. If the reseating pressureis not reduced enough to meet the standard,repeat this procedure until the standard isachieved. The upper adjusting ring should bepositioned to provide no more blowdown thanthat indicated in Table 9.8. Once the valve has tested in compliance withthe appropriate standard, conduct two moreverification tests. All external adjustments shouldbe sealed after completing final setting.9. Proceed to the next valve to be tested.XVII. Electronic Valve Testing (EVT)Periodic tests may be required for verification of valve setpressure. The Dresser Consolidated ® EVT provides forthis capability. However, set pressure is the only factorwhich can be verified. Valves should be initially set usingfull system pressure (as outlined in Section XVI.). The EVTmay be used for subsequent checks of set pressure.Accuracy of results obtained by the use of this devicedepends on several factors. First, friction must be reducedas a source of error so that, for a given pressure, theEVT repeatedly produces exactly the same lifting force.Second, gauge calibration and vibration, and the effectiveseating area between valves of the same size and type,will also affect accuracy. With well calibrated gauges andvalve seats in good condition, accuracy on the order of1% of set pressure may be expected. Upon request,Dresser Consolidated ® will provide pertinent writtenmaterial concerning the EVT. This material specifies allrequired information necessary to insure proper usage ofthis device.<strong>1511</strong> <strong>Series</strong> Safety Valve (July/2010) | 23
XVIII. Trouble Shooting The <strong>1511</strong> ValvesProblem Possible Cause Corrective ActionValve does not go A. Upper ring positioned too high A. A. Lower upper adjusting ringinto full lift.B. Foreign material trapped between discholder & guideB. Disassemble valve and correct anyabnormality. Inspect system forcleanliness.Failure to openat set pressureSimmerA. Improper compression screwadjustmentA. Adjust set pressureB. Lower ring positioned too low. B. Raise lower adjusting ringValve Leakingand/or exhibitserratic poppingactions.C. Steam line vibrations C. Investigate and correct causeA. Damaged seat A. Disassemble valve, lap seatingsurfaces, replace disc if required.B. Part misalignment B. Disassemble valve, inspect contactarea of disc and seat bushing, lowerspring washer or spindle, compressionscrew, spindle straightness, etc.C. Operating too close to set pressure C. Lower operating pressure.D. Discharge stack binding on valve outlet D. Correct source of bindingHang-up, or valvedoes not closecompletely.ExcessiveblowdownChatter or shortblowdownA. Lower ring positioned too high A. Move lower ring to the left one notchper adjustment and test. Repeat untilproblem is eliminated.B. Foreign material B. Disassemble valve and correct anyabnormal condition. Inspect system forcleanliness.C. Improper disc/guide clearance C. Verify proper clearanceA. Upper ring positioned too low. A. Raise upper adjusting ringB. Built up back pressure excessive B. Decrease exhaust pressure byincreasing discharge stack area.A. Upper ring positioned too high A. Lower upper adjusting ringB. Excessive inlet piping pressure drop B. Reduce inlet pressure drop to less thanone-half of required valve blowdown byredesigning inlet piping.C. Valve size improper for application C. Verify valve sizing24 | Dresser Consolidated ®
XIX. <strong>Maintenance</strong> Tools and SuppliesTable 10: <strong>Maintenance</strong> Tools and SuppliesRing LapsValve Orifice Part No. Valve Orifice Part No.F 1672805 M 1672810G 1672805 N 1672811H 1672806 P 1672811J 1672807 Q 1672812K 1672808L 1672809Brand Grade GritLapping CompoundsLappingFunctionLubricantsSize ContainerPart No.1. Clover 1A 320 General 4 oz. 19932. Clover 3A 500 Finishing 4 oz. 19943. Kwik-AK -- 1000 Polishing 1 lb. 19911- Shun 2 oz. 19912Brand Application Points Size Container Part No.NickelEaseAll threaded connections 2 oz. VA437Spindle Tip-Ball EndSpindle-Washer Bearing RadiusCompression Screw-Bearing End<strong>1511</strong> <strong>Series</strong> Safety Valve (July/2010) | 25
XX. Service Parts Inventory PhilosophyThe basic objectives in formulating a replacement parts plan are:• PROMPT AVAILABILITY• MINIMUM DOWNTIME• SENSIBLE COST• SOURCE CONTROLGuidelines for establishing meaningful inventory levels:Parts ClassificationPART CLASSIFICATION REPLACEMENT FREQUENCY PREDICTED AVAILABILITYCLASS I MOST FREQUENT 70%CLASS II LESS FREQUENT BUT CRITICAL 85%CLASS III SELDOM REPLACED 95%CLASS IV HARDWARE 99%CLASS V PRACTICALLY NEVER REPLACED 100%Consult the Recommended Spare Parts list (see Section XXI) to define the parts to be included in the inventory plan.Select parts and specify quantities.26 | Dresser Consolidated ®
XXI. Recommended Spare PartsTable 11: Recommended Spare PartsClassPart No.(Note 1)Part NameRatio Parts/Valves (Minimum)Ratio Parts/Valves (Maximum)PredictedAvailabilityIIIIIIIV3 Disc 1/3 1/15 Adj. Ring Pin (Lower) 1/3 1/17 Adj. Ring Pin (Upper) 1/3 1/14 Adj. Ring (Lower) 1/5 1/36 Adj. Ring (Upper) 1/5 1/310 Spindle 1/5 1/32 Seat Bushing 1/5 1/311 Spring Washers (2) 1 Set/5 1 Set/312 Spring 1/5 1/313 Compression Screw 1/5 1/39 Yoke Cap Screws 1/5 1/314 Compression Screw Nut 1/5 1/315 Cap 1/5 1/316 Cap Set Screw 1/5 1/317 Lever 1/5 1/318 Release Nut 1/5 1/319 Lever Pin 1/5 1/320 Spring Cover 1/5 1/321 Cover Bolt 1/5 1/322 Cover Nut 1/5 1/323-26 Cap & Lifting Lever Assembly 1/5 1/327 Floating Washer 1/5 1/328 Lift Stop 1/5 1/329 Spindle Locknut 1/5 1/370%85%95%99%Note 1: Refer Figure 1 for the part numbers and their corresponding parts.DESIGN CODE KEY:FSD - Flat Solid Design is designated by a “-20” in the valve code on the nameplate (example: 1 1/2” <strong>1511</strong>H-0-2-20).<strong>1511</strong> <strong>Series</strong> Safety Valve (July/2010) | 27
XXII. Identification and Ordering EssentialsIdentification and Ordering EssentialsWhen ordering service parts, please furnish the followinginformation to ensure receiving the correct replacementparts:Identify valve by the following nameplate data:1. Size2. Type3. Temperature Class4. Serial NumberExample: 1 1/2” <strong>1511</strong>H-0-2-20BY-23098Specify parts required by:1. Part Name (See illustration at front of manual).2. Part Number (if known)3. QuantityContact Parts Marketing: 1-318-640-2250In addition, the serial number is stamped on the top edgeof the outlet flange. Be sure to include the one or twoletters preceding the figures in the serial number. A typicalvalve nameplate is shown in Figure 11.TYPECAP.B/MC O N S O L I D A T E DCERTIFIEDBYALEXANDRIA, LOUISIANA U.S.A.<strong>1511</strong>H-0-2-20SERIALSIZE 1 1/2 NO. BY-23098SETPRESS. 600 PSI LIFT .32036763LBS/HR. AT9403401DATEIN.SAT.7-10NB•FFigure 11: Valve NameplateXXIII. Manufacturer’s Field Service & Repair ProgramA. Factory Setting vs. FieldSettingEvery Consolidated ® Safety Valve is set and adjustedon steam before shipment from the factory. Ringadjustments are made at the factory. However, it mustbe recognized that actual field operating conditions mayvary considerably from factory test conditions.Conditions beyond the manufacturer’s control that affectSafety Valve operation include:• Improper header nozzle design• Quality of media being discharged• Discharge piping stresses and back pressure• Ambient temperature• Shipping or storage damage• Improper gagging• Damage due to foreign material in the steamFinal Safety Valve adjustments made on the actualinstallation are the best means of ensuring that the valvesperform in compliance with the ASME Boiler Code and/or other applicable code requirements.28 | Dresser Consolidated ®
XXIII. ContinuedB. Field ServiceUtilities and Process Industries expect and demandservice at a moment’s notice. Consolidated ® FieldService can be depended upon for prompt response,even in extreme off-hour emergency situations.Dresser Consolidated ® maintains the largest and mostcompetent field service staff in the industry. ServiceEngineers are located at strategic points throughout theUnited States to respond to customer’s requirementsfor service. Each Service Engineer is factory trained andlong experienced in servicing Safety Valves. DresserConsolidated ® Service Engineers restore disc and seatbushing critical dimensions which affect valve performance,and are capable of modernizing valves in the field.It is highly recommended that the professional talentsof a Dresser Consolidated ® Field Service Engineer beemployed to make final field adjustments during the initialsetting of all Consolidated ® Safety Valves.All Field Service Engineers’ activities are coordinatedfrom the Alexandria, Louisiana, Field Service Office. Uponreceipt of a purchase order number authorizing the trip,the engineer is dispatched.Reference: www.consolidatedvalve.com to locate yourlocal Field Service representative.C. Factory Repair FacilitiesThe factory at Alexandria, Louisiana maintains aConsolidated ® Repair Center. The repair department, inconjunction with the manufacturing facilities, is equippedto perform specialized repairs and product modifications,e.g. bushing replacements, hydroset calibrations,electromatic relief valve repairs, etc.Contact: Valve Repair Department at (318) 640-6057.XXIV. Safety Valve <strong>Maintenance</strong> TrainingRising costs of maintenance and repair in the Utilityand Process Industries indicate the need for trainedmaintenance personnel. Dresser Industrial ValveOperation conducts service seminars that can help yourmaintenance and engineering personnel to reduce thesecosts.Seminars, conducted either at your site, or at ourAlexandria, Louisiana manufacturing plant, provideparticipants with an introduction to the basics ofpreventative maintenance. These seminars help tominimize downtime, reduce unplanned repairs andincrease valve safety. While they do not make “instant”experts, they do provide the participants with “HandsOn” experience with Consolidated Valves. The seminaralso includes valve terminology and nomenclature,component inspection, trouble shooting, setting andtesting, with emphasis on the ASME Boiler and PressureVessel Code.For further information, Please contact the ProductTraining Manager by fax at (318) 640-6325, ortelephone (318) 640-6054.XXV. Genuine Dresser PartsThe next time replacement parts are needed, keepthese points in mind:• Dresser Consolidated ® designed the parts• Dresser Consolidated ® guarantees the parts• Consolidated valve products have been inuse since 1879• Dresser Consolidated ® has worldwide service• Dresser Consolidated ® has fast responseavailability for parts<strong>1511</strong> <strong>Series</strong> Safety Valve (July/2010) | 29
Sales Office LocationsUNITED STATESDresser Consolidated ®Dresser, Inc.LA Hwy. 3225 @ US Hwy. 167NP.O. Box 1430Alexandria, LA 71309-1430Telephone: + (1) 318 640 2250Fax: + (1) 318 640 6325Dresser Consolidated ® Headquarters10343 Sam Houston Park DriveSuite 210Houston, TX 77064Telephone: +(1) 281 671 1640Fax: +(1) 281 671 1735Dresser Direct1250 Hall CourtDeer Park, TX 77536Telephone: + (1) 281 884 1000Fax: + (1) 281 884 1010Dresser Direct905A Industrial RoadClute, TX 77531Telephone: + (1) 979 265 1309Fax: + (1) 979 265 2514Dresser Direct4841 Leopard StreetCorpus Christi, TX 78408Telephone: + (1) 361 881 8182Fax: + (1) 361 881 8246BRAZILDresser Industria E Comercio LtdaRod. Presidente Dutra, KM 154, 7Predio 18 - Pq Industrial CEP 12240-420San Jose dos Campos, Sau Paulo, BrazilTelephone: + (55) 11 2146 3600Fax: + (55) 11 2146 3610CHINADresser Machinery (Suzhou) Co., Ltd.81, Suhong Zhong RoadSuzhou Industrial ParkSuzhou, P.R. China 215021Telephone: + (86) 512 6258 6500Fax: + (86) 512 6258 8590Dresser, Inc.Suite 1703, Capital Mansion6 Xinyuan S. Road, Chaoyang DistrictBeijing 100004 P.R. ChinaTelephone: + (86) 10 8486 4515Fax: + (86) 10 8486 5305FRANCEDresser Flow Technology EuropeEnergy 5 - 130/190 Bd de Verdun92413 Courbevoie Cedex, FranceTel: + (33) 1 49 04 90 00Fax: + (33) 1 49 04 90 10GERMANYDresser Valves Europe GmbHHeiligenstrasse 7541751 Viersen, GermanyTel: + (49) 2162 8170 0Fax: + (49) 2162 8170 280INDIADresser Valve India Pvt. Ltd.305/306, “Midas”, Sahar PlazaMathuradas Vasanji RoadJ B Nagar, Andheri East, Mumbai, India 400 059Telephone: + (91) 22 2 835 4790 / 838 1134Fax: + (91) 22 2 835 4791ITALYDresser Italia S.r.l.Via Cassano 7780020 Casavatore (Naples), ItalyTelephone: + (39) 081 7892 111Fax: + (39) 081 7892 308JAPANDresser Japan,Ltd. (DJL)20th Floor Marive East TowerWBG 2-6 NakaseMihama-ku Chiba-shiChiba 261-7120 JapanTelephone: + (81) 43 297 9211Fax: + (81) 43 299 1115KOREADresser Korea, Inc.Hyundai Swiss Tower, 17 Floor143-40, Samsun-don Kangham-kuSeoul 135-090, KoreaTelephone: + (82) 2 2274 0748Fax: + (82) 2 2274 072030 | Dresser Consolidated ®
Sales Office LocationsMALAYSIADresser, Inc.Asia Pacific HeadquartersBusiness Suite 19A-9-1, Level 9UOA Centre, No. 19 Jalan Pinang50450 Kuala Lumpur, West MalaysiaTelephone: + (60) 3 2161 0322Fax: + (60) 3 2163 6312MEXICODresser De Mexico S.A. de C.V.Henry Ford #114 Esq. FultonFraccionamiento Industrial San NicolasC.P. 54030 Tlalnepantla, Estado de MexicoTelephone: + (52) 55 5310 9863Fax: + (52) 55 5310 4279THE NETHERLANDSDresser Valves Europe GmbHSteenhouwerstraat 11NL-3194 AG Hoogvliet, The NetherlandsTelephone: + (31) 10 866 6538Fax: + (31) 79 361 8995RUSSIADresser EuropeDerbenevskaya Ulitsa 1, Bldg. 3, Office 17Moscow, Russian Federation 115 114Telephone: + (7) 4955 851276Fax: + (7) 4955 851279SAUDI ARABIADresser Al Rushaid Valve & Inst. Co. Ltd.(DARVICO)P. O. Box 10145Jubail Industrial City 31961Kingdom of Saudi ArabiaTelephone: + (966) 3 341 0278Fax: + (966) 3 341 7624SINGAPOREDresser Singapore, Pte. Ltd.Dresser Flow Solutions16 Tuas Avenue 8Singapore 639231Telephone: + (65) 6861 6100Fax: + (65) 6861 7197SOUTH AFRICADresser International, Ltd., South Africa BranchDresser Flow SolutionsP. O. Box 2234, 16 Edendale RoadEastleigh, Edenvale 1610Republic of South AfricaTelephone: + (27) 11 452 1550Fax: + (27) 11 452 2903SPAINDresser Italia S.r.l.Via Cassano 7780020 Casavatore (Naples), ItalyTelephone: + (39) 081 7892 111Fax: + (39) 081 7892 308SWITZERLANDDresser Valves Europe GmbHWindenboden 23CH-6345 Neuheim, SwitzerlandTelephone: + (41) 41 755 27 03Fax: + (41) 41 755 28 13UNITED ARAB EMIRATESDresser International, Inc. - Middle East OperationsP. O. Box 61302R/A 8, Blue Sheds JA01 & JA02,Jebel Ali Free ZoneDubai, United Arab EmiratesTelephone: + (971) 4 8838752Fax: + (971) 4 8838038UNITED KINGDOMDresser U.K. LimitedDresser HouseEast GillibrandsSkelmersdale, LancashireEngland WN8 9TU United KingdomTelephone: + (44) 1695 52600Fax: + (44) 1695 52601FOR YOUR GREEN TAG CENTER IN USA/CANADACALL 1-800-245-VALVor contact the locations listed above for international service.Dresser ® and Consolidated ® are registered trademarks of Dresser, Inc.Copyright 2007, Dresser, Inc.<strong>1511</strong> <strong>Series</strong> Safety Valve (July/2010) | 31
About Dresser ConsolidatedDresser Consolidated, headquartered in Houston,Texas, has been an international leader in dependablepressure relief valves and solutions for more than100 years. A business segment of Dresser, Inc., thecompany delivers the trusted expertise to provideand service reliable flow safety systems in criticalapplications around the world. www.dresser.comAbout Dresser, Inc.Dresser, Inc. is a leader in providing highly engineeredinfrastructure products for the global energy industry.The company has leading positions in a broad portfolioof products, including valves, actuators, meters,switches, regulators, piping products, natural gasfueledengines, retail fuel dispensers and associatedretail point-of-sale systems, and air and gas handlingequipment. Leading brand names within the Dresserportfolio include Dresser Wayne ® retail fueling systems,Waukesha ® natural gas-fired engines, Masoneilan ®control valves, Consolidated ® pressure relief valves, andRoots ® blowers. It has manufacturing and customerservice facilities located strategically worldwide and asales presence in more than 100 countries.Dresser, Inc.15455 Dallas ParkwayAddison, TX 75001T. 972 361 9800F. 972 361 9903www.consolidatedvalve.com© 2009 Dresser, Inc. All rights reserved.MM_<strong>1511</strong>