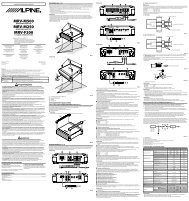
CDE-13xBT BT FW Update - Alpine Europe
CDE-13xBT BT FW Update - Alpine Europe
CDE-13xBT BT FW Update - Alpine Europe
- No tags were found...

Create successful ePaper yourself
Turn your PDF publications into a flip-book with our unique Google optimized e-Paper software.
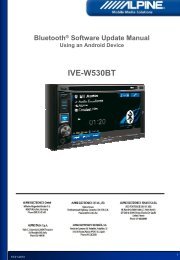
IntroductionThis manual describes the steps required for updating the Head Units Bluetooth firmware. Read allwarnings and steps carefully before performing the update.ImprovementsThe update improves the following points:• The Head Units compatibility will be improved from AVRCP1.3 to AVRCP1.4• Compatibility with new mobile phones.• iOS6 Bluetooth Audio - displaying the tag information on the Head Unit• iOS6 Bluetooth Audio - ability to control the iPhone‘s music player from the Head UnitRequirements• A Windows 7 computer with Bluetooth connectivity. This includes built-in Bluetooth adapters orexternal USB Bluetooth adapters.• The Bluetooth adapter must support File Transfer Profile (FTP).• The Bluetooth firmware update file (<strong>Alpine</strong> provided).• An internet connection during pairing process (automatic driver download)Caution• Do NOT update the Bluetooth firmware while driving.• Do NOT turn off the vehicle or remove power from the Head Unit while the unit isupdating. The update will not be performed correctly and the Head Unit may bedamaged.Notice• Updating will result in all user information being deleted, including user settings,paired devices, and phonebook contacts.• Please contact <strong>Alpine</strong> Technical Support of your country with any questionsconcerning the update process.Bluetooth Firmware <strong>Update</strong> InstructionsThe Bluetooth firmware update procedure uses a Bluetooth feature known as File Transfer Profile(FTP) to wirelessly transfer the update file from the PC to the Head Unit. This manual describes theupdate process performed using the Windows 7 operating system (Broadcom Bluetooth Stack andMicrosoft Bluetooth Enumerator).Downloading the Bluetooth Firmware <strong>Update</strong>Go to the <strong>Alpine</strong> homepage of your region to download the Bluetooth firmware updatefile to the computer that will be used to perform this update. You can find it at your local<strong>Alpine</strong> website at www.alpine-europe.com15.01.20132
Head Unit Setup Buttons IllustrationThe illustration shows the buttons that shall be used during theupdating procedure.This illustration is based on the<strong>CDE</strong>-133<strong>BT</strong> model. The button locations will be different onsome models. Please refer to the owner’s manual for yourspecific model.1. Preparing the Bluetooth ConnectionWARNING – Do not update the Bluetooth firmware while drivingTurn ON the Head Unit by setting the vehicles ignition to the Accessory (ACC) position.Confirm that the Head Units Bluetooth Hands-free and Audio Streaming connections are enabled.a) Enable Hands-free by pressing and hold the AUDIO/SETUP button for at least 2 seconds thenrelease.b) Use the rotary encoder to select "BLUETOOTH"> ENTER > "<strong>BT</strong> IN" > ENTER >"HFP" > ENTER > "ON" > ENTER (Fig. 1).The Head Unit will return to the "HFP" screen (Fig. 2).(Fig. 1).(Fig. 2)c) Enable Audio Streaming by using the rotary encoder to select"AUDIO" > ENTER > "ON" > ENTER (Fig.3).The Head Unit will return to the "Audio" screen (Fig. 4).(Fig. 3)(Fig. 4)d) Press the button to return to the setup menu in which "<strong>BT</strong> IN" is displayed (Fig. 5)(Fig. 5)15.01.20133
Confirm that the Head Units Bluetooth visible mode is ON.a)Use the rotary encoder to select "VISIBLE M" > ENTER > "VISI M ON" > ENTER (Fig. 6).The Head Unit will return to the "VISIBLE M" screen (Fig. 7).(Fig. 6)(Fig. 7)Confirm that no devices are paired to the Head Unit.a) Use the rotary encoder to select "PAIRED DEV" > ENTER (Fig.8)(Fig. 8)b) Use the rotary encoder to select the paired device then press ENTER >"CLEAR" > ENTER (Fig. 9). In this example the paired device name is ALPINE."NO DEV" will be displayed after the device is cleared (Fig 10).(Fig. 9)c) Repeat step 4 to clear any additional devices.Turn the Head Unit OFF then ON by setting the vehicles ignition to the OFF (LOCK) positionthen back to the Accessory (ACC) position.Power ON the computer.(Fig. 10)Confirm that the Bluetooth Adapter is turned on orplugged into the computer. The Bluetooth icon ora similar notification should be displayed on the taskbar when the adapter is enabled (Fig. 11).(Fig. 11)15.01.20134
2. Creating a Bluetooth Pairing between the PC and Head UnitFrom the Windows 7 task bar select "Start"Printers" (Fig. 12).> "Control Panel" > "Devices and(Fig. 12)Select "Add a Device" (Fig. 13).(Fig. 13)The "Add a device" window will open and Windows will start to search for devices (Fig. 14).Select the device "<strong>Alpine</strong> CD Receiver" in the "Add a device" window (Fig. 14).(Fig. 14)Select "Next" on the "Add a new device" window to start the pairing (Fig. 14).15.01.20135
The Head Unit will immediately display "PAIRING" followed by "PAIR NO" (Fig. 15).(Fig. 15)Turn the rotary encoder to select "PAIR YES" then press ENTER (Fig. 16)."CONNECTING" will start to flash on the Head Unit (Fig. 17).(Fig. 16)(Fig. 17)Wait a few moments until "CONNECTED" is displayed on the Head Unit (Fig. 18).This indicates that the Bluetooth connection is successful paired.(Fig. 18)Select Close on the "Add a device" window (Fig. 19).Return to the "Devices and Printers" window.(Fig. 19)15.01.20136
Right click on the device named "<strong>Alpine</strong> CD Receiver" then select "Properties"(Fig. 20)(Fig. 20)If the window was closed select Start > Control Panel > Devices and Printers.The <strong>Alpine</strong> CD Receiver Properties window will open (Fig. 21).Select the "Services" tab (Fig. 21).(Fig. 21)Confirm that "Headset service" is NOT checked and that all other services are checked, asdisplayed below (Fig. 22).(Fig. 22)Select "OK" to accept the changes and close Properties window (Fig. 22).15.01.20137
Use the rotary encoder to select "BLUETOOTH" > ENTER > "<strong>FW</strong> UPDATE" >ENTER (Fig 26)."UPDATE NO" will be displayed on the Head Unit (Fig. 27)(Fig. 26)(Fig. 27)Turn the rotary encoder to select "UPDATE YES" then press ENTER (Fig. 28)."WAITING" will appear on the display (Fig. 29).(Fig. 28)(Fig. 29)On the computer open the folder containing the Bluetooth update firmware(named: FC6000S_01-27-00.plf).Drag-and-drop the update firmware file (named: FC6000S_01-27-00.plf) into the"update" folder (which you opened in Step 3) (Fig. 30).(Fig. 30)The update file will now be copied to the Head Unit.Note: The copy process will take approximately 30 seconds to complete.(Fig. 31)Make sure that the file is copied completely by viewing the copy progress bar on the computer. (Fig. 31)If the update file was NOT copied successfully please refer to Page 10 of this manual under the sectiontitled "4. In case of problems...".15.01.20139
The Head Unit will display "FIRMWARE UPDATE DON’T TOUCH ANY BUTTON" whilethe firmware is being updated.Even though the progress bar is completed after 30 seconds, the update can take up to 5 minutes. Pleasedo not interrupt the update process.After the update has successfully finished, the Head Unit will display"FIRMWARE UPDATED PLEASE PRESS ANY BUTTON".Push the button on the Head Unit to exit update mode.Close the Bluetooth Device Control menu on the computer.Turn the Head Unit OFF then ON using the vehicles ignition switch. This will finalise theupdate process.3. Confirming the updateOn the Head Unit press and hold the AUDIO/SETUP button for at least 2 seconds.Use the rotary encoder to select"BLUETOOTH" > ENTER > "<strong>FW</strong> VERSION" > ENTER (Fig. 32).(Fig. 32)Confirm that the version displayed is "01.27.00" (Fig. 32).4. In case of problems...This alternative update method might be necessary if the previously described procedure doesnot work. Following cases might be relevant depending on your OS/Hardware combination:• The update file cannot be copied completely• The update file was copied too quick (usually 2-5 seconds)• FIRMWARE UPDATE DON’T TOUCH ANY BUTTON never disappears• After the update was finished, <strong>BT</strong> Version is still the old one.Pair and connect the Head Unit and the Computer, following all instructions, up to page 7,step 1315.01.201310
4. In case of problems...Double click "<strong>Alpine</strong> CD Receiver" in the "Devices and Printers" window to open the BluetoothDevice Control menu (Fig. 33).(Fig. 33)Click once on <strong>Alpine</strong> CD Receiver headset icon in the Bluetooth Device Control window (Fig. 34).(Fig. 34)A Window will open containing 2 folders named "recorder" and "update" (Fig. 35).(Fig. 35)Open the "update" folder.15.01.201311
4. In case of problems...Select Disconnect on the Bluetooth Device Control menu (Fig. 36).(Fig. 36)"(Disconnected)" will be displayed below <strong>Alpine</strong> CD Receiver (Fig. 37).(Fig. 37)On the Head Unit press and hold the AUDIO/SETUP button for at least 2 seconds to open thesetup menu.Use the rotary encoder to select"BLUETOOTH" > ENTER > "<strong>FW</strong> UPDATE" > ENTER (Fig. 38)."UPDATE NO" will be displayed on the Head Unit (Fig. 39)(Fig. 38)(Fig. 39)Turn the rotary encoder to select "UPDATE YES" then press ENTER (Fig. 40)."WAITING" will appear on the display (Fig. 41).(Fig. 40)(Fig. 41)On the computer select "Connect" on the Bluetooth Device Control menu (Fig. 44).Now follow the update instructions, according to this manual, Page 9 step 8.15.01.201312