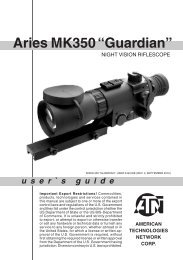
User Guide - ATN night vision
User Guide - ATN night vision
User Guide - ATN night vision
- No tags were found...

Create successful ePaper yourself
Turn your PDF publications into a flip-book with our unique Google optimized e-Paper software.
Tackling Domestic Violence: effective interventions and approaches.Parmar, A., Sampson, A. and Diamond, A. (2005) Tackling Domestic Violence: providing advocacyand support to survivors of domestic violence. Home Office Development and PracticeReport No. 34. London: Home Office.Parmar, A., Sampson, A. and Diamond, A. (2005) Tackling Domestic Violence: providing advocacyand support to survivors of domestic violence from Black and other minority ethniccommunities. Home Office Development and Practice Report No. 35. London: Home Office.Taket, A., Beringer, A., Irvine, A. and Garfield, S. (2004) Tackling Domestic Violence: exploring thehealth service contribution. Home Office Online Report No. 52/04. London: Home Office.Taket, A. (2004) Tackling Domestic Violence: the role of health professionals. Home OfficeDevelopment and Practice Report No. 32. London: Home Office.Rape and sexual assaultKelly, L., Lovett, J. and Regan, L. (2005) A gap or chasm? Attrition in reported rape cases. HomeOffice Research Study No. 293. London: Home Office.Lovett, J., Regan, L., Kelly, L. (2004) Sexual Assault Referral Centres: developing good practiceand maximising potentials. Home Office Research Study No. 285. London: Home Office.Regan, L., Lovett, J., Kelly, L. (2004) Forensic nursing: an option for improving responses toreported rape and sexual assault. Home Office Online Report No. 28/04. London: HomeOffice.Regan, L., Lovett, J., Kelly, L. (2004) Forensic nursing: an option for improving responses toreported rape and sexual assault. Home Office Development and Practice Report No. 31.London: Home Office.Skinner, T. and Taylor, H. (2005) Providing counselling, support and information to survivors ofrape: an evaluation of the Surviving Rape and Trauma After Rape (STAR) young persons'project. Home Office Online Report 51/04. London: Home Office.ii
The IR-450 illuminator has a control panel withtwo buttons. To switch the IR illuminator on/offpress “+” and “-” buttons simultaneously. Whenthe IR illuminator is switched on you can seethe green LED lit on the back side of IR450. Bypushing the buttons “+” and “-” you may adjustthe IR brightness.The IR beam is focusable to change the fieldof coverage. To change the beam width slightlyturn the IR lens. You may need adjust the focusingof the IR beam to change the field of coverage.Do it by slightly rotating the IR lens. TheWindagewindage and elevation screws help adjust theScrewing-on Capdirection of the IR beam from the IR450 in orderto focus on the scene observed in the viewfinder of your NVD. Use the included Allen wrenchto rotate the adjusting screws until the IR beam is centered. Please remember the adjustmentsshould be performed under <strong>night</strong> light conditions only.You can change the position of the IR control panel to meet your needs. The wrench that isincluded in the set, is used to loosen the nut located on the body of the IR. Rotate the IR to thedesired position. Tighten the nut with the wrench to secure the new position.OPERATION• Take the binoculars out of the case.• Install the batteries into the housing with the polarity order as shown on the binoculars. BatteryType: 3 Volt Lithium, #CR123A• Press the button marked -/O to turn unit on with the protective lens covers still attached tothe lenses. Do not turn unit on in the daytime without the protective lens caps on. Youshould see a green glow in the eyepieces.• Observe the scene, and adjust the diopters for the optimal image clarity.• You may now enter a dark environment or simply shut the lights off in order to darken theroom.• Next, remove the lens caps/daylight filters and observe the scene. You should readjust thediopters for maximum clarity. Remember the focus range of the binocular is 20’ to infinity.• The unit will turn on and off automatically when you bring it to or take away from your eyes.This is done by activating the proximity sensor. To activate the proximity sensor push the digitalcontrol marked “A”. You will notice the green LED change to red when the sensor is on.• In order to assure the proper functioning of the proximity sensor, make sure that the protectiveglass surface of the sensor is always clean. Adjust the digital features as needed.• To increase battery life the LED diodes will go off after 10 seconds.• Take your time learning about your “smart” binoculars. It will take practice to properly use thedevice. As you use these binoculars you will be able to improve your speed of focusing, aswell as sharpness of image.• Have fun and enjoy.CLEANING THE EYEPIECEIR Brightness AdjustmentBatteryElevationHousingIR FocusingYou may need to clean the eyepiece of the Night Scout from time to time in order to guaranteetop performance. When you receive your Night Scout you should check for dust on the eyepieceof the unit. First you will need to remove the eyepiece. To remove the eyepiece you willneed to initially loosen 2 set screws that can be found on the base. Then unscrew the eyepiececounter-clockwise to remove it.NOTE: You do not have to remove the set screws completely, they are very small and easy tomisplace.4
CAUTION: Use only Photographic lens cleaning tissue on these surfaces. Be careful not toscratch or smudge any of these surfaces. When using compressed air to blow dust away, makesure to avoid inverting the can while spraying. This may cause frozen propellent to exit the can,which can result in serious problems of the glass and phosphor screen.WARNINGS AND CAUTIONS• Always remember to turn off the Night Scout when it is not in use. If you do not plan on usingyour device for a period of more than 10 days, you should remove the batteries.• Keep lens cap/daylight filter on when not in use.• Avoid contact with dust, steam, and gas.• The Night Scout is not harmful to the user or the environment.• Do not disassemble except to clean the front lens and the eyepiece: it will void yourwarranty.• Evaluate the scopes function by looking through it in a lit environment with the daylight filterlens cap on. Never use in daylight without the daylight filter lens cap on. Do not surpass tenminutes of testing.• Never point the Night Scout at a bright light source. If the scope shuts off automaticallyafter directing it at a bright light source, turn the unit off and wait 1 - 2 minutes before turningthe unit back on.• Adverse atmospheric conditions such as fog, smog, or haze and a lack of ambient light(moon or starlight) may diminish the effective viewing distance. All technical data for this unitwas compiled in a controlled environment.• If you use the rubber eyecaps for a long period of time, you may suffer skin inflammation. Ifyou develop any symptoms, consult a doctor immediately.TROUBLESHOOTINGQ: Flashes, flickers, or clicking occur while operatingS: If it occurs within the first five minutes of inserting new batteries it is normal and the devicewill resume normal operation soon thereafter. If it occurs for more than 10 minutes contactyour dealer or other authorized service representative for service instructions.Q: Dark spots on screen.S: These are either cosmetic blemishes in the intensifier tube or dust particles. Dust particlescan be cleaned following instructions in “Cleaning Eyepiece” section.Q: Screen becomes darker than in previous use.S: Replace batteries. If the problem persists contact your dealer or other authorized servicerepresentative for service instructions.Q: Image not clear.S: Adjust objective lens and/or the eyepiece. Turn on IR.5
240420122 YEAR PRODUCT WARRANTYThis product is guaranteed to be free from manufacturing defects in material and workmanship undernormal use for a period of 2 (two) years from the date of purchase. In the event a defect that is coveredby the foregoing warranty occurs during the applicable period stated above, <strong>ATN</strong>, at its option, will eitherrepair or replace the product, and such action on the part of <strong>ATN</strong> shall be the full extent of <strong>ATN</strong>’s liability,and the Customer’s sole and exclusive remedy. This warranty does not cover a product (a) usedin other than its normal and customary manner; (b) subjected to misuse; (c) subjected to alterations,modifications or repairs by the Customer of by any party other than <strong>ATN</strong> without prior written consent of<strong>ATN</strong>; (d) special order or “close-out” merchandise or merchandise sold “as-is” by either <strong>ATN</strong> or the <strong>ATN</strong>dealer; or (e) merchandise that has been discontinued by the manufacturer and either parts or replacementunits are not available due to reasons beyond the control of <strong>ATN</strong>. <strong>ATN</strong> shall not be responsible forany defects or damage that in <strong>ATN</strong>’s opinion is a result from the mishandling, abuse, misuse, improperstorage or improper operation, including use in conjunction with equipment which is electrically ormechanically incompatible with or of inferior quality to the product, as well as failure to maintain the environmentalconditions specified by the manufacturer. CUSTOMER IS HEREBY NOTIFIED THAT OP-ERATION OF THE EQUIPMENT DURING DAYLIGHT HOURS OR UNDER ANY EXCESSIVE LIGHTCONDITIONS MAY PERMANENTLY DAMAGE THE INTERNAL COMPONENTS OF THE UNIT ANDSAID DAMAGE WILL NOT BE COVERED UNDER THIS WARRANTY. This warranty is extended onlyto the original purchaser. Any breach of this warranty shall be waived unless the customer notifies <strong>ATN</strong>at the address noted below within the applicable warranty period.The customer understands and agrees that except for the foregoing warranty, no other warrantieswritten or oral, statutory, expressed or implied, including any implied warranty of merchantability orfitness for a particular purpose, shall apply to the product. All such implied warranties are hereby andexpressly disclaimed.LIMITATION OF LIABILITY<strong>ATN</strong> will not be liable for any claims, actions, suits, proceedings, costs, expenses, damages or liabilitiesarising out of the use of this product. Operation and use of the product are the sole responsibility ofthe Customer. <strong>ATN</strong>’s sole undertaking is limited to providing the products and services outlined hereinin accordance with the terms and conditions of this Agreement. The pro<strong>vision</strong> of products sold andservices performed by <strong>ATN</strong> to the Customer shall not be interpreted, construed, or regarded, eitherexpressly or implied, as being for the benefit of or creating any obligation toward any third party of legalentity outside <strong>ATN</strong> and the Customer; <strong>ATN</strong>’s obligations under this Agreement extend solely to theCustomer. <strong>ATN</strong>’s liability hereunder for damages, regardless of the form or action, shall not exceedthe fees or other charges paid to <strong>ATN</strong> by the customer or customer’s dealer. <strong>ATN</strong> shall not,in any event, be liable for special, indirect, incidental, or consequential damages, including, butnot limited to, lost income, lost revenue, or lost profit, whether such damages were foreseeableor not at the time of purchase, and whether or not such damages arise out of a breach of warranty,a breach of agreement, negligence, strict liability or any other theory of liability.PRODUCT WARRANTY REGISTRATIONIn order to validate the warranty on your product, <strong>ATN</strong> must receive a completed Product WarrantyRegistration Card for each unit or complete warranty registration on our website at www.atncorp.com.Please complete the included form and immediately mail it to our Service Center: <strong>ATN</strong> Corporation,1341 San Mateo Avenue, South San Francisco, CA 94080.OBTAINING WARRANTY SERVICETo obtain warranty service on your unit, End-user must notify <strong>ATN</strong> service department by calling800-910-2862 or 650-989-5100 or via e-mail service@atncorp.com to receive a Return MerchandiseAuthorization number (RMA). When returning please take or send the product, postage paid, witha copy of your sales receipt to our service center, <strong>ATN</strong> Corporation at the address noted above. Allmerchandise must be fully insured with the correct postage; <strong>ATN</strong> will not be responsible for improperpostage or, missing or damaged merchandise during shipment. When sending product back, pleaseclearly mark the RMA# on the outside of the shipping box. Please include a letter that indicates yourRMA#, Name, Return Address, reason for service return, Contact information such as valid telephonenumbers and/or e-mail address and proof of purchases that will help us to establish the valid start dateof the warranty. Product merchandise returns that do not have an RMA listed may be refused or asignificant delay in processing may occur. Estimated Warranty service time is 10-20 business days.End-user/customer is responsible for postage to <strong>ATN</strong> for warranty service. <strong>ATN</strong> will cover return postage/shippingafter warranty repair to end-user/customer only if product is covered by aforementionedwarranty. <strong>ATN</strong> will return product after warranty service by domestic UPS ground and/or domestic mail.Any other requested, required or international shipping method the postage/shipping fee will be theresponsibility of the end-user/customer.6
For customer service and technical support, please contactAmerican Technologies Network Corp.North American Office1341 San Mateo Avenue, South San Francisco, CA 94080phone: 800-910-2862, 650-989-5100; fax: 650-875-0129European OfficeThe following countries can use our toll free number:00 800 9102-8620Austria, France, Germany, Holland, Italy, Spain, Sweden, SwitzerlandFor other countries, please use38 048-7770214 or 38 048-7770345www.atncorp.com©2010 <strong>ATN</strong> Corporation