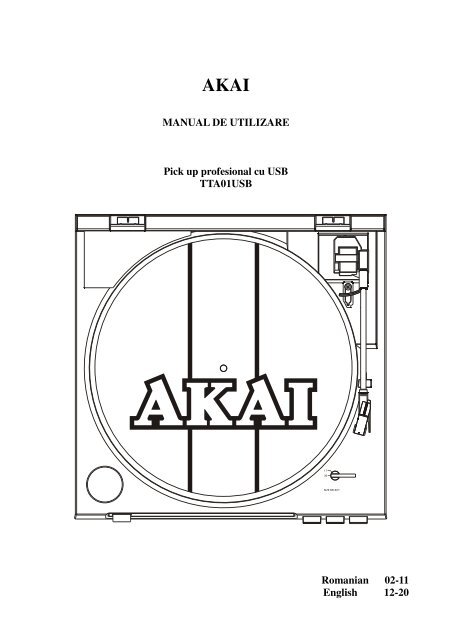
Pick-up AKAI TTA01USB
Pick-up AKAI TTA01USB
Pick-up AKAI TTA01USB
- No tags were found...

Create successful ePaper yourself
Turn your PDF publications into a flip-book with our unique Google optimized e-Paper software.
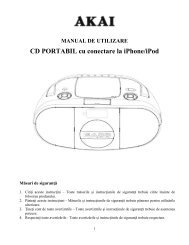
Conexiuni.Inainte de conectarea aparatului este indicat sa consultati manualul de instructiuni .Nota: Fiti siguri ca echipamentul este oprit inainte de a face schimbari la diferite conexiuni.1. Conectati cablul de alimentare la priza.2. Conectati cablul RCA la intrarea PHONO a amplificatorului.Terminalele iesiriiL (ALB)R (ROSU)Amplificator/ReceptorCanalul StangaCanalul DreaptaNota: Puteti sa folositi si o intrare setand comutatorul phono/line din spatele aparatului.3. Conectati cablul USB la calculator.PCSet the PHONO/LINEswitch to “LINE”Set the PHONO/LINEswitch to “PHONO”6
Operatii.A12243017size select37437BBRedare automata (A)Discurile LP 30cm (12'') si EP 17cm (7'') sunt redate automat.1. Deschideti protectia de praf.2. Puneti discul pe platan.Puneti adaptorul EP in centru cand redati discuri EP 17cm (7'').3. Setati viteza la 33 sau 45 rpm.4. Setati selectorul de marime la 17 sau 30.5. Inchideti protectia de praf.6. Introduceti selectorul de iesire in amplificator.7. Apasati butonul START.8. Ajustati controlul volumui la amplificator.Bratul de sunet se va retrage automat in pozitia de stand-by cand discul se termina.Oprire in timpul redarii (B)Pentru a opri discul in timpul redarii apasati butonul STOP.Precautii cand redati discuri.Nu rotiti sau opriti platanul manual.Nu opriti bratul de sunet manual cand se retrage automat.Miscand sau bruscand unitatea fara securizarea bratului de sunet il poate defecta.Redand discuri flexibile sau stricate poate defecta penita.
Programul Audacity.Audacity este un software gratuit, sub licenta GNU General Public License (GPL). Maimulte informatii ca codul open source poate fi gasit pe CD-ul inclus sau pe web la adresa:http://audacity.sourceforge.net/Nota: Va rugam sa va asigurati ca ati instalat corect programul inainte de folosire.Setarea PC-ului pentru a rula programul Audacity.1.Conectati o sursa de intrare in unitate.2.Conectati cablul USB in calculator.3. Instalati softul de inregistrare Audacity.4.Deschideti programul Audacity.5.Selectati Preferences din tabul Edit.6.Selectati tabul Audio I/O din stanga sus.Sub meniul Playback, Device, selectati placa dumneavoastra de sunet.Sub meniul Recording, Device, selectati USB Audio CODEC.Sub meniul Recording,Channels, selectati 2 (Stereo).Bifati casuta in care scrie Play other tracks while recording new one.Bifati casuta in care scrie Software Playthrough.9
<strong>AKAI</strong>Reciclarea echipamentelor electrice şi electronice uzate:Acest simbol prezent pe produs sau pe ambalaj semnifică faptul căprodusul respectiv nu trebuie tratat ca un deşeu menajer obişnuit. Nuaruncaţi aparatul la gunoiul menajer la sfârşitul duratei de funcţionare, ciduceţi-l la un centru de colectare autorizat pentru reciclare. În acest fel veţiajuta la protejarea mediului înconjurător şi veţi putea împiedicaeventualele consecinţe negative pe care le-ar avea as<strong>up</strong>ra mediului şisănătăţii umane.Pentru a afla adresa celui mai apropiat centru de colectare:- Contactaţi autorităţile locale;- Accesaţi pagina de internet: www.mmediu.ro ;- Solicitaţi informaţii s<strong>up</strong>limentare de la magazinul de unde aţi achiziţionat produsul.11
IMPORTANTCaution : To reduce the risk of electric shock, donot remove any cover. No user-serviceable partsinside. Refer servicing to qualified servicepersonnel only.This symbol is intended to alert you to the presence of dangerous voltage inside theproduct that presents a risk of electric shock. Do not open the product’s case.The exclamation point within the equilateral triangle is intended to alert the user tothe presence of important operation and maintenance (servicing) instructions in theliterature accompanying this appliance.Power Cord CautionHandle the power cord by the plug. Do not pull out the plug by tugging the cord andnever touch the power cord when your hands are wet as this could cause a short circuit orelectric shock. Do not place the unit, a piece of furniture, etc., on the power cord, or pinch thecord, Never make a knot in the cord or tie with other cords. The power cords should be routedsuch that they are not likely are not likely to be stepped on. A damaged power cord can causea fire or give you an electrical shock. Check the power cord once in a while. When you find itdamaged, ask your nearest authorized service center or your dealer for a replacement.Handling PrecautionsInstall on a solid, flat surface - but not on top of a speaker.Install away from high heat, moisture, or direct sunlight. Avoid dust, dirt, smoke andsteam.Install away from a TV set and tuner, To avoid interference. use an outdoor antenna orturn off the TV set and tuner.Moisture may condense on the turntable if it is brought from a cold area to a warmroom, or if room temperature increases rapidly. If so, do not use until moistureevaporates.To clean records, use an antistatic spray or cleaning fluid and soft cloth. Wiping with adry cloth or brush may cause static noise.Before UseCheck for the following parts included in the package with the main unit:Instruction manual, 45 rpm adaptor, USB cable, Platter, Dust cover, Software CD,slipmat.12
Safety Instructions• Read Instructions - All the safety and operating instructions should be read before the appliance is operated.• Retain Instructions - The safety and operating instructions should be retained for future reference.• Heed Warnings - All warnings on the appliance and in the operating instructions should be adhered to.• Follow Instructions - All operating and use instructions should be followed.• Water and Moisture - Th e appliance should not be use d near water - for example, near a bathtub, wa shbowl,kitchen sink, laundry tub, in a wet basement, or near a swimming pool, and the like.• Carts and S tands - The appliance should be usemanufacturer.d only with a cart or st and that is recomm ended by theAn appliance and cart combination should be moved with care Quick stops, excessive force,and uneven surfaces may cause the appliance and cart combination to overturn.• Wall or Ceiling Mounting - The appliance should be mounted to a wall or ceili ng only as re commended by th emanufacturer.• Ventilation - The ap pliance should be situated so that its location or p osition does not inte rfere with its properventilation. For example, the appliance should not be situated on a bed, sofa, rug, or similar surface that mayblock the ventilation open ings; or, pla ced in a built-in in stallation, such a s a boo kcase or cabi net that mayimpede the flow of air through the ventilation openings• Heat - Th e appliance should be situated away from heat sources such as radiators, heat registers, stoves, orother appliances (including amplifiers) that produce heat.• Power S ources - Th e a ppliance should be connected to a po wer s<strong>up</strong>ply o nly of the type de scribed in theoperating instructions or as marked on the appliance.• Grounding or Pola rization - Precautio ns should b e t aken so th at the groun ding o r p olarization means of anappliance is not defeated.• Power-Cord Protection - Power-s<strong>up</strong>ply cords should be routed so that they are n ot likely to be wal ked on orpinched by items pla ced <strong>up</strong>on or agai nst them, p aying particular attention to co rds at plu gs, conveni encereceptacles, and the point where they exit from the appliance.• Cleaning - The appliance should be cleaned only as recommended by the manufacturerClean by wiping with a cloth slightly damp with water. Avoid getting water inside the appliance.• Disconnect power cord before servicing.• Replace critical components only with factory parts or recommended equivalents.• For AC line powered units - Before ret urning repaired unit to user , use an ohmmeter to measure iron b oth ACplug badges to all exposed metallic parts. The resistance should be more than 100,000ohms.• Nonuser Periods - The power cord of the appliance should be unplugged from the outlet when left unused for along period of time.• Object and Liquid Entry - Care sh ould be t aken so that object s do not fall and liquids a re not spilled into theenclosure through openings.• Damage Requiring Service - The appliance should be serviced by qualified service personnel when:- The power-s<strong>up</strong>ply cord or the plug has been damaged; or- Objects have fallen, or liquid has been spilled into the appliance; or- The appliance has been exposed to rain; or- The appliance does not appear to operate normally or exhibits a marked change in performance; or- The appliance has been dropped, or the enclosure damaged• Servicing - The u ser should n ot attempt to se rvice the appliance b eyond th at described in the op era- tingeinstructions. All other servicing should be referred to qualified service personnel.13
CondensationWhen the turntable is brought into a warm room from previously cold surroundings orwhen the room temperature is suddenly increased, condensation may form inside and theturntable may not be able to attain its full performance. In cases like this, use the turntableafter allowing it to stand for about an hour or after raising the room temperature gradually.Names of Parts35212411109876AC141311. AC power cord. 8. Size Select (30/17).2. Platater 9. Arm-elevation ( UP / DOWN)3. Dust cover 10. STOP Button4. RCA output jack 11. START Button5. Platter mat 12. SPEED Button ( 33/ 45)6. Tonearm 13. USB socket (USB cable limit within 3M)7. Cartridge 14. Phono/Line switch14
Before OperationFig.1Fig.3Fig.2Fig.4Fig.5Fig.5aFig.5bAssembly1. Carefully place the platter on the center spindle, and align one of its openings overthe motor pulley position (Fig.1)2. Tear the fiber tape off.3. While holding both ends of the ribbon on the turntable belt, carefully pull the beltover the motor pulley (Fig. 2). Be sure it does not twist.4. Remove the ribbon.5. Once the belt is seated in the pulley’s groove, as Fig.2, the fiber tape can be torn off.6. Remove another one ribbon (Fig.3).7. Place the mat on top of the platter (Fig.4).8. Remove the tie securing the tonearm (Fig.5a).9. Remove the stylus guard (Fig. 5b).15
ConnectionsBefore connecting the unit it is advised that you also consult your current equipmentinstruction manual.Note: Be sure to turn off the equipment before you make changes to the different connections.1. Connect the power cord to an AC outlet.2. Connect the RCA cable to the PHONO input of your AMPLIFIER.Output terminalsL (White)R (Red)Amplifier(Receiver)L ChannelR ChannelNote: You can also use a line input by setting the phono/line switch at the rear of theturntable to line3. Connect PC via USB cord.PCSet the PHONO/LINEswitch to “LINE”Set the PHONO/LINEswitch to “PHONO”16
OperationA12243017size select37437BBAutomatic Play (A)30-cm (12”) LP records and 17-cm (7”) EP records can be played automatically.1. Open the dust cover2. Place the record on the playerPlace the EP adaptor over the center spindle when playing 17-cm (7”) EP records3. Set the SPEED button to 45 or 33..4. Set the SIZE selector to 17 or 30.5. Close the dust cover6. Set the input selector on the amplifier7. Press the START button.8. Adjust the volume control on the amplifierThe tonearm will automatically return to the rest position when the record finishesTo Stop During Play (B)Press the STOP buttonPrecautions when playing records.Do not rotate or stop the platter manually.Do not stop the tonearm manually when it is returning automatically.Moving or jarring the unit without securing the tonearm can damage the tonearm.Playing flexible records or badly warped records can damage the records and the stylus.17
MaintenanceA BCleaning the stylus AA dirty stylus will cause noise and poor sound quality. Use a stylus cleaning kit and brush offthe dirt in the direction of the arrow.Do not brush in the opposite direction or from side to side, since this can damage the stylus.Replacing the stylus BWhen the sound quality drops, replace the stylus with a new one. Remove the old stylus bypulling it downwards gently, and push the new stylus into place as shown..Maintenance of external surfacesUse a polishing cloth or dry cloth to wipe off dust and dirt.When the surfaces are very dirty, wipe with a soft cloth dipped in some neutral cleanserdiluted five or six times with water, and wrung out well, and then wipe again with a drycloth. Do not use furniture wax or cleaners.Never use thinners, benzene, insecticide sprays and other chemicals on or near this unit,since these will corrode the surfaces.SpecificationGENERALPower s<strong>up</strong>ply: AC 230V/50HzPower consumption: 3WDimensions: 350 x 348 x 95.4 mmLoad Impedance: 47K ohmA.Connect with Equalizer90-216mV at 1KHz 5cm/sec(HP-4005)Output Voltage:B. Connect without Equalizer1.5-3.6mV at 1KHz 5cm/sec(HP-4005)Weight:2,47KgComputer interface: USB 1.1 compliant Windows XP or MAC OSX18
Audacity Software OverviewAudacity is free software, licensed under the GNU General Public License(GPL). More information as wellas open source code can be found on the web at http://audacity.sourceforge.net/Note: Please ensure you have installed the software before starting.Setting <strong>up</strong> your PC to work with Audacity.1. Connection an input source to the unit.2. Connection the USB lead to your computer.3. Install the Audacity recording software.4. Open the Audacity program.5. Select Preferences from the Edit tab in the Audacity menu.6. Select Audio I/O tab at the top left.Under Playback, Device, select your internal sound card.Under Recording, Device, select USB Audio CODECUnder Recording, Channels, select 2 (Stereo)Check the box marked Play other tracks while recording new oneCheck the box marked Software Playthrough19
Recording Albums with Audacity.1. Saving a projectAudacity writes all the changed and recorded audio to a directory calledProjectname_data, which is located right where you saved the project file itself.Thus, select Save project as from your Audacity File tab and choose a location andfilename for your projectPlease note that when you start<strong>up</strong> Audacity fresh, only the “Save As...” menu option isavailable2. How to recordSet your USB turntable <strong>up</strong> to play the song or album you want to record.Click on the red Record button to b to begin recording.Lower tone arm on USB turntable onto album and track you want to record.Click on the blue Pause button to pause the recording. Press it again tocontinueClick on the yellow Stop buttonThat's it. You can now play around with your recording and explore the editing capabilities ofAudacity.Remember that you can use the Undo function almost without limits while the project is open.Note: CD's cannot be burned directly from the Audacity application. Other CD burningapplications should be used.20