July - Home Metal Shop Club
July - Home Metal Shop Club
July - Home Metal Shop Club

Create successful ePaper yourself
Turn your PDF publications into a flip-book with our unique Google optimized e-Paper software.
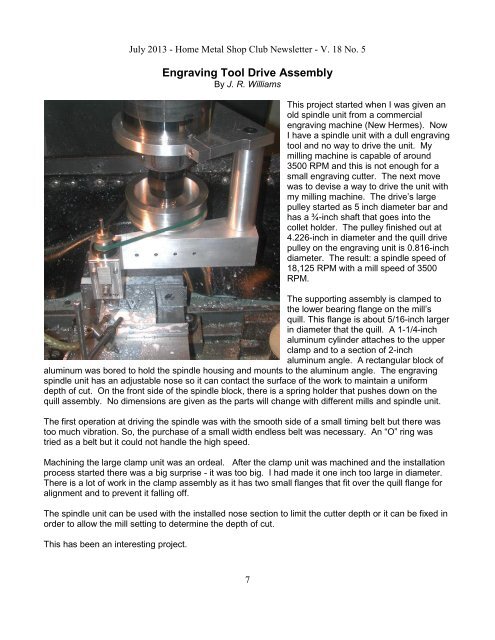
<strong>July</strong> 2013 - <strong>Home</strong> <strong>Metal</strong> <strong>Shop</strong> <strong>Club</strong> Newsletter - V. 18 No. 5Engraving Tool Drive AssemblyBy J. R. WilliamsThis project started when I was given anold spindle unit from a commercialengraving machine (New Hermes). NowI have a spindle unit with a dull engravingtool and no way to drive the unit. Mymilling machine is capable of around3500 RPM and this is not enough for asmall engraving cutter. The next movewas to devise a way to drive the unit withmy milling machine. The drive’s largepulley started as 5 inch diameter bar andhas a ¾-inch shaft that goes into thecollet holder. The pulley finished out at4.226-inch in diameter and the quill drivepulley on the engraving unit is 0.816-inchdiameter. The result: a spindle speed of18,125 RPM with a mill speed of 3500RPM.The supporting assembly is clamped tothe lower bearing flange on the mill’squill. This flange is about 5/16-inch largerin diameter that the quill. A 1-1/4-inchaluminum cylinder attaches to the upperclamp and to a section of 2-inchaluminum angle. A rectangular block ofaluminum was bored to hold the spindle housing and mounts to the aluminum angle. The engravingspindle unit has an adjustable nose so it can contact the surface of the work to maintain a uniformdepth of cut. On the front side of the spindle block, there is a spring holder that pushes down on thequill assembly. No dimensions are given as the parts will change with different mills and spindle unit.The first operation at driving the spindle was with the smooth side of a small timing belt but there wastoo much vibration. So, the purchase of a small width endless belt was necessary. An “O” ring wastried as a belt but it could not handle the high speed.Machining the large clamp unit was an ordeal. After the clamp unit was machined and the installationprocess started there was a big surprise - it was too big. I had made it one inch too large in diameter.There is a lot of work in the clamp assembly as it has two small flanges that fit over the quill flange foralignment and to prevent it falling off.The spindle unit can be used with the installed nose section to limit the cutter depth or it can be fixed inorder to allow the mill setting to determine the depth of cut.This has been an interesting project.7