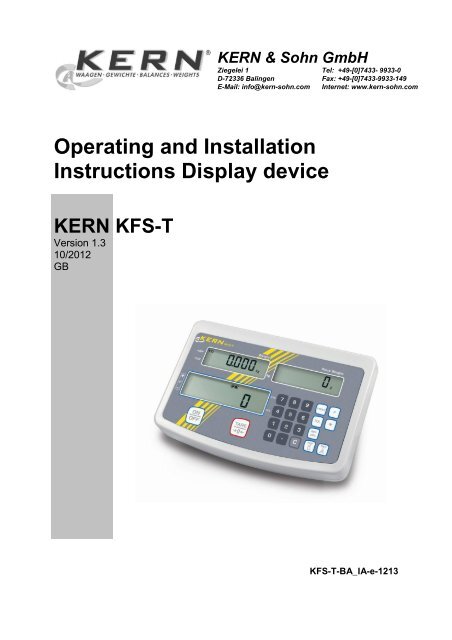
Operating and Installation Instructions Display device KERN KFS-T
Operating and Installation Instructions Display device KERN KFS-T
Operating and Installation Instructions Display device KERN KFS-T
- No tags were found...

You also want an ePaper? Increase the reach of your titles
YUMPU automatically turns print PDFs into web optimized ePapers that Google loves.
1 Technical data<strong>KERN</strong><strong>Display</strong>DivisionsWeighing Units<strong>Display</strong>DMS weighing cellsRange calibrationElectric Supply<strong>KFS</strong>-T6-digit1,2,5,…10nkgLCD 16.5 mm digits with back lighting80-100 Ω. Max. 4 item per 350 Ω;Sensitivity 2-3 mV/VWe recommend ≥ 50 % max.Input voltage 220 V – 240 V, 50 HzPower pack secondary voltage 12V, 500mAHousing 260 x 150 x 65Admissibleambient temperatureNet weightRechargeable battery(optional)<strong>Operating</strong> / charge timeSupport baseincl. wall bracketData output0°C – 40°C1.5 kg40 h / 12 hSt<strong>and</strong>ardRS2324 <strong>KFS</strong>-T-BA_IA-e-1213
2 Appliance overview1. <strong>Display</strong> “weight”2. <strong>Display</strong> “average item weight“3. <strong>Display</strong> “quantity”4. Tolerance margin, see chpt. 7.65. ON/OFF key6. Tare <strong>and</strong> zero set key7. Numeric keys8. Function keys9. RS-23210. Input connection load cell cable11. Guide rail support base / st<strong>and</strong>12. End stop support base / st<strong>and</strong>13. Mains adapter connection<strong>KFS</strong>-T-BA_IA-e-1213 5
2.1 Overview of displayWeight display<strong>Display</strong> average piece weight<strong>Display</strong> quantity• Weight displayHere the weight of your goods is displayed in [kg].Indicator [] next to symbol displays:TAREaNet weightStability displayZeroing display• <strong>Display</strong> average piece weightHere the average reference weight of a sample is displayed in [g]. This value is eithernumerically entered by user or calculated by weighing on balance.6 <strong>KFS</strong>-T-BA_IA-e-1213
• <strong>Display</strong> quantityHere the current piece quantity (PCS = pieces) or in totalizing mode the sumSum of the placed parts is displayed, see chapter 7.8.Indicator [] next to symbol displays:TOTALTotal number of pieces+ Target quantity of items above upper tolerance limitTarget quantity of items within tolerance limits- Target quantity of items below lower tolerance limit• Other displays• Power supply via line adapter• Status display battery (optional)BUSY • Saving / calculating weighing dataLIGHT • Piece below minimum weight of piece<strong>KFS</strong>-T-BA_IA-e-1213 7
2.2 Keyboard overviewKeyFunction Turn on/off Taring (>2 % Max) Zero setting (< 2 % Max) Change menu settings For entering of item weight by weighing see chpt. 7.6.1 For numeric entry of item weight see chpt. 7.6.2 Reference optimisation Set / call limits for tolerance check Addition in sum memory Exit menu, return to weighing mode Calculate weighing data via interface Call function menu How to select menu items…. Numeric keys Decimal point Delete key2.3 Audio signal1 x briefly Confirm by pressing key1 x longer Saving was successful2 x briefly Invalid entry3 x briefly Missing entrycontinuousTolerance check depends onmenu setting ”14.bu”, see chap. 88 <strong>KFS</strong>-T-BA_IA-e-1213
3 Basic Information (General)3.1 Proper useThe display unit acquired by you is used in combination with a weighing plate <strong>and</strong>serves to determine the weighing value of material to be weighed. It is intended to beused as a “non-automatic weighing system”, i.e. the material to be weighed ismanually <strong>and</strong> carefully placed in the centre of the weighing plate. As soon as a stableweighing value is reached the weighing value can be read.3.2 Improper UseDo not use display unit for dynamic weighing. In the event that small quantities areremoved or added to the material to be weighed, incorrect weighing results can bedisplayed due to the “stability compensation“ in the display unit. (Example: Slowlydraining fluids from a container on the balance.)Do not leave permanent load on the weighing pan. This may damage the measuringsystem.Impacts <strong>and</strong> overloading exceeding the stated maximum load (max) of the weighingplate, minus a possibly existing tare load, must be strictly avoided. Both, the weighingplate <strong>and</strong> the display unit may be damaged during this process.Never operate display unit in explosive environment. The serial version is notexplosion protected.Changes to the display unit's design are not permitted. This may lead to incorrectweighing results, safety-related faults <strong>and</strong> destruction of the display unit.The display unit may only be operated in accordance with the described defaultsettings. Other areas of use must be released by <strong>KERN</strong> in writing.3.3 WarrantyWarranty claims shall be voided in case• Our conditions in the operation manual are ignored• The appliance is used outside the described uses• The appliance is modified or opened• Mechanical damage or damage by media, liquids, natural wear <strong>and</strong> tear• The appliance is improperly set up or incorrectly electrically connected• The measuring system is overloaded<strong>KFS</strong>-T-BA_IA-e-1213 9
3.4 Monitoring of Test ResourcesIn the framework of quality assurance the measuring-related properties of the displayunit <strong>and</strong>, if applicable, the testing weight, must be checked regularly. The responsibleuser must define a suitable interval as well as type <strong>and</strong> scope of this test. Informationis available on <strong>KERN</strong>’s home page (www.kern-sohn.com with regard to themonitoring of display units’ test substances <strong>and</strong> the test weights required for this. In<strong>KERN</strong>’s accredited DKD calibration laboratory test weights <strong>and</strong> display units may becalibrated (return to the national st<strong>and</strong>ard) fast <strong>and</strong> at moderate cost.4 Basic Safety Precautions4.1 Pay attention to the instructions in the Operation ManualCarefully read this operation manual before setup <strong>and</strong> commissioning, even if youare already familiar with <strong>KERN</strong> balances.4.2 Personnel trainingThe appliance may only be operated <strong>and</strong> maintained by trained personnel.5 Transport <strong>and</strong> storage5.1 Testing upon acceptanceWhen receiving the appliance, please check packaging immediately, <strong>and</strong> theappliance itself when unpacking for possible visible damage.5.2 Packaging / return transport Keep all parts of the original packaging for a possiblyrequired return. Only use original packaging for returning. Prior to dispatch disconnect all cables <strong>and</strong> removeloose/mobile parts. Reattach possibly supplied transport securing <strong>device</strong>s. Secure all parts such as the glass wind screen, theweighing platform, power unit etc. against shifting <strong>and</strong>damage.10 <strong>KFS</strong>-T-BA_IA-e-1213
6 Unpacking <strong>and</strong> placing6.1 <strong>Installation</strong> Site, Location of UseThe display units are designed in a way that reliable weighing results are achieved incommon conditions of use.Precise <strong>and</strong> fast work is achieved by selecting the right place for your display unit<strong>and</strong> your weighing plate.On the installation site observe the following:• Place the display unit <strong>and</strong> the weighing plate on a stable, even surface.• Avoid extreme heat as well as temperature fluctuation caused by installingnext to a radiator or in the direct sunlight;• Protect the display unit <strong>and</strong> the weighing plate against direct draft from openwindows or doors.• Avoid jarring during weighing;• Protect the display unit <strong>and</strong> the weighing plate against high humidity, vapours<strong>and</strong> dust.• Do not expose the display unit to extreme dampness for longer periods oftime. Non-permitted condensation (condensation of air humidity on theappliance) may occur if a cold appliance is taken to a considerably warmerenvironment. In this case, acclimatize the disconnected appliance for ca. 2hours at room temperature.• Avoid static charge of goods to be weighed or weighing container.Major display deviations (incorrect weighing results) may be experienced shouldelectromagnetic fields (e.g. due to mobile phones or radio equipment), staticelectricity accumulations or instable power supply occur. Change location or removesource of interference.6.2 Scope of delivery / serial accessories:• For display unit, see chapter 2• Mains adapter• Support base incl. wall bracket• Protective cover• <strong>Operating</strong> instructions<strong>KFS</strong>-T-BA_IA-e-1213 11
6.3 Unpacking/installationCarefully remove the display unit from packaging, remove plastic cover <strong>and</strong> place itin the designated work area.Mount the display unit in a way that facilitates operation <strong>and</strong> where it is easy to see.To be used with support base <strong>and</strong> wall bracketWall bracketPush support base in guide rail [11] up to end stop [12], see chap. 2.Using with tripod (optional)To position the display higher up, the display unit may be mounted on an optionallyavailable tripod. (<strong>KERN</strong> IFB-A01/A02).12 <strong>KFS</strong>-T-BA_IA-e-1213
6.4 Mains connectionPower is supplied via the external mains adapter. The stated voltage value must bethe same as the local voltage.Only use original <strong>KERN</strong> mains adapters. Using other makes requires consent by<strong>KERN</strong>.6.5 AdjustmentAs the acceleration value due to gravity is not the same at every location on earth,each display unit with connected weighing plate must be coordinated - in compliancewith the underlying physical weighing principle - to the existing acceleration due togravity at its place of location (only if the weighing system has not already beenadjusted to the location in the factory). This adjustment process must be carried outfor the first commissioning, after each change of location as well as in case offluctuating environment temperature. To receive accurate measuring values it is alsorecommended to adjust the display unit periodically in weighing operation.• Provide adjustment weight.• The required adjustment weight depends on the capacity of theweighing system. Carry out adjustment as near as possible to thescale’s maximum weight. Information about test weights you will find inthe internet under: http://www.kern-sohn.com• Observe stable environmental conditions. Stabilisation requires a certainwarm-up time.<strong>KFS</strong>-T-BA_IA-e-1213 13
Call up menu: Switch-on balance <strong>and</strong> during the selftest press .Ensure that there are no objects on the weighing pan.Reset to zero if necessary by pressing . Go to weighing mode <strong>and</strong> press <strong>and</strong> hold for approx. 5-6 seconds untilFUNC followed by F0 iSn appears. Release button. Pressrepeatedly until F2 dm is displayed. Press <strong>and</strong> select the set weighing scales type by .= Single-range balance= Dual range balance= Multi-interval balance Acknowledge with . Pressrepeatedly until „CAL“ will be displayed. Acknowledge by <strong>and</strong> select desired setting with .= Linearization= Adjustment14 <strong>KFS</strong>-T-BA_IA-e-1213
Carry out adjustment: Confirm menu setting nonLin with .Ensure that there are no objects on the weighing pan. LoAd will be displayed after st<strong>and</strong>still control has been carried out. Put the required adjustment weight carefully in the centre of the weighing pan. After successful adjustment, the weighing scales will carry out a self test. Duringthis self test remove the adjustment weight <strong>and</strong> the weighing scales willautomatically return to weighing mode.An adjusting error or incorrect adjusting weight will be indicated by the errormessage; repeat adjustment procedure.<strong>KFS</strong>-T-BA_IA-e-1213 15
6.6 LinearizationLinearity shows the greatest deviation of a weight display on the scale to the value ofthe respective test weight according to plus <strong>and</strong> minus over the entire weighingrange. If linearity deviation is discovered during a testing instrument control, you canimprove this by means of linearization.• Carrying out linearization is restricted to specialist staff possessingwell acquainted with the workings of weighing scales.• The test weights to be used must be adapted to the weighing scale’sspecifications; see chapter “testing instruments control”.• Observe stable environmental conditions. Stabilisation requires acertain warm-up time.• Do not remove the adjustment weight during linearization in stepLAOD 1 to LOAD 4, merely increase it instead. Conversely do notremove the adjustment weight during step LAOD 4 to LOAD 1,merely increase it instead.• After successful linearisation you will have to carry out calibration;see chapter “testing instruments control”.Tab. 1: Adjustment weights“LOAD1 – LOAD4”MAX LOAD 1 LOAD 2 LOAD 3 LOAD 43kg 0.5kg 1kg 2kg 3kg6kg 1kg 2kg 4kg 6kg15kg 3kg 5kg 10kg 15kg30kg 5kg 10kg 20kg 30kg60 kg 10kg 20kg 40kg 60kg120 kg 30kg 60kg 60kg 150kg300 kg 50kg 100kg 200kg 300kg600 kg 100kg 200kg 400kg 600kg1.5 t 3000kg 5000kg 1000kg 1500kg3 t 5000kg 1000kg 2000kg 3000kg16 <strong>KFS</strong>-T-BA_IA-e-1213
Call menu item linearization , see chap. 6.5 Confirm menu setting with .Ensure that there are no objects on the weighing plate. “LoAd 1” will be displayed after st<strong>and</strong>still control has been carried out. Put thefirst adjustment weight approx. 1/4 Max (see table 1) carefully in the centre of theweighing pan.“LoAd 2” will be displayed after st<strong>and</strong>still control has been carried out. Put the second adjustment weight approx. 2/4 max (see table 1) carefully in thecentre of the weighing pan. “LoAd 3” will be displayed after st<strong>and</strong>still control hasbeen carried out. Put the third adjustment weight approx. 3/4 max (see table 1) carefully in thecentre of the weighing pan. “LoAd 4” will be displayed after st<strong>and</strong>still control hasbeen carried out. Put the forth adjustment weight approx. 4/4 max (see table 1) carefully in thecentre of the weighing pan.After successful st<strong>and</strong>still control the balance carries out a selftest, then itautomatically returns to weighing mode.• An adjusting error or incorrect adjusting weight will be indicated by the errormessage; repeat adjustment procedure.• You can cancel adjustment by pressing any key with the exception of<strong>and</strong> .<strong>KFS</strong>-T-BA_IA-e-1213 17
7 Operation7.1 Start-up Press <strong>and</strong> the instrument will carry out a self-test. As soon as the weightdisplay appears, the instrument will be ready to weigh.7.2 Switching Off Press<strong>and</strong> the display will disappear.7.3 ZeroingResetting to zero corrects the influence of light soiling on the weighing plate.Resetting range ± 2 % max. To unload the weighing system Press , the zero display as well as the indicator [] next to a willappear.7.4 Simple weighing Place goods to be weighed on balance. Wait for stability display []. Read weighing result.Overload warningOverloading exceeding the stated maximum load (max) of the <strong>device</strong>, minus apossibly existing tare load, must be strictly avoided. This could damage theinstrument.Exceeding maximum loads is indicated by the display of “O-err“, <strong>and</strong> an audiosound. Unload weighing system or reduce preload.18 <strong>KFS</strong>-T-BA_IA-e-1213
7.5 Weighing with tare Deposit weighing vessel. After successful st<strong>and</strong>still control press theZero display <strong>and</strong> the indicator [] next to TAR E appear. The weight of thecontainer is now internally saved.button. Weigh the material, the net weight will be indicated. After removing the weighing container, the weight of the weighing containerappears as negative display. The tare procedure can be repeated as many times as necessary, for examplewith initial weighing of several components for a mix (add-on weighing). The limitis reached when the total weighing range capacity is full. To delete the tare value, remove load from weighing plate <strong>and</strong> press .7.6 CountingDuring piece counting parts can either be counted into a container or out of acontainer. To count a greater number of parts the average weight per part has to bedetermined with a small quantity (reference quantity). The larger the referencequantity, the higher the counting exactness.High reference must be selected for small parts or parts with considerably differentsizes.• The average piece weight can only be determined by stable weighingvalues.• If weighing values are under zero, the piece counter display shows anegative number of items.• The message light appearing on the display indicates that load falls belowminimum weight value.• Delete incorrect entries by pressing .• The accuracy of an average item weight can be improved at any timeduring additional counting processes. For this purpose add additionalitems <strong>and</strong> press . After the reference optimization sounds a signaltone. As the additional pieces increase the base for the calculation, thereference also becomes more exact.<strong>KFS</strong>-T-BA_IA-e-1213 19
7.6.1 Determination of the average piece weight by weighingSet reference Reset balance to zero or tare the empty weighing container if necessary. Place on the weighing plate a known number (e.g. 10 items) of individual piecesas a reference. Wait for the stability display, than enter the number of individual items via thenumeric keypad. Acknowledge with .The balance determines the average piece weight.Count the items Tare if necessary, place weighing good <strong>and</strong> read off the number of items.Delete reference Press<strong>and</strong> the average unit weight will be deleted.20 <strong>KFS</strong>-T-BA_IA-e-1213
7.6.2 Numeric input of the average piece weightSet reference Enter established item weight by pressing numeric keys <strong>and</strong> confirm by .Count the items Tare if necessary, place weighing good <strong>and</strong> read off the number of items.Delete reference Press<strong>and</strong> the average unit weight will be deleted.<strong>KFS</strong>-T-BA_IA-e-1213 21
7.7 TotalizationAdding-up during weight display:Weight display:Item weight display:Item quantity display:Currently placed weightSelected item weightCurrently placed quantity of itemsCurrently placed weightSelected item weightCurrently placed quantity of itemsAdding-up during item display:Press<strong>and</strong> the display changes to item display.Weight display:Item weight display:Item quantity display:Currently placed item quantityCurrently placed item quantity + total of addeddisplay valuesTotal of added-up display valuesCurrently placed quantity of itemsPreview: currently placed quantity ofitems + current total number of itemsCurrent total number of items22 <strong>KFS</strong>-T-BA_IA-e-1213
7.7.1 Manual totalizingWith this function the individual weighing values are added into the summationmemory by pressing<strong>and</strong> edited, when an optional printer is connected.Menu setting:„F11 AC“ „5 AC 1“, see chap. 8„F7 UA“ „4 UA 5“ see chap. 8 Calculate the average item weight (see chap. 7.6.1) or enter it manually (seechap. 7.6.2). Place weighing goods A.Currently placed weightSelected item weightCurrently placed quantity of items Wait for stability display, then press . The displayed value (e.g. 50 pieces) willbe added to the summation memory <strong>and</strong> printed if an optional printer isconnected.****************GS:NO: 1UW:PCS:5.0000kg100g50pcs**************** Remove the weighed good. More weighed goods can only be added when thedisplay ≤ zero.<strong>KFS</strong>-T-BA_IA-e-1213 23
<strong>Display</strong> <strong>and</strong> output sum „Total“: Unload the weighing pan <strong>and</strong> press , the total weight, the number ofweighings, followed by the total number of pieces will be shown for 2 sec <strong>and</strong>printed if an optional printer is connected.Indicator:Total weightNumber weighing processesTotal number of piecesPrintout example:****************TotalNO: 2WT: 7.0000kgPCS: 70pcs****************<strong>KFS</strong>-T-BA_IA-e-1213 25
Delete weighing data: Pressto display the total weight, the number of weighing procedures <strong>and</strong>the total quantity for 2 sec. During this display press .26 <strong>KFS</strong>-T-BA_IA-e-1213
7.7.2 Automatic adding-upWith this function the individual weighing values are automatically added into thesummation memory when the balance is unloaded <strong>and</strong> edited, when an optionalprinter is connected.Menu setting:„F11 AC“ „5 AC 0“, see chap. 8„F7 UA“ „4 UA 5“ see chap. 8Adding-up: Calculate the average item weight (see chap.. 7.6.1) or enter it manually(see chap.. 7.6.2). Place weighing goods A.After the st<strong>and</strong>still control sounds a signal tone, the weighing value will beadded into the summation memory. Remove the weighed good. When an optional printer is connected, datawill be edited.****************GS:NO: 1UW:PCS:5.0000kg100g50pcs****************More weighed goods can only be added when the display ≤ zero. Place goods to be weighed B.After the st<strong>and</strong>still control sounds a signal tone, the weighing value will beadded into the summation memory. Remove the weighed good.The total weight, the number of weighings as well as the total number ofpieces will shortly appear (Indicator [] next to TOTAL).When an optional printer is connected, data will be edited.****************GS:NO: 2UW:PCS:2.0000kg100g20pcs****************<strong>KFS</strong>-T-BA_IA-e-1213 27
Add more weighed goods as described before.Please note that the weighing system must be unloaded between theindividual weighing procedures.This process may be repeated 99 times or till such time as the capacity of theweighing system has been exhausted.<strong>Display</strong> <strong>and</strong> output sum „Total“: Unload the weighing pan <strong>and</strong> press , the total weight, the number ofweighings, followed by the total number of pieces will be shown for 2 sec<strong>and</strong> printed if an optional printer is connected.Delete weighing data:****************TotalNO: 2WT: 7.0000kgPCS:70pcs**************** Pressto display the total weight, the number of weighing procedures<strong>and</strong> the total quantity for 2 sec. During this display press .28 <strong>KFS</strong>-T-BA_IA-e-1213
Activate function For menu setting “F0 SEL 2“ see chpt. 8Tolerance check „Weighing“Tolerance check „Counting“30 <strong>KFS</strong>-T-BA_IA-e-1213
<strong>Display</strong> limits1. Tolerance check for target weight Pressto display the lower limit for target weight including current setting. Pressto display the upper limit for target weight including current setting.2. Tolerance check for target quantity Pressto display the lower limit for target quantity including current setting. Pressto display the upper limit for target quantity including current setting. Return to weighing mode using<strong>KFS</strong>-T-BA_IA-e-1213 31
7.8.1 Tolerance check for target quantity Activate menu setting „F0 sel / SEL 2“, see chap.7.8 „Activate function“.Set limit values Pressto display the lower limit including current setting.If required, delete the current setting by pressing . Use the numeric keys to enter the quantity for the lower limit (such as 70 units)<strong>and</strong> confirm by pressing .The upper limit will be displayed with the current setting.Delete with if necessary. Use the numeric keys to enter the quantity for the upper limit (such as 80 units)<strong>and</strong> confirm by pressing .32 <strong>KFS</strong>-T-BA_IA-e-1213
Start tolerance check Specify unit weight, see chap. 7.6.1 or 7.6.2 Place load <strong>and</strong> wait until tolerance margin [] appears. With the help of theindicator check if the weighed goods are under, inside or over the defaulttolerance.Depending on the setting in the menu an additional audio signal may be sounded.Target quantity below tolerance:Target quantity within tolerance:Target quantity exceeds tolerance:<strong>KFS</strong>-T-BA_IA-e-1213 33
7.8.2 Tolerance check for target weight Activate menu setting „F0 sel / SEL 1“, see chap.7.8 „Activate function“.Set limit values Pressto display the lower limit including current setting.Delete withif necessary. Use the numeric keys to enter the weight for the lower limit value (such as 3 kg)<strong>and</strong> confirm by pressing .The upper limit for the target weight including current setting will be displayed.Delete withif necessary.34 <strong>KFS</strong>-T-BA_IA-e-1213
Use the numeric keys to enter the upper limit (such as 4 kg) <strong>and</strong> confirm by .<strong>KFS</strong>-T-BA_IA-e-1213 35
Start tolerance check Place load <strong>and</strong> wait until tolerance indicator [] appears. With the help of thetolerance indicator check if the weighed goods are under, inside or over thedefault tolerance.Depending on the setting in the menu an additional audio signal may be sounded.Target weight below tolerance:Target weight within tolerance:Target weight exceeds tolerance:36 <strong>KFS</strong>-T-BA_IA-e-1213
8 Function menuNavigation in the menu:Call up menuIn weighing mode keep pressed until FSEt appears.Release button. The first menu item F0. SEL is displayed.Select menu itemsWith help of , the individual menu items can beselected one after the other.etc.<strong>KFS</strong>-T-BA_IA-e-1213 37
Change settingsConfirm selected menu item withsetting will be shown.<strong>and</strong> the currentChange setting in selected menu item by pressing .Confirm settingConfirm required setting withto the menu.Return to weighingmode Press to return to weighing mode .<strong>and</strong> the appliance returns38 <strong>KFS</strong>-T-BA_IA-e-1213
Overview:Menu itemF0 SELEnable tolerance checkF1 Co<strong>Display</strong> conditions of the tolerancemarkerF2 LiTolerance rangeF3 PnNumber of limiting pointsF4 bUAudio signalF5 AoAutomatic zero point correction(zero tracking)F6 APAutomatic shutdown for batteryoperationF7 UARS-232 modeF8 bl.Baud rateAvailable settings1 SEL0 Tolerance check disabled1 SEL1* Tolerance check for weighing1 SEL2* Tolerance check for counting11 Co011 Co 1*12 Li 012 Li 1*Tolerance marker is always displayed, even ifst<strong>and</strong>still control is not yet displayed.Tolerance marker is only displayed in connectionwith st<strong>and</strong>still control.Tolerance marker is only displayed above zerorange.Tolerance marker is displayed for the wholerange.13 Pn 0 1- Limiting point (OK/ -)13 Pn 1* 2- Limiting points (+/OK/-)14 bu0* Audio sound during tolerance check disabled14 bu1 Audio sound when load is within tolerance limits14 bu2 Audio sound when load is beyond tolerance limits2 Ao0 Automatic zero tracking off2 Ao1 Automatic limiting point correction on, 0.5 d2 Ao2* Automatic limiting point correction on, 1 d2 Ao3 Automatic limiting point correction on, 2 d2 Ao4 Automatic limiting point correction on, 4 d3 Ap0* AUTO OFF function disabled3 Ap1Instrument will be switched off after 3 minutes ofinactivity of display unit or weighing bridge.4 UA0 Output via RS232C interface disabled4 UA1* Continuous data output4 UA2 Continuous data output of stable weighing values4 UA3One output for stable weighing value. No outputfor stable weighing values. Renewed output afterstabilization.Remote control comm<strong>and</strong>s, see chap. 9.2.8 /4 UA4output after pressng the PRINT button4 UA54 UA6 Not documented41 bl 0 1200 bps41 bl1 2400 bps41 bl 2 4800 bps41 bl 3 * 9600 bpsSt<strong>and</strong>ard printer setting, output after pressing thePRINT button<strong>KFS</strong>-T-BA_IA-e-1213 39
F9 PAParity42 Pr0* No parity bit44 Pr1 Odd parity44 Pr2 Even parityF10 S0 Sd0 on* Autom. printout enabled on zero displaySd0 ofAutom. printout disabled on zero displayF11 AC 5 AC 0For automatic totalizing see chap. 7.7.2With this function the individual weighing valuesare automatically added into the summationmemory when the balance is unloaded <strong>and</strong>edited, when an optional printer is connected.5 AC 1*Manual totalizing, see chap. 7.7.1With this function the individual weighing valuesare added into the summation memory byF12 bk<strong>Display</strong> background illuminationpressing <strong>and</strong> edited, when an optionalprinter is connected.5 bkL0 Background illumination off5 bkL1*Automatic background illumination on whenweighing pate is loaded or key pressed.5 bkL2 Continuous background lightingFactory settings are marked by *.40 <strong>KFS</strong>-T-BA_IA-e-1213
9 RS 232C interfaceThe RS 232C interface allows a bi-directional data exchange from the balance toexternal <strong>device</strong>s. This data exchange is asynchronous using ASCII - Code.The following conditions must be met to provide successful communication betweenthe weighing system <strong>and</strong> the printer.• Use a suitable cable to connect the display unit to the interface of the printer.Faultless operation requires an adequate <strong>KERN</strong> interface cable.• Communication parameters (Baud rate, parity, see chap. 8) of display <strong>device</strong><strong>and</strong> printer must match.Pin allocation of balance output plug:Pin nr. Signal Input/Output Function2 RXD Input Receive data3 TXD Output Transmit data4 DTR Output HIGH5 GND - Signal ground6 - -7 - -8 - -9 GND - Signal groundInterface cable:PCD-SUB9PBalanceD-SUB9PTXD32RXRX23TXDGN55GN<strong>KFS</strong>-T-BA_IA-e-1213 41
9.1 Printer modePrintout example (<strong>KERN</strong> YKB-01N):ST, GS1.000kgSymbols:STUSNTGSNOUWPCSWTStable valueInstable valueNet weightGross weightNumber of weighing when totalizingAverage piece weightQuantityTotal weight „Total“9.2 Remote control instructionsComm<strong>and</strong> FunctionPrintout exampleSWTZPStable weighing value for the weight issent via the RS232 interfaceWeighing value for the weight (stable orunstable) is sent via the RS232 interfaceNo data are sent, the balance carries outthe tare function.No data are sent, the zero-displayappears.Quantity will be sent via the RS232-interfaceST,NT 0.0000kgST,GS 1.9990kg--ST,GS 10pcs42 <strong>KFS</strong>-T-BA_IA-e-1213
10 Service, maintenance, disposal10.1 CleanBefore cleaning, disconnect the appliance from the operating voltage.Please do not use aggressive cleaning agents (solvents or similar agents), but acloth dampened with mild soap suds. Take care that the <strong>device</strong> is not penetrated byfluids <strong>and</strong> polish it with a dry soft cloth.Loose residue sample/powder can be removed carefully with a brush or manualvacuum cleaner.Spilled weighing goods must be removed immediately.10.2 Service, maintenanceThe appliance may only be opened by trained service technicians who are authorizedby <strong>KERN</strong>.Before opening, disconnect from power supply.10.3 DisposalDisposal of packaging <strong>and</strong> appliance must be carried out by operator according tovalid national or regional law of the location where the appliance is used.Should other error messages occur, switch balance off <strong>and</strong> then on again. If the errormessage remains inform manufacturer.<strong>KFS</strong>-T-BA_IA-e-1213 43
11 Error messages, troubleshooting guideIn case of an error in the program process, briefly turn off the appliance <strong>and</strong>disconnect from power supply. The weighing process must then be restarted from thebeginning.FaultThe displayed weight doesnot glow.The displayed weight ispermanently changingThe weighing result isobviously incorrectError messagePossible cause• The unit is not switched on.• Mains power supply interrupted (mains cabledefective).• Power supply interrupted.• (Rechargeable) batteries are inserted incorrectly orempty• No (rechargeable) batteries inserted.• Draught/air movement• Table/floor vibrations• Weighing pan has contact with other objects.• Electromagnetic fields / static charging (choosedifferent location/switch off interfering <strong>device</strong> ifpossible)• The display of the balance is not at zero• Adjustment is no longer correct.• The weighing pan is not level• Great fluctuations in temperature.• Warm-up time was ignored.• Electromagnetic fields / static charging (choosedifferent location/switch off interfering <strong>device</strong> ifpossible)Possible causeo-Erru-Errb-Err1-Err2-Errl-ErrErr 3• Weighing range exceeded• Insufficient preload, e. g. missing weighing pan• Missing internal memory• Incorrect adjusting weight• Inappropriate adjustment• Item weight too low• Adjustment error• Transport safety <strong>device</strong> has not been removedShould other error messages occur, switch <strong>device</strong> off <strong>and</strong> then on again. If the errormessage remains inform manufacturer.44 <strong>KFS</strong>-T-BA_IA-e-1213
12 Installing display unit / weighing bridge<strong>Installation</strong> / configuration of the weighing system must be carried out by a wellacquainted specialist with the workings of weighing balances.12.1 Technical dataSupply voltage:SensitivityResistance parameter5 V/150mA2-3 mV/V80 - 100 Ω, max 4 items per 350 Ω load cell12.2 Weighing system designThe display unit is suitable for connection to any analogue platform in compliancewith the required specifications.The following data must be established before selecting a weighing cell:• Weighing balance capacityThis usually corresponds to the heaviest load to be weighed.• PreloadThis corresponds to the total weight of all parts that are to be placed on theweighing cell such as upper part of platform, weighing pan etc.• Total zero setting rangeThis is composed of the start-up zero setting range (± 2%) <strong>and</strong> the zerosetting range available to the user via the ZERO-key (2%). The total zerosetting range equals therefore 4 % of the scale’s capacity.The addition of weighing scales capacity, preload <strong>and</strong> the total zero settingrange give the required capacity for the weighing cell.To avoid overloading of the weighing cell, include an additional safetymargin.• Smallest desired display division<strong>KFS</strong>-T-BA_IA-e-1213 45
12.3 How to connect the platform Disconnect the display unit from the power supply. Weld the individual wires of the load cell cable to the printed circuit board. Please see diagram below for plug allocation.46 <strong>KFS</strong>-T-BA_IA-e-1213
12.4 Configuring display <strong>device</strong>sNavigation in the menu:Call up menuSwitch-on balance <strong>and</strong> during the selftest press .To call the firm menu item , press <strong>and</strong> hold for approx.5-6 seconds until Func followed by F0 iSn appears.Release button.How to select menuitems With help of , the individual menu items can beselected one after the other.<strong>and</strong> so on<strong>KFS</strong>-T-BA_IA-e-1213 47
Change settingsConfirm selected menu item such as F2 dm by pressing<strong>and</strong> the current setting will be displayed.Change setting in selected menu item by pressing .Confirm settingReject settingConfirm required setting with <strong>and</strong> the appliance returnsto the menu.Press , the unit will return to the menuReturn to weighingmode Press back to weighing mode several times.48 <strong>KFS</strong>-T-BA_IA-e-1213
Configuration menu overview:Menu blockMain menuMenu itemsub menuAvailable settings / explanationF0 iSn - <strong>Display</strong> internal resolutionF 1 Grv - Not documentedF2 dmSingle-range balanceConfirm with, then the following menu items can beselected by .dESCPosition decimal point available selection0, 0.0, 0.00, 0.000, 0.0000, 0.00000inC inC 1 ReadabilityinC 2selectable 1, 2, 5, 10, 20, 50CAPinC 5inC 10inC 20inC 50Balance capacity (max)Adjust weighing system according to configuration.CAL nonLin Adjustment, see chap. 6.5LinEAr For linearisation see chapter 6.6<strong>KFS</strong>-T-BA_IA-e-1213 49
Dual range balanceConfirm with, then the following menu items can beselected by .dESCPosition decimal point availableselection 0, 0.0, 0.00, 0.000, 0.0000,0.00000inC div 1 inC 1 Readability forinC 2inC 5inC 101. Weighing rangeSelectable 1, 2, 5, 10, 20,50inC 20inC 50div 2 inC 1 Readability forinC 2inC 5inC 102. Weighing rangeSelectable 1, 2, 5, 10, 20,50inC 20inC 50CAP CAP 1 Balance capacity (Max) 1st weighingrangeCAP 2Adjust weighing system after configuration.Balance capacity (Max) 2nd weighingrangeCAL nonLin Adjustment, see chap. 6.5LinEAr For linearisation see chapter 6.650 <strong>KFS</strong>-T-BA_IA-e-1213
Multi-interval balanceConfirm byavailable., after that the following menu items arePosition decimal point availableselection 0, 0.0, 0.00, 0.000, 0.0000inC div 1 inC 5 Readability forinC 5inC 5inC 101. Weighing rangeSelectable 1, 2, 5, 10, 20,50inC 20inC 50div 2 inC 1 Readability forinC 2inC 5inC 102. Weighing rangeSelectable 1, 2, 5, 10, 20,50inC 20inC 50CAP CAP 1 Balance capacity (Max) 1st weighingrangeCAP 2Balance capacity (Max) 2nd weighingrangeAdjust weighing system according to configuration.CAL nonLin Adjustment, see chap. 6.5LinEAr Linearisation see chap. 6.6<strong>KFS</strong>-T-BA_IA-e-1213 51
13 Declaration of conformityEG-KonformitätserklärungEC- Déclaration de conformitéEC-Dichiarazione di conformitàEC- Declaração de conformidadeEC-Deklaracja zgodnościDKonformitätserklärungGB Declaration ofconformityCZ Prohlášení oshodeE Declaración deconformidadF Déclaration deconformitéI Dichiarazione diconformitàNL ConformiteitverklaringP Declaração deconformidadePL DeklaracjazgodnościRUS Заявление осоответствии<strong>KERN</strong> & Sohn GmbHD-72322 Balingen-FrommernPostbox 4052E-Mail: info@kern-sohn.deDeclaration of conformityTel: 0049-[0]7433- 9933-0Fax: 0049-[0]7433-9933-149Internet: www.kern-sohn.deEC-Declaration of -ConformityEC-Declaración de ConformidadEC-ConformiteitverklaringEC- Prohlášení o shodeEC-Заявление о соответствииWir erklären hiermit, dass das Produkt, auf das sich diese Erklärung bezieht,mit den nachstehenden Normen übereinstimmt.We hereby declare that the product to which this declaration refers conformswith the following st<strong>and</strong>ards.Tímto prohlašujeme, že výrobek, kterého se toto prohlášení týká, je v souladus níže uvedenými normami.Manifestamos en la presente que el producto al que se refiere estadeclaración está de acuerdo con las normas siguientesNous déclarons avec cela responsabilité que le produit, auquel se rapporte laprésente déclaration, est conforme aux normes citées ci-après.Dichiariamo con ciò che il prodotto al quale la presente dichiarazione siriferisce è conforme alle norme di seguito citate.Wij verklaren hiermede dat het product, waarop deze verklaring betrekkingheeft, met de hierna vermelde normen overeenstemt.Declaramos por meio da presente que o produto no qual se refere estadeclaração, corresponde às normas seguintes.Niniejszym oświadczamy, że produkt, którego niniejsze oświadczenie dotyczy,jest zgodny z poniższymi normami.Мы заявляем, что продукт, к которому относится данная декларация,соответствует перечисленным ниже нормам.Electronic Balance: <strong>KERN</strong> <strong>KFS</strong>-T;BFS;IFSEU DirectiveSt<strong>and</strong>ards2004/108/EC EN55022: 2006 A1:2007EN61000-3-3:1955+A1:2001+A2:2005EN55024: 1998+A1:2001+A2:20032006/95/EC EN 60950-1:2006EN 60065:2002+A1:20062005/32/ECDate: 18.07.2011Signature:<strong>KERN</strong> & Sohn GmbHManagement<strong>KERN</strong> & Sohn GmbH, Ziegelei 1, D-72336 Balingen, Tel. +49-[0]7433/9933-0Fax +49-[0]7433/9933-149, E-Mail: info@kern-sohn.com, Internet: www.kern-sohn.com52 <strong>KFS</strong>-T-BA_IA-e-1213