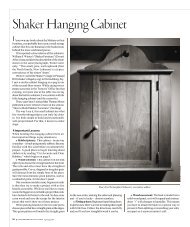
Classic Shaker Side Table - Popular Woodworking Magazine
Classic Shaker Side Table - Popular Woodworking Magazine
Classic Shaker Side Table - Popular Woodworking Magazine
- No tags were found...
Create successful ePaper yourself
Turn your PDF publications into a flip-book with our unique Google optimized e-Paper software.
ShortcutsTwo Finger Tricks for Drilling and Sawing StraightPoint index fingerin line with drill bitUse middle fingerto operate triggerFor first-time (or even experienced) drill users, itcan be difficult to drill a straight hole every time.Your eyes can trick you. Therefore, it’s best to letyour brain and body take over. When using yourdrill, lay your index finger along the barrel ofthe drill (in line with the bit), then use your middlefinger to pull the trigger. Essentially, you’reusing your index finger to point the way you wantto drill. This technique will allow your body topoint straight every time.David Thiel, senior editorPlace index finger on top of blade,pointing in direction of cutTry to usefull length of bladeA sharp hand saw can be a precision instrumentwith just a little practice. Here are three tips I wastaught that make all saws cut straighter and faster.One: Similar to the shortcut shown at left, alwayshold the saw with your index finger extended out,pointing down the blade. This greatly improvesyour control. (This advice is true for many tools,actually). Two: Use very little downward pressurewhen sawing. Let the saw do the work. If you pressthe saw down as you cut, it will wander off the line.Three: Woodworkers tend to use the teeth only inthe middle of the saw. As you are cutting, pretendthat the saw is longer than it actually is. This willtrick you into making longer strokes. Your sawwill cut faster and the teeth will stay sharp longerbecause you are using more of them.Christopher Schwarz, executive editorNo More Broken DowelsLike most turners, I use a 3 ⁄ 8 " dowel glued into asmall block of wood when turning bottle stoppers.The dowel provides a handy way to hold thework in a standard drill chuck in the head stock.The problem was, I would sometimes break thedowel when turning, ruining the work. I guessedthat one of the reasons the dowel was breakingwas because of the small area of contact in thechuck on the dowel itself. Remembering I had anold 3 ⁄ 8 " split-sleeve router collet, I tried insertingthe dowel in the collet, then the collet in the drillchuck. Now the dowel was supported all aroundby a steel sleeve. Since adding the collet to my setup,I haven’t broken a dowel yet.Steve Shanesy, editor & publisherSleeve placed intoSleeve placed intodrill chuck on lathe3 ⁄ 8" routercollet givesfull supportFixing Gaps in JointsThis is an often-forgotten carpenter’s trick. Whenyou have two parts of a joint that won’t closetightly, there is a simple solution. First put the jointtogether and apply enough clamp or hand pressureto keep the parts in place. Take a fine-toothsaw (a Japanese flush-cutting saw is ideal) and sawbetween the two parts of the joint. The small kerfUse workpieceas guidewhen cuttingClamp workpieceto benchtopwill remove the imperfections between the twomating parts and the joint will go together tightly.This works with many joints including half-laps,miters, mortise-and-tenons and scarf joints.David FlemingCobden, OntarioParts don’t meetat clean lineJoint tight afterthe cut at the jointJointer’s Guard a Source of ErrorRecently in our shop here at <strong>Woodworking</strong> <strong>Magazine</strong>,we were having trouble getting our jointerto machine an edge that was 90° to the face of theboard. At first we thought our machinist squarehad gone out of true, but that wasn’t the case. Nomatter how much we tweaked the fence, all theedges were off a couple of degrees.Then one day it dawned on me: The jointer’sspring-loaded guard was slapping the machine’sfence after each pass. The guard wasn’t hittingthe fence hard, but it was enough to throw off theangle setting – no matter how tightly we lockedthe fence down. Here’s how to see if you have thisproblem: Set your jointer’s fence to 90° and allowthe spring-loaded guard to strike the fence. Thencheck the angle of the fence again.The solution is simple: Set the tension on theguard so that it doesn’t slap the fence after eachboard passes over the machine’s cutterhead. Adjustthe tension until the guard swings to cover thecutterhead, but doesn’t strike the fence.Christopher Schwarz, executive editor4 ■ woodworking magazine Autumn 2004


