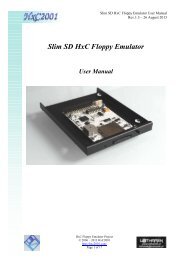
User Manual - HxC Floppy Emulator
User Manual - HxC Floppy Emulator
User Manual - HxC Floppy Emulator
- No tags were found...

Create successful ePaper yourself
Turn your PDF publications into a flip-book with our unique Google optimized e-Paper software.
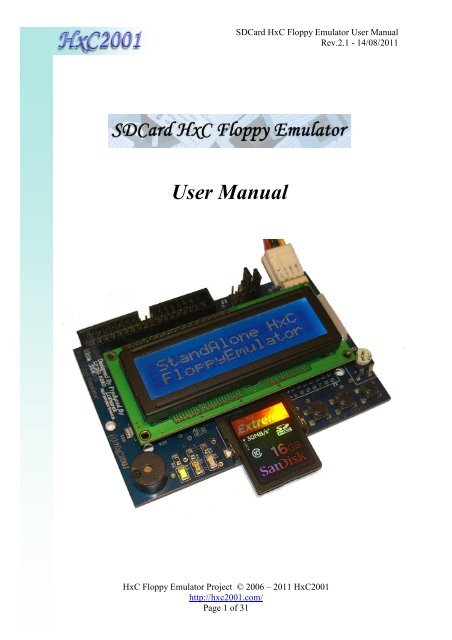
SDCard <strong>HxC</strong> <strong>Floppy</strong> <strong>Emulator</strong> <strong>User</strong> <strong>Manual</strong>Rev.2.1 - 14/08/2011<strong>User</strong> <strong>Manual</strong><strong>HxC</strong> <strong>Floppy</strong> <strong>Emulator</strong> Project © 2006 – 2011 <strong>HxC</strong>2001http://hxc2001.com/Page 1 of 31
SDCard <strong>HxC</strong> <strong>Floppy</strong> <strong>Emulator</strong> <strong>User</strong> <strong>Manual</strong>Rev.2.1 - 14/08/2011SDCard <strong>HxC</strong> <strong>Floppy</strong> <strong>Emulator</strong> <strong>User</strong> Guide DisclaimerThe information in this document is subject to change without notice and does notrepresent a commitment on the part of <strong>HxC</strong>2001. No part of this manual may be reproducedor transmitted in any form for any purpose other than the purchaser's personal use, withoutthe express written permission of <strong>HxC</strong>2001. <strong>HxC</strong>2001 has made every effort to providecomplete details about the product in this manual, but makes no warranty of any kind withregard to this material, including, but not limited to, the implied warranties ofmerchantability or fitness for a particular purpose. In no event shall <strong>HxC</strong>2001 be liable forany incidental, special, indirect, or consequential damages whatsoever included but notlimited to lost profits arising out of errors or omissions in this manual or the informationcontained herein.All trademarks mentioned in this document, belong to their respective owners.Website : http://hxc2001.com/This product is manufactured and sold by Lotharek:http://www.lotharek.pl/© 2006-2011 Jean-François DEL NERO© 2006-2011 <strong>HxC</strong>2001.All rights reserved.SDCard <strong>HxC</strong> <strong>Floppy</strong> <strong>Emulator</strong> <strong>User</strong> Guide issued August 2011.<strong>HxC</strong> <strong>Floppy</strong> <strong>Emulator</strong> Project © 2006 – 2011 <strong>HxC</strong>2001http://hxc2001.com/Page 2 of 31
SDCard <strong>HxC</strong> <strong>Floppy</strong> <strong>Emulator</strong> <strong>User</strong> <strong>Manual</strong>Rev.2.1 - 14/08/2011Summary:1 General description / requirement .......................................................................................... 52 Hardware requirement / setup ................................................................................................ 62.1 Power supply...................................................................................................................... 62.2 <strong>Floppy</strong> interface connection ............................................................................................... 72.3 Jumper settings................................................................................................................... 82.3.1 Atari ST / Amiga / Shugart jumper settings................................................................... 92.3.2 PC Compatible jumper settings.................................................................................... 102.3.3 Amstrad CPC6128 jumper settings .............................................................................. 113 Quick step by step guide ...................................................................................................... 123.1 SDCard <strong>HxC</strong> <strong>Floppy</strong> <strong>Emulator</strong> installation ..................................................................... 123.2 Preparing the SDCard....................................................................................................... 123.3 Convert/Copy floppy images to the SDCard.................................................................... 143.4 Use the SDCard with the SDCard <strong>HxC</strong> <strong>Floppy</strong> <strong>Emulator</strong> ............................................... 164 <strong>HxC</strong> <strong>Floppy</strong> <strong>Emulator</strong> software ........................................................................................... 184.1 The main window............................................................................................................. 184.2 SDCard <strong>HxC</strong> <strong>Floppy</strong> <strong>Emulator</strong> settings window ............................................................. 194.3 Custom raw file image loader / floppy generator............................................................. 204.4 <strong>Floppy</strong> dump feature ........................................................................................................ 214.5 File system based floppy generator.................................................................................. 225 SDCard <strong>HxC</strong> <strong>Floppy</strong> <strong>Emulator</strong> file selector software.......................................................... 236 SDCard <strong>HxC</strong> <strong>Floppy</strong> <strong>Emulator</strong> firmware update................................................................. 247 Technical details................................................................................................................... 257.1 <strong>Floppy</strong> interface................................................................................................................ 257.2 Power supply.................................................................................................................... 257.3 <strong>User</strong> Interface ................................................................................................................... 267.4 SDCard support ................................................................................................................ 267.5 SDCard Filesystem........................................................................................................... 267.6 Read / Write support ........................................................................................................ 267.7 <strong>Floppy</strong> bitrate supported................................................................................................... 277.8 Additional features ........................................................................................................... 277.9 Mechanical drawing ......................................................................................................... 277.10 Supported file format / Input............................................................................................ 287.11 Tested Target list............................................................................................................. 307.12 Contact / Project page ..................................................................................................... 31<strong>HxC</strong> <strong>Floppy</strong> <strong>Emulator</strong> Project © 2006 – 2011 <strong>HxC</strong>2001http://hxc2001.com/Page 3 of 31
SDCard <strong>HxC</strong> <strong>Floppy</strong> <strong>Emulator</strong> <strong>User</strong> <strong>Manual</strong>Rev.2.1 - 14/08/2011Figure Summary:Figure 1 : The SDCard <strong>HxC</strong> <strong>Floppy</strong> <strong>Emulator</strong> .......................................................................... 5Figure 2 : Power supply connector pinout ................................................................................. 6Figure 3 : <strong>Floppy</strong> connector ....................................................................................................... 7Figure 4 : Jumpers settings......................................................................................................... 8Figure 5 : Format the SDCard in FAT32 ................................................................................. 12Figure 6 : Copy HXCSDFE.CFG to the SDCard..................................................................... 13Figure 7 : Start <strong>HxC</strong> <strong>Floppy</strong> <strong>Emulator</strong> software ...................................................................... 14Figure 8 : The batch converter window................................................................................... 14Figure 9 : HFE files after conversion ....................................................................................... 15Figure 10 : Disk drive menu selector ....................................................................................... 16Figure 11 : Browsing the SDCard ............................................................................................ 16Figure 12 : <strong>Floppy</strong> image disk loaded...................................................................................... 17Figure 13 : SDCard write protect switch.................................................................................. 17Figure 14 : <strong>HxC</strong> <strong>Floppy</strong> <strong>Emulator</strong> software functions............................................................. 18Figure 15 : SDCard <strong>HxC</strong> FLoppy <strong>Emulator</strong> settings window ................................................. 19Figure 16 : RAW File loader window...................................................................................... 20Figure 17 : The floppy dump window...................................................................................... 21Figure 18 : Create a File system based floppy window ........................................................... 22Figure 19 : File image selector main page and help page (Amiga version)............................ 23Figure 20 : <strong>Floppy</strong> connector pinout ........................................................................................ 25Figure 21 : Power connector pinout ......................................................................................... 25Figure 22 : Front panel connector pinout ................................................................................. 26<strong>HxC</strong> <strong>Floppy</strong> <strong>Emulator</strong> Project © 2006 – 2011 <strong>HxC</strong>2001http://hxc2001.com/Page 4 of 31
SDCard <strong>HxC</strong> <strong>Floppy</strong> <strong>Emulator</strong> <strong>User</strong> <strong>Manual</strong>Rev.2.1 - 14/08/20111 General description / requirementThe SDCard <strong>HxC</strong> <strong>Floppy</strong> <strong>Emulator</strong> is an universal floppy drive emulator based onSD/SDHC memory card.To use it you need :- A computer/device/sampler/keyboard with a Shugart or PC compatible floppy diskdrive interface.- An SD or SDHC memory card (from 64MB up to 32GB).- A PC to pre-process/prepare floppy file images and copy them on the SDCard.Figure 1 : The SDCard <strong>HxC</strong> <strong>Floppy</strong> <strong>Emulator</strong><strong>HxC</strong> <strong>Floppy</strong> <strong>Emulator</strong> Project © 2006 – 2011 <strong>HxC</strong>2001http://hxc2001.com/Page 5 of 31
SDCard <strong>HxC</strong> <strong>Floppy</strong> <strong>Emulator</strong> <strong>User</strong> <strong>Manual</strong>Rev.2.1 - 14/08/20112 Hardware requirement / setup2.1 Power supplyThe SD <strong>HxC</strong> <strong>Floppy</strong> <strong>Emulator</strong> need a +5V power source to work.The power source must be able to deliver at least 500mA for proper operations (200mA forthe SD <strong>HxC</strong> <strong>Floppy</strong> <strong>Emulator</strong> and 200mA for the SD/SDHC Card).The power supply connector is a standard floppy disk drive power supply connector.The +12V line is not used by the emulator.Below the power connector pinout:Figure 2 : Power supply connector pinoutA special care should be taken before connecting the powersupply. The device and the host computer can be damaged if thedevice is powered with a bad voltage. Some systems doesn’t use thestandard pinout : +5V and +12V power supply lines can bereversed.Amstrad CPC6128 users : The CPC6128 floppy connector hasa reverse pinout : +5V and +12V are exchanged. Unlike otherssystems : Orange wire=5V, Red wire=12V, Black wires=GND.Special care must be taken before connecting the power supplyconnector on the CPC6128.To test the device securely, disconnect the +12V power source sincethe CPC6128 doesn’t need it.<strong>HxC</strong> <strong>Floppy</strong> <strong>Emulator</strong> Project © 2006 – 2011 <strong>HxC</strong>2001http://hxc2001.com/Page 6 of 31
SDCard <strong>HxC</strong> <strong>Floppy</strong> <strong>Emulator</strong> <strong>User</strong> <strong>Manual</strong>Rev.2.1 - 14/08/20112.2 <strong>Floppy</strong> interface connectionA 34 pin floppy cable must be used to connect the device to the host computer.This one can be twisted or non-twisted.Figure 3 : <strong>Floppy</strong> connectorNote 1: On most computer, pin 1 are indicated by the red wire on the on-place floppy cable.In this case the floppy cable may be connected directly (red wire on the pin 1 side – to theright).Note 2: On some case (Amiga,...), the original floppy cable is reversed : Pin 1 is in theopposite side of the red wire. In this case connect the floppy cable on the opposite side tothe emulator (red wire to the left), or reconnect the floppy cable in the right side on theAmiga motherboard. If your are using a twisted cable, the red wire MUST be to the right(pin 1).Note 3: If you are using the external floppy port of an Amstrad CPC6128 computer, youmust connect the floppy cable on the opposite side to the emulator (red wire to the left).To switch the emulator as the first disk drive and disable the internal disk drive, wire 23must be connected to the ground (with wire 24 for example).Note 4: If after connecting and setting the jumpers, the <strong>Floppy</strong> access LED is still alwayson, this probably means that the floppy cable is connected in the wrong way. (Drive selectlines forced/connected to the ground).<strong>HxC</strong> <strong>Floppy</strong> <strong>Emulator</strong> Project © 2006 – 2011 <strong>HxC</strong>2001http://hxc2001.com/Page 7 of 31
SDCard <strong>HxC</strong> <strong>Floppy</strong> <strong>Emulator</strong> <strong>User</strong> <strong>Manual</strong>Rev.2.1 - 14/08/20112.3 Jumper settingsHere is the jumper configuration settings:Figure 4 : Jumpers settingsTo use the device you must assign at least one ID drive for the emulator.Since the emulator is able to emulate 2 disk drives, there are 2 ID inputs :”Drive A” and“Drive B”.Unlike real floppy disk drive the SDCard <strong>HxC</strong> <strong>Floppy</strong> <strong>Emulator</strong> doesn’t use themotor control line. So there are only one jumper to set per virtual disk drive.Depending of the host computer type and the floppy cable used (twisted or not), themeaning of IDx/jumper lines may change. Below you can see some examples of jumperssettings.<strong>HxC</strong> <strong>Floppy</strong> <strong>Emulator</strong> Project © 2006 – 2011 <strong>HxC</strong>2001http://hxc2001.com/Page 8 of 31
SDCard <strong>HxC</strong> <strong>Floppy</strong> <strong>Emulator</strong> <strong>User</strong> <strong>Manual</strong>Rev.2.1 - 14/08/20112.3.1 Atari ST / Amiga / Shugart jumper settingsID line ID3 ID2 ID1 ID0Host Line MTRON DS2 DS1 DS0Function Motor On DF2 B: / DF1 A: / DF0Table 1 : Shugart jumper settingNote : If your are using a twisted floppy cable, the ID lines are inverted. In this case IDslines meaning are changed:ID line ID3 ID2 ID1 ID0Host Line DS0 DS1 DS2 MTRONFunction A: / DF0 B: / DF1 DF2 Motor OnTable 2 : Shugart jumper setting (twisted floppy cable)<strong>Emulator</strong> as the first disk drive(A: / DF0)<strong>Emulator</strong> as the first and second disk drive(A: / DF0, B: / DF1)<strong>Emulator</strong> as the first disk drive(A: / DF0)with a twisted floppy cable!<strong>Emulator</strong> as the first and second disk drive(A: / DF0, B: / DF1)with a twisted floppy cable!<strong>HxC</strong> <strong>Floppy</strong> <strong>Emulator</strong> Project © 2006 – 2011 <strong>HxC</strong>2001http://hxc2001.com/Page 9 of 31
SDCard <strong>HxC</strong> <strong>Floppy</strong> <strong>Emulator</strong> <strong>User</strong> <strong>Manual</strong>Rev.2.1 - 14/08/20112.3.2 PC Compatible jumper settingsID line ID3 ID2 ID1 ID0Host Line /MOTEB /DRVSA /DRVSB /MOTEAFunction Motor Enable B Drive Sel A: Drive Sel B: Motor Enable ATable 3 : PC jumper settingNote : If your are using a twisted floppy cable, the ID lines are inverted. In this case IDslines meaning are changed:ID line ID3 ID2 ID1 ID0Host Line /MOTEA /DRVSB /DRVSA /MOTEBFunction Motor Enable A Drive Sel B: Drive Sel A: Motor Enable BTable 4 : PC jumper setting (twisted floppy cable)<strong>Emulator</strong> as the first disk drive(A:)<strong>Emulator</strong> as the first and second disk drive(A:, B:)<strong>Emulator</strong> as the first disk drive(A:)with a twisted floppy cable!<strong>Emulator</strong> as the first and second disk drive(A: / DF0, B: / DF1)with a twisted floppy cable!<strong>HxC</strong> <strong>Floppy</strong> <strong>Emulator</strong> Project © 2006 – 2011 <strong>HxC</strong>2001http://hxc2001.com/Page 10 of 31
SDCard <strong>HxC</strong> <strong>Floppy</strong> <strong>Emulator</strong> <strong>User</strong> <strong>Manual</strong>Rev.2.1 - 14/08/20112.3.3 Amstrad CPC6128 jumper settingsBelow the possible jumper settings for Amstrad CPC 6128 (external port connection).<strong>Emulator</strong> as the first disk drive<strong>Emulator</strong> as the second disk driveNote : In this case the internal floppydisk drive must be disabled.To do this you can connect wire 23 ofthe external floppy cable to theground (wire 24), or simply unplugthe floppy cable from the internal diskdrive.(type |b to select the floppy emulator,and |a to select the internal disk drive)<strong>HxC</strong> <strong>Floppy</strong> <strong>Emulator</strong> Project © 2006 – 2011 <strong>HxC</strong>2001http://hxc2001.com/Page 11 of 31
SDCard <strong>HxC</strong> <strong>Floppy</strong> <strong>Emulator</strong> <strong>User</strong> <strong>Manual</strong>Rev.2.1 - 14/08/20113 Quick step by step guideTo use the SDCard <strong>HxC</strong> <strong>Floppy</strong> <strong>Emulator</strong>, follow this guide :3.1 SDCard <strong>HxC</strong> <strong>Floppy</strong> <strong>Emulator</strong> installationRemove the original floppy disk drive from the host computer, and replace it by theSDCard <strong>HxC</strong> <strong>Floppy</strong> <strong>Emulator</strong>.Please read the “Hardware requirement/setup” section (Page 6) for more details.3.2 Preparing the SDCard► Format the SDCard in FAT32To use the SDCard with the SDCard <strong>HxC</strong> <strong>Floppy</strong> <strong>Emulator</strong> this one must beformatted in FAT32. Others file system are currently not supported.So the first thing to do is format the SDCard in FAT32:Figure 5 : Format the SDCard in FAT32<strong>HxC</strong> <strong>Floppy</strong> <strong>Emulator</strong> Project © 2006 – 2011 <strong>HxC</strong>2001http://hxc2001.com/Page 12 of 31
►Copy the file HXCSDFE.CFG into the SDCardSDCard <strong>HxC</strong> <strong>Floppy</strong> <strong>Emulator</strong> <strong>User</strong> <strong>Manual</strong>Rev.2.1 - 14/08/2011The SDCard <strong>HxC</strong> <strong>Floppy</strong> <strong>Emulator</strong> need the HXCSDFE.CFG be present on theSDCard. This file contains the floppy emulator settings and the path of last floppy fileused/selected.The HXCSDFE.CFG file can be created with the <strong>HxC</strong> <strong>Floppy</strong> <strong>Emulator</strong> software orcan be found in the firmware zip file:http://hxc2001.free.fr/floppy_drive_emulator/SDCard_<strong>HxC</strong><strong>Floppy</strong><strong>Emulator</strong>_firmware.zipFor more informations about the SDCard <strong>HxC</strong> <strong>Floppy</strong> <strong>Emulator</strong> settings please go to theSDCard <strong>HxC</strong> <strong>Floppy</strong> <strong>Emulator</strong> settings window chapter (page 19).Figure 6 : Copy HXCSDFE.CFG to the SDCardAfter this the SDCard is usable with the SDCard <strong>HxC</strong> <strong>Floppy</strong> <strong>Emulator</strong>.Now floppy file images can be copied to this SDCard .NOTE: If you want to use the floppy image file selector, copy the AUTOBOOT.HFE fileafter the HXCSDFE.CFG file.For more details please go to the SDCard <strong>HxC</strong> <strong>Floppy</strong> <strong>Emulator</strong> file selector section (page23).<strong>HxC</strong> <strong>Floppy</strong> <strong>Emulator</strong> Project © 2006 – 2011 <strong>HxC</strong>2001http://hxc2001.com/Page 13 of 31
SDCard <strong>HxC</strong> <strong>Floppy</strong> <strong>Emulator</strong> <strong>User</strong> <strong>Manual</strong>Rev.2.1 - 14/08/20113.3 Convert/Copy floppy images to the SDCardThe <strong>HxC</strong> <strong>Floppy</strong> <strong>Emulator</strong> software allows you to create, convert and manage floppydisk images files for the SDCard <strong>HxC</strong> <strong>Floppy</strong> <strong>Emulator</strong>.This software can be started by double-clicking on the <strong>HxC</strong><strong>Floppy</strong><strong>Emulator</strong>.exe executable.► Use the “Batch converter” functionFigure 7 : Start <strong>HxC</strong> <strong>Floppy</strong> <strong>Emulator</strong> softwareTo convert a large quantities of floppy images, the batch converter can be used. To dothis, click on the button. The following window should appears:Figure 8 : The batch converter windowChoose the SDCard disk drive (D: here) as target directory.For the SDCard <strong>HxC</strong> <strong>Floppy</strong> <strong>Emulator</strong> the target file format must be set to HFE.Drag and drop on the window all floppy images you want to convert and copy in theSDCard.<strong>HxC</strong> <strong>Floppy</strong> <strong>Emulator</strong> Project © 2006 – 2011 <strong>HxC</strong>2001http://hxc2001.com/Page 14 of 31
SDCard <strong>HxC</strong> <strong>Floppy</strong> <strong>Emulator</strong> <strong>User</strong> <strong>Manual</strong>Rev.2.1 - 14/08/2011Once done, the SDCard contains HFE floppy images. Now you can insert it in theSDCard <strong>HxC</strong> <strong>Floppy</strong> <strong>Emulator</strong>.Figure 9 : HFE files after conversionNote 1: You can recursively convert a folder and its subfolders by specify its path in the“Source directory” field.Note 2: A HFE file can be converted back to a standard floppy image : ADF/IMG or IMD.You just need to change the Target file format field.<strong>HxC</strong> <strong>Floppy</strong> <strong>Emulator</strong> Project © 2006 – 2011 <strong>HxC</strong>2001http://hxc2001.com/Page 15 of 31
SDCard <strong>HxC</strong> <strong>Floppy</strong> <strong>Emulator</strong> <strong>User</strong> <strong>Manual</strong>Rev.2.1 - 14/08/20113.4 Use the SDCard with the SDCard <strong>HxC</strong> <strong>Floppy</strong> <strong>Emulator</strong>When you insert the SDCard in the emulator, this drive selector should appear. Select thedisk drive you want use with buttons and and press to confirm.Figure 10 : Disk drive menu selectorNote: The drive menu selection can be disabled if you don’t intend to use the two-driveemulation feature. More details in SDCard <strong>HxC</strong> <strong>Floppy</strong> <strong>Emulator</strong> settings window (page19).You can now browse the SDCard with and buttons and to enter a subfolder or loada floppy image disk.Figure 11 : Browsing the SDCard<strong>HxC</strong> <strong>Floppy</strong> <strong>Emulator</strong> Project © 2006 – 2011 <strong>HxC</strong>2001http://hxc2001.com/Page 16 of 31
SDCard <strong>HxC</strong> <strong>Floppy</strong> <strong>Emulator</strong> <strong>User</strong> <strong>Manual</strong>Rev.2.1 - 14/08/2011Figure 12 : <strong>Floppy</strong> image disk loadedThe floppy disk image is loaded and can be access by the host computer.To eject the floppy disk image press briefly.You can also directly change floppy disk images by pressing or buttons.If you want to come back to the disk drive selector menu, in order to insert another floppyimage to the other virtual disk drive, press until this menu appear.Note: The floppy write protect can be set/unset by using the SDCard write protect switch.Figure 13 : SDCard write protect switch<strong>HxC</strong> <strong>Floppy</strong> <strong>Emulator</strong> Project © 2006 – 2011 <strong>HxC</strong>2001http://hxc2001.com/Page 17 of 31
SDCard <strong>HxC</strong> <strong>Floppy</strong> <strong>Emulator</strong> <strong>User</strong> <strong>Manual</strong>Rev.2.1 - 14/08/20114 <strong>HxC</strong> <strong>Floppy</strong> <strong>Emulator</strong> softwareThe <strong>HxC</strong> <strong>Floppy</strong> <strong>Emulator</strong> software allows you to convert or create floppy image filesfor the SDCard <strong>HxC</strong> <strong>Floppy</strong> <strong>Emulator</strong>.The list of supported file image format can be found in Supported file format / Input (page28) or on the SDCard <strong>HxC</strong> <strong>Floppy</strong> <strong>Emulator</strong> project page :http://hxc2001.free.fr/floppy_drive_emulator/4.1 The main windowThis window allows you to :► Load & Load Raw image:► Batch converter:► Create FS <strong>Floppy</strong>:Figure 14 : <strong>HxC</strong> <strong>Floppy</strong> <strong>Emulator</strong> software functions► Export:► SD <strong>HxC</strong> <strong>Floppy</strong> <strong>Emulator</strong> settings:► USB <strong>HxC</strong> <strong>Floppy</strong> <strong>Emulator</strong> settings:►<strong>Floppy</strong> disk dump:Load a floppy image.Convert automatically a folder of floppyimage.Create a MS DOS or Amiga DOS floppydisk.Export/convert the loaded floppy image.Edit/create the HXCSDFE.CFG file.Change the USB <strong>HxC</strong> <strong>Floppy</strong> <strong>Emulator</strong>settings.Dump a floppy disk and load it.<strong>HxC</strong> <strong>Floppy</strong> <strong>Emulator</strong> Project © 2006 – 2011 <strong>HxC</strong>2001http://hxc2001.com/Page 18 of 31
SDCard <strong>HxC</strong> <strong>Floppy</strong> <strong>Emulator</strong> <strong>User</strong> <strong>Manual</strong>Rev.2.1 - 14/08/20114.2 SDCard <strong>HxC</strong> <strong>Floppy</strong> <strong>Emulator</strong> settings windowFigure 15 : SDCard <strong>HxC</strong> FLoppy <strong>Emulator</strong> settings windowThis window allows you to create/edit the HXCSDFE.CFG file to change the behavior ofthe emulator :►UI sound :►Head step sound :►Backlight standby :►Device standby :►Load last loaded floppy :►Disable disk drive selector :►Enable auto boot mode :►HFE file interface mode :This slide can be used to change the user interfacesound level of the emulator.This slide can be used to change the head step soundlevel of the emulator.This slide can be used to change LCD backlight poweroff timing.This slide can be used to change standby timing.If checked, the last selected floppy image are autoloadedat power up.If checked, the drive selection is disabled.If checked, the autoboot.hfe file is loaded at power up.If you intend to use a floppy image software selector,this feature must be set.The floppy interface mode are automatically set intothe SDCard <strong>HxC</strong> <strong>Floppy</strong> <strong>Emulator</strong> file image (HFE).To force/change the floppy disk interface mode,before converting files, uncheck "Auto" and choosethe wanted floppy interface mode.<strong>HxC</strong> <strong>Floppy</strong> <strong>Emulator</strong> Project © 2006 – 2011 <strong>HxC</strong>2001http://hxc2001.com/Page 19 of 31
4.3 Custom raw file image loader / floppy generatorSDCard <strong>HxC</strong> <strong>Floppy</strong> <strong>Emulator</strong> <strong>User</strong> <strong>Manual</strong>Rev.2.1 - 14/08/2011Figure 16 : RAW File loader windowThis window allows you to specify a custom floppy disk format and load a raw fileusing your setting. You can also generate/format a virtual floppy according to your settingwith the “Create Empty <strong>Floppy</strong>” button.►Track type :Specify the track format : MFM(DD) or FM (SD).►Two sides floppy : If checked 2 sides (DS), otherwise 1 one side floppy (SS).►Reverse side : Exchange side 0 and side 1.►Track of a side groupedin the file :If checked the first half part of the file contain side 0 trackonly, and the other half part side 1 track.►Number of track : Specify the number of track on the floppy disk.►Sector per track : Specify the number of sector on a track.►Sector size :Specify the sector size.►Sector ID start : Specify the starting sector ID (commonly set to 1).►GAP3 length :Specify the GAP3/inter sector gap length.►Interleave :Specify the sectors interleave.►Skew :Specify the tracks skew.►Bitrate : Specify bitrate of the floppy disk (common values are :250000, 300000, 500000…).►RPM : Specify the disk rotation speed (common values are : 300,360).“Load” and “Create” buttons may appear grey if you have specify a track formatwhich doesn’t fit into the actual track size. The track size is computed with the RPM andbitrate parameters. In this case try to reduce the GAP3 value or correct your settings.<strong>HxC</strong> <strong>Floppy</strong> <strong>Emulator</strong> Project © 2006 – 2011 <strong>HxC</strong>2001http://hxc2001.com/Page 20 of 31
SDCard <strong>HxC</strong> <strong>Floppy</strong> <strong>Emulator</strong> <strong>User</strong> <strong>Manual</strong>Rev.2.1 - 14/08/20114.4 <strong>Floppy</strong> dump featureThis function allows you to read real floppy disks to use their images on the SDCard<strong>HxC</strong> <strong>Floppy</strong> <strong>Emulator</strong>. This tool is able to read most of ISO/IBM MFM(DD/HD) or FM(SD) floppy disk.To be able to use this function your PC must be equipped with the right floppy diskdrive (8” 5”1/4 or 3”1/2) connected to the motherboard. USB floppy disk drives are notsupported.This tool uses fdrawcmd for Windows developed by Simon Owen. You can downloadthe lastest version of this driver on this site : http://simonowen.com/fdrawcmdFigure 17 : The floppy dump windowThe dump settings depend on the disk type you need to dump. Below you will find somesafe settings:<strong>Floppy</strong> Disk Drive model Safe track setting1.44MB/720KB 3”1/2 80 tracks and 2 sides.1.2MB 5”1/480 tracks and 2 sides.360KB 5”1/440 tracks and 2 sides.8” 77 tracks and 2 sides.During reading, for each track, its format (encoding mode/bitrate, number of sector,sector layout…) is automatically determined by the tool and displayed in the status field.Once done the image of the floppy is loaded on the main window. You have to export it intoHFE to use it on the emulator.Note: The default floppy interface mode of dumped floppy disk is set to . If the targeted system use another floppy interface mode (PC for example) don’tforget to change this setting in the SDCard <strong>HxC</strong> <strong>Floppy</strong> <strong>Emulator</strong> settings (more details onpage 19) before exporting the floppy image.Caution: Be careful with the Number of track setting ! A too high value may damage thefloppy disk drive during reading.Note: If you are reading an 5”1/4 360KB floppy disk on an 5”1/4 1.2MB disk drive, set theDouble step feature and set the number of tracks to 40.<strong>HxC</strong> <strong>Floppy</strong> <strong>Emulator</strong> Project © 2006 – 2011 <strong>HxC</strong>2001http://hxc2001.com/Page 21 of 31
SDCard <strong>HxC</strong> <strong>Floppy</strong> <strong>Emulator</strong> <strong>User</strong> <strong>Manual</strong>Rev.2.1 - 14/08/20114.5 File system based floppy generator.The <strong>HxC</strong> <strong>Floppy</strong> <strong>Emulator</strong> software is able to generate a virtual floppy disk based on afiles system. This feature allows you to generate a MS DOS or AmigaDos floppy diskcontaining your files.To generate a FAT12 floppy disk, click on the “Create FS <strong>Floppy</strong>” button and choosethe target floppy format (Example : 3”5 1.44MB MSDOS floppy).Then click on the “Inject director” button and select the folder containing the floppyfiles / directory tree.Once done you have just to export the created floppy image into HFE file and copy it tothe SDCard.Figure 18 : Create a File system based floppy windowNote: By adding an extension to the name of the folder you can generate the floppy disk bya drag & drop of the folder on the <strong>HxC</strong> <strong>Floppy</strong> <strong>Emulator</strong> software window.For example if you drag and drop a folder with the name “myfloppydisk.fat1440”, a1.44MB MS DOS floppy is generated.<strong>HxC</strong> <strong>Floppy</strong> <strong>Emulator</strong> Project © 2006 – 2011 <strong>HxC</strong>2001http://hxc2001.com/Page 22 of 31
SDCard <strong>HxC</strong> <strong>Floppy</strong> <strong>Emulator</strong> <strong>User</strong> <strong>Manual</strong>Rev.2.1 - 14/08/20115 SDCard <strong>HxC</strong> <strong>Floppy</strong> <strong>Emulator</strong> file selector softwareThe SDCard <strong>HxC</strong> <strong>Floppy</strong> <strong>Emulator</strong> file selector software is a tool running on the hostcomputer. This tool allows you to select floppy file image directly on the host computerkeyboard and screen. In this case the LCD is optional, and only one push button is needed.This tool is actually available on Amiga, Atari and Amstrad CPC platform.To use this tool, copy the AUTOBOOT.HFE to the root of the SDCard and set the"Enable auto boot mode" feature (page 19 for more details).The last version of the tool can be downloaded on the project website :http://hxc2001.free.fr/floppy_drive_emulator/index.html#downloadFigure 19 : File image selector main page and help page (Amiga version)Once started you can see and browse the content of the SDCard.To get the help page, press the key “HELP”.Basically you can select a file image and reboot with it, or make a “slot list” with multipledisk.Once rebooted, the floppy disk emulator buttons meaning change to:Button : Previous Slot.Button : Next SlotButton: Select first slot (AUTOBOOT.HFE)Each time another image is selected the slot number is indicated by the buzzer and the SDaccess LED.Note : If you press any button more than 1s, the first slot/selector software is selected. Inthis case only one push button is needed.<strong>HxC</strong> <strong>Floppy</strong> <strong>Emulator</strong> Project © 2006 – 2011 <strong>HxC</strong>2001http://hxc2001.com/Page 23 of 31
SDCard <strong>HxC</strong> <strong>Floppy</strong> <strong>Emulator</strong> <strong>User</strong> <strong>Manual</strong>Rev.2.1 - 14/08/20116 SDCard <strong>HxC</strong> <strong>Floppy</strong> <strong>Emulator</strong> firmware updateSDCard <strong>HxC</strong> <strong>Floppy</strong> <strong>Emulator</strong> Update procedure :►Download the last firmware version:http://hxc2001.free.fr/floppy_drive_emulator/SDCard_<strong>HxC</strong><strong>Floppy</strong><strong>Emulator</strong>_firmware.zip►Copy the new firmware file (*.upd) to a freshly formated FAT32 SDCard.►Insert the SDCard into the emulator.►Press Left and Right buttons before power up and keep it pressed at least 1 seconds atpower up.►Wait some seconds .... its done !Note 1:The file must be unfragmented on the SDCard and must be in the first part of the rootdirectory.For these reasons it is recommended to use a freshly formatted FAT32 SDCard,otherwise you may get the error 4 or 6 (see note 2).Note 2:Bootstrap LED error messages:Error 1 : (blink 1 time and 2 seconds pause cycle) No entry point (->no software flashed)Error 2 : (blink 2 time and 2 seconds pause cycle) SDCard init error.Error 3 : (blink 3 time and 2 seconds pause cycle) FAT error.Error 4 : (blink 4 time and 2 seconds pause cycle) UPD File not found!Error 5 : (blink 5 time and 2 seconds pause cycle) Bad UPD File header! (bad file)Error 6 : (blink 6 time and 2 seconds pause cycle) Bad data CRC! (file corrupted)Error 7 : (blink 7 time and 2 seconds pause cycle) Bad data size!Error 8 : (blink 8 time and 2 seconds pause cycle) Write error (Pic flash error)<strong>HxC</strong> <strong>Floppy</strong> <strong>Emulator</strong> Project © 2006 – 2011 <strong>HxC</strong>2001http://hxc2001.com/Page 24 of 31
SDCard <strong>HxC</strong> <strong>Floppy</strong> <strong>Emulator</strong> <strong>User</strong> <strong>Manual</strong>Rev.2.1 - 14/08/20117 Technical details7.1 <strong>Floppy</strong> interface HE10 34 pins floppy connector Shugart compatible mode supported. PC compatible mode supported. 24mA driving capability. Two floppy disk drives emulation. 300 RPM , 360 RPM supported (others RPM possible). Up to 255 tracks Up to 2 Sides7.2 Power supplyFigure 20 : <strong>Floppy</strong> connector pinout5V +/- 10% standard power floppy connector input.500mA max current consumption. (Standby :100mA,RD/WR:170mA min – 450mA max. depend on the SDCard)Figure 21 : Power connector pinout<strong>HxC</strong> <strong>Floppy</strong> <strong>Emulator</strong> Project © 2006 – 2011 <strong>HxC</strong>2001http://hxc2001.com/Page 25 of 31
SDCard <strong>HxC</strong> <strong>Floppy</strong> <strong>Emulator</strong> <strong>User</strong> <strong>Manual</strong>Rev.2.1 - 14/08/20117.3 <strong>User</strong> Interface3 LEDs:• Power LED• <strong>Floppy</strong> access LED• SDCard access LED3 buttons ("Previous","Select/Eject","Next").1 audio transducer (Head Step and <strong>User</strong> interface sound).Detachable 2*16 chars Alphanumerical LCD.(Note : LCD and buttons can be put on an external front panel)On screen display software for Amiga, Atari ST and Amstrad CPCcomputer.7.4 SDCard supportFigure 22 : Front panel connector pinoutSD Card p to 2GB.SDHC Card supported up to 32GB.(10Mhz SPI bus mode. Average byte rate: ~500KB/s)7.5 SDCard FilesystemFAT32 supported. Subdirectory and long name file supported.7.6 Read / Write supportTrack mode based floppy emulator (Full track pre-encoded in the HFE image file)Read support:• Most of existing formats (FM/MFM/Amiga track...)supported.• Custom tracks supported.Write support:• ISO MFM (DD) 256 Bytes-sector• ISO MFM (DD) 512 Bytes-sector• ISO MFM (DD) 1024 Bytes-sector• ISO FM (SD) 128 Bytes-sector• ISO FM (SD) 256 Bytes-sector• ISO FM (SD) 512 Bytes-sector<strong>HxC</strong> <strong>Floppy</strong> <strong>Emulator</strong> Project © 2006 – 2011 <strong>HxC</strong>2001http://hxc2001.com/Page 26 of 31
7.7 <strong>Floppy</strong> bitrate supportedSDCard <strong>HxC</strong> <strong>Floppy</strong> <strong>Emulator</strong> <strong>User</strong> <strong>Manual</strong>Rev.2.1 - 14/08/2011• ISO FM (SD) 1024 Bytes-sector• Amiga track write support (since the PCB revision C)• E-mu track write support (since the PCB revision C)250/300Kbits/s (SD/DD floppies)500Kbits/s (HD floppies)(others bit rates possible)Note : Variable bit rate not supported for the moment. So protected floppy disk image(IPF and STX file format) file support is only partial ! If you look for a devicesupporting IPF / STX please a have a look to the USB <strong>HxC</strong> <strong>Floppy</strong> <strong>Emulator</strong> device.7.8 Additional featuresFirmware update via the SDCard.Last Loaded <strong>Floppy</strong> Image autostart at power up.Fast floppy image loading (
SDCard <strong>HxC</strong> <strong>Floppy</strong> <strong>Emulator</strong> <strong>User</strong> <strong>Manual</strong>Rev.2.1 - 14/08/20117.10 Supported file format / InputFile format / Input Target Notes*.ADFAmiga computers*.ADZAmiga computers*.AFI Multiplatform <strong>HxC</strong> <strong>Floppy</strong> <strong>Emulator</strong> fileformat*.DSK (CopyQM) Multiplatform*.DSK (CPC DSK) Amstrad CPC computers*.DSK (MSX DSK) MSX computers*.DSK (Oric DSK) Oric computers MicroDisc or compatible FDCneeded*.DSK (TI99 DSK) TI99/4A computers*.D88NEC PC88/PC98*.DIMAtari ST computers*.DMSAmiga computers*.DPXOberheim DPX*.EDEEnsoniq EPS/ SQ-80/VFX-SD*.EM1Emax*.EM2Emax II*.EMX Emax I/II Operating system image*.EMUFD E-mu emulator*.EMUIIFD E-mu emulator II*.EIIE-mu emulator II*.SP1200FD E-mu SP1200*.EDMEnsoniq Mirage*.FDThomson TO8D*.HDMX68000*.HFE Multiplatform SD <strong>HxC</strong> <strong>Floppy</strong> <strong>Emulator</strong> fileformat*.IMDMultiplatform*.IMGPC / Multiplatform*.IMG Prophet 2000/2002*.IPF Multiplatform Need CAPSImg.dll*.JV1TRS-80*.JV3TRS-80*.JVCTRS-80 CoCo*.MFM Multiplatform <strong>HxC</strong> <strong>Floppy</strong> <strong>Emulator</strong> fileformat*.MGTSam Coupé*.SADSam Coupé*.MSAAtari ST computers*.SAPThomson TO8D*.SCLZX Spectrum*.SMC SNES / Super Famicom Generate a FAT12 floppy*.STAtari ST computers*.STT Atari ST computers STEem file format<strong>HxC</strong> <strong>Floppy</strong> <strong>Emulator</strong> Project © 2006 – 2011 <strong>HxC</strong>2001http://hxc2001.com/Page 28 of 31
SDCard <strong>HxC</strong> <strong>Floppy</strong> <strong>Emulator</strong> <strong>User</strong> <strong>Manual</strong>Rev.2.1 - 14/08/2011*.STX Atari ST computers Pasti file format*.TD0 Multiplatform Teledisk file format*.TRDZX Spectrum*.VDK Dragon 64FAT12 file systemgeneratorMultiplatform:PC – Keyboards/Samplers –More details on the page 22RAW floppyloader/generator.<strong>Floppy</strong> readerCNC machines.Multiplatform.Allow you to generate a customfloppy formatMultiplatform.Allow you to read a real floppydisk.More details on the page 20More details on the page 21Note : This list is subject to change since new files format support are regularly added.If you want a particular file format support don’t hesitate to contact us (contact informationson page 31).<strong>HxC</strong> <strong>Floppy</strong> <strong>Emulator</strong> Project © 2006 – 2011 <strong>HxC</strong>2001http://hxc2001.com/Page 29 of 31
SDCard <strong>HxC</strong> <strong>Floppy</strong> <strong>Emulator</strong> <strong>User</strong> <strong>Manual</strong>Rev.2.1 - 14/08/20117.11 Tested Target listSome examples of host working with the SDCard <strong>HxC</strong> <strong>Floppy</strong> <strong>Emulator</strong>.Note: This list is not complete since the SDCard <strong>HxC</strong> <strong>Floppy</strong> <strong>Emulator</strong> should works withany host having a Shugart/IBM PC floppy interface.Target Support NotesAtari STE[RD][WR][HCP]Atari Mega STE[RD][WR][HCP]Atari STF[RD][WR][HCP]Atari Falcon[RD][WR][HCP]Amiga 500[RD][WR][HCP]Amiga 600[RD][WR][HCP]Amiga 1200[RD][WR][HCP]Amiga 2000[RD][WR][HCP]Amstrad CPC6128[RD][WR][HCP]Amstrad CPC6128+[RD][WR][HCP]Amstrad CPC464 +DDI[RD][WR][HCP]MSX2[RD][WR]Robotron KC 85/X[RD][WR]Kaypro 4-84[RD][WR]Super Wildcard DX-SWC3201 [RD][WR]TI99/4A[RD][WR]NEC PC88[RD][WR]Thomson TO8D[RD][WR]IBM PC Compatible[RD][WR]X68000[RD][WR]TRS-80[RD][WR]Sam Coupé[RD][WR]ZX Spectrum[RD][WR]Dragon 64[RD][WR]ACT/Apricot[RD][WR]PERKIN-ELMER MODEL3030 [RD][WR]Ensoniq EPS[RD][WR]Ensoniq Mirage[RD][WR]Emax[RD][WR]Emax II[RD][WR]E-mu emulator[RD][WR]E-mu emulator II[RD][WR]Oberheim DPX1[RD][WR]Korg DSS-1[RD][WR]Yamaha Clavinova CVP-83S [RD][WR]Prophet 2000[RD][WR]Roland S-50[RD][WR]Prophet 2000[RD][WR]Roland S-50[RD][WR]ComputersKeyboard / Samplers<strong>HxC</strong> <strong>Floppy</strong> <strong>Emulator</strong> Project © 2006 – 2011 <strong>HxC</strong>2001http://hxc2001.com/Page 30 of 31
SDCard <strong>HxC</strong> <strong>Floppy</strong> <strong>Emulator</strong> <strong>User</strong> <strong>Manual</strong>Rev.2.1 - 14/08/20117.12 Contact / Project pageThe Software and Firmware are regularly updated to add new features and correct bugs.To get the latest version of the software and firmware please visit the project website:http://hxc2001.comTo report problems and/or bugs please go to the project forum :http://www.torlus.com/floppy/forumor contact us at this email:Website : http://hxc2001.com/This product is manufactured and sold by Lotharek:Website : http://www.lotharek.pl/© 2006-2011 Jean-François DEL NERO© 2006-2011 <strong>HxC</strong>2001.All rights reserved.SDCard <strong>HxC</strong> <strong>Floppy</strong> <strong>Emulator</strong> <strong>User</strong> Guide issued January 2011.<strong>HxC</strong> <strong>Floppy</strong> <strong>Emulator</strong> Project © 2006 – 2011 <strong>HxC</strong>2001http://hxc2001.com/Page 31 of 31