
You also want an ePaper? Increase the reach of your titles
YUMPU automatically turns print PDFs into web optimized ePapers that Google loves.
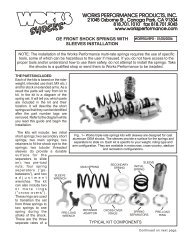
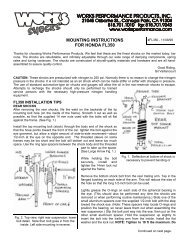
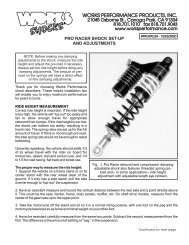
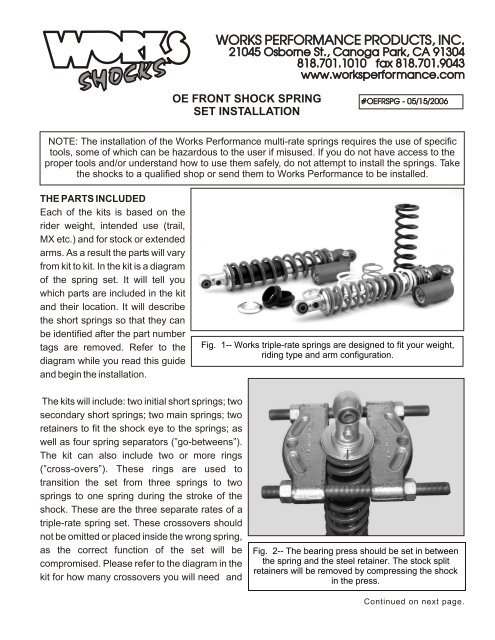
SHOCKSWORKS PERFORMANCE PRODUCTS, INC.21045 Osborne St., Canoga Park, CA 91304818.701.1010 fax 818.701.9043www.worksperformance.com<strong>OE</strong> FRONT SHOCK SPRINGSET INSTALLATION#<strong>OE</strong>FRSPG - 05/15/2006NOTE: The installation of the <strong>Works</strong> Performance multi-rate springs requires the use of specifictools, some of which can be hazardous to the user if misused. If you do not have access to theproper tools and/or understand how to use them safely, do not attempt to install the springs. Takethe shocks to a qualified shop or send them to <strong>Works</strong> Performance to be installed.THE PARTS INCLUDEDEach of the kits is based on therider weight, intended use (trail,MX etc.) and for stock or extendedarms. As a result the parts will varyfrom kit to kit. In the kit is a diagramof the spring set. It will tell youwhich parts are included in the kitand their location. It will describethe short springs so that they canbe identified after the part numbertags are removed. Refer to thediagram while you read this guideand begin the installation.Fig. 1-- <strong>Works</strong> triple-rate springs are designed to fit your weight,riding type and arm configuration.The kits will include: two initial short springs; twosecondary short springs; two main springs; tworetainers to fit the shock eye to the springs; aswell as four spring separators (”go-betweens”).The kit can also include two or more rings(”cross-overs”). These rings are used totransition the set from three springs to twosprings to one spring during the stroke of theshock. These are the three separate rates of atriple-rate spring set. These crossovers shouldnot be omitted or placed inside the wrong spring,as the correct function of the set will becompromised. Please refer to the diagram in thekit for how many crossovers you will need andFig. 2-- The bearing press should be set in betweenthe spring and the steel retainer. The stock splitretainers will be removed by compressing the shockin the press.Continued on next page.
<strong>OE</strong> <strong>Spring</strong> <strong>Kit</strong> Instructions, Continuedwhere they go in the assembly.Page 2INSTALLATION1. Remove the stock shocks, and reduce the pre-loadon the springs, by unscrewing the pre-load rings at thetop of the springs.2. Place a bearing press on the lower end of the springso that it is between the retainer and the spring. Makesure that the press has full purchase on the spring (Fig.2)3. Put the shock in the hydraulic press with the shaftpointing down (Fig.3) Allow enough upward movementof the ram so that all of the pre-loaded spring can beaccommodated.4. Slowly pump the ram down on top of the shock eyeso that the eye on the end will be pushed out of theretainer about one inch. Usually at this point the twokeeper halves will fall out, but they may have to bepried. Use a screwdriver or other tool that will keepyour fingers away from the area between the eye andthe retainer.5. With the split retainers out of the assembly, releasethe ram slowly to let the spring go to full extension.Make sure that the eye does not snag on the edge ofthe plastic sleeve or on the bearing press. Remove theshock and spring from the press.6. Remove the metal retainer, plastic sleeve and springfrom the shock. Break loose the pre-load nuts andunscrew them from the pre-load collar. They will needto be installed upside down to fit the spring set (Fig. 4).Fig. 3-- Run the ram down on the end ofthe body eye to push the shaft end eyethrough the split retainers, allowing theretainers to be removed.Fig. 4--To fit the <strong>Works</strong>’ springs, breakthe pre-load nuts loose and then reversethem. Install the pre-load collarassembly making sure to align the notchand tab.Continued on next page.
<strong>OE</strong> <strong>Spring</strong> <strong>Kit</strong> Instructions, ContinuedPage 3Fig. 5-- Refer to the diagram of theparts in the kit, as to whether or notyou will install a ring here inside ofthe spring. Some kits will not haveone here.Fig. 6-- Install the spring separator, crossover ring andsecond spring. Refer to the diagram for the length andnumber of crossover that are used in your kit. Therecan be one or more. Also use the diagram to identifythe spring.NOTE: The kits vary in the parts that are used based on the rider weight, intended use, extended orstock arms, etc. As a result not all kits will have all of the same parts shown here. Besides different ratesprings, the parts that vary will be the rings that fit inside the small springs. In some cases there may benone in the assembly, or as many as four. Refer to the diagram in the kit for which parts go where andwhich parts are included with your kit.7. With the rings inverted, place the pre-load collar on the shock so that the notch and tab line-up.Install the ring or rings (as indicated on the diagram) on the shock tube and slide it--or them-- upagainst the spring collar (Fig. 5).8. Follow the cross-over ring with the correct initial spring (see the diagram for identification).9. Then install one of the “go-betweens.” the nylon spring separators.10. Next comes one or more crossover rings as determined by the diagram for your particular kit.Follow that with the second short spring (Fig. 6).Continued on next page.
<strong>OE</strong> <strong>Spring</strong> <strong>Kit</strong> Instructions, ContinuedPage 4Fig. 7--Install the main spring last.Before you install the retainer,make sure that the spring pre-loadcollar is notched into place.Fig. 8-- Depending on how stiff the spring is, itis possible to load the spring retainer withhelp from a friend. Otherwise, load the shockinto the press.11. Install the other spring separator and the main spring.12. Depending on the kit and the springs involved, the retainer that goes between the eye and thespring can be installed in one of two ways:A: If the spring set is light enough, and you have enough muscle, you can pull down on the set andhave an assistant install the spring retainer.orB: Use the bearing press and install it in the reverse order of disassembly,CAUTION: Whether you are loading the springs by hand or with the press, if the retainer gets hung sothat the spring doesn’t fit into place DO NOT TRY TO SEAT THE SPRING WITH YOUR HANDS. ITCAN BITE YOU IN AN INSTANT. Simply, smack the spring with a dead-blow hammer or a rubbermallet and it will pop into place.