Scope Component Test Unit
Scope Component Test Unit
Scope Component Test Unit

Create successful ePaper yourself
Turn your PDF publications into a flip-book with our unique Google optimized e-Paper software.
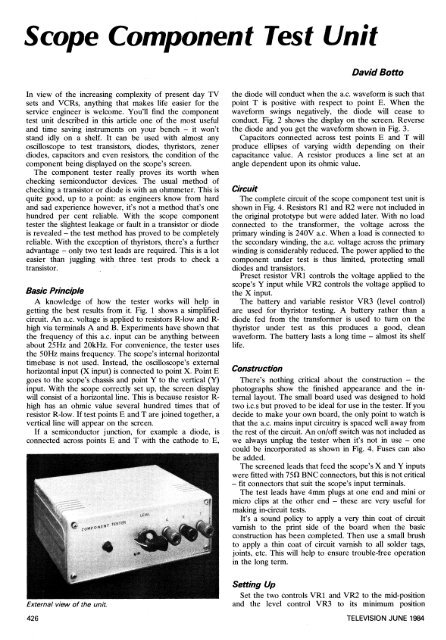
<strong>Scope</strong> <strong>Component</strong> <strong>Test</strong> <strong>Unit</strong>David BottoIn view of the increasing complexity of present day TVsets and VCRs, anything that makes life easier for theservice engineer is welcome. You'll find the componenttest unit described in this article one of the most usefuland time saving instruments on your bench — it won'tstand idly on a shelf. It can be used with almost anyoscilloscope to test transistors, diodes, thyristors, zenerdiodes, capacitors and even resistors, the condition of thecomponent being displayed on the scope's screen.The component tester really proves its worth whenchecking semiconductor devices. The usual method ofchecking a transistor or diode is with an ohmmeter. This isquite good, up to a point: as engineers know from hardand sad experience however, it's not a method that's onehundred per cent reliable. With the scope componenttester the slightest leakage or fault in a transistor or diodeis revealed — the test method has proved to be completelyreliable. With the exception of thyristors, there's a furtheradvantage — only two test leads are required. This is a loteasier than juggling with three test prods to check atransistor.Basic PrincipleA knowledge of how the tester works will help ingetting the best results from it. Fig. 1 shows a simplifiedcircuit. An a.c. voltage is applied to resistors R-low and R-high via terminals A and B. Experiments have shown thatthe frequency of this a.c. input can be anything betweenabout 25Hz and 20kHz. For convenience, the tester usesthe 50Hz mains frequency. The scope's internal horizontaltimebase is not used. Instead, the oscilloscope's externalhorizontal input (X input) is connected to point X. Point Egoes to the scope's chassis and point Y to the vertical (Y)input. With the scope correctly set up, the screen displaywill consist of a horizontal line. This is because resistor R-high has an ohmic value several hundred times that ofresistor R-low. If test points E and T are joined together, avertical line will appear on the screen.If a semiconductor junction, for example a diode, isconnected across points E and T with the cathode to. E,the diode will conduct when the a.c. waveform is such thatpoint T is positive with respect to point E. When thewaveform swings negatively, the diode will cease toconduct. Fig. 2 shows the display on the screen. Reversethe diode and you get the waveform shown in Fig. 3.Capacitors connected across test points E and T willproduce ellipses of varying width depending on theircapacitance value. A resistor produces a line set at anangle dependent upon its ohmic value.CircuitThe complete circuit of the scope component test unit isshown in Fig. 4. Resistors R1 and R2 were not included inthe original prototype but were added later. With no loadconnected to the transformer, the voltage across theprimary winding is 240V a.c. When a load is connected tothe secondary winding, the a.c. voltage across the primarywinding is considerably reduced. The power applied to thecomponent under test is thus limited, protecting smalldiodes and transistors.Preset resistor VR1 controls the voltage applied to thescope's Y input while VR2 controls the voltage applied tothe X input.The battery and variable resistor VR3 (level control)are used for thyristor testing. A battery rather than adiode fed from the transformer is used to turn on thethyristor under test as this produces a good, cleanwaveform. The battery lasts a long time — almost its shelflife.ConstructionThere's nothing critical about the construction — thephotographs show the finished appearance and the internallayout. The small board used was designed to holdtwo i.c.s but proved to be ideal for use in the tester. If youdecide to make your own board, the only point to watch isthat the a.c. mains input circuitry is spaced well away fromthe rest of the circuit. An on/off switch was not included aswe always unplug the tester when it's not in use — onecould be incorporated as shown in Fig. 4. Fuses can alsobe added.The screened leads that feed the scope's X and Y inputswere fitted with 75fl BNC connectors, but this is not critical— fit connectors that suit the scope's input terminals.The test leads have 4mm plugs at one end and mini ormicro clips at the other end — these are very useful formaking in-circuit tests.It's a sound policy to apply a very thin coat of circuitvarnish to the print side of the board when the basicconstruction has been completed. Then use a small brushto apply a thin coat of circuit varnish to all solder tags,joints, etc. This will help to ensure trouble-free operationin the long term.External view of the unit.Setting UpSet the two controls VR1 and VR2 to the mid-positionand the level control VR3 to its minimum position426 TELEVISION JUNE 1984
Fig. 11: Waveforms obtained with a BT106 thyristor. (a)With VR3 at minimum. (b) Thyristor just starting to conduct.(c) Thyristor on. (d) Saturation.Fig. 12: <strong>Test</strong>ing a diode-thyristor combination. (a) Diode testonly. (b) Thyristor turned on.lead from socket G to the thyristor's gate. Some smallthyristors, such as the TIC44, will then produce thewaveform shown in Fig. 2. With larger thyristors such asthe BT106, the level control must be turned slowly toobtain this waveform.This test is also useful if you suspect that a thyristor isturning on too early or too late. Compare it with a knowngood thyristor of the same type.On disconnecting the G lead, the horizontal line shouldreappear. Fig. 11 shows waveforms for the BT106.The thyristors used in applications such as TV lineoutput stages often have a diode incorporated in the sameencapsulation, connected across the thyristor's anode andcathode. With the E lead to the cathode and the T lead tothe anode, the waveform shown in Fig. 12(a) should beseen. This shows that the diode is o.k. Next connect the Gtest lead to the thyristor's gate and slowly turn up the levelcontrol. When the thyristor turns on, you'll see thewaveform change as shown in Fig. 12(b).Fig. 13: Measurement of capacitance.Fig. 14: <strong>Test</strong>s on LEDs. (a) Waveform for a small LED. (b)Waveform from a seven-segment LED.Measuring CapacitanceCapacitors with values between about 0.22euF and somehundreds of microfarads can be measured. With thecapacitor connected to test leads E and T, an ellipse willbe seen, the size depending on the capacitor's value — seeFig. 13.Large value capacitors will produce an almost verticalline. With these, use either the scope's X times five (orten) control or increase the setting of the X gain control. Ifyou calibrate settings with capacitors of known value,you'll find this test extremely useful and reliable.En 2 kFig. 15: Waveforms produced by various resistor values.10kshould then consist of a horizontal line. With the levelcontrol at minimum (maximum resistance), connect the22 kLED <strong>Test</strong>sTo test an LED, connect the E lead to the cathode(usually identified by a flat side or notch) and the T lead,with a 100f/ resistor in series, to the anode. The LEDshould light and the waveform shown in Fig. 14(a) shouldbe seen. Reversing the leads will simply reverse thewaveform — the LED will still produce light.Seven-segment LEDs can also be tested. This test isparticularly useful when one segment is not lighting. Is itdue to the LED or the complex drive circuitry? Connectthe E lead to the common cathode (or anode) connectionand the T lead, via a 100f/ series resistor, to each segment<strong>Component</strong>s listR1 4.7k 2W VR1 1k miniature horizontal presetR2 4.7k 2W VR2 100k miniature horizontalR3 1.2k 1W presetR4 330k 1W VR3 3k wirewound potentiometerR5 820k 1WTi RS 207-661 mains transformer.Ni Tandy 272-708 or similar miniature 240V a.c.neon.PCB Tandy 276-159 experimenters' board.Plastic case with feet — Tandy 270-9501 or similar.Two BNC 750 connectors, RS, or as required.Battery holder and 1.5V battery — UM3 or equivalent.Screened audio lead, mini-clip test leads, etc.Three terminals, two red one black, Tandy 274-661.Optional: Double-pole on/off switch; two 630mA20mm anti-surge fuses with holders.Internal view of the unit.428 TELEVISION JUNE 1984
connection in turn. The segments should light and thewaveform shown in Fig. 14(b) should be displayed — anFND500 was used to get this trace.Resistor WaveformsThe displays obtained when resistors of various valuesare connected across T and E are shown in Fig. 15. Thistest won't replace your ohmmeter, but is useful whenmaking in-circuit checks.In-circuit <strong>Test</strong>sA helpful feature of the tester is its use for in-circuittests. Many transistors, diodes, capacitors, etc. can betested whilst still in circuit — disconnect the equipmentfrom the mains supply of course! Also make sure thatreservoir/smoothing capacitors and the c.r.t.'s final anodeare discharged.In some cases the waveforms will be affected by othercomponents in the circuit, i.e. those shunting the componentbeing checked. In practice you'll soon get used tothis. If you service particular TV sets or VCRs regularly,it's helpful to note various key waveforms you shouldobtain. If there's room, these can be drawn on or aroundthe circuit diagram.If it's necessary to isolate a transistor, unsolder only twoof its leads and keep them clear of the print. Check thetransistor, then resolder the two leads if it tests good. Thissaves time and also avoids the problems of finding theboard unmarked after removing a transistor completely —and perhaps putting it back the wrong way round . . .The same principle applies with diodes, capacitors etc. -with only one lead being unsoldered of course.Continuity <strong>Test</strong>ingContinuity checks on print and transformer windingsetc. can also be made. Doubtless you'll find many additionaluses for your component tester.TELEVISION JUNE 1984 429