MSD 12 AMP PRO-MAG GENERATOR - MSD Pro-Mag.com
MSD 12 AMP PRO-MAG GENERATOR - MSD Pro-Mag.com
MSD 12 AMP PRO-MAG GENERATOR - MSD Pro-Mag.com

You also want an ePaper? Increase the reach of your titles
YUMPU automatically turns print PDFs into web optimized ePapers that Google loves.
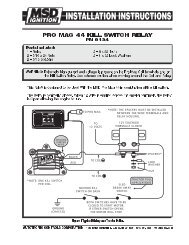
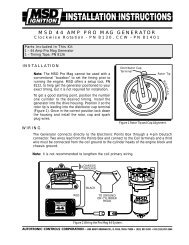
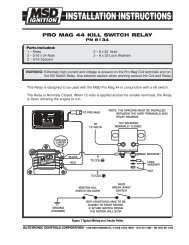
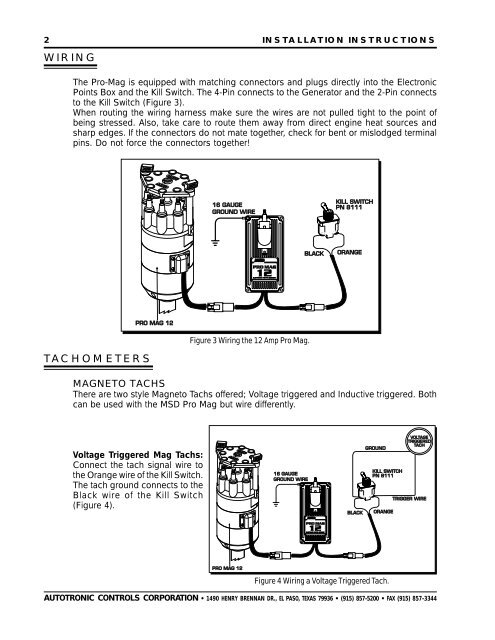
2 INSTALLATION INSTRUCTIONSWIRINGThe <strong>Pro</strong>-<strong>Mag</strong> is equipped with matching connectors and plugs directly into the ElectronicPoints Box and the Kill Switch. The 4-Pin connects to the Generator and the 2-Pin connectsto the Kill Switch (Figure 3).When routing the wiring harness make sure the wires are not pulled tight to the point ofbeing stressed. Also, take care to route them away from direct engine heat sources andsharp edges. If the connectors do not mate together, check for bent or mislodged terminalpins. Do not force the connectors together!TACHOMETERSFigure 3 Wiring the <strong>12</strong> Amp <strong>Pro</strong> <strong>Mag</strong>.<strong>MAG</strong>NETO TACHSThere are two style <strong>Mag</strong>neto Tachs offered; Voltage triggered and Inductive triggered. Bothcan be used with the <strong>MSD</strong> <strong>Pro</strong> <strong>Mag</strong> but wire differently.Voltage Triggered <strong>Mag</strong> Tachs:Connect the tach signal wire tothe Orange wire of the Kill Switch.The tach ground connects to theBlack wire of the Kill Switch(Figure 4).Figure 4 Wiring a Voltage Triggered Tach.AUTOTRONIC CONTROLS CORPORATION • <strong>12</strong><strong>12</strong>0 1490 HENRY ESTHER LAMA, BRENNAN SUITE DR., 114, EL EL PASO, TEXAS 79936 ••(915) 857-5200 • FAX (915) 857-3344