
You also want an ePaper? Increase the reach of your titles
YUMPU automatically turns print PDFs into web optimized ePapers that Google loves.
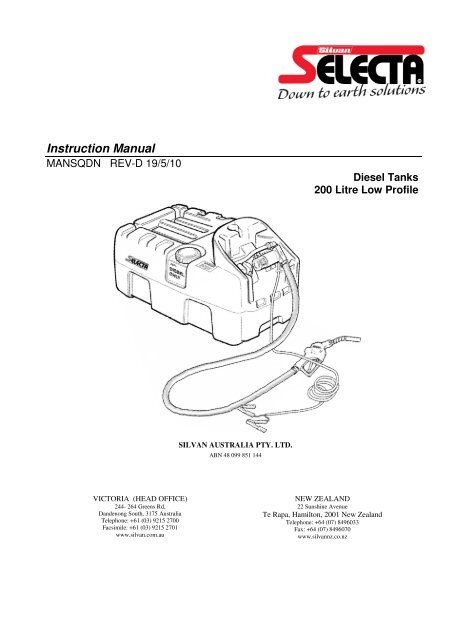
Instruction <strong>Manual</strong>MANSQDN REV-D 19/5/10Diesel Tanks200 Litre Low ProfileSILVAN AUSTRALIA PTY. LTD.ABN 48 099 851 144VICTORIA (HEAD OFFICE)244- 264 Greens Rd,Dandenong South, 3175 <strong>Australia</strong>Telephone: +61 (03) 9215 2700Facsimile: +61 (03) 9215 2701www.silvan.com.auNEW ZEALAND22 Sunshine AvenueTe Rapa, Hamilton, 2001 New ZealandTelephone: +64 (07) 8496033Fax: +64 (07) 8496070www.silvannz.co.nz
No liability can be accepted for any inaccuracies or omissions inthis publication, although due care has been taken to make it ascomplete and accurate as possible.The information, illustrations and technical data were consideredto be correct at the time of preparation.In accordance with our policy of continuous development <strong>Silvan</strong><strong>Australia</strong> Pty. Ltd. reserves the right to make changes at any timewithout notice.YOUR DIESEL TRANSFER UNIT DETAILSRecord the details here for future reference when discussing service with your <strong>Silvan</strong>dealer, ordering service parts or making a warranty claim.DATE OF DELIVERYSELLING DEALERADDRESSTELEPHONE NO.INSTALLED BY_______________________________________________________________________________________________________________________________________________________________________________________Attached to all Diesel Transfer units a serial number sticker; from the sticker record the followingdetails below.MODEL NUMBER _____________________________SERIAL NUMBER_____________________________
New Product Warrantythe <strong>Silvan</strong>WarrantyThis warranty is the only warranty applicable to <strong>Silvan</strong> new products ('Products') and, to themaximum extent permitted by law, is expressly in lieu of any other conditions or warranties expressedor implied in relation to the Products.Subject only to legislative obligations to the contrary, <strong>Silvan</strong> shall not be liable for incidental orconsequential damage resulting from ownership or use of a Product.<strong>Silvan</strong> does not authorize any person to create for it any other obligation or liability in connection withthese products.<strong>Silvan</strong> warrants its authorised Dealer, who in turn warrants the original purchaser (owner) of each new<strong>Silvan</strong> product that it will repair or replace the product, or, pay the cost of repair or replacement, asdetermined by <strong>Silvan</strong> without charge for labour or any defective or malfunctioning parts in accordance withthe warranty limitations and adjustment schedule below.The warranty period begins on the date the product is delivered to the first retail purchaser for a period of 12monthsThis Warranty CoversOnly conditions resulting directly from defects in workmanship or material under normal use and service.Warranty ExclusionsThe Warranty does not cover:Conditions resulting from misuse, use of incompatible chemicals, exceeding machine specificationsincluding overloading, impact damage, negligence, accidental damage or failure to performrecommended maintenance services.Any product which has been repaired by other than an authorised <strong>Silvan</strong> service outlet in a waywhich, in the sole and absolute judgement of <strong>Silvan</strong>, adversely affect its performance or reliability.The replacement of maintenance items such as diaphragms, batteries, V belts and ground engagingcomponents, etc.Loss of time, inconvenience, loss of use of the product liability to third parties or any otherconsequential damages.Incidental costs associated with a warranty repair including any travel costs, out of hour’s labourcharges, cleaning costs, transportation costs, freight costs or any communication costs.The repair of a defective product qualifying under this warranty will be performed by any authorised <strong>Silvan</strong>service outlet within a reasonable time following the delivery of the product, at the cost of the owner, to theservice outlet’s place of business. The product will be repaired or replaced, using new parts supplied by<strong>Silvan</strong>. <strong>Silvan</strong>, in its absolute discretion, may choose to pay the cost of replacement or repair of the product.The owner is responsible for the performance of regular maintenance services as specified in theOwner/Operator <strong>Manual</strong> applicable to the product. Failure to carry out regular maintenance may invalidatewarranty
Safety InstructionsBefore attempting to operate or install the diesel unit carefully read and take note of the followingsafety warnings.Failure to comply with these warnings may result in serious injury or death.Warning ! This Diesel unit is designed and manufactured solely for the purpose of carrying and pumping Diesel fuel. Under nocircumstances may it be used for any other purposes.Warning ! Prior to installing or using the Diesel unit all operators must have read and fully understand the contents of this instructionmanual as well as all other manuals supplied and the safety decal fitted to the Diesel unit.Warning !Warning !Never allow an inadequately trained person to install or operate the Diesel unit.Ensure the capacity of the vehicle is suitable for the loaded mass of the diesel unit. Refer to the vehicle operator’s manualfor safe working loads, correct secure points and relevant safety instructions.Warning ! Avoid diesel contact with skin and eyes, and avoid breathing vapours or mists. Refer to the Material Data Safety sheet fromyour Diesel supplier for recommended safety precautions and any required protective equipment for use when handling.Ensure that all operators and associated personnel are familiar with the legal regulations and codes of practice that apply tothe safe use, storage and disposal of Diesel.Warning ! This diesel unit should be securely restrained or tied down when being transported on a vehicleWarning ! This Diesel unit should not be lifted when partially or completely full unless supported by an appropriate frame or pallet.Warning ! This unit should never be left unattended while dispensing or being filled.Warning !Warning !Warning !Warning !Before attempting to fill the tank at a service station consult the operator for the correct procedure.Do not store the diesel unit within or next to a dwelling or garage attached to a dwelling.Always store the diesel unit in well ventilated open areas.Storage of the diesel unit must not be in the proximity of any heating or ignition sources.Warning ! No combustible wast material or residues shall be permitted to remain in or around areas in which diesel is stored ordecantedWarning ! Any spillage shall be cleaned up immediately and the materials used in the clean-up shall be disposed of safely and inaccordance with any legal regulations and codes of practice that apply to the safe use, storage and disposal of Diesel.Warning ! Ensure that the electrical lead(s) are always in good condition: do not allow the lead to lie in water! Or on damp surfaces. Donot allow the lead to become tightly knotted, crushed or pinched or you risk creating an electrocution hazard!
Safety Instructions (cont.)The location and wording of the safety decal fitted to your <strong>Silvan</strong> Diesel tank is shown below. It is important that alloperators read and follow the information on all safety decals before operating the unit. Failure to comply with thesewarnings could result in serious injury or death. Safety decals should be kept clean and legible at all times. If any decalsare missing or unreadable, they should be replaced by ordering new decals from your <strong>Silvan</strong> dealer using the partnumbers shown.Warning decal part number: DEC90.
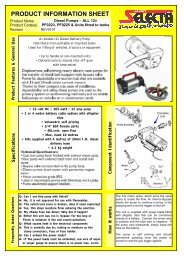
SpecificationsGENERALAll transfer units come standard with an Auto shut-off gun and all pumps feature a duty cycle for 30 minutes of continuesdispensing, all pumps also contain an internal bypass that allows for the pump to operate for up to a maximum of threeminutes when the dispensing gun is closed without Damaging the Pump or motor.SPECIFICATIONSTANKS- Made from impact resistant polyethylene, UV stabilized, coloured grey and fitted with lid and breather with a200L capacity in a Low-Profile free-standing design (which allows for minimal interruption to visibility when mounted tothe tray of a Utility).GUN- Trigger filling nozzle with automatic shut-off and hose swivel.FILTRATION - Suction foot screen filter.PUMPS AND DELIVERY HOSE- All Selecta Diesel transfer units are fitted with an electric self priming vane pumpwith a 4 meter power lead and alligator clips, details are provided below.Diesel unitmodel number(part number)Pump NameVolts(DC)AmpsOpenFlowMotor DutycycleInternalbypassDelivery hoseSQDN200-1 BP2000 12 22 40L/min 30 minutes Yes4 meters(20mm I.D.)SQDN200-X1 BP3000 12 22 45L/min 30 minutes Yes5 meters(20mm I.D.)IMPORTANT OPERATIONAL NOTE- The internal Bypass found in all diesel pump models is designed toprotect the pump and motor from damage when the trigger is shut off for a time no greater the 2-3 minutes whichwill allow the operator to switch off the pump or recommence pumping. The internal bypass engages fromincreased ‘back pressure’ from a shut off trigger, closed tap or over extended delivery line; when this happens themotor will be creating more work and utilizing more amps which is why it important not to keep the bypassengaged for more that 2-3 minutes.DIMENSIONS AND WEIGHTSMass is specified with tank empty. To roughly calculate grossmass, add 1 kg/liter capacity. (eg 200L =200Kg). All dimensionsare in mm, Mass in Kg, The mass of each tank may varyaccording to the type of pump fitted and other accessories.Tank Capacity Length Width Height Mass200L 1100 640 550 24
Operation and InstallationPREPARING THE TRANSFER UNIT FOR OPERATIONFor transport purposes some transfer units will be supplied with the Delivery hose and Automatic Shut-off gun disconnectedfrom the pump. Before attempting to pump any Diesel ensure that the delivery hose is securely fitted to the pumps outlet,and that the Automatic Shut-off gun (with swivel) is fitted to the other end of the delivery hose. If you have a Diesel unitfeaturing the BP3000 pump you will need to connect the hose using special “Half Clamp” connectors that will be includedwith this operators manual (as per the diagram below).1. Push the Fitting from the Delivery hose into the outlet2. Tightly fit the ‘Half Clamps’ and 5mm Allen head screws (as per the diagram).3. Note: Once connected the outlet fittings should not be able to swivel.1 2 3CONNECTING TO A POWER SUPPLYEach diesel unit is supplied with a comprehensive pump Use and Maintenance <strong>Manual</strong>. Be sure to have read and understoodits contents prior to operation. In addition, the following information must be followed and noted.All of the diesel transfer units fitted with DC electric motors are supplied with alligator clips that can be connected directlyto a 12 volt DC battery. Connect the brown wire to the positive terminal and the blue wire to the negative terminal. If thepump runs backwards, simply swap the clips on the battery.FILLING THE DIESEL UNITEnsure that the tank is supported by an even base capable of taking the weight. No Special equipment is required for fillingthe tank, however when the lid has been removed from the tank take care not to introduce contaminants into the tank via thefiller neck and ensure that the lid is kept free of contaminating particles while filling.TRANSFERING DIESELThe pump will need to prime itself upon first use. Turn the pump on and depress the trigger to allow air to be bled from thehoses; after a short time the pump will have primed and delivery will commence. We recommend for this first priming thatthe lid is removed from the tank and the nozzle is directed back into the tank while pumping to avoid spillage or loss ofDiesel; with this done the unit is now ready to operate.To dispense the pump must be turned on and the nozzles trigger depressed; the nozzle features an automatic shut-off forwhen fluid contacts the outer nozzle end which can be noted by a “Click” sound from the nozzle followed by a change intone from the pumps motor as the back pressure causes the by-pass to open. Once the pump has stopped delivery turn offthe pump or immediately start dispensing into another container (without allowing the bypass to operate for longer than 2-3minutes) and not allowing the motor to run for longer than its specified duty cycle.
MaintenanceThe pumps have been designed and built to require minimal maintenance however it is still important that you Alwaysremove the pump from the power source before any inspection.The Vanes in the head of the pump will wear over time and require replacement. To extend the life of the Vanes, ensure thatthe filters are kept clean and the tank free of contaminants. If a reduced flow rate is noticeable, or a screeching sound isheard from the pump, dirt or debris may have entered the pumps and requires immediate cleaning before parts arepermanently damaged. Periodically check the suction foot filter to ensure that is clean and free of debris. In particular thisshould be done if there is a noticeable decrease in diesel flow rate. There is also a coarse screen mesh at the inlet of the red“Selecta” Auto shut-off gun supplied with the BP2000, BP3000 and 230V AC Panther pumps, that can be checked byremoving the gun from the nozzle.SymptomPump does not operateTo Test & Repair if Pump does notoperatePump Wiring OverheatingPump makes asquealing/scratching sound whilerunning.Pump stalls when Transfer Guntrigger is released and pump isrunning.To Test & Repair if Pump isrunning, but low or nil flow fromnozzleTROUBLE SHOOTING GUIDERemedy• Ensure battery wires are connected to battery properly.• Check Fuse and Fuse Holder under pump end cover.• Remove pump end cover, connect power to White & Black wires to test• If motor runs, replace loom kit, PN: R09789000 (4m), PF0225-14 (2m)• If motor still does not operate, remove 2 x 8mm head motor bolts &check for rust or calcification, & replace motor if required.• This can happen when pump is operated in bypass mode for longer than3 minutes or if low voltage/amps. Ensure that pump is not left runningfor longer than 3 minutes without depressing Transfer Gun trigger.• This can be caused by dirt or debris entering the pump and becomingcaught in the working parts. Remove the end cover of the pump by firstunscrewing the three Socket Head screws and lifting off the cover.Clean the impeller vanes ensuring you remove any dirt particles caughtbetween the ends of the vanes and the impeller housing. Do not overtightenhead screws when reassembling.• The non-return valve in the outlet of the pump may be jammed shut.Remove the outlet hose from the pump. Operate the white plastic valvein the outlet port of the pump manually (by pushing it in and out), toensure it moves freely.• Remove gun from hose & re-test• If flow improves, check hole in the end of the nozzle for blockage• Replace gun as required