
You also want an ePaper? Increase the reach of your titles
YUMPU automatically turns print PDFs into web optimized ePapers that Google loves.
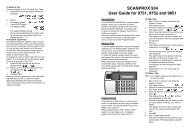
M-Series<strong>User</strong>'sGuide
© <strong>Cooper</strong> <strong>Security</strong> Limited 2005-2006Every effort has been made to ensure that the contents of this book arecorrect. However, neither the authors nor <strong>Cooper</strong> <strong>Security</strong> Limitedaccept any liability for loss or damage caused or alleged to be causeddirectly or indirectly by this book. The contents of this book are subject tochange without notice.iD Plus is a trademark of Novar ED&S. All trademarks acknowledged.Printed and published in the UK.
ContentsChapter 1: Introduction .....................................................................2About the Alarm System.............................................................................................. 2About Zones and Wards.............................................................................................. 3Zones ...................................................................................................................... 3Wards...................................................................................................................... 3About the Keypad....................................................................................................... 4LCD Keypad ........................................................................................................... 4Keypad Features .................................................................................................... 4Communication Devices............................................................................................ 5Remote Signalling................................................................................................... 5Downloading .......................................................................................................... 5Chapter 2: Operating your Alarm System......................................................................................6Getting Started ............................................................................................................ 6Accessing the System............................................................................................. 6Selecting Options.................................................................................................... 6Setting Your Alarm System ........................................................................................... 7The First Step – Entering Your <strong>User</strong> Code................................................................. 7Selecting the Wards to Set (Part Setting) ................................................................. 8Selecting the Ward Groups to Set (Part Setting)...................................................... 8Leaving the Protected Area.................................................................................... 9Unsetting Your Alarm System ..................................................................................... 10Selecting the Wards to Unset ................................................................................ 12Selecting the Ward Groups to Unset..................................................................... 12Silencing an Alarm .................................................................................................... 13Resetting the System ................................................................................................. 14Obtaining a Remote Reset Code ........................................................................ 15Other Operations....................................................................................................... 16Special <strong>User</strong> Codes .............................................................................................. 16Panic Alarm at Keypad ........................................................................................ 16Chapter 3: Troubleshooting ..........................................................................................17Alert Messages .......................................................................................................... 17Other Messages ........................................................................................................ 19Setting the System with Zones Active ........................................................................ 22Overview ............................................................................................................... 22Setting with View Errors .......................................................................................... 22Setting with Ignore Errors ....................................................................................... 231
Chapter 1: IntroductionAbout the Alarm SystemM-Series alarm systems use state-of-the-artelectronics to provide comprehensive butflexible protection for large domestic andcommercial premises. Each systemcomprises components linked to a centralcontrol panel that is concealed butaccessible for maintenance.This guide describes how to set, unset andreset your alarm system.The alarm system has two user menus,each of which contain several options.These menus are described in theManager's <strong>Manual</strong>.To ensure problem-free operation, discussthe system with your alarm company orsystem manager before operating it.2
About Zones and WardsZonesYour alarm system has a number of“zones”. Each zone is a detectiondevice, such as a movement sensoror magnetic contact, that is monitoredby your alarm system. Each zone hasa unique 4-digit number and anoptional description of up to 16characters to identify it.Your alarm company has configuredeach zone to respond in a certain waywhen it is activated, dependingwhether the system is set or unset. Forexample, a zone that uses a PassiveInfra-Red (PIR) detector may cause afull alarm when triggered when thealarm system is set.WardsZones are grouped into wards, whichcan be set and unset independently.Each ward can consist of one or morezones.<strong>User</strong>s may be given access to allwards or to selected wards. You canset and unset only the wards to whichyou have access.3
About the KeypadYou can operate your alarm system fromone or more keypads located around thepremises.LCD KeypadThe keypad can be usedto set and unset thealarm system, and alsoto program and test it.The information shownon the display is referredto throughout this guide.SYSTEM OPEN17:30 Thu 01 Jan#1 2 347ENT5 68 90 ESCThe keypad may includea proximity tag reader.Keypad Features 1. Display: Shows the date and time, a bannermessage (configured by your alarmcompany 1 ) and other system messages.2. Green power indicator: Glows steadily whenpower is present.3. Function indicator: By default, this indicatesthat there is more than one alert message toreset (page 14).The indicator can also be programmed byan engineer 2 to show other conditions.4. Keys: These are used to operate the system.5. Cover: Folds down to reveal the keys.1Engineer option 1-7 or <strong>User</strong> option 1-72Engineer option 1-4; by changing keypad output to follow an event other than "Pending"4
Communication DevicesRemote SignallingARCPublic ServiceTelephoneNetworkProtected PremisesSome models in the M-Series range 1 arefitted with an on-board modem, which canbe connected to a telephone line to signalalarms and other events to an AlarmReceiving Centre (ARC). Other advancedcommunicators can be connected to youralarm system for enhancedcommunications security, such as theETHER800 series.If your system has been fitted with a remotesignalling device, it is important that youfully understand how to operate your alarmsystem. Misuse may result in a policeresponse to a false alarm.DownloadingRemote PCIf your alarm system has an on-boardmodem 1 , a personal computer (PC)running the Downloader software canconnect to your alarm system through atelephone line. This enables the system tobe programmed and tested remotely.Public ServiceTelephoneNetworkThis feature is known as downloading and isnormally performed with your authorisationby either your alarm company or your ARC.Protected Premises1All models except M750 and M5505
Chapter 2: Operating your Alarm SystemGetting StartedAccessing the SystemBefore you can set, unset or select otheroptions, you must enter your unique usercode or present your proximity tag (if used).The user code may be 4 or 6 digits,depending on how your system is set up 1 .You have a user code or a proximitytag, not both.Selecting OptionsAfter entering your user code or presentingyour proximity tag, the Set/Unset menu isdisplayed if there are no alerts to reset(page 14). For example:0=Set Selection[Ent]=<strong>User</strong> LevelAfter entering your user code or presentingyour proximity tag, use the keypad to selectthe option you require:| to scroll up through the options. Onlyrelevant options are shown, e.g. "0=SetSelection" is not shown if all wards are set.¬ to scroll down through the options.0 to set/unset wards (page 7 or 10).r to set/unset ward groups (page 8 or 12).] to exit without changes.1Engineer option 1-9-36
Setting Your Alarm SystemThe First Step – Entering Your <strong>User</strong> CodeBANNER TEXT17:30 Sun 01 JANUse the following procedure to set youralarm system.Before setting, check that all relevantareas have been vacated and alldoors and windows are securelyclosed. You cannot set the system whilea zone is active (see page 22).1. At the keypad, enter your user code orpresent your proximity tag.0=Set Selection[Ent]=<strong>User</strong> Levelor0=Set With Omits[Ent]=<strong>User</strong> Level2. You will see one of the screens shownopposite. Press:• 0 – to set your system. Audiblefeedback is provided by thesounder, unless disabled 1 .If the system does not automaticallyset, continue from Selecting theWards to Set (next page).Pressing 0 when "Set With Omits" isdisplayed sets the system withselected zones omitted 2 .• 8 – as 0, but sets your systemsilently 3 .• [ – to enter the <strong>User</strong> menus. Seethe Manager's <strong>Manual</strong>1<strong>User</strong> option 1-82Defined by <strong>User</strong> option 1-2 or 1-33Requires P.Set Hotkey in Engineer option 1-9-1 to be set to NO; not affected by <strong>User</strong> option 1-87
Selecting the Wards to Set (Part Setting)Set Selection :-Ward > **......• r – to set a ward group. SeeSelecting the Ward Groups to Set.• | or ¬ – to display the next/previousoption.The setting procedure continuesautomatically if you do not press a keywithin a specified period 1 .Your user code settings 2 determine thewards you can set and whether they setautomatically.If you see the screen shown opposite, usethe numeric keys to select the wards to set,then press [. Any ward numbers shown willbe set. (A “*” indicates that the ward will notbe set, and “.” Indicates that you have noaccess to the ward.)Go to Leaving the Protected Area (page 9.Selecting the Ward Groups to Set (Part Setting)If wards have been allocated to groups 3 ,you can set all wards in a group with oneoperation.To set a ward group:0=Set Selection[Ent]=<strong>User</strong> Level1. At the screen shown opposite, press r.1Select Menu timer in Engineer option 1-5-22<strong>User</strong> option 2-4-13Engineer option 1-8-1 or <strong>User</strong> option 2-88
Alternatively, press a ward group hotkey 1 .Setting Group 1Press ENT To Set2. Select the ward group you want to setby pressing a number key (or scrolling),then [. For example, press 2 then [to set ward group 2.The top line of the display shows thegroup description 2 .3. Leave the protected area (see below).Leaving the Protected AreaWhen leaving the protected area:Exit NowArming System1. Leave via the designated exit route. Theinternal sounder will sound if you havenot set silently.2. Close the final door and press the exitterminator button (if fitted).17:31 Sun 01 JAN3. When the internal sounder stops, thesystem is set.If the exit tone changes to an alarmtone, see page 13.1Requires P.Set Hotkey in Engineer option 1-9-1 to be set to YES2Customisable using <strong>User</strong> option 1-7-79
If there is no sound (you have not started the entry timer):1. Enter your user code or present yourproximity tag to the keypad.0=Unset System[Ent]=<strong>User</strong> Level0=Set Selection[Ent]=<strong>User</strong> Level2. You will see one of the screens shownopposite. You can now do one of thefollowing:• If necessary, scroll (| or ¬) todisplay "0=Unset System", then press0. If the system does not unsetautomatically, continue fromSelecting the Wards to Unset (nextheading).• Press 0 at "0=Set Selection" – to setwards that are not currently set.Refer to the setting instructions forfurther details (page 7).• Press r – to select a ward group tounset. See Selecting the WardGroups to Unset (next page).Pressing [ when “[ENT]=<strong>User</strong> Level” isdisplayed takes you into the <strong>User</strong>menus – see the Manager's <strong>Manual</strong>.11
Selecting the Wards to UnsetYour user code settings 1 determine thewards you can unset and whether theyunset automatically.Unset wards :-Ward > **......If you see the screen shown opposite, usethe numeric keys (e.g. 1) to select thewards to unset, then press [. Any wardnumbers shown will be unset. (A “*”indicates that the ward will not be unset,and “.” Indicates that you have no accessto the ward.)Selecting the Ward Groups to UnsetIf wards have been allocated to groups 2 ,you can unset all wards in a group with oneoperation.To unset a ward group:0=Unset System[Ent]=<strong>User</strong> LevelSetting Group 1Press ENT To Set1. At the screen shown opposite(displayed only if you have not startedthe entry timer), press r. Alternatively,press a ward group hot key 3 .2. Select the ward group you want tounset by pressing a number key (orscrolling), then [. For example, press 2then [ to unset ward group 2.The top line of the display shows thegroup description 4 .1<strong>User</strong> option 2-4-12Engineer option 1-8 or <strong>User</strong> option 2-83Requires P.Set Hotkey in Engineer option 1-9-1 to be set to YES4Customisable in <strong>User</strong> option 1-7-712
Silencing an AlarmIf an alarm has occurred and you want tosilence the sounders:1. Enter your user code or present yourproximity tag. This silences both theinternal and external sounders.If your user code has no access to theward that is in alarm, entering your usercode or proximity tag silences externaland internal sounders, but does notreset the strobe or outputs.Unset wards :-Ward > .2......ALARM 000203:14:47 01/01! ALERTS !17:38 Wed 16 MAR2. If your system has more than one ward,press [ at this prompt.3. The display temporarily shows details ofthe alarm, including the zone thatcaused the alarm (if appropriate), thetime and the date.4. An ALERTS message appears. Thisindicates that the system needs to bereset, as described next.13
Resetting the SystemResetting the system enables you to reviewthe alerts that have taken place and clearsthe ALERTS message on the main screen. Insome cases, you may not be able to setyour alarm system until you have reset it.Any user can silence the sounders andreview the message, but some alarmsmay require an engineer or remotereset code (page 15) to reset thesystem.The keypad sounder may emit awarning chime every minute if thesystem needs to be reset.To reset your alarm system:! ALERTS !17:38 Wed 16 MAR01 Faults. Press'Ent' to view.ALARM 000508:13:45 01/011. Enter your user code or present yourproximity tag when you see the ALERTSscreen.2. The screen shown opposite shows howmany alert messages there are.3. Press [ to view each message in turn(see page 17 for details).Pressing ] lets you to access the usermenus, but does not reset the system.14
Press ENTTo Reset4. You will see the message shownopposite once you have reviewedeach message. Press [ to reset thesystem.The ALERTS message should not appearagain, unless:• The condition still remains (e.g. a mainsfailure).• You need to call an engineer.• A remote reset code is required (seebelow).Obtaining a Remote Reset CodeRING A.R.C. FORREM. RESET CODEYou will see the screen shown opposite ifthere is an arrangement to obtain a remotereset code from an Alarm Receiving Centre(ARC) 1 .To obtain and enter the remote reset code:Press ENTTo Reset- REMOTE RESET –Quote > 58201. Press [ at this message.2. Make a note of the displayed code.The code may be 4 or 6 digits 2 .The top line of the screen may havebeen customised by your alarmcompany 3 .1Engineer option 1-3-22Engineer option 1-9-33Engineer option 1-715
3. Contact your ARC and quote the code.The ARC will ask you for details of thealarm. If there is no need for anengineer to visit, the ARC will give you aremote reset code.- REMOTE RESET –Reply > 00004. Press | to display the screen shownopposite, enter the remote reset code,then press [.Other OperationsSpecial <strong>User</strong> Codes Depending on how your system is set up 1 ,entering a user code may:• Generate a silent duress alarm toindicate that you are being coercedinto gaining access.• Generate a full panic alarm.• Isolate (shunt) zones. Entering the codeagain reinstates the zones.Panic Alarm at Keypad If keypad panic alarms are enabled 2 ,pressing keys 1 and 3 generates a panicalarm.1<strong>User</strong> option 2-4-12Engineer option 1-9-1-2516
Chapter 3: TroubleshootingAlert MessagesThis section gives the meaning of eachmessage that can be displayed whenresetting the system (page 14). Contactyour alarm company if there are problemsyou cannot resolve.ALARM 000508:13:45 01/01PSTN LINE FAULT12:00 Sun 01 JANAC Mains FaultBattery FaultPANEL LID TAMPER08:13:45 01/01A zone alarm has occurred. The zonenumber is displayed, together with the timeand date.The remote signalling device fitted to youralarm system is reporting a fault on thetelephone line. You may not be able to setyour system until you clear the fault.There is no mains power to the control unitand the alarm system is running on itsstandby battery. You may not be able toset your system until the power is restored. Ifthe fault persists, the standby battery willeventually run flat.The standby battery has developed a faultor is disconnected. You may not be able toset your system until the fault is cleared.The lid of the control unit has beenremoved. You may not be able to set yoursystem until the fault is cleared.17
AUXILIARY X TAMP12:00 Sun 01 JANBELL TAMPER12:00 Sun 01 JANTEST CCTS FAILED12:00 Sun 01 JANTAMPER 0001Office WindowCALL ENGINEER TORESET SYSTEMReset RequiredThe control unit has auxiliary tamper zonesfor monitoring auxiliary devices. The lid of adevice has been removed. You may notbe able to set your system until the fault iscleared.The lid of the external sounder has beenremoved. You may not be able to set yoursystem until the fault is cleared.One or more zones failed during a testroutine initiated by your alarm company.You can still set and unset your system butyou should contact your alarm company.This message is displayed when a zone'stamper circuit has been activated.An engineer code or remote reset codeneeds to be entered to reset the system.See CALL ENGINEER TO RESET SYSTEM.RING A.R.C. FORREM. RESET CODEYou need to contact an Alarms ReceivingCentre for a remote reset code (see page15).18
Other MessagesSERVICE REQUIRED12:00 Sun 01 JANRELEARN REQUIRED12:00 Sun 01 JANHI SECURE UNSET12:00 Sun 01 JANCODE TAMPERKEYPAD LOCKED !! AUTO SETTING !12:00 Sun 01 JANThe alarm system requires a routinemaintenance visit. You can still set andunset your system but you should contactyour alarm company.The hardware configuration of your alarmsystem has changed. You may not be ableto set your system. Contact your alarmcompany.The alarm system has a high-securityfeature that can be applied to any ward.When the ward is unset, the keypads showthis message and the high-security timer 1 isstarted. Every time a zone is activated inthe selected ward, the timer is reset. If nozones in the ward are activated before thetimer expires, the ward is automatically setand the message is cleared.This message is displayed when a keypad islocked out after too many invalid codeentries. After five minutes, the messageclears and the keypad unlocks itself.The panel has an auto-set feature thatautomatically sets and unsets specifiedwards at pre-defined times, This message isdisplayed one minute before the wards arescheduled to set and a chime is emittedevery ten seconds to warn you to leave thearea. If you have the appropriate usercode, you can delay automatic setting by1Engineer option 1-5-219
entering your user code and selecting the"Defer Setting" option.Engineer on Site12:00 Sun 01 JANSYSTEM IS BUSYPLEASE WAITSorry,cannot setAux X tamp openSorry,cannot setBell box tamperAn engineer from your alarm company ison site and logged into the alarm system. Ifrequired, you can operate the system asnormal. The message is automaticallycleared when the engineer logs off.Another user is accessing the alarm system.You cannot use your keypad until thismessage has cleared.Cannot set because of a tamper fault onauxiliary zone 1 or 2. Clear the fault.Cannot set because of a tamper fault onthe external sounder. Clear the fault.Sorry,cannot setEquipment faultySorry,cannot setZone in faultSorry,cannot setPanel lid tamperCannot set because of a fault from one ormore system components (shown). Clearthe fault.Cannot set because of a fault from one ormore zones (shown). Press ] to show thezone in fault. Clear the fault.Cannot set because of a tamper fault onthe control unit. Clear the fault.Sorry,cannot setMains Power offCannot set because there is no mainspower at the control unit. Clear the fault.Sorry,cannot setPhone line faultCannot set because of a line fault from theremote signalling device. Clear the fault.20
Sorry,cannot setPayment requiredSorry, Your codeis locked outSorry, keypadIs locked outCannot ‘SET’From this keypadCannot ‘UNSET’From this keypadCannot set because the payment timerhas expired. Contact your alarm companyto arrange the appropriate payment.This is a code lock feature, applied toselected users to prevent them from usingtheir user codes to set or unset wards.The keypad has been locked out of thesystem (usually from a keyswitch) andcannot be used by any users.The keypad from which you are setting thesystem is not assigned to your wards. Use akeypad that is assigned to the wards.The keypad from which you are unsettingthe system is not assigned to your wards.Use a keypad that is assigned to the wards.21
Setting the System with Zones ActiveOverviewSetting with View ErrorsFollowing ZonesAre In Error :-Office window2002 ActiveOffice door2001 Active*NO ERROR ZONES*PRESS ENT TO SETIf you try to set the system while one ormore zones are active, the system’sresponse depends on whether the engineerhas selected 1 View exit errors or Ignoreerrors, as described next.If View exit errors is used, the procedureafter attempting to set the system is:1. The system gives a fault tone andsuspends the exit procedure.2. The display then scrolls through theactive zones automatically.3. Investigate why the zones are activeand rectify the cause.4. When all zones show healthy, thescreen shown opposite is displayed.Press [ to start the exit procedure.Continue as normal.To abandon the setting procedurewithout rectifying the active zones, press].1Engineer option 1-9-122
Setting with Ignore Errors If Ignore errors is used, the procedure afterattempting to set the system is as follows:Office window2002 ActiveOffice door2001 Active1. The system gives a fault tone and thedisplay shows all active zones in turn.2. Investigate why the zones are activeand rectify the cause.To abandon the setting procedurewithout rectifying the active zones, enteryour user code again and select theunset option.3. When all zones are healthy, continuewith the exit procedure.If the zones are not cleared by the end of the exit procedure:! ALERTS !16:42 Wed 16 MARSET FAIL:-Ward : 1.......1. The internal sounder sounds, theexternal strobe flashes and the displayshows the ALERTS message. Proceeddirectly to the keypad.2. Enter your user code or present yourproximity tag; the display shows whichward failed to set.23
IndexAlarmAlert Messages .................................17Resetting ..........................................14Setting ................................................7Silencing...........................................13Unsetting...........................................10Alarm Receiving Centre................... 5, 15Alert Messages......................................17Buttons ....................................................6Chime ...................................................14Duress....................................................16Entry timer .............................................10Exit terminator .........................................9Final exit route.................................. 9, 10Ignore errors ..........................................23Keypads..................................................4Panic alarm ..........................................16Part setting ..............................................8Proximity tag............................................6Remote reset code ..............................15Resetting the System.............................14Secondary entry timer...........................10Selecting Options ................................... 6Set wards ................................................ 7Setting the alarm system........................ 7Setting with zones active ...................... 22Shunting zones ..................................... 16Silencing an Alarm ............................... 13Telephone line........................................ 5Troubleshooting .................................... 17Unset wards .......................................... 11Unsetting the alarm system .................. 10<strong>User</strong> code............................................... 6<strong>User</strong> menus............................................. 2View exit errors ...................................... 22Ward groupsSetting................................................ 8Unsetting .......................................... 11WardsAbout................................................. 3Setting................................................ 8Unsetting .......................................... 11Zones...................................................... 324
497061 Issue 3