Fan Circulated Oven 200FD - C R Clarke
Fan Circulated Oven 200FD - C R Clarke
Fan Circulated Oven 200FD - C R Clarke
Create successful ePaper yourself
Turn your PDF publications into a flip-book with our unique Google optimized e-Paper software.
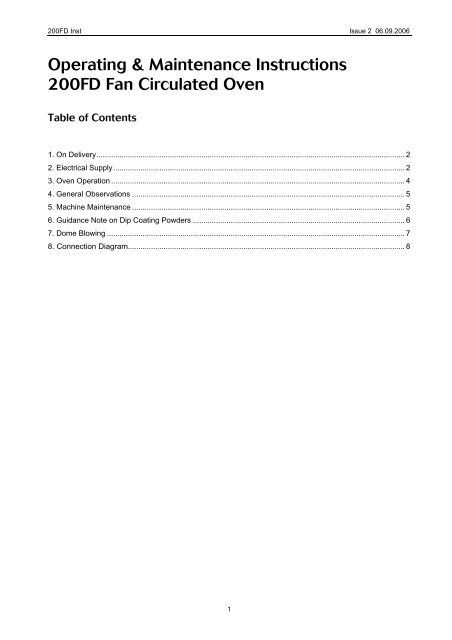
<strong>200FD</strong> Inst Issue 2 06.09.2006Operating & Maintenance Instructions<strong>200FD</strong> <strong>Fan</strong> <strong>Circulated</strong> <strong>Oven</strong>Table of Contents1. On Delivery................................................................................................................................................... 22. Electrical Supply........................................................................................................................................... 23. <strong>Oven</strong> Operation ............................................................................................................................................ 44. General Observations .................................................................................................................................. 55. Machine Maintenance .................................................................................................................................. 56. Guidance Note on Dip Coating Powders ..................................................................................................... 67. Dome Blowing .............................................................................................................................................. 78. Connection Diagram.................................................................................................................................... 81
<strong>200FD</strong> Inst Issue 2 06.09.20061. On DeliveryCarefully unpack your new oven and ensure that it has arrived in good condition. Anyobvious transit damage must be reported promptly to us and the haulier. Position theoven at a convenient working height, ensuring that there is a 75mm (3") air gap all roundfor heat dissipation.2. Electrical SupplyThe electrical specification of your new machine is as follows:-High VoltageLow VoltageVoltage 220-230V 110-115VCurrent 8.33A 16.66AWatts 2000W 2000WHz 50-60 50-60W!IMPORTANT!The wires in this mains lead are coloured in accordance with the following code:GeneralUSAGreen & Yellow Earth GreenBlue Neutral WhiteBrown Live(Hot) Black2
<strong>200FD</strong> Inst Issue 2 06.09.2006GeneralThe green and yellow wire must be connected to the terminal marked with the letter E,or the earth symbol, or coloured green and yellow or green.The blue wire must be connected to the terminal marked with the letter N, or colouredblue or black.The brown wire must be connected to the terminal marked with the letter L, or colouredbrown or red.USA (110-115V)The green wire must be connected to the green pin (the largest). The white wire must beconnected to the silver pin (marked N). The black wire must be connected to the brasspin (marked L).USA (220/230V)The white and black wires must be connected to the brass coloured terminals. Polarity isnot important.If the plug top is incompatible, replace it with a suitable alternative using the aboveguidelines.Warning - read instructions before installation and use.If in doubt about electrical supply or connection refer to yoursupplier or consult a qualified electrician.3
<strong>200FD</strong> Inst Issue 2 06.09.20063. <strong>Oven</strong> Operation230V MachinesWhen the oven is plugged into its mains supply the green "mains available" indicator lightwill illuminate. Switch on the oven at the mains switch on the control panel (0=off /I=on).this switch incorporates a no-volt release, cutting power to the oven until manually reset inthe event of a power failure.115V MachinesPlug the machine into a suitable mains supply. Switch on at the rotary mains switch (0=off,I=on) and the clear neon will illuminate. Switch on the heater at the main circuit breaker.Set the temperature as follows:200Lift the lower grey cover on the temperature controller and the rotating dial. The settemperature is marked by the arrow at the top of the dial. The controller has threeindicating neons, to show the actual oven temperature in relation to the set temperature,the left hand arrow shows that the oven is below temperature, the right hand arrowshows the oven in above temperature, with the central arrow illuminating when the ovenis at set temperature. There is also a neon in the top left hand corner of the controller, thisilluminates when power is being supplied to the heating element.<strong>200FD</strong><strong>Oven</strong> temperature can be adjusted from 0 - 400°C (32 - 750°F). The set temperature can beobserved by momentarily pressing the left button marked * on the controller. To adjustpress and hold the button * and adjust using the ⇓ or ⇑ buttons. The readout will displayactual oven temperature other than when ] is pressed when the target or set point will bedisplayed.HeatingItems can be heated by placing them on or hanging them from the two mesh shelvesprovided. Do not use place items on the mesh heater guard; it is too close to the elementto afford uniform heat distribution.When heating thermoplastic sheets such as acrylic for dome blowing, an aluminium sheetplaced on the shelf will ensure that no marks are left on the material by the bars of theshelves.Leave the oven door closed at all times except when loading and unloading, this ensuresmaximum safety and oven efficiency. When opening the door while the oven is hot, standwell away to avoid the initial "blast" of hot air rising from the interior.When running at temperatures above 300°C (572°F), the oven casing around the upper dooropening may exceed 60°C (140°F).Hazardous materials with a low flash point such as resins, paints, petroleum basedadhesives, low temperature alloys producing toxic fumes etc. should not be putin the oven under any circumstances. If in doubt consult material manufacturers.NO ASBESTOS HAS BEEN USED IN THE MANUFACTURE OF THIS OVEN4
<strong>200FD</strong> Inst Issue 2 06.09.20064. General ObservationsWhen the oven initially warms up, observe the temperature controller display. It isnormal for the temperature to "overshoot" due to the residual heat of the element beingreleased into the oven cavity. Allow the temperature to stabilise before loading the oven,particularly if heating, for example, acrylic sheets, where the overshoot may causeblistering of the material.The Model 200 is a convection oven, and thus relies upon free air flow within theheated cavity to maintain a uniform temperature. For this reason, do not cover the meshshelves any more than is necessary. The 200 FD maintains a more even cavitytemperature due to the circulation fan, enabling fuller shelf loading.5. Machine MaintenanceYour new oven should provide many years of trouble free use. The following points areworth checking from time to time to ensure that the oven is operating at maximumefficiency.After a period of time, the woven fibre door seal may become compressed. The doorhinges and handle mountings have been provided with slotted holes to adjust thecompression and thus compensate for this.Periodically oil the hinges and door catch to ensure continued smooth operation.5
<strong>200FD</strong> Inst Issue 2 06.09.20066. Guidance Note on Dip Coating PowdersAlways keep powders dry and free from contamination. Damp powder (mostthermoplastics are hygroscopic) will cause the grains to cling together and result in poorfluidisation. Contamination by different colours or powder types will produce a"speckled" effect on the finished component. This effect can, sometimes, be quiteattractive even if achieved by accident. As the powder becomes fluid it will rise and occupyapproximately 10-20% more volume, tanks should not, therefore, be completely filled.The following data on two of the common powders in general use may be helpful:-LDPENylonDensity (Static) .40Kg/Litre .55Kg/LitreDensity (Fluidised) .325Kg/Litre .49Kg/LitreMax. working temperature 60°C 100°CCoating temperature 300-400°C 280-350°CPost Heat Temp.(if required) 170°C 165°CCoating thickness 0.30 – 0.90mm 0.20 – 0.75mmTypical weight of powder for a 200L tank = (Vol – 20%) x Density (static)(360) = (200 x 0.80) x 0.4 (LDPE)= 64kgTypical weight of powder for a 50L tank = (Vol – 20%) x Density (static)(300) = (50 x 0.80) x 0.4 (LDPE)= 16kgTypical weight of powder for a 5L tank(150/150R)= (Vol – 20%) x Density (static)= (5 x 0.80) x 0.4 (LDPE)= 1.6kg6
<strong>200FD</strong> Inst Issue 2 06.09.20067. Dome BlowingDome blowing relies upon the elastic nature of a heated thermoplastic sheetstretching it uniformly when air pressure is applied to form an even hemisphere.Because of this, materials which are dominantly elastic when heated are most suitable.The most common materials in this category are cast acrylic and PVC.The sheet should be heated in an oven well into its elastic range, to give the operatortime to transfer the material and form the dome. Typical temperatures are 160°C (320°F)for cast acrylic and 140°C (284°F) for PVC. As a general rule, use material of at least 3mm(1/8") thickness, as thinner material will cool too quickly. Thicker materials can be usedsuccessfully as they hold their heat longer and, unlike when vacuum forming, nosignificant extra air pressure is required to form the extra thickness.Dome Blowing TechniqueHeat the thermoplastic sheet up to the required temperature. Using heat resistantgloves, transfer the sheet to the dome blowing unit, and clamp down.Apply air pressure using a vacuum forming machine or other suitable source. Whenblowing, remember that the air inside the dome will expand as it is warmed by thesheet being blown. When the dome is at the required height, stop the incoming air andleave to cool before unclamping.If the sheet is overblown, and cannot be released from its clamping ring once cold, putthe ring complete with dome back into the oven, upon reaching its elastic state thedome will revert to a flat sheet - this is known as plastic memory. For the same reason,a plastic sheet can be used many times to demonstrate the principle of dome blowing.7
<strong>200FD</strong> Inst Issue 2 06.09.20068. Connection Diagram8
<strong>200FD</strong> Inst Issue 2 06.09.20069


