Tim Manual - Abacus Business Solutions
Tim Manual - Abacus Business Solutions
Tim Manual - Abacus Business Solutions

You also want an ePaper? Increase the reach of your titles
YUMPU automatically turns print PDFs into web optimized ePapers that Google loves.
•11 ~-exHOSPITALITY SYSTEMSCopyright © 1998 • 20 II Index Hospitality Systems BVDocumentation Services. This publication is confidential. proprietary information which is not to be reproduced or disclosed toothers without written permission from Index Hospitality Systems BV. documentation Services. No part of this document may bereproduced, transmitted, stor ed in a retrieval system, or translated into any language in any form by any means without writtenpermission of Index Hospitality Systems BV.Index Hospitality Systems BV. is not responsible for any technical inaccuracies or typographical errors contained in this publication.Changes are periodically made to the information herein; these changes will be incorporated in new editions of this publication.Any reference to gender in this document is not meant to be discriminator-y. The software described in this document is providedunder a license agreement. The software may be used or copied only in accordance with the terms of that agreement.© Index Hospitality Systems BV., 2007.AII Rights Reserved.ALOHA® is a U.S. Registered Trademark of Radiant Systems Inc.Microsoft®, and Windows® are registered trademarks of Microsoft, Inc.Other products mentioned are trademar ks or registered trademarks of their respective companies.TIM Installation <strong>Manual</strong> 2
Table of ContentsTechnical Requirements 4Configuring Aloha 6Install ing TIM Backoffice 8Installing TIM c lient 11Wireless networ ks 14Troubleshooting 15TIM Installation <strong>Manual</strong>
Technical RequirementsThe TIM Installation process consists of two parts: installation of the Backoffice suite on your server and installation of theTIM client on your iPod(s) and\or iPhone(s). Please ensure the following requirements are met before you start yourinstallation.Back OfficeThe Backoffice server is needed for installation of the Backoffice suite. This server should be part of your exisiting Aloha POSnetwork and run your Aloha Interface Server. The hardware and software run on this server should meet the minimumrequirements as in the following table.. · ' Minuinum RecommendedOperating System WindowsXP W indows 7 UltimateRAM 2Gb 4GbProcessor 2 .8 3.0 Dual CoreHarddrive space reserved 2Gb 2GbYour Backoffice server will also need to run your Aloha Interface Server. The TIM Maintenance server can manage the timelystarting or stopping of this server, but configuration in Aloha and local system variables must be set. Consult your Aloha POSmanual or reseller on setting up an Interface Server.AlohaYour Aloha license should have Aloha Connect enabled for TIM to be able to interface with Aloha. You will also need anamount of Interface Terminals licensed which equals the amount of concurrent users in your TIM license. As a lastrequirement you will need to be on Aloha version 6.5 as a minimum.Wireless NetworkYour TIM clients will need to communicate with your TIM server through WI Fl. Read the Wireless Best Practices later on inthis manual carefully to ensure a stable, fast and secure network for your business.iOS DevicesEnsure your Apple iPod(s) and\or iPhone(s) are running the latest version of iOS and are able to connect to the wirelessnetwork set-up for communication with Aloha. You will also need at least 1 Apple.com account to be able to download theTIM Client.TIM Installation <strong>Manual</strong>
AlaN Seltin!l> I Disk Mamnance Erd 01 DayDale/Tine J l..icons01g I Slae lrlonnolionr 6W>SIMIBockOIHot IIOOl!goen) 3[ICOM Iris~ aces~ ll"' FOH COM lrisfoco?r Enal>leQSRVideoKDS irislace?TIM Installation <strong>Manual</strong>
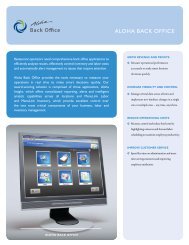
Configuring AlohaActivating Aloha ConnectTIM uses the Aloha Connect interface to communicate with Aloha. This needs to be activated through Aloha Manager.Assuming your key has been licensed properly, you can do this as follows:1 . Log into Aloha Manager using an account that can edit the store settings2. Choose Maintenance > Store Settings3. Select the System group4. Select the Interfaces tab5. Rag the Use FOH COM Interface setting6. Input the following string into one of the tekstfields under External Activity Interceptors: TIMAiohalnterceptor.HandlerConfiguring your terminalsAfter having enabled the COM Interface, you will need to setup your terminals for TIM. You need to define at least 1 interfaceserver and 1 interface terminal for TIM to work. Depending on ow many TIM terminals your client wants to use, you mighthave to enabled multiple interface terminals.Configuring an Interface serverThe Interface server is the instance of IBER.EXE that the TIM service communicates with. You will always need at least oneof these, but depending on the environment you might choose to use more. As a rule of thumb we advise you to use nomore than 10 TIM clients for every Interface Server.1 . Log into Aloha Manager using an account that can edit terminals2. Create a new terminal and name it something logical, like for example TIM ITF SERVER3. Select a revenue center for this terminal. It doesn't really matter which you select, but Aloha will require you to do so.4. Rag the option Interface Server5. Save your settingsConfiguring an Interface terminalInterface terminals are the terminals used by the TIM clients. You will need an interface terminal for each TIM license. SO ifyour customer wants to use 5 TIM clients at the same time, you will need 5 interface terminals defined.1. Log into Aloha Manager using an account that can edit terminals2. Create a new terminal and name it something logical, like for example TIM 1TIM Installation <strong>Manual</strong>
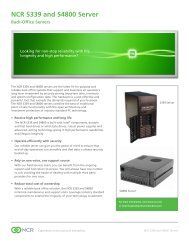
3. Select a revenue center for this terminal. This is the revenue center used by the specific client for Tabs.4. Select a default printer for checks to print to from the TIM client5. Flag the option Interface Terminal6. Select the Interface Server you just created as the Interface Host7. Save your settings8. Repeat steps 1 through 7 for every TIM client you have licensedRunning your Interface ServerOnce all the configuration for Aloha has takenplace and has been made active (Refresh Data)you need to run your interface server on themachine you will be installing the TIM Serviceson. To ensure this instance of IBER.EXE keepsrunning after a refresh data or EOD weencourage you to use a batch-file to monitor theIBER status. You might already have your ownbatchfile for this, if that is not the case you couldrun a batch file containing the following:The InstaiSHeld(R) Wlzerd..,. nstal TIM · rme Is Money on'ff» c~. To conti-ue, dd< Next.@echo off:TOPCLS[" I I c.ncetrem if e xists %IBERDIR%\ tmp\exiting del %IBERDIR %\TMP\exitingCLSSET IBERROOT=AlohaSET LOCALDIR=C: \Ibertech\AlohaSET TERMSTR={YOUR TERMSTR}TBJ TERM=(YOUR INTERFACE SERVER.:; TIM fomo h Money ln•ldiiSh old Wildrd !Xli dexCherlge ...SET NUMTERMS={YOUR NUMTERMS}SET DEBUG COM=TRUE~JER VER=(YOURALOHA SERVERSET MASTERCAPABLE=FALSESET SERVERCAPABLE=FALSESET AUTOEXIT=FALSESET REBOOTNT=FALSESTART / WAIT %IBERDIR%\BIN\IBER .EXEgoto TOPMake sure you place this batchfile in the startup folder to ensure it is always activated. Also, set the TERM variable inyour environment variables as well, as the TIM backoffice requires this!TIM Installation <strong>Manual</strong>
Installing TIMBackofficeThe-Wlurd has su:ces~ nstoled TIM · rme IsMoney. Cld.a I • •• ·,-: 'i)•3. Select the directory you want to install TIM in. Click'Next' when done.TIM Installation <strong>Manual</strong>
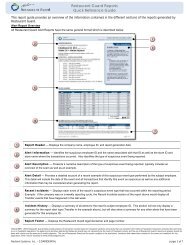
~ ....-...-_.....,-..,...,.._- -,...~~ ....,..._"' -rc ._. -~ -=.;-..-4. After installation you click 'Rnish' to end theinstallation.-., ...."_ .._....._..~__·-_. ...........,._._...._....~=== ; I, _R •"- -"'-=---·w.-==::n""':..~-.....Q i!i::.-------·~ofJ::............~ Iu®= -,,_.,.omt=-.,........,."l::i'"'...oa:-----·-::-.oG:J::'!- .... - . .... .·~- --·-----------...--.... ---·--.- ..- "W"W,.,.., ~~-__, . ~., .;:. ·.4:- =:; :"u · : ~::. .:·~;_· ·v~~--~ - Y• ~ - -. -5. After the installshield finishes, navigate to the directory you installed TIM in.6. The directory should contain 4 executables, two of which need to be launched for TIM to function. These files are:TIMSrvcApp.exe is the main TIM service which takes care of all processing.TIM Installation <strong>Manual</strong>
TIMSoapApp.exe is the webservice which takes care of communication to and from the clients.7. Start these two services and they should start running in the windows system tray.Licensing the TIM installTo license TIM you will need to start the TIM Backoffice application You can do this by either opening the TIM.EXE in theinstallation directory of your TIM server, or by clicking on the TIMServiceApp icon that is running in the tray on your server.Once opened, Click on the blue info icon in the top right corner. You will see a 'license' option. Click on this and a licensingscreen will pop-up showing a Ucense Request Code and a Activation key. You will need to pass the Request Code to IndexHospitality Systems so they can provide you with an Activation key. This can be done by telephone or manually. Pleasenote, the TIM install will only work for 21 days without a license!TIM Installation <strong>Manual</strong>
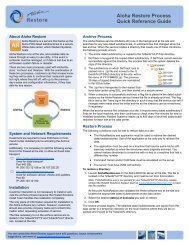
InstallingTIM client--; ..~~..... \ ,..,: . _e-1/hca ~__Nf'o.,_~or ...~ . T •O.Wl-Installing TIM client onyour iOS deviceInstalling the TIM app on your iPod touch oriPhone is easy and can be done eitherdirectly through the appstore, or syncingwith iTunes. The latter is advised as youI ., _1n -~"--'--~ ·.•--......_. Nttr.. :ZJU~ U:•umost likely won't have internet access on the devices. We recommend installing iTunes on a separate workstation, ifavailalble.-- . g • tJ - ~ /)~ .,....IDe-(j)-Nno'\ Slm.Lllor5L , .. c.-.1:::.w ~:. rtl~ U:t • : • ._......-w!'iL!J-a - ....o--s Qecamltfelp.-obWhen you install TIM on your device, theapp will be in 'Demo mode' by default. Toconnect TIM to your aloha system, enterthe settings section of your device and youwill find a TIM settings tab. Select the TIMtab to view the TIM client settings.I ~ _1, _~"-=-'..IJita.O..C•-....__...Uln.( .... lTIM Installation <strong>Manual</strong>
1. To start with, slide the Demo mode slider to OFF.2. Under Hostname, enter the IP-address of the server you installed the TIM Backoffice on.3. If you changed the port of the TIMSoapApp.exe, change the default value in the Port field.4. Enter a descriptive name for the specific device. Use a number or naming scheme so you can easily identify individualdevices.5. If you opened the TIM app before changing its settings, kill the TIM app through the multitasking bar and start it again sothe new settings take effect.Activating devicesOnce you installed the TIM app on your iOS device, it will need activation in the backotfice. This can be done by followingthese steps:1. After having configured TIM, start up the application. If all was set up well, you should see a message on your devicestating that the device is not allowed.2. Open up the TIM backoffice. You can do this by either opening the TIM.EXE in the installation directory of your TIM server,or by clicking on the TIMServiceApp icon that is running in the tray on your server.TIM Installation <strong>Manual</strong>
3. Once you opened the TIM backoffice, you should see a screen which shows an iPod and your device name. The deviceshould be accompanied by a yellow icon with a star in it. This means a new device is trying to register itself to thebackoffice.4. Click on the yellow icon and a pop-up will appear asking what you want to do with the device. Click on the EnableDevice button to approve your device.5. If done properly, you should now see your device with a grey icon and the text Enabled. Return to your device and pressthe OK button. Your device is now enabled and should start loading.TIM Installation <strong>Manual</strong>
Wireless networksA properly set up wireless network is an essential part of a good TIM implementation. Not only are speed and stabilityobvious requirements, but also security. Please take into account the following pointers when setting up your wirelessnetwork:- Ensure you do a sitesurvey. When doing a sitesurvey you will want to focus on:- possible locations of Accesspoints for good WiR coverage- Noise factors that disrupt a good signal, like Microwaves, alarmsystems or other WiR access points- Channels that are being used by other WiR networks. You will want to configure your access points to use channels thatare not being used by other wireless networks- Ensure yourself you are aware of areas where potentially there are lots of customers or people. The situation during asitesurvey does not necessarily have to correspond with real-life situations and people cause the most 'noise' for a wirelessnetwork- Use WPA2 encryption for security with a password that has at least 9 characters and uses lower- and higher case lettersas well as numbers and non-alphabetical characters. Hacking of a WPA2 encrypted network usually starts with so called'dictionary-attacks' which use brute force to discover the password. A complex password is therefore essential for security.- Hide the SSID of the network. Although from a security standpoint it doesn't make much difference as there are plenty oftools to discover a 'hidden' network, all small differences together make a wireless network harder to breach.- Preferably use MAC-filtering to filter access. Just like hidden SSID's, this is not something that is very hard for hackers tospoof or mimic, it does however add an extra layer to security.- Use a roaming set-up instead of separate SSID's. Although from a technical perspective the iPod could work fine with bothsetups, in our experience a roaming network performs a lot better.TIM Installation <strong>Manual</strong>
TroubleshootingBackofficeThe Back Office service doesn't seem to connect to Aloha (ALOHA NOT CONNECTED)- Ensure your Aloha Interface server is up and running- Verify you have the Aloha FOH COM interface activated- Verify the TERM variable is set as a Windows Environment VariableTIM App'Device is not allowed' error- You might still need to Approve the device through the TIM service- Please verify the TIM app is running the latest version'Connection problem' error- Please double check your Hostname and Port in the device's TIM settings- Open up safari and enter the following URL:http:/ I {HOSTNAME): {PORT}/ soap/TIMSoapConnector.You should see the TIMSoapApp.exe HTML page. If this does not show, check your network settings and connectivity.Also verify the TIMSoapApp.exe is functioning.'Connection t imeout' error- This error means that the application has or had a connection with the TIM services (meaning your configuration is mostlikely correct) but the communication has been dropped or is too slow. Verify you have a functioning network connectionand the TIM services are runningTIM Installation <strong>Manual</strong>