Manual for Bino Camera - Famous Trails
Manual for Bino Camera - Famous Trails
Manual for Bino Camera - Famous Trails
- No tags were found...

Create successful ePaper yourself
Turn your PDF publications into a flip-book with our unique Google optimized e-Paper software.
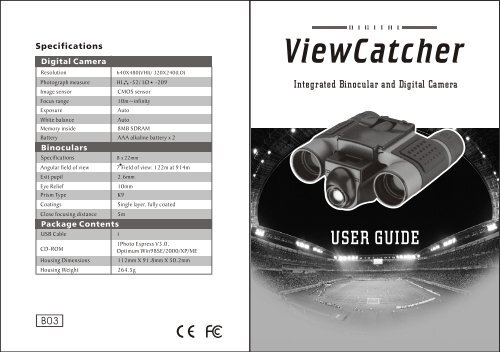
SpecificationsDigital <strong>Camera</strong>Resolution640X480(VHI)/ 320X240(LO)Photograph measure HI -52/ LO -209Image sensorFocus rangeExposureWhite balanceMemory insideCMOS sensor10m~infinityAutoAuto8MB SDRAMBattery AAA alkaline battery x 2<strong>Bino</strong>cularsSpecificationsAngular field of viewExit pupilEye ReliefPrism TypeCoatingsClose focusing distancePackage ContentsUSB Cable 1CD-ROMHousing Dimensions8 x 22mm7 Field of view: 122m at 914m2.6mm10mmK9Single layer, fully coated5mHousing Weight 264.5g1Photo Express V3.0,Optimum Win98SE/2000/XP/ME112mm X 91.8mm X 50.2mmDigitalViewCatcherIntegrated <strong>Bino</strong>cular and Digital <strong>Camera</strong>USER GUIDE
DigitalViewCatcherDigitalViewCatcherTroubleshootingPlease make sure to use the following connection and disconnectionprocedures to download pictures.a. Only connect ViewCatcher to your PC when the PC is on andWindows has completed loading.b. Your ViewCatcher and PC must be connected be<strong>for</strong>e running thesoftware program.c. Avoid connecting, disconnecting and reconnecting the camera,if you have Downloaded pictures and disconnected the camera,please reboot be<strong>for</strong>e reconnecting.. Always disconnect ViewCatcher be<strong>for</strong>e shutting down the PC.If ViewCatcher is unexpectedly not recognized by the softwareprogram, close the program, disconnect the camera and rebootyour PC. Only connect and disconnect your ViewCatcher usingthe procedure outlined in this section.User's guideContents1. Introduction....................................................................P.12. Name of each part.............................................................P.23. How to use your binocular.............................................P.3~4*Adjustment of Eye Relief <strong>for</strong> Eyeglass Wearers / Adjusting the Eyepieces /Focusing the <strong>Bino</strong>cular4. How to use your camera................................................P.4~5*Inserting Batteries / Taking Pictures / Self-Timer Mode / Erasing/ Deleting Picture5. Digital camera modes.......................................................P.6*Resolution Options / Other Modes6. System Requirements........................................................P.77. Software and driver installation.....................................P.7~13*Software Installation / Driver Installation / Important Note Regarding Device DriverInstallation / Troubleshooting8. Maintenance........................ .........................................P.14P.13
DigitalViewCatcherDigitalViewCatcher1. IntroductionViewCatcher is a 8 x 22 binocular integrated with a digital camerathat is great <strong>for</strong> spotting events, concerts and wildlife activities such ashunting or bird-watching. It is not the tool <strong>for</strong> a serious photographer,but it is a ton of fun and lets you record memories and sights at thetouch of a button. Use the full-featured 8x22 binocular <strong>for</strong> closerviews and capture images to take home with you at the same time.Image Download1.Open Photo Express software123ViewCatcher makes it possible to share your fun with others bydownloading images from the camera right to your computer <strong>for</strong> faxor e-mail to your friends and family.2.Display download selected screen and press"Acquire" or others item.453.Image will be download to PC.P. 1P.12
DigitalViewCatcherDigitalViewCatcher2. Name of each part8.Auto installing9.Press "Finish" to restart your computer3 11-+171.Diopter Knob(on underside)2.Center Focus Knob8 92563.Objective Lens44.Power/Mode Button31175.Shutter/Set Button6.USB Port7.Eyepiece8.<strong>Camera</strong> Lens879.LCD Screen10.Battery Compartment Lid1011.BarrelFig.1P.11 P. 2
DigitalViewCatcher3. How to use your binocularWARNING !Never use a ViewCatcher to look at the sun !Looking at or near the Sun will cause instant and irreversible damageto your eye. Eye damage is often painless, so there is no warning tothe observer that damage has occurred until it is too late. Do notpoint the binocular at or near the Sun.Children should always have adult supervision while observing.1. Insert your CD2.In Photo Express 3.0 Auto run screen andselect Install Photo Express 3.03. Select install language you want andpressAdjustment eye-relief <strong>for</strong> eyeglass wearersFold down the rubber eyecups and place them against your glasses toget the best viewing result.4.Step by step to Install Photo Express asinstruction5.Install ViewCatcher driver (USB cable mustbe unplug from ViewCatcher)Adjusting the eyepiecesThe distance between your eyes is called interpupillary distance, or IPD.The IPD is different from one person to another. It is important toadjust to your IPD be<strong>for</strong>e using your ViewCatcher:- Hold ViewCatcher firmly in the normal viewing position.- Adjust the barrels by pushing together or pulling apart until you see asingle circle field with both of your eyes. (Fig.2)Focusing the <strong>Bino</strong>culara.Set the Diopter on underside of ViewCatcher (Fig.1) at its centerpoint between + and - .b.Choose an object that is 5m away.c.Looking with just your left eye, rotate the Center Focus Knob(Fig.1)until the object you are viewing is in best focus.d.Looking with just your right eye, rotate the Diopter Knob(Fig.1)until the object you are viewing is in best focus..Viewing your object with both eyes, turn the Center Focus Knob(Fig.1) to bring it in best focus.P. 36.Step by step to install driver as instruction7.Press "Next"P.10
DigitalViewCatcherDigitalViewCatcher7-3.If necessary, navigate to your CD driver, open the Driver folder and7-4.Click the OK button in the next window.7-5.Windows again asks <strong>for</strong> the installation disk. Click the OK Button.7-6.Windows is now looking <strong>for</strong> another system file. Repeat steps 2-4.7-7.Windows is now looking <strong>for</strong> an initialization file(filename.ini).With the software and driver loaded, your computer rebooted and theViewCatcher connected to your PC, you are now ready to run the UleadPhoto Express software to download and share images.Ulead Photo Express allows you to capture, print, and e-mail images,and create custom cards, messages, and greetings. You will find theViewCatcher camera listed asThe<strong>Camera</strong>90 within the software program.Refer to the manual loaded on your hard drive(Start/Programs/UleadPhoto Express) and the on screen Help menu <strong>for</strong> more in<strong>for</strong>mation aboutthe program.NOTE:For best image viewing, set your PC monitor to 16-bit or 24-bit color.Ulead Photo Express is a proprietary program, and may not be sold,licensed or distributed without the express written consent of Ulead.For more in<strong>for</strong>mation about Ulead Photo Express you may visit theUlead website at www.ulead.com/pe.P. 9then click the open button.(Please notice that Windows may alreadybe in this folder. The needed files are all located in the D:\Driverfolder. Most CD drives are assigned as drive D. Please substituteyour CD driver letter <strong>for</strong> D as appropriate <strong>for</strong> your CD driver.)Repeat steps 2-4.Fig.2:Adjustment of interpupillary Distance (IPD).4. How To Use Your <strong>Camera</strong>Attention!!:- Remove the batteries when not using the camera.Failure to do so will result in losing pictures and dead battery afterseveral days.- When batteries are removed, memory of pictures can maintain <strong>for</strong>90 seconds. Batteries must be replaced within 90 seconds to avoidlosing pictures. Be sure the ViewCatcher is OFF be<strong>for</strong>e chargingthe batteries.Inserting BatteriesLift the battery compartment lid Fig. 1 and insert two AAA sizebatteries.Taking Picturesa. Press the power/ mode button to turn on the camera.. Select a picture resolution mode by pressing the power/mode button,to show the " " screen <strong>for</strong> 640x480 high resolution mode and the" " screen <strong>for</strong> 320x240 resolution mode.Use the shutter/ select button Fig.1 to select a mode a beepwill sound to confirm the selection. The mode selected will show onthe LCD. See "Digital <strong>Camera</strong> Modes" <strong>for</strong> more in<strong>for</strong>mation.P. 4
DigitalViewCatcherDigitalViewCatcherc. View a target through ViewCatcher.d. Press the shutter/select button Fig.1 .A beep sounds to confirm that a picture was taken.. The counter in the LCD decreases by one.Click on Install Driver on the software installation screen and followthe prompts. When prompted, restart your PC. After Windows loads,connect the ViewCatcher to the computer's USB port Fig. 3 .How to download image from ViewCatcher (see P.12)Self-Timer ModeThe self-timer allows a 10 second delay be<strong>for</strong>e taking a picture.a. Press the power/mode button Fig.1 to turn on the camera.b. Select a picture resolution mode b pressing the power/modebutton to show the " " screen <strong>for</strong> 640x480 high resolutionmode and the " " screen <strong>for</strong> 320x240 resolution mode.Use the shutter/select button Fig.1 to select a modea beep will sound to confirm the selection. The mode selectedwill show on the LCD. See "Digital <strong>Camera</strong> Modes" <strong>for</strong> morein<strong>for</strong>mation.c. Press the power/mode button until the self-timer option displays.It shows the resolution you chose and a clock.d. Press the shutter/select button. It breeds a "Be" sound.e. ViewCatcher beeps when the picture has been taken.. The counter in the LCD decreases by one.Erasing/Deleting PicturesUse the option to erase the last picture, or use the optionto erase all the pictures .ABViewCatcherPC with USB portFig.3:Connecting ViewCatcher to a PC.Important Note <strong>for</strong> Device Driver InstallationDepending upon the device drivers that are already installed on yourcomputer system, the ViewCatcher driver installation just outlined maynot be recognized correctly by Windows the first time you connect hecamera. If this occurs, it is easily remedied by per<strong>for</strong>ming the followingin response to the questions Windows will ask you:7-1.After connecting the ViewCatcher to you PC <strong>for</strong> the first time,Windows asks you to insert the installation CD into your CD-ROMdriver. Please insert the CD and click the OK Button.7-2.Windows will tell you it needs to find some files. Windows firstasks <strong>for</strong> a system file(filename.sys). Click the Browse...button.P. 5P. 8
DigitalViewCatcherDigitalViewCatcher6. System Requirements6-1.Windows 98SE / Windows Me / Windows 2000 / Windows XP.6-2.200MHz (or equivalent) processor or faster.6-3.64 MB of SDRAM6-4.Video (VGA) card with 2MB of RAM <strong>for</strong> minimum 16-bit(High Color) display.6-5.CD-ROM driver6-6.USB port6-7.600 MB of free hard drive space.7.Software and Driver InstallationPut the CD (bundled with your ViewCatcher) into the CD-ROMdriver, then the start screen will come up automatically.(see P.10)Driver InstallationBe<strong>for</strong>e connecting the ViewCatcher to your PC, you need toinstall aThe<strong>Camera</strong>90 driver <strong>for</strong> your PC to recognize theViewCatcher. (See P.10)5. Digital <strong>Camera</strong> ModesDefault Setting: Taking pictures at this mode.The selected resolution displayed at bottom left.The battery life indicator displayed at lower right.Resolution OptionsAs taking pictures, the number of picture is down counting.(For example,when you take by hi resolution <strong>for</strong> 5 pictures, the monitor appears "47" and so on.)Other ModesHigh Resolution (640x480)Mode(VHI).ViewCatcher will store up to 52 images.Low Resolution (320x240)Mode(LO).ViewCatcher will store up to 209 images.Off screen.Self-Timer Mode with 10 second delay.Erase All Image Mode.Erase Last Picture Mode.P. 7P. 6
DigitalViewCatcher8.MaintenanceOperating Environment: 41 to 104 F (5 to 40 C). 20%-85%relative humidity, non-condensingCare of your ViewCatcher8-1.Never immerse ViewCatcher into any fluid or liquid.Remove dust or stains with a soft cloth dampened with wateror neutral detergent. Keep in a dry and cool dust-free environmentor a container when it is NOT used.8-2.Take the batteries out when ViewCatcher is NOT to beused over a long period.8-3. Avoid dropping the ViewCatcher. Do not disassemble ViewCatcher.8-4.Download pictures to your PC be<strong>for</strong>e removing the batteries.P.14