Getting started with UniOP and CoDeSys integrated controller
Getting started with UniOP and CoDeSys integrated controller
Getting started with UniOP and CoDeSys integrated controller
You also want an ePaper? Increase the reach of your titles
YUMPU automatically turns print PDFs into web optimized ePapers that Google loves.
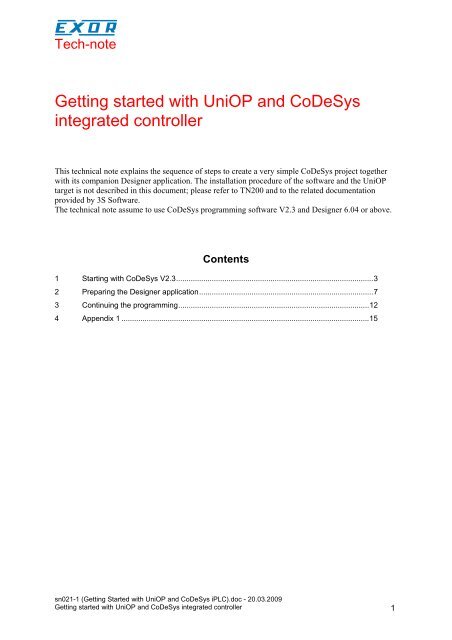
Tech-note<strong>Getting</strong> <strong>started</strong> <strong>with</strong> <strong>UniOP</strong> <strong>and</strong> <strong>CoDeSys</strong><strong>integrated</strong> <strong>controller</strong>This technical note explains the sequence of steps to create a very simple <strong>CoDeSys</strong> project together<strong>with</strong> its companion Designer application. The installation procedure of the software <strong>and</strong> the <strong>UniOP</strong>target is not described in this document; please refer to TN200 <strong>and</strong> to the related documentationprovided by 3S Software.The technical note assume to use <strong>CoDeSys</strong> programming software V2.3 <strong>and</strong> Designer 6.04 or above.Contents1 Starting <strong>with</strong> <strong>CoDeSys</strong> V2.3..............................................................................................32 Preparing the Designer application...................................................................................73 Continuing the programming...........................................................................................124 Appendix 1 ......................................................................................................................15sn021-1 (<strong>Getting</strong> Started <strong>with</strong> <strong>UniOP</strong> <strong>and</strong> <strong>CoDeSys</strong> iPLC).doc - 20.03.2009<strong>Getting</strong> <strong>started</strong> <strong>with</strong> <strong>UniOP</strong> <strong>and</strong> <strong>CoDeSys</strong> <strong>integrated</strong> <strong>controller</strong> 1
Tech-note1 Starting <strong>with</strong> <strong>CoDeSys</strong> V2.31) Start the <strong>CoDeSys</strong> workbench from the start menu; by default, <strong>CoDeSys</strong> software opens thelast opened project.2) Select File / New to create a new project3) Depending on the SCM module, select the proper target configuration from the list ofavailable platforms; in case of an SCM03-C module, select "Exor/SITEK <strong>CoDeSys</strong> forSCM03…" as target4) In the "New POU" dialog box displayed after the previous confirmation, select the languageyou want to use for the PLC_PRG Program Organization Unit (POU). This program is themain module of your project that is calling all the other POUs of your application. Please,don't change the name of this POU.5) To complete the settings of your project, click on the "Resources" tab in the project treeopen then "Workspace" <strong>with</strong> a double clicksn021-1 (<strong>Getting</strong> Started <strong>with</strong> <strong>UniOP</strong> <strong>and</strong> <strong>CoDeSys</strong> iPLC).doc - 20.03.2009<strong>Getting</strong> <strong>started</strong> <strong>with</strong> <strong>UniOP</strong> <strong>and</strong> <strong>CoDeSys</strong> <strong>integrated</strong> <strong>controller</strong> 3
Tech-note6) In the "Options" dialog box, select first "Symbol Configuration", check the "Dump symbolentries" <strong>and</strong> finally, press the "Configure symbol file…" button:7) In the "Set object attributes" dialog box, the "Export variables of object" is grayed-out <strong>and</strong>need to be unchecked <strong>and</strong> marked back again. This is the final result:IMPORTANT : Please, look at appendix 1 for new informationsn021-1 (<strong>Getting</strong> Started <strong>with</strong> <strong>UniOP</strong> <strong>and</strong> <strong>CoDeSys</strong> iPLC).doc - 20.03.2009<strong>Getting</strong> <strong>started</strong> <strong>with</strong> <strong>UniOP</strong> <strong>and</strong> <strong>CoDeSys</strong> <strong>integrated</strong> <strong>controller</strong> 4
Tech-note8) Double click now on the PLC Configuration item of the Resource tree:9) In the "PLC Configuration" dialog box, right click on the "SITEK SCM03…" <strong>and</strong> select infrom the "Append Sub element" the hardware configuration you need to use in your project,following pictures shows how to insert the uIM05 digital inputs.sn021-1 (<strong>Getting</strong> Started <strong>with</strong> <strong>UniOP</strong> <strong>and</strong> <strong>CoDeSys</strong> iPLC).doc - 20.03.2009<strong>Getting</strong> <strong>started</strong> <strong>with</strong> <strong>UniOP</strong> <strong>and</strong> <strong>CoDeSys</strong> <strong>integrated</strong> <strong>controller</strong> 5
Tech-note10) You are now ready to start writing the PLC program; the following picture shows a verysimple example using the Ladder diagram programming language:During this phase, the variables are declared automatically. Some of them are "local", othersare "Global". These variables will be exported to a file that we will use in our <strong>UniOP</strong>Designer project importing them directly into it. The <strong>CoDeSys</strong> symbols used to name thevariables can be exported to a text file after the project has been compiled.11) Select menu "Project / Rebuild all" to compile the projectWhen building the application the <strong>CoDeSys</strong> software automatically creates a file <strong>with</strong>extension “.sym” stored in the same project folder; this file contains all the variables declaredin the project <strong>and</strong> can be used later in Designer to import them into the project.12) If there are no errors in the project, the Message window will appear as following:sn021-1 (<strong>Getting</strong> Started <strong>with</strong> <strong>UniOP</strong> <strong>and</strong> <strong>CoDeSys</strong> iPLC).doc - 20.03.2009<strong>Getting</strong> <strong>started</strong> <strong>with</strong> <strong>UniOP</strong> <strong>and</strong> <strong>CoDeSys</strong> <strong>integrated</strong> <strong>controller</strong> 6
Tech-note2 Preparing the Designer application1) Create a new project, select the folder <strong>and</strong> the name of the project2) Select the <strong>UniOP</strong> model from “Panel Setup” <strong>and</strong> open "Project / Configure Controller…"menu. In the "Configure Controller" window, select "Internal <strong>controller</strong> only" <strong>and</strong> click "Ok".In the next dialog box select <strong>CoDeSys</strong> <strong>and</strong> confirm3) Since <strong>CoDeSys</strong> PLC does not use fixed addresses, we will need to connect the project to a tagdictionary <strong>and</strong> import the symbol file we exported during <strong>CoDeSys</strong> "build project" phase.Select then "Tools / Tag Editor'" from DesignerStart now “Tag Editor” form the “Tools” menu <strong>and</strong> select "File / New"; create a new databasechoosing its name <strong>and</strong> its location.Right click the database icon in the tree <strong>and</strong> select "Import Tags"sn021-1 (<strong>Getting</strong> Started <strong>with</strong> <strong>UniOP</strong> <strong>and</strong> <strong>CoDeSys</strong> iPLC).doc - 20.03.2009<strong>Getting</strong> <strong>started</strong> <strong>with</strong> <strong>UniOP</strong> <strong>and</strong> <strong>CoDeSys</strong> <strong>integrated</strong> <strong>controller</strong> 7
Tech-note4) Designer will start now a quick wizard to import the <strong>CoDeSys</strong> symbol file; in the Step1 selecta name for the dictionary <strong>and</strong> in the list of <strong>controller</strong> drivers make sure you have selected“iPLC <strong>CoDeSys</strong>” corresponding to the file "D32Uplc196.dll"Click "Next"5) In the Step 2 use the reference button to locate the <strong>CoDeSys</strong> symbol file; the file isnormally store in the same folder where it was saved the PLC applicationClick "Next" <strong>and</strong> "Finish" to complete end the import processThe Tag Editor wizard ends showing the information about the number of imported tags asshown in the following example:(number of imported tags is of course project dependant)IMPORTANT : Please, look at appendix 1 for new informationsn021-1 (<strong>Getting</strong> Started <strong>with</strong> <strong>UniOP</strong> <strong>and</strong> <strong>CoDeSys</strong> iPLC).doc - 20.03.2009<strong>Getting</strong> <strong>started</strong> <strong>with</strong> <strong>UniOP</strong> <strong>and</strong> <strong>CoDeSys</strong> <strong>integrated</strong> <strong>controller</strong> 8
Tech-note6) The tag dictionary is now ready to be used in the Designer project to create the <strong>UniOP</strong>application:7) In Designer select now “Project / Configure Tag Dictionaries” enable the tag support <strong>and</strong>browse for the database file created in the previous steps:sn021-1 (<strong>Getting</strong> Started <strong>with</strong> <strong>UniOP</strong> <strong>and</strong> <strong>CoDeSys</strong> iPLC).doc - 20.03.2009<strong>Getting</strong> <strong>started</strong> <strong>with</strong> <strong>UniOP</strong> <strong>and</strong> <strong>CoDeSys</strong> <strong>integrated</strong> <strong>controller</strong> 9
Tech-note8) Create your project using the normal procedure. Variables for the project can be selected fromthe list of imported symbols:9) Let’s now consider the following example as final result of the Designer application:What are these two buttons "1" <strong>and</strong> "2"?These buttons are Generic Buttons programmed <strong>with</strong> the macro comm<strong>and</strong>s for portassignment.We will use the same cable <strong>and</strong> same PC/Printer <strong>UniOP</strong> port to program both devices (HMI<strong>and</strong> iPLC). The "PC port for <strong>UniOP</strong>" will assign the PC/Printer port to the <strong>UniOP</strong> forDesigner programming; note that the port is automatically assigned to the <strong>UniOP</strong> when thepanel is in Configuration Mode. The "PC port for SCM03C" will connect the PC/Printer portto the SCM module for <strong>CoDeSys</strong> programming.This is the macro definition for "PC port for <strong>UniOP</strong>" button…sn021-1 (<strong>Getting</strong> Started <strong>with</strong> <strong>UniOP</strong> <strong>and</strong> <strong>CoDeSys</strong> iPLC).doc - 20.03.2009<strong>Getting</strong> <strong>started</strong> <strong>with</strong> <strong>UniOP</strong> <strong>and</strong> <strong>CoDeSys</strong> <strong>integrated</strong> <strong>controller</strong> 10
Tech-noteAnd this is the macro definition for "PC port for SCM03C" button…The port assignment can be also done directly from the HMI in the System Menu:- enter the comm<strong>and</strong> menu (press for 2 seconds on the touch screen or 2 seconds on theENTER key on non touch screen HMI) <strong>and</strong> select "SYSTEM"- in the System menu scroll the cursor down until you reach the "PRINTER.....OFF-LINE" line- Use left <strong>and</strong> right arrows to change the settings:-- "SCMxx #0 APPLICATION" when you want to download the iPLC project <strong>with</strong><strong>CoDeSys</strong>-- "OFF-LINE" when you want to download the <strong>UniOP</strong> project <strong>with</strong> Designer- Select then "EXIT" to go out of this system menu.10) Now, you are ready to download your projects (<strong>UniOP</strong> <strong>and</strong> <strong>CoDeSys</strong>) to your HMI- Use st<strong>and</strong>ard procedure to download your <strong>UniOP</strong> project to the HMI <strong>with</strong> designer.- When the panel is in operation Mode, use the "PC port for SCM03C" button to reserve thePC port for <strong>CoDeSys</strong>.- In <strong>CoDeSys</strong> software, select then "Online / Login" menu to connect <strong>with</strong> the SCM module- <strong>CoDeSys</strong> will now display a message according to the status of the SCM module; if themodule has already an application loaded on it the following message is displayed:- at the end of the download the PLC_PRG POU will be automatically displayed in monitormode on the <strong>CoDeSys</strong> programming software.11) By default the <strong>CoDeSys</strong> application is downloaded in the module RAM memory; to keep it atpower cycle you need to store the project in the internal SCM flash memory; create then the“Boot Project": the PLC application is stored in the flash memory <strong>and</strong> it will be automatically<strong>started</strong> at each power cycle. The boot project can be created form "Online / Create bootsn021-1 (<strong>Getting</strong> Started <strong>with</strong> <strong>UniOP</strong> <strong>and</strong> <strong>CoDeSys</strong> iPLC).doc - 20.03.2009<strong>Getting</strong> <strong>started</strong> <strong>with</strong> <strong>UniOP</strong> <strong>and</strong> <strong>CoDeSys</strong> <strong>integrated</strong> <strong>controller</strong> 11
Tech-noteproject" while in On Line mode.3 Continuing the programmingEach time you modify the iPLC application, you need to recompile your project. Since <strong>CoDeSys</strong> usesdynamic variable allocation done at each project build, you cannot be sure that the previous internaladdresses used to store the variables are still valid after the last compilation of the project.This means that Tag Dictionary needs to be upgraded each time the iPLC project is re-compiled.1) Select the "Tools / Tag editor" in Designer to re-open the Tag Editor window2) Right click on the tag dictionary name <strong>and</strong> select "Import Tags"3) Confirm you want to overwrite the existing tag dictionary4) Click "Next" in the "Step 1" dialog box5) Use the reference button to locate the new version of the ".SYM" file generated by<strong>CoDeSys</strong>. You can verify the generation date if you select the "detail" display mode…Click "Next" when the right file is selected.sn021-1 (<strong>Getting</strong> Started <strong>with</strong> <strong>UniOP</strong> <strong>and</strong> <strong>CoDeSys</strong> iPLC).doc - 20.03.2009<strong>Getting</strong> <strong>started</strong> <strong>with</strong> <strong>UniOP</strong> <strong>and</strong> <strong>CoDeSys</strong> <strong>integrated</strong> <strong>controller</strong> 12
Tech-noteClick "Finish" in the next window to complete the processTag Editor reports finally the number of imported tags.Close the Tag Editor window <strong>and</strong> return to DesignerNote : <strong>with</strong> last versions of Designer <strong>and</strong> TagEditor, the process is shorter because you canselect at point 2) above the option "Re import tags from [.Sym file previously selected]"6) Select now the "Project / Tag Validation" menu to check the validity of the addresses used inyour <strong>UniOP</strong> project.- If Tag validation reports "All the tags match <strong>with</strong> the field address values", no additionalactions are required:- sometimes however, the Tag validation process could detect changes into addresses used tostore your variables <strong>and</strong> will display for example a report similar to the one in the followingpicture:sn021-1 (<strong>Getting</strong> Started <strong>with</strong> <strong>UniOP</strong> <strong>and</strong> <strong>CoDeSys</strong> iPLC).doc - 20.03.2009<strong>Getting</strong> <strong>started</strong> <strong>with</strong> <strong>UniOP</strong> <strong>and</strong> <strong>CoDeSys</strong> <strong>integrated</strong> <strong>controller</strong> 13
Tech-noteSelect the line(s) where a change is detected <strong>and</strong> right click to select "Update Field (<strong>with</strong>database values)" to adapt your <strong>UniOP</strong> project accordingly to the new iPLC application.7) The Designer project needs then to be downloaded again to <strong>UniOP</strong>.sn021-1 (<strong>Getting</strong> Started <strong>with</strong> <strong>UniOP</strong> <strong>and</strong> <strong>CoDeSys</strong> iPLC).doc - 20.03.2009<strong>Getting</strong> <strong>started</strong> <strong>with</strong> <strong>UniOP</strong> <strong>and</strong> <strong>CoDeSys</strong> <strong>integrated</strong> <strong>controller</strong> 14
Tech-note4 Appendix 1In case you use UIMxx module defined in PLC configuration, the next message can be reported whileimporting into TagEd the .sym file generated by <strong>CoDeSys</strong> :This message means that two variables <strong>with</strong> same name are present in the sym file which causesdouble index definition in mdb file.In fact, I/O variables are defined twice in the project :- first definition in "PLC configuration"- second definition in "Global variable"If "export ALL variables" is selected as explained in section 1 point 7) above, the sym file willcontain the two definition which causes the trouble during import in TagEd !To avoid this, please follow the next steps :In the "Set object Attributes" dialog, unselect the "Export variable of object" checkbox. This is theview of the current situation :Click on "POUs" section to select only this one. Pressing the "Ctrl" key on your keyboard, select thenthe "Global Variables" to add this section in the current selection. Finally, select again the "Exportvariables of object" checkbox.sn021-1 (<strong>Getting</strong> Started <strong>with</strong> <strong>UniOP</strong> <strong>and</strong> <strong>CoDeSys</strong> iPLC).doc - 20.03.2009<strong>Getting</strong> <strong>started</strong> <strong>with</strong> <strong>UniOP</strong> <strong>and</strong> <strong>CoDeSys</strong> <strong>integrated</strong> <strong>controller</strong> 15
Tech-noteThis is the view of the final situation.Press "Ok" to close the dialog.By this way, the "PLC Configuration" section is not exported <strong>and</strong> the sym file will not contain anydouble variable definition.Import ou RE import this sym file <strong>with</strong> TagEditor using usual way.Pay attention that this process must be repeated each time you add a new POU in your project or thenew variables will not be exported in the sym file.sn021-1 (<strong>Getting</strong> Started <strong>with</strong> <strong>UniOP</strong> <strong>and</strong> <strong>CoDeSys</strong> iPLC).doc - 20.03.2009<strong>Getting</strong> <strong>started</strong> <strong>with</strong> <strong>UniOP</strong> <strong>and</strong> <strong>CoDeSys</strong> <strong>integrated</strong> <strong>controller</strong> 16


