
Create successful ePaper yourself
Turn your PDF publications into a flip-book with our unique Google optimized e-Paper software.
HUMAX DVD Recorder Viewer’s GuideViewer’s GuideThe On-Screen Menus and the Remote ControlArrow ButtonsSelectSelectTo navigate the Recorder’s on-screen menus, use theremote control’s arrow buttons to move the highlightbar onto the option you want, then press SELECT.The LEFT arrow button often takes you to the previousscreen.Two Types of On-Screen ArrowsThe arrows that appear beside or nearthe highlight bar show possibledirections. For example, on this screen,you could press the RIGHT arrow tohighlight Options or the DOWN arrow tohighlight “Edit Category WishList.”Page UpArrowHighlight BarArrows NearHighlight BarWhen you see page up orpage down arrows at the topor bottom of the screen (or alist), press the CHANUP/DOWN button to jump anentire page at a time.Page DownSetting up your HUMAX DVD RecorderUsing the <strong>TiVo</strong> ® serviceArrowChanPageCHAN UP/DOWNButton
Programming the Remote ControlRemote Control Tips<strong>TiVo</strong> ButtonRemote Active LightAfter you complete Guided Setup (see Chapter 2), you can program theTV POWER, VOL, and MUTE buttons to control your TV*:1. Find the four-digit codes for your television brand. Press the <strong>TiVo</strong> button togo to <strong>TiVo</strong> Central ® . Select Messages & Setup, then Settings, then RemoteControl & Recorder Front, then Remote Control - TV (power, volume, mute).2. Prepare the remote control. Point the remote away from your Recorder andcover the front end with your hand. Press and hold the TV POWER buttonand <strong>TiVo</strong> button simultaneously for about 5 seconds (until the red light atthe end of the remote control comes on, remains steady, then stays onwhen you release the buttons).3. Enter a code. Use the number buttons on the remote to enter a four-digitcode (starting with the first code in the list on the screen). After you pressthe fourth digit of the code, the red light on the end of the remote controlshould flash three times and then go out.4. Test the code. Point the remote towards the TV and press the TV POWERbutton. If pressing the button turns the TV off, you're finished. If it doesnot work, repeat steps 2 and 3 using the next code in the list. If none ofthe codes works, see Chapter 6 of this guide for alternatives.*You can also program the remote to control your TV’s input settings, an A/Vreceiver, and a second Recorder. See Chapter 6 for complete instructions.Inserting Batteries into the Remote ControlHold the remote with the battery door facing you. Place your thumb inthe depression of the door and slide the door towards you.Insert two AA batteries (supplied). Be sure to match the + and - markson the batteries to the + and - marks in the compartment.Replace the battery door by sliding it back into the case with the tabstowards the rear of the compartment. You’ll hear a click when it’ssecurely back in place.Press the <strong>TiVo</strong> button once to go to <strong>TiVo</strong> Central, or twice to go to theNow Playing list.Press LIVE TV/GUIDE to see the program guide.Press FORWARD ( ) and BACK ( ) up to 3 times for 3 speeds.Press PLAY to resume normal play.INSTANT REPLAY replays the last 8 seconds of a program.CHAN UP/DOWN does more than change the channel—it also pagesup or down through lists of programs or menu items. It skips tothe next (or previous) chapter or track when playing a DVD or CD.Press the DVD button to go to the DVD screen. Use TOP MENU andMENU to navigate a particular DVD’s menus. (These may workdifferently for different DVDs.) Press RETURN to return to aprevious DVD menu.Press CLEAR to delete a title in a list (like the Now Playing list) or tohide things that aren’t part of the program you’re watching (likethe channel banner).INFO brings up the channel banner. Press the RIGHT arrowto switch among three versions of the banner, each with adifferent amount of information.When you’re watching “behind” live TV (for example, if you pausedlive TV and later resumed watching from the paused spot),ADVANCE catches you up to the live broadcast. In a recordedprogram, press it once to jump to the end of the program, thenagain to jump to the beginning.If programmed, the TV POWER, VOLUME, MUTE, and TV INPUTbuttons can control your TV and A/V equipment.Arrow ButtonsTV PowerTV InputDVDSelectThumbs DownMuteVolumePlayPauseBack (rewind)SlowInstant ReplayTop MenuNumber ButtonsClear/ReturnT VT VIn p utD V DTopIn p utVolM enuSelectLive1 2 34 5 67 8 9ClearM u teRecordPlaySlowStop0T VG u id eChanPageInfoA n gleMenuEnterLive TV/GuideInfoAngleThumbs UpChan Up/DownSkip ForwardSkip BackRecordForwardAdvanceMenuStopEnter
Welcome!
20005-2380© 2004 by <strong>TiVo</strong> Inc and HUMAX Corporation. Not to be copied, used, or translated in partor whole without HUMAX’s prior consent in writing except approval of ownership ofcopyright and copyright law. All rights reserved. Printed in China.<strong>TiVo</strong>, the <strong>TiVo</strong> logo, <strong>TiVo</strong> Central, and <strong>TiVo</strong>lution are registered trademarks of <strong>TiVo</strong> Inc.Season Pass, <strong>TiVo</strong> Basic, <strong>TiVo</strong> Plus, Series2, WishList, Ipreview, the Thumbs Down logoand text, and the Thumbs Up logo and text are trademarks of <strong>TiVo</strong> Inc., 2160 Gold Street,P.O. Box 2160, Alviso, CA 95002-2160. All other trademarks are the properties of theirrespective owners. All rights reserved.<strong>TiVo</strong> Product and Service protected by U.S. Pat. Nos. 5,241,428; 6,233,389; 6,327,418;6,385,739; 6,490,722; 6,642,939; 6,643,798; 6,728,713; 6,757,837; 6,757,906; D424,577;D435,561; D445,801. Other patents pending.DIRECTV is a registered trademark of DIRECTV Inc., a unit of The DIRECTV Group, Inc.“Dolby” and the double-D symbol are trademarks of Dolby Laboratories.“DTS” and “DTS Digital Out” are trademarks of Digital Theater Systems, Inc.All other trademarks are the properties of their respective owners.ii
Welcome to the <strong>TiVo</strong>lution ® !It’s a revolution in television. We’ve pioneered an exciting new category that will foreverchange the way you watch TV. Your new HUMAX DVD Recorder with <strong>TiVo</strong> ® servicecombines a <strong>TiVo</strong> ® Digital Video Recorder (DVR) with a DVD recorder.Never miss your favorite shows again. The <strong>TiVo</strong> service automatically records everyepisode of your favorite series, all season long, even if the network schedule changes. Itcan even skip reruns.No more videotapes. Because it’s all-digital, your HUMAX DVD Recorder saves allyour programs in one place so they’re ready to watch anytime. You can even startwatching a show from the beginning—even while it’s still recording.Archive your memories. When we say “no more videotapes,” we mean it! Turn your oldhome movies into DVDs. Plus, easy-access front panel inputs let you connect a digitalvideo camera directly to your Recorder, and easily archive your home movies.Networked home entertainment. Schedule recordings on your Recorder at home fromany web browser, anywhere! Connect your Recorder to a home network and enjoy digitalmusic and photos in your living room, and transfer recordings to any <strong>TiVo</strong> Series2 TMDVR connected to your home network.No more interruptions. Pause live TV for as long as 30 minutes—any channel, any time.You can also rewind, instant replay, and slow-motion live or recorded TV. Wow!Watch more of what you like, less of what you don’t. Because the <strong>TiVo</strong> service is“smart,” it can automatically find and record shows that feature your favorite actor, team,hobby, etc., so you’ll always catch the good stuff—even if you never knew it was on.At last, TV fits into your busy life, not the other way around!iii
Table of ContentsUsing This Guide . . . . . . . . . . . . . . . . . . . . . . . . . . . . . . . . . . . . . . . . . . . . . . . . . . . . . . . . . . . . . . . . . . . . . . . . . . . . viivChapter 1: Connecting Your Recorder . . . . . . . . . . . . . . . . . . . . . . . . . . . . . . . . . . . . . . . . . . . . . . . . . . . . . . .1Getting Started . . . . . . . . . . . . . . . . . . . . . . . . . . . . . . . . . . . . . . . . . . . . . . . . . . . . . . . . . . . . . . . . . . . . . . . . . . . . . . . 2Cables and Accessories . . . . . . . . . . . . . . . . . . . . . . . . . . . . . . . . . . . . . . . . . . . . . . . . . . . . . . . . . . . . . . . . . . . . . . . . 3Choosing a Setup Example . . . . . . . . . . . . . . . . . . . . . . . . . . . . . . . . . . . . . . . . . . . . . . . . . . . . . . . . . . . . . . . . . . . . . 9Setup 1: Antenna or Cable (No Cable Box) . . . . . . . . . . . . . . . . . . . . . . . . . . . . . . . . . . . . . . . . . . . . . . . . . . . . . . . . 10Setup 2: Cable or Satellite Box . . . . . . . . . . . . . . . . . . . . . . . . . . . . . . . . . . . . . . . . . . . . . . . . . . . . . . . . . . . . . . . . . 12Setup 3: Satellite Box & RF Program Source . . . . . . . . . . . . . . . . . . . . . . . . . . . . . . . . . . . . . . . . . . . . . . . . . . . . . . 14Setup 4: Cable Box and Satellite Box . . . . . . . . . . . . . . . . . . . . . . . . . . . . . . . . . . . . . . . . . . . . . . . . . . . . . . . . . . . . 16Watching One Channel & Recording Another . . . . . . . . . . . . . . . . . . . . . . . . . . . . . . . . . . . . . . . . . . . . . . . . . . . . . 18Chapter 2: Guided Setup . . . . . . . . . . . . . . . . . . . . . . . . . . . . . . . . . . . . . . . . . . . . . . . . . . . . . . . . . . . . . . . . .21Activating the <strong>TiVo</strong> ® Service . . . . . . . . . . . . . . . . . . . . . . . . . . . . . . . . . . . . . . . . . . . . . . . . . . . . . . . . . . . . . . . . . . . 22Completing Guided Setup . . . . . . . . . . . . . . . . . . . . . . . . . . . . . . . . . . . . . . . . . . . . . . . . . . . . . . . . . . . . . . . . . . . . . 23<strong>TiVo</strong> Central ® . . . . . . . . . . . . . . . . . . . . . . . . . . . . . . . . . . . . . . . . . . . . . . . . . . . . . . . . . . . . . . . . . . . . . . . . . . . . . . . 28Chapter 3: The Basics in 5 Short Tours . . . . . . . . . . . . . . . . . . . . . . . . . . . . . . . . . . . . . . . . . . . . . . . . . . . . .29Tour One: Play with Live TV . . . . . . . . . . . . . . . . . . . . . . . . . . . . . . . . . . . . . . . . . . . . . . . . . . . . . . . . . . . . . . . . . . 30Tour Two: Find and Record Programs . . . . . . . . . . . . . . . . . . . . . . . . . . . . . . . . . . . . . . . . . . . . . . . . . . . . . . . . . . . . 32Tour Three: Now Playing and Save To DVD . . . . . . . . . . . . . . . . . . . . . . . . . . . . . . . . . . . . . . . . . . . . . . . . . . . . . . 34Tour Four: Playing a DVD or CD . . . . . . . . . . . . . . . . . . . . . . . . . . . . . . . . . . . . . . . . . . . . . . . . . . . . . . . . . . . . . . . 36Tour Five: Finding New Programs . . . . . . . . . . . . . . . . . . . . . . . . . . . . . . . . . . . . . . . . . . . . . . . . . . . . . . . . . . . . . . 38Cool Things You Can Do . . . . . . . . . . . . . . . . . . . . . . . . . . . . . . . . . . . . . . . . . . . . . . . . . . . . . . . . . . . . . . . . . . . . . . 40Chapter 4: Recording Programs and DVDs . . . . . . . . . . . . . . . . . . . . . . . . . . . . . . . . . . . . . . . . . . . . . . . . . .41Season Pass, Recording Options, To Do List . . . . . . . . . . . . . . . . . . . . . . . . . . . . . . . . . . . . . . . . . . . . . . . . . . . . . . 42
Using the Guide to Find Programs . . . . . . . . . . . . . . . . . . . . . . . . . . . . . . . . . . . . . . . . . . . . . . . . . . . . . . . . . . . . . . . 47Find Your Favorite Programs . . . . . . . . . . . . . . . . . . . . . . . . . . . . . . . . . . . . . . . . . . . . . . . . . . . . . . . . . . . . . . . . . . 49Find Programs That Match Your Interests . . . . . . . . . . . . . . . . . . . . . . . . . . . . . . . . . . . . . . . . . . . . . . . . . . . . . . . . . 54Record from a Video Camera or VCR . . . . . . . . . . . . . . . . . . . . . . . . . . . . . . . . . . . . . . . . . . . . . . . . . . . . . . . . . . . . 59Recording a DVD . . . . . . . . . . . . . . . . . . . . . . . . . . . . . . . . . . . . . . . . . . . . . . . . . . . . . . . . . . . . . . . . . . . . . . . . . . . 61Compatibility and Copy Protected Material . . . . . . . . . . . . . . . . . . . . . . . . . . . . . . . . . . . . . . . . . . . . . . . . . . . . . . . 64Chapter 5: Watching Programs and Playing Discs . . . . . . . . . . . . . . . . . . . . . . . . . . . . . . . . . . . . . . . . . . . .65Using the Control Buttons . . . . . . . . . . . . . . . . . . . . . . . . . . . . . . . . . . . . . . . . . . . . . . . . . . . . . . . . . . . . . . . . . . . . . 66The Status Bar . . . . . . . . . . . . . . . . . . . . . . . . . . . . . . . . . . . . . . . . . . . . . . . . . . . . . . . . . . . . . . . . . . . . . . . . . . . . . . 67The Channel Banner . . . . . . . . . . . . . . . . . . . . . . . . . . . . . . . . . . . . . . . . . . . . . . . . . . . . . . . . . . . . . . . . . . . . . . . . . 68Watching Live TV . . . . . . . . . . . . . . . . . . . . . . . . . . . . . . . . . . . . . . . . . . . . . . . . . . . . . . . . . . . . . . . . . . . . . . . . . . . 69Watching Programs from Now Playing . . . . . . . . . . . . . . . . . . . . . . . . . . . . . . . . . . . . . . . . . . . . . . . . . . . . . . . . . . . 71Playing a DVD or CD . . . . . . . . . . . . . . . . . . . . . . . . . . . . . . . . . . . . . . . . . . . . . . . . . . . . . . . . . . . . . . . . . . . . . . . . 73Disc Compatibility . . . . . . . . . . . . . . . . . . . . . . . . . . . . . . . . . . . . . . . . . . . . . . . . . . . . . . . . . . . . . . . . . . . . . . . . . . . 80Save to VCR . . . . . . . . . . . . . . . . . . . . . . . . . . . . . . . . . . . . . . . . . . . . . . . . . . . . . . . . . . . . . . . . . . . . . . . . . . . . . . . 82Chapter 6: Messages & Setup . . . . . . . . . . . . . . . . . . . . . . . . . . . . . . . . . . . . . . . . . . . . . . . . . . . . . . . . . . . . .83Chapter 7: Connecting to a Home Network for Home Media Features . . . . . . . . . . . . . . . . . . . . . . . . . . . 111Chapter 8: Troubleshooting . . . . . . . . . . . . . . . . . . . . . . . . . . . . . . . . . . . . . . . . . . . . . . . . . . . . . . . . . . . . 129Chapter 9: Privacy, Service, Warranty, and Licenses . . . . . . . . . . . . . . . . . . . . . . . . . . . . . . . . . . . . . . . . 153Appendix A: Front and Back Panel Reference & Specifications . . . . . . . . . . . . . . . . . . . . . . . . . . . . . . . . 181Index . . . . . . . . . . . . . . . . . . . . . . . . . . . . . . . . . . . . . . . . . . . . . . . . . . . . . . . . . . . . . . . . . . . . . . . . . . . . . . . 187Glossary of Icons . . . . . . . . . . . . . . . . . . . . . . . . . . . . . . . . . . . . . . . . . . . . . . . . . . . . . . . . . .Inside Back Coverv
vi®Throughout this guide, you will seeimportant and helpful notes andtips in this side column.Using This GuideGetting Started1. Activate the <strong>TiVo</strong> ® service (see page 22 for more on activating).2. Connect your Recorder using the Start Here poster and Chapter 1 of this guide.3. Complete Guided Setup following the steps provided in Chapter 2 of this guide.When you’ve finished these three steps, you’re ready to use the <strong>TiVo</strong> service. Take thetours in Chapter 3 of this guide to check out the basic features.Basic terms. These are terms used in this guide when we talk about the rest of the service:Recorder. Your HUMAX DVD Recorder combines a <strong>TiVo</strong> ® Digital Video Recorder(DVR) with a DVD recorder. This guide uses “Recorder” to refer to it.Live TV. If you’re watching a program as it’s being broadcast, you’re watching live TV.With the <strong>TiVo</strong> service, you can also watch recorded programs, or watch “behind” liveTV (if you pause live TV, then come back later and watch from the paused spot).Icons. These are graphic symbols used in the <strong>TiVo</strong> service to provide information andoptions you can select. You’ll find the Glossary of Icons on the inside back cover.Program Information screen. When you select a program title from a list, you’ll seethis type of screen. From it, select actions and view the program description.Menu paths. Notes at the bottom of some pages show you how to find the screen beingdescribed. For example, page 46 describes the To Do List. At the bottom of the page yousee <strong>TiVo</strong> Central Pick Programs to Record To Do List. This means you can find theTo Do List by going to <strong>TiVo</strong> Central, selecting Pick Programs to Record, then To Do List.Service updates. Your Recorder may receive service updates which include features notdescribed in this guide. Details about service updates are always available atwww.tivo.com/support.
CHAPTER 1Connecting Your RecorderGetting Started 2Cables and Accessories 3Choosing a Setup Example 9Watching One Channel & Recording Another 18
Chapter 1Connecting Your DVRGetting StartedTelevision used to be so simple: all you needed was an antenna and a TV. The antennacaptured audio and video signals and sent them to your TV over a wire.®Remember, always connect cablesfrom the OUT jack of one device tothe IN jack of the next. Never connect anIN to an IN or an OUT to an OUT.OUTINAs TVs have acquired more features, and new devices have been created to work withyour TV, it may seem that everything has become more complex. You may have a VCR, aDVD player, and a game system connected to your TV, in addition to your HUMAX DVDRecorder with <strong>TiVo</strong> ® service. However, one thing has remained the same: you still need toget audio and video (sound and pictures) from their source (an antenna, or a cable orsatellite box) to your TV.Sounds and pictures travel through cables. The choice of cables may seem overwhelming,but they all perform the same function: they transfer sounds and pictures to your TV atvarying levels of quality.All of your equipment has connectors, or jacks, where cables can be connected. Somejacks are labeled “In” and some are labeled “Out.” Pictures and sounds enter audio/video(A/V) equipment through IN jacks and leave through OUT jacks.When you connect your Recorder to your TV and other A/V equipment, you are simplycreating a path that starts at the wall, or your cable or satellite box, and goes in (through INjacks) and out (through OUT jacks) of your equipment until it reaches your TV.2
T VT VI n p utD V DT o pP o w erVolSelectLiveStop1 2 3M e n uPlaySlow4 5 67 8 9Cle arM u t eRecord0T VG u i d eChanPageI nf oA n gl eM e n uE nt erCables and AccessoriesCables and AccessoriesInside the carton, you will findyour new HUMAX DVD Recorder, a boxcontaining the Remote Control,batteries, a blank DVD-RW disk, andconnection cables (contents listedbelow), along with this Viewer’s Guideand the Start Here poster.RecorderRemoteControlDVD-RWYou may need to purchaseadditional items forsome setups:OUTINOUTRF Coaxial cable Splitter1Audio, Video, Phone, and PowerThese cables connect your Recorder to yourTV, power, and home phone line.25’ Phone CordComponent Video cablePower CordComposite A/V cablesRF Coaxial cablePhone Line SplitterChannel Changing cablesThese cables allow your Recorder tochange channels on a cable or satellitebox. If you don’t have a cable orsatellite box, you won’t use thesecables.If you have a DIRECTV ®satellite box with a9-pin Data connector, or aMotorola/GI DCT2000 seriescable box, use this cable:If you can’t use the Serial Controlcable with your satellite box orcable box, use this cable instead:S-Video cableSerial (Data) Control cableIR Control cableDigital Audio cable3
Chapter 1Connecting Your DVR Composite A/V cable & jacks (audio & video)(red)(white)(yellow)S-Video cable & jack (video only)Component Video cable & jacks (video only)(green)(blue)(red) Optical Digital Audio cable & jack (audio only) Coaxial RF cable & jack (audio & video)Choosing audio and video cablesMost TVs and other audio/video devices have jacks for Composite A/V cables ().Composite A/V cables have three ends, two (white and red) for stereo audio (left andright), and one (yellow) for video. You can connect all three, or use just the red and whiteends for stereo audio, and connect a separate cable for video (see below).The Recorder’s back panel also has jacks for S-Video (). S-Video provides a higherquality video signal than composite. If you have equipment that supports this connection,you can purchase an S-Video cable to use in place of the yellow video end of theComposite A/V cable. (Use the red and white ends for stereo audio.)The Recorder also has Component Video () output jacks. Component Video providessuperior video quality by separating the video signal into three components, luminance(Y) and two color difference signals (Pb, Pr). If your TV has Component Video inputs,purchase a Component Video cable and use it to connect the Recorder to your TV.The Recorder provides digital audio output through the Optical Digital Audio () jack. Ifyou have an A/V receiver that supports Dolby Digital audio, you can purchase an OpticalDigital Audio cable to connect your Recorder. Ordinarily, the Recorder produces toneswhen certain buttons on the remote are pressed. If you use the Optical Digital Audio jack,you won’t hear these tones when watching programs with Dolby Digital audio.The Recorder also has a Coaxial RF Out () jack, however this jack is used only to pass acable or antenna signal through the Recorder (see the Back Panel Reference on page 184for details). You must connect your Recorder to your TV using one of the video outputjacks described above to see <strong>TiVo</strong> screens and watch DVDs. If your TV only has an RF Injack and no other A/V input jacks, you will not be able to connect the Recorder.4
Cables and AccessoriesChoosing a Channel Changing CableYour Recorder needs to be able to change channels in order to record programs anddisplay live TV. If you are using a cable or satellite box, the Recorder needs to sendchannel changing signals to it using either an IR (infrared) or a Serial (data) control cable.The following pages help you choose which control cable to use.If you don’t have a cable or satellite box, your Recorder does not need a channel changingcable. Skip to “Connecting to a Phone Line” on page 8.Serial/Data Control. You can use the Serial Control cable for channel changing if:• You have a DIRECTV ® satellite box with a 9-pin data connector like this:• You have a Motorola/General Instruments DCT2000 series cable box, and your cableprovider has enabled it for serial control.Otherwise, use the IR Control cable (described on the next page).Some DIRECTV ® satellite boxes have other connections that you may be able to try. Touse one of these connections, you will need to purchase an additional cable or accessory(available from www.tivo.com/store):• If your DIRECTV ® satellite box has a 15-pin connector like this:you can connect the Serial Control cable by using a 15-pin adapter.• Some satellite boxes for the DIRECTV ® service have a Home Control connector likethis: (similar to a phone jack, but slightly smaller).®After setting up your Recorder,including the control cableconnection, you can change channelsusing only your Recorder’s remotecontrol.Serial Control cable15-pin adapter(not included)1To connect the Home Control cable, plug one end of the cable into the Home Controljack on your DIRECTV satellite box. This connector is sometimes labeled “LowSpeed Data.” (Don’t try to connect a Home Control cable to the satellite box’s phonejack.) Plug the other end into the Control Out/Serial jack on the Recorder.Home Control cable(not included)5
Chapter 1Connecting Your DVRIR Control cableThis purple end These IR emittersplugs into your send signals to theRecorder.IR sensor on yourcable or satellitebox.The small “bulbs” on the IR®emitters do not visibly light upwhen they send an IR signal. If you findthat channels are not changing, seepage 136 for troubleshooting help. Ifchannels change unreliably orinconsistently, try the tips on optimizingthe IR Control connection (right).IR (infrared) Control. The IR Control cable allows the Recorder to change channels onany cable or satellite box with an IR sensor. See the Start Here poster for diagrams ofcommon cable and satellite boxes, and where to find the IR sensor on each.• Finding the IR sensor. To correctly position the IR Control cable, you need to findyour cable box or satellite box’s IR sensor. To locate the IR sensor, look for a tinyround bulb behind the dark, translucent plastic “window”—the IR window—on thefront of your cable or satellite box. A flashlight might help you see it. Position the IRemitters so they are centered on the IR sensor and stick out about 1.5 inches.• Choosing an IR code in Guided Setup. After setting up your Recorder, you’llcomplete Guided Setup (see Chapter 2 for more information). During Guided Setup,you’ll be asked to test and select an IR code. Each IR code signals a particular cable orsatellite box model to change channels. If none of the codes changes the channel onyour particular cable or satellite box, see page 136 for troubleshooting tips. If you finda code or codes that work, but none of the codes is reliable or consistent, tryoptimizing the IR Control connection (see below).• Optimizing the IR Control connection. The IR Control cable works better if itsemitters and the IR window on the cable or satellite box are shaded from other infraredsignals. You can create an “IR tent” to decrease the interference from other signals.This solution may help if changing channels with an IR Control cable is unreliable orinconsistent, but not if channels don’t change at all.Test whether an IR tent might be effective simply by draping a magazine, a towel, or adark cloth over the front of cable or satellite box, including the IR emitters. (See thediagram on page 7.) Do not block the Recorder’s IR window. Try changing channelsseveral times with the <strong>TiVo</strong> remote. If channels change more reliably this way, youmay want to build an IR tent.6
Cables and AccessoriesBuilding an IR Tent. The exact methods and materials you use to build the IR tent willdepend on the shape of your cable or satellite box's IR window and the materials you haveavailable. However, the general procedure described below will guide you. Cover the area around the IR emitters and the cable or satellite box's IR window with apiece of thick fabric, such as black flannel. You could create a cover using cardboardor opaque tape instead. The important point is that the material you use fits snugly overthe area around the translucent IR window and the IR Control cable’s emitters.If possible, cover the entire IR window on the cable or satellite box, because signalinterference can enter from anywhere in the window. For some cable and satelliteboxes, covering the entire IR window will include covering the controls on the front.In that case, you won’t be able to use the controls, nor will you be able to control thecable or satellite box with its remote. However, we recommend using only your <strong>TiVo</strong>remote to change the channel. If you still need to access your cable or satellite box, usematerials that are relatively easy to remove. Secure the cloth, tape, or other material (with tape or by another method), making surethat it fits closely around the IR window and the IR Control cable’s emitters. Place a piece of opaque material—forexample, cloth or tape—over the IR emitters(shown on opposite page) and the IR window ofthe cable or satellite box.IR windowRecordercable orsatellite box Secure the material, making sure that itfits snugly.17
Chapter 1Connecting Your DVR®Do not connect the Recorder to adigital PBX phone system (theseallow many phones to share a singletelephone number and are usually used inhotels and office buildings). Doing so maypermanently damage your Recorder’smodem and will void your warranty.If your cable or satellite box is also®connected to your phone line, usethe provided phone line splitter so theRecorder can share the same phone jack.Plug the splitter into the wall jack, thenplug both phone cords into the splitter.Connecting to a Phone LineDuring Guided Setup, your Recorder uses a standard analog phone line to connect to the<strong>TiVo</strong> ® service (see Chapter 2). After Guided Setup, your Recorder needs to make regularconnections to the <strong>TiVo</strong> service, using either a phone line or a shared broadband Internetconnection. When it connects to the <strong>TiVo</strong> service, the Recorder may receive:• Updated program information, including episode titles, plot descriptions, ratings, andschedule information.• Any available updates to the Recorder service, including content for Showcases. (Seepage 39 for more information about Showcases.)• Any recording requests you made using <strong>TiVo</strong> Central Online. (See page 53 for moreinformation about Online Scheduling.)Guided Setup Requires a Phone Line. Almost every household phone line is a standardanalog line, which is what the Recorder needs to complete Guided Setup. After GuidedSetup, you can connect your Recorder to a home network and use a shared broadbandInternet connection instead of a phone line for connections to the <strong>TiVo</strong> service. See“Connecting to a Home Network for Home Media Features” on page 111 for information.If you don’t have a home network with a shared broadband Internet connection, theRecorder must use a standard analog phone line for regular connections to the <strong>TiVo</strong>service. You should leave the phone cord plugged in continuously in order to keep yourRecorder’s program information up to date.Phone Jack Location. If the phone jack isn’t close to the Recorder, you can use the 25-foot phone cord that comes with the Recorder to connect it to a phone jack. Phone cordslonger than 25 feet are readily available at most hardware or electronics stores.8
Choosing a Setup ExampleChoosing a Setup ExampleThe rest of this chapter provides examples for connecting your Recorder to your programsource (antenna, cable, or satellite), your TV, and other optional A/V equipment. From thelist below, choose a basic setup based on your program source.After you get your basic system working, connect other equipment (such as a VCR, DVDplayer, or game console) to additional inputs on your TV or A/V receiver.Basic Setups: Connect your Recorder to your Program Source and your TVYour program source is antenna orcable with no cable box.Your program source is either a cableor satellite box. (If you have both, seeSetup 4, below.)You have two program sources: asatellite box and an antenna; or asatellite box and cable (no cable box).You have two program sources: asatellite box and a cable box.Setup Variations: These are variations on the Basic SetupsYour program source is antenna orcable (with or without a cable box) andyou want to watch one channel whilerecording another.Setup 1: Antenna or Cable (No Cable Box) p. 10Setup 2: Cable or Satellite Box p. 12Setup 3: Satellite Box & RF ProgramSourcep. 14Setup 4: Cable Box and Satellite Box p. 16Watching One Channel & RecordingAnother (Antenna or Cable)p. 18®®Before you begin:Make sure all your equipment is turned offand the Recorder is unplugged.The Recorder is not designed tosupport a heavy load, such as a TV.Your Recorder is only capable ofsupporting the weight of one or twocommon A/V components such as VCRs,DVD players, or A/V receivers (providedthey have four good, broad, padded feetthat distribute of the weight near thecorners of the Recorder).Also, avoid stacking your Recorder on topof other electronic components such asVCRs, A/V receivers, or your TV’s vents.19
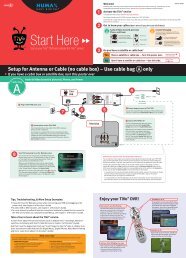
Chapter 1®The audio/video cables shown hereare for example only. For helpchoosing cables, see page 4.Connecting Your DVRSetup 1: Antenna or Cable (No Cable Box)®Other kinds of A/V equipment, suchas a DVD player or game console, donot connect to your Recorder. You shouldconnect your other devices to additionalinputs on your TV or A/V receiver.®Recorder1432TelevisionINPUTRLVIDEOAntennaIn10
Setup 1: Antenna or Cable (No Cable Box) Connect the Coaxial RF cable coming from the wall to the Cable/Antenna-RF In jackon the Recorder. Connect a Composite A/V cable from the Audio/Video Output jacks on the Recorderto the Audio/Video Input jacks on the TV. Connect the phone cord (see page 8). After you complete Guided Setup, you canconnect your Recorder to a home network and use a broadband Internet connectioninstead of a phone line to connect to the <strong>TiVo</strong> service. See Chapter 7. Plug in all power cords and turn on your TV.Set your TV to display video from the input jacks you used in step . You may haveto find the correct TV input setting by pressing the Input or TV/Video button on yourTV’s remote control until you see the Welcome screen. (For more help, see page 131.)Once you see the Welcome screen, the final steps are to activate the <strong>TiVo</strong> service andcomplete Guided Setup. If you need help, see Chapter 2.111
Chapter 1Connecting Your DVR®The audio/video cables shown hereare for example only. For helpchoosing cables, see page 4.Other kinds of A/V equipment, such®as a DVD player or game console, donot connect to your Recorder. You shouldSetup 2: Cable or Satellite Box1Cable orSatellite BoxRF InRF OutSerialPhoneAUDIO/VIDEOOUTconnect your other devices to additionalinputs on your TV or A/V receiver.26Recorder®643TelevisionINPUTRLVIDEOAntennaIn12
®Setup 2: Cable or Satellite Box Make sure the cable from the wall is connected to your cable or satellite box. Connect a Composite A/V cable from the Audio/Video Output jacks on the cable orsatellite box to the Audio/Video Input jacks on the Recorder. Connect a Composite A/V cable from the Audio/Video Output jacks on the Recorderto the Audio/Video Input jacks on the TV. Connect the phone cord (see page 8). After you complete Guided Setup, you canconnect your Recorder to a home network and use a broadband Internet connectioninstead of a phone line to connect to the <strong>TiVo</strong> service. See Chapter 7. Connect a channel changing cable (see the diagrams to the right). Plug in all power cords and turn on your TV.Set your TV to display video from the input jacks you used in step . You may haveto find the correct TV input setting by pressing the Input or TV/Video button on yourTV’s remote control until you see the Welcome screen. (For more help, see page 131.)Once you see the Welcome screen, the final steps are to activate the <strong>TiVo</strong> service andcomplete Guided Setup. If you need help, see Chapter 2. Connect a Channel Changing Cable(See page 5 for help choosing a channelchanging cable.)Serial Control cable:Serial Controlcable connectionSerialPlug one end of theSerial Control cable intothe Serial/Data connectoron the cable or satellitebox. Plug the other endinto the Control Out-Serial connector (the upper minijack) on the back of the Recorder.IR Control cable:(a) Plug the purple end of the IR Control cable intothe Control Out-IR connector (the lower mini-jack)on the Recorder. (b) Locate the IR sensor (see page6 for help). (c) Mount the IR emitters. Place oneemitter on top of the cable/satellite box and the otherunderneath it. Be sure both emitters stick out about1.5 inches directly in front of the IR sensor. Use theprovided adhesive strips to hold the emitters in place.1Cable orSatellite BoxcbRecorderaIR Control cable connection13
Chapter 1®The audio/video cables shown hereare for example only. For helpchoosing cables, see page 4.Connecting Your DVRSetup 3: Satellite Box & RF Program Source(Antenna or Cable)Other kinds of A/V equipment, suchSatellite Box®as a DVD player or game console, donot connect to your Recorder. You should1SAT InRF OutSerialPhoneAUDIO/VIDEOOUTconnect your other devices to additionalinputs on your TV or A/V receiver.27Recorder®3754TelevisionINPUTRLVIDEOAntennaIn14
®Setup 3: Satellite Box & RF Program Source Make sure the satellite cable from the wall is connected to your satellite box. Connect a Composite A/V cable from the Audio/Video Output jacks on the satellitebox to the Audio/Video Input jacks on the Recorder. Connect the Coaxial RF cable from your antenna or cable source to theCable/Antenna-RF In jack on the Recorder. Connect a Composite A/V cable from the Audio/Video Output jacks on the Recorderto the Audio/Video Input jacks on the TV. Connect the phone cord (see page 8). After you complete Guided Setup, you canconnect your Recorder to a home network and use a broadband Internet connectioninstead of a phone line to connect to the <strong>TiVo</strong> service. See Chapter 7. Connect a channel changing cable (see the diagrams to the right). Plug in all power cords and turn on your TV.Set your TV to display video from the input jacks you used in step . You may haveto find the correct TV input setting by pressing the Input or TV/Video button on yourTV’s remote control until you see the Welcome screen. (For more help, see page 131.)Once you see the Welcome screen, the final steps are to activate the <strong>TiVo</strong> service andcomplete Guided Setup. If you need help, see Chapter 2. Connect a Channel Changing Cable(See page 5 for help choosing a channelchanging cable.)Serial Control cable:Serial Controlcable connectionSerialPlug one end of theSerial Control cable intothe Serial/Data connectoron the cable or satellitebox. Plug the other endinto the Control Out-Serial connector (the upper minijack) on the back of the Recorder.IR Control cable:(a) Plug the purple end of the IR Control cable intothe Control Out-IR connector (the lower mini-jack)on the Recorder. (b) Locate the IR sensor (see page6 for help). (c) Mount the IR emitters. Place oneemitter on top of the cable/satellite box and the otherunderneath it. Be sure both emitters stick out about1.5 inches directly in front of the IR sensor. Use theprovided adhesive strips to hold the emitters in place.1Cable orSatellite BoxcbRecorderaIR Control cable connection15
®Chapter 1®The audio/video cables shown hereare for example only. For helpchoosing cables, see page 4.Connecting Your DVRSetup 4: Cable Box and Satellite BoxOther kinds of A/V equipment, such®as a DVD player or game console, donot connect to your Recorder. You shouldconnect your other devices to additional1Satellite BoxSAT In RF OutSerialPhoneAUDIO/VIDEOOUTinputs on your TV or A/V receiver.27RecorderCable Box3RF OutRF InSerialPhoneAUDIO/VIDEOOUT75417TelevisionINPUTRLVIDEOAntennaIn16
®®Setup 4: Cable Box and Satellite Box Make sure the cables from the wall are connected to your cable and satellite boxes. Connect a Composite A/V cable from the Audio/Video Output jacks on the satellitebox to the Audio/Video Input jacks on the Recorder. Connect a Coaxial RF cable from the RF Out jack on the cable box to theCable/Antenna-RF In jack on the Recorder. Connect a Composite A/V cable from the Audio/Video Output jacks on the Recorderto the Audio/Video Input jacks on the TV. Connect the phone cord (see page 8). After you complete Guided Setup, you canconnect your Recorder to a home network and use a broadband Internet connectioninstead of a phone line to connect to the <strong>TiVo</strong> service. See Chapter 7. Channel changing cables: First, see page 5 to check whetheryou can use the Serial Control cable for either your satellite orcable box. If you can, connect it as shown in the diagram to theright. Then use the IR Control cable for the other box. If youcan’t use the Serial Control cable for either box, you can use theIR control cable for both. See the IR diagrams at the right.Serial Controlcable connection Plug in all power cords and turn on your TV.Set your TV to display video from the input jacks you used in step . You may haveto find the correct TV input setting by pressing the Input or TV/Video button on yourTV’s remote control until you see the Welcome screen. (For more help, see page 131.)Once you see the Welcome screen, the final steps are to activate the <strong>TiVo</strong> service andcomplete Guided Setup. If you need help, see Chapter 2.Serial Connect Channel Changing CablesIR Control cable for one box:(a) Plug the purple end of the IR Control cable intothe Control Out-IR connector (the lower mini-jack)on the Recorder. (b) Locate the IR sensor (see page6 for help). (c) Mount the IR emitters. Place oneemitter on top of the cable/satellite box and the otherunderneath it. Be sure both emitters stick out about1.5 inches directly in front of the IR sensor. Use theprovided adhesive strips to hold the emitters in place.Cable orSatellite BoxbRecordercIR Control cable connectionIR Control cable for both boxes:Follow steps (a) and (b) as above. In step (c),mount the IR emitters on top of each box as shown.Satellite BoxbbCable BoxRecorderccaa1IR Control for Cable and Satellite17
®Chapter 1®The audio/video cables shown hereare for example only. For helpchoosing cables, see page 4.Connecting Your DVRWatching One Channel & Recording AnotherAntenna or Cable with No Cable BoxRecorder1®How do I watch one channeland record another?To watch live TV on one channel while theHUMAX DVD Recorder records another, putthe Recorder into Standby mode. To dothis, press the <strong>TiVo</strong> button on the5 432TelevisionINPUTRecorder’s remote. Select Messages &Setup, then Standby. Then use your TV’sRL VIDEOAntennaIn18remote to change channels. Because thissignal simply passes through theRecorder, it has no <strong>TiVo</strong> servicefunctionality (so you can’t pause or rewindlive TV ).To watch video from the Recorder again,press the <strong>TiVo</strong> button on the Recorder’sremote, then press the Input, Source, orTV/Video button on your TV remote or TVuntil you see <strong>TiVo</strong> Central ® . Connect the Coaxial RF cable coming from the wall to the RF In jack on the Recorder. Connect a Coaxial RF cable from the RF Out jack on the Recorder to the Antenna/RFIn jack on your TV. Connect a Composite A/V cable from the Audio/Video Output jacks on the Recorderto the Audio/Video Input jacks on your TV. Connect the phone cord (see page 8). Plug in all power cords and turn on your TV. You may have to find the correct TVinput setting by pressing the Input or TV/Video button on your TV’s remote controluntil you see the Welcome screen. (For more help, see page 131.)Once you see the Welcome screen, the final steps are to activate the <strong>TiVo</strong> service andcomplete Guided Setup. If you need help, see Chapter 2.
®Watching One Channel & Recording AnotherCable with a Cable BoxCable BoxSerialPhoneAUDIO/VIDEOOUTRF OutRF In®The audio/video cables shown hereare for example only. For helpchoosing cables, see page 4.1Recorder6321OUTINOUT65TelevisionINPUT42RF Splitter(not included)®This setup requires an RFsplitter. You can purchaseone at a local electronics store.INOUTOUTRLVIDEOAntennaIn Connect the cable from the wall to the input jack of an RF splitter (not included). Connect an RF Coaxial cable from one of the splitter’s outputs to the RF In jack onyour cable box. Connect another RF Coaxial cable from the splitter’s other output tothe Antenna/RF In jack on your TV. Connect a Composite A/V cable from the Audio/Video Output jacks on the cable boxto the Audio/Video Input 1 jacks on the back of the Recorder. Connect a Composite A/V cable from the Audio/Video Output jacks on the Recorderto the Audio/Video Input jacks on your TV. Connect the phone cord (see page 8). After you complete Guided Setup, you canconnect your Recorder to a home network and use a broadband Internet connectioninstead of a phone line to connect to the <strong>TiVo</strong> service. See Chapter 7.19
®Chapter 1Connecting Your DVR Connect a Channel Changing Cable(See page 5 for help choosing a channelchanging cable.)Serial Control cable:Serial Controlcable connectionPlug one end of the SerialControl cable into theSerial/Data connector onthe cable or satellite box.Plug the other end intothe Control Out-Serial connector (the upper minijack) on the back of the Recorder.SerialIR Control cable:(a) Plug the purple end of the IR Control cable intothe Control Out-IR connector (the lower mini-jack)on the Recorder. (b) Locate the IR sensor (see page6 for help). (c) Mount the IR emitters. Place oneemitter on top of the cable/satellite box and the otherunderneath it. Be sure both emitters stick out about1.5 inches directly in front of the IR sensor. Use theprovided adhesive strips to hold the emitters in place. Connect a channel changing cable (see the diagrams to the left). Plug in all power cords and turn on your TV.Set your TV to display video from the input jacks you used in step . You may haveto find the correct TV input setting by pressing the Input or TV/Video button on yourTV’s remote control until you see the Welcome screen. (For more help, see page 131.)Once you see the Welcome screen, the final steps are to activate the <strong>TiVo</strong> service andcomplete Guided Setup. If you need help, see Chapter 2.How do I watch one channel and record another?In this setup, your cable signal is split and sent to two different devices: your cable boxand your TV. Keep in mind that you can receive only basic cable channels on the signalthat goes from the splitter to your TV.• To watch live TV on one channel while the Recorder records another, use your TV’sremote to change channels. Because this signal does not pass through the Recorder, ithas no <strong>TiVo</strong> service functionality (so you can’t pause or rewind live TV).• To watch video from the Recorder again, press the <strong>TiVo</strong> button on the Recorder’sremote, then press the Input, Source, or TV/Video button on your TV remote or TVuntil you see <strong>TiVo</strong> Central ® .Cable orSatellite BoxcbRecorderaIR Control cable connection20
CHAPTER 2Guided SetupActivating the <strong>TiVo</strong> ® Service 22Completing Guided Setup 23<strong>TiVo</strong> Central ® 28
Chapter 2®Your <strong>TiVo</strong> service number is a15-digit number found on the labelon the back of your Recorder.The Recorder was designed to be®used exclusively with the <strong>TiVo</strong>service. The <strong>TiVo</strong> service is required forproper operation of the Recorder. Withoutthe <strong>TiVo</strong> service, your Recorder will havelimited functionality. No functionality isrepresented, warranted, or should beexpected without a subscription to the<strong>TiVo</strong> service.Activating the <strong>TiVo</strong> ® ServiceGuided SetupTo activate the <strong>TiVo</strong> service, visit the <strong>TiVo</strong> website at www.tivo.com/activate or call us.(See Chapter 8 for Customer Support contact information.) When you activate, you willprovide your Recorder’s <strong>TiVo</strong> service number and choose a billing option.The <strong>TiVo</strong> service consists of the program information shown in the guide, features thatuse the guide information such as Season Pass TM recordings, WishList TM searches, and<strong>TiVo</strong> Suggestions, as well as Showcases, Online Scheduling, and Service Updates.Home Media Features. After you activate the <strong>TiVo</strong> service and complete Guided Setup,connect your Recorder to a home network! Doing so gives you new ways to use yourRecorder as a digital home entertainment center. Connect to a home network and enjoy:• Digital Music Player — Use the home entertainment center in your living room tolisten to the digital MP3 music collection stored on your computer.• Digital Photo Viewer — Use your television to view slideshows of digital photosstored on your computer.• Multi-Room Viewing — Record programs in the living room and watch them in thebedroom. Or vice versa.For more information about connecting your Recorder to a home network to use thesebonus features, see “Connecting to a Home Network for Home Media Features” onpage 111. For details about using these features, download the Home Media FeaturesGuide at www.tivo.com/guides.Activate now! Don’t miss a single day of using the <strong>TiVo</strong> service.22
Completing Guided SetupCompleting Guided SetupAfter you connect your Recorder to your TV and activate the <strong>TiVo</strong> service, you will needto complete Guided Setup, which takes less than an hour.• Guided Setup is easy. The Guided Setup screens step you through the process. If youget stuck, look for tips and troubleshooting in this chapter. (You may not see all thescreens described here, or you may see them in a different order, depending on yourequipment.)If you make a mistake during Guided Setup, simply press the LEFT arrow to go backand fix it. You can also change your setup information later in Messages & Setup. (SeeChapter 6.)• Guided Setup is intelligent. In Guided Setup, you tell your Recorder your programsource (antenna, cable, or satellite) and equipment setup. Then you only have tocomplete the steps that apply to your particular setup.• Guided Setup requires two phone calls. Try to complete Guided Setup when youdon’t need the phone for an hour or so. After you complete Guided Setup, you’ll beable to connect your Recorder to a home network and use a shared broadband Internetconnection instead of a phone line to connect to the <strong>TiVo</strong> service. See Chapter 7.After completing Guided Setup, you can watch live TV and use <strong>TiVo</strong> service features tocontrol live TV. You will have to wait a few hours while the Recorder organizesinformation before you can set up your Season Pass TM recordings and search for programs.®If you can’t find the help you need inthis chapter, please visit<strong>TiVo</strong> Customer Support online atwww.tivo.com/support or call us. (Refer toChapter 8 for Customer Support contactinformation.)If you need to use the phone during®either of the setup phone calls, pickup your telephone, then hang it up andwait about 45 seconds. The Recorder willhang up, and the next time you pick thephone up there will be a dial tone. You cancomplete Guided Setup later.223
Chapter 2Guided SetupGuided Setup Tips and TroubleshootingZIP Code. If your program source is an antenna connected to your TV, the <strong>TiVo</strong> serviceuses the channel lineup of a nearby cable service to determine which channels you receive.If no cable company serves your ZIP code, enter a nearby ZIP code that has cable service.E-mail Address. When you provide your e-mail address, you’ll be notified about what’snew at <strong>TiVo</strong>, including new features, tips and tricks, and <strong>TiVo</strong> exclusives. Your e-mailaddress will not be sold, rented, loaned, or otherwise disclosed. For information on how<strong>TiVo</strong> safeguards your privacy, visit www.tivo.com/privacy.Phone Dialing Options. If your phone system requires special dialing options, choose“Yes.” Most people won’t need to change the settings. See page 104 for information abouteach option.Setup Call. This toll-free call takes a few minutes to retrieve the dial-in numbers for yourarea code and the list of cable or satellite providers for your ZIP code. After hanging up,the Recorder will take 5 to 15 minutes to organize the information. If the call doesn’tsucceed, see page 132 for troubleshooting steps.Dial-In Number. The Recorder will use the dial-in number you choose for phoneconnections to the <strong>TiVo</strong> service. The list may be too long to fit on one screen. To see moredial-in numbers, press the DOWN arrow or CHAN DOWN to scroll down the list.After Guided Setup, the Recorder uses either a phone line or a broadband Internetconnection to connect to the <strong>TiVo</strong> service, which is a local call in most areas. In someareas, local and long distance toll charges may apply. You are responsible for anytelephone charges.24
Completing Guided SetupDialing Format. Choose how you want the Recorder to dial the dial-in number. (Forexample: should the dial-in number be preceded by your area code and should a “1”precede the area code?) In some areas, local numbers must be dialed using the area code.Satellite Provider. If you subscribe to additional local channels for your city or a nearbycity from your satellite provider, choose the appropriate option followed by the city namefrom which you get your local channels (for example, DIRECTV-Sacramento, CA).Cable Provider. Cable companies may have entries with very similar names, and it may bedifficult to know which is yours. Check your channel lineup card (received during cableinstallation) or your cable bill. If you aren’t sure, make your best guess. Later in GuidedSetup, you can check your guess on the Channels You Receive screen (see page 26). Ifyou still don’t see your provider, go back and verify that you entered the correct ZIP code.Cable Lineups. A lineup is the type of subscription you purchased from your cablecompany. Lineups usually have names like “Basic” or “Extended Basic.” Your cable billmay have this information. If you still aren’t sure, make your best guess. Later in GuidedSetup, you can check your guess on the Channels You Receive screen (see page 26).You may also see names like “Rebuild Basic” or “Rebuild Extended Basic.” “Rebuild” isa term used to refer to a revised lineup. Usually you would be informed by your cablecompany if your lineup has been revised. If your best guess at a lineup choice was notcorrect, and a rebuild lineup with a similar name is available, try that one instead.If you have a cable A/B system, you must pick either A or B to watch with your Recorder.225
Chapter 2Guided SetupChannels You Receive. First, if you had to make a guess about your provider or lineup,verify that the channel numbers match the networks on this list. (For example, if you hadthe lineup pictured on the left, is channel 2 actually KTVU?) If you aren’t sure, refer to thechannel guide or quick-reference card from your cable or satellite company.Next, add or remove check marks—so that the list reflects the channels you actuallysubscribe to—by highlighting a channel and pressing SELECT. (Some types of satelliteboxes will get stuck on channels you don’t receive if those channels are selected here, sobe sure to de-select channels you don’t receive.)®Use the CHAN UP/DOWN button as ashortcut to go up or down a wholescreen at a time.The <strong>TiVo</strong> service will search for programs only on channels marked with a yellow check.Also, the CHAN UP/DOWN button skips channels that aren’t checked on this list.Finally, highlight Done Selecting Channels and press SELECT to continue. If you changeyour mind, you can easily make changes after you finish Guided Setup. (See page 86.)Channel Changing. If you have a cable or satellite box, your Recorder needs to send it asignal to change channels. It can do this through an IR (infrared) or serial connection.Make sure that the connection described on this screen matches what you have used toconnect your cable or satellite box to your Recorder. For help choosing and setting up aconnection, see the Start Here poster and Chapter 1 of this guide. After Guided Setup, ifyour channels don’t change, see troubleshooting steps on page 136.Connection to Recorder Screens. Use the UP/DOWN arrows until the picture of theRecorder matches the cable you used to connect video from your satellite or cable box.When the status says “Video OK,” press SELECT to continue. If the status says “NoVideo,” check that the video cable is firmly connected to the Recorder and that you haveselected the correct type of video cable.26
Completing Guided SetupIR Code List. If you use an IR connection, the Recorder will need to send a code to yourcable or satellite box in order to change channels. You will need to test these codes to seewhich works best with your connection. Each code has a slow, medium, and fast version.First, test the slow codes by highlighting them and pressing the CHAN UP/DOWN buttonslowly several times. When you find a slow code that changes channels every time, try afaster speed for that code. (Slow may take longer, but fast may be too fast for your cable orsatellite box.) You want to find the code with the fastest speed that changes the channelevery time. When you find it, press SELECT to choose that code. If channels don’t changeat all, see page 136 for troubleshooting steps.2Program Call. During this call, the <strong>TiVo</strong> service downloads all your programinformation—which includes program titles, times, channels, and descriptions—for up tothe next two weeks. If the call doesn’t succeed, see page 132 for troubleshooting steps. Ifyou need to use the phone during the program call, pick it up, then hang it up, then waitabout 45 seconds. The Recorder will hang up and you can make the program call later.Congratulations! Once you have activated your <strong>TiVo</strong> service and completed GuidedSetup, you’ll see the Congratulations! screen. If you have not yet activated your <strong>TiVo</strong>service, you will be reminded to do so at this time.You can immediately begin watching live TV and using your Recorder’s features tocontrol live TV (pause, instant replay, slow motion). The Recorder works behind thescenes for about four to eight hours to organize program information for the first time.During this process, you will have to wait to search for programs, set up recordings, andview information in the program guide. A message at the bottom of the Pick Programs toRecord screen will warn you if you are not able to search for programs yet. If the messageappears, try again after a few hours.Press the <strong>TiVo</strong> button on your remote control to go to <strong>TiVo</strong> Central ® to begin enjoying the<strong>TiVo</strong> service.27
Chapter 2Guided Setup<strong>TiVo</strong> Central ®Almost everything you do with the <strong>TiVo</strong> service starts from <strong>TiVo</strong> Central. You canschedule recordings, watch live TV or recorded programs, play DVDs or CDs, and more.To get to <strong>TiVo</strong> Central, press the <strong>TiVo</strong> button on your remote control.Occasionally, you will notice special icons beside some options in <strong>TiVo</strong> Central.This icon appears if you have <strong>TiVo</strong> Messages to read. See page 84 for moreabout <strong>TiVo</strong> Messages.Choose the selection next to this icon to watch a special preview or visit aShowcase. See page 39 for more about Showcases.This icon appears next to selections that contains special video content. Highlightthe selection and press PLAY on the <strong>TiVo</strong> remote to play the video.This icon indicates news or special offers from <strong>TiVo</strong>.You can find a complete Glossary of Icons in the inside back cover of this guide.Music & Photos. Connect your HUMAX DVD Recorder to a home network and you’ll beable to use your Recorder to listen to digital music and view digital photos stored on ahome computer. See Chapter 7.Take a Tour. Now you’re ready to start enjoying the <strong>TiVo</strong> service! Check out the five shorttours in Chapter 3 to learn more.28
CHAPTER 3The Basics in 5 Short ToursTour One: Play with Live TV 30Tour Two: Find and Record Programs 32Tour Three: Now Playing and Save To DVD 34Tour Four: Playing a DVD or CD 36Tour Five: Finding New Programs 38Cool Things You Can Do 40
Chapter 3The Basics in Five Short ToursTour One: Play with Live TVIn this tour, you’ll learn how you to control live TV. So turn on your TV and grab your<strong>TiVo</strong> remote! To watch live TV, select Watch Live TV from <strong>TiVo</strong> Central ® , or press theLIVE TV button on the remote.First, press the PAUSE button—the program you’re watching pauses. Now you canstand up and stretch, or go to the kitchen and get a snack. You can pause live TV forup to 30 minutes!®status barChanging channels works just likeyou would expect it to: use thenumber buttons on the remote to enter achannel number, then press ENTER.Or, press the CHAN UP or CHAN DOWNbuttons to surf one channel at a time.P l a ySlo wBut for now, press PLAY and the program resumes.Next, press BACK—the program rewinds. Press BACK a second time—it goesfaster! A third time—faster still! Both the FORWARD and BACK buttons havethree speeds. Press BACK a fourth time (or press PLAY at any time) to return tonormal speed.+ Press PAUSE once more, then immediately press FORWARD to move thepicture a small step forward! Press BACK to move the picture a small step back.When your show is paused, FORWARD and BACK move the program forward orback in small steps. Press PLAY to resume watching at normal speed.Try out the INSTANT REPLAY button. INSTANT REPLAY jumps you back 8seconds—useful for when you miss a great sports play or a bit of dialog, or for whenyou fast forward too far.Press INSTANT REPLAY again, then immediately press SLOW. You get your ownslow-motion replay!Finally, try the ADVANCE button. Presto! You’re caught up to live TV.30
Tour One: Play with Live TVStatus BarPress PAUSE to make the status bar visible. It shows a one-hour period. The greensegment is the portion of the current hour that has been saved by your Recorder.Look for the white line. It marks the part of the program you are currently watching. If thewhite line is anywhere back in the green segment you are “behind” real time (which isway better than being behind the times!).3Now press CHAN UP. When you change channels, the saved programming from the oldchannel is cleared, and the Recorder starts to save what’s showing on the new channel.Channel BannerPress INFO to see the channel banner. (You can also press RIGHT arrow.) It’s only therefor a few seconds, but you can bring it back by pressing INFO again. While the banner isvisible, press RIGHT arrow to switch from a small, to medium, to large banner. Note thateach version has a different amount of information.Keep pressing RIGHT arrow until you see the largest version of the channel banner.Notice the small icons on the right side. Each symbol represents a useful feature, likerecording or Parental Controls. Press the UP and DOWN arrows to highlight differenticons. Pressing SELECT while an icon is highlighted will take you to that feature. (Formore on using these icons, see page 68.)Finally, press the CLEAR button—the channel banner disappears. (CLEAR gets rid ofthings that aren’t part of the program you’re watching.)Now go have fun playing with live TV, then come back for the next tour!status barchannel bannerThis white linetells you whereyou are.selectable icons31
Chapter 3The Basics in Five Short Tours32®If you just finished Guided Setupand you go to Pick Programs toRecord, you will see a message at thebottom of the screen stating that theRecorder is still indexing data. TheRecorder should be done indexing within4 to 8 hours of finishing Guided Setup.Tour Two: Find and Record ProgramsYou can always record the program you’re watching by pressing the RECORD ( )button on the <strong>TiVo</strong> remote. The <strong>TiVo</strong> service also provides many ways to quickly searchlarge numbers of TV programs, find your favorites, and schedule recordings in advance.Using the Program GuideWhile watching live TV, press GUIDE to display your Recorder’s program guide. Pressthe UP, DOWN, LEFT, and RIGHT arrows to move the highlight bar over a program title.(Notice that the program description at the top changes.) Then press SELECT on thehighlighted channel.If the program is on now, the channel changes and the program guide disappears. If theprogram is upcoming, selecting it brings up a transparent screen with recording options.Choose an option or press LEFT arrow to go back to the guide. See page 47 for moreinformation about using the program guide to find and record programs.Search by TitleIf you know the name of the program you want to record, you can find it easily usingSearch by Title. Press the <strong>TiVo</strong> button to see <strong>TiVo</strong> Central. Press the DOWN arrow tohighlight Pick Programs to Record and press SELECT.As you can see, the Pick Programs to Record screen gives you many ways to findprograms. Let’s look for The Simpsons. Highlight “Search by Title” and press SELECT.The next screen is a categories screen. It lets you limit your search to any of severalcategories—but for now, choose “All Programs,” then press SELECT.The next screen has a grid of letters. Notice the white box around the letter A. Use theRIGHT, LEFT, UP, and DOWN arrows to move the box among the letters. Now move itto S, then press SELECT.
Tour Two: Find and Record ProgramsA list of programs that begin with “S” appears on the right side of the screen. Move thewhite box to the letter I and press SELECT again. The list changes. The <strong>TiVo</strong> service hassearched through all available programs (usually, those airing in the next two weeks) tofind those that begin with SI, then listed those programs.Keep on entering letters until you see “Simpsons, The” in the list on the right. (Notice, thelist alphabetizes without “A” or “The.”) If you make a mistake entering text, select DELon the screen, or press BACK on the remote. To clear all text, use CLR on the screen orpress the CLEAR button. Selecting SP on the screen enters a space.3To get to the list of programs, press RIGHT arrow until you move off the grid of letters.Press the UP or DOWN arrow to highlight “Simpsons, The” and press SELECT.A Program Information screen appears. It lets you choose to record the episode, viewupcoming episodes, or get a Season Pass.Get a Season PassOn the Program Information screen for The Simpsons, highlight “Get a Season Pass,” andpress SELECT. A confirmation screen appears to make sure the Recorder is doing whatyou want. Press SELECT again—and after a short pause you have a Season Pass to TheSimpsons! Every episode on the selected channel will be recorded automatically.You should now be on the Search by Title screen again. Press the LEFT arrow to return toPick Programs to Record, then select the To Do List. You can see all your scheduledrecordings here.In the To Do List, notice the upcoming episodes of The Simpsons are marked with twocheck marks ( ), indicating they are part of a Season Pass. You can cancel therecording of any episode by highlighting the title in the To Do List and pressing CLEAR.Once you’ve recorded some programs, come back for the next tour!®If you schedule a lot of Season Passrecordings, it’s a good idea to setpriorities for them. You do this with theSeason Pass Manager; see page 45 formore information.33
Chapter 3The Basics in Five Short ToursTour Three: Now Playing and Save To DVDThe last tour showed you how to find and record programs. Once a program has startedrecording, it appears in Now Playing—a list of all the programs stored on your Recorder.To go to Now Playing, press the <strong>TiVo</strong> button twice, or select Now Playing from <strong>TiVo</strong>Central ® . Even if you haven’t recorded anything, your new Recorder may have come withsome entertaining short programs.An icon like this next to a recording in Now Playing tells you the recording’scurrent status (see the Glossary of Icons on the inside back cover). You can watchany title in Now Playing—even one still being recorded. Just highlight it and press thePLAY ( ) button.P l a yTry it now. Highlight a program and press PLAY ( ). (If there are no programs inNow Playing, go to live TV and start a recording so you can complete this tour.)Now for the cool part—watch the program for at least 5 minutes (or just fast forwardthrough some of it), then press LEFT arrow button to go back to Now Playing. This time,press SELECT on the program title. On the Program Information screen that appears,select “Resume Playing.” The program starts from where you left it!Keep until... By default, the oldest programs you record may be deleted to make room fornew recordings you've scheduled (they are usually kept at least two days). However, youalways have the option to keep a program for as long as you want.To change how long a program in Now Playing is saved, highlight it and press SELECT orRIGHT arrow. The Program Information screen appears. Select “Keep until....” On thenext screen you can choose “Keep until I delete” or use the arrow buttons to highlight andchange the date displayed. When you are done, press SELECT.P l a y34
Tour Three: Now Playing and Save To DVDSaving a Program From Now Playing to a DVDYour Recorder not only records programs to Now Playing, it can also save programs fromNow Playing to a recordable DVD. The rest of this tour shows you how. If you don’t wantto use a disc for the programs currently in Now Playing, you can still go through the tour,and just cancel before creating the disc.Put In a Disc. First, you have to put a disc into the Recorder’s disc tray. You can use eithera “DVD-RW” disc, which can be saved to, erased, and copied to again, or a “DVD-R”disc, which can only be copied to once. You must use a “DVD” disc. The Recorder willnot save to some DVD formats (such as those with a “+” sign), so make sure your blankdisc is either DVD-RW or DVD-R. To insert a disc, press the OPEN/CLOSE button ( )on the front of your Recorder, put in the disc with the blank, shiny side down, and thenpress OPEN/CLOSE ( ) again.Select a Program. Go to Now Playing (if you are not there already, press the <strong>TiVo</strong> buttontwice), and highlight a program. Press SELECT to see the Program Information screen,then select Save to DVD or VCR, then Save to DVD. The next screen asks whether youwant to save just the program you selected, or additional programs as well. For this tour,select “Save just this program.” The following screen suggests a name for the disc, andasks if you want to use it or enter your own. For this tour, just select “Yes” to use thesuggested name.Create the DVD. At this point, you see the Confirmation screen. This is your last chance tocancel the save, so if you do not want to copy to the disc you have inserted, select “Don’tsave,” otherwise select “Begin saving to DVD.”As you can see, there are more options than are covered here, but those are the basics. Thenext screen tells you how long it will take to save your program. When finished, you havea new DVD with your program on it! For further details, see page 61.®Some content may not be saved toDVD due to copy protection rightsover the material. For more details, see“Copy Protected Material” on page 64.DVD recordings that you make using thisRecorder are for your personal use only.You may not sell, lend, or rent them toother people.353
Chapter 3The Basics in Five Short ToursTour Four: Playing a DVD or CDYou must complete Guided Setup before you can play CDs, and play or record DVDs. Forinstructions, see “Completing Guided Setup” on page 23.Playing a DVD or CD does not interfere with recording TV. However, you cannot watchlive TV or recorded programs from Now Playing while playing a DVD or CD.Playing a DiscTo put a disc into the Recorder, press the OPEN/CLOSE ( ) button on the front panel ofyour Recorder to open the disc tray. Put in the disc with the label side facing up, using thedisc tray guide to align it, then press OPEN/CLOSE again to close the disc tray. (For a fulllist of the different kinds of discs that are compatible with the Recorder, see page 80.)DVD Menu. After you have inserted a disc, <strong>TiVo</strong> Central ® changes to show that theRecorder is holding a disc. Highlight the DVD item on <strong>TiVo</strong> Central and press play tostart the disc from the beginning. However, the DVD menu usually gives you moreplayback options.To go to the DVD menu, press the DVD button on the Recorder’s remote control. Pressingthe DVD button from most screens, from live TV, or while you are playing a DVD, goesdirectly to the DVD menu.From the DVD menu, select Play to start the currently loaded disc. Go ahead and try it. (Ifyou have a DVD disc in the tray and see a menu after you select Play, choose the optionyou want to view to start the video playing.)36
Tour Four: Playing a DVD or CDControlling Playback. While a disc is playing, you can press the PAUSE ( ) button,to pause the music or video, just as you would with live TV or with a program from NowPlaying. Press PLAY ( ) to restart the program. PAUSE, PLAY, FORWARD ( )and BACK ( ), all work with DVDs and CDs. In fact, while playing a DVD, all of thecontrol buttons work as they would for live TV or a program in Now Playing. (See TourOne for details.)P l a yFinally, while a disc is playing, the CHAN/PAGE button has SKIP FORWARD ( )and SKIP BACK ( ) functionality. Press SKIP FORWARD ( ) to go to thebeginning of the next chapter on a DVD or the next track on a CD. Press SKIP BACK( ) once to go to the beginning of the current chapter or track; press it again to go tobeginning of the previous chapter or track.Stopping and Resuming. Press the STOP (Recorder goes back to the DVD menu.) button. The disc stops playing and theNotice the DVD menu now has an option to “Resume playing.” If you want, you can go toNow Playing or live TV and watch something else. Then when you’re ready, you canpress the DVD button to return to this menu and select “Resume playing.” Playback of thedisc picks up right where you left off.Removing the Disc. To remove the disc, just press the OPEN/CLOSE button ( ) on thefront panel of the Recorder once to open the tray. Remove the disc, then press OPEN/CLOSE again to close the empty tray.®The Recorder can record to DVD-Rand DVD-RW discs. It can playbackmost DVD-R and DVD-RW discs thatcontain video. It can also playback audioCDs and most CD-R and CD-RW discs thatcontain MP3 files. Playback control (suchas FWD, REWIND and INSTANT REPLAY) isnot available for MP3 files larger than 10megabytes that were recorded with VBR(variable bit rate). For more information,see “Compatibility and Copy ProtectedMaterial” on page 64.337
Chapter 3The Basics in Five Short ToursTour Five: Finding New Programs<strong>TiVo</strong> makes it easy for you to find new programs you might want to watch by respondingto your interests and collecting the best the networks have to offer.WishList Searches®Your personal TV preferences arejust that: personal. See the <strong>TiVo</strong>Privacy Policy in Chapter 9, and theFederal Trade Commission (FTC) WhitePaper available at www.tivo.com/privacyfor more information.A WishList search automatically finds programs that match your tastes, passions, andwhims on any channel you receive. And it keeps on searching for as long as you keep theWishList. Just enter your favorite actor or director’s name, or any keyword, and yourRecorder will find programs for you. Go to <strong>TiVo</strong> Central, then Pick Programs to Record,then Search Using a WishList. For more information, see page 54.<strong>TiVo</strong> Suggestions<strong>TiVo</strong> Suggestions is a personalized list of shows selected to match your preferences. Howis this magic possible? Any time you watch programs, live or recorded, or browseprograms with the live guide, or in Showcases or <strong>TiVo</strong>lution Magazine, you can rate themby pressing the THUMBS UP TM and THUMBS DOWN TM buttons ( ). You cangive a program up to three Thumbs Up or three Thumbs Down. Also, any time you chooseto record a program, it automatically gets one Thumbs Up.38The <strong>TiVo</strong> icon next to the titleindicates that it was recordedas a <strong>TiVo</strong> Suggestion.Over time, the more shows you rate, the better <strong>TiVo</strong> Suggestions will be at findingprograms you might like. The suggestions are listed under <strong>TiVo</strong> Suggestions in order ofhow closely they match your preferences.Suggested programs based on your ratings appear in <strong>TiVo</strong> Suggestions. Go to <strong>TiVo</strong>Central, then Pick Programs to Record, then <strong>TiVo</strong> Suggestions. (If you don’t see programsyet, come back later—it may take a few hours the first time.) The list of programs isranked, so shows you are more likely to enjoy are near the top. If you want to record aprogram, select it and the Program Information screen appears.
Tour Five: Finding New ProgramsAuto-Recording <strong>TiVo</strong> Suggestions. As an added bonus, when the Recorder has availablespace, it automatically records <strong>TiVo</strong> Suggestions. (You can turn this feature off if youprefer; see page 94.) You will find recorded <strong>TiVo</strong> Suggestions on Now Playing, listedbelow programs you requested. Or, if you have the Groups option turned on (see page 71),<strong>TiVo</strong> Suggestions recordings will appear in their own group.It’s important to remember these characteristics of <strong>TiVo</strong> Suggestions recordings:• <strong>TiVo</strong> Suggestions never replace shows you request, or prevent your requested showsfrom being recorded.• <strong>TiVo</strong> Suggestions are always the first programs deleted to make room for recordingsyou request.Auto-recording <strong>TiVo</strong> Suggestions is an easy way to find programs you never knew about,or old favorites you may have forgotten.ShowcasesShowcases is an interactive content area which often includes opportunities to schedulerecordings of featured programs, or allows you to watch previews of upcoming movies orTV shows. The programs in Showcases are grouped in theme packages, giving you “onestopshopping” convenience when browsing for programs to record. Packages mayinclude exclusive content, the inside scoop on hit movies, exciting miniseries, specialevents, popular series, and shows featuring the biggest stars of the screen and stage.<strong>TiVo</strong>lution ® Magazine is one part of Showcases where you’ll always find something funand different. It’s a guide to the best upcoming shows on television. Select a title to see theProgram Information screen. If you get the channel that airs the program, you can set up arecording here—it’s that easy! Showcases and <strong>TiVo</strong>lution Magazine are updated duringyour Recorder’s regular connection to the <strong>TiVo</strong> service.®If other members of your householdare pressing THUMBS UP on showsyou don’t care for, and vice versa, you mayfind that <strong>TiVo</strong> Suggestions is makingsome suggestions that you like, and somethat are more appropriate for othermembers of your household.393
Chapter 3The Basics in Five Short ToursCool Things You Can DoNever, ever be late for your favorite programs! Your co-worker just told you about amust-see program that’s on tonight, but you won’t make it home in time to set up arecording. No problem! If your Recorder is connected to a home network with abroadband Internet connection, you can use <strong>TiVo</strong> Central Online (www.tivo.com/tco) toschedule the recording. It will be waiting for you when you get home. See page 53.Connect your Recorder to your home network. When you do, your Recorder becomes adigital home entertainment center, with access to even more features. See Chapter 7.Other DVRs connected to your homenetwork appear at the bottom of the NowPlaying list.Multi-Room Viewing. Record programs in the living room and watch them in thebedroom–or vice versa. If you have more than one <strong>TiVo</strong> ® Series2 TM DVR connected toyour home network, you can transfer programs between them.Enjoy digital Music & Photos—from your sofa! Connect your Recorder to your homenetwork, and you can watch slideshows of your digital photos on your big screen TV, andlisten to playlists of your MP3s on your stereo system.Looking for good movies? Kids’ shows? Science fiction? With Search by Title, you canbrowse upcoming programs by category. See page 49.See a good preview, record the show. If you’re watching live TV and a promotioncomes on for an upcoming program, you may see an Ipreview TM icon like thisone: Press THUMBS UP TM while the icon is visible to see options forrecording for the program. You don’t have to remember when it’s on—it will be recorded!(If you accidentally fast-forwarded past the Ipreview icon, rewind until it’s visible again.)40Use the Overtime Scheduler TM (and don’t miss overtime!). Programs sometimes startbefore they’re supposed to, and often end later than scheduled. You can adjust yourrecording times to account for variations using the Overtime Scheduler. See page 44.
CHAPTER 4Recording Programsand DVDsSeason Pass, Recording Options, To Do List 42Using the Guide to Find Programs 47Find Your Favorite Programs 49Find Programs That Match Your Interests 54Record from a Video Camera or VCR 59Recording a DVD 61Compatibility and Copy Protected Material 64
Chapter 4Recording Programs and DVDs42®An exception to the 28-day rule mayoccur if the program wasn’t watchedbut was automatically deleted from NowPlaying to make room for anotherrecording you requested—or if theprogram information describes itincorrectly.Season Pass, Recording Options, To Do ListYour HUMAX DVD Recorder makes finding and recording TV programs easy—so easythat you may find more programs you enjoy than you ever expected! Your Recorder canhelp with this too, by giving you simple ways to manage your recordings.Season Pass and Other Repeating RecordingsThere are three types of recordings that repeat automatically:• Season Pass TM recordings. Records every episode of a series that airs on a certainchannel—even if the day or time changes! It’s automatic and easy to set up. Just selecta program (in the <strong>TiVo</strong> Live Guide, or search results) and choose “Get a Season Pass.”• Manual Repeating Recording. Records on a specific channel at a specific time, just asyou would with a VCR. See page 52 for more information.• Auto-recording WishList TM search. Records all programs found by a WishList search.See page 58.These three types of repeating recordings also have the following in common:• No duplicates within 28 days. If you watch or delete a particular episode or showing,it will not be recorded automatically again for 28 days. This prevents Now Playing fromfilling up with shows you probably don’t want. If you want to record duplicates, go toRecording Options, Show Type, and select “All (with duplicates).” You can alsoschedule a single duplicate recording for a particular program.• Parental Controls. If Parental Controls are on when you schedule a repeatingrecording, the Recorder checks its current program information to see if any upcomingprogram violates a Parental Control. If it does, the Recorder requires the password tocontinue. See page 89 for more information.
Season Pass, Recording Options, To Do List• Keep at Most. By default, five episodes of a repeating recording program are kept inNow Playing. You can change this setting; see page 44.• Resolving conflicts. The <strong>TiVo</strong> service resolves scheduling conflicts betweenrepeating recordings by comparing recording priorities. You can change recordingpriorities with the Season Pass Manager. (See page 44 for more details).Recording OptionsYou can set Recording Options when you set up a recording, or any time later by selectingthe program from the To Do List or the Season Pass Manager, and choosing “Options.”Setting Recording Options. The ProgramInformation screen that appears when you selecta program includes choices to “Record thisepisode” and “Get a Season Pass.” When one ofthese recording actions is highlighted, “Options”appears to its right. To see the current RecordingOptions, use the arrow buttons to highlight“Options,” then press SELECT.To set your Recording Options:Recording Options1. Use the UP/DOWN arrows to highlight anoption on the Recording Options screen.2. Use RIGHT and LEFT arrow to change the setting.3. When you are done, press SELECT or highlight “Record with these options.”4. Press SELECT again to schedule the recording with the new options.To cancel your changes, press LEFT arrow, or highlight “Don’t change recording options”and press SELECT.Recording Options: one-time recordingRecording Options: repeating recording434
Chapter 4Recording Programs and DVDs®Are two of your favorite programs onat the same time? If you useRecording Options, you can create twoSeason Pass recordings for the sametime. Set the first one to record only firstrun episodes; set the second to recordevery episode. Use the Season PassManager (described on page 45) to givethe first one higher priority than thesecond. Voilà! As long as the programinformation is correct, when reruns of thefirst program air, your Recorder willignore them and record episodes of thesecond program.Recording Options include:Record Quality. The choices for Recording Quality are Basic, Medium, High, andBest. The default setting is High. (Best looks great, but keep in mind that it takes upmore space.) These settings are described on page 93. (This option is not availableonce a recording starts.)Keep At Most. This option sets the maximum number of episodes to be saved—usefulfor keeping only the most recent nightly news or only a few of your kids’ dailyprograms. The default setting is 5. (This option is available only for a repeatingrecording.)Show Type. The choices are “Repeats & first run,” “First run only,” and“All (with duplicates).”Keep Until. You can change this setting from “Space needed” (the default setting) to“Until I delete.” (This option is available only for a repeating recording.)Keep At Least. You can set the minimum amount of time the Recorder keeps arecording. The default setting is “Until Space Needed.”The Overtime Scheduler ® consists of these two options:Start Recording. You can choose to start recording up to ten minutes before aprogram begins. The default setting is “On-time.” (This option is not available oncerecording starts.)Stop Recording. You can set a recording to continue—for a few minutes or up tothree hours—after it’s scheduled to end. For example, you can extend a recording of asports event and be sure to catch the whole game—even if it goes into overtime. Youcan change this setting when you set up the recording, or while the recording is inprogress! The default setting is “On-time.”44
Season Pass, Recording Options, To Do ListSeason Pass ManagerSay you have a Season Pass to ER and an auto-recording WishList for movies with JuliaRoberts. What if a Julia Roberts movie happens to air at the same time as ER? TheRecorder will check the priorities in the Season Pass Manager to decide which program torecord. If the Julia Roberts WishList has a higher priority than the ER Season Pass, theJulia Roberts movie will be recorded, and ER will not.Changing the priority order. If you don’t change priorities in the Season Pass Manager,repeating recordings are prioritized by the order they were set up: the first has highestpriority, and so on. To change the priority order:1. Use the UP/DOWN arrows to highlight one of your repeating recordings.2. Press RIGHT arrow to highlight the arrows to the right of the title.3. Use the UP/DOWN arrows to move the selected title up or down in the list.Priorities and resolving conflicts. If a conflict occurs when you’re setting up a newrepeating recording, you’ll be shown which programs are involved. You’ll also be givenoptions to resolve the conflict:• Record only those programs that do not conflict with others previously scheduled torecord. This gives the repeating recording the lowest priority.• Record all programs requested. This gives the repeating recording the highest priority.Canceling a Season Pass. To cancel a Season Pass, just highlight the program’s title inthe Season Pass Manager and press CLEAR. Or, from a Program Information screen,select “Cancel/edit the Season Pass,” then “Cancel this Season Pass.”4<strong>TiVo</strong> Central Pick Programs to Record Season Pass Manager45
Chapter 4Recording Programs and DVDsTo Do ListThe To Do List shows all your scheduled recordings and lets you cancel or edit them.Individual recordings are marked with a single check mark ( ). Season Pass recordingsand manual repeating recordings have a double check mark ( ), and WishListrecordings have a star ( ). Press SELECT on any program to see available edit options.Canceling a recording. To cancel an upcoming recording from the To Do List, highlightthe title and press CLEAR.View Recording HistoryThis is an advanced feature in the To Do List for those who really want all the details.Selecting this option takes you to a list of three types of programs:Deleted. To find programs that were deleted, press the UP arrow or CHAN UP. (You willfind these programs listed above the point where the highlight bar starts off.) Selecting atitle will take you to a screen that tells you how and when the program was deleted.Were not recorded. To find programs that were not recorded, press the UP arrow orCHAN UP. (You will find these programs listed above the point where the highlight barstarts off.) Selecting a title will take you to a screen that tells why it was not recorded.Will not be recorded. To find programs that will not be recorded, press DOWN arrow orCHAN DOWN. (You will find these programs listed below the point where the highlightbar starts off.) Selecting a title will take you to a screen that tells you why the program willnot be recorded. You can then select “More recording options” on this screen, which willdisplay the Program Information screen. You could choose “View upcoming episodes” tofind an episode that doesn’t conflict with anything else, or change Recording Options,which may allow the program to be recorded.46<strong>TiVo</strong> Central Pick Programs to Record To Do List
Using the Guide to Find ProgramsUsing the Guide to Find ProgramsThe <strong>TiVo</strong> service provides a program guide that displays up to two weeks of TVprogramming at the touch of a button. You can use the guide to quickly find programs andset up recordings by customizing the channels and filtering the types of programs shownin the guide. To view the guide, just press the GUIDE button on your <strong>TiVo</strong> remote.Customizing the GuideThe guide has options that let you quickly change what programs and channels it shows.To see Guide Options, press ENTER while the guide is displayed. Available options are:Channels. Choose which channel list you want the guide to display. For details on how tocustomize these channel lists, see page 86. The three channel lists are:• You Receive. This is the default list. It displays only the channels you have chosenin the Channels You Receive channel list.• Favorites. This list shows only your favorite channels when browsing the guide.• All. This list displays all of your cable or satellite provider’s channels, evenchannels you don’t subscribe to.Day and Time. Sets the guide to show what’s on at a particular day and time.Style. Choose between the <strong>TiVo</strong> Live Guide and Grid Guide styles. (For details about thedifferences between these two styles, see page 69.)Filtering. Turns filtering on or off. (Choosing a filter is explained below.) When you wantto see all channels and programs in the guide, turn filtering off.Choose filter. Use the UP and DOWN arrows to highlight a category in the list, then pressSELECT. Choose a subcategory. The guide displays only channels with programs in thatsubcategory.®When filtering is on, the guide willshow only channels that have aprogram in that category within six hoursof the day and time selected. Programsthat don’t fit your category are grayed out.474
Chapter 4Recording Programs and DVDsChanging a guide option. Highlight the option, then press the LEFT or RIGHT arrow tochange the selection displayed. Save your changes by pressing SELECT or GUIDE. Tocancel your changes, press CLEAR.Recording a Program from the GuideTo record a program, highlight it in the guide, then press RECORD. On the transparentscreen that appears, select “Record this showing (Best Quality)” or “Season Pass & otheroptions” for more choices. (See page 42 for more on Season Pass recordings and page 43for more on Recording Options.)Recording the Program You Are WatchingYou can always record the program you are watching: just press the RECORD button. Onthe transparent screen that appears, select “Record this showing (Best Quality).” Select“Season Pass & other options” for more choices, or to change the recording quality.Recording the Saved Portion. Up to 30 minutes of the current channel’s broadcast isalways being saved, even when you are not recording a program. When you changechannels, the Recorder clears what it has saved and starts saving again on the new channel.(So, if the saved portion is important to you, either record it or don’t change the channel.)To record the saved portion—in addition to the rest of the program—you must choose“Record this showing (Best Quality).” If you change the Recording Quality (by selecting“Season Pass & other options”), the saved portion of the program won’t be recorded.Stopping a recording. You can stop any recording in either of two ways: select the title inNow Playing, then select “Stop Recording;” or, press the RECORD button in live TV, thenchoose “Stop the current recording.”48
Find Your Favorite ProgramsFind Your Favorite ProgramsSearch by TitleIf you know the name of the program you’re looking for, or even the first part of the name,choose Search By Title from Pick Programs to Record. Then follow these steps:1. If you wish, you can first narrow the search with a category and subcategory.2. The next screen has a grid with numbers andletters. Spell out the title using the arrow buttonsto move, then pressing SELECT on each letteryou want. (Skip “a,” “an,” or “the.”) As youselect letters, an alphabetical list of programsappears on the right. Keep selecting letters untilyou see your program.You can use the <strong>TiVo</strong> remote for somefunctions too. The CLEAR button on the remoteerases everything; BACK erases one letter at a time; FORWARD inserts a space.3. When you see your program, press RIGHT arrow until the highlight is in the list. Tomove the highlight within the list, press the UP and DOWN arrows. To move quicklyup or down the list one screen at a time, press CHAN UP/DOWN.4. Press SELECT when the title you want is highlighted. The Program Informationscreen will appear. Then you can view upcoming episodes, set up a Season Pass, orrecord an individual showing.Browsing a category. You can browse through programs in any category and subcategoryyou choose. Numbers come before letters, so to start from the top of the list, enter a zero.®®If you only know one word in thetitle, use a Title Wishlist to find theprogram. See page 54 for details.Replace hyphens ( - ), slashes ( / )and periods ( . ) with spaces. Forexample, use 20 20 to search for the title“20/20.” Any other marks, such asapostrophes ( ’ ), asterisks ( * ) andampersands ( & ) are ignored.For example, you would use6 OCLOCK NEWS to search for the title“6 O’Clock News.”4<strong>TiVo</strong> Central Pick Programs to Record Search by Title49
Chapter 4Recording Programs and DVDsRecord by Time or ChannelThree options are available under Record by Time/Channel: Browse by Time, Browse byChannel, and Manually Record Time/Channel.Browse by Time. Browse by Time lets you browse all programs on a particular day andtime. With Browse by Time, you can filter the list to see only programs in a particularcategory. For example, you can browse all the movies airing on Saturday night. To browseby time:1. Use the arrow buttons to highlight a category (for example, “Movies”) to narrow thelist of programs, then press SELECT.2. Press the UP and DOWN arrows to select the date you want to see, then press RIGHTarrow to move the highlight to the time column.3. Press the UP and DOWN arrows to select a time.4. Press SELECT to bring up the list ofprograms without leaving the time selector, orpress RIGHT arrow to bring up the list ofprograms and move to the list at the same time.5. When you find a program you want torecord, highlight it and press SELECT to bringup the Program Information screen. Then youcan view upcoming episodes, set up a SeasonPass, or record an individual showing.50<strong>TiVo</strong> Central Pick Programs to Record Record by Time or Channel Browse by Time
Find Your Favorite ProgramsBrowse by Channel. Browse by Channel lets you browse through programs airing on aparticular channel. You can start with all channels, or just your favorites. To browse bychannel:1. Highlight and select either “All Channels,” which includes all the channels youreceive, or “Favorite Channels,” which includes just the channels you have selected asyour favorites. (For information on creating your own list of Favorite Channels, seepage 86.)2. Press the UP and DOWN arrows to select the date you want to browse, then pressRIGHT arrow to move the highlight to the channel column.3. Press the UP and DOWN arrows to select a channel. (You can also use the numbers onthe remote to enter a channel, then press ENTER.)4. Press SELECT to see the list of programs without leaving the channel selector, orpress the RIGHT arrow to see the list of programs and move to the list.5. When you find a program you want to record, highlight it and press SELECT to bringup the Program Information screen. Then you can view upcoming episodes, set up aSeason Pass, or record an individual showing.4<strong>TiVo</strong> Central Pick Programs to Record Record by Time or Channel Browse by Channel51
Chapter 4Recording Programs and DVDsManually Record Time/Channel. Manually Record Time/Channel lets you schedule arecording on a specific channel at a specific time (just as you would with a VCR). You canalso create a manual repeating recording here by setting the recording to repeat everyweek, every day, or every weekday. To create a manual recording:1. Choose the recording type, using the UP and DOWN arrows to select “One Time,” or“Repeating.” Then press RIGHT arrow.2. Choose the day(s) for the recording, using the UP and DOWN arrows to change thecurrent selection. If you chose “Repeating,” you can choose to repeat the recording ona specified day of the week (for example., “Every Tuesday”) or several times a week(for example, “Every M - F” or “Every Day”). Then press RIGHT arrow.3. Choose a channel using the UP and DOWN arrows (or by entering a number with theremote, then pressing ENTER). Press RIGHT arrow.4. Set the hour, minute, and am/pm for the start and stop time, using the UP/DOWNarrows to change the current selection. Press RIGHT arrow to move to the next step,LEFT arrow to move back.®Use a Manual Repeating Recordingto record things like just theopening monologue of a late night talk5. Schedule the recording by pressing SELECT. A confirmation screen appears. (Therecording will be named with a “best guess” based on program guide listings for thattime and channel. This will help you find your program later in the To Do List or inNow Playing.) When you’re ready to schedule the recording, just press SELECT.show.52<strong>TiVo</strong> Central Pick Programs To Record Record by Time or Channel Manually Record Time/Channel
Find Your Favorite ProgramsUsing Online Scheduling to Find Programs (<strong>TiVo</strong> Central Online)You can schedule recordings on your Recorder at home from any computer with Internetaccess and a standard web browser. Use <strong>TiVo</strong> Central Online at www.tivo.com/tco tosearch for shows by time, title, keyword, or actor/director. You can record a single episodeor get a Season Pass TM , with all the recording options you have on your Recorder at home.You can even set the program not to record if it conflicts with a scheduled recording that isalready on your Recorder.Using Online Scheduling doesn’t require any changes to your current setup. However, ifyour Recorder is connected to a home network (see Chapter 7) that includes a broadbandInternet connection, it will check the <strong>TiVo</strong> service for your recording requests much moreoften. With a broadband Internet connection, you can schedule a recording within an hourof its air time from any place that you have access to the Internet!To Use Online Scheduling:1. Go to www.tivo.com/tco and sign in.2. On the Welcome page of <strong>TiVo</strong> Central Online, select the name of the Recorder forwhich you want to schedule recordings.3. Use the simple or advanced search of your TV listings, or browse by channel.4. From the list of search results, click the name of a program and choose:Record this episode — to record the program and specify the priority and quality.Get a Season Pass — to record this program every time it airs on this channel.You can choose to receive a confirmation e-mail sent to the e-mail address you provide.®Each time your Recorder connects tothe <strong>TiVo</strong> service, it checks <strong>TiVo</strong>Central Online and schedules any recordingrequests you’ve made.453
Chapter 4Recording Programs and DVDsFind Programs That Match Your InterestsTry a WishList SearchIf you know what you like, WishList searches are great! A WishList search automaticallyfinds programs that match your interests, tastes, passions, and whims on any channel youreceive. And it keeps on searching for as long as you keep the WishList. For example:• You could create a Category Only WishList for the category “Movies” andsubcategory “Comedy.” You could then use it occasionally to look at a list of allcomedy movies airing in the next two weeks. The list would be updated each time yourRecorder connects to the <strong>TiVo</strong> service.• You could search for something more specific by creating an Actor WishList for SeanConnery, and then include the category “Movies,” and subcategory “Action.” ThisWishList would only find action movies starring Sean Connery.• With a Keyword WishList, you can look for something very specific. For example, theKeyword WishList GIANTS with category “Football” would find Giants football (butnot baseball) games for you.Can a WishList Do More Than Search?Yes it can! You can set a WishList to auto-record, and it will record every program theWishList finds, on any channel you receive. For example, with the Sean Connery ActorWishList, you would automatically collect Sean Connery action movies in Now Playing.Some WishList searches are better suited to browsing than to auto-recording. Forexample, a Category Only WishList for the category “Documentary” would find everyupcoming documentary. You might not want to record every documentary, but you couldoccasionally browse the WishList and choose the ones you do want to record. The morespecific a WishList search is, the better suited it is to auto-recording.54<strong>TiVo</strong> Central Pick Programs To Record Search Using a WishList
Find Programs That Match Your InterestsCreating a WishList SearchFrom Search Using a WishList, select “Create new WishList.” Next, select the type ofWishList: Actor, Director, Category Only, Keyword, or Title. For most WishListsearches, you use the grid of letters on the next screen to spell out what you’re looking for.As the last step, you’ll then be able to select a category and subcategory to narrow yoursearch. For example, if you want movies with Harrison Ford, but not documentaries ortalk shows, select “Movies.” To search every category, select “Don’t specify a category.”Category Only WishList. Use the UP and DOWN buttons to highlight a category, thenpress SELECT or RIGHT arrow. A subcategories list appears. Highlight a subcategory,then press SELECT or RIGHT arrow. To search all subcategories, you can also select“Don’t specify a subcategory.”Actor or Director WishList. Spell the person’s last name using the arrow buttons to movethe selection box around the grid; press SELECT to enter a highlighted letter. As youselect letters, a list of names appears to the right of the grid.If you see the person’s name, press RIGHT arrowuntil you move the highlight to a name in the list.Use the UP or DOWN arrow to highlight the nameyou want and press SELECT.To search for a name that is not on the list, enterthe name in the format: LAST NAME, FIRSTNAME. You must match the spelling of the nameexactly, and you must use a comma (available inthe grid under the letter W).4<strong>TiVo</strong> Central Pick Programs to Record Search Using a WishList55
Chapter 4Recording Programs and DVDsKeyword or Title WishList. You can create a Keyword or Title WishList with onekeyword or with several. For a Keyword WishList, the <strong>TiVo</strong> service checks for yourkeywords in the program or episode title, description, actor, director, year, and categoryinformation. A Title WishList works very similarly, but the <strong>TiVo</strong> service only searchesprogram and episode titles.Spell your keyword(s) using the arrow buttons to move around the grid; then pressSELECT to enter the highlighted letter. You can enter as many characters as will fit on thescreen. When you have finished, use RIGHT arrow to highlight “Done creatingkeywords,” then press SELECT or RIGHT arrow.Using * in WishList searches. To search for similar words in a Keyword or TitleWishList, use the asterisk (*) as a special symbol that replaces the endings of words. Forexample, the keyword AIRP* would find shows containing “airport,” “airplane,”“airplanes,” as well as the movie “Airplane!” To enter an asterisk, press the SLOW ( )button on the remote.The asterisk can be helpful when you’re looking for a range of similar words, or if you’rejust not sure how something is spelled. Pop quiz: is it “irresistable” or “irresistible?” Usethe keyword IRRESIST* and don’t worry about it! Remember, when using the asterisk:• It can be used only at the end of a keyword; it cannot be used to omit letters at thebeginning or in the middle of a word. (For example, keywords like AIR*NE or*PLANE will not work.)• When using this symbol, be as specific as possible. For example, do not use keywordslike TH*. There will not be enough room to show all the results of a keyword that istoo general.Slo w56<strong>TiVo</strong> Central Pick Programs To Record Search Using a WishList
Find Programs That Match Your InterestsTips for entering keywords:• To specify an exact phrase in a Keyword or Title WishList, surround a set of wordswith quotation marks (to enter quotation marks, press PAUSE ( ). For example,the keyword PAUL SIMON might also turn up a documentary about Simon Bolivarwith a director whose name is Paul. Use “PAUL SIMON” to be certain you find onlyprograms that feature Paul Simon.• If you enter more than one keyword in a Keyword or Title WishList, it finds onlyprograms that match all of your keywords (for example, “GEENA DAVIS” FLY).• If you want to include an exact phrase and additional keywords, there should be aspace between the final quotation mark and the beginning of the next word. You canenter a space by selecting SP on the grid of letters or by pressing FORWARD ( ).• Replace hyphens ( - ), slashes ( / ) and periods ( . ) with spaces. For example, youwould use the keyword 20 20 to search for the title “20/20.” For an Actor WishList forCatherine Zeta-Jones, use ZETA JONES, CATHERINE. You can enter a space byselecting SP on the grid of letters or by pressing FORWARD ( ).• Any other marks, such as apostrophes ( ’ ) and ampersands ( & ), are ignored. Forexample, you would use the keyword phrase 6 OCLOCK NEWS to search for the title“6 O’Clock News.” (Note that commas ( , ) are also ignored, except in an actor ordirector WishList, where they are essential.)• For dollar signs ( $ ) substitute the letter S. For example, to find “$100,000 Pyramid,”use S100000. (In Search by Title, skip the dollar signs to find these titles.)®If you like music performances, try akeyword WishList for “Concert.”Choose the category “Arts” and the Sub-Category “Music.”4<strong>TiVo</strong> Central Pick Programs To Record Search Using a WishList57
Chapter 4Recording Programs and DVDs58®As you browse the upcomingprogram titles found by WishListsearches, remember that the CHAN UP/DOWN button pages quickly through lists.Browsing, Recording, and Editing a WishListBrowsing all WishList searches. Select “View all upcoming WishList programs.” Thisselection displays a list of up to 10 upcoming programs from each of your WishListsearches—and up to 200 programs total (so it may take a long time to display). To record aprogram, select its title; you will see the Program Information screen, where you can select“Record this episode” and other actions.Browsing an individual WishList. Select the WishList you want to browse, then select“View upcoming programs” to see a list of up to 200 unique upcoming programs thatmatch the WishList. To record a program, select its title to see the Program Informationscreen, then select “Record this episode.”For a comprehensive list of all upcoming showings of a program, including repeats(multiple showings of the same program), select the title of the program in the “UpcomingPrograms” list. On the Program Information screen that appears, select “View upcomingepisodes/showings.”Auto-recording WishList. When you create a WishList or select it, you can choose theaction, “Auto-record WishList programs.” This means every program the WishList findswill be automatically recorded.Each auto-recording WishList and its upcoming recordings are marked with a star ( ).If you want to be sure that all the matches your auto-recording WishList finds arerecorded, give the auto-recording WishList a high priority in the Season Pass Manager.(See page 44 for details.)Editing a WishList. You can change a WishList—for example, to correct a misspelling, orto add a category or subcategory to narrow the results. Just select the WishList, then select“Edit WishList.”<strong>TiVo</strong> Central Pick Programs To Record Search Using a WishList
Record from a Video Camera or VCRRecord from a Video Camera or VCRIn addition to recording your favorite TV programs, your HUMAX DVD Recorder canalso record from a video camera or VCR—the first step in transferring your home moviesto DVD. These recordings appear on the Now Playing list, with titles you choose.Recordings you make from a video camera or VCR have much in common with recordedTV programs. For example, if the recording causes disk space conflicts or upcomingprogram schedule conflicts, you will be notified and given the option to continue orcancel. You can also set the recording quality, and specify how long the recording will besaved on the Now Playing list.While recording from a video camera or VCR, all other Recorder functions areunavailable. No TV programs will be recorded, and you cannot watch live TV, play DVDsor CDs, or watch other recordings from Now Playing.Setting Up the Recording1. Connect your video camera or VCR to the Recorder using the inputs on the its frontpanel. Choose the best input(s) that will work with your video camera or VCR:S-Video. If you use an S-Video cable to connect your video camera or VCR, you willalso need to connect the red and white ends of a Composite A/V cable for audio.Composite A/V. Use the yellow end of a Composite A/V cable for video, and the redand white ends for audio. If your video camera or VCR has only one audio out jack,use just the white end.DV. If your video camera or VCR has a DV output jack, this is the best connection touse. A DV cable (not supplied) carries both audio and video.2. From <strong>TiVo</strong> Central ® , select Pick Programs to Record, then Record from a VideoCamera or VCR.<strong>TiVo</strong> Central Pick Programs To Record Record from a Video Camera or VCR®Some content may not be saved toDVD due to copy protection rightsover the material. For more details, see“Copy Protected Material” on page 64.DVD recordings that you make using thisRecorder are for your personal use only.You may not sell, lend, or rent them toothers.These input jacks are located behind asmall door on the Recorder’s front panel.594
Chapter 4Recording Programs and DVDs3. The Recorder reminds you that all other functions are unavailable while recordingfrom a video camera or VCR. Select “Yes, continue” to proceed.4. Select the input you used to connect your video camera or VCR to the Recorder.5. Choose a name for your recording. Use the arrow buttons on the remote to highlight acharacter, and press SELECT to enter it. You can use the THUMBS UP TM andTHUMBS DOWN TM buttons to change to uppercase or lowercase letters. Select“Done entering name” when you are finished.®You can play, pause, instant replay,and slow-motion recordings from avideo camera or VCR just like any otherprogram on the Now Playing list. You caneven save them to a DVD! See page 61 tolearn how.6. On the Recording Options screen, specify the recording quality you want to use, andhow long you want the recording to be saved on the Now Playing list.If you used the Recorder’s DV input to connect your video camera or VCR, yourRecording Quality choices are Best or High quality.7. On the next screen, set the length of the recording. You can always press STOP to endthe recording earlier than you estimated.After setting the recording length, you will be notified of any recording conflicts, justas you would if you were scheduling any other recording. You can cancel anyconflicting recordings, change your recording length, or choose “Don’t record fromcamera/VCR now.”8. Choose the starting point for your recording by playing video from your camera orVCR, then pausing when you’re ready to start recording.9. The Recorder gives you a 15 second countdown before recording begins. Press PLAYon your video camera or VCR when the countdown reaches zero.When the recording is complete, you will find its title (the name you gave to therecording) on the Now Playing list.60<strong>TiVo</strong> Central Pick Programs To Record Record from a Video Camera or VCR
Recording a DVDRecording a DVDYour Recorder can save programs from the Now Playing list to a recordable DVD. Somecontent may not be saved due to copy protection rights over the material. For more details,see “Copy Protected Material” on page 64. Saving to DVD does not interfere withrecording TV programs or watching live TV.What Can Be SavedOnly programs in Now Playing can be saved to a DVD. (Now Playing can contain contentrecorded from live TV, a video camera, or video tapes.) Programs must have completedrecording to Now Playing before being saved to DVD. The following are reasons theRecorder might not be able to save a program to DVD:• Some programs might not be saved due to copy protection rights over the material.• Programs transferred to this Recorder from a different kind of <strong>TiVo</strong> DVR via theMulti-Room Viewing feature cannot be saved to DVD.• If a recording is less than 2 minutes long, it cannot be saved to DVD.Save Programs to DVDThere are two ways to save programs to DVD. One method is to select “Save to DVD orVCR” from a recording’s Program Information screen. This is useful if you only want thatsingle program on the DVD. See page 35 for instructions.If you want to save several programs to the same DVD, follow these steps:1. From <strong>TiVo</strong> Central ® , select DVD, then “Save programs to DVD.”2. Insert a DVD-RW (rewritable) or a blank DVD-R (record once) disc. If you re-use aDVD-RW disc, all of the programs on it will be erased. For a complete list ofcompatible discs, see page 64.®Some content may not be saved toDVD due to copy protection rightsover the material. For more details, see“Copy Protected Material” on page 64.DVD recordings that you make using thisRecorder are for your personal use only.You may not sell, lend, or rent them toothers.614
Chapter 4Recording Programs and DVDs3. Choose the programs you want to save onto the DVD. Programs in Now Playing thatcan be saved have an empty box next to them ( ); programs that cannot be savedhave a red circle with a slash ( ). To choose a program, highlight it and pressSELECT. A checkmark appears in the box next to the program title.• You can select as many programs as will fit on a DVD (several short programs orfewer longer ones), up to a maximum of 24. Programs that can be saved but willnot fit with the other programs selected on the current disc have a red “x” besidethem ( ).• Programs will be recorded in the order you choose them. To change the order,remove programs from the list by highlighting them and pressing SELECT; thenselect them again in the order you want them to record.• The percentage wheel in the upper right-hand corner of the screen provides a closeestimate of how much of the DVD would be filled by the selected programs. Itupdates automatically.®If you choose to record only oneprogram and it is too large to fit on asingle DVD, the Recorder will attempt tosave segments of it to multiple DVDs.4. When you are ready to continue, press RIGHT arrow, or select “Done choosingprograms.” If you are copying a single program that is too large to fit on a DVD, yousee the Choose Part to Save screen. You can use the RIGHT and LEFT arrows tochange the part that will copy. Press SELECT to continue.5. If you are saving only one program, the Recorder suggests using that program’s namefor the DVD. You can use that name or choose to enter a different name.To name the DVD, use the arrow buttons on the remote to highlight a character, andpress SELECT to enter it. You can use the THUMBS UP TM and THUMBS DOWN TMbuttons to change to uppercase or lowercase letters. Select “Done entering name”when you are finished.62
Recording a DVD6. Confirm your selections and start the saving process. While your DVD is beingcreated, the current status is displayed. If you go to another screen, or to live TV, pressthe DVD button to return to the status screen. If saving to DVD causes disk spaceconflicts, you will be notified and given the option to continue or cancel.You can cancel Save to DVD while it is in process. You will be notified whether thedisc can be re-used (DVD-RW) or not (DVD-R).Finalizing the DiscAll DVDs are automatically finalized at the end of the DVD recording process.Finalizing means:• A title is created for each program saved. Chapter marks are placed every 5 minutes.You cannot turn chapter marks off.• A DVD “Disc” menu is created that lists the title of each program on the disc.• DVDs you create have no DVD Parental Controls rating, so they cannot be blocked byParental Controls unless Parental Controls are set to block all DVDs. See page 89.• The closed captioning of the original program is maintained.After the DVD is finalized, you’re done! To play your new DVD, press the DVD buttonon your remote, then press PLAY. For more about playing DVDs, see page 73.463
Chapter 4®Some discs recorded using a DVDrecorder, CD recorder, or personalcomputer may not be playable in thisRecorder even though they were madewith software that is compatible with theRecorder. Some possible reasons for thisinclude:• the type of disc used• damage, dirt or condensation on eitherthe disc or in the Recorder’s disc drive• other reasons related to specificformats; see the notes about individualformats in this sectionCopy protected video includes®DVD-Video discs, and some satelliteand cable broadcasts.When portions of a program are copyprotected, they cannot be saved to DVD.The Recorder will only save the portions ofthe program that are not protected.Recording Programs and DVDsCompatibility and Copy Protected MaterialRecording Disc CompatibilitySize. The Recorder can record video to 12 cm. discs, the standard for DVDs.Format. The Recorder can record to DVD-R and DVD-RW discs.(It does not record DVD+R or DVD+RW discs.) The blank DVDdisc packaging should be marked with one of these logos:The Recorder is compatible with DVD-RW Ver. 1.1 and Ver. 1.1/2x, and DVD-R Ver. 2.0and Ver. 2.0/4x.Playback of Discs You RecordThis DVD recorder records in Video Mode, which is the use of the DVD-Video format forrecording on DVD-R and DVD-RW discs. DVD discs saved using this Recorder can beplayed on regular DVD players, including computer DVD drives compatible with DVD-Video format. However, support for playback of DVD-R and DVD-RW discs is optionalfor manufacturers of DVD playback equipment, and there is DVD playback equipmentthat does not play DVD-R or DVD-RW discs recorded in the DVD-Video format.Copy Protected MaterialYou may use this Recorder only to reproduce or save materials for which you own thecopyright or have obtained permission to copy from the copyright owner, or for which youotherwise have a legal right to reproduce or copy. Unless you own the copyright or haveobtained permission from the copyright owner or otherwise have a legal right to reproduceor copy, you may be breaking the law, including applicable copyright laws, and may besubject to payment of damages and other remedies.64
CHAPTER 5Watching Programs andPlaying DiscsUsing the Control Buttons 66The Status Bar 67The Channel Banner 68Watching Live TV 69Watching Programs from Now Playing 71Playing a DVD or CD 73Disc Compatibility 80Save to VCR 82
Chapter 5Watching Programs and Playing Discs66®®Most of the control buttons on yourremote work when playing audioCDs too. See page 77 for moreinformation.When you fast forward too far, pressINSTANT REPLAY to jump back eightseconds. Press it again if you reallymissed the mark.Using the Control ButtonsPart of the fun of watching programs with the HUMAX DVD Recorder is the ability tocontrol what you’re watching. The best part is, the pause, instant replay, slow motion, andother control features work whether you’re watching live TV, recordings, or DVDs.P l a ySlo wRECORD. Records a program when you’re watching live TV or browsing theprogram guide.PLAY. Plays a program at normal speed. Shows the status bar for three seconds.PAUSE. Pause live TV for up to 30 minutes; pause a recorded program, DVD, orCD for as long as you want. To resume playing, press PAUSE again (or PLAY).BACK. Rewinds a program. Press BACK once, twice, or three times to gobackward fast, faster, or fastest. Press it a fourth time to return to normal speed.FORWARD. Fast forwards a program. Press FORWARD once, twice, or threetimes to go forward fast, faster, or fastest. Press it a fourth time to return tonormal speed.Frame Forward or Back. Press PAUSE, then press the FORWARD or BACKbutton. The picture moves a small step forward or backward.INSTANT REPLAY. Instantly jumps back eight seconds and resumes playing.ADVANCE. In live TV, catches up to the live broadcast. When you are fastforwarding or rewinding in a recorded program, DVD, or CD, press ADVANCEto instantly jump ahead or back to the next tick mark. While playing a recording,DVD, or CD, press ADVANCE once to jump to the end of the recording, andagain to jump to the beginning.SLOW. Plays the program in slow motion.
The Status BarThe Status BarWhen you press PLAY, PAUSE, FORWARD, or BACK, the status bar appears at thebottom of the screen. Whether you’re watching live TV, a DVD, a recorded program, orlistening to a CD, the status bar shows where you are and what you’re doing.®The CLEAR button hides the statusbar, the program guide, the channelbanner, and anything else that is not partof the program.In live TV, the status bar represents one hour and the white tick marks are 15 minutesapart. In recorded programs and DVDs, the bar shows the program’s length, and the tickmarks are evenly spaced depending on the length of the program. A white vertical lineshows where you are in the program.In live TV, the green segment represents the part of the program saved by the Recorder.the right edge of the green segment represents the current time. The Recorderautomatically saves up to 30 minutes of live TV. You can move backward and forwardthrough the saved portion of a live program. (For more information, see page 66.)5Status Bar for live TV.The white vertical lineindicates where you are now.You can only rewind live TV up to 30®minutes, or to the point where youStatus Bar for a twohourrecording or DVD.Tick marksThis symbol shows you arecontrolling live TV (here, liveTV is paused).This end is where youcatch up with live TV andthe current time.last changed the channel (whichever isless). When you change the channel, youskip ahead to the current time on the newchannel and start saving on that channel.If you are behind live TV and watchingThese symbols show that the BACKbutton has been pressed twice.This recording (or DVD)is two hours long.something you still want to see, youshould not change the channel.67
Chapter 5®Pressing RIGHT arrow switchesamong channel banner styles, fromsmall......to medium...to large.Watching Programs and Playing DiscsThe Channel BannerThe channel banner appears at the top of the screen when you change channels, or pressthe INFO button or RIGHT arrow on your remote. This works when you’re watching liveTV, recorded programs or DVDs, or listening to a CD. The banner disappears after a fewseconds. You can also hide the channel banner by pressing CLEAR or LEFT arrow.There are three versions of the channel banner in live TV: small (with the current time andchannel), medium (adds the title, running time and ratings), and large (adds a programdescription and icons). Press RIGHT arrow to switch among them. In recorded programs,only the medium and large versions are available. When playing DVDs and CDs, thebanner has different information and options. See “Playing a DVD or CD” on page 73.Channel banner icons. In live TV and recorded programs, the large channel banner hasthree selectable icons on the right side. To use an icon, use the UP/DOWN arrows tohighlight it, then press SELECT. (See the inside back cover for a glossary of icons.)Record a program (or stop a current recording). If a recording is in progress, theicon appears bright.Go to Parental Controls.If Parental Controls are off, the lock appears unlocked and dim.If they are on, it appears locked and bright (pictured here).If they have been turned off temporarily, it appears unlocked and bright.Read Messages. If the symbol is bright, you have new messages from the<strong>TiVo</strong> ® service.68
Watching Live TVWatching Live TVWhen you’re watching a program as it’s broadcast, you’re watching live TV. To go to liveTV at any time, press the LIVE TV/GUIDE button on your remote control. You can alsoselect Watch Live TV from <strong>TiVo</strong> Central ® . If you’ve used the pause, rewind, slow, orinstant replay features and are “behind” live TV, press ADVANCE to catch up.Changing ChannelsThere are several ways to change channels:• Use the Guide. Tired of channel surfing? Choose something to watch with theprogram guide. To see the guide, press the LIVE TV/GUIDE button. Then use thearrow buttons to highlight a program. To change the channel, press SELECT.• Use the Number Pad. To go to a specific channel, use the numbers on your remotecontrol, then press ENTER. (If you don’t press ENTER, the channel changesautomatically after a few seconds.) To clear the number before the channel changes,press CLEAR.• Use ENTER. To jump back to the previous channel, press ENTER.• Use CHAN UP/DOWN. Of course, you can also still use the CHAN UP/DOWN buttonon your remote control. (CHAN UP/DOWN skips channels that are not on the channellist selected in Guide Options. For more information on channel lists, see page 86.)Choosing a Guide StyleYou can choose between two guide styles that display your channels and programinformation in different ways. Press the LIVE TV/GUIDE button to display the guide,then ENTER to see the Guide Options. Highlight “Style” to see the available options.®You can use your Recorder’s remoteto control the power, volume, mute,and TV input settings on your TV. Forinformation on setting this up, see“Remote Control & Recorder Front” onpage 96.569
Chapter 5Watching Programs and Playing Discs<strong>TiVo</strong> Live Guide: While the highlight<strong>TiVo</strong> Live Guide®is on the left side, you can press theFORWARD and BACK buttons to changethe time in half-hour increments.Title, date, time theprogram airs, and ratingDay and timeSelected channelProgram descriptionWhile the highlight is on the right side,you can press the FORWARD and BACKbuttons to change the selected channel.Use CHAN UP/DOWN to page through theGuide options (Press ENTER to set)Channel list and categoryfilter currently in useprogram listings.Programs duringthis time periodUpcoming programs onthe selected channelGrid Guide: Use the FORWARD andGrid Guide®BACK buttons to change the time in90-minute increments.Title, date, time theprogram airs, and ratingProgram descriptionUse CHAN UP/DOWN to page through theTime slotsprogram listings.Channel number and channelcall lettersProgram listingsChannel list and categoryGuide options (Press ENTER to set)filter currently in use70
Watching Programs from Now PlayingWatching Programs from Now PlayingAll the programs saved on your Recorder are listed in Now Playing (no more searchingthrough unlabeled videotapes!). To go to Now Playing, press the <strong>TiVo</strong> button twice.As soon as a recording starts, the program’s title appears in Now Playing. You can watchany program in Now Playing, even one that is still recording. Just highlight it and pressPLAY. If you have watched part of the program already, it resumes from the point youstopped watching. When a program ends, you have the option to delete it. If you don’tdelete it, the program is available to watch again from the beginning in Now Playing.Highlight a program title and press SELECT to see the Program Information screen,which offers these options:• Play or Resume playing.• Keep until... See page 72 for details.• Delete Now or Stop Recording (if recording is in progress)• Save to DVD or VCR. See page 35 for Save to DVD. See page 82 for Save to VCR.Sorting and Grouping ProgramsWhen you are in Now Playing, press ENTER on your <strong>TiVo</strong> remote to see Now PlayingOptions. You can also Press 1 on the remote to change the sort order of Now Playingprograms; or press 2 to turn groups on or off.Sorting Programs. Choose how you want the programs in Now Playing to be listed:• Alphabetically. Programs are listed alphabetically by title (from A to Z).• By date recorded. Programs are listed by the date they were recorded, with the mostrecent at the top and the oldest at the bottom.®A colored icon to the left of eachtitle in Now Playing tells you howlong the recording will be saved. See theGlossary of Icons on the inside back coverfor details.On a Program Information screen, press INFOto see the Program Details, which often hasmore about the program, such as actors,writers, producers, etc.715
Chapter 5Watching Programs and Playing DiscsGrouping Programs. The Groups option lets you group like programs together to “tidyup” the screen. When you turn on Groups, a folder appears in Now Playing for:• Each television series with more than one recorded episode;• Each auto-recording WishList TM search with a recorded program;• <strong>TiVo</strong> Suggestions (if you have auto-recording of <strong>TiVo</strong> Suggestions turned on).A note at the bottom of Now Playing tellsyou which sorting option you are usingand whether groups are on.A program may fit in any or all of these categories, so it may appear in more than onegroup, even though only one copy of the program is actually recorded. For example, sayyou have an auto-recording WishList search for an actor who also appears in a series, andyou have a Season Pass TM for that series. Each episode of the series that records willappear in two folders—one for the WishList and one for the Season Pass. If you delete theprogram from one folder, it also disappears from the other.A number in parentheses to the right of each folder shows how many programs it contains.If you delete a program from one folder, it will disappear from all folders.Keep Until...By default, programs you record are saved until space is needed for new recordings yourequest (this usually means for about two days). The oldest ones may be deleted to makeroom for new recordings you’ve scheduled. However, you always have the option to keepa program for as long as you want.®When you set up recordings, youcan also specify how long you wantto keep them by setting the “KeepTo change how long a program will be saved, highlight it and press SELECT. TheProgram Information screen appears. Select “Keep Until....” On the next screen you canchoose “Keep until I delete” or use the arrow buttons to highlight and change the datedisplayed. When you are done, press SELECT.Until...” Recording Option. See page 72.72
Playing a DVD or CDPlaying a DVD or CDYou must complete Guided Setup before you can play CDs, and play or record DVDs. Forinstructions, see “Completing Guided Setup” on page 23.If you finished “Tour Four: Playing a DVD or CD” on page 36, then you already know thebasics of playing a DVD or CD on your Recorder. This section provides a bit more detailand also describes some advanced playback features.Inserting a DiscTo put a disc into the Recorder, press the OPEN/CLOSE ( ) button on the Recorder’sfront panel to open the disc tray. Put in the disc with the label side facing up, using the disctray guide to align it, then press OPEN/CLOSE again to close the disc tray.5Press PLAY (P l a y) to play the disc.The DVD ScreenAfter you insert a disc, you can simply highlight the DVD option on <strong>TiVo</strong> Central ® andpress PLAY to play the disc. For more options, go to the DVD screen. To view the DVDscreen, highlight DVD on <strong>TiVo</strong> Central and press SELECT, or press the DVD button onthe remote. The DVD screen may give options such as Resume Playing, if you havealready been watching the DVD, or Go To options.Front Panel DisplayWhile playing a DVD, the Recorder’s front panel displays the title, chapter, and timeelapsed in the current title. While playing MP3 files on CD, or while playing an audio CD,the front panel displays the number and elapsed time of the current track.73
Chapter 5Watching Programs and Playing Discs®If you have turned on ParentalControls for DVDs, you may need toenter a password to watch some DVDs.(See page 89 for details.)The DVD Menu ScreenIf a DVD includes its own menu screen, you see this screen when you first play the DVD.To open or return to the DVD menu screen, press MENU or TOP MENU while the DVDis playing. (This may vary depending on how the DVD was created.)To navigate a menu screen. Although individual DVD titles may differ, when a menuscreen is displayed, use the UP/DOWN arrows to move around the options on the screenand use SELECT on the remote control to select options. Some DVDs also allow you touse the number buttons on the remote to select an option on a menu screen.DVD Information and Playback SettingsDVD Banner. Press the INFO button while a video DVD is playing to show the DVDbanner. You can hide the banner by pressing CLEAR or LEFT arrow. The DVD bannershows the time, the DVD title number and chapter number, and how far you are into thetitle and chapter. On the right side of the banner are selectable icons that let you changeDVD settings. Use the UP and DOWN arrows to highlight an icon, then press SELECT tochange one of the following settings:Go To. Select to go to a specific title, chapter, or time. (See page 75.)Repeat Setting. Select to choose a different repeat setting for the DVD. Youcan choose to repeat an individual chapter or a whole title.Camera Angle. Selectable if you are watching a DVD with multiple cameraangles. Select to change the camera angle.Audio Track and Subtitle. Select to change audio track or subtitle language.74Video Format. Displays the DVD’s format. The Recorder automatically detectsthe video format used on a particular DVD. If the picture looks jagged, selectthis icon to change the method used to detect the DVD’s format.
Playing a DVD or CDControl ButtonsThe remote’s buttons control DVDs and CDs much the same way they control live TV andrecorded programs. Some exceptions are listed below. For more on using the remote, seepage 66.ChanPageSKIP FORWARD: Press SKIP FORWARD (the CHAN/PAGE UP button) togo to the beginning of the next chapter on a DVD or the next track on a CD.SKIP BACK: Press SKIP BACK (the CHAN/PAGE DOWN button) once togo to the beginning of the current chapter on a DVD or track on a CD, press itagain to go to the previous chapter or track.Buttons that are temporarily disabled. Some control buttons may be disabled duringportions of DVD or CD. For example, control buttons are often disabled during theopening titles of a DVD. If you press a control button while it is disabled, a red circle witha slash ( ) appears on screen.Searching for a Title, Chapter, Track, or Location on a DiscCDs generally have multiple music tracks and DVDs are generally divided into one ormore titles. A DVD’s titles may be further subdivided into chapters. Your Recorder offersdifferent ways of accessing the information on a DVD or CD. You can• Search for titles or chapters on a DVD-Video.• Search for tracks on a CD.• Select the point in time to start playback.Searching Via Remote Control.®If the Recorder is playing an MP3music file that is larger than 10 MBand that was recorded with a variable bitrate (VBR), control buttons such as BACK,FORWARD, and INSTANT REPLAY will notwork. A special transparent version of thestatus bar (with no green segment) is alsoused for such MP3 files. Most MP3recordings of popular music will not bethis large.575
Chapter 5Watching Programs and Playing Discs• DVD. Press the number buttons while the disc is stopped and the Recorder goes to thattitle. Press the number buttons while the disc is playing and the Recorder goes to thatchapter of the current title.• CD. Press the number buttons while playing a disc and the Recorder goes to that track.This does not work if “shuffle” is on. (See page 77.)Changing the DVD Camera AngleSome DVDs feature scenes shot from two or more angles. When you play a scenerecorded from multiple camera angles, an angle icon ( 1 ) appears on the screen and inthe DVD Banner. The number in the icon tells you which of the available angles you arecurrently using.To change the camera angle:• Press the ANGLE button while a scene with multiple angles is playing, or• Press the INFO button to view the DVD banner. Use the DOWN arrow to highlight theangle icon, then press SELECT to change the angle.To turn the angle indicator on or off:Press the <strong>TiVo</strong> button to go to <strong>TiVo</strong> Central. Select Messages & Setup, then Settings, thenDVD, then “Angle Indicator.” Select “On” or “Off.”76
Playing a DVD or CDAudio CD Information and Playback SettingsThe Recorder can play audio CDs as well as MP3 and WMA music files. It can also readmusic playlists that are in the most common format, M3U.Browsing a Music Disc. Inserting a CD makes a “Play music” option available on theRecorder’s DVD menu. Highlight “Play music” and press SELECT to browse the disc’scontents. Press ENTER while browsing to change the order in which the contents display.Finding Information for Music. Press INFO while music is playing to see the musicbanner, which shows time and track information for the current disc. It disappearsautomatically after a few moment.The Recorder also shows a blue song info banner in the center of a black screen whilemusic is playing. For audio CDs, the song info banner shows the current track number andthe total number of tracks. If the files on a disc include tags with the song title, artist andalbum, the banner shows that information.If you do not press a button on the remote or the front panel, the song info banner willchange positions a few times every minute. Pressing CLEAR hides the song info bannerand the music banner.Changing the Play Order of Music. Press INFO to see the music banner, then pressENTER to see Music Play Options. Use the RIGHT and LEFT arrows to change them.• Shuffle. (On, Off) When Shuffle is on, music tracks play in random order. When it isoff (the default), they play in the order they are arranged on the CD or in the currentplaylist. Using SKIP FORWARD ( ) and SKIP BACK ( ) while Shuffle is onskips to the next or previous randomly selected track.• Repeat. (One, All, None) Set Repeat to “One” to repeat an individual track, or to “All”to repeat the whole CD. If Repeat is set to None, the full disc plays once, then stops.®audio CD.The Recorder does not produce<strong>TiVo</strong> sound effects when playing an775
Chapter 5Watching Programs and Playing DiscsPlaying a Photo CDYour HUMAX DVD Recorder lets you view digital photos in JPEG format from a CD.Browsing a Photo Disc. When you insert a photo CD, highlight “View photos” on theDVD screen and press SELECT to browse the contents of the disc. Photos and folders aredisplayed in a grid. Press ENTER while browsing to see the Photo Browsing Options:• Sort. This option specifies how the photos and folders are sorted in the grid display.You can choose to sort the photos alphabetically, by date taken, or by date modified.• Arrange by type. When this option is On, the Recorder displays all the folders at thetop of the list, and the photos beneath them. When this option is Off, the folders andphotos are sorted together. When you play a slide show, photos appear in the orderthey are arranged in the grid.Playing a slide show. When you insert a photo CD, there are a number of ways to start aslide show, beginning with the first photo in the first folder on the disc:• From <strong>TiVo</strong> Central, highlight the “CD: Disc inserted” option and press PLAY.• On the DVD screen, highlight “View photos” and press PLAY.• From the Photos grid, highlight a folder or photo and press PLAY.You can use many of the remote’s control buttons (PAUSE, PLAY, FORWARD, BACK)during a slide show. You can even use the INSTANT REPLAY button ( ) to jumpback one photo.To view photos at your own pace, highlight a single photo inside a folder and press PLAYto display it. It will stay on the screen until you press FORWARD to see the next photo inthe folder. Press BACK to see the previous photo.78
Playing a DVD or CDSlide Show Options. Highlight any photo and press SELECT to view details about thatphoto. Highlight “Play slide show,” then “Options,” and press SELECT.• Slide delay. This option sets the time each photo is displayed before going to the next.• Shuffle. This option displays the photos in the selected folder in random order.• Repeat. This option repeats the slide show after the last photo is displayed.• Include subfolders. Set this option to Yes, and the slide show will include photos infolders within the current folder. Set this option to No and the slide show displays onlyphotos in the current folder.Rotating a photo. If a photo appears incorrectly oriented on your TV, you can rotate it.Highlight any photo and press SELECT to view details about that photo. On the Photoscreen, select “Rotate 90° clockwise.” You may select this option more than once if thephoto needs additional rotation.5When viewing a single photo, you can also use the INSTANT REPLAY button (quickly rotate a photo 90° counter-clockwise.) to79
Chapter 5®Some discs recorded using adifferent DVD recorder, CD recorder,or personal computer may not be playablein this Recorder even though they weremade with software that is compatiblewith the Recorder. Some possible reasonsfor this include:• the type of disc used• damage, dirt or condensation on eitherthe disc or in the Recorder’s disc drive• other reasons related to specificformats; see the notes about individualformats in this sectionWatching Programs and Playing DiscsDisc CompatibilityThe Recorder can play standard DVDs, audio CDs, and MP3 music CDs. This sectiondescribes the Recorder’s compatibility with different kinds of discs and files.Playback Disc CompatibilitySize: The Recorder can playback 8 cm. (with the use of an adapter) and 12 cm. discs.Format. This Recorder was designed and engineered to playback discs created by productsbearing one or more of the logos shown at the left.CD-R/RW. The Recorder will play CD-R and CD-RW discs recorded in CD Audio formator recorded as CD-ROMs containing MP3 or WMA files, or digital photo files.DVD-R/RW. The Recorder will play DVD-R/RW discs that use DVD-Video format (VideoMode), and DVD-RW discs that use the Video Recording (VR) format.PC-Created Discs. If you record a disc on a personal computer, even if it is in one of thecompatible formats listed above, there is a small chance that settings of the software usedto create the disk might prevent the Recorder from playing it. If this happens, check withthe publisher of the software used to create the disc for more information.The Recorder might not play discs with very complex directory structures (for example,large numbers of folders within folders), or with very large numbers of music playlists.While the specific number of playlists and the level of directory complexity required tomake a disc unplayable depends on many factors, this should not be an issue for mostdiscs created on a PC.The Recorder can play discs created byproducts that bear any of these logos.80
Disc CompatibilityDVD Regions. DVDs and DVD players are manufactured for different regions of theworld and are marked with corresponding “region codes.” To play a DVD, the DVD andthe DVD player must have compatible region codes. Discs marked with the region codeALL will play in any DVD player.®This Recorder can play DVDs markedwith the region code “1” or “ALL.”A DVD’s case should be marked with a logo that indicates the region(s) in which the discis playable. This Recorder has a region code of “1,” which you can find on its back panel.Discs that do not have region code 1 or region code “ALL” will not play in this Recorder.Music and Other Audio FilesThe Recorder can play music and other audio files that are in MP3 or WMA format. It willattempt to play any file with an .MP3 or .WMA file name extension (upper or lowercase).Make sure the audio files on your discs are valid files and have one of those file nameextensions. A file that is not an MP3 (or WMA) but has an MP3 (or WMA) file nameextension may cause noise or unexpected results when you try to play it. Other kinds ofcontent may cause a disc not to play, or to create noise, or distort the output.The device used to create discs with MP3 or WMA files on them must be ISO 9660 Level1 or 2 compliant, and the CDs must be created using physical format Mode1, or Mode2XA Form1. The Recorder is compatible with both Romeo and Joliet file systems.Bit Rate. The Recorder is designed to play MP3 files or WMA encoded at any bit rate.Audio encoded at 128Kbps should sound close to regular CD quality. The quality of thesound may become noticeably worse at lower bit rates.®The “file name extension” is the lastfour characters of a file name. AllMP3 files should end with the file nameextension “.MP3”, as in “ASong.MP3”.Windows usually hides file nameextensions; to make them visible, see theHelp utility for your Windows operatingsystem.581
Chapter 5Watching Programs and Playing DiscsSave to VCRIf you have a VCR, you can save a program from Now Playing to a videotape. Saving to avideo tape happens in real time. For example, if a program is two hours long, it will taketwo hours to save it. You will not be able to watch live TV or recordings while saving.Most of the buttons on your remote that control live TV work as usual during Save toVCR—you can fast forward through the boring parts! The VCR will record the videoexactly as it appears, including the status bar, channel banner, and any icons on the screen.82Using Save to VCR:1. Connect a Composite A/V cable from the Recorder’s A/V Output jacks to the A/VInput jacks your VCR. Your VCR’s A/V Output should already be connected to yourTV or A/V receiver (so you can watch video tapes). Make sure your TV orA/V receiver is set to display video from your VCR.2. Set the VCR to record input from your Recorder (see your VCR’s instructions for howto set its input), and insert a videotape.3. Go to Now Playing, highlight the show you want to save, then press SELECT.4. Select Save to DVD or VCR, then Save to VCR.5. Select “Start saving from the beginning.”6. A title screen appears for ten seconds. When you see it, press your VCR’s recordbutton. When the program is over, press stop on your VCR.You can cancel saving by pressing the LIVE TV or <strong>TiVo</strong> button on yourremote. A videotape icon appears as a warning. Press the same button againand a confirmation screen appears giving you the option to resume saving at alater time, or cancel saving to VCR. If you choose to cancel saving, be sure to press stopon your VCR as well.
CHAPTER 6Messages & SetupMessages 84Settings 85Remote Control & Recorder Front 96Phone & Network Setup 102System Information 107Troubleshooting 108Restart or Reset System 109Standby 110
Chapter 6Messages & SetupMessagesSelect Messages to read any messages from the <strong>TiVo</strong> service or internal alerts from yourRecorder. When you receive a new message, <strong>TiVo</strong> Central ® will show the option ReadNew Messages & Setup.To read the messages:1. Go to <strong>TiVo</strong> Central, then select Read New Messages & Setup.2. Select Read New Messages. A list of all of your messages appears. Messages you havenot yet read are marked with an envelope icon:3. Use the UP/DOWN arrows to highlight a message, then press SELECT to read it.CHAN UP/DOWN lets you page through a message if it doesn’t fit on the screen.84<strong>TiVo</strong> Central Messages & Setup Messages
SettingsSettingsWith the options in Settings, you can make the Recorder work more to your liking. Usethese screens to set your preferences for recording quality, Parental Controls, and more.Audio SettingsYour Recorder can send an analog or digital audio signal to your TV or A/V receiver. Toenjoy multichannel surround sound, you will need to connect the Recorder to your A/Vreceiver using an Optical Digital Audio cable (not supplied). You should choose the audiosettings below to match the capabilities of your A/V receiver.96kHz PCM Output. PCM (Pulse Code Modulation) is the most common system ofencoding digital audio. Sound can be turned into digital audio data at different samplingrates; the higher the rate, the better the quality. If your amplifier/receiver is compatiblewith 96kHz sampling rate audio, then choose “96kHz.” Otherwise, leave it set to “96kHzto 48kHz” (the default). PCM soundtracks are mono or stereo only.Audio DRC. When watching Dolby Digital DVDs at low volume, it’s easy to lose lowlevel sounds completely, including some of the dialog. Turning on Audio DRC (DynamicRange Control) can help by making quiet sounds louder and loud sounds quieter. AudioDRC is not effective if Dolby Digital Output is set to “Dolby Digital” (see below). In thatcase, you must use your amplifier/receiver to adjust the dynamic range.Dolby Digital Output. Dolby Digital audio soundtracks can be mono, stereo or contain upto 5.1 channels (surround sound). If your Recorder is connected to an A/V receiver thathas a built-in Dolby Digital decoder, choose “Dolby Digital” (the default). Otherwise,choose “Dolby Digital to PCM.” If you choose “Dolby Digital,” you won’t hear <strong>TiVo</strong>sound effects when playing Dolby Digital content. If you choose “Dolby Digital to PCM,”you won’t have 5.1 surround sound capabilities.<strong>TiVo</strong> Central Messages & Setup Settings Audio856
Chapter 6Messages & SetupDTS Digital Output for DVD. DTS (Digital Theater Systems) is another 5.1 channelsurround format sometimes used on DVD-Video discs. If your Recorder is connected toan A/V receiver that has a built-in DTS decoder, choose “On.” Otherwise, choose “Off”(the default). If this setting is off, you will not hear audio when playing a DVD with DTS.Sound Effects Volume. You can change the volume or turn off the Recorder’s soundeffects (the tones played when you press buttons on the remote control). The defaultsetting is Medium.Television Audio. This option lets you select the Recorder’s default audio output option.You can choose to have the default audio in stereo or mono, or have a secondary audioprogram (SAP) recorded when one is available.Secondary audio programs are generally audio broadcasts in a language other thanEnglish. If you choose to record SAP and there is a secondary audio program, it will berecorded. The SAP may be in Spanish, French, Japanese or some other language.Channel SettingsCable Lineup. (You won’t see the “Cable Lineup” option if your program source is notcable.) Select this if you have changed your cable subscription, or if your channel lineuplooks wrong in “Channels You Receive.” On the next screen you’ll be able to chooseamong available cable channel lineups based on your ZIP code.Channel Banner. Normally, when you change channels, the channel banner is displayedfor a few seconds. Use this setting to control how the channel banner is displayed. If youwant the channel banner to disappear quickly, select “Clear banner quickly.”86<strong>TiVo</strong> Central Messages & Setup Settings Channels
SettingsChannel Changing. Use this setting to make changes to the way your Recorder changeschannels on your cable or satellite box. You should do this if:• you change the type of control cable (IR or Serial) used to change channels on yourcable or satellite box (see “Choosing a Channel Changing Cable” on page 5),• your cable or satellite box is replaced by a new make or model,• you are having trouble with channel changing (see page 136 for troubleshooting.)Channel Lists. The Recorder uses channel lists to determine which channels to display inthe guide, and which channels are available for recording programs. Features such asSearch by Title, Search Using a WishList, and Browse By Channel search for programsonly on channels you select in the Channels You Receive list.Channels You Receive. The Channels You Receive list starts with all the channelsincluded in your service package. You can customize it to include only channels youactually subscribe to and to reflect your viewing preferences. For example, if younever watch a channel and don’t plan to set up any recordings on it, or search forprograms on it, you can de-select it here.Favorite Channels. The Favorite Channels list is for channels you watch frequently.Include only a few channels in this list, so that you can quickly look at what’s comingup on them using the guide. See “Customizing the Guide” on page 47.To set up a custom channel list:1. Select the Channels You Receive or Favorite Channels list. A check mark appears tothe left of channels that are part of the selected list.2. To remove or add a channel, highlight it and press SELECT. You can speed throughthe list with the CHAN UP/DOWN. To go directly to a specific channel, use thenumber buttons, then press ENTER. Your changes are saved automatically.<strong>TiVo</strong> Central Messages & Setup Settings Channels®In the event that there is a changeto your cable or satellitesubscription package, a <strong>TiVo</strong> messagewill let you know what the change is. Youmust then use Channel Settings to ensurethat the Channels You Receive list reflectsthe change to your lineup.876
Chapter 6Messages & SetupDVD SettingsThere are two selections available in DVD Settings:Angle Indicator. Some DVDs feature scenes shot from two or more angles. During thosescenes, an angle indicator appears on the screen ( 1 ). If you do not want to see theangle indicator, select “Off.”Language & Subtitles. You can select the preferred audio and DVD menu languages(default is English). If that language is available on a DVD, the Recorder will use itinstead of any others. You can also change the subtitle settings:• Subtitle language. (Default is English.)• Subtitle display. On or Off. (Default is Off.)88<strong>TiVo</strong> Central Messages & Setup Settings DVD
SettingsParental ControlsParental Controls allow you to set limits on movie and television ratings, to lock specificchannels, and to prevent viewing of recorded programs that violate Parental Controls. Thepadlock icon shows the current state of Parental Controls:®The large version of the channelbanner has a shortcut to ParentalControls; see page 68 for details.Off. No password or controls set. Padlock appears unlocked and dark.On. Password and controls set. Padlock appears locked and bright.Temporarily off. Controls set, but password was entered to temporarily turn off.Padlock appears unlocked and bright.While Parental Controls are on, you can watch a locked program or channel by pressingSELECT, then entering the password. This temporarily turns off Parental Controls.To turn on Parental Controls and define a password ( ): Select “Turn on ParentalControls.” Use the number buttons on the remote control to enter a four-digit password,then enter the same password again for confirmation.6To turn off Parental Controls ( ): Select “Turn off Parental Controls,” enter thepassword, and press SELECT. When Parental Controls are turned off, the password isdeleted and anyone can view any programs or watch any channels.To temporarily turn off Parental Controls ( ): Just enter the password to watch aprogram or channel. Or, select “Temporarily turn off Parental Controls” on the ParentalControls screen. When Parental Controls are temporarily turned off, any program orchannel can be viewed, but the password is still required to change Parental Controlssettings. To re-enable Parental Controls, select “Re-enable Parental Controls.” Or, you canput the Recorder into Standby mode, then take it back out. To do this, select Messages &Setup, then Standby. Then press the <strong>TiVo</strong> or LIVE TV button.®When you turn Parental Controls off,your password is deleted. You mayprefer to temporarily turn off ParentalControls, so that another person in yourhousehold does not choose a newpassword.<strong>TiVo</strong> Central Messages & Setup Settings Parental Controls89
Chapter 6Messages & SetupTo change the Password ( ): To change the password for Parental Controls, ParentalControls must be on. Select “Change Password” on the Parental Controls screen. Enter anew password, then re-enter the new password to confirm.Auto Re-lock Option. When Parental Controls are temporarily turned off, they re-lockautomatically after four hours if you don’t use your remote. Parental Controls won’t relockin the middle of a show. By default, the Auto Re-lock option is on. To turn off AutoRe-lock, go to Messages & Setup, then Settings, then Parental Controls. Press the DOWNarrow to highlight “Auto Re-lock,” then press SELECT. Enter your password, thenhighlight and select “Auto Re-lock off.”Rating Settings for TV and Movies ( ). Movies originally meant for release to theatershave a different rating system from programs made for TV. You can use Parental Controlsto set limits for both rating systems (see page 92). You can also set limits for specific typesof TV content that may be objectionable—such as sexual content or violence.To set Rating Limits for TV and Movies: From Parental Controls, select “RatingSettings.” Enter the password and select the kind of limit you want to change.The next screen contains a box listing all potential ratings. Ratings shaded in green are notlocked; those in red are locked. Use the UP and DOWN arrows to move the red shadingand adjust which ratings are locked. Your changes are saved automatically. When you aredone, press RIGHT or LEFT arrow to return to Parental Controls.To set Rating Limits for Specific TV Content: From Parental Controls, select “RatingSettings,” then enter the password and press SELECT. Select “Block by TV Content.” Alist of categories appears on the next screen. Select a category (for example, V-Violence).A box containing all the possible ratings appears. Ratings in green are not locked; ratingsin red are locked. (Ratings in gray do not apply to the category. For example, a TV-Yprogram would not have V-Violence content so there is nothing to block.)90<strong>TiVo</strong> Central Messages & Setup Settings Parental Controls
SettingsUse the UP and DOWN arrows to adjust which ratings are locked or unlocked. Thedisplay to the right of the box will change to tell you exactly what ratings level you areallowing. Your changes are saved automatically. To return to the Parental Controls screen,press SELECT or RIGHT arrow.Broadcasters are not required to provide ratings for specific types of content. If you wantto be sure to block programs that do not include ratings for specific types of content, youwill have to use age-based ratings to block content. See “Rating Limits for TV andMovies,” above.Movies and TV Programs with No Rating Information. If a movie has no ratinginformation, it is treated as if it has the highest movie rating, ‘X.’ If you require apassword for X-rated movies, then movies without rating information also require apassword. If a television program has no rating information, it is treated as if it has thelowest TV rating, ‘TV-Y.” A password is required to view it only if you set ParentalControls to require a password for programs rated ‘TV-Y’.Channel Lock for Live TV ( ). You can lock individual channels so that a password isrequired to view any program on those channels. To lock or unlock channels:1. From the Parental Controls screen, select “Channel Lock,” and enter the password.2. A channel list appears with a padlock icon to the left of any locked channels. Highlighta channel and press SELECT to add or remove a padlock icon. Use CHAN UP/DOWNto move through the list quickly. You can highlight a specific channel by entering itschannel number with the number buttons on the remote.3. When you are done, press RIGHT or LEFT to return to Parental Controls. Yourchanges are saved automatically.red = lockedgreen = not lockedgray = does not apply to the category6<strong>TiVo</strong> Central Messages & Setup Settings Parental Controls91
Chapter 6Messages & SetupMotion Picture Association of America ratings for moviesG: General Audiences. Most parents would find this material suitablefor all ages.PG: Parental Guidance Suggested. Parents may find portions of thismaterial unsuitable for younger children.PG-13: Parents Strongly Cautioned. This material contains portionsmany parents would find unsuitable for children under 13 years of age.R: Restricted. This material is specifically designed to be viewed byadults and therefore may be unsuitable for children under 17.NC-17: Adult Content. This material contains intense, disturbing, orgraphically portrayed themes or content that are not suitable forviewing by children under 17.AO: Explicit Sexual Content. This material contains explicit sexualcontent and is intended to be viewed by adults ONLY.Ratings for television movies and programs (including content ratings)TV-Y. All children. This program is designed to be appropriate for allchildren. Whether animated or live action, the themes and elements inthis program are specifically designed for a very young audience,including children from ages 2-6. This program is not expected tofrighten younger children.TV-Y7. Directed to older children. This program is designed forchildren age 7 and above. Themes and elements in this program mayinclude mild fantasy or comedic violence, or may frighten childrenunder the age of 7. Programs where fantasy violence that may be moreintense or more combative than other programs in the TV-Y7 categoryare designated TV-Y7-FV.TV-G. General audience. Most parents would find this programappropriate for all ages. Although this rating does not signify aprogram designed specifically for children, most parents may letyounger children watch this program unattended. It contains little orno violence, sexual dialogue, or situations; and no strong language.TV-PG. Parental guidance suggested. This program containsmaterial that parents may find unsuitable for younger children. Manyparents may want to watch it with their younger children. The themeitself may call for parental guidance and/or the program contains oneor more of the following: moderate violence (V), some sexualsituations (S), infrequent coarse language (L), or some suggestivedialogue (D).TV-14. Parents strongly cautioned. This program contains somematerial that parents would find unsuitable for children under 14 yearsof age. Parents are strongly urged to exercise greater care inmonitoring this program and are cautioned against letting childrenunder the age of 14 watch unattended. This program contains one ormore of the following: intense violence (V), intense sexual situations(S), strong coarse language (L), or intensely suggestive dialogue (D).TV-MA. Mature audiences only. This program is specificallydesigned to be viewed by adults and therefore may be unsuitable forchildren under 17. This program contains one or more of thefollowing: graphic violence (V), explicit sexual activity (S), or crude,indecent language (L).92<strong>TiVo</strong> Central Messages & Setup Settings Parental Controls
SettingsRecording SettingsRecording Quality. You can increase the available recording time on your Recorder byselecting a recording quality appropriate for the type of program you are recording. TheRecorder offers four levels of recording quality; set your default on this screen. The choiceyou make here will be used for all recordings unless you change it, using RecordingOptions, when you schedule a recording (for details, see page 43). Two different recordingqualities cannot be used on one recording.The recording quality choices available are Best, High, Medium, and Basic. The factorydefault is High. Basic quality takes up about one-third the space of Best quality, so it givesyou about three times the amount of space for programs. You may wish to experimentwith different levels and then reset your default. Some quality settings are better suited forcertain kinds of programs, but you should choose what looks best to you.Recording QualityBasicMediumHighBestSuggested useNewsDaytime Talk Shows, AnimationDramas, FilmsSports, Action MoviesThe Recorder automatically uses Best Quality when displaying live TV. However, when itrecords a program, the Recorder uses the Video Recording Quality you specified for thatprogram. If that quality is not Best, you may notice the difference when recording starts.®One hour of Best Quality equalsabout 3 hours of Basic Quality, 2hours of Medium Quality, and 1.5 hours ofHigh Quality.6<strong>TiVo</strong> Central Messages & Setup Settings Recording93
Chapter 6Messages & Setup®If you change video sources, forexample, by changing from cable tosatellite service, you should repeatGuided Setup (go to Messages & Setup,then Restart or Reset System, thenRepeat Guided Setup).<strong>TiVo</strong> Suggestions. Use this screen to turn automatic recording of <strong>TiVo</strong> Suggestions on oroff. When automatic recording is on (the default), <strong>TiVo</strong> Suggestions may be recorded ontoavailable space. Programs you have recorded or scheduled to record will never be deletedto make room for suggestions. Also, if space is needed to save programs you havescheduled to record, suggestions are the first things to be deleted. (For more informationon <strong>TiVo</strong> Suggestions, see page 38.)Video SettingsConnection to Recorder. If you change the cable you use to connect video from yourcable or satellite box to the Recorder, use this screen to inform the Recorder of the change.The next screen you see depends on whether you have one or two video sources.Progressive Output. This setting allows you to choose the type of video signal output bythe Recorder. Interlaced scan video is the standard method of displaying a picture on yourTV. All TVs are compatible with Interlaced scan, and this is the default setting.Progressive scan video is a method of displaying a more stable, flicker-free picture onyour TV. If your TV is compatible with progressive scan and it is connected to yourRecorder with a Component Video cable (not supplied; see page 4), choose Progressive.3D Noise Reduction. (Appears if you set your video output to Progressive.) If your TV iscompatible with Progressive, you can enable, disable, or change digital video noisereduction settings. To reduce the amount of noise in the video, choose “On.”RF Video. If you use a Coaxial RF cable as the video input to your Recorder, this option isavailable. You can use the RF Video screen to smooth the video, which will decrease thestatic and improve the picture on these channels. However, it will cause images on allchannels carried to your Recorder on a Coaxial RF cable to lose some sharpness.94<strong>TiVo</strong> Central Messages & Setup Settings Video
SettingsTV Aspect Ratio. You can select the image proportions for the type of TV you have: 16:9(wide screen) or 4:3 (standard).Wide Screen Format. If you set the TV Aspect Ratio to 4:3, use this setting to determinehow you want to display wide screen content. Choose “Letterbox” to shrink the widescreen picture to fit on the TV screen with black bars at the top and bottom. Choose “Pan& Scan” to chop off the sides of the picture to fit on the screen without shrinking.6<strong>TiVo</strong> Central Messages & Setup Settings Video95
Chapter 6®TV POWERTV INPUTMUTEVOLUMET VT VIn p utD V DT o pP o w erVolM e n uSelectM u teRecordPlaySlowStopLive1 2 34 5 67 8 9Clear0T VG u id eChanPageInfoA n gleM en uE nterThe TV INPUT button can controlthe video signal—or “input”—yourTV displays. Changing the input willRemote Control & Recorder FrontMessages & SetupTo change the settings of the lights on the Recorder’s front panel, see page 101.For information about the individual buttons on the <strong>TiVo</strong> remote control, please refer tothe Remote Control Tips on the inside front cover of this guide. Before programming theremote control, you must first insert the batteries and complete Guided Setup.The <strong>TiVo</strong> remote will already work with your Recorder. You can also program somebuttons on the remote to control your TV and/or A/V receiver (your stereo system).• Control TV power, volume, mute, and input settings. Complete the instructionsstarting on on page 97 using the first column in each of the tables (TV power, volume,and mute). Then repeat the instructions using the second column (TV input).• Control TV and A/V receiver power & A/V receiver volume and mute. Complete theinstructions starting on on page 97 using the first column in each of the tables. Thenrepeat the instructions using the third column (A/V receiver power, volume, andmute). In this case, the TV POWER button turns on/off the TV and the A/V receiver atthe same time. The VOL and MUTE buttons control only the A/V receiver.• Control TV power and A/V receiver volume and mute. Complete the instructionsstarting on on page 97 using the first column in each of the tables. Then repeat theinstructions using the fourth column (A/V receiver volume and mute). The VOL andMUTE buttons control only the A/V receiver.change the source of the video displayedon your TV. TV inputs can include videofrom a VCR, DVD player, DVR, or a videocamera.96<strong>TiVo</strong> Central Messages & Setup Settings Remote Control & Recorder Front
Remote Control & Recorder FrontProgramming the TV POWER, VOLUME, and TV INPUT Buttons1. Go to the Remote Control screen. Press the <strong>TiVo</strong> button to go to <strong>TiVo</strong> Central ® .Select Messages & Setup, then Settings, then Remote Control & Recorder FrontLights. Choose which device and/or functions you want to control:To Control:TV power, volume, andmuteTV inputA/V receiver power,volume, and muteA/V receiver volumeand mute onlyChoose:Remote Control-TV(power, volume, mute)Remote Control-TV(TV Input)Remote Control-A/V Stereo SystemRemote Control-A/V Stereo System2. Select the brand of your device. Using the UP/DOWN arrows, highlight the brand ofthe device you wish to control, then press SELECT. (If you have been using auniversal TV remote control, select your TV or A/V receiver’s brand, not the brand ofthe universal remote.) Next you’ll see a screen with four-digit codes.63. Prepare the remote control. Point the remote away from your Recorder and cover thefront end with your hand. Refer to the table below and determine which two buttons topress to prepare the remote. Press and hold the buttons simultaneously for about 5seconds (until the red light at the end of the remote control lights up and stays on whenyou release the buttons).To Control:TV power, volume,and muteTV inputA/V receiver power,volume, and muteA/V receiver volumeand mute onlyPress the:TV POWER and<strong>TiVo</strong> buttonsTV INPUT and<strong>TiVo</strong> buttonsTV POWER and<strong>TiVo</strong> buttonsMUTE and<strong>TiVo</strong> buttons<strong>TiVo</strong> Central Messages & Setup Settings Remote Control & Recorder Front97
Chapter 6Messages & Setup4. Enter a code. Use the number buttons on the remote control to enter a four-digit code(starting with the first code in the list on the screen). After you press the fourth digit ofthe code, the red light on the end of the remote control should flash. If it doesn’t, trythe next code.5. Test the code. Point the remote towards the TV and test the button:To Test the:TV power, volume,and muteTV inputA/V receiver power,volume, and muteA/V receiver volumeand mute onlyPress the:TV POWER button TV INPUT button TV POWER button MUTE buttonIf pressing the button works (e.g., turns the TV or A/V receiver off, or changes the TVinput), the code is correct. If it does not work, repeat steps 3 and 4 using the next codeon the list. If none of the codes works, perform a code search (see below).Performing a Code SearchIf none of the codes listed allows you to control your device, a code search may detect thecorrect code. Performing a code search can take up to 20 minutes.1. Prepare the remote control. Point the remote away from your Recorder and cover thefront end with your hand.Refer to the table below and determine which two buttons to press to prepare theremote. Press and hold the buttons simultaneously for about 5 seconds (until the redlight at the end of the remote lights up and stays lit when you release the buttons).To Control:TV power, volume,and muteTV inputA/V receiver power,volume, and muteA/V receiver volumeand mute onlyPress the:TV POWER and<strong>TiVo</strong> buttonsTV INPUT and<strong>TiVo</strong> buttonsTV POWER and<strong>TiVo</strong> buttonsMUTE and<strong>TiVo</strong> buttons98<strong>TiVo</strong> Central Messages & Setup Settings Remote Control & Recorder Front
Remote Control & Recorder Front2. Enter the search code. Refer to the table below and use the number keys on yourremote control to enter the appropriate code.To Test:Enter:TV power, volume,and muteTV inputA/V receiver power,volume, and mute0999 0999 1999 1999A/V receiver volumeand mute onlyAfter you press the fourth digit of the code, the red light on the end of the remotecontrol will flash twice, then remain on.3. Test the remote control. Point the remote control at the TV or A/V receiver. PressCHAN UP to test the first code. The test is successful if the TV or A/V receiverresponds (by powering off, changing input, or muting, depending on the function youare trying to program). If there is no response, wait two or three seconds, then pressCHAN UP again. Continue doing this until the TV or A/V receiver responds.When the TV or A/V receiver does respond, press ENTER to select the current code.The red light at the end of the remote control will flash three times to indicate that theremote control is properly coded to control your device.When the red light on the end of the remote control turns off, you have reached the endof the available codes.Unfortunately, due to the great variety of TVs and A/V receivers, some makes andmodels are not compatible with your Recorder’s remote control. If you reach the endof the available codes without finding a code that works with your device, you willneed to use your TV or A/V receiver’s remote to turn it on and off, and control thevolume.6<strong>TiVo</strong> Central Messages & Setup Settings Remote Control & Recorder Front99
Chapter 6Messages & Setup®By default, all <strong>TiVo</strong> DVRs andremote controls (inluding yourHUMAX DVD Recorder) have a RemoteAddress of “0” (zero). A remote controlwith a Remote Address of “0” will controlany <strong>TiVo</strong> DVR, even one with an assignedcode. A DVR or Recorder set to “0” willrespond to any remote control, even onewith an assigned code. This prevents youfrom becoming accidentally “locked out”of controlling your <strong>TiVo</strong> DVRs.Remote AddressManaging Multiple Recorders and RemotesIf you have more than one Recorder in your home, or if you have another model of <strong>TiVo</strong>DVR in addition to your HUMAX DVD Recorder, you can match a particular Recorderwith a particular remote so that each Recorder will only respond to its own remote. Youcan do this by setting the Remote Address.1. If both Recorders are in the same room, start by covering the IR sensor window on oneRecorder using a cloth or thick piece of paper. This will prevent setting the RemoteAddress on both Recorders simultaneously.2. Go to the System Information screen. First, press the <strong>TiVo</strong> button, then highlight andselect Messages & Setup, then System Information. On the System Informationscreen, scroll down until you see Remote Address.3. Hold down the PAUSE and <strong>TiVo</strong> buttons simultaneously for about five seconds (untilthe red light at the end of the remote control lights up and stays on when you releasethe buttons).4. Use the number keys to enter any digit from 1 to 9. Press the number you have chosenseveral times until you see the Remote Address change on the screen.5. Press the <strong>TiVo</strong> button to go to <strong>TiVo</strong> Central.6. Repeat these steps using your second Recorder and remote control. Be sure to choose adifferent number (in Step 4) for the remote address of the second Recorder.7. Once you complete this process, each remote will control only the Recorder to which itis assigned.100<strong>TiVo</strong> Central Messages & Setup Settings Remote Control & Recorder Front
Remote Control & Recorder FrontResetting the Programmable ButtonsIf you make a mistake, or are having difficulty, you can reset the programmable buttons(TV POWER, VOLUME, MUTE, TV INPUT, and the DVR SWITCH). All the remote'sbuttons will return to the unprogrammed state of a new remote.1. Prepare the remote control. Point the remote away from your Recorder and cover thefront end with your hand.Press and hold the TV POWER button and <strong>TiVo</strong> button simultaneously until the redlight at the end of the remote control comes on, remains steady, then stays on whenyou release the buttons.2. Press THUMBS DOWN three times, then press ENTER. (To cancel, press CLEARbefore you press ENTER.)Front Panel LightsYou can change the settings of the lights on the Recorder’s front panel.Recorder Front - Clock Light. You don’t have to set the clock on the front of theRecorder—the <strong>TiVo</strong> service sets it for you. (No more blinking “12:00”!). This setting letsyou dim or turn off the clock.Recorder Front - LED Lights. The Recorder has LED (light emitting diode) lights on itsfront panel to indicate when it is receiving power and when it is recording a program. Youcan choose to turn off these lights.Even if you choose to turn off the front panel lights, one of the LEDs on the front panelwill flash briefly when a button on the remote is pressed. This indicates that the Recorderis receiving a signal from the remote.6<strong>TiVo</strong> Central Messages & Setup Settings Remote Control & Recorder Front101
Chapter 6®Your Recorder should NOT be usedwith a digital PBX phone system.Doing so may permanently damage yourRecorder’s modem and will void yourwarranty. See Chapter 9 for warrantyinformation.Phone & Network SetupMessages & SetupThe Recorder makes regular connections to the <strong>TiVo</strong> service to get updates to the <strong>TiVo</strong>service, program information for the program guide, Search by Title, WishList TMsearches, and updates to Showcases and <strong>TiVo</strong>lution ® Magazine. The connection usuallylasts less than five minutes. You may receive service updates to your Recorder from timeto time. In such cases, it may last longer, but this happens rarely (a few times a year).A phone connection is required for Guided Setup, but after you complete Guided Setup,you’ll be able to connect your Recorder to a home network and use a shared Internetconnection instead of a phone line to make connections to the <strong>TiVo</strong> service.On the Phone & Network Setup screen, you can see details, including the time of the lastsuccessful connection to the <strong>TiVo</strong> service and last connection attempt, as well as the statusof the last connection.The Phone & Network Setup screen has different selections depending on whether youhave connected a network adapter to your Recorder. If you haven’t connected a networkadapter, you will see these selections:• Edit phone settings. This selection takes you to the Phone Dialing Options screen.Selections on this screen are explained in detail on page 104.• Test phone connection. When you select this, a test connection to the <strong>TiVo</strong> servicewill start automatically. You may wish to use this option for troubleshooting or otherunusual circumstances. Test connections usually only take a couple of minutes. Whenthe connection has finished, press SELECT to continue.102<strong>TiVo</strong> Central Messages & Setup Settings Phone & Network
Phone & Network Setup• Connect to the <strong>TiVo</strong> service now. Normally, you do not need to connect to the <strong>TiVo</strong>service manually. However, for troubleshooting or other unusual circumstances, youmay wish to use this option. After you start the connection, the status indicator reads“Starting Up” and will change as it goes through several stages. You can watch liveTV, set up recordings, and search for programs while the connection is in progress.• Troubleshooting. This selection takes you to the Troubleshooting screen, where youwill find Phone Troubleshooting and Network Troubleshooting steps among othertroubleshooting selections.• Learn about connecting to a home network. Before you connect a network adapterto your Recorder, the Phone & Network Setup screen will display this selection with ayellow star. See Chapter 7 for more information about connecting your Recorder to ahome network.After you connect a network adapter to your Recorder, you will no longer see “Learnabout connecting to a home network.” You will have two new selections available:• Change connection type. This allows you to change how the Recorder connects tothe <strong>TiVo</strong> service, by phone or using your home network’s shared Internet connection.• Edit phone or network settings. The Phone & Network Settings screen has selectionsfor Phone Dialing Options (see below for details), TCP/IP Settings, and WirelessSettings. See Chapter 7 for more information about TCP/IP Settings and WirelessSettings.6<strong>TiVo</strong> Central Messages & Setup Settings Phone & Network103
Chapter 6Messages & Setup®In some areas, local and longdistance toll charges may apply.You are responsible for any telephonecharges.Phone Dialing OptionsChange Dialing Options. You can change the following settings (if you make a mistakewhile entering a change, use the BACK button to backspace):Set Dial-In Number. Use this to change the number the Recorder uses to make testcalls and daily calls. To change it:1. Select “Set Dial-In Number.” The Area Code screen appears.2. Use the number keypad on the remote to set the area code, then press SELECT. Ifyou change the area code, or if the Recorder has not connected in the last twentyfourhours, the Update Numbers screen appears and the Recorder calls the <strong>TiVo</strong>service to retrieve a list of local dial-in numbers. After the phone call, pressSELECT. The Dial-In Number screen appears.3. Use the UP/DOWN arrow to choose one of the listed phone numbers. The Recorderwill use this number to connect to the <strong>TiVo</strong> service. Then press SELECT.If your area code has no access numbers, press LEFT arrow to return to the AreaCode screen and try a nearby area code.4. The Dialing Format screen appears after you have chosen a dial-in number. Youshould use this screen to tell the Recorder which dialing format to use. For example:should the dial-in number be preceded by your area code and should a “1” precedethe area code? In some areas, even local numbers must be dialed using the areacode. Press SELECT to return to the Phone Dialing Options screen.To test your new dial-in number, select “Test Phone Connection Now.” The TestPhone Connection screen appears and a test phone call begins. When the call104<strong>TiVo</strong> Central Messages & Setup Settings Phone & Network
Phone & Network Setupcompletes, you should see the message “Test Succeeded!” Press SELECT to returnto Phone Dialing Options.Set Dial Prefix. Use this option if you normally dial a prefix before making a phonecall (for example, if you need to dial “9” to get an outside line). Use the number keyson the remote control to enter the prefix. Press the PAUSE button after you haveentered the prefix. This will insert a comma, which will create a two second pauseafter the prefix is dialed.Set Call Waiting Prefix. If you have call waiting, you may choose to disable it whilethe Recorder is making a call, so that the Recorder’s phone call is not interrupted. Ifyou do not disable it, the Recorder may drop its call and allow the incoming call to ringthrough, depending on your phone system. The Recorder will then try its call againlater. The most common code that phone companies use to disable call waiting is *70(check with your phone company to find out how to disable call waiting in your area).Press CLEAR to enter a star (*). Press the PAUSE button after you have entered theprefix to insert a comma, which creates a two second pause after the prefix is dialed.Set Tone/Pulse. If your phone system uses pulse dialing, rather than tone dialing, youcan change the setting to pulse here. (Today, most phone systems are tone.)Set “Phone Avail.” Detection. When Set ‘Phone Avail.’ Detection is on, the Recordercan determine whether the phone line is in use by detecting voltage on the line. Thisallows it to avoid disrupting a call in progress (such as another modem call).This setting is off by default. With ‘Phone Avail.’ Detection turned off, if you are onthe phone when the Recorder tries to call, you may hear a click on the line. If you haveanother modem call in progress (on your computer or other device), that call may be6<strong>TiVo</strong> Central Messages & Setup Settings Phone & Network105
Chapter 6Messages & Setup®With Dial Tone Detection and‘Phone Avail.’ Detection both turnedoff, if you happen to be talking on thephone when the Recorder tries to call youwill hear the modem dial and try toconnect to the <strong>TiVo</strong> service.disrupted if the Recorder attempts to call the <strong>TiVo</strong> service. If you have a standard dialtone, and ‘Phone Avail.’ Detection is off, turn on Dial Tone Detection (below).If you are experiencing “Failed, Line unavailable” errors, or if the Recorder is notmaking daily calls, you may have a low-voltage phone system that the Recordercannot detect. In this case, it’s best to have ‘Phone Avail.’ Detection off.Set Dial Tone Detection. This setting is on by default. If you leave it on, the Recorderwill check for a dial tone before it starts dialing. However, if you have a non-standarddial tone, or a stuttering dial tone (as some voice messaging systems have), theRecorder will be unable to detect the dial tone and will not make its call.Restore previous options. The Recorder must make a successful test phone callbefore it will accept changes to Phone Dialing Options. If you want to restore yourprevious dialing options and continue past this screen without making a test phonecall, select “Restore previous options.”106<strong>TiVo</strong> Central Messages & Setup Settings Phone & Network
System InformationSystem InformationThe System Information screen provides general information about your Recorder,including its service number, manufacturer, model number, software version used, storagecapacity, and information about recent connections to the <strong>TiVo</strong> ® service. You’ll needsome of this information if you contact Customer Support. You can use the CHAN UP/DOWN button to see the rest of the information on the screen.6<strong>TiVo</strong> Central Messages & Setup System Information107
Chapter 6Messages & SetupTroubleshootingIf you’re having trouble, or have any questions about your Recorder, consult thetroubleshooting steps available in Chapter 8 of this guide.The Troubleshooting screens provide tips that may help you troubleshoot variousproblems. Use CHAN UP/DOWN to see all of the text on the screens.Parental Controls Troubleshooting provides instructions for using Parental Controls.Phone Troubleshooting can help if your Recorder’s phone connection is unsuccessful.Channel Troubleshooting provides help for changing channels on either a satellite orcable box. The tips at the top of the screen are for cable or satellite boxes that attach to theRecorder through a serial connection. Use CHAN UP/DOWN to see the second set of tips,which deal with cable or satellite boxes using IR (infrared) connections to the Recorder.You can also find tips in Chapter 8 and at www.tivo.com/support.Network Troubleshooting provides tips to help you with your Recorder’s networkconnection. See Chapter 7 for more information.Transfer Troubleshooting helps if you are having trouble with Multi-Room Viewing. Formore information about Multi-Room Viewing, refer to the “Home Media Features Guide”available at www.tivo.com/guides.108<strong>TiVo</strong> Central Messages & Setup Troubleshooting
Restart or Reset SystemRestart or Reset SystemYou may need to restart the Recorder as a routine troubleshooting step. Other options onthis screen erase information or restore original factory settings. Selecting any of thesedisplays a warning. To continue, press THUMBS DOWN TM three times, then ENTER.Restart the Recorder. Shuts down the Recorder and starts it up again. It will not affectrecorded programs, Season Pass TM recordings, WishList TM searches, or <strong>TiVo</strong> Suggestions.Repeat Guided Setup. You will have to repeat Guided Setup if you move or if youchange your cable or satellite provider. Repeating Guided Setup will reset the ChannelsYou Receive and Favorites channel lists to the factory settings. It will not affect recordedprograms, Season Pass recordings, WishList searches, or <strong>TiVo</strong> Suggestions.Clear Thumb Ratings and Suggestions. Removes all Thumbs Up TM and ThumbsDown TM ratings and deletes the list of <strong>TiVo</strong> Suggestions. It does not delete <strong>TiVo</strong>Suggestions that have been recorded and are in the Now Playing List.Clear program information & To Do List. Clears all program information, cancels allSeason Pass recordings and everything in the To Do List, and removes all Thumbs Up andThumbs Down ratings. It does not delete programs in the Now Playing List. The Recorderacquires new program information during the next connection to the <strong>TiVo</strong> service.Completing this process may take over an hour.Clear & delete everything. Clears all Season Pass recordings, WishList searches,Thumbs Up and Thumbs Down ratings, <strong>TiVo</strong> Suggestions, Now Playing List recordings,program information, the To Do List and setup information, including the Channels YouReceive and Favorite Channels lists. It also clears the current password and resets ParentalControls to the factory specified default. Completing this process may take over an hour.6<strong>TiVo</strong> Central Messages & Setup Restart or Reset System109
Chapter 6Messages & SetupStandbyYou can put your Recorder in Standby mode by selecting Standby in Messages & Setup.To return to normal mode from Standby, press either the <strong>TiVo</strong> button the or LIVE TVbutton. (On some remotes, there is a POWER button that puts the Recorder in Standbymode and takes it back out.)In Standby mode:• Your TV shows a black screen and the lights on the front of the Recorder go out.®If you used only RF coaxial cables toconnect your program source(antenna or cable) to the Recorder, andalso to connect the Recorder to your TV,Standby mode allows RF signal passthrough.This means you can watchchannels on your RF program source usingyour TV’s tuner instead of the Recorder’stuner—and that means you can watch onechannel while recording another! Keep inmind, you won’t have Recorder• Programs that are being recorded or are scheduled to record will still be recorded. (If aprogram is being recorded, the red light will turn on.)• The Recorder will still connect to the <strong>TiVo</strong> ® service. (If the Recorder is connecting,the yellow light will turn on.)• If you temporarily turned off Parental Controls, Standby mode re-enables them. (Seepage 89 for more on Parental Controls.)• The Recorder will continue to save a portion of live TV—up to 30 minutes ofprogramming.• If live TV was paused when Standby was selected, the Recorder will remain pausedfor up to 30 minutes.• If the <strong>TiVo</strong> Live Guide was set to display a category filter, filtering will be turned off.functionality in live TV (pause, rewind,etc.) while the Recorder is in Standby.110<strong>TiVo</strong> Central Messages & Setup Standby
CHAPTER 7Connecting to a HomeNetwork for Home MediaFeaturesIntroduction to Home Media Features 112Home Networks 116Connecting to a Home Network Using a Wireless Adapter 117Connecting to a Home Network Using Wired (Ethernet) 119Completing the Recorder’s Network Settings 121
112Chapter 7®If you do not already have a homenetwork and you want to learn howto create one, Linksys — a leadingmanufacturer of wireless and always-onInternet connection networkingequipment — provides valuableinformation on its web site at:www.linksys.com/edu/.Other online resources also describe thesteps and types of equipment used to setup a home network. You can try going to apopular search engine like Google(www.google.com) or Yahoo(www.yahoo.com) and typing the phrase,“setting up a home network,” in thesearch field. You will obtain a number ofsearch results (links) that supplyguidance to help you set up your homenetwork.Connecting to a Home NetworkIntroduction to Home Media FeaturesThis chapter shows you how to connect your HUMAX DVD Recorder to a home network.Doing so gives you brand new ways to use your Recorder as a digital home entertainmentcenter. Connect it to a home network and enjoy:• Multi-Room Viewing – Record programs in the living room and watch them in thebedroom–or vice versa. See page 113.If you don’t have a home network, you can connect two Series2 TM DVRs to each otherfor Multi-Room Viewing. (Your HUMAX DVD Recorder is also a Series2 DVR.)This setup is described in the Home Media Features guide, available online atwww.tivo.com/guides.• Digital Music Player – Use the home entertainment center in your living room tolisten to the digital MP3 music collection stored on your computer. See page 114.• Digital Photo Viewer – View slideshows of digital photos stored on your computerwithout huddling around a small computer monitor. See page 114.These Home Media Features are included with the <strong>TiVo</strong> ® service. Connecting yourRecorder to a home network allows you to enjoy them. For more about using thesefeatures, download the Home Media Features Guide at www.tivo.com/guides.Connect to the <strong>TiVo</strong> service via broadband. If your home network includes an always-onInternet connection (for example, DSL or a cable modem), your Recorder can use thatconnection, instead of a phone line, for regular connections to the <strong>TiVo</strong> service. (TheRecorder will still need a standard phone line connection for Guided Setup.)In addition, with an always-on Internet connection, you can use Online Scheduling (seepage 53) for any program airing more than an hour after you request it. (If your Recorderis using a phone line, processing an Online Scheduling request can take up to 36 hours.)
Multi-Room ViewingMulti-Room ViewingMulti-Room Viewing lets you transfer programs from one <strong>TiVo</strong> ® DVR in your home toanother. To use Multi-Room Viewing, you need at least two Series2 TM DVRs, and:• The DVRs must be on the same <strong>TiVo</strong> service account. (The <strong>TiVo</strong> service subscriptionfor each DVR must be owned by the same person.)• The DVRs must be connected to the same home network. For more information, see“Home Networks” on page 116.• Each DVR must have active <strong>TiVo</strong> service, and Multi-Room Viewing enabled atwww.tivo.com/manage.®Your HUMAX DVD Recorder is also a<strong>TiVo</strong> Series2 DVR.After you have connected the DVRs to your home network, the Now Playing list of eachDVR will show the names of the others.How to Transfer a ProgramUsing Multi-Room Viewing couldn’t be easier. To transfer a program from one DVRwithin your home to another DVR:1. In Now Playing on the receiving DVR, select the DVR containing the program youwant to transfer. This will be the sending DVR.2. Press SELECT on the name of a program you want to transfer. (You cannot transfer aprogram while it is recording on the sending DVR.) Then select “Watch on this TV.”3. On the Getting Program screen, you can choose to watch the program as it istransferring, or continue browsing Now Playing on the sending DVR. If you watch theprogram as it is transferring, you might experience intermittent delays in the transfer.You may want to complete the transfer before viewing the program.®If you are connecting two Recordersto a home network to use Multi-Room Viewing, using a wired (Ethernet)connection for one of them may speed upprogram transfers.7113
Chapter 7Connecting to a Home NetworkDigital Music & PhotosThe Digital Music Player and Digital Photo Viewer let you use your Recorder to playMP3 music files and playlists, and view photos that are stored on a computer. Now youcan enjoy your digital music collection on the best sound system in the house, or watchslideshows of digital photos in the comfort of your living room.To use the Digital Music Player or Digital Photo Viewer, you need:• A Recorder with a subscription to the <strong>TiVo</strong> service.• A computer connected to the Recorder via a home network (see page 116).• The <strong>TiVo</strong> Desktop application that makes music and photos on the computer availableto a Recorder.<strong>TiVo</strong> DesktopThe <strong>TiVo</strong> Desktop application is a small, easy-to-use program for your computer that youcan download from www.tivo.com/desktop. <strong>TiVo</strong> Desktop is available for the followingoperating systems:• Windows 98, ME, 2000, XP• Macintosh OS X v10.2 or laterMusic File Types. <strong>TiVo</strong> Desktop plays music in the MP3 format, and supports playlists inthe following formats used by common music players: M3U, PLS, ASX, and B4S. On aMac, <strong>TiVo</strong> Desktop works with music organized by iTunes 3.0 or later.Photo File Types. <strong>TiVo</strong> Desktop for Windows works with digital photos in these formats:BMP, DIB, GIF, JPG, PNG. <strong>TiVo</strong> Desktop for Mac works with digital photos organizedby iPhoto 2.0 in these formats: JPG, GIF, BMP, TIFF, and PNG.114
Digital Music & PhotosPlaying Your Music and Viewing Your PhotosUsing the Digital Music Player and Digital Photo Viewer is easy. You can find Music &Photos on <strong>TiVo</strong> Central ® .Listening to music on the Recorder. On your computer, use the <strong>TiVo</strong> Desktopapplication to “publish” music that you want to access through your Recorder. (Publishingis a process that makes digital music and photos available to your Recorder. It is usually assimple as selecting music and clicking a Publish button.)On your Recorder, go to <strong>TiVo</strong> Central and select Music & Photos, then select the musicoption for your computer.You should see a list of music you published with <strong>TiVo</strong> Desktop. Select the music youwant to listen to and press the PLAY ( ) button. In a few seconds, the music plays.P l a yViewing photos on the Recorder. On your computer, use the <strong>TiVo</strong> Desktop applicationto “publish” photos that you want to access through your Recorder. (Publishing is aprocess that makes digital music and photos available to your Recorder. It is usually assimple as selecting photos and clicking a Publish button.)7On your Recorder, go to <strong>TiVo</strong> Central and select Music & Photos, then select the photosoption for your computer.You should see a list of the photos you published with <strong>TiVo</strong> Desktop. Select the photosyou want to view and press the PLAY ( ) button. In a few seconds, the photos start toappear on your television screen.P l a y115
Chapter 7Connecting to a Home Network116The USB ports on the back of your RecorderA USB Wireless network adapter(yours may look different)An Ethernet USB network adapter(yours may look different)<strong>TiVo</strong> has recommendations for®compatible models of wireless andwired (Ethernet) network adapters. Besure to check www.tivo.com/adapters forthe latest information.Home NetworksWhen we refer to a “home network,” we mean two or more devices (probably computers),connected to a router.USB Ports, Wireless and Wired Network AdaptersOn the back of your DVR, you will see two USB ports that can be used to connect either awireless or a wired (Ethernet) USB network adapter. Although you can use either of theseports, only one network adapter can be connected at a time.USB network adapters let a Recorder use a USB port to communicate with othernetworked devices. Whether you choose wireless or wired (Ethernet), you will need anetwork adapter for each Recorder you wish to connect.Choosing Wireless or Wired (Ethernet). You can connect your Recorder to your homenetwork using either a wireless or wired (Ethernet) connection. Here are some notes tohelp you choose which approach you want to use.• Wired (Ethernet). Ethernet connections are generally faster, less expensive, morereliable and less susceptible to interference than wireless networks. To connect aRecorder to a wired (Ethernet) network, see “Connecting to a Home Network UsingWired (Ethernet)” on page 119• Wireless. Connecting your Recorder wirelessly may be more convenient because youdo not have to run a cable from your Recorder to another device. However, wirelessnetworks are typically more expensive and slower than Ethernet networks, and may besubject to interference from appliances such as microwaves and cordless phones. Toconnect a Recorder to a home network wirelessly, see “Connecting to a HomeNetwork Using a Wireless Adapter” on page 117.
Connecting to a Home Network Using a Wireless AdapterConnecting to a Home Network Using aWireless AdapterUse this example if you have a home network that includes a wireless access point (WAP)or wireless router, or for each Recorder in a wireless peer-to-peer network. On most homenetworks, the wireless access point is part of an integrated hub/router and homegateway.You can leave your Recorder plugged in while you connect a network adapter.To connect a wireless network adapter to your Recorder:®Do not use the CDs that are includedwith your network adapters to setup your Recorders. These CDs areintended to load drivers and networkadapter software on your personalcomputer.71. Connect to the adapter. If it is not already attached, connect one end of the USBcable that came with your wireless network adapter to the port located on the back ofthe adapter.2. Connect to the Recorder. Connect the other end of the USB cable to the USB port onthe Recorder. The power light on the wireless adapter may come on before the cable iscompletely inserted into the USB slot. Make sure you push the cable all the way intothe USB slot.®The cable may already be attachedto your wireless network adapter.117
Chapter 7Connecting to a Home Network3. Position the adapter. Position the adapter in an open location so that the signal iseasily transmitted. For example, you might place the adapter on top of yourentertainment center. Do not place the wireless adapter near the Recorder’s powersupply or on a power strip or surge protector. Doing so can cause signal interference orreduce signal strength.4. Firmware update. When you first connect a wireless network adapter to yourRecorder, you may see a screen that says “Firmware Update Required.” This meansyour Recorder has a software update for the wireless network adapter you haveconnected. Select the option to update. This should not take more than a minute or two.During the update, do not disconnect the network adapter wires or the power to theRecorder. Either action might damage the adapter.5. Important message. The first time you press the <strong>TiVo</strong> button after connecting anetwork adapter, you will see an Important Message. Review it, then press SELECTon the remote control to go to <strong>TiVo</strong> Central.6. Next Step. Go to “Completing the Recorder’s Network Settings” on page 121.118
Connecting to a Home Network Using Wired (Ethernet)Connecting to a Home Network Using Wired(Ethernet)This example shows you how to connect a Recorder to a network hub using a wired(Ethernet) network adapter. You can leave your Recorder plugged in while you connect anetwork adapter.To connect a wired (Ethernet) network adapter to your Recorder and your network hub,follow these steps:®Do not use the CDs that are includedwith your network adapters to setup your Recorders. These CDs areintended to load drivers and networkadapter software on your personalcomputer.USB-Ethernet71. Connect to the Recorder. Connect the USB end of the Ethernet adapter to the USBport on the Recorder.2. Connect Ethernet to the adapter. Plug one end of an Ethernet cable into the Ethernetadapter.3. Connect Ethernet to the hub or router. Plug the other end of the Ethernet cable intoyour home network’s hub or router.119
Chapter 7Connecting to a Home Network4. Important message. The first time you press the <strong>TiVo</strong> button after connecting anetwork adapter, you will see an Important Message. Review it, then press SELECTon the remote control to go to <strong>TiVo</strong> Central.5. Next Step. If your home network has DHCP, wait for a few minutes for your Recorderto automatically complete its network settings, and then you’re done! If your networkdoes not have DHCP, or you are having trouble establishing a network connection, goto “Completing the Recorder’s Network Settings” on page 121. (DHCP is described in“Basic TCP/IP Concepts” on page 125.)120
Completing the Recorder’s Network SettingsCompleting the Recorder’s Network SettingsIf your Recorder is connected to a wired (Ethernet) network adapter, skip to“TCP/IPSettings for a Home Network” on page 124.Wireless Settings for a Home NetworkIf you have a wireless home network, and have connected a wireless network adapter toyour Recorder, as described on page 117, you are ready to complete Wireless Settings fora home network.To get to Wireless Settings: press the <strong>TiVo</strong> button on the remote control to go to <strong>TiVo</strong>Central, then select Messages & Setup, then Settings, then Phone & Network Setup, then“Edit phone or network settings,” then Wireless Settings.Wireless Checklist. This is the first Wireless Settings screen you will see. It listsinformation you need to complete wireless settings. You can find all this information inthe configuration settings of your network’s wireless access point or router.If your wireless network does not use encryption (WEP), then you only need to provide awireless network name; you do not need to provide a password format or password.When you are ready to continue, press SELECT on your remote control.Wireless Connection and Wireless Network Name. You must now provide the name ofyour wireless network. Wireless networks have a network name (sometimes called anSSID for service set identifier). A wireless network may be open or closed. Open wirelessnetworks broadcast their network names, allowing devices in their vicinity to identifythem automatically. Closed wireless networks do not broadcast their network names, sothey cannot be identified automatically.®Many of the screens you use tocomplete Wireless Settings orTCP/IP Settings have the same title.However, they have different subtitles. Inthis section, each screen is identified byits subtitle.Screen subtitle7121
Chapter 7Connecting to a Home NetworkThis screen lists the names of nearby wireless networks that your Recorder has been ableto identify. If you have a wireless router (or wireless access point) and you did not set anetwork name, your network is probably using a name supplied by the router’smanufacturer.If your network’s name is listed, select it. (You may be able to see more names bypressing CHAN DOWN to scroll down the screen.)122Otherwise, select “Connect to a closed wireless network”:On the Wireless Network Name screen, enter the name of your network using thearrow buttons on your remote to highlight a character. Then press SELECT.You must use capital and lowercase letters appropriately. For example, to find anetwork named “My Network” you must capitalize the “M” and “N”; entering “mynetwork” would not work. Use THUMBS UP and THUMBS DOWN to change touppercase or lowercase. Select “Done entering text” when you are finished.If the Recorder detects that your wireless network does not use encryption (WEP) you willsee the Confirm Settings screen, described on page 124.Wireless Password Format. You see the Wireless Password Format screen if there is achance that your wireless network uses WEP encryption.WEP. WEP is a kind of encryption used by wireless networks to improve their security.There are different levels of WEP encryption, typically called 40-, 64-, 104-, 128-, or 256-bit encryption. Encryption at higher levels offers better security. At the highest levels(104-bit or above), WEP encryption may slow down the transfer of programs from oneRecorder to another by a small amount. WEP is usually turned on or off through theconfiguration settings of a wireless access point or router. If your network uses WEP, thenit has a password or “key.”To connect a Recorder to a network that uses encryption, you need to provide:
Completing the Recorder’s Network Settings• A wireless password format. WEP passwords may be hexadecimal (a combination ofletters from A-F and numbers from 0-9), or alphanumeric (a combination of lettersfrom A-Z and numbers from 0-9). If your network has both an alphanumeric and ahexadecimal password, we strongly recommend you use the hexadecimal password.• A wireless password. It does not matter whether the letters of a hexadecimalpassword are uppercase or lowercase, but for alphanumeric passwords, capitalizationis important. For example, if the password is “MyPassword,” then entering“mypassword” will not work. Some hexadecimal passwords have only numbers.• A level of wireless encryption. If you specify an alphanumeric password, you mustalso specify a level of wireless encryption. Recorders are compatible with 40, 64, 104,and 128-bit encryption; they are not currently compatible with 256-bit encryption.Choose a format or select “The wireless network doesn’t use a password.” If you select“The wireless network doesn’t use a password,” you will see the Confirm Settings screen,described on page 124.Wireless Password — Alphanumeric or Hexadecimal• Hexadecimal (preferred). Enter a hexadecimal password using the arrow buttons onthe remote to highlight a character. Then press SELECT. It does not matter if a letter isuppercase or lowercase. Some hexadecimal passwords contain only numbers.• Alphanumeric. Enter an alphanumeric password using the arrow buttons on yourremote to highlight a character. Then press SELECT. You must use capital andlowercase letters appropriately. For example, if your password is “MyPassword”,entering “mypassword” will not work. Use THUMBS UP and THUMBS DOWN tochange to uppercase or lowercase. Select “Done entering text” when you are finished.7123
Chapter 7Connecting to a Home NetworkWireless Encryption. If you entered an alphanumeric password, you will see this screen.Select the level of encryption used by your wireless network. If your network uses 104-bitencryption, select 128-bit encryption. Recorders are not currently compatible with 256-bitencryption.Confirm Settings. Select “Accept these settings” if they are correct. For steps you cantake to troubleshoot issues with your wireless connection, see “Questions AboutNetworking” on page 148.Change Connection Type. You see this screen if you are not using a shared Internetconnection to connect to the <strong>TiVo</strong> service. If your network has access to an always-onbroadband connection, select “Yes” to use it to connect to the <strong>TiVo</strong> service instead of aphone line.Next Step. You have completed wireless settings. If your home network has DHCP, andyou do not have a DHCP Client ID, the Recorder will automatically complete networksetup. We recommend that you confirm the DHCP settings of your network by continuingwith “TCP/IP Settings for a Home Network,” below.If your home network does not have DHCP, or if you have a DHCP client ID, continuewith “TCP/IP Settings for a Home Network.”TCP/IP Settings for a Home NetworkYou are ready to complete TCP/IP settings if:• You are connecting your Recorder to your home network wirelessly and have alreadycompleted “Wireless Settings for a Home Network” on page 121, or• You have a wired (Ethernet) adapter connecting your Recorder to your home network.124
Completing the Recorder’s Network SettingsBasic TCP/IP ConceptsThis section describes a few basic TCP/IP concepts. If you are familiar with homenetworking, you can skip to “Begin TCP/IP Settings” on page 126.• IP Address. TCP/IP settings are used to manage IP addresses on a network. An IPaddress is a number that identifies a single device on a network (in much the same waythat a home address identifies a single home in a town). IP addresses use four numbersseparated by periods. Each number can be from 0 to 255. Some example IP addressesare: ‘192.168.0.1’ and ‘10.8.3.25’.• DHCP and Static IP Addresses. DHCP automatically assigns IP addresses to deviceson a network. Most home networks include a router or home gateway that has DHCP.If your network has DHCP, or you are creating a peer-to-peer network, your Recordercan obtain its IP address automatically. An IP address assigned by DHCP is called adynamic IP address because it may change automatically as devices are added to orremoved from the network.If your network does not have DHCP, you must specify an IP address for your Recorder.An IP address you specify is considered a static IP address, because it will not changeuntil you specify a new one.If you assign a static IP address to your Recorder, remember that:• The first three sets of numbers in the IP address usually must match the first sets ofnumbers in the IP address used by another device on the network (for example, acomputer). The first three sets of numbers for IP addresses on a home network areusually: ‘192.168.0’ or ‘192.168.1’.• If the first three numbers match those of another IP address, the last number has to beunique. For example, two IP addresses for devices on the same network might be‘192.168.1.5’ and ‘192.168.1.6’.1257
Chapter 7Connecting to a Home Network126Begin TCP/IP SettingsTo get to TCP/IP Settings: press the <strong>TiVo</strong> button on the remote control to go to <strong>TiVo</strong>Central, then select Messages & Setup, then Settings, then Phone & Network Setup, then“Edit phone or network settings,” then TCP/IP Settings.TCP/IP Connection. On the first screen in TCP/IP Settings you specify how yourRecorder gets an IP address. On this screen you can choose to:• Obtain the IP address automatically. Use this option if your router or gateway hasDHCP. Continue with “DHCP Client ID,” below.• Specify a static IP address if you don’t have a DHCP server. Continue with “Static IPAddress Checklist. If you do not have a DHCP server, you need to provide all of thefollowing:” on page 127.If you are not sure what to select, you can try “Obtain IP address automatically.” Thisselection will work for most people. If it does not work, you can return to TCP/IP Settingslater and make other selections. (A brief description of IP addresses is provided in “BasicTCP/IP Concepts” on page 125.)DHCP Client ID. Unless you received a DHCP Client ID from your Internet serviceprovider (ISP), you can select “I don’t have a DHCP Client ID.” This selection will workfor most people.If your ISP provided you with a DHCP Client ID, enter it using the arrow buttons on yourremote to a highlight a character. Then press SELECT.You must use capital and lowercase letters appropriately. For example, if your DHCPClient ID is “ID7343”, entering “id7343” will not work. Use THUMBS UP and THUMBSDOWN to change to uppercase or lowercase. Select “Done entering text” when you arefinished. Skip to “Confirm Settings. Review the settings and select “Accept these
Completing the Recorder’s Network Settingssettings” if they are correct. Congratulations, your Recorder should now be connected toyour home network!” on page 128.Static IP Address Checklist. If you do not have a DHCP server, you need to provide all ofthe following:• An IP address for your Recorder.• A Subnet Mask for your home network.• An IP address for your home gateway or router.• An IP address for a DNS (Name Server).You will create a unique IP address for your Recorder. The Subnet Mask, gateway orrouter IP address, and DNS IP address are usually provided by your Internet serviceprovider (ISP). They are also usually available on the configuration screens of your homegateway or router.If you have a computer on your home network, you may be able find the Subnet Mask,home gateway, or router IP address, and DNS IP address in the computer’s TCP/IPsettings. (If you are having trouble getting this information, contact your Internet serviceprovider.) In addition, you can use your computer’s IP address to help create an IP addressfor your Recorder. For example, if your computer’s IP address is ‘192.168.1.2’ then yourRecorder’s IP address should probably also start with ‘192.168.1’ and end with a numberother than 2.IP Address. The first three sets of numbers in the IP address are usually the same as otherdevices on your home network. The final number is usually unique to a device on yourhome network. For example, with the IP address ‘192.168.1.12’, the first part,‘192.168.1’, would be common to all devices on the network. The last part, ‘12’, would beunique to a device on the network.1277
Chapter 7Connecting to a Home NetworkSubnet Mask. A subnet mask allows communication between a large network (such asthe Internet) and a smaller sub-network (such as your home network). It uses the sameformat as an IP address and is usually provided by your Internet service provider (ISP).The subnet mask for a home network is usually ‘255.255.255.0’.You may also be able to find the subnet mask by inspecting the IP settings of a computeron the same home network, or by contacting your Internet service provider.Gateway (Router) Address. Enter the IP address of your home gateway or router. The IPaddress is usually available in the configuration screens for your gateway or router. Somecommon values for the gateway or router IP address on a home network are ‘192.168.0.1’and ‘192.168.1.1’. If you use a router supplied by your Internet service provider (ISP),your ISP should also have supplied the router’s IP address.You may also be able to find the home gateway or router IP address by inspecting the IPsettings of a computer on the same home network.DNS (Domain Name Server) Address. If your home network includes a broadbandconnection to the Internet, your Internet service provider (ISP) will have given you a DNSaddress. You may also be able to find the DNS address by inspecting the IP settings of acomputer on the same home network.Confirm Settings. Review the settings and select “Accept these settings” if they arecorrect. Congratulations, your Recorder should now be connected to your home network!For steps you can take to troubleshoot issues with your TCP/IP Settings, see “QuestionsAbout Networking” on page 148.128Change Connection Type. You see this screen if you are not using a shared Internetconnection to connect to the <strong>TiVo</strong> service. If your network has access to an always-onbroadband connection, select “Yes” to use it to connect to the <strong>TiVo</strong> service instead of aphone line.
CHAPTER8TroubleshootingCustomer Support 130Troubleshooting 131
Chapter 8TroubleshootingCustomer Support<strong>TiVo</strong> and HUMAX are dedicated to providing you with quality support and customer service. When you have a question:1. Use this chapter. It contains troubleshooting for questions about:Getting Started . . . . . . . . . . . . . . . . . . . . . . . . . . . . . . . . . . . . . . . . . . . . . . . . . . . . . . . . . . . . . . . . . . . . . . . . . . . . . . . . . . . 131Connecting to the <strong>TiVo</strong> ® Service . . . . . . . . . . . . . . . . . . . . . . . . . . . . . . . . . . . . . . . . . . . . . . . . . . . . . . . . . . . . . . . . . . . . . 132DVDs and CDs. . . . . . . . . . . . . . . . . . . . . . . . . . . . . . . . . . . . . . . . . . . . . . . . . . . . . . . . . . . . . . . . . . . . . . . . . . . . . . . . . . . . 134Channels. . . . . . . . . . . . . . . . . . . . . . . . . . . . . . . . . . . . . . . . . . . . . . . . . . . . . . . . . . . . . . . . . . . . . . . . . . . . . . . . . . . . . . . . 136Live TV . . . . . . . . . . . . . . . . . . . . . . . . . . . . . . . . . . . . . . . . . . . . . . . . . . . . . . . . . . . . . . . . . . . . . . . . . . . . . . . . . . . . . . . . . . 138Recording Programs. . . . . . . . . . . . . . . . . . . . . . . . . . . . . . . . . . . . . . . . . . . . . . . . . . . . . . . . . . . . . . . . . . . . . . . . . . . . . . . 139Recording Conflicts . . . . . . . . . . . . . . . . . . . . . . . . . . . . . . . . . . . . . . . . . . . . . . . . . . . . . . . . . . . . . . . . . . . . . . . . . . . . . . . 142Now Playing . . . . . . . . . . . . . . . . . . . . . . . . . . . . . . . . . . . . . . . . . . . . . . . . . . . . . . . . . . . . . . . . . . . . . . . . . . . . . . . . . . . . . 143Parental Controls . . . . . . . . . . . . . . . . . . . . . . . . . . . . . . . . . . . . . . . . . . . . . . . . . . . . . . . . . . . . . . . . . . . . . . . . . . . . . . . . . 144Audio and Video . . . . . . . . . . . . . . . . . . . . . . . . . . . . . . . . . . . . . . . . . . . . . . . . . . . . . . . . . . . . . . . . . . . . . . . . . . . . . . . . . . 145The <strong>TiVo</strong> Service . . . . . . . . . . . . . . . . . . . . . . . . . . . . . . . . . . . . . . . . . . . . . . . . . . . . . . . . . . . . . . . . . . . . . . . . . . . . . . . . . . 147Networking . . . . . . . . . . . . . . . . . . . . . . . . . . . . . . . . . . . . . . . . . . . . . . . . . . . . . . . . . . . . . . . . . . . . . . . . . . . . . . . . . . . . . . 1482. Use the troubleshooting screens on your Recorder. From <strong>TiVo</strong> Central, select Messages & Setup, then Troubleshooting.3. Contact Customer Support. Go online or give us a call. Refer to the contact information below.130HUMAX Customer Support• Connecting your Recorder to your TV & other equipment• Recording DVDs, or playing DVDs and CDs• Channel changing and the remote control• Audio and videowww.humaxusa.com/support1-866-486-2987<strong>TiVo</strong> Customer Support• Using <strong>TiVo</strong> service features (finding & recording programs)• Your channel lineup and channel lists• Your <strong>TiVo</strong> service account and billing issues• Online scheduling and Home Media featureswww.tivo.com/support1-877-367-8486
Questions About Getting StartedQuestions About Getting StartedI don’t see the Welcome Screen when I plug in my Recorder for the first time.• Make sure cables are connected from the OUT jack of one device to the IN jack of another. Never connect OUT to OUT or IN to IN.• If you’re using Composite A/V cables or S-Video cables, make sure your TV is displaying the appropriate video source. You mayneed to use the Input, Source, or TV/Video button on your TV’s remote to change video sources. If you are having trouble changingthe video source, refer to your TV’s owner’s manual.• If you are passing the signal through your VCR (as in Setup 4 in this guide), tune your TV the way you would to watch your VCR.Also, try turning your VCR on or off. If your VCR has multiple inputs, you may need to select the correct input on the VCR as well.• If your Recorder is connected to an A/V receiver, and you are having trouble finding the correct input, try connecting it directly tothe TV instead.• The cables you are using to connect your Recorder to your TV or other equipment may be damaged or defective. Try exchanging thecables connected to the Recorder with other cables that you know are working properly.My phone jack isn’t near the Recorder.• The Recorder comes with a 25 foot phone cord. Phone cords longer than 25 feet are available at most hardware or electronics stores.• After you complete Guided Setup, you can connect your Recorder to a home network and use a broadband Internet connectioninstead of a phone line to connect to the <strong>TiVo</strong> service. See Chapter 7 for details.My <strong>TiVo</strong> Recorder remote control doesn’t control my TV’s power, volume, etc.• You can program the Recorder’s remote control to turn your TV on and off, and control its volume and mute functions. You can alsoprogram it to control volume and mute on an A/V receiver or stereo. See “Remote Control & Recorder Front” on page 96.8131
Chapter 8TroubleshootingMy <strong>TiVo</strong> Recorder remote control doesn't work with my Recorder.• Be sure you are using the Recorder’s remote, and that you hold it so that the <strong>TiVo</strong> button points toward the Recorder.• Try changing the position of the Recorder SWITCH on the remote control.• Press any button on the remote. Does the red light above the <strong>TiVo</strong> button on the remote flash?If the red light does not flash, make sure the batteries are positioned correctly in the remote. If they are correctly positioned, try a newset of batteries. See the inside front cover of this guide for instructions on installing batteries.If the red light on the remote does flash, watch the lights on the front of the Recorder. Do the lights seem to respond (i.e., blink orflash) when you press any button on the remote? If lights on the front of the Recorder do not respond to the remote, restart yourRecorder by unplugging it, waiting 15 seconds, then plugging it back in.• You may not have the correct input selected on your TV. Use the Input, Source, or TV/Video button on your TV’s remote to changethe input. If you are passing the signal through your VCR, you may need to select the correct input on the VCR as well.Questions About Connecting to the <strong>TiVo</strong> ServiceWhy does the Recorder have to be connected to a phone line or the Internet?• The Recorder needs to be connected to the phone line or the Internet so that it can make periodic connections to the <strong>TiVo</strong> service.This connection downloads program information, which tells the Recorder when programs are scheduled to air and on what channel.The connection may also retrieve additional information such as updates to the <strong>TiVo</strong> service, Showcases, and <strong>TiVo</strong>lution Magazine.In addition, the connection sends anonymous viewing information back to <strong>TiVo</strong>—that is, anonymous information about viewingchoices, which do not identify you as an individual or household. <strong>TiVo</strong> has no way to access any of your personally identifiableviewing information from your Recorder without your prior consent. Without your consent, the <strong>TiVo</strong> service has no way of knowingwhat shows you—as an individual or household—have watched or recorded. For more information, read the <strong>TiVo</strong> Privacy Policyon page 154.132
Questions About Connecting to the <strong>TiVo</strong> ServiceDo I need to keep the phone connected all the time?• We recommend you leave the Recorder connected to the phone line all the time. The <strong>TiVo</strong> service will not interfere with other needsfor the phone line, and periodic connections will keep the Recorder’s program information fully up to date.• You can also use a broadband Internet connection to connect to the <strong>TiVo</strong> service instead of a phone line. See Chapter 7 for details.My Recorder’s phone connection to the <strong>TiVo</strong> service is failing.• First, verify that your phone line is working by connecting a phone to it, then listening for a dial tone. Make sure the phone cord isconnected to both the Recorder and the phone jack. If the phone line is working, continue with the troubleshooting here. If it is notworking, contact your telephone service provider.• The following tips require changing your Phone Dialing Options. To change Phone Dialing Options, go to <strong>TiVo</strong> Central, then selectMessages & Setup, then Settings, then Phone & Network Setup, then “Edit phone or network settings,” then Phone Dialing Options.After you change a Phone Dialing Option, the Recorder will make a test connection to verify whether or not your problem wassolved.Phone Connection Troubleshooting Tips:• Try another local dial-in number. Select “Set Dial-In Number.” Confirm your area code, then select a new number from the list ofavailable numbers for your area.• If you have voice mail on this phone line or use another non-standard dial tone, turn off “Dial Tone Detection.” (Select “Set DialTone Detection,” then select “Off.”)• If you dial a prefix for outside lines, be sure it is entered on the Phone Dialing Options screen. To enter or change a prefix, select“Set Dial Prefix,” then follow instructions on the screen. For example, if you must dial 9 to reach an outside line, select “Set DialPrefix,” then press “9” then the PAUSE ( ) button. (This enters a 9, followed by a comma. The comma inserts a pause.)• If you have call waiting, be sure it is disabled during the daily phone call. (Select “Set Call Waiting Prefix,” then enter the correctprefix, usually “*70,”. You would enter “*70,” by pressing CLEAR then “7” then “0” then the PAUSE ( ) button.)8133
Chapter 8Troubleshooting• Your phone line may have low voltage. Set ‘Phone Avail.’ Detection to “Off.” (Select “Set Phone Avail. Detection,” then select“Off.”) If you have a cordless telephone, fax machine, or computer modem connected to the same line, try turning ‘Phone Avail.’Detection off, as well. When ‘Phone Avail.’ Detection is off, you may hear a click on the line when the Recorder tries to call.This is the sound of the Recorder picking up the line to see if it is free.• If you use a wireless modem jack, try connecting the Recorder directly to a standard wall jack.• If you have a caller ID box, try removing it from the line, since some models interfere with the Recorder’s ability to make a call.• If you have DSL, try installing a DSL filter on your phone line.• It could be that you have too much line noise due to the length of the phone cord. Try a shorter cord, or you can buy a line noisefilter at your local electronics store.What if I need to use the phone while the Recorder is connecting to the <strong>TiVo</strong> service?• You can interrupt the connection. To do this, pick up the phone, then hang it up. Wait about 45 seconds. When you pick it up again,there should be a dial tone. Repeat this process if necessary.What if my phone line is busy when the Recorder tries to connect to the <strong>TiVo</strong> service?• The Recorder will continue to attempt to connect several times a day until it is successful. You can check the status of the connectionon the Phone & Network Setup screen (from <strong>TiVo</strong> Central, select Messages & Setup, then Settings, then Phone & Network Setup).The status of the most recent connection is displayed near the top of the screen.Am I charged for connections to the <strong>TiVo</strong> service?• <strong>TiVo</strong> uses either a standard phone line or a broadband Internet connection to provide the <strong>TiVo</strong> service, and is available as a local callin most areas. In some areas, however, local and long distance toll charges may apply. You are responsible for any phone charges.Questions About DVDs and CDsI cannot play DVDs or CDs on the HUMAX DVD Recorder.• You must complete Guided Setup (see Chapter 2) before the Recorder can play DVDs or CDs.134
Questions About DVDs and CDs• Check that the disc is loaded properly (aligned in the disc tray with the label side up).• Remove the disc and clean it.• Check that the disc has a region code compatible with the Recorder. If one of the regional codes on the disc does not match thenumber on the back panel of the Recorder (region code 1), the disc can’t be played. Discs marked ALL will play in any DVD player.Regional restriction codes are built-in to DVD players and DVDs for each sales region.• There may be condensation in the player. Allow time for condensation to evaporate. Leave the Recorder for an hour or so, then tryagain. If the Recorder is near an air-conditioning unit, you should move it.The Recorder is not playing audio on a DVD.• If playing a DTS DVD, the Recorder must be connected to a DTS Receiver to receive audio.The DVD did not record successfuly.• Check whether the source that you are trying to record is copy protected. You cannot record copy-protected material using thisRecorder. For more information, see “Compatibility and Copy Protected Material” on page 64.• Check that there wasn’t a power outage during the recording.8135
Chapter 8TroubleshootingI can’t play a DVD disc that I recorded using my HUMAX DVD Recorder in another DVD player.• Not all DVD players will play all discs, even if the disc has been finalized.I can’t save programs to a DVD disc I purchased.The Recorder will only save to DVD-R and DVD-RW discs. It will not save to other disc formats (such as DVD+R or DVD+RW) . Formore information, see “Compatibility and Copy Protected Material” on page 64.Questions About ChannelsCan I watch one channel while recording from another?136• Yes. See “Watching One Channel & Recording Another” on page 18. (You will not have <strong>TiVo</strong> functionality on the channels youwatch using an RF cable that goes directly to your TV.) You can always watch any program from the Now Playing list while theRecorder is recording a program.I can’t get the channel to change.If you use cable with no cable box:• Be sure that you are using the <strong>TiVo</strong> remote and that you hold it so the <strong>TiVo</strong> button points toward the Recorder.• Press any button on the remote. Does the red light above the <strong>TiVo</strong> button flash? If not, make sure the batteries are positionedcorrectly in the remote. If they are, try a new set of batteries. If the red light on the remote does flash, do the lights on the front of theRecorder seem to respond when you press any button on the remote? If they do not, restart your Recorder by unplugging it, waiting15 seconds, then plugging it back in.If you have a cable or satellite box and used the IR Control cable:• Make sure the cable or satellite box is turned on.• Make sure you are using the Recorder’s remote control, and that you hold it so the <strong>TiVo</strong> button points toward the Recorder, not at thecable or satellite box.
Questions About Channels• Refer to page 6 to verify that the IR Control cable is positioned correctly in front of the IR sensor. Also, make sure the purple end ofthe cable is plugged into the Control Out-IR jack on the back of the Recorder.• You may consider optimizing the IR Control connection as described on page 9.• Press the <strong>TiVo</strong> button to go to <strong>TiVo</strong> Central, then select Messages & Setup, then Cable/Satellite Box, then Control Cable Setup.Verify the IR code you chose during Guided Setup. See page 6 for more on choosing an IR code.• Try using the cable or satellite box’s remote to change the channel. If it doesn’t work, contact the manufacturer or service provider.If you have a Motorola/General Instruments DCT2000 series cable box or a DIRECTV ® satellite box and you used the SerialControl cable:• Make sure the cable or satellite box is turned on.• Verify that the Serial Control cable is plugged into the data connector on the cable or satellite box and into the Control Out-Serialjack on the back of the Recorder.• Unplug the cable or satellite box’s power cord, then plug it back in. Then try changing channels with the <strong>TiVo</strong> remote again.• Try using the cable or satellite box’s remote to change the channel. If it doesn’t work, contact the manufacturer or service provider.• Serial control of a Motorola/General Instruments DCT2000 series cable box may not be available for all customers. Check with yourcable provider to find out if your cable box is enabled for serial control.• Satellite Box Only: You may have incorrectly specified the type of program guide for your DIRECTV satellite box. There are twotypes of program guides: MPG (Master Program Guide) and APG (Advanced Program Guide).To change this option: First, unplug the power cord for the satellite box, wait a few seconds, then plug it back in. Next, go to <strong>TiVo</strong>Central, then Message & Setup, then Settings, the <strong>TiVo</strong> Recorder Setup, then Cable/Satellite Box, then Satellite Channel Changingand select “Satellite Box.” On the Connection to Satellite screen, if you originally selected Serial-MPG, change your selection toSerial-APG. (If you originally selected Serial-APG, change it to Serial-MPG.) You can also check the manual for your satellite box(as well as the satellite box’s system setup screen) for information on the type of program guide it uses.8137
Chapter 8TroubleshootingI can’t go to one of my channels.• You may be using a channel list that does not include the channel you want. Use the numbers on the remote control to enter thechannel number, then press ENTER. For more information on using a channel list, see page 47.• The channel you want may be showing a program that exceeds a limit set with Parental Controls. In this case, you will see only ablack screen with a notice that a limit has been exceeded. You will be able to tune to the channel if you use the Parental Controlspassword. (For more information on Parental Controls, see page 89.) If your cable or satellite box has a feature like ParentalControls, you may have to use the satellite or cable box’s remote to disable it as well.I can’t find all the channels I receive in the Channels You Receive list.• Have you changed your satellite or cable provider, or changed your subscription package? If you have, you should repeat GuidedSetup to specify your current satellite or cable provider and lineup. From <strong>TiVo</strong> Central, select Messages & Setup, then Restart orReset System, then Repeat Guided Setup. Press THUMBS DOWN three times, and then press ENTER. You may need to check all ofthe available selections to find the right one since cable providers often change their lineups. For complete instructions on GuidedSetup, see Chapter 2.• If you have cable, and have not changed your cable provider, go to Messages & Setup, then Settings, then Channels, then CableLineup. Look at your cable or satellite bill, then check the Channels You Receive list. If the channels are incorrect, try another CableLineup. If that does not work, go to www.tivo.com/support.Questions About Live TV138Can I watch a program while it is being recorded?• Yes, you can watch a program as it is being recorded; you can even start watching from the beginning while the rest of the programis recorded! You can also watch any program stored in Now Playing while another program is being recorded.The Channel Banner always says “To be announced.”• Your Recorder probably does not have full program information. For details, see the question “I can’t find my program in Search byTitle or Search Using a WishList, even though I know it’s on,” on page 139.
Questions About Recording ProgramsThere aren’t any shows listed in the program guide.• Your Recorder may not have program information. See “I can’t find my program in Search by Title or Search Using a WishList,even though I know it’s on,” on page 139.• If category filtering of the guide is turned on, but no upcoming programs in the next six hours match both your filter and yourFavorite Channels list, no programs will appear in the guide. To view programs in the guide again, use the Guide Options to turn offfiltering. (See page 47.)I can’t find my program in the guide, even though I know it’s on.• You can choose a channel list or filter to use with the guide. Not all programs or channels will be displayed if you have chosen to usea filter or the “Favorites” channel list. Press GUIDE to display the live guide, then ENTER to choose “Channels You Receive” or toturn off filters. You can also add and remove channels on the “Channels You Receive” and “Favorites” channel lists. (See page 86.)• Occasionally the program information provided by the networks includes errors. We would like to hear of any inaccuracies youdiscover so that we can work with our providers to correct them. See the Customer Support contact information at the beginning ofthis chapter.Questions About Recording ProgramsI can’t find my program in Search by Title or Search Using a WishList, etc., even though I know it’s on.• The Recorder uses the Channels You Receive list to search for programs in all the features under Pick Programs to Record. To checkif you’ve selected the program’s channel, go to Messages & Setup, then Settings, then Channels, then Channels You Receive. Doesthe channel have a check mark next to it? To give it one, highlight the channel and press SELECT. (For instructions on customizingthis list, see page 86.)• Look on the Phone & Network Setup screen (from <strong>TiVo</strong> Central, select Messages & Setup, then Settings, then Phone & NetworkSetup) for the time of the last successful connection to the <strong>TiVo</strong> service. If it was more than 36 hours ago, your Recorder may behaving trouble connecting to the <strong>TiVo</strong> service. Select “Test connection” to test the current settings. If the test connection does notsucceed, see page 132 for connection troubleshooting. Once you have made a successful test connection, start a regular connection8139
Chapter 8Troubleshooting140by selecting “Connect to the <strong>TiVo</strong> service now.” If your connection is successful, new program information will be downloaded andorganized, and become available to search in about 1 to 5 hours.• Is your <strong>TiVo</strong> service account up to date? Check your account status on the System Information screen (from <strong>TiVo</strong> Central, selectMessages & Setup, then System Information). If your account is suspended or closed and you wish to re-activate it, go towww.tivo.com/manage, or refer to page 130 for Customer Support contact information and give us a call.• Occasionally the program information provided by the networks includes errors. We would like to hear of any inaccuracies youdiscover so that we can work with our providers to correct them.I can’t use features in Pick Programs to Record. The Recorder says it is organizing program information.• Your Recorder may not have all its program information yet. The first time you go through Guided Setup, the Recorder downloadsprogram information from the <strong>TiVo</strong> service. The Recorder then indexes this information in the background over the next 4-8 hours.As the program information gets indexed, more of it becomes available. After 8 hours, full information (for up to 2 weeks from thetime of the last successful connection to the <strong>TiVo</strong> service) is available for you to use. Wait a few hours, then try to find your programagain.• If the Recorder loses power while it is indexing program information, the indexing process will stop until the Recorder makes asuccessful connection to the <strong>TiVo</strong> service, and then will start again. If your Recorder lost power while it was indexing programinformation, you can get it to start indexing again by plugging it in and then starting a connection to the <strong>TiVo</strong> service. To do this, goto <strong>TiVo</strong> Central, then select Messages & Setup, then Settings, then Phone & Network Setup, then “Connect to the <strong>TiVo</strong> servicenow.”What happens if a sports event I have scheduled to record goes into overtime?• The <strong>TiVo</strong> service cannot predict whether a sporting event might go into overtime, but we provide a feature that lets you add from oneextra minute to three hours at the end of a recording just in case. We call the feature the Overtime Scheduler. The OvertimeScheduler has two options: “Start Recording” and “Stop Recording.” Both are available on the Recording Options screen. You caneven use the Overtime Scheduler to change the scheduled end of a recording while the program is being recorded. You can use theOvertime Scheduler with any kind of program, not just sports. For more information on Recording Options, see page 43.If you are watching a program while it’s being recorded, you can record an overtime segment in a couple of ways. One way is to gointo Now Playing, select the recording, then select “Change recording options.” On the Recording Options screen that appears, select
Questions About Recording Programs“Stop recording.” Use RIGHT arrow to increase the length of the recording by anywhere from one minute to 3 hours. Alternatively,you could choose to press the RECORD button after the regularly scheduled part of the program has finished.Is there a way to record a program that will not be aired for weeks or months?• Create an auto-recording WishList for programs that are not yet listed in the guide. See page 54 for details on WishList searches.• If you know the date, time, and channel on which the program will air, you can create a manual recording to record it. You can createmanual recordings by going to <strong>TiVo</strong> Central, then selecting Pick Programs to Record, then Record by Time or Channel, thenManually Record Time/Channel. (See page 50 for details.)How do I set the clock so that my shows are recorded on time?• If you are missing the beginning or end of a show, it usually means that the broadcaster is not starting or stopping the show on time.You can use the Overtime Scheduler ® , described on page 44, to compensate for this.• The <strong>TiVo</strong> service sets your Recorder’s clock during every service connection. If you set your time zone and Daylight Savings Timecorrectly in Guided Setup, you never have to worry! If you move to a new time zone, change your Recorder’s time settings byrepeating Guided Setup. To connect to the <strong>TiVo</strong> service at any time, go to <strong>TiVo</strong> Central, then select Messages & Setup, thenSettings, then Phone & Network Setup, then “Connect to the <strong>TiVo</strong> service now.”How do I record a Pay Per View event?• From live TV, catch up to the present broadcast by pressing the ADVANCE button. Then, order the program from your cable orsatellite provider as you normally would—by using your satellite or cable box remote, or by calling your cable/satellite provider. (Ifthe program violates a Parental Control limit—or a feature like Parental Controls on your cable or satellite box—make sure todisable both <strong>TiVo</strong> Parental Controls and your satellite or cable box’s Parental Controls.) To record the program, search for it inBrowse by Time. If there are no listings for Pay Per View events, record the showing with the Manually Record Time/Channeloption under <strong>TiVo</strong> Central, then Pick Programs to Record, then Record Time/Channel.Some content may not be saved to DVD due to copy protection rights over the material. For more details, see “Copy ProtectedMaterial” on page 64.8141
Chapter 8TroubleshootingWhy wasn’t my program recorded?• Check Recording History for an explanation of why the program did not record. Recording History is the first selection in the To DoList (from <strong>TiVo</strong> Central, select Pick Programs to Record, then To Do List, then View Recording History). Here are some reasonswhy a program may not be available in Now Playing:• The program may have been canceled by the network.• If you had two Season Pass recordings that were on at the same time, only the Season Pass with the higher priority would berecorded. Priorities and the Season Pass Manager are described on page 45.• The program may have been deleted from Now Playing by someone else in your household.• There may have been a conflict when requesting another program, and the proposed resolution was to delete the missing programearlier than planned. If you accepted that resolution, the program would have been deleted.• There may have been a channel changing problem. See “Questions About Channels” on page 136.Questions About Recording ConflictsCan I record multiple programs simultaneously?• No. You can watch any program in Now Playing while another is recording. However, you can only record one program at a time onyour Recorder, because it does not contain the necessary hardware to record two programs at once. The DIRECTV Recorder with<strong>TiVo</strong> has two tuners and can record two programs at the same time.How can I record a program (or programs) when there is a conflict?• The Recorder gives each repeating recording a priority. You can resolve some conflicts in favor of preferred programs using theSeason Pass Manager to change priorities (see page 45.)• If you encounter a conflict for a single episode, use “View upcoming episodes” to see if the program or episode you want will air ata different time.142
Questions About Now Playing• You can sometimes resolve recording conflicts by changing the “Stop Time” or “Start Time” Recording Options. (See page 43 formore about Recording Options.) If you set a program to start recording one minute early, it may conflict with a recording that airsright before it. To resolve such a conflict, change the “Start Time” back to “On Time” on the Recording Options screen.• If a single episode of a repeating recording conflicts with another program, you can select that episode in the To Do List and changeit independently of the rest of the repeating recording.Questions About Now PlayingCan I recover a recorded program that was deleted?• No. There is no way to bring back a program that has been deleted from Now Playing. You can choose to keep programs as long asyou want (see page 72) or save programs to video tapes or recordable DVDs (see page 61).I haven’t scheduled enough programs to fill my Recorder, but when I try to schedule more programs, the Recordersays there isn’t room.• The <strong>TiVo</strong> service includes smart scheduling features that track not only how much space you currently have on your Recorder, butalso how much space will be needed in the future to record all of the programs you have scheduled. If your Recorder will be full atsome point in the future, the <strong>TiVo</strong> service informs you and suggests options—such as allowing some programs to be deleted early—that will allow you to schedule additional recordings. With the <strong>TiVo</strong> service, you always have the final say over what gets recordedand how long it is kept.• In addition, the amount of recording space the Recorder needs varies from channel to channel and from show to show. In general, themore action you see on your screen, such as in fast-moving sports or action movies, the more recording space is required. Weakervideo signals may also require more space. The amount of space required for each show you record affects the total hours ofrecording capacity in your Recorder.8143
Chapter 8TroubleshootingHow can I fit more programs in Now Playing?• To make space, delete some programs in Now Playing. You delete a program by highlighting its title, then pressing CLEAR.• Lowering the default recording quality will allow you to fit more programs in Now Playing. See page 93 for details.• Set up Season Pass recordings with the Recording Option “First-run only.” You’ll collect only new episodes. You’ll also be lesslikely to run out of space in Now Playing and less likely to encounter conflicts.What does it mean when my Recorder says programs will be deleted earlier than planned?• By default, all programs are kept until space is needed. After that, programs you have not set to save longer may be deleted to makeroom for other recordings you request. The <strong>TiVo</strong> service includes smart scheduling features that keep track of when programsbecome available to be deleted, and of how much free space will be available at any given time in the future. If space will not beavailable to record a program you request, the <strong>TiVo</strong> service gives you the option of deleting some programs early to make moreroom. However, you always have the final say on how long the Recorder keeps programs. You can delete a program at any time, andyou can always change how long it is saved. Just select the program in Now Playing, then select “Keep until...”Questions About Parental Controls144My Parental Controls are not working.• For Parental Controls to work, they must be on (and must not be temporarily turned off). When you enter your password to watch aprogram that violates Parental Controls, they are temporarily turned off. You can re-enable them on the Parental Controls screen(from <strong>TiVo</strong> Central, select Messages & Setup, then Settings, then Parental Controls), or by putting your Recorder in Standby modeand then taking it out of Standby. You can put your Recorder in Standby mode by going to <strong>TiVo</strong> Central and selecting Messages &Setup, then Standby. To return to normal mode from Standby, press either the <strong>TiVo</strong> button the or LIVE TV button. (On someremotes, there is a POWER button that puts the Recorder in Standby mode and takes it back out.)I disabled Parental Controls, but I still can’t tune to the channel I want.• If your cable or satellite box has a feature like Parental Controls, make sure you have disabled them with the satellite or cable box’sremote. See your cable or satellite box’s owner’s manual for instructions.
Questions About Audio and Video• You may be using a channel list that does not include the channel you want. Use the number buttons on the remote control to enterthe channel number, then press ENTER. For more information on using a channel list see page 47.Questions About Audio and VideoThe audio and video are out of sync.• The audio and video may re-sync if you change channels.• You may be able to re-sync audio and video by pressing the INSTANT REPLAY button on the remote control.• Press the <strong>TiVo</strong> button to go to <strong>TiVo</strong> Central, then press the LIVE TV button to return to live TV.• You can also try restarting your Recorder. From <strong>TiVo</strong> Central, select Messages & Setup, then Restart or Reset System, then Restartthe Recorder. On the Restart the Recorder screen, press the THUMBS DOWN button three times, then press ENTER. You will seethe Welcome screen and the system will restart within a few minutes.My Recorder was working, but now the picture does not move• Try restarting your Recorder. From <strong>TiVo</strong> Central, select Messages & Setup, then Restart or Reset System, then Restart the Recorder.On the Restart the Recorder screen, press the THUMBS DOWN button three times, then press ENTER. You will see the Welcomescreen and the system will restart within a a few minutes. You can also restart the Recorder by unplugging it, waiting at least 15seconds, then plugging it back in.I don’t get a picture now, even though I have been able to get one in the past.• Someone in your household may have placed the Recorder in Standby mode. To return to normal mode from Standby, press eitherthe <strong>TiVo</strong> button or the LIVE TV button. (On some remotes, there is a POWER button that puts the Recorder in Standby mode andtakes it back out.)• Your TV may not be set to the correct input. Most TVs have an input button that says either “TV/Video,” “Input,” or “Source.” Itmay be on the TV or on the TV remote control. Look at your TV and TV remote and try changing the input for your TV.8145
Chapter 8Troubleshooting• If you have your Recorder connected to a VCR, the VCR may not be set to the correct input. Most VCRs have an input button thatsays either “TV/Video,” “Input,” or “Source.” It may be on the VCR or on the VCR remote control. Look at your VCR and VCRremote and try changing the input for your VCR.146• Check to make sure all of the appropriate cables are firmly connected to your Recorder, television and other audio/video equipment.For help with your cable connections, see the Start Here booklet and Chapter 1 of this guide.My audio system is set up to play in stereo, but it is only playing mono.• Make sure that “Main Audio Program (stereo)” is selected on the Television Audio screen (<strong>TiVo</strong> Central and select Messages &Setup, then Settings, then Audio, then Television Audio). And be sure you connected audio using the Recorder’s L/R Audio Outjacks.I can’t select an alternate audio track.• Secondary audio programs (SAP) are not available for all programs. If you set the SAP as the default audio, programs that have SAPwill use it. Only one audio track is saved with recorded programs. If SAP is the default audio and a program you are recording has anSAP, the SAP will be the recorded program’s only audio. You can set the default audio on the Television Audio screen (from <strong>TiVo</strong>Central, select Messages & Setup, then Settings, then Audio, then Television Audio).• Recorded programs, such as those in Now Playing, always have only one audio track, the one they were recorded with.• You cannot change the audio track if you are watching a live program, but are not caught up to live TV. Catch up to live TV bypressing the ADVANCE button. Changing the audio program will clear the saved part of the program you are watching, so you willonly be able to rewind live TV to the point where you changed the audio program.Programs are playing in the wrong language.• You may have selected the secondary audio program (SAP) as the default audio on the Television Audio screen. Most programs withSAP use it to broadcast in an alternate language. To turn off the SAP, change the main audio program on the Television Audio screen(from <strong>TiVo</strong> Central, select Messages & Setup, then Settings, then Audio, then Television Audio).When I turn on my TV, I see a blue screen with a <strong>TiVo</strong> logo.Your Recorder is having trouble tuning to the channel you are on. Follow these steps to restore the video:
Questions About the <strong>TiVo</strong> ®Service• Try changing channels. If the blue screen appears on just a few channels, you may be tuned to a channel to which you do notsubscribe, or you may be experiencing a weak signal on a channel to which you do subscribe. If you do not subscribe to thechannel, you should take it off the “Channels You Receive” list. (For more information, see page 86.) If you do subscribe to thechannel, wait 24 hours to see if the signal improves, or call your cable or satellite provider.• If you have a satellite or cable box, go to Messages & Setup, Cable/Satellite Box, Connection to Recorder. Verify that you chosethe same cable on this screen that you used to connect your satellite or cable box to the Recorder.• If the blue screen appears on every channel, and you have a cable or satellite box, make sure it is turned on.• You may be experiencing a temporary cable or satellite outage; check with your cable or satellite provider.• Your video cable may have come loose. Make sure all the cable connections on the back of your Recorder are secure.• Verify that you are receiving a video signal by temporarily connecting the video source directly to the TV. If you still do not seeany video, there may be a problem with your cable, satellite or antenna equipment.• The cables you are using to connect your Recorder to your TV or other equipment may be damaged or defective. Try exchangingthe cables connected to the Recorder with other cables that you know are working properly.• Restart your Recorder. (From <strong>TiVo</strong> Central, select Messages & Setup, then Restart or Reset System, then Restart the Recorder.Press THUMBS DOWN three times, then press ENTER. You will see the Welcome screen, and the system will restart withinabout 45 seconds. You can also restart the Recorder by unplugging it, waiting 15 seconds, then plugging it back in.Questions About the <strong>TiVo</strong> ® Service8Will my Recorder still work without the <strong>TiVo</strong> service?• Without the <strong>TiVo</strong> service, your Recorder will have extremely limited functionality. The Recorder was designed to be usedexclusively with the <strong>TiVo</strong> service. The <strong>TiVo</strong> service is required for proper operation of the Recorder. No functionality is represented,warranted or should be expected without a subscription to the <strong>TiVo</strong> service. The Recorder uses the program information provided bythe <strong>TiVo</strong> service to record the programs you request, to provide Season Pass functionality, to power the program guide, to allow you147
Chapter 8Troubleshootingto search for programs by name, etc. The <strong>TiVo</strong> service may also provide you with new Showcases, <strong>TiVo</strong>lution Magazine, andservice updates.What happens if my Recorder loses power temporarily?• Everything is saved—including your Now Playing programs—regardless of the length of time the Recorder is without power. Theonly thing you will miss is a recording that was scheduled to occur during the time the power was out.Will the <strong>TiVo</strong> service collect information about my viewing habits?• <strong>TiVo</strong> has designed its system and instituted policies to ensure that <strong>TiVo</strong> is unable to access any of your personally identifiableviewing information without your prior consent. <strong>TiVo</strong> does collect anonymous viewing information; that is, information aboutviewing choices made while using your Recorder, which does not identify you as an individual or household. In other words, there isno contact information associated with the viewing information that could identify the viewing information as coming from you oryour household. If you don’t want even your anonymous viewing information used in any way, you may simply call and tell us, andwe will stop collecting it. (See page 130 for our phone number.) For more information, see Chapter 9 or go to www.tivo.com/privacy.How is information from the <strong>TiVo</strong> service delivered to my Recorder?• The Recorder automatically makes regular connections to the <strong>TiVo</strong> service to download program information and other data.Information may also be delivered by a special <strong>TiVo</strong> program that is recorded late at night (when it does not conflict with any of yourrequested recordings).Questions About Networking148I can’t find “Edit phone or network settings.”• The menu item “Edit phone settings” will change to “Edit phone or network settings” after you connect a network adapter that theRecorder recognizes to the Recorder’s USB port. To see the Phone & Network Setup screen, press the <strong>TiVo</strong> button to go to <strong>TiVo</strong>Central, then select Messages & Setup, then Settings, then Phone & Network Setup.If you have attached an adapter and still see “Edit phone settings:”• Make sure the USB cable between the adapter and the Recorder is plugged firmly into both devices.
Questions About Networking• Confirm that you are using a recommended adapter. Check the list online at www.tivo.com/adapters. You may need to use adifferent adapter.My Recorder is not connecting to the <strong>TiVo</strong> service.• You can make the Recorder connect to the <strong>TiVo</strong> service at any time. Press the <strong>TiVo</strong> button to go to <strong>TiVo</strong> Central, then selectMessages & Setup, then Settings, then Phone & Network Setup, then “Connect to the <strong>TiVo</strong> service now.”• Your Recorder can connect to the <strong>TiVo</strong> service via a home network’s always-on broadband Internet connection, or via a phone line.To change the type of connection your Recorder uses to connect to the <strong>TiVo</strong> service, press the <strong>TiVo</strong> button to go to <strong>TiVo</strong> Central,then select Messages & Setup, then Settings, then Phone & Network Setup, then “Change connection type.”• If your Recorder is having trouble connecting via a broadband Internet connection:• Check that the Internet connection is available, then troubleshoot. There are two links in the chain between your Recorderand the Internet: your Recorder’s connection to your home network, and your home network’s connection to the Internet. First,confirm that the connection between your home network and the Internet is working. Try to go online and browse a web site froma computer on the same network as your Recorder. If you cannot browse the Internet, you must fix the connection from yournetwork to the Internet. After you have fixed this connection, try again to make your Recorder connect to the <strong>TiVo</strong> service. (Pressthe <strong>TiVo</strong> button to go to <strong>TiVo</strong> Central, then select Messages & Setup, then Settings, then Phone & Network Setup, then “Connectto the <strong>TiVo</strong> service now.”) If you can browse the web, then see “My Recorder is not connecting to my home network,” below.• Use a phone line. Use a regular phone line to connect to the <strong>TiVo</strong> service.• If your Recorder is having trouble connecting over a regular phone line:• Use broadband. If you have a home network with a broadband Internet connection, try allowing your Recorder to use it toconnect to the <strong>TiVo</strong> service over the Internet. Doing this eliminates the Recorder’s need to use a phone line. See Chapter 7 formore details.8149
Chapter 8Troubleshooting150My Recorder is not connecting to my home network.Any of the steps below may fix a network connection; you probably will not have to complete each one. For additional steps for wirelessnetworks, see “My Recorder is not connecting to my wireless home network.” on page 151.1. Check network adapter.• The network adapter or cables could be defective. If you have another adapter or USB cable available, try that adapter or cable.• The network adapter that you attached may not be supported. If your network adapter is compatible with your Recorder, andfunctioning properly, a MAC address—an identifier unique to the network adapter you purchased—is visible on the Phone &Network Setup screen. To check, from <strong>TiVo</strong> Central, select Messages & Setup, then Settings, then Phone & Network Setup. TheMAC address should be on the top right-hand side of the Phone & Network Setup screen. If you do not see a MAC address listed,your Recorder is not recognizing the network adapter you installed. The adapter is either not compatible, not functioning properly, ornot properly connected. If you do see a MAC address, the adapter you are using may or may not be compatible. For moreinformation, see “USB Ports, Wireless and Wired Network Adapters” on page 116.2. Check connection to the network adapter. Unplug the USB cable from the back panel of your Recorder and then plug it back in.Make sure the cable is pushed all the way in; sometimes lights on the adapter turn on before the USB cable is pushed all the way in.Unplug the side of the USB cable connected to the adapter and then plug it back in.3. Restart the Recorder. Press the <strong>TiVo</strong> button on the remote control to go to <strong>TiVo</strong> Central, then select Messages & Setup, then Restartor Reset System, then Restart the Recorder. Press THUMBS DOWN three times, then press ENTER.4. Check physical connections. Ensure that all network equipment is receiving power and all cable connections for routers, hubs,access points, and computers are working. Verify that the “connection” light is lit on devices connected to the network.5. Powercycle network devices. If you have a router or wireless access point, unplug it, wait a moment, and then plug it back in. Thiswill temporarily halt your network’s Internet connection. It may take a minute for your equipment to “restart” after you plug it in.6. Check your Network Settings. Verify that your Network Settings are correct. Complete TCP/IP Settings, even if you did not whenyou first connected your Recorder. For more information, see “Completing the Recorder’s Network Settings” on page 121.
Questions About Networking7. Update router or home gateway firmware. If your home network includes using a router, home gateway, or wireless access point, itmay need a firmware update. Firmware is a software program that is loaded onto a hardware device. You can usually find anyupdated firmware at the Customer Support web site for the manufacturer of your hardware. (For example, if you have a Linksysdevice, check http://www.linksys.com/download/.) Older firmware may cause unpredictable results. It may be necessary to powercycleyour device before and after you reinstall the firmware.8. Check Static IP Address. If you assigned an IP address to your Recorder, check that its IP address is unique on your network. Also,confirm that the first three sets of numbers of the Recorder’s IP address are the same as those of other devices on the network. (Forexample, if you computer’s IP address starts with “192.168.1” then your Recorder’s IP address must also start with“192.168.1”.)• You may have assigned a static IP address on a network with a DHCP server. If your network includes a DHCP server (forexample, as part of your router), you should not assign static IP addresses to devices on the network. Go to <strong>TiVo</strong> Central, thenselect Messages & Setup, then Settings, then Phone & Network Setup, then “Edit phone or network settings,” then TCP/IPSettings, then “Obtain IP address automatically.”If you have a wireless network, also try the steps below.My Recorder is not connecting to my wireless home network.Connecting to the network access point may take several minutes once the problem is resolved. Be certain the Phone & Network Setupscreen has had time to update to display the true network status before making any additional changes. To refresh the Phone & NetworkSetup screen using the remote control, press the LEFT arrow to go to the previous screen, and then press the RIGHT arrow to return tothe Phone & Network Setup screen.1. Check power at wireless access point. Ensure the wireless access point or wireless router is receiving power and that the“connection” light is on.2. Change password format. If you used an alphanumeric password for your wireless network, try using a hexadecimal passwordinstead. You can find a hexadecimal password (sometimes referred to as a “Key” or “WEP Key”) in the configuration settings foryour wireless access point or wireless router. If more than one hexadecimal password is listed, always use the first one. To changethe password format, follow the instructions for completing Wireless Settings at “Wireless Settings for a Home Network” onpage 121.1518
Chapter 8Troubleshooting3. Check signal strength. On the Phone & Network Setup screen (press the <strong>TiVo</strong> button to go to <strong>TiVo</strong> Central, then select Messages &Setup, then Settings, then Phone & Network Setup), check the wireless signal strength.The following may improve wireless signal strength:• Make sure the wireless adapter is placed well away from the Recorder’s power supply, or power strips, or surge protectors. Anyof these may cause interference and reduce signal strength. Some household appliances, such as microwave ovens and 2.4 GHzcordless phones, may also reduce signal strength when they are in use.• Verify that the wireless network adapter’s antenna is fully extended.• Move the wireless network adaptor to a higher position, or give it a better line of sight to your wireless gateway (router).• Reduce the distance between the wireless network adapter and the wireless access point. Wireless networks typically have arange of 100 - 300 feet, but distances can vary based on walls, floors, and other obstructions. It may be necessary to adjust thelocation adapter of your wireless access point or router to be closer to the network adapter attached to your Recorder(s).• Consider adding a signal booster to your network (available from some wireless equipment manufacturers).4. Check network name. On the Wireless Settings screen (press the <strong>TiVo</strong> button to go to <strong>TiVo</strong> Central, then select Messages & Setup,then Settings, then Phone & Network Setup, then “Edit phone or network settings,” then Wireless Settings), check that the networkname (SSID) for your network access point is listed correctly. To change the network name, follow the instructions for completingWireless Settings at “Wireless Settings for a Home Network” on page 121.If you haven’t already done so, you should also try the steps in “My Recorder is not connecting to my home network.” on page 150.152
CHAPTER9Privacy, Service, Warranty,and Licenses<strong>TiVo</strong> Privacy Policy 154<strong>TiVo</strong> Service Agreement 162HUMAX DVR Limited Warranty 170FCC Information 172Safety Instructions 173GNU General Public License 175Linux and Other Important Information 180
Chapter 9Privacy, Service, Warranty, and Licenses154<strong>TiVo</strong> Privacy PolicyPREAMBLE<strong>TiVo</strong> Inc. (“<strong>TiVo</strong>”) is committed to protecting the privacy of yourpersonal information. The <strong>TiVo</strong> Privacy Policy is published on the WorldWide Web at www.tivo.com/privacy. We have printed it here for yourconvenience, but we encourage you to check the web site or call us for acopy of the current Privacy Policy.This Privacy Policy applies to your use of the <strong>TiVo</strong> service (also knownas the <strong>TiVo</strong> Plus service) and/or the <strong>TiVo</strong> Basic service, as the case maybe. For purposes of convenience only, the <strong>TiVo</strong> service (also known asthe <strong>TiVo</strong> Plus service) and the <strong>TiVo</strong> Basic service are each referred toindividually as the “<strong>TiVo</strong> service” in this Privacy Policy. Where thePrivacy Policy differs depending on the type of service you have, thatdifference will be noted. Use of your <strong>TiVo</strong> ® Digital Video Recorder(referred to in this Privacy Policy as your “<strong>TiVo</strong> DVR”) with the <strong>TiVo</strong>service will signify your acceptance of this Privacy Policy. Thank you forusing the <strong>TiVo</strong> service!SUMMARY OF THE TIVO PRIVACY POLICY<strong>TiVo</strong> knows how important personal privacy is to you, so we havedesigned our system and established strict policies to help protect theprivacy of your Personally Identifiable Viewing Information. Insummary, we want you to know that:• The <strong>TiVo</strong> DVR collects certain types of information from its users,including Anonymous Viewing Information, Diagnostic Information,Commerce Information, and Service Information (each as definedbelow).• <strong>TiVo</strong> has no way to access any of your Personally IdentifiableViewing Information (as defined below) from your <strong>TiVo</strong> DVRwithout your prior consent. Absent your consent, <strong>TiVo</strong> has no way ofknowing what shows you—as an individual or household—havewatched, recorded, or rated with “Thumbs Up” or “Thumbs Down.”NOTE: If your <strong>TiVo</strong> DVR is receiving the <strong>TiVo</strong> Basic service, youmay not be able to consent to <strong>TiVo</strong>’s collection of your PersonallyIdentifiable Viewing Information from that <strong>TiVo</strong> DVR.• <strong>TiVo</strong> does collect Anonymous Viewing Information; that is,information about viewing choices made while using your <strong>TiVo</strong>DVR, but that does not identify you as an individual or household. Inother words, there is no personally identifiable informationassociated with your Anonymous Viewing Information that couldidentify the Anonymous Viewing Information as coming from you oryour household.• <strong>TiVo</strong> also collects Diagnostic Information from a small number ofrandomly sampled <strong>TiVo</strong> DVRs for quality control purposes. If yousubscribe to the <strong>TiVo</strong> Plus service and don’t want your AnonymousViewing Information and Diagnostic Information used in any way,simply tell us by writing to us or calling us at 1-877-367-8486.NOTE: If your <strong>TiVo</strong> DVR is receiving the <strong>TiVo</strong> Basic service, youmay not opt out of <strong>TiVo</strong>’s collection of Anonymous ViewingInformation or Diagnostic Information from that <strong>TiVo</strong> DVR;however, you are not required to provide <strong>TiVo</strong> with any ContactInformation (as defined below) with respect to that <strong>TiVo</strong> DVR.• If you affirmatively elect to engage in a commercial transaction suchas by responding to an advertisement or promotion, <strong>TiVo</strong> will collectand disclose your Commerce Information (as defined below) to thecommerce partner fulfilling the transaction. NOTE: If your <strong>TiVo</strong>DVR is receiving the <strong>TiVo</strong> Basic service, you may not be able toengage in commercial transactions from that <strong>TiVo</strong> DVR.• If you affirmatively elect to use the Online Scheduling feature of the<strong>TiVo</strong> Plus service, <strong>TiVo</strong> will collect the Personally IdentifiableViewing Information associated with fulfillment of your individual
<strong>TiVo</strong> Privacy Policyrequest(s). Use of the Online Scheduling feature, however, does notchange your privacy preferences with respect to viewing choicesmade in the privacy of your household. NOTE: If your <strong>TiVo</strong> DVR isreceiving the <strong>TiVo</strong> Basic service, you may use the Online Schedulingfeature on that <strong>TiVo</strong> DVR.• <strong>TiVo</strong> intends to make available new services in the future. Theseservices will be governed by the privacy policies of the respectiveservice providers.• NOTE TO TIVO BASIC SERVICE CUSTOMERS: If your <strong>TiVo</strong>DVR is receiving the <strong>TiVo</strong> Basic service, you may not (i) be able toopt out of our collection of Anonymous Viewing Information andDiagnostic Information from that <strong>TiVo</strong> DVR, (ii) opt out of yourreceipt of communications we send you in the event you provide uswith Contact Information (though you are not required to provide uswith any Contact Information as to that <strong>TiVo</strong> DVR), or (iii) be ableto change your privacy preferences to allow <strong>TiVo</strong> to collectPersonally Identifiable Viewing Information from that <strong>TiVo</strong> DVR.• NOTE TO CUSTOMERS WITH MORE THAN ONE TIVO DVR:Generally, <strong>TiVo</strong> will cause all of all the <strong>TiVo</strong> DVRs on your accountreceiving the <strong>TiVo</strong> Plus service to have the same “opt” status. SeeSec. 2.9 of the Privacy Policy for further details.TIVO PRIVACY POLICYPlease read this Privacy Policy carefully. It provides importantinformation on how your privacy is protected when using the <strong>TiVo</strong>service.In order to provide you with a better, more satisfying televisionexperience, <strong>TiVo</strong> Inc. (“<strong>TiVo</strong>”) collects and uses certain types ofinformation, as described in this Privacy Policy. The User Information(defined below) you provide to the <strong>TiVo</strong> Digital Video Recorder(referred to in this Privacy Policy as your “<strong>TiVo</strong> DVR”) in your houseand to us at <strong>TiVo</strong> enables your <strong>TiVo</strong> DVR to select programs you want itto record and, if you are <strong>TiVo</strong> Plus service user, to suggest programs youmight enjoy.By using your <strong>TiVo</strong> DVR and the <strong>TiVo</strong> service, you consent to theprovisions of this Privacy Policy including the privacy preferences setforth in Section 4.1. This Privacy Policy explains our commitments toyour privacy in the following areas:1 Our User Information Definitions. In discussing the kind ofinformation <strong>TiVo</strong> collects, it is important to distinguish betweenanonymous information and other information that specificallyidentifies you or your household. Too often, people refer to “personalinformation” or “personally identifiable information” without reallymaking clear what they mean. <strong>TiVo</strong> has developed the followingdefinitions to help clarify this important issue. We use “UserInformation” as a general term that refers to any information relatingto you or your use of the <strong>TiVo</strong> service. The following are morespecific types of User Information.1.1 “Account Information” means information about you and your<strong>TiVo</strong> DVR, including your Contact Information (defined below) andother information linked to your Contact Information such as themodel and Service Number of your <strong>TiVo</strong> DVR, your ZIP code,software version used, your TV programming source (cable, satelliteor an antenna), the type of cable hook-up (digital or analog) and levelof <strong>TiVo</strong> service (<strong>TiVo</strong> Basic, <strong>TiVo</strong> Plus, premium services, etc.),privacy preferences, and the cable or satellite box model that you use.You provide us with this information when (a) you set up your <strong>TiVo</strong>DVR with <strong>TiVo</strong> Basic service or (b) when you register as a user ofthe <strong>TiVo</strong> Plus service. This Service Information (defined below) issent to <strong>TiVo</strong> on an ongoing basis to enable <strong>TiVo</strong> to provide the <strong>TiVo</strong>service to your <strong>TiVo</strong> DVR. Account Information also includesinformation we may receive about you in a communication from youor a third party. Account Information does not include any Personally1559
Chapter 9Privacy, Service, Warranty, and Licenses156Identifiable Viewing Information, or Anonymous ViewingInformation, as defined below.a “Contact Information” means information that allowssomeone to identify or contact you, including, for example: yourname, address, telephone number, and e-mail address. ContactInformation is a subset of Account Information and is thus linkedto your <strong>TiVo</strong> DVR’s Service Number. Your ZIP code by itself,while part of your address, is not Contact Information becauseyour ZIP code alone does not allow someone to identify orcontact you. NOTE: If your <strong>TiVo</strong> DVR is receiving the <strong>TiVo</strong>Basic service, you are not required to provide <strong>TiVo</strong> with anyContact Information from that <strong>TiVo</strong> DVR.b “Service Information” means information necessary for <strong>TiVo</strong>to provide service to your <strong>TiVo</strong> DVR. Examples of ServiceInformation include your software version number, your TVprogramming source, level of service, and the success status ofthe last attempted service connection (e.g., periodic call). Thisinformation is always transmitted to <strong>TiVo</strong> when connected to the<strong>TiVo</strong> servers.1.2 “Personally Identifiable Viewing Information” meansinformation about the viewing choices that you and those in yourhousehold make while using your <strong>TiVo</strong> DVR, if that information islinked to or associated with your Account Information. Your <strong>TiVo</strong>DVR stores your viewing information so that it may recommendviewing choices and personalize your viewing experience. We haveworked very hard to design our system to ensure that no PersonallyIdentifiable Viewing Information may be sent to <strong>TiVo</strong> without yourexpress consent. If you use the <strong>TiVo</strong> Plus service, you may choose toconsent to <strong>TiVo</strong>’s collection of Personally Identifiable ViewingInformation by changing your privacy preferences as provided inSection 4.1. NOTE: If your <strong>TiVo</strong> DVR is receiving the <strong>TiVo</strong> Basicservice, you may not be able to consent to <strong>TiVo</strong>’s collection ofPersonally Identifiable Viewing Information from that <strong>TiVo</strong> DVR.1.3 “Anonymous Viewing Information” means information aboutviewing choices that you and those in your household make whileusing your <strong>TiVo</strong> DVR, but is not associated with or linked to anyContact Information. Your <strong>TiVo</strong> DVR sends Anonymous ViewingInformation to <strong>TiVo</strong> on an ongoing basis. This information allows<strong>TiVo</strong> to know that a <strong>TiVo</strong> service user from a particular ZIP codewatched certain programming but we are unable to associate thoseviewing choices with you. If you use the <strong>TiVo</strong> Plus service, you mayrequest that <strong>TiVo</strong> block the collection of Anonymous ViewingInformation from your <strong>TiVo</strong> DVR as described in Section 4.1.NOTE: If your <strong>TiVo</strong> DVR is receiving the <strong>TiVo</strong> Basic service, youmay not opt out of <strong>TiVo</strong>’s collection of Anonymous ViewingInformation from that <strong>TiVo</strong> DVR.1.4 “Diagnostic Information” means a log file containing detailedinformation about the operation of your <strong>TiVo</strong> DVR, such as memoryconsumption, user interface response time, disk space, enclosuretemperature, and enclosure fan speed. Diagnostic Information logscontain your <strong>TiVo</strong> DVR’s Service Number and are thus associatedwith your Account Information. If you use the <strong>TiVo</strong> Plus service, youmay request that <strong>TiVo</strong> block the collection of Diagnostic Informationlogs from your <strong>TiVo</strong> DVR as described in Section 4.1. NOTE: Ifyour <strong>TiVo</strong> DVR is receiving the <strong>TiVo</strong> Basic service, you may not optout of <strong>TiVo</strong>’s collection of Diagnostic Information from that <strong>TiVo</strong>DVR.1.5 “Commerce Information” means personally identifiableinformation that enables a commerce partner to fulfill your request toparticipate in a promotion or transaction. From time to time, <strong>TiVo</strong>may present special offers and/or enable you to purchase goods andservices from <strong>TiVo</strong>, or third party advertisers or promoters. You
<strong>TiVo</strong> Privacy Policywould be informed of such offers on screen while using the <strong>TiVo</strong>Plus service. Should you decide to take advantage of such an offer orengage in a transaction, <strong>TiVo</strong> will collect and communicate yourrelevant Contact Information and your interest in a specific offer ortransaction to the commerce partner sponsoring the promotion ortransaction. In addition to fulfilling your request, that commercepartner may also use your Commerce Information to send you otherinformation in which you might be interested consistent with its ownprivacy policies. This information is collected and disclosed by <strong>TiVo</strong>only upon your affirmative response to an offer. NOTE: Dependingon your level of <strong>TiVo</strong> service and the model of your <strong>TiVo</strong> DVR, suchfeatures may not be available to you.1.6 “Feature-Generated Request Information” means personallyidentifiable information about television programming or othercontent that you request your <strong>TiVo</strong> DVR to record or identify using afeature offered by <strong>TiVo</strong>, such as Online Scheduling, or a third partycontent delivery service. Should you decide to use such a feature orservice, <strong>TiVo</strong> will collect the Personally Identifiable ViewingInformation associated with the fulfillment of your recording (orscheduling conflict) request. <strong>TiVo</strong> may use this PersonallyIdentifiable Viewing Information as described in Section 2.2. If thefeature or service is offered by a third party, <strong>TiVo</strong> will communicateto the third party the necessary Personally Identifiable ViewingInformation to complete the transaction. The use of this informationwill be governed by the privacy policy of the respective third partyservice provider. <strong>TiVo</strong> collects this information only upon youraffirmative choice to use a particular feature. NOTE: Depending onyour level of <strong>TiVo</strong> service and the model of your <strong>TiVo</strong> DVR, suchfeatures may not be available to you.2 Use of User Information2.1 Account Information. We use your Account Information toestablish and provide you with your <strong>TiVo</strong> service, provide thenecessary resources to your <strong>TiVo</strong> DVR, offer you new services whenthey are available, and other legitimate business purposes. Forexample, we use your e-mail address to communicate with youregarding new services, and to exclude you from offers for servicesyou may already have. If you use the <strong>TiVo</strong> Plus service, we also usesuch information to create your account with <strong>TiVo</strong> and to bill you forthe <strong>TiVo</strong> Plus service. Knowing your ZIP code, programming source,and information about your cable or satellite box model allows us todetermine which programming information (e.g., times and channelsof programs) to send to your <strong>TiVo</strong> DVR.We use your Account Information to communicate with you aboutupcoming features in the <strong>TiVo</strong> service or promotions that mightinterest you. If you use the <strong>TiVo</strong> Plus service, you may opt not toreceive communications in the future as explained in Section 4.1. Wealso use your Account Information in aggregate form (i.e., excludingany Contact Information) to generate demographic profiles of ourusers as a whole to assist us to, for example, identify future users ofthe <strong>TiVo</strong> service or other services. NOTE: If your <strong>TiVo</strong> DVR isreceiving the <strong>TiVo</strong> Basic service, and you choose to provide us withContact Information, you may not opt out from receivingcommunications in the future. However, you are not required toprovide us with any Contact Information so long as that <strong>TiVo</strong> DVR isreceiving the <strong>TiVo</strong> Basic service.2.2 Personally Identifiable Viewing Information. Your <strong>TiVo</strong>DVR uses your viewing information to tune, schedule, and recordprograms. If you have the <strong>TiVo</strong> Plus service, your <strong>TiVo</strong> DVR alsouses your viewing information to recommend programs for you.Your <strong>TiVo</strong> DVR may also use this viewing information to selectadvertisements or other promotions for you that you may be1579
Chapter 9Privacy, Service, Warranty, and Licenses158interested in. <strong>TiVo</strong> does not receive the Personally IdentifiableViewing Information stored on your <strong>TiVo</strong> DVR without yourconsent. Absent your consent, no “tag” is added to the AnonymousViewing Information transmitted from your <strong>TiVo</strong> DVR to <strong>TiVo</strong> thatwould enable <strong>TiVo</strong> to identify the <strong>TiVo</strong> DVR from which it came.If you expressly choose to allow <strong>TiVo</strong> to collect your PersonallyIdentifiable Viewing Information, <strong>TiVo</strong> may use this information forsurveys, audience measurement, and other legitimate businesspurposes. NOTE: If your <strong>TiVo</strong> DVR is receiving the <strong>TiVo</strong> Basicservice, you may not be able to allow <strong>TiVo</strong> to collect your PersonallyIdentifiable Viewing Information from that <strong>TiVo</strong> DVR.2.3 Anonymous Viewing Information. We use AnonymousViewing Information to develop reports and analyses about whatprograms, advertisements, and types of programming our users (as awhole or in subgroups) watch or skip, for other programming oradvertising research, and for any other legitimate business purpose.For example, we use Anonymous Viewing Information to developinferences that people who watch show X also watch show Y. Wealso use Anonymous Viewing Information to help with theinvestigation of technical issues with our systems.2.4 Diagnostic Information. <strong>TiVo</strong> collects Diagnostic Informationlogs from a small number of randomly sampled <strong>TiVo</strong> DVRs forquality control and technical troubleshooting purposes.2.5 Commerce Information. <strong>TiVo</strong> uses Commerce Information asdescribed in Section 1.5.2.6 Feature Generated Requests Information. <strong>TiVo</strong> uses FeatureGenerated Request Information for the purposes described in Section1.6.2.7 Activating the <strong>TiVo</strong> Plus Service. When you activate a <strong>TiVo</strong>DVR that was receiving <strong>TiVo</strong> Basic service to receive the <strong>TiVo</strong> Plusservice, and it is the only <strong>TiVo</strong> DVR on your account receiving the<strong>TiVo</strong> Plus service, your <strong>TiVo</strong> DVR will provide AnonymousViewing Information and Diagnostic Information to <strong>TiVo</strong>. You mayopt in to the collection of Personally Identifiable ViewingInformation or opt out of <strong>TiVo</strong>’s collection of Anonymous ViewingInformation and Diagnostic Information pursuant to the terms andconditions of this Privacy Policy.2.8 Reverting to the <strong>TiVo</strong> Basic Service. If you decide to terminateyour <strong>TiVo</strong> Plus service, and your <strong>TiVo</strong> DVR is eligible to receive the<strong>TiVo</strong> Basic service, that <strong>TiVo</strong> DVR will retain the opt status that ithad when the <strong>TiVo</strong> Plus service is terminated. NOTE: Your <strong>TiVo</strong>DVR may not be eligible to receive the <strong>TiVo</strong> Basic service. Consultyour User’s Guide to determine if your <strong>TiVo</strong> DVR is eligible toreceive the <strong>TiVo</strong> Basic service.2.9 <strong>TiVo</strong> Customers with Multiple <strong>TiVo</strong> DVRs. <strong>TiVo</strong> will cause allof the <strong>TiVo</strong> DVRs on your account to have the same “opt” status.This means that if you opt out of our collection of AnonymousViewing Information and Diagnostic Information from one <strong>TiVo</strong>DVR, we will not collect Anonymous Viewing Information andDiagnostic Information from any of the <strong>TiVo</strong> DVRs. If you requestthat <strong>TiVo</strong> collect your Personally Identifiable Viewing Informationfrom one <strong>TiVo</strong> DVR, <strong>TiVo</strong> will collect Personally IdentifiableViewing Information from all of the <strong>TiVo</strong> DVRs on your account.3 Disclosure of User Information3.1 Generally. We disclose aggregated Account Information andaggregated Anonymous Viewing Information and any reports oranalyses derived therefrom, to third parties including advertisers,broadcasters, consumer and market research companies and otherorganizations.
<strong>TiVo</strong> Privacy Policy3.2 Manufacturing and Service Provider Partners. In certaininstances we will disclose to our hardware manufacturing partnersand service provider partners (for example DIRECTV) the AccountInformation of users who have a DVR made by that manufacturingpartner or receive a service from that service provider partner.However, <strong>TiVo</strong> contractually binds our manufacturing and serviceprovider partners to comply with the provisions of this PrivacyPolicy. Our manufacturing and service provider partners are legallyliable for misuse of User Information.3.3 Contractors and Third Party Service Providers. We usecontractors to help with some of our operations. Some of thesecontractors will have access to our databases of User Information on atemporary basis for specific tasks. <strong>TiVo</strong> also uses third parties to helpwith certain aspects of its operations, which may require disclosure ofyour User Information to them. For example, <strong>TiVo</strong> may use a thirdparty to communicate with you (via telephone, e-mail, or letter) aboutyour <strong>TiVo</strong> service or upcoming features or services, to mail rebatechecks, to generate demographic profiles based on User Informationof current <strong>TiVo</strong> service users, and to perform other work that we mayneed to outsource. If you are a <strong>TiVo</strong> Plus service user, <strong>TiVo</strong> mayadditionally use a third party to process and collect payment for your<strong>TiVo</strong> Plus service via your credit card. <strong>TiVo</strong> contractually binds thesecontractors and third parties to use your User Information only asnecessary to perform the services they are asked to perform. Suchcontractors and third parties are legally liable for misuse of UserInformation.3.4 The “Corporate Family.” Although <strong>TiVo</strong> currently does not havea parent company, any subsidiaries (other than <strong>TiVo</strong> International,Inc. and <strong>TiVo</strong> UK Ltd., which provides <strong>TiVo</strong> service in the UnitedKingdom), joint ventures, or other companies under a commoncontrol (collectively, “affiliates”), it may in the future. <strong>TiVo</strong> mayshare some or all of your User Information with these affiliates, inwhich case <strong>TiVo</strong> will require its affiliates to honor this PrivacyPolicy. If another company acquires <strong>TiVo</strong>, or acquires assets of <strong>TiVo</strong>that comprise or include your User Information, that company willpossess the User Information collected by <strong>TiVo</strong> and it will assume therights and obligations regarding your User Information as describedin this Privacy Policy.3.5 Commerce Partners. When you elect to participate in a specialoffer or engage in a transaction with <strong>TiVo</strong> or a third party advertiseror promoter, <strong>TiVo</strong> will collect and disclose your CommerceInformation to the commerce partner sponsoring and/or fulfilling thepromotion. In addition to fulfilling your request, that commercepartner may also use your Commerce Information to send you otherinformation in which you might be interested consistent with its ownprivacy policies. This information is disclosed only upon youraffirmative response to an offer. NOTE: Depending on your level of<strong>TiVo</strong> service and the model of your <strong>TiVo</strong> DVR, such features maynot be available to you.3.6 Factors Beyond Our Control. Your privacy is very important tous. Due to factors beyond our control, however, we cannot fullyensure that your User Information will not be disclosed to thirdparties. For example, we may be legally obligated to disclose UserInformation to local, state or federal governmental agencies or thirdparties under certain circumstances (including in response to asubpoena), or third parties may circumvent our security measures tounlawfully intercept or access your User Information.4 Your Choices Regarding User Information4.1 Limits on <strong>TiVo</strong>’s Collection, Use, and Disclosure of UserInformation. The default privacy preferences, to which you herebyconsent, do not allow <strong>TiVo</strong> to collect Personally Identifiable Viewing1599
Chapter 9Privacy, Service, Warranty, and Licenses160Information, but do allow <strong>TiVo</strong> to collect, use, and discloseAnonymous Viewing Information and Diagnostic Information logs,in addition to Account Information, in manners consistent with thisPrivacy Policy. Commerce Information is collected, used, anddisclosed only upon your affirmative response to an offer. Feature-Generated Request Information is collected, used, and disclosed onlyupon your affirmative choice to use a particular feature. NOTE:Depending on your level of <strong>TiVo</strong> service and the model of your <strong>TiVo</strong>DVR, such features may not be available to you.Even though Anonymous Viewing Information and DiagnosticInformation do not include any Contact Information, if your <strong>TiVo</strong>DVR is receiving the <strong>TiVo</strong> Plus service, you may request that <strong>TiVo</strong>block the collection of Anonymous Viewing Information andDiagnostic Information from your <strong>TiVo</strong> DVR. If your <strong>TiVo</strong> DVR isreceiving the <strong>TiVo</strong> Plus service, you may further opt not to receivecommunications that we send to you based on your AccountInformation; provided, however, that we will still send youcommunications <strong>TiVo</strong> deems important regarding your <strong>TiVo</strong> Plusservice. If you make this choice, you understand that we will not beable to inform you about any upcoming features, improvements, orpromotions regarding your <strong>TiVo</strong> Plus service. In all cases, however,we will collect and use your Account Information (including ServiceInformation) to enable us to provide your <strong>TiVo</strong> DVR with the <strong>TiVo</strong>Basic service and the <strong>TiVo</strong> Plus service. If your <strong>TiVo</strong> DVR isreceiving the <strong>TiVo</strong> Plus service, you may choose to change yourprivacy preferences to allow <strong>TiVo</strong> to collect Personally IdentifiableViewing Information from your <strong>TiVo</strong> DVR.If you are a <strong>TiVo</strong> Plus customer and you would like to change yourprivacy preferences, you must either (a) send <strong>TiVo</strong> a signed writtenrequest at the address set forth in Section 8.3, or (b) call us at 1-877-367-8486 to request a change. NOTE: Please see Sections 2.7, 2.8,and 2.9 above for important provisions if you have a <strong>TiVo</strong> DVReligible to receive the <strong>TiVo</strong> Basic service and if you have multiple<strong>TiVo</strong> DVRs.4.2 Review and Update of Account Information. We believe youhave a right to know your Contact Information, billing information,and privacy preferences collected and stored by <strong>TiVo</strong> and to updateor change such information you believe is incorrect. You may make arequest by telephone, mail, or via the web (if and when available) toreview such information and we will mail you a printout of suchinformation. If you request that certain parts of such information bechanged, we will make the changes to the extent commerciallypracticable. In addition, we will take commercially reasonable stepsto propagate those changes to third parties with whom we may haveshared such information pursuant to this Privacy Policy.4.3 How to Delete Information. Should you decide to discontinueyour <strong>TiVo</strong> Plus service, you may make that request by telephone ormail and we will suspend billing for the <strong>TiVo</strong> Plus service. After youdiscontinue the <strong>TiVo</strong> service, <strong>TiVo</strong> will maintain your AccountInformation only as long as necessary for business purposes. Inaddition, although we delete your Account Information from our“live” database, your Account Information may remain in ourarchives and records until they are destroyed. NOTE: If your <strong>TiVo</strong>DVR is eligible to receive the <strong>TiVo</strong> Basic service then upontermination of the <strong>TiVo</strong> Plus service you may elect to continuereceiving the <strong>TiVo</strong> Basic service. In such a case, <strong>TiVo</strong> may maintainyour <strong>TiVo</strong> Plus service Account Information until such time as your<strong>TiVo</strong> Basic service is terminated. Consult your User’s Guide todetermine if your <strong>TiVo</strong> DVR is eligible to receive the <strong>TiVo</strong> Basicservice.5 Comment Regarding Children. <strong>TiVo</strong> feels strongly aboutprotecting the privacy of children and encourages parents to be
<strong>TiVo</strong> Privacy Policyinvolved in the television viewing of their minor children by, forexample, limiting the types of content minor children can watch.6 Separate Rules for the <strong>TiVo</strong> Web Site. We have a separateprivacy policy that covers activities on our web site. However, if youregister for <strong>TiVo</strong> service on the Web, or log in to your accountpreferences page (when available) to make changes to your accountor request services, this Privacy Policy will apply to the UserInformation you provide to us in those instances. If you use the <strong>TiVo</strong>web site to access certain features or services such as OnlineScheduling, we may institute amendments and modifications to thisPrivacy Policy addressing the handling of your information inproviding you such features or services to which you must agree ifyou wish to use such features or services.7 Security of User Information.When you contact us by e-mail orphone regarding your <strong>TiVo</strong> service, we ask you for certain AccountInformation—in order to verify your identity—before acceptingrequests to make changes to your <strong>TiVo</strong> service. We take these steps toensure that only you or a household member who knows yourAccount Information will be able to access or change your UserInformation.<strong>TiVo</strong> uses industry-standard methods such as encryption to securethe communication of viewing information from your <strong>TiVo</strong> DVR to<strong>TiVo</strong>. In addition, <strong>TiVo</strong> uses industry-standard methods of securingits databases of User Information, including the use of firewalls.Except as provided elsewhere in this Privacy Policy, <strong>TiVo</strong> limitsaccess to User Information databases to those persons in the <strong>TiVo</strong>organization who have a business need for such access, includingservicing your account, informing you of service news and special<strong>TiVo</strong> offers, or aggregating Account Information or AnonymousViewing Information for the purpose of conducting research, andtargeting new users. However, you should know that no company,including <strong>TiVo</strong>, can fully eliminate security risks associated withUser Information.8 General8.1 Future Features, Services, and Amendments to thisPrivacy Policy. We may add to or upgrade the <strong>TiVo</strong> service toprovide you with new features on an ongoing basis. We may alsomake available new services in the future. New services will begoverned by the privacy policies of the respective service provider.To the extent that any new features or services may requireamendments to this Privacy Policy to describe the treatment of UserInformation, these amendments are effective upon notice to you. Inthe event that we make a substantial and material change to ourtreatment of User Information, such as a change in the way that wecollect, use, or disclose Personally Identifiable Viewing Information,we will notify you of such planned change and offer you theopportunity to alter your privacy preferences.8.2 Technical Problems. Even though <strong>TiVo</strong> has taken significantsteps to ensure that your User Information is never collected, used, ordisclosed by <strong>TiVo</strong> except as set forth by this Privacy Policy,technical mistakes are possible. If such a mistake takes place, we willtake commercially reasonable steps to correct it.8.3 Contact <strong>TiVo</strong>. Our intention is to be diligent in protecting yourprivacy by strictly following our Privacy Policy. If you would like tomake suggestions or find out more about our privacy practices,please call us at 1-877-367-8486 or send us a letter.Our mailing address is <strong>TiVo</strong> Inc., ATTN: Privacy Policy, 2160 GoldStreet, P.O. Box 2160, Alviso CA 95002-2160.8.4 Entire Agreement. The term “including” in this Privacy Policyshall mean “including without limitation.” This Privacy Policy1619
Chapter 9Privacy, Service, Warranty, and Licensessupplements and is incorporated into the <strong>TiVo</strong> Basic ServiceAgreement, the <strong>TiVo</strong> Plus Service Agreement, and any other <strong>TiVo</strong>service Agreements. This Privacy Policy constitutes the entireagreement, and replaces and supersedes all prior agreements,between you and <strong>TiVo</strong> concerning the subject matter discussed inthis Privacy Policy. Use of your <strong>TiVo</strong> DVR with <strong>TiVo</strong> service willsignify your acceptance of this Privacy Policy.BY USING THE TIVO SERVICE, I REPRESENT THAT I HAVEREAD AND UNDERSTOOD THIS ENTIRE PRIVACY POLICY ANDI AGREE TO ALL THE TERMS OF THIS PRIVACY POLICY ASSTATED ABOVE.<strong>TiVo</strong> Service Privacy Policy v20040602162<strong>TiVo</strong> Service AgreementINTRODUCTIONWelcome to <strong>TiVo</strong> and the <strong>TiVo</strong> service! This agreement explains theterms and conditions that will apply to your use of the <strong>TiVo</strong> service, andconstitutes a legally binding agreement between you and <strong>TiVo</strong> Inc.(“<strong>TiVo</strong>”). By using the <strong>TiVo</strong> service, you agree to all the terms andconditions in this agreement (“Agreement”).THE TIVO SERVICE AND THE PRIVACY POLICY1 Terms of Service. The <strong>TiVo</strong> logo on your <strong>TiVo</strong> ® Digital VideoRecorder (your “<strong>TiVo</strong> DVR”) means that it can receive the <strong>TiVo</strong>service offered and provided by <strong>TiVo</strong> for personal, non-commercialuse on a subscription basis. Your activation and continued use of the<strong>TiVo</strong> service is subject to the terms and conditions of thisAgreement. <strong>TiVo</strong> may at its discretion change the terms of thisAgreement. Such changes shall be effective upon notification by<strong>TiVo</strong>. We encourage you to check www.tivo.com/privacy or call usfor a copy of the current <strong>TiVo</strong> service agreement. If you aredissatisfied with any changes to this Agreement, you may cancelyour use of the <strong>TiVo</strong> service as provided in Section 14 (“Terminationof Service”).2 <strong>TiVo</strong>’s Privacy Policy. You must provide us with accurate andcomplete information when you activate your <strong>TiVo</strong> service. <strong>TiVo</strong>reserves the right to terminate your account if you give <strong>TiVo</strong>inaccurate or incomplete information. <strong>TiVo</strong> respects the privacy ofyour User Information (as defined in <strong>TiVo</strong>’s Privacy Policy) and willnot disclose any of your User Information except as permitted in<strong>TiVo</strong>’s Privacy Policy. A copy of <strong>TiVo</strong>’s Privacy Policy is included inthe product manual and the latest version can always be found viaour web site at www.tivo.com/privacy. Please read it carefully beforeusing the <strong>TiVo</strong> service. By using the <strong>TiVo</strong> service, you agree to theterms and conditions of our Privacy Policy and affirm that youunderstand the options <strong>TiVo</strong> provides to you with regard to your UserInformation. <strong>TiVo</strong> will notify you of any substantial and materialchanges to the Privacy Policy and the latest Privacy Policy canalways be accessed through our web site at www.tivo.com/privacy.3 The <strong>TiVo</strong> Service. The <strong>TiVo</strong> service consists of program guideinformation and the following features: (a) Season Pass TM -automatically finds and records every episode of a series all seasonlong; (b) WishList TM - finds and records programs that feature yourfavorite actor, director, team or even topic; (c) Smart Recording -automatically detects program line-up changes for your cable/
<strong>TiVo</strong> Service Agreementsatellite provider and adjusts recording times so you don't have toworry about the details; (d) <strong>TiVo</strong> Suggestions - <strong>TiVo</strong> can beprogrammed to suggest and auto-record programs that may matchyour interests; and (e) Parental Controls-lock channels or set ratingslimits based on content. Each of these features is part of the “<strong>TiVo</strong>service.” The “<strong>TiVo</strong> service” means these features and any additionalfeatures and functionality that <strong>TiVo</strong> may, at its discretion and fromtime to time, offer.3.1 Network-Enabled Features (includes former Home MediaOption features). You must have a network-enabled <strong>TiVo</strong> DVR touse any network-enabled features. (A network-enabled <strong>TiVo</strong> DVRhas an established network connection through the <strong>TiVo</strong> DVR’sbuilt-in USB port, Ethernet, or wireless adapter; is running a <strong>TiVo</strong>software version that supports home networking; and is subscribed tothe <strong>TiVo</strong> service.) Some features require a personal computer andinstallation of the <strong>TiVo</strong> Desktop application (www.tivo.com/desktop) on your networked computer. Some features require abroadband connection to the Internet through the home network.Multi-Room Viewing requires two network-enabled <strong>TiVo</strong> DVRs thatare enabled for the Multi-Room Viewing feature.Not all <strong>TiVo</strong> DVRs are able to use network-enabled features.Moreover, even among Series2 DVRs, the multi-room viewingfeature may not permit particular DVRs to transfer content amongone another due to incompatibility issues among manufacturers orcopy protection mechanisms. Please visit our <strong>TiVo</strong> Home MediaFeatures FAQs at www.tivo.com/mediafaq for details.The <strong>TiVo</strong> service enables you to schedule recordings on yournetwork-enabled <strong>TiVo</strong> DVR by using the Internet. The terms andconditions governing the use of the Online Scheduling feature arecontained in the <strong>TiVo</strong> Website Terms and Conditions, available atwww.tivo.com/webpolicy. Please note that when you purchase a<strong>TiVo</strong> service subscription, the Online Scheduling feature is alwaysturned on. The Online Scheduling feature cannot be turned off unlessthis Agreement is terminated. This means that if you purchase yournetwork-enabled <strong>TiVo</strong> DVR with Product Lifetime Service fromanother individual, the seller will be able to schedule recordings tothe DVR until you contact <strong>TiVo</strong> and have the <strong>TiVo</strong> servicesubscription for the DVR transferred to your own account.3.2 Multi-Room Viewing. You must have at least two (2) <strong>TiVo</strong>Series2 DVRs each with a <strong>TiVo</strong> service subscription to takeadvantage of the Multi-Room Viewing feature. The Multi-RoomViewing feature is intended solely to enable the transfer of contentamong DVRs within a single household. You may transfer contentonly among DVRs on the same <strong>TiVo</strong> account and only among DVRson the same network subnet. For example, if one DVR in your homeresides on your network at 192.168.1.5, any DVR used for Multi-Room Viewing must reside on that same network, having an IPaddress of 192.168.1.x. Any DVR that resides on a different network,such as a DVR with an IP address of 192.168.2.5, is not permitted toparticipate in Multi-Room Viewing.In addition, you may only transfer content among ten (10) DVRs on asingle <strong>TiVo</strong> account within your household. Unauthorized transfersor distribution of copyrighted works outside of your home mayconstitute an infringement of the rights of copyright holders. <strong>TiVo</strong>reserves the right to terminate the <strong>TiVo</strong> service accounts of userswho transfer or distribute content in violation of this Agreement –either to an unauthorized device or otherwise.Please note that when you subscribe to the <strong>TiVo</strong> service, the Multi-Room Viewing feature is turned on by default. You may turn thisfeature off by using Manage My Account at www.tivo.com/manage.1639
Chapter 9Privacy, Service, Warranty, and Licenses1643.3 Access to PC-based Media. Access to PC-based media via your<strong>TiVo</strong> is enabled through the <strong>TiVo</strong> Desktop application that isavailable at www.tivo.com/desktop.The <strong>TiVo</strong> Desktop application itself does not contain any securitymechanisms. If your home network has Internet access but does notinclude a firewall, information on your home network can be easilyseen by anyone on the Internet. Most firewall products stop all trafficoriginating from the Internet, protecting your systems from maliciousnetwork attacks or curious browsers interested in the files you haveon your computer. A firewall can be installed to protect an individualcomputer or to protect a whole home network. Because the <strong>TiVo</strong>Desktop application makes media you publish to your DVR availableon your home network, <strong>TiVo</strong> recommends that you install a firewallthat protects your home network. If your network does not include afirewall, Internet users may be able to access media on your networkor even information on your computer, such as personal financialdata. <strong>TiVo</strong> strongly suggests you take steps to protect your homenetwork from unwanted intruders. Routers and home gateways,available at most electronics stores, may include a firewall meant toprotect your home network.Some third-party PC-based applications may also enable access toPC-based media through your <strong>TiVo</strong>. Such applications may or maynot include built-in security mechanisms. <strong>TiVo</strong> is not responsible forand does not warrant the use, behavior, or performance of suchapplications.Network-enabled features are intended solely to enable you to accessmedia that resides on your home computer for personal,noncommercial use. The feature is not intended to be used forlistening to or viewing music, photographs, video, or other mediafrom third party sources including, but not limited to, Internetstreaming, webcasting, peer-to-peer or any other form oftransmission of content. Viewing or listening to media from thirdparty sources could subject your DVR and/or home computer toharm and may infringe the copyrights of third parties.3.4 Note About Privacy and <strong>TiVo</strong> Desktop Application. Pleasereview <strong>TiVo</strong>'s Privacy Policy located at www.tivo.com/privacy,which is incorporated herein by reference. Unless you have changedyour privacy preferences, when you use the features enabled by the<strong>TiVo</strong> Desktop application, <strong>TiVo</strong> collects anonymous informationabout the use of these features, but that does not identify you as anindividual or household. This anonymous information is treated thesame as Anonymous Viewing Information under <strong>TiVo</strong>’s PrivacyPolicy. In other words, there is no personally identifiable informationassociated with this data that could identify the data as coming fromyou or your household.4 We Don’t Control Third-Party Content! The <strong>TiVo</strong> service givesyou the ability to access audio, video, and other media over which<strong>TiVo</strong> exercises no editorial or programming control (“Third PartyContent”). You understand that: (a) <strong>TiVo</strong> does not guarantee theaccess to or the ability to record, display, or transfer any particularprogram; (b) programming is not under <strong>TiVo</strong>’s control; (c)programming providers may restrict or limit the ability to record,display, view or transfer particular programs by using a variety ofcopy protection mechanisms; (d) content providers may restrict orrevoke access to their content at any time; (e) <strong>TiVo</strong> is not responsiblefor and has no editorial control over any Third Party Content; and (f)<strong>TiVo</strong> has no control over the distribution of such content. You agreethat <strong>TiVo</strong> will have no liability to you, or anyone else who uses youraccount and <strong>TiVo</strong> DVR, with regard to any Third Party Content.5 Third Party Content Is Copyrighted. You also understand thatthe Third Party Content is the copyrighted material of the third party
<strong>TiVo</strong> Service Agreementthat supplies it, is protected by U.S. copyright law and otherapplicable laws, and may not be reproduced, used to preparederivative works, distributed, performed publicly or displayedpublicly without the written permission of the third party thatsupplied it, except to the extent allowed under the “fair use”provisions of the U.S. copyright laws, other limitations on exclusivecopyrights in the U.S. copyright laws, or comparable provisions offoreign laws. You hereby agree and declare that any and all ThirdParty Content accessed using your <strong>TiVo</strong> DVR or <strong>TiVo</strong> software arefor personal, non-commercial use and that the <strong>TiVo</strong> DVR or <strong>TiVo</strong>software will not be used for Third Party Content to be copied ordisplayed before a public audience without authorization from theappropriate rights holder. Unauthorized copying or distribution ofcopyrighted works may constitute an infringement of the copyrightholders’ rights. <strong>TiVo</strong> reserves the right to terminate the accounts ofusers of any <strong>TiVo</strong> software who infringe the copyrights of others.6 Changes to Your <strong>TiVo</strong> Service. <strong>TiVo</strong> may at its discretion andfrom time to time change, add, or remove features and functionalityof the <strong>TiVo</strong> service or the <strong>TiVo</strong> DVR without notice. If you aredissatisfied with any such changes to the <strong>TiVo</strong> service, you mayimmediately cancel your use of the <strong>TiVo</strong> service as provided inSection 14 (“Termination of Service”). <strong>TiVo</strong> reserves the right todiscontinue one, some, or all of the features of the <strong>TiVo</strong> service youreceive at any time at its discretion. <strong>TiVo</strong> may at its discretiondiscontinue the provision of software updates to certain <strong>TiVo</strong> DVRs.This means that while other <strong>TiVo</strong> DVRs may receive continuedsoftware updates and functionality; <strong>TiVo</strong> is not required to providesuch updates to your <strong>TiVo</strong> DVR. Additionally, the level of service<strong>TiVo</strong> provides may not be the same on each <strong>TiVo</strong> DVR; a given <strong>TiVo</strong>DVR may support different features and functionality, and <strong>TiVo</strong> isunder no obligation to provide all features and functionality to your<strong>TiVo</strong> DVR.ACTIVATING AND USING THE TIVO SERVICE7 Eligible Subscribers. You must be at least 18 years of age toassume the responsibilities of this Agreement. Minors may use the<strong>TiVo</strong> service only if one of their parents or legal guardians assumesthe responsibilities of this Agreement and thereby assumes fullresponsibility for the minor's use of the <strong>TiVo</strong> service.8 Subscription Fees. You agree to pay your subscription fee inadvance. Your subscription fee will cover the <strong>TiVo</strong> service receivedvia a <strong>TiVo</strong> DVR authorized by <strong>TiVo</strong> to enable the <strong>TiVo</strong> service. Youhave a choice of subscription payment options that may change overtime. You may switch payment options at the end of each period. Iffor any reason you need to reactivate your subscription, you may becharged a reactivation fee. If you are signing up for the <strong>TiVo</strong> serviceunder a promotional subscription fee, some additional restrictionsmay apply. If you have multiple <strong>TiVo</strong> service subscriptions under thesame account information, additional terms and conditions mayapply. Whatever your subscription payment option, your subscriptionfee does not include any services, features or functionality other thanthe <strong>TiVo</strong> service.9 Telephone Access and Possible Charges. The <strong>TiVo</strong> service isaccessed through a standard telephone line and is available as a localcall in most areas. In some areas, local and long- distance toll chargesmay apply. The <strong>TiVo</strong> service may also be available through theInternet with a broadband connection. However, <strong>TiVo</strong> does not makeany assurances about the availability or functionality of the <strong>TiVo</strong>service over a broadband connection. Firewall protection is stronglyadvised for any broadband Internet connections to protect your <strong>TiVo</strong>DVR from viruses and other harmful things. You are responsible for1659
Chapter 9Privacy, Service, Warranty, and Licenses166any telephone or broadband service charges incurred as a result ofusing or accessing the <strong>TiVo</strong> service and acknowledge and agree thatyou shall be solely responsible for all disputes with any telephonecompany or Internet service provider related to the same.10 Payment Authorization. If you choose a subscription option withrecurring payments, you agree that <strong>TiVo</strong> may automatically chargethe subscription fee to your credit or charge card at the beginning ofeach period. Your <strong>TiVo</strong> service access will not be established until<strong>TiVo</strong> has verified that the credit card information you provide us forpayment is accurate and that your credit card account is in goodstanding. <strong>TiVo</strong> may, as necessary, extend the expiration date of yourcredit card in order to ensure continued service. <strong>TiVo</strong> may, at itsdiscretion, change the <strong>TiVo</strong> service fees from time to time, and chargefees (which <strong>TiVo</strong> may also change) for features and functionalitiesthat are not a part of the <strong>TiVo</strong> service. <strong>TiVo</strong> will notify you 30 days inadvance of any fee changes or new fees; you may obtain the feescurrently in effect at any time by contacting <strong>TiVo</strong> Customer Supportat 1-877-367-8486. <strong>TiVo</strong> reserves the right to suspend or terminateyour <strong>TiVo</strong> service without notice upon rejection of any credit cardcharges or if your card issuer (or its agent or affiliate) seeks return ofpayments previously made to <strong>TiVo</strong> when <strong>TiVo</strong> believes you are liablefor the charges. You agree to pay a late charge on all amounts duewhich remain unpaid for 30 days. The late charge will equal 1.5% ofthe past due amount, or the highest rate allowed by law, per monthuntil paid. Such rights are in addition to and not in lieu of any otherlegal right or remedies available to <strong>TiVo</strong>. <strong>TiVo</strong> reserves the right torefer your account to a third party for collection in the event of anongoing default.11 Using the <strong>TiVo</strong> Service. You may access and use the <strong>TiVo</strong> serviceonly with a <strong>TiVo</strong> DVR that is authorized to receive the <strong>TiVo</strong> serviceand you agree not to tamper with or otherwise modify your <strong>TiVo</strong>DVR. Among other things, this means that you may access and usethe program guide information only on a <strong>TiVo</strong> DVR that is authorizedto receive it. The <strong>TiVo</strong> service is provided for your personal, noncommercialuse, and may not be resold, in whole or in part. Except asexpressly provided in this Agreement, you may not transfer the <strong>TiVo</strong>service. By using the <strong>TiVo</strong> service, you agree to receive all softwareupdates and upgrades that <strong>TiVo</strong> sends to your <strong>TiVo</strong> DVR. If your<strong>TiVo</strong> DVR accesses the <strong>TiVo</strong> service (regardless of your payment orsubscription status), you acknowledge and agree that you are a user ofthe <strong>TiVo</strong> service and are bound by the terms of this Agreement.12 Advertising and Promotions. The <strong>TiVo</strong> service is advertisersupported. The hard disk drive of your <strong>TiVo</strong> DVR contains reservedspace in addition to the advertised recording capacity. <strong>TiVo</strong> reservesthe right to send content (including advertising and promotionalmaterial) to such reserved portions of your <strong>TiVo</strong> DVR's hard diskdrive as part of the <strong>TiVo</strong> service. In order to send such content, youagree that <strong>TiVo</strong> may tune your <strong>TiVo</strong> DVR to a particular channel at aparticular time.13 Definition of Product Lifetime Subscription. A “ProductLifetime Subscription” to the <strong>TiVo</strong> service covers the life of the <strong>TiVo</strong>DVR you buy–not the life of the subscriber. The Product LifetimeSubscription accompanies the <strong>TiVo</strong> DVR in case of ownershiptransfer. The subscription remains in effect if the <strong>TiVo</strong> DVR needs tobe repaired or replaced due to a malfunction (see manufacturer orretailer warranty details) or even if you upgrade your <strong>TiVo</strong> DVR toincrease storage capacity (though such upgrades, if not performed bya <strong>TiVo</strong>-authorized third party, will void the warranty on your <strong>TiVo</strong>DVR and constitute a breach of this Agreement). Because a ProductLifetime Subscription is linked to a particular <strong>TiVo</strong> DVR, you maynot transfer it to any other <strong>TiVo</strong> DVR unless all the followingconditions apply: (a) the <strong>TiVo</strong> DVR is being replaced pursuant to the
<strong>TiVo</strong> Service Agreementmanufacturer's or retailer's warranty; and (b) the <strong>TiVo</strong> DVR beingreplaced is of the same make and model as the replacement <strong>TiVo</strong>DVR; and (c) you provide us with a proof of replacement by themanufacturer or retailer. <strong>TiVo</strong> reserves the right to charge you a fee totransfer Product Lifetime Service from a <strong>TiVo</strong> DVR being replacedto a replacement <strong>TiVo</strong> DVR. Each <strong>TiVo</strong> DVR purchased requires itsown <strong>TiVo</strong> service subscription and activation. Of course, hardwareproducts don’t last forever and their lifespan will vary. <strong>TiVo</strong> makesno warranties or representations as to the expected lifetime of the<strong>TiVo</strong> DVR (aside from the manufacturer’s or retailer’s warranty).14 Termination of Service. You may terminate your account, thisAgreement, and your right to use the <strong>TiVo</strong> service, at any time andfor any reason or no reason, by contacting <strong>TiVo</strong> Customer Support at1-877-367-8486. The <strong>TiVo</strong> service will be terminated within 24hours after your call and unused subscription fees are nonrefundable.Notwithstanding anything to the contrary in this Agreement, <strong>TiVo</strong>retains the absolute right to immediately suspend or terminate youraccount, and terminate this Agreement, if the charges to your creditcard for the fees described in Section 8 (“Subscription Fees”) andSection 10 (“Payment Authorization”) are refused for any reason, ifyou breach any provision in this Agreement, if you misuse the <strong>TiVo</strong>service, and/or if you alter your <strong>TiVo</strong> DVR or use the <strong>TiVo</strong> service insuch a manner as to infringe upon the intellectual property rights of<strong>TiVo</strong> or any third party. In addition, <strong>TiVo</strong> reserves the right toterminate your account and this Agreement for any other reason or noreason if <strong>TiVo</strong> gives you at least 30 days advance notice of suchtermination. Upon any such termination of your account, you willremain obligated to pay all outstanding fees and charges relating toyour use of the <strong>TiVo</strong> service before termination.OWNERSHIP, OPEN SOURCE SOFTWARE, DISCLAIMERSAND LIABILITY LIMITATIONS15 Title to Software and Intellectual Property. You may need touse certain software programs to use or have full access to certainfeatures of the <strong>TiVo</strong> service. You received certain software with thepurchase of the <strong>TiVo</strong> DVR and other software programs may beprovided to you by <strong>TiVo</strong> from time to time, which you are obligatedto accept. Your use of such software is subject to the terms of thisAgreement. <strong>TiVo</strong> retains title to and ownership of all the <strong>TiVo</strong>software and certain intellectual property rights in the <strong>TiVo</strong> DVR.<strong>TiVo</strong> also retains ownership of all <strong>TiVo</strong> copyrights and trademarks. Inthe case of third party software delivered by <strong>TiVo</strong> to the <strong>TiVo</strong> DVR,the applicable third party retains title to and ownership of itssoftware, copyrights and trademarks. Any attempt to disassemble,decompile, create derivative works of, reverse engineer, modify,sublicense, distribute or use for other purposes either the <strong>TiVo</strong> DVRor software of this system is strictly prohibited, except as expresslyset forth in Section 16 (“Open Source Software”).16 Open Source Software. Certain components of the <strong>TiVo</strong> softwareare subject to the GNU General Public License or other so-calledopen source licenses (“Open-Source Software”). Open SourceSoftware is not subject to the restrictions in the last sentence ofSection 15 (“Title to Software and Intellectual Property”), and issubject to the GNU General Public License (“GPL”) or other licenseterms, as applicable. In compliance with the terms of the GPL, <strong>TiVo</strong>makes its modifications to Open Source Software that <strong>TiVo</strong> uses,modifies and distributes pursuant to the GPL available to the publicin source code form at www.tivo.com/source. You are free to use,modify and distribute Open Source Software that is subject to theGPL so long as you comply with the terms of the GPL (available inthe product manual or at www.gnu.org/copyleft/gpl.html).1679
Chapter 9Privacy, Service, Warranty, and Licenses16817 Indemnity. YOU AGREE TO DEFEND, INDEMNIFY ANDHOLD HARMLESS TIVO FROM AND AGAINST ANY ANDALL CLAIMS, PROCEEDINGS, INJURIES, LIABILITIES,LOSSES, COSTS AND EXPENSES (INCLUDINGREASONABLE ATTORNEYS’ FEES), INCLUDING, BUT NOTLIMITED TO, CLAIMS ALLEGING NEGLIGENCE,COPYRIGHT INFRINGEMENT AND/OR TRADEMARKINFRINGEMENT AGAINST TIVO OR THE TIVO SERVICE,RELATING TO OR ARISING OUT OF YOUR BREACH OF ANYTERM OF THIS AGREEMENT, YOUR MISUSE OF THE TIVOSERVICE, OR YOUR UNAUTHORIZED MODIFICATION ORALTERATION OF THE TIVO DVR OR RELATED SOFTWARE(OTHER THAN AS EXPRESSLY SET FORTH IN SECTION 16(“OPEN SOURCE SOFTWARE”)).18 Warranty Disclaimer. YOU UNDERSTAND AND AGREETHAT THE TIVO SERVICE IS PROVIDED ON AN “AS IS” AND“AS AVAILABLE” BASIS. TIVO MAKES NO WARRANTYTHAT THE TIVO SERVICE WILL MEET YOURREQUIREMENTS, ALLOW YOU TO RECORD OR VIEW ANYPARTICULAR PROGRAMMING, OR THAT USE OF THE TIVOSERVICE WILL BE UNINTERRUPTED, TIMELY, SECURE, ORERROR-FREE; NOR DOES TIVO MAKE ANY WARRANTY ASTO THE ACCURACY OR RELIABILITY OF ANYINFORMATION OBTAINED THROUGH THE TIVO SERVICE(INCLUDING THIRD PARTY CONTENT), THAT ANYDEFECTS IN THE TIVO SERVICE WILL BE CORRECTED ORTHAT THE TIVO DVR OR TIVO SERVICE WILL BECOMPATIBLE WITH ANY OTHER SPECIFIC HARDWARE ORSERVICE. FURTHER, TIVO DOES NOT WARRANT THAT THETIVO SERVICE OR THE TIVO SERVERS THAT PROVIDE YOUWITH DATA AND CONTENT ARE FREE OF VIRUSES OROTHER HARMFUL COMPONENTS. YOU (AND NOT TIVO)ASSUME THE ENTIRE COST OF ALL NECESSARYMAINTENANCE, REPAIR OR CORRECTION. TIVO ALSOASSUMES NO RESPONSIBILITY, AND SHALL NOT BELIABLE FOR ANY DAMAGES TO, OR VIRUSES THAT MAYINFECT YOUR TIVO DVR, TIVO SOFTWARE, OR OTHERHARDWARE. TIVO AND ITS SUPPLIERS DISCLAIM ALLWARRANTIES OF ANY KIND, WHETHER EXPRESS,IMPLIED, OR STATUTORY, REGARDING THE TIVO SERVICEOR TIVO SOFTWARE, INCLUDING ANY IMPLIEDWARRANTY OF TITLE, MERCHANTABILITY, FITNESS FOR APARTICULAR PURPOSE, OR NON- INFRINGEMENT OFTHIRD PARTY RIGHTS. Because some jurisdictions do not permitthe exclusion of implied warranties, the last sentence of this sectionmay not apply to you.19 Limitations of <strong>TiVo</strong>’s Liability. IN NO EVENT WILL TIVO ORITS SUPPLIERS BE LIABLE TO YOU OR ANY THIRD PARTYFOR ANY LOST PROFITS, USE OF USER INFORMATION,LOSS OF DATA, BUSINESS INTERRUPTION, OR OTHERINDIRECT, CONSEQUENTIAL, SPECIAL, OR INCIDENTALDAMAGES OF ANY NATURE ARISING FROM OR RELATINGTO YOUR USE OF THE TIVO SERVICE OR USE OF THE TIVOSERVICE THROUGH YOUR ACCOUNT BY ANYONE ELSE,EVEN IF TIVO HAS BEEN ADVISED OF THE POSSIBILITY OFSUCH DAMAGES. IN NO CASE WILL TIVO'S TOTALCUMULATIVE LIABILITY TO YOU AND ANYONE WHOUSES THE TIVO SERVICE THROUGH YOUR ACCOUNT, FORANY AND ALL CLAIMS UNDER ANY THEORY OF LAW,EXCEED THE AGGREGATE AMOUNT YOU PAID TO TIVO INTHE PRECEDING TWELVE MONTHS. YOU UNDERSTANDTHAT THESE LIMITATIONS OF TIVO’S AND TIVO'S
<strong>TiVo</strong> Service AgreementSUPPLIERS’ LIABILITY ARE A FUNDAMENTAL PART OFTHIS AGREEMENT. Some states do not allow the exclusion orlimitation of incidental or consequential damages, so the abovelimitation or exclusion may not apply to you. Additionally, thisprovision is not intended to limit <strong>TiVo</strong>’s liability in the event of<strong>TiVo</strong>’s willful or intentional misconduct. Moreover, if <strong>TiVo</strong>mistakenly or wrongfully overcharges your account, this section doesnot limit <strong>TiVo</strong>’s obligation to refund such mistakenly or wrongfullyovercharged amounts.GENERAL20 Miscellaneous. This Agreement will be governed by the laws ofthe State of California as such laws apply to agreements betweenCalifornia residents performed entirely within California. The UnitedNations Convention on Contracts for the International Sale of Goodsdoes not apply to this Agreement. You and <strong>TiVo</strong> agree to submit tothe exclusive personal jurisdiction of the courts located within thecounty of Santa Clara, California. If any provision of this Agreementis invalid or unenforceable under applicable law, such provision willbe deemed modified to the extent necessary to render such provisionvalid and enforceable and the other provisions of this Agreement willremain in full force and effect. The official text of this Agreement ornotice submitted hereunder shall be in English. In the event of anydispute concerning the construction or meaning of this Agreement,reference shall be made only to this Agreement as written in Englishand not to any translation into another language. This documentrepresents the entire agreement governing your use of the <strong>TiVo</strong>service and supersedes any prior or contemporaneous written or oralstatements by <strong>TiVo</strong> or its representatives or resellers. <strong>TiVo</strong>’s failure toenforce any of the terms of this Agreement shall not constitute awaiver or relinquishment of <strong>TiVo</strong>’s right to do so at any time.Sections 8 (“Subscription Fees”), 9 (“Telephone Access and PossibleCharges”), 10 (“Payment Authorization”), 11 (“Using the <strong>TiVo</strong>Service”), 15 (“Title to Software and Intellectual Property”), 16(“Open Source Software”), 17 (“Indemnity”), 18 (“WarrantyDisclaimer”), 19 (“Limitations of <strong>TiVo</strong>’s Liability”), and 20(“Miscellaneous”) shall survive any termination or expiration of thisAgreement.BY USING THE TIVO SERVICE, I REPRESENT THAT I HAVEREAD AND UNDERSTOOD THIS ENTIRE AGREEMENT AND IAGREE TO ALL THE TERMS OF THIS AGREEMENT AS STATEDABOVE.<strong>TiVo</strong> Service Agreement v200406081699
Chapter 9Privacy, Service, Warranty, and Licenses170HUMAX DVR Limited WarrantyWe thank you for having bought this Humax product and hope you willenjoy it for many years. In order to avoid any unnecessary inconvenienceon your part, we suggest reading the instruction manual carefully beforecontacting our customer care department. Also keep the original box andpacking material in case you need to return or repair your product.LIMITED 90 DAYS WARRANTYHumax warrant the product to be free from defects in materials andworkmanship, Humax warrant this product against defects in materials orworkmanship for a period of ninety (90) days after the date of originalretail purchase. During this period Humax will repair or replace adefective product or part, at its discretion, with a new or refurbishedproduct or part without charge to you. You are responsible for allshipping and insurance charges for the unit to the Authorized ServiceCenter. Upon receipt we will at our option exchange the unit with a newor refurbished unit.LIMITED ONE (1) YEAR WARRANTYHumax warrants the product to be free from defects in materials andworkmanship, Humax warrants this product against defects in materialsor workmanship for a period of one (1) year after the date of originalretail purchase. During this period Humax will repair or replace adefective product or part without charge to you, except that if a defectivepart is replaced after ninety (90) days from the date of the original retailpurchase you shall pay labor charges involved in the replacement. Youare responsible for all shipping and insurance charges for the unit to theAuthorized Service Center. Upon receipt we will at our option exchangethe unit with a new or refurbished unit.CONDITIONS1. This warranty will be granted only when the original invoice or salesreceipt (indicating the date of purchase, product type and dealer's name)is presented together with the defective product. Humax reserves theright to refuse free-of-charge warranty service if the above documentcannot be presented or if the information contained in it is incomplete orillegible.2. This warranty will not reimburse nor cover the damage resulting fromadaptations or adjustments which may be made to the product, withoutthe prior written consent of Humax, in order to conform to the national orlocal technical or safety standards in force in any country other than theones for which the product was originally designed and manufactured.3. This warranty will not apply if the type or serial number on the producthas been altered, deleted, removed or made illegible.4. This warranty covers none of the following:• Periodic maintenance and repair or replacement of parts due tonormal wear and tear;• Any adaptation or changes to upgrade the product from its normalpurpose as described in the instruction manual, without the priorwritten consent of Humax;• Transport costs, home service transport cost and all risks of transportrelating directly or indirectly to the guarantee of the product;• Damage resulting from: (i) misuse, including but not limited to (a)failure to use the product for its normal purpose or in accordancewith Humax' instructions on the proper use and maintenance, and (b)installation or use of the product in a manner inconsistent with thetechnical or safety standards in force in the country where it is usedand (c) improper or incorrect installation of software; (ii) repair done
HUMAX DVR Limited Warrantyby non-authorized service stations or dealers, or the customerhimself; (iii) accidents, lightning, water, fire, improper ventilation orany cause beyond the control of Humax; (iv) defects of the systeminto which this product is incorporated.5. This warranty does not affect the consumer's statutory rights underapplicable national laws in force, nor the consumer's rights against thedealer arising from their sales/purchase contract.6. THERE ARE NO EXPRESS WARRANTIES OTHER THOSELISTED AND DESCRIBED ABOVE. AND NO WARRANTIESWHETHER EXPRESS OR IMPLIED, INCLUDING, BUT NOTLIMITED TO, ANY IMPLIED WARRANTIES OFMERCHANTABILITY OR FITNESS FOR A PARTICULARPURPOSE, SHALL APPLY AFTER THE EXPRESS WARRATYGIVEN BY ANY PERSON, FIRM, OR CORPORATION WITHRESPECT TO THIS PRODUCT SHALL BE BINDING ON Humax.7. Humax shall not be liable for loss of revenue or profits, failure torealize saving or other benefits, or any other special, incidental orconsequential damages caused by the use, misuse or inability to use thisproduct, regardless of the legal theory on which the claim based, andeven if Humax has been advised of the possibility of such damages. Norshall recovery of any kind against Humax be greater in amount than thepurchase price of the product sold by Humax and causing the allegeddamage. Without limiting the foregoing, purchaser assumes all risk andliability for loss, damage to purchaser and purchaser's property and toothers and their property arising out of the use, misuse or inability to usethis product sold by Humax not caused directly by the negligence ofHumax. This limited warranty shall not extend to anyone other than theoriginal purchaser of this product, is nontransferable and states yourexclusive remedy.Where states do not allow limitation on how long an implied warrantylasts, or the exclusion or limitation of incidental or consequentialdamages, the above limitations or exclusions may not apply to you. Inthis case this warranty gives specific legal rights and you may also haveother rights which vary from state to state.To obtain warranty service, please contact HUMAX at:HUMAX USA, Inc.3601 West Garry AveSanta Ana, CA 92704Tel: (866) 486-2987E-mail: Support@HumaxUSA.com9171
Chapter 9Privacy, Service, Warranty, and LicensesFCC InformationThis equipment complies with Part 68 of the FCC Rules and therequirements adopted by ACTA. On the back of this equipment is a labelthat contains a product identifier in the format US:AAAEQ##TXXXX. Ifrequested, this information must be provided to your telephone company.A plug and jack used to connect this equipment to the premises wiringand telephone network must comply with the applicable FCC Part 68rules and requirements adopted by ACTA. A compliant telephone cordand modular plug is provided with this product. It is designed to beconnected to a compatible modular jack that is also compliant. Seeinstallation instructions for details.The REN is used to determine the number of devices that may connect toa telephone line. Excessive RENs on a telephone line may result in thedevices not ringing in response to an incoming call. In most but not allareas, the sum of the RENs should not exceed five (5.0). To be certain ofthe number of devices that may be connected to a line, as determined bythe total RENs, contact your local telephone company. For productapproved after July 23, 2001, the REN for this product is part of theproduct identifier that has the format US:AAAEQ##TXXXX. The digitsrepresented by ## are the REN without the decimal point (e.g., 03 is aREN of 0.3). For earlier products, the REN is separately shown on thelabel.If your HUMAX DVD RECORDER causes harm to the telephonenetwork, the telephone company will notify you in advance thattemporary discontinuance of service may be required. But if advancenotice isn't practical, the telephone company will notify the customer assoon as possible. Also, you will be advised of your right to file acomplaint with the FCC if you believe it is necessary.The telephone company may make changes in its facilities, equipment,operations or procedures that could affect the proper functioning of yourequipment. If they do, you will be notified in advance in order for you tomake necessary modifications to maintain uninterrupted service.Connection to party line service is subject to state tariffs. Contact thestate public utility commission, public service commission or corporationcommission for information.If your home has specially wired alarm equipment connected to thetelephone line, ensure the installation of this HUMAX DVDRECORDER does not disable your alarm equipment. If you havequestions about what will disable alarm equipment, consult yourtelephone company or a qualified installer.If trouble is experienced with this unit, for repair or warrantyinformation, please contact customer service at the address and phonelisted below. If the equipment is causing harm to the network, thetelephone company may request that you disconnect the equipment untilthe problem is resolved.DO NOT DISASSEMBLE THIS EQUIPMENT. It does not contain anyuser serviceable components.We recommend the installation of an AC surge arrester in the AC outletto which this equipment is connected. Telephone companies report thatelectrical surges, typically lighting transients, are very destructive tocustomer terminal equipment connected to AC power sources.HUMAX USA, Inc.3601 West Garry AveSanta Ana, CA 92704Tel: (866) 486-2987172
Safety InstructionsSafety InstructionsThis product was designed and manufactured to meet strict quality andsafety standards. There are, however, some installation and operationprecautions of which you should be particularly aware. Please read theseinstructions before operating the equipment and save them for futurereference.1. Read Instructions—All the safety and operating instructions should beread and understood before the appliance is operated.2. Retain Instructions—The safety and operating instructions should beretained for future reference.3. Heed Warnings—All warnings on the appliance and in the operatinginstructions should be followed.4. Follow Instructions—All operating and use instructions should befollowed.5. Water and Moisture—The appliance should not be used near water -for example, near a bathtub, washbowl, kitchen sink, laundry tub, in awet basement or near a swimming pool, etc.6. An appliance and cart combination should be moved with care. Quickstops, excessive force, and uneven surfaces may cause the appliance andcart combination to overturn.7. Tilt/Stability—All televisions must comply with recommendedinternational global safety standards for tilt and stability properties oftheir cabinet design. Do not compromise these design standards byapplying excessive pull force to the front, or top, of the cabinet, whichcould ultimately overturn the product. Also, do not endanger yourself, orchildren, by placing electronic equipment/toys on top of the cabinet.Such items could unexpectedly fall from the top of the set and causeproduct damage and/or personal injury.8. Ventilation—The appliance should be situated so that its location orposition does not interfere with its proper ventilation. For example, theappliance should not be situated on a bed, sofa, rug, or similar surfacethat may block the ventilation openings; or, placed in a built-ininstallation, such as a bookcase or cabinet that may impede the flow ofair through the ventilation openings.9. Heat—The appliance should be situated away from heat sources suchas radiators, heat registers, stoves, or other appliances (includingamplifiers) that produce heat.10. Power Cord Protection—Power supply cords should be routed so thatthey are not likely to be walked on or pinched by items placed upon oragainst them, paying particular attention to cords and plugs, conveniencereceptacles, and the point where they exit from the appliance.11. Object and Liquid Entry—Never push objects of any kind into thisproduct through cabinet slots, as they may touch dangerous voltagepoints or short the parts, resulting in the risk of fire or electric shock.Never spill liquid of any kind on this product.12. Damage Requiring Service—The appliance should be serviced byqualified service personnel when:A. THE POWER SUPPLY CORD OR PLUG IS DAMAGED OR FRAYED;B. LIQUID HAS SPILLED INTO THE PRODUCT;C. THE PRODUCT HAS BEEN EXPOSED TO RAIN OR WATER;9173
Chapter 9Privacy, Service, Warranty, and LicensesD. THE PRODUCT DOES NOT OPERATE NORMALLY WHEN YOUFOLLOW THE OPERATING INSTRUCTIONS (ADJUST ONLY THOSECONTROLS THAT ARE DISCUSSED IN THIS GUIDE, AS IMPROPERADJUSTMENT OF OTHER CONTROLS MAY RESULT IN DAMAGE,OFTEN REQUIRING EXTENSIVE WORK BY A QUALIFIEDTECHNICIAN TO RESTORE THE PRODUCT TO NORMALPERFORMANCE);E. THE PRODUCT HAS BEEN DROPPED OR THE CABINET DAMAGED;F. THE PRODUCT EXHIBITS A DISTINCT CHANGE IN PERFORMANCE.13. Servicing—The user should not attempt service to the appliancebeyond that described in the Troubleshooting section of this guide. Allother servicing should be referred to qualified service personnel.14. Cleaning—Unplug this product from the wall outlet before cleaning.Do not use liquid cleaners or aerosol cleaners; use a damp cloth forcleaning. If the product comes in contact with any liquid, unplug thephone line and the power adapter and let the unit dry thoroughly beforeplugging it back in.15. Power Source—This product should be operated only from the type ofpower source indicated on the marking label or in this guide. If you arenot sure of the type of power supply to your home, consult your dealer orlocal power company.16. Overloaded Power Outlets—do not overload wall outlets andextension cords, as this can result in the risk of fire or electric shock.17. Electric Shock—To reduce the risk of electric shock, do notdisassemble this product. Take it to a qualified service person whenservice or repair work is required. Opening or removing covers mayexpose you to dangerous voltage or other risks. Incorrect reassembly cancause electric shock when this product is subsequently used.18. Telephone Usage—When using your telephone equipment, basicsafety precautions should be always followed to reduce the risk of fire,electric shock and injury to persons. To reduce the risk of fire, use onlyNo. 26 AWG or larger telecommunication line cord.19. Moving—Avoid moving the unit while it is plugged in to avoidaccumulative shock and vibration damage to the internal hard disk drive.20. CAUTION—Danger of explosion if battery is incorrectly replaced.Replace only with the same or equivalent type recommended by themanufacturer. Dispose of used batteries according to the manufacturer’sinstructions.174
GNU General Public LicenseGNU General Public LicenseVersion 2, June 1991Copyright (C) 1989, 1991 Free Software Foundation, Inc.59 Temple Place, Suite 330, Boston, MA 02111-1307 USAEveryone is permitted to copy and distribute verbatim copies of thislicense document, but changing it is not allowed.PREAMBLEThe licenses for most software are designed to take away your freedomto share and change it. By contrast, the GNU General Public License isintended to guarantee your freedom to share and change free software--tomake sure the software is free for all its users. This General PublicLicense applies to most of the Free Software Foundation's software andto any other program whose authors commit to using it. (Some other FreeSoftware Foundation software is covered by the GNU Library GeneralPublic License instead.) You can apply it to your programs, too.When we speak of free software, we are referring to freedom, not price.Our General Public Licenses are designed to make sure that you have thefreedom to distribute copies of free software (and charge for this serviceif you wish), that you receive source code or can get it if you want it, thatyou can change the software or use pieces of it in new free programs; andthat you know you can do these things.To protect your rights, we need to make restrictions that forbid anyone todeny you these rights or to ask you to surrender the rights. Theserestrictions translate to certain responsibilities for you if you distributecopies of the software, or if you modify it.For example, if you distribute copies of such a program, whether gratis orfor a fee, you must give the recipients all the rights that you have. Youmust make sure that they, too, receive or can get the source code. Andyou must show them these terms so they know their rights.We protect your rights with two steps: (1) copyright the software, and (2)offer you this license which gives you legal permission to copy,distribute and/or modify the software.Also, for each author's protection and ours, we want to make certain thateveryone understands that there is no warranty for this free software. Ifthe software is modified by someone else and passed on, we want itsrecipients to know that what they have is not the original, so that anyproblems introduced by others will not reflect on the original authors'reputations.Finally, any free program is threatened constantly by software patents.We wish to avoid the danger that redistributors of a free program willindividually obtain patent licenses, in effect making the programproprietary. To prevent this, we have made it clear that any patent mustbe licensed for everyone's free use or not licensed at all.The precise terms and conditions for copying, distribution andmodification follow.GNU GENERAL PUBLIC LICENSETerms and conditions for copying, distribution and modification.0. This License applies to any program or other work which contains anotice placed by the copyright holder saying it may be distributed underthe terms of this General Public License. The “Program”, below, refers toany such program or work, and a “work based on the Program” meanseither the Program or any derivative work under copyright law: that is tosay, a work containing the Program or a portion of it, either verbatim orwith modifications and/or translated into another language. (Hereinafter,translation is included without limitation in the term “modification”.)Each licensee is addressed as “you”.1759
Chapter 9Privacy, Service, Warranty, and Licenses176Activities other than copying, distribution and modification are notcovered by this License; they are outside its scope. The act of running theProgram is not restricted, and the output from the Program is coveredonly if its contents constitute a work based on the Program (independentof having been made by running the Program). Whether that is truedepends on what the Program does.1. You may copy and distribute verbatim copies of the Program's sourcecode as you receive it, in any medium, provided that you conspicuouslyand appropriately publish on each copy an appropriate copyright noticeand disclaimer of warranty; keep intact all the notices that refer to thisLicense and to the absence of any warranty; and give any other recipientsof the Program a copy of this License along with the Program.You may charge a fee for the physical act of transferring a copy, and youmay at your option offer warranty protection in exchange for a fee.2. You may modify your copy or copies of the Program or any portion ofit, thus forming a work based on the Program, and copy and distributesuch modifications or work under the terms of Section 1 above, providedthat you also meet all of these conditions:a) You must cause the modified files to carry prominent notices statingthat you changed the files and the date of any change.b) You must cause any work that you distribute or publish, that in wholeor in part contains or is derived from the Program or any part thereof, tobe licensed as a whole at no charge to all third parties under the terms ofthis License.c) If the modified program normally reads commands interactively whenrun, you must cause it, when started running for such interactive use inthe most ordinary way, to print or display an announcement including anappropriate copyright notice and a notice that there is no warranty (orelse, saying that you provide a warranty) and that users may redistributethe program under these conditions, and telling the user how to view acopy of this License. (Exception: if the Program itself is interactive butdoes not normally print such an announcement, your work based on theProgram is not required to print an announcement.)These requirements apply to the modified work as a whole. If identifiablesections of that work are not derived from the Program, and can bereasonably considered independent and separate works in themselves,then this License, and its terms, do not apply to thosesections when you distribute them as separate works. But when youdistribute the same sections as part of a whole which is a work based onthe Program, the distribution of the whole must be on the terms of thisLicense, whose permissions for other licensees extend to the entirewhole, and thus to each and every part regardless of who wrote it.Thus, it is not the intent of this section to claim rights or contest yourrights to work written entirely by you; rather, the intent is to exercise theright to control the distribution of derivative or collective works based onthe Program.In addition, mere aggregation of another work not based on the Programwith the Program (or with a work based on the Program) on a volume of astorage or distribution medium does not bring the other work under thescope of this License.3. You may copy and distribute the Program (or a work based on it, underSection 2) in object code or executable form under the terms of Sections 1and 2 above provided that you also do one of the following:a) Accompany it with the complete corresponding machine-readablesource code, which must be distributed under the terms of Sections 1 and2 above on a medium customarily used for software interchange; or,b) Accompany it with a written offer, valid for at least three years, togive any third party, for a charge no more than your cost of physicallyperforming source distribution, a complete machine-readable copy of thecorresponding source code, to be distributed under the terms of Sections 1and 2 above on a medium customarily used for software interchange; or,
GNU General Public Licensec) Accompany it with the information you received as to the offer todistribute corresponding source code. (This alternative is allowed onlyfor noncommercial distribution and only if you received the program inobject code or executable form with such an offer, in accord withSubsection b above.)The source code for a work means the preferred form of the work formaking modifications to it. For an executable work, complete sourcecode means all the source code for all modules it contains, plus anyassociated interface definition files, plus the scripts used to controlcompilation and installation of the executable. However, as a specialexception, the source code distributed need not include anything that isnormally distributed (in either source or binary form) with the majorcomponents (compiler, kernel, and so on) of the operating system onwhich the executable runs, unless that component itself accompanies theexecutable.If distribution of executable or object code is made by offering access tocopy from a designated place, then offering equivalent access to copy thesource code from the same place counts as distribution of the sourcecode, even though third parties are not compelled to copy the sourcealong with the object code.4. You may not copy, modify, sublicense, or distribute the Programexcept as expressly provided under this License. Any attempt otherwiseto copy, modify, sublicense or distribute the Program is void, and willautomatically terminate your rights under this License.However, parties who have received copies, or rights, from you underthis License will not have their licenses terminated so long as suchparties remain in full compliance.5. You are not required to accept this License, since you have not signedit. However, nothing else grants you permission to modify or distributethe Program or its derivative works. These actions are prohibited by lawif you do not accept this License. Therefore, by modifying or distributingthe Program (or any work based on the Program), you indicate youracceptance of this License to do so, and all its terms and conditions forcopying, distributing or modifying the Program or works based on it.6. Each time you redistribute the Program (or any work based on theProgram), the recipient automatically receives a license from the originallicensor to copy, distribute or modify the Program subject to these termsand conditions. You may not impose any further restrictions on therecipients' exercise of the rights granted herein. You are not responsiblefor enforcing compliance by third parties to this License.7. If, as a consequence of a court judgment or allegation of patentinfringement or for any other reason (not limited to patent issues),conditions are imposed on you (whether by court order, agreement orotherwise) that contradict the conditions of this License, they do notexcuse you from the conditions of this License. If you cannot distributeso as to satisfy simultaneously your obligations under this License andany other pertinent obligations, then as a consequence you may notdistribute the Program at all. For example, if a patent license would notpermit royalty-free redistribution of the Program by all those who receivecopies directly or indirectly through you, then the only way you couldsatisfy both it and this License would be to refrain entirely fromdistribution of the Program.If any portion of this section is held invalid or unenforceable under anyparticular circumstance, the balance of the section is intended to applyand the section as a whole is intended to apply in other circumstances.It is not the purpose of this section to induce you to infringe any patentsor other property right claims or to contest validity of any such claims;this section has the sole purpose of protecting the integrity of the free9177
Chapter 9Privacy, Service, Warranty, and Licensessoftware distribution system, which is implemented by public licensepractices. Many people have made generous contributions to the widerange of software distributed through that system in reliance onconsistent application of that system; it is up to the author/donor todecide if he or she is willing to distribute software through any othersystem and a licensee cannot impose that choice.This section is intended to make thoroughly clear what is believed to be aconsequence of the rest of this License.8. If the distribution and/or use of the Program is restricted in certaincountries either by patents or by copyrighted interfaces, the originalcopyright holder who places the Program under this License may add anexplicit geographical distribution limitation excluding those countries, sothat distribution is permitted only in or among countries not thusexcluded. In such case, this License incorporates the limitation as ifwritten in the body of this License.9. The Free Software Foundation may publish revised and/or newversions of the General Public License from time to time. Such newversions will be similar in spirit to the present version, but may differ indetail to address new problems or concerns.Each version is given a distinguishing version number. If the Programspecifies a version number of this License which applies to it and "anylater version", you have the option of following the terms and conditionseither of that version or of any later version published by theFreeSoftware Foundation. If the Program does not specify a versionnumber of this License, you may choose any version ever published bythe Free Software Foundation.10. If you wish to incorporate parts of the Program into other freeprograms whose distribution conditions are different, write to the authorto ask for permission. For software which is copyrighted by the FreeSoftware Foundation, write to the Free Software Foundation; wesometimes make exceptions for this. Our decision will be guided by thetwo goals of preserving the free status of all derivatives of our freesoftware and of promoting the sharing and reuse of software generally.NO WARRANTY11. Because the program is licensed free of charge, there is no warrantyfor the program, to the extent permitted by applicable law. except whenotherwise stated in writing the copyright holders and/or other partiesprovide the program "as is" without warranty of any kind, eitherexpressed or implied, including, but not limited to, the implied warrantiesof merchantability and fitness for a particular purpose. The entire risk asto the quality and performance of the program is with you. Should theprogram prove defective, you assume the cost of all necessary servicing,repair or correction.12. In no event unless required by applicable law or agreed to in writingwill any copyright holder, or any other party who may modify and/orredistribute the program as permitted above, be liable to you fordamages, including any general, special, incidental or consequentialdamages arising out of the use or inability to use the program (includingbut not limited to loss of data or data being rendered inaccurate or lossessustained by you or third parties or a failure of the program to operatewith any other programs), even if such holder or other party has beenadvised of the possibility of such damages.End of terms and conditions.HOW TO APPLY THESE TERMS TO YOUR NEW PROGRAMSIf you develop a new program, and you want it to be of the greatestpossible use to the public, the best way to achieve this is to make it freesoftware which everyone can redistribute and change under these terms.178
GNU General Public LicenseTo do so, attach the following notices to the program. It is safest to attachthem to the start of each source file to most effectively convey theexclusion of warranty; and each file should have at least the "copyright"line and a pointer to where the full notice is found.
Chapter 9Privacy, Service, Warranty, and LicensesLinux and Other Important InformationGNU/LINUX SOURCE NOTICE<strong>TiVo</strong> ® Digital Video Recorders (DVRs) are powered by the Linuxoperating system. The machine-readable copy of the correspondingsource code is available for the cost of distribution. Please visitwww.tivo.com/linux or write <strong>TiVo</strong> Inc., 2160 Gold Street, Alviso, CA95002 for more information.MACROVISION COPYRIGHT PROTECTIONThis product incorporates copyright protection technology that isprotected by U.S. patents and other intellectual property rights. Use ofthis copyright protection technology must be authorized by MacrovisionCorporation, and is intended for home and other limited consumer usesonly unless otherwise authorized by Macrovision. Reverse engineeringor disassembly is prohibited.HIGH DEFINITION TELEVISION COMPATIBILITYConsumers should note that not all high definition television sets arefully compatible with this product and may cause artifacts to bedisplayed in the picture. In case of 525 progressive scan pictureproblems, it is recommended that the user switch the connection to the"standard definition" output. If there are questions regarding our TV setcompatibility with this model 525p DVD player, please contact ourCustomer Service center.INTERACTIVE PROGRAM GUIDEThe interactive program guide (“IPG”) features of this device are coveredby the following United States patents: 4,706,121.TELEPHONE LINE INTERRUPTIONPeriodically, the <strong>TiVo</strong> Digital Video Recorder dials in to the <strong>TiVo</strong>service via your telephone line. If you pick up your telephone during thetime information is being transferred, you will hear static noise. If youwould like to use your telephone while the information is beingtransferred, you can hang up, wait about 45 seconds, and pick up yourtelephone again. The DVR will disconnect, and allow you to place yourcall. You can also interrupt the transfer at any time by temporarilyunplugging the phone line from the DVR. If the transfer is interrupted, itwill resume at a later time.MPEG LAAny use of this product other than consumer personal use in any mannerthat complies with the MPEG-2 standard for encoding video informationfor packaged media is expressly prohibited without a license underapplicable patents in the MPEG-2 patent portfolio, which license isavailable from MPEG LA, L.L.C., 250 Steele Street, Suite 300, Denver,Colorado 80206.DOLBY LABORATORIESThe <strong>TiVo</strong> ® Digital Recorder contains one or more programs protectedunder international and U.S. copyright laws as unpublished works. Theyare confidential and proprietary to Dolby Laboratories. Theirreproduction or disclosure, in whole or in part, or the production ofderivative works therefrom without the express permission of DolbyLaboratories is prohibited. Copyright 1992-1997 by Dolby Laboratories,Inc. All rights reserved.180
APPENDIXAFront and Back PanelReference & SpecificationsFront Panel Reference 182Back Panel Reference 184Specifications 186
AppendixFront and Back PanelFront Panel Reference SELECT. This button corresponds to the directional arrows and SELECT button on theRecorder’s remote. Move the button up, down, left, and right to highlight items on ascreen. Press the button to select an item. Disc Tray. Place DVDs and CDs in the disc tray with the label side facing up. Indicator lights. These lights indicate the Recorder’s current status. A red light showsthat a recording is in progress. An amber light can indicate that a connection to the<strong>TiVo</strong> service is in progress, or that the Recorder is responding to the remote control ora front panel button.182 <strong>TiVo</strong> button. Press once to go to <strong>TiVo</strong> Central ® , twice to go to the Now Playing list.
Front Panel Reference OPEN/CLOSE ( PLAY ( PAUSE (playback. STOP (). This button opens and closes the disc tray.). Press PLAY to play a DVD or CD.). While playing a DVD or CD, press PAUSE to temporarily stop). While playing a DVD or CD, press STOP to halt playback. SKIP BACK ( ). While playing a DVD or CD, the SKIP BACK button skips to theprevious chapter or track. SKIP FORWARD ( ). While playing a DVD or CD, the SKIP FORWARD buttonskips to the next chapter or track Status Display. Information or messages about the the Recorder’s activity are shownon the status display. While playing a DVD or CD, title, track, and chapter informationis displayed, along with elapsed or remaining time. While watching live TV orrecorded programs, the current time is displayed. You can change the brightness of thedisplay, or turn it off. See “Front Panel Lights” on page 101.®You don’t need to set theRecorder’s clock—the <strong>TiVo</strong> servicedoes it for you!A183
AppendixFront and Back PanelBack Panel Reference AC ~ In. (Connects to A/C power.) Use only the power cord supplied with yourHUMAX DVD Recorder. Phone Jack. (Connects to phone cord.) The Recorder uses the phone line to getprogram information and other data from the <strong>TiVo</strong> service. Control Out/Serial. (Connects to cable or satellite box; not available on all cable orsatellite boxes.) Allows the Recorder to change channels on a cable or satellite box.184 Control Out/IR. (Connects to cable or satellite box; IR stands for infrared.) Thisconnection allows the Recorder to change channels on your cable or satellite box. Thepurple end of the IR Control cable plugs into the Recorder. The two emitters on the
Back Panel Referenceother end of the cable are placed in front of the IR sensor on the cable and/or satellitebox. See page 6 for details. USB. (Universal Serial Bus.) For connecting a USB network adapter. Connecting yourRecorder to a home network gives you access to additional features and eliminates theneed to connect the Recorder to a phone line. (A phone line is still required for GuidedSetup.) See Chapter 7. Component Video Output. (Connects to TV.) This is the Recorder’s highest qualityvideo output. Use a Component Video cable (not supplied). Composite A/V Output. (Connects to TV or VCR.) The yellow jack sends video, andthe red and white jacks send stereo audio. Use a Composite A/V cable (supplied). Digital Audio Output. (Connects to A/V receiver.) Use an Optical Digital Audio cable(not supplied) to connect the Recorder to a Dolby Digital compatible A/V receiver. S-Video Output. (Connects to TV or VCR.) If you use an S-Video cable (not supplied)for video, you will need to connect a separate cable for audio. S-Video Input. (Connects to cable or satellite box.) The Recorder can receive videofrom a cable or satellite box with an S-Video output. Use an S-Video cable (notsupplied). Composite A/V Input. (Connects to cable or satellite box.) The Recorder can receiveaudio and video from a cable or satellite box with Composite A/V output jacks. RF In. (Connects to cable without a box , or antenna.) Use this jack to connect cablefrom the wall, or a rooftop or set-top antenna, to your Recorder . RF Out (Bypass Only). Signals entering the Recorder at the RF In jack are passedthrough the Recorder to this jack. No <strong>TiVo</strong> ® service functionality is available on thesignal from this jack.185A
Appendix®CAUTION: TO PREVENT ELECTRICALSHOCK, MATCH WIDE BLADE OFPLUG TO WIDE SLOT, AND FULLY INSERT.SpecificationsVideo In: S-Video 4-pin mini DIN (2)Composite Video RCA (2)Front and Back PanelVideo Out:Audio Line In:Audio Line Out:RF In:RF Bypass Out:S-Video 4-pin mini DINComposite Video RCAComponent Video RCAStereo L/R RCA (2 pairs)Stereo L/R RCA (1 pair)Digital Audio (Optical)F-Connector FemaleF-Connector FemaleExpansion Port: USB (2)Telephone:RJ-11 female, 2-wireControl Out: 3.5mm mini jack sockets (2)Power:Ambient (external)Operating Temperature:120VAC, 60Hz, 59W15C to 35COperating Humidity: 5% to 80%®Actual recording capacity dependson signal quality and the type ofprogramming being recorded.Dimensions:Remote Control:Storage:16.5" w X 13.25" d X 3.3" h37 ButtonsATA/IDE Hard Drive186
Index
Index188Numerics3D noise reduction 94AA/V components, stacking on Recorder 9A/V receiverprogramming remote to control 96accessoriescarton contents 3not included 3adaptersUSB network 116wired (Ethernet) 116wireless 116ADVANCE button 66audiosecondary audio program (SAP) 86troubleshooting 145Audio Settings screen 85auto-recording WishListrepeating recording features and 42auto-recording WishList search 58BBACK button 66back panel reference 184Browse by Channel 51Browse by Time 50Ccable boxincluding in setup 5why to connect 5cable lineupGuided Setup and 25setting 86cablescarton contents 3choosing a video cable 4not included 3cables and jacks, the basics 2call waiting prefix 105channel banner 86icons and 68viewing 68channel changing settings 87channel listssetting up 87Channel Settings screen 86channelsGuide Options and 47locking channels with ParentalControls 91troubleshooting 136–138Channels You ReceiveGuided Setup and 26setting up a list of 87code search, performing 98, 101Composite A/V cables, when to choose 4Composite Video Input jacks 185conflictspriorities and 45questions about 142connecting to the <strong>TiVo</strong> servicetroubleshooting 132–134control buttonsusing the 66Customer Support 130DDHCP Client ID 126dial prefixsetting 105dial tone detectionsetting 106dial-in numberchanging 104Guided Setup and 24DNS address 128Dolby Digital output, setting the 85DRC (Dynamic Range Control) 85DTS (Digital Theater Systems) output,setting 86duplicatesrepeating recordings and 42Dynamic Range Control (DRC) 85FFavorite ChannelsSee also Guide Options.setting up a list of 87forwardfast forward 66FORWARD button 66frame forward 66
front panel lightsturning on and off 101front panel reference 182Ggateway address 128GNU General Public License 175GPL (General Public License) 175guidecustomizing 47displaying 47Guide Options and 47recording from 47, 48using to find programs 47Guide Options 47channels 47Channels You Receive and 47day and time 47Favorite Channels and 47filtering 47guide style 47Guided Setupcable lineup and 25cable providers and 25Channels You Receive and 26choosing IR code and 6dial-in number and 24dialing format and 25introduction to 23IR Test screen and 6phone dialing option. See dialingoptions.repeating 109satellite providers and 25setup call and 24tips and troubleshooting 24Hhome networkconnecting 116settings 121troubleshooting 148–152HUMAX DVD Recorderback panel reference 184front panel reference 182specifications 186IiconsSee inside back cover.INSTANT REPLAY button 66IP address 127IR codewhat it does 6IR tentbuilding an IR tent 7optimizing IR control 6KKeep Until... 72Llightson the Recorder’s front panel 101Linux 180live TV virecording from 48recording the saved portion 48troubleshooting 138–139MMacrovision 180manual repeating recordingrepeating recording features and 42setting up 52Manual Season Pass. See manual repeatingrecording.Manually Record Time/Channel 52Messagesreading messages from <strong>TiVo</strong> 84Multi-Room Viewing 113musicfile types 114playing 115Music & Photos 114MUTE button, programming 97Nnetworkingtroubleshooting 148–152Now Playingtour 38troubleshooting 143–144watching programs from 71OOnline Scheduling 53189
Index190open source 175operating temperature 186Overtime Scheduler ® . See RecordingOptions.PParental Controlsauto-relock 90channel lock 91movies and TV shows withno rating 91repeating recordings and 42troubleshooting 144turning on and off 89Parental Controls screen 89PAUSE button 66PCM output, setting 85performing a code search 98, 101Phone & Network Setup 102phone avail. detectionsetting 105phone dialing options 104–106phone jackwhat if it’s not close by 8phone line 8photosfile types 114viewing 115Pick Programs to RecordSee also Record by Time or Channel.See also Season Pass Manager.See also To Do List.troubleshooting 139–142PLAY button 66Privacy Policy 162Program Information screen vi, 71programmable buttonsresetting 101programstransferring between DVRs 113progressive format - DVD 95progressive format - TV 95progressive output, setting 94RRating SettingsMMPA definitions 92Movies and 90TV Content and 90TV Movies and 90TV ratings definitions 92RECORD button 66Record by Time or Channel 50Recorderstacking things on top 9recording capacity, actual 186Recording History 46Recording Options 43Keep At Least 44Keep At Most 44Keep Until 44list of 44Overtime Scheduler 44setting 43Show Type 44Start Recording 44Stop Recording 44recording qualitysetting the default 93remote controlincompatibility with some makesand models 99not working with TV 131performing a code search 98, 101programming 96resetting the programmablebuttons 101setting the Remote Address 100using with your TV andA/V receiver 96repeating recordings 42Restart or Reset System 109restarting the Recorder 109RF Coaxial cable, when to choose 4RF splitter 18RF Video 95router address 128SSAP (secondary audio program) 86Save to VCR 82Search By Title 49Season Pass TM 49cancelling a Season Pass 45repeating recording features and 42using the Season Pass Manager 45
Serial Control cable, when to connect 5service numberactivating <strong>TiVo</strong> service and 22where to find 107service updates viSettingsaudio 85cable lineup 86channel banner 86channel changing 87channels 86Channels You Receive 87Favorite Channels 87Parental Controls 89recording quality 93RF Video 95sound effects volume and 86television audio 86<strong>TiVo</strong> Suggestions 94video 94Settings screen 85setup examplechoosing 9Showcases 39SLOW button 66sound effects volume 86specifications 186splitting the signal 18stacking objects on Recorder 9Standby 110Start Recording. See Recording Options.status bar 67Stop Recording. See Recording Options.stopping a recording 48storage 186subnet mask 128S-Video cable, when to choose 4System Information screen 107TTCP/IP settings 124television audio 86timehow the Recorder’s clock is set 141<strong>TiVo</strong> Central Online 53<strong>TiVo</strong> Desktop application 114<strong>TiVo</strong> Privacy Policy 162<strong>TiVo</strong> ® Serviceactivating 22questions about 147<strong>TiVo</strong> Suggestionsautomatic recording of 94auto-recording of 39using Thumbs buttons and 38<strong>TiVo</strong>lution ® Magazine 39To Do List 46tone/pulse setting 105troubleshooting screens 108TV aspect ratio 95TV INPUT button, programming 97TV POWER button, programming 97UUSB 182VVCR, saving programs to 82videoSee also Video Recording Qualitytroubleshooting 145Video Recording QualityRecording Options and 44Video Settings screen 94View Recording History 46VOLUME button, programming 97volume, sound effects and 86Wwarranty 170weight, supporting of on Recorder 9WEP 122wide screen format 95wireless passwords 123WishList TM searches 54–58keyword tips 57191
Glossary of IconsTMTMThese appear when you press THUMBS UP or THUMBSDOWN . You can give a program up to three THUMBS UPor three THUMBS DOWN.Ipreview icons appear when an option—such asautomatically scheduling an upcoming program orwatching an additional program segment—isavailable. Press SELECT or THUMBS UP to choosethe option.To Do List and View Upcoming Episodes(These icons appear beside programs scheduled to be recorded.)Program is an individual recording (not part of a Season Pass or WishList ). In other places, it means an item has beenselected.Program will be recorded as part of a Season Pass.<strong>TiVo</strong> Central, DVD, or ShowcasesIndicates a selection that has some special video content.Select to watch a special preview or visit a Showcase.Indicates news or a special promotional offer from <strong>TiVo</strong>.Indicates a playable DVD or photo CD is inserted.Indicates a playable music CD is inserted.(Orange with black border) Indicates a DVD is currentlyrecording.Program will be recorded as part of a WishList.Channel Banner(These icons appear in the large channel banner.)(Red with black border) Select to start or stop a recording.Save to VCRSelect to display or turn on Parental Controls.Select to read new messages.Appears as a warning if a remote button is pressed during“Save to VCR.”
Now Playing(Green) This program will be saved until you delete it.(Yellow) In less than one day, this program may be deleted tomake room for other recordings you have requested, but only ifspace is needed.(Yellow with exclamation mark) At any time, this program may bedeleted to make room for other programs you have requested.(Red with black border) This program is currently being recordedor transferred.This program is a <strong>TiVo</strong> ® Suggestion. <strong>TiVo</strong> Suggestions arerecorded only if space is available, and are the first to be deleted“Plain” folder – contains more than one episode of the sameseries.Folder with red dot – for any group that includes a program thatis currently recording or transferring.Folder with blue star – contains one or more programs recordedby a WishList TM search.Folder with Thumbs Up TM – contains all programs recorded as<strong>TiVo</strong> Suggestions.DVR – for a DVR on your network.DVD BannerSelect to search for a title, chapter, or time on a DVD.Select to change the repeat setting on a DVD.Select to change the camera angle for DVD scenes with multiplecamera angles.Select to change the audio track or subtitle language on a DVD.Select to change theProgressive Output setting if available.
<strong>TiVo</strong> and HUMAX are dedicated to providing you with quality support and customerservice. If you have questions or difficulties, we would like to hear from you.TroubleshootingCheck the Troubleshooting chapter of this guide. It has detailed answers to the most common questions,and solutions for typical troubleshooting issues.Contact Customer SupportYou can find complete Customer Support contact information in the Troubleshooting chapter of this guide.Online Customer SupportCheck the HUMAX support site or the <strong>TiVo</strong> support site:HUMAX Customer Support• Connecting the Recorder to your TV & other equipment• Recording DVDs or playing DVDs and CDs• Channel changing and the remote control• Audio and videowww.humaxusa.com/support<strong>TiVo</strong> Customer Support• Using <strong>TiVo</strong> service features (finding & recording programs)• Your channel lineup and channel lists• Your <strong>TiVo</strong> service account and billing issues• Online scheduling and Home Media Featureswww.tivo.com/support20005-2380