Connecting to a Home Network - TiVo
Connecting to a Home Network - TiVo
Connecting to a Home Network - TiVo

You also want an ePaper? Increase the reach of your titles
YUMPU automatically turns print PDFs into web optimized ePapers that Google loves.
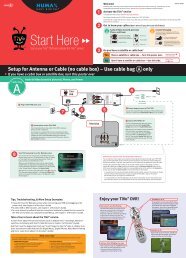
AC INRF INRF BYPASS OUTCABLE/ANTENNA<strong>Home</strong> <strong>Network</strong>s<strong>Home</strong> <strong>Network</strong>sWhen we refer <strong>to</strong> a “home network,” we mean two or more devices (probably computers),connected <strong>to</strong> a router. <strong>Connecting</strong> Recorders <strong>to</strong> a home network is the best way <strong>to</strong> take fulladvantage of <strong>Home</strong> Media Option.USB Port, Wireless and Wired <strong>Network</strong> AdaptersOn the back panel of your Recorder, you will see a USB port that can be used <strong>to</strong> connecteither a wireless or a wired (Ethernet) USB network adapter.USB network adapters let your Recorder use its USB port <strong>to</strong> communicate with othernetworked devices. Whether you choose wireless or wired (Ethernet), you will need anetwork adapter for each Recorder you wish <strong>to</strong> connect.<strong>TiVo</strong> recommends the following models of wireless and wired (Ethernet) networkadapters:• Wireless: Linksys WUSB11 ver. 2.6 — Instant Wireless USB <strong>Network</strong> Adapter,Version 2.6 or later. (The version number is located on the front and side panels of thebox.)• Wired (Ethernet): Linksys USB100TX — EtherFast® 10/100 USB <strong>Network</strong> Adapter.Our cus<strong>to</strong>mers have also reported some success with other models. Check <strong>TiVo</strong> onlinesupport at www.tivo.com/adapters for the latest information.The USB port on the back panel of your RecorderA USB Wireless network adapter(yours may look different)An Ethernet USB network adapter(yours may look different)You do not need <strong>to</strong> use the CDs that8®came with your network adapters.They are intended <strong>to</strong> load software on yourcomputer. You can put the CDs away forsafe keeping.103
Chapter 8<strong>Connecting</strong> <strong>to</strong> a <strong>Home</strong> <strong>Network</strong>Choosing Wireless or Wired (Ethernet)You can connect your Recorder <strong>to</strong> your home network using either a wireless or wired(Ethernet) connection. Here are some notes <strong>to</strong> help you choose which approach you want<strong>to</strong> use.• Wired (Ethernet). Ethernet connections are generally faster, less expensive, morereliable and less susceptible <strong>to</strong> interference than wireless networks. Using Multi-RoomViewing <strong>to</strong> transfer a program is quicker over wired (Ethernet) than it would be over awireless connection.®If you are connecting two Recorders<strong>to</strong> a home network <strong>to</strong> use Multi-Room Viewing, using a wired (Ethernet)connection for one of them will speed upprogram transfers.• Wireless. <strong>Connecting</strong> your Recorder wirelessly may be more convenient because youdo not have <strong>to</strong> run a cable from your Recorder <strong>to</strong> another device. However, wirelessnetworks are typically more expensive and slower than Ethernet networks, and may besubject <strong>to</strong> interference from appliances such as microwaves and 2.4 GHz cordlessphones. To connect wirelessly, you must have a wireless access point or wirelessrouter on your home network. On most home networks, the wireless access point ispart of an integrated hub/router and home gateway.<strong>Connecting</strong> <strong>to</strong> a <strong>Home</strong> <strong>Network</strong>• To connect a Recorder <strong>to</strong> a home network wirelessly, see “Making a WirelessConnection” on page 105.• To connect a Recorder <strong>to</strong> a wired (Ethernet) network, see “Making a Wired (Ethernet)Connection” on page 107.104
Chapter 8<strong>Connecting</strong> <strong>to</strong> a <strong>Home</strong> <strong>Network</strong>adapter near the Recorder’s power supply or on a power strip or surge protec<strong>to</strong>r. Doingso can cause signal interference or reduce signal strength.4. Firmware update. When you first connect a wireless network adapter <strong>to</strong> yourRecorder, you may see a screen that says “Firmware Update Required.” This meansyour Recorder has a software update for the wireless network adapter you haveconnected. Select the option <strong>to</strong> update. This should not take more than a minute or two.During the update, do not disconnect the network adapter wires or the power <strong>to</strong> theRecorder. Either action might damage the adapter.5. Important message. The first time you connect a network adapter, you will see anImportant Message the next time you press the <strong>TiVo</strong> but<strong>to</strong>n. Review it, then pressSELECT on the remote control <strong>to</strong> go <strong>to</strong> <strong>TiVo</strong> Central.6. Next Step. Go <strong>to</strong> “Completing the Recorder’s <strong>Network</strong> Settings” on page 108.106
AC INRF INRF BYPASS OUTCABLE/ANTENNAMaking a Wired (Ethernet) ConnectionThis example shows how <strong>to</strong> connect a Recorder <strong>to</strong> a network hub using a wired (Ethernet)network adapter.To connect a wired (Ethernet) network adapter <strong>to</strong> your Recorder and your network hub:Making a Wired (Ethernet) ConnectionUSB-Ethernet1. Connect the adapter <strong>to</strong> the Recorder. Connect the USB end of the Ethernet adapter<strong>to</strong> the USB port on the Recorder.2. Connect the Ethernet cable. Plug one end of an Ethernet cable in<strong>to</strong> the Ethernetadapter, and plug the other end in<strong>to</strong> your home network’s hub or router.3. Important message. The first time you connect a network adapter, you will see anImportant Message the next time you press the <strong>TiVo</strong> but<strong>to</strong>n. Review it, then pressSELECT on the remote control <strong>to</strong> go <strong>to</strong> <strong>TiVo</strong> Central.4. Next Step. If your home network has DHCP, wait for a few minutes for your Recorder<strong>to</strong> au<strong>to</strong>matically complete its network settings, and then you are done. If your networkdoes not have DHCP, or you are having trouble establishing a network connection, go<strong>to</strong> “Completing the Recorder’s <strong>Network</strong> Settings” on page 108. (DHCP is described in“Basic TCP/IP Concepts” on page 112.)®You can leave your Recorderplugged in while you connect anetwork adapter.8107
Chapter 8®Many of the screens you use <strong>to</strong>complete Wireless Settings orTCP/IP Settings have the same title.However, they have different subtitles. Inthis document, each screen is identifiedby its subtitle.Screen subtitle<strong>Connecting</strong> <strong>to</strong> a <strong>Home</strong> <strong>Network</strong>Completing the Recorder’s <strong>Network</strong> SettingsIf your Recorder is connected <strong>to</strong> a wired (Ethernet) network adapter, skip <strong>to</strong>“TCP/IPSettings for a <strong>Home</strong> <strong>Network</strong>” on page 111.Wireless Settings for a <strong>Home</strong> <strong>Network</strong>If you have a wireless home network, and have connected a wireless network adapter <strong>to</strong>your Recorder, as described on page 105, you are ready <strong>to</strong> complete Wireless Settings.To get <strong>to</strong> Wireless Settings: press the <strong>TiVo</strong> but<strong>to</strong>n on the remote control <strong>to</strong> go <strong>to</strong> <strong>TiVo</strong>Central, then select Messages & Setup, then Settings, then Phone & <strong>Network</strong>, then “Editphone or network settings,” then Wireless Settings.Wireless ChecklistThis is the first Wireless Settings screen you will see. It lists information you need <strong>to</strong>complete wireless settings. You can find all this information in the configuration settingsof your network’s wireless access point or router.If your wireless network does not use encryption (WEP), then you only need <strong>to</strong> provide awireless network name; you do not need <strong>to</strong> provide a password format or password.When you are ready <strong>to</strong> continue, press SELECT on your remote control.Wireless Connection and Wireless <strong>Network</strong> NameYou must now provide the name of your wireless network. Wireless networks have anetwork name (sometimes called an SSID for service set identifier). A wireless networkmay be open or closed. Open wireless networks broadcast their network names, allowingdevices in their vicinity <strong>to</strong> identify them au<strong>to</strong>matically. Closed wireless networks do notbroadcast their network names, so they cannot be identified au<strong>to</strong>matically.108
Completing the Recorder’s <strong>Network</strong> SettingsThis screen lists the names of nearby wireless networks that your Recorder has been able<strong>to</strong> identify. If you have a wireless router (or wireless access point) and you did not set anetwork name, your network is probably using a name supplied by the router’smanufacturer.If your network’s name is listed, select it. (You may be able see more names by pressingCHAN DOWN <strong>to</strong> scroll down the screen.)Otherwise, select “Connect <strong>to</strong> a closed wireless network”:• On the Wireless <strong>Network</strong> Name screen, enter the name of your network by using thearrow keys on your remote control <strong>to</strong> highlight a character, then press SELECT.You must use capital and lowercase letters appropriately. For example, <strong>to</strong> find anetwork named “My <strong>Network</strong>” you must capitalize the “M” and “N”; entering “mynetwork” would not work. Use THUMBS UP and THUMBS DOWN <strong>to</strong> change <strong>to</strong>uppercase or lowercase. Select “Done entering text” when you are finished.If the Recorder detects that your wireless network does not use encryption (WEP) you willsee the Confirm Settings screen, described on page 111.Wireless Password FormatYou see the Wireless Password Format screen if there is a chance that your wirelessnetwork uses WEP encryption.WEP. WEP is a kind of encryption used by wireless networks <strong>to</strong> improve their security.There are different levels of WEP encryption, typically called 40, 64, 104, 128, or 256-bitencryption. Encryption at higher levels offers better security. At the highest levels (104-bi<strong>to</strong>r above), WEP encryption may slow down the transfer of programs from one Recorder <strong>to</strong>another by a small amount. WEP is usually turned on or off through the configuration8109
Chapter 8<strong>Connecting</strong> <strong>to</strong> a <strong>Home</strong> <strong>Network</strong>settings of a wireless access point or router. If your network uses WEP, then it has apassword or “key.”To connect a Recorder <strong>to</strong> a network that uses encryption, you need <strong>to</strong> provide:• A wireless password format. WEP passwords may be hexadecimal (a combination ofletters from A-F and numbers from 0-9), or alphanumeric (a combination of lettersfrom A-Z and numbers from 0-9). If your network has both an alphanumeric and ahexadecimal password, we strongly recommend you use the hexadecimal password.• A wireless password. It does not matter whether the letters of a hexadecimalpassword are uppercase or lowercase, but for alphanumeric passwords, capitalizationis important. For example, if the password is “MyPassword,” then entering“mypassword” will not work. Some hexadecimal passwords have only numbers.• A level of wireless encryption. If you specify an alphanumeric password, you mustalso specify a level of wireless encryption. Recorders are compatible with 40, 64, 104,and 128-bit encryption; they are not currently compatible with 256-bit encryption.Choose a format or select “The wireless network doesn’t use a password.” If you select“The wireless network doesn’t use a password,” you will see the Confirm Settings screen,described on page 111.Wireless Password — Alphanumeric or Hexadecimal• Hexadecimal (preferred). Enter a hexadecimal password by using the arrow keys onyour remote <strong>to</strong> highlight a character, then press SELECT. It does not matter if a letteris uppercase or lowercase. Some hexadecimal passwords contain only numbers.• Alphanumeric. Enter an alphanumeric password by using the arrow keys on yourremote <strong>to</strong> highlight a character, then press SELECT. You must use capital and110
Completing the Recorder’s <strong>Network</strong> Settingslowercase letters appropriately. For example, if your password is “MyPassword”,entering “mypassword” will not work. Use THUMBS UP and THUMBS DOWN <strong>to</strong>change <strong>to</strong> uppercase or lowercase. Select “Done entering text” when you are finished.Wireless EncryptionIf you entered an alphanumeric password, you will see this screen. Select the level ofencryption used by your wireless network. If your network uses 104-bit encryption, select128-bit encryption. Recorders are not currently compatible with 256-bit encryption.Confirm SettingsSelect “Accept these settings” if they are correct. For steps you can take <strong>to</strong> troubleshootissues with your wireless connection, see “Questions About <strong>Network</strong>ing” on page 141.Change Connection Type?If your network has a shared broadband Internet connection, you can select “Yes” <strong>to</strong> use it<strong>to</strong> connect <strong>to</strong> the <strong>TiVo</strong> service instead of a phone line.Next StepYou have completed wireless settings. If your home network has DHCP, and you do nothave a DHCP Client ID, you are done. If your home network does not have DHCP or youhave a DHCP client ID, continue with “TCP/IP Settings for a <strong>Home</strong> <strong>Network</strong>.”8TCP/IP Settings for a <strong>Home</strong> <strong>Network</strong>You are ready <strong>to</strong> complete TCP/IP settings if:• You are connecting your Recorder <strong>to</strong> your home network wirelessly and have alreadycompleted “Wireless Settings for a <strong>Home</strong> <strong>Network</strong>” on page 108, or• You have a wired (Ethernet) adapter connecting your Recorder <strong>to</strong> your home network.111
Chapter 8<strong>Connecting</strong> <strong>to</strong> a <strong>Home</strong> <strong>Network</strong>®An IP address assigned by DHCP iscalled a dynamic IP addressbecause it may change au<strong>to</strong>matically asdevices are added <strong>to</strong> or removed from thenetwork. An IP address you specify isconsidered a static IP address, because itwill not change until you specify a newone.Basic TCP/IP ConceptsThis section describes a few basic TCP/IP concepts. If you are familiar with homenetworking, you can skip <strong>to</strong> “Begin TCP/IP Settings” on page 113.IP Address. TCP/IP settings are used <strong>to</strong> manage IP addresses on a network. An IP addressis a number that identifies a single device on a network (in much the same way that ahome address identifies a single home in the US). IP addresses use four numbers separatedby periods. Each number can be from 0 <strong>to</strong> 255. Some example IP addresses are:192.168.0.1 and 10.8.3.25DHCP and Static IP Addresses. DHCP au<strong>to</strong>matically assigns IP addresses <strong>to</strong> devices on anetwork. Most home networks include a router or home gateway that has DHCP. If yournetwork has DHCP, or you are creating a peer-<strong>to</strong>-peer network, your Recorder can obtainits IP address au<strong>to</strong>matically.If your network does not have DHCP, you must assign an IP address for your Recorder. Ifyou assign an IP address <strong>to</strong> your Recorder, remember that:• The first three sets of numbers in the IP address usually must match the first sets ofnumbers in the IP address used by another device on the network (for example, acomputer). The first three sets of numbers for IP addresses on a home network areusually: ‘192.168.0’ or ‘192.168.1.’• If the first three sets of numbers match those of another IP address, the last set ofnumbers has <strong>to</strong> be unique.For example, two IP addresses for devices on the same network might be ‘192.168.1.5’and ‘192.168.1.6’.112
Completing the Recorder’s <strong>Network</strong> SettingsBegin TCP/IP SettingsTo get <strong>to</strong> TCP/IP Settings: press the <strong>TiVo</strong> but<strong>to</strong>n on the remote control <strong>to</strong> go <strong>to</strong> <strong>TiVo</strong>Central, then select Messages & Setup, then Settings, then Phone & <strong>Network</strong>, then “Editphone or network settings,” then TCP/IP Settings.TCP/IP ConnectionOn the first screen in TCP/IP Settings, you specify how your Recorder gets an IP address.On this screen you can choose <strong>to</strong>:• Obtain the IP address au<strong>to</strong>matically. Use this option if your router or gateway hasDHCP. Continue with “DHCP Client ID,” below.• Specify a static IP address if you don’t have a DHCP server. Continue with “Static IPAddress Checklist” on page 114.If you are not sure what <strong>to</strong> select, you can try “Obtain IP address au<strong>to</strong>matically.” Thisselection will work for most people. If it does not work, you can return <strong>to</strong> TCP/IP Settingslater and make other selections. (A brief description of IP addresses is provided in “BasicTCP/IP Concepts” on page 112.)DHCP Client IDUnless you received a DHCP Client ID from your Internet service provider (ISP), you canselect “I don’t have a DHCP Client ID.” This selection will work for most people.If your ISP provided you with a DHCP Client ID, enter it by using the arrow keys on yourremote control <strong>to</strong> a highlight a character, then press SELECT.You must use capital and lowercase letters appropriately. For example, if your DHCPClient ID is “ID7343”, entering “id7343” will not work. Use THUMBS UP and THUMBS8113
Chapter 8<strong>Connecting</strong> <strong>to</strong> a <strong>Home</strong> <strong>Network</strong>DOWN <strong>to</strong> change <strong>to</strong> uppercase or lowercase. Select “Done entering text” when you arefinished. Skip <strong>to</strong> “Confirm Settings” on page 116.Static IP Address ChecklistIf you do not have a DHCP server, you need <strong>to</strong> provide:• An IP address for your Recorder,• A Subnet Mask for your home network,• An IP address for your home gateway or router, and• An IP address for a DNS (Name Server).You will create a unique IP address for your Recorder. The Subnet Mask, gateway orrouter IP address, and DNS IP address are usually provided by your Internet serviceprovider (ISP). They are also usually available on the configuration screens of your homegateway or router.If you have a computer on your home network, you may be able find the Subnet Mask,home gateway, or router IP address, and DNS IP address in the computer’s TCP/IPsettings. In addition, you can use your computer’s IP address <strong>to</strong> help create an IP addressfor your Recorder. For example, if your computer’s IP address is ‘192.168.1.2’ then yourRecorder’s IP address should probably also start with ‘192.168.1’ and end with a numberother than 2.IP AddressThe first three sets of numbers in the IP address are usually the same as other devices onyour home network. The final number is usually unique <strong>to</strong> a device on your homenetwork. For example, with the IP address ‘192.168.1.12’, the first part, ‘192.168.1’,114
Completing the Recorder’s <strong>Network</strong> Settingswould be common <strong>to</strong> all devices on the network. The last part, ‘12’, would be unique <strong>to</strong> adevice on the network.Subnet MaskA subnet mask allows communication between a large network (such as the Internet) anda smaller sub-network (such as your home network). It uses the same format as an IPaddress and is usually provided by your Internet service provider (ISP). The subnet maskfor a home network is usually ‘255.255.255.0’.You may also be able <strong>to</strong> find the subnet mask by inspecting the IP settings of a computeron the same home network.Gateway (Router) AddressEnter the IP address of your home gateway or router. The IP address is usually available inthe configuration screens for your gateway or router. Some common values for thegateway or router IP address on a home network are ‘192.168.0.1’ and ‘192.168.1.1’. Ifyou use a router supplied by your Internet service provider (ISP), your ISP should alsohave supplied the router’s IP address.You may also be able <strong>to</strong> find the home gateway or router IP address by inspecting the IPsettings of a computer on the same home network.DNS (Domain Name Server) AddressIf your home network includes a broadband connection <strong>to</strong> the Internet, your Internetservice provider (ISP) will have given you a DNS address. You may also be able <strong>to</strong> findthe DNS address by inspecting the IP settings of a computer on the same home network.8115
Chapter 8<strong>Connecting</strong> <strong>to</strong> a <strong>Home</strong> <strong>Network</strong>®For steps you can take <strong>to</strong>troubleshoot issues with yourConfirm SettingsReview the settings and select “Accept these settings” if they are correct.Congratulations, your Recorder should now be connected <strong>to</strong> your home network!For steps you can take <strong>to</strong> troubleshoot issues with your <strong>Network</strong> Connections, see“Questions About <strong>Network</strong>ing” on page 141.Change Connection Type?If your Recorder connects <strong>to</strong> the <strong>TiVo</strong> service over a phone line, you will see this screenanytime you complete Wireless Settings or TCP/IP Settings. Only select “Yes,” if yourRecorder is connected <strong>to</strong> a network that includes an always-on Internet connection.Advantages of connecting <strong>to</strong> the <strong>TiVo</strong> service over the Internet are:• You may disconnect your phone line from the Recorder. You only need <strong>to</strong> reconnectyour phone line if you repeat Guided Setup.• If you have <strong>Home</strong> Media Option, you can use Remote Scheduling <strong>to</strong> schedule aprogram <strong>to</strong> record an hour before it begins.After you select “Yes” or “No,” you see the Phone & <strong>Network</strong> Settings screen. PressLEFT arrow <strong>to</strong> see the Phone & <strong>Network</strong> screen. The first line of Phone & <strong>Network</strong>should read: “Connect Via: <strong>Network</strong>.”To test the new connection, select Test Connection. On the next screen, press SELECT.connection <strong>to</strong> the <strong>TiVo</strong> service, see“Questions About <strong>Network</strong>ing” onpage 141.116