GPS™ Brochure - Implant Direct
GPS™ Brochure - Implant Direct
GPS™ Brochure - Implant Direct

You also want an ePaper? Increase the reach of your titles
YUMPU automatically turns print PDFs into web optimized ePapers that Google loves.
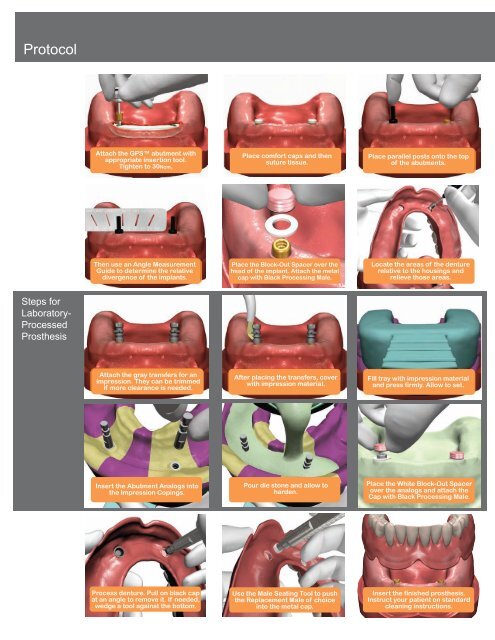
ProtocolAttach the GPS abutment withappropriate insertion tool.Tighten to 30Ncm.Place comfort caps and thensuture tissue.Place parallel posts onto the topof the abutments.Then use an Angle MeasurementGuide to determine the relativedivergence of the implants.Place the Block-Out Spacer over thehead of the implant. Attach the metalcap with Black Processing Male.Locate the areas of the denturerelative to the housings andrelieve those areas.Steps forLaboratory-ProcessedProsthesisAttach the gray transfers for animpression. They can be trimmedif more clearance is needed.After placing the transfers, coverwith impression material.Fill tray with impression materialand press firmly. Allow to set.Insert the Abutment Analogs intothe Impression Copings.Pour die stone and allow toharden.Place the White Block-Out Spacerover the analogs and attach theCap with Black Processing Male.Process denture. Pull on black capat an angle to remove it. If needed,wedge a tool against the bottom.Use the Male Seating Tool to pushthe Replacement Male of choiceinto the metal cap.Insert the finished prosthesis.Instruct your patient on standardcleaning instructions.