!OST #14_rev - O scale trains
!OST #14_rev - O scale trains
!OST #14_rev - O scale trains
- No tags were found...
You also want an ePaper? Increase the reach of your titles
YUMPU automatically turns print PDFs into web optimized ePapers that Google loves.
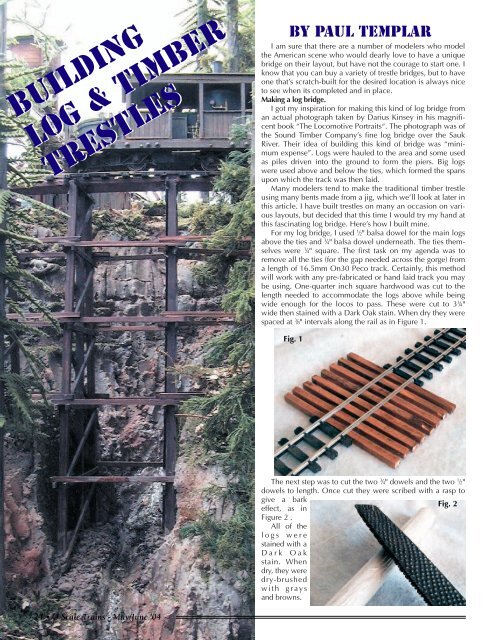
BUILDINGLOG & TIMBERTRESTLESBY PAUL TEMPLARI am sure that there are a number of modelers who modelthe American scene who would dearly love to have a uniquebridge on their layout, but have not the courage to start one. Iknow that you can buy a variety of trestle bridges, but to haveone that’s scratch-built for the desired location is always niceto see when its completed and in place.Making a log bridge.I got my inspiration for making this kind of log bridge froman actual photograph taken by Darius Kinsey in his magnificentbook “The Locomotive Portraits“. The photograph was ofthe Sound Timber Company’s fine log bridge over the SaukRiver. Their idea of building this kind of bridge was “minimumexpense”. Logs were hauled to the area and some usedas piles driven into the ground to form the piers. Big logswere used above and below the ties, which formed the spansupon which the track was then laid.Many modelers tend to make the traditional timber trestleusing many bents made from a jig, which we’ll look at later inthis article. I have built trestles on many an occasion on variouslayouts, but decided that this time I would try my hand atthis fascinating log bridge. Here’s how I built mine.For my log bridge, I used 1 ⁄2" balsa dowel for the main logsabove the ties and 3 ⁄4" balsa dowel underneath. The ties themselveswere 1 ⁄4" square. The first task on my agenda was toremove all the ties (for the gap needed across the gorge) froma length of 16.5mm On30 Peco track. Certainly, this methodwill work with any pre-fabricated or hand laid track you maybe using. One-quarter inch square hardwood was cut to thelength needed to accommodate the logs above while beingwide enough for the locos to pass. These were cut to 3 3 ⁄4"wide then stained with a Dark Oak stain. When dry they werespaced at 3 ⁄8" intervals along the rail as in Figure 1.Fig. 1The next step was to cut the two 3 ⁄4" dowels and the two 1 ⁄2"dowels to length. Once cut they were scribed with a rasp togive a barkFig. 2effect, as inFigure 2 .All of thelogs werestained with aDark Oakstain. Whendry, they weredry-brushedwith graysand browns.24 • O Scale Trains - May/June ’04


