the Light & Mighty - Breville
the Light & Mighty - Breville
the Light & Mighty - Breville
You also want an ePaper? Increase the reach of your titles
YUMPU automatically turns print PDFs into web optimized ePapers that Google loves.
<strong>Breville</strong> recommends safety firstAt <strong>Breville</strong> we are very safety conscious. We design and manufacture consumer products with<strong>the</strong> safety of you, our valued customer, foremost in mind. In addition we ask that you exercisea degree of care when using any electrical appliance and adhere to <strong>the</strong> following precautions.Important safeguardsRead all instructionsBEFORE USE AND SAVE FORFUTURE REFERENCE• Carefully read all instructions beforeoperating <strong>the</strong> <strong>Breville</strong> Power Blender for<strong>the</strong> first time and save for future reference.• Remove and safely discard anypackaging material and promotionallabels before using <strong>the</strong> blender for <strong>the</strong>first time.• To eliminate a choking hazard for youngchildren, remove and safely discard <strong>the</strong>protective cover fitted to <strong>the</strong> power plugof this appliance.• Do not place <strong>the</strong> blender near <strong>the</strong> edgeof a bench or table during operation.Ensure <strong>the</strong> surface is level, clean andfree of water and o<strong>the</strong>r substances.Vibration during operation may cause<strong>the</strong> appliance to move.• Do not use <strong>the</strong> blender on a sinkdrain board.• Do not place <strong>the</strong> blender on or near a hotgas or electric burner, or where it couldtouch a heated oven.• Handle <strong>the</strong> blender and attachmentswith care – remember <strong>the</strong> blades arerazor-sharp and should be kept out of<strong>the</strong> reach of children.• Always ensure <strong>the</strong> blender iscompletely assembled before operating.The blender will not operate unlessproperly assembled.• Do not use attachments o<strong>the</strong>r than thoseprovided with <strong>the</strong> blender.• Do not attempt to operate <strong>the</strong> blender byany method o<strong>the</strong>r than those describedin this book.4• Always secure <strong>the</strong> blade assembly onto<strong>the</strong> blender jug before attaching to <strong>the</strong>motor base.• Ensure <strong>the</strong> speed selection dial is in<strong>the</strong> OFF position and <strong>the</strong> blender isswitched off at <strong>the</strong> power outlet and<strong>the</strong> power cord is unplugged beforeattaching <strong>the</strong> blender jug.• Always operate <strong>the</strong> blender with <strong>the</strong>blender jug lid in position.• Keep fingers, hands, knives and o<strong>the</strong>rutensils away from moving blades.• Do not place hands or fingers into <strong>the</strong>blender jug unless <strong>the</strong> motor and bladeshave come to a complete stop. Ensure<strong>the</strong> speed selection dial is in <strong>the</strong> OFFposition and <strong>the</strong> appliance is switchedoff at <strong>the</strong> power outlet and <strong>the</strong> powercord is unplugged before removing <strong>the</strong>lid from <strong>the</strong> blender.• Ensure <strong>the</strong> motor and <strong>the</strong> bladeshave completely stopped beforedisassembling. Ensure <strong>the</strong> speedselection dial is in <strong>the</strong> OFF positionand <strong>the</strong> appliance is switched off at<strong>the</strong> power outlet and <strong>the</strong> power cord isunplugged from <strong>the</strong> power outlet beforeattempting to move <strong>the</strong> blender, whennot in use, if left unattended and beforedisassembling, cleaning or storing.• Care should be taken when removing <strong>the</strong>food from <strong>the</strong> blender jug by ensuring <strong>the</strong>motor and <strong>the</strong> blades have completelystopped before disassembling. Ensure<strong>the</strong> speed selection dial is turned to <strong>the</strong>OFF position, <strong>the</strong> appliance is switchedoff at <strong>the</strong> power outlet and unplugged,before removing <strong>the</strong> lid from <strong>the</strong> blenderjug. The blender jug should <strong>the</strong>n belifted from <strong>the</strong> motor base and <strong>the</strong> foodcarefully removed before attempting toremove <strong>the</strong> blade assembly.
<strong>Breville</strong> recommends safety first• Do not operate <strong>the</strong> blender continuouslyfor periods longer than 1 minute on anysetting or if processing a heavy load. Noneof <strong>the</strong> recipes in this book are considereda heavy load. If <strong>the</strong> blender is operatedcontinuously for too long, it should beswitched off, unplugged and allowed tocool for 30 minutes before recommencing.• Do not process hot or boiling liquids –allow liquids to cool before placing into<strong>the</strong> blender jug.• Do not move <strong>the</strong> blender whilstin operation.• Do not leave <strong>the</strong> blender unattendedwhen in use.• Do not place any part of <strong>the</strong> blender in amicrowave oven.• Do not place <strong>the</strong> motor body, lid, innermeasuring cup, silicone seal, blender jugor blade assembly into a dishwasher.• Do not place anything on top of <strong>the</strong> motorbase and/or blender jug when <strong>the</strong> lid is onor off, when in use and when stored.• Keep <strong>the</strong> blender clean. Follow <strong>the</strong>cleaning instructions provided inthis book.IMPORTANT SAFEGUARDS FORALL ELECTRICAL APPLIANCES• Fully unwind <strong>the</strong> power cord before use.• Do not let <strong>the</strong> power cord hang over<strong>the</strong> edge of a bench or table, touch hotsurfaces or become knotted.• To protect against electric shock do notimmerse <strong>the</strong> power cord, power plug orappliance in water or any o<strong>the</strong>r liquid.• The appliance is not intended for useby persons (including children) withreduced physical, sensory or mentalcapabilities, or lack of experience andknowledge, unless <strong>the</strong>y have been givensupervision or instruction concerninguse of <strong>the</strong> appliance by a personresponsible for <strong>the</strong>ir safety.• Children should be supervised to ensurethat <strong>the</strong>y do not play with <strong>the</strong> appliance.• It is recommended to regularly inspect<strong>the</strong> appliance. To avoid a hazard do notuse <strong>the</strong> appliance if power cord, powerplug or appliance becomes damaged inany way. Return <strong>the</strong> entire appliance to<strong>the</strong> nearest authorised <strong>Breville</strong> ServiceCentre for examination and/or repair.• If <strong>the</strong> supply cord is damaged, it must bereplaced by <strong>the</strong> manufacturer, its serviceagent or similarly qualified persons inorder to avoid a hazard.• Any maintenance o<strong>the</strong>r than cleaningshould be performed at an authorised<strong>Breville</strong> Service Centre.• This appliance is for household use only.Do not use this appliance for anythingo<strong>the</strong>r than its intended use. Do not usein moving vehicles or boats. Do not useoutdoors. Misuse may cause injury.• The installation of a residual currentdevice (safety switch is recommendedto provide additional safety protectionwhen using electrical appliances. It isadvisable that a safety switch with a ratedresidual operating current not exceeding30mA be installed in <strong>the</strong> electricalcircuit supplying <strong>the</strong> appliance. See yourelectrician for professional advice.SAVE THESEINSTRUCTIONS5
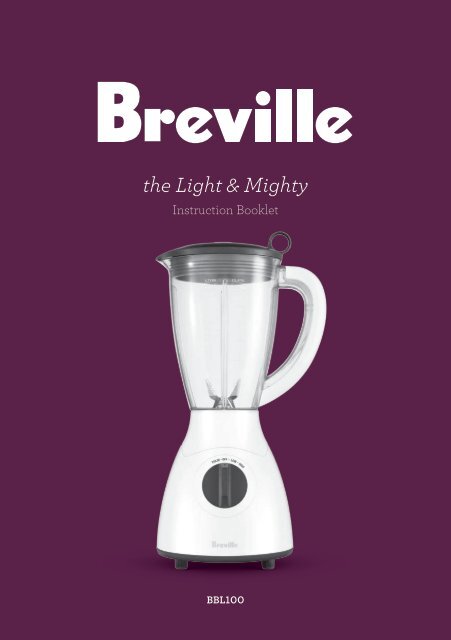
KNOW YOUR BREVILLE <strong>Light</strong> & <strong>Mighty</strong>ABCFGDHEA. Inner measuring cupfor adding ingredients whilst blendingand removing <strong>the</strong> blade assembly from<strong>the</strong> blender jug.B. 1.5 litre jugC. Serrated Ice crushing stainlesssteel bladeD. 2 speeds plus PulseE. Non-slip feetF. Blade assemblyeasily removable for cleaningusing <strong>the</strong> inner measuring cup.G. Blender jug baseH. Motor base7
OPERATINGyour <strong>Breville</strong><strong>Light</strong> & <strong>Mighty</strong>
Operating Your BREVILLE <strong>Light</strong> & <strong>Mighty</strong>Before first useRemove and safely discard any packagingmaterial and promotional labels.Disassemble <strong>the</strong> blender jug by following<strong>the</strong> steps in <strong>the</strong> ‘Disassembling <strong>the</strong> blender’section below. Wash <strong>the</strong> lid, inner lid,blender jug, silicone seal, blender jug baseand blade assembly in warm, soapy waterwith a soft cloth. Rinse and dry thoroughly.Wipe <strong>the</strong> motor base with a damp cloth anddry thoroughly.6. Use one hand to hold <strong>the</strong> jug handleand <strong>the</strong> o<strong>the</strong>r hand to turn <strong>the</strong> bladeassembly tool counter clockwise toloosen <strong>the</strong> blade assembly.Disassembling <strong>the</strong> blender1. Place <strong>the</strong> motor base on a flat, dry surfacesuch as a bench top. Ensure that <strong>the</strong> speedselection dial is in <strong>the</strong> OFF position, <strong>the</strong>appliance is switched off at <strong>the</strong> poweroutlet and <strong>the</strong> power cord is unplugged.2. Remove <strong>the</strong> blender jug from <strong>the</strong> motorbase by lifting <strong>the</strong> jug up by <strong>the</strong> handle.3. Remove <strong>the</strong> lid and inner measuring cupfrom <strong>the</strong> blender jug.4. Place <strong>the</strong> jug upside down on a flat, drysurface such as a bench top.5. Take <strong>the</strong> inner measuring cup (whichdoubles as a blade assembly removaltool). Insert <strong>the</strong> two tabs on <strong>the</strong> bladeassembly tool into <strong>the</strong> two grooves on<strong>the</strong> blade assembly.7. Once loose, lift <strong>the</strong> blade assembly upand out of <strong>the</strong> jug.8. Remove <strong>the</strong> silicone seal from outside<strong>the</strong> narrow end of <strong>the</strong> blender jug.9
Operating Your BREVILLE <strong>Light</strong> & <strong>Mighty</strong>NOTEThe blending blades are extremelysharp. Avoid any contact with fingersand hands.Assembling and attaching<strong>the</strong> blender jug1. Place <strong>the</strong> motor base on a flat, dry surfacesuch as a bench top. Ensure <strong>the</strong> speedselection dial is in <strong>the</strong> OFF position, <strong>the</strong>appliance is switched off at <strong>the</strong> poweroutlet and <strong>the</strong> power cord is unplugged.2. Ensure <strong>the</strong> lid is off <strong>the</strong> blender jug andplace <strong>the</strong> blender jug upside down on aflat, dry surface such as a bench top.3. Place <strong>the</strong> silicone seal onto <strong>the</strong> narrowend of <strong>the</strong> blender jug so that <strong>the</strong> sealsits underneath <strong>the</strong> 3 tabs.5. Place <strong>the</strong> two tabs of <strong>the</strong> bladeassembly tool into two grooves of <strong>the</strong>blade assembly.6. Use one hand to hold <strong>the</strong> jug handleand <strong>the</strong> o<strong>the</strong>r to turn <strong>the</strong> assembly toolclockwise to secure into place.7. Turn <strong>the</strong> assembled blender jug uprightand place onto <strong>the</strong> motor base.8. Insert <strong>the</strong> inner measuring cup into <strong>the</strong>lid, <strong>the</strong>n insert <strong>the</strong> lid firmly into <strong>the</strong> topof <strong>the</strong> blender jug.NOTEEnsure lid is placed onto blenderjug firmly and <strong>the</strong> inner measuringcup is in position before operating<strong>the</strong> blender. Do not operate blenderwithout <strong>the</strong> lid. Additional ingredientscan be added whilst blending byremoving <strong>the</strong> inner measuring cupand placing or pouring ingredientsthrough <strong>the</strong> middle opening in <strong>the</strong> lid.NOTELiquids should be placed into <strong>the</strong>blender jug before solid ingredients,unless specified differently in a recipe.4. Carefully insert <strong>the</strong> blade assembly.NOTEAll foods should be cut into cubes(approx. 2-3cm square) to achieve aneven result.10
Operating Your BREVILLE <strong>Light</strong> & <strong>Mighty</strong>Using <strong>the</strong> blenderNOTEWhen using <strong>the</strong> blender for <strong>the</strong> firsttime, you may notice an odour comingfrom <strong>the</strong> motor. This is normal andwill dissipate with use.1. Ensure <strong>the</strong> speed selection dial is in <strong>the</strong>OFF position. Insert <strong>the</strong> power cord intoa 230/240V power outlet and switch onat <strong>the</strong> power outlet.2. Remove <strong>the</strong> lid and add food and/orliquid into <strong>the</strong> blender jug.3. Select <strong>the</strong> desired speed by turning <strong>the</strong>speed selection dial clockwise to <strong>the</strong> lowor high speed setting. The speed can bechanged at any time during <strong>the</strong> blendingprocess. Turn <strong>the</strong> speed selection dialanti-clockwise to select <strong>the</strong> Pulse setting.Low: suitable for savoury dips, thin battersand soups.High: suitable for smoothies, cocktails,drinks, sauces and pesto.Pulse: can be used for foods that requireshort bursts of power to process such asherbs, nuts (pesto), small vegetables andice. When using <strong>the</strong> Pulse function, hold <strong>the</strong>blender lid in place.4. During <strong>the</strong> blending process, someingredients may stick to <strong>the</strong> sides of <strong>the</strong>blender jug. To push <strong>the</strong> food back onto<strong>the</strong> blades, turn <strong>the</strong> speed selection dialto <strong>the</strong> OFF position and switch off at <strong>the</strong>power outlet. Remove <strong>the</strong> lid and use aplastic spatula to scrape down <strong>the</strong> sidesof <strong>the</strong> blender jug. Replace <strong>the</strong> lid beforerecommencing blending.5. At <strong>the</strong> end of use, always ensure <strong>the</strong>speed selection dial is turned to <strong>the</strong> OFFposition. Then switch <strong>the</strong> applianceoff at <strong>the</strong> power outlet and unplug <strong>the</strong>power cord.NOTEEnsure <strong>the</strong> motor and blades havecompletely stopped before attemptingto move <strong>the</strong> appliance, when not inuse, if left unattended and beforedisassembling, cleaning and storing.NOTEIf any moisture or liquid appears on<strong>the</strong> motor base, ensure <strong>the</strong> speedselection dial is in <strong>the</strong> OFF position,<strong>the</strong> appliance is switched off at <strong>the</strong>power outlet and <strong>the</strong> power cord isunplugged, remove <strong>the</strong> blender jug<strong>the</strong>n wipe <strong>the</strong> spillage immediatelywith paper towel and dry thoroughly.Ensure <strong>the</strong> blender jug is correctlyassembled before placing back onto<strong>the</strong> motor body and operating.11
CARE, CLEANING& STORAGEfor your <strong>Breville</strong><strong>Light</strong> & <strong>Mighty</strong>
Care, Cleaning & StorageCare and cleaningBefore cleaning, ensure <strong>the</strong> speed selectiondial is in <strong>the</strong> OFF position, <strong>the</strong> appliance isswitched off at <strong>the</strong> power outlet and <strong>the</strong> powercord is unplugged from <strong>the</strong> power outlet.Cleaning <strong>the</strong> blender jug, lid,inner measuring cup, siliconeseal, blender jug base andblade assemblyWash blender jug, lid, inner measuring cup,silicone seal, blender jug base and bladeassembly in warm soapy water with a softcloth. Use a kitchen bottle brush to dislodgestubborn food. Rinse and dry thoroughly.Do not place <strong>the</strong> lid, inner measuring cup,silicone seal, blender jug or blade assemblyinto a dishwasher.Removing stubborn or strongfood stains and odoursStrong smelling foods such as garlic and fishmay leave an odour and some vegetablessuch as carrots may leave a stain on <strong>the</strong>blender jug and lid. To remove, soak blenderjug and lid for 5 minutes in warm soapywater. Then wash with a mild detergent andwarm water, rinse well and dry thoroughly.StorageStore <strong>the</strong> blender upright with <strong>the</strong> blenderjug, silicone seal, blade assembly, blenderjug base, lid and inner measuring cupassembled and inserted on <strong>the</strong> motor baseor beside it. Do not place anything on topCleaning <strong>the</strong> motor baseWipe <strong>the</strong> motor base with a soft, damp cloth<strong>the</strong>n dry thoroughly. Wipe any excess foodparticles from <strong>the</strong> power cord.NOTEDo not use abrasive scouring padsor cleaners when cleaning <strong>the</strong> motorbase as <strong>the</strong>y may scratch <strong>the</strong> surface.CAUTIONThe blending blades are extremelysharp. Avoid any contact with fingersand hands. Use caution when handlingand storing.13
HINTS & TIPSfor your <strong>Breville</strong><strong>Light</strong> & <strong>Mighty</strong>
HINTS & TIPSHints and Tips• Do not put more than 2 cups ofingredients into <strong>the</strong> blender beforeblending commences. After <strong>the</strong> blendingprocess has begun and <strong>the</strong> blades areturning you may slowly add ano<strong>the</strong>r 1½cups of ingredients through <strong>the</strong> innermeasuring cup opening if desired.• Do not blend a heavy mixture for morethan 1 minute at one time withoutswitching off <strong>the</strong> blender. For normalblending tasks, such as mayonnaise,dressings, etc., do not operate for longerthan 1 minute at one time withoutswitching off <strong>the</strong> blender, stirring <strong>the</strong>ingredients <strong>the</strong>n continuing operation.• Do not place hot or boiling foods and/or liquids into <strong>the</strong> blender; allow to coolbefore placing into <strong>the</strong> blender jug.• When using several ingredients, placeliquid ingredients in <strong>the</strong> blender jugfirst unless specified in <strong>the</strong> recipe todo o<strong>the</strong>rwise.• When blending thick or dry mixturesit may be necessary to stop <strong>the</strong> blenderand scrape down <strong>the</strong> sides of <strong>the</strong> jug,once or twice, during blending.• The blender will not knead dough ormash potatoes.• The blender is not designed to chop/mince meat or extract juice from fruitand vegetables.• Thick mixtures such as patés, pureemore efficiently when <strong>the</strong> blender jug is¼ to ½ full.• Do not use <strong>the</strong> blender to store food.• Do not overload <strong>the</strong> blender withmore than <strong>the</strong> specified quantity ofingredients as doing so could cause <strong>the</strong>motor to stall. Turn <strong>the</strong> blender off byturning <strong>the</strong> speed selection dial to <strong>the</strong>OFF position, switch off at <strong>the</strong> poweroutlet and unplug <strong>the</strong> power cord.Remove a portion of <strong>the</strong> mixture from<strong>the</strong> blender jug before continuing.• Do not operate <strong>the</strong> blender without <strong>the</strong>blender lid in position. To add additionalingredients whilst blending, remove <strong>the</strong>inner measuring cup and place or pouringredients through <strong>the</strong> opening in <strong>the</strong> lid.• Do not fill <strong>the</strong> blender jug above <strong>the</strong>MAX line. When <strong>the</strong> blender jug is filledat or near <strong>the</strong> MAX line, hold <strong>the</strong> blenderlid in place to avoid displacement of <strong>the</strong>lid during operation.• Do not use metal utensils as <strong>the</strong>y maydamage <strong>the</strong> blades or blender jug.• Do not place any objects, o<strong>the</strong>r thanfood or liquid, into <strong>the</strong> blender whilst <strong>the</strong>motor is running.• Do not remove <strong>the</strong> blender jug when <strong>the</strong>blender is operating. Always ensure <strong>the</strong>speed selection dial is turned to <strong>the</strong> OFFposition, <strong>the</strong> appliance is switched off at<strong>the</strong> power outlet and <strong>the</strong> power cord isunplugged from <strong>the</strong> power outlet.Suggested UsesCrush iceTo crush ice, place 1 cup of ice cubes into<strong>the</strong> blender jug. Replace <strong>the</strong> lid and turn <strong>the</strong>speed selection dial to <strong>the</strong> Pulse setting forshort bursts until a snowy textured ice isachieved. This will take approximately 15seconds. When crushing ice, hold lid in placeto avoid displacement during operation.Bread crumbsRemove <strong>the</strong> crusts from <strong>the</strong> bread and tearinto pieces. Process sufficient pieces at atime to cover <strong>the</strong> blades. Up to 5 slices ata time can be crumbed. Stale bread willproduce <strong>the</strong> best results.Chopped nutsProcess ¾ cup of nuts at a time. Use <strong>the</strong>Pulse setting as this will give more evenchopping.15
HINTS & TIPSDrinksFill <strong>the</strong> blender jug at least ¼ full andremember to leave room to allow froth toform as <strong>the</strong> drink is aerated.Soups, sauces, pureesThe most efficient amount to blend willdepend on <strong>the</strong> food/recipe used. However,generally, <strong>the</strong> more liquid used, <strong>the</strong> morecan be processed at one time. Never processboiling liquids or hot ingredients, allow tocool before placing into <strong>the</strong> blender jug.16
RECIPES
DIPS & STARTERSGUACAMOLEMakes approx. 1¼ cupsINGREDIENTS1 large avocado, peeled, de-stoned and chopped3 tablespoons lemon juice½ cup sour cream1 teaspoon minced garlic1 teaspoon chilliMETHOD1. Place all ingredients into blender jugand blend using speed 3 until smooth.Serve with crustini or crudites.PESTO DIPMakes approx. 1½ cupsINGREDIENTS1 cup fresh basil leaves1 clove garlic, peeled and chopped2 tablespoons lemon juice¼ cup pine nuts¼ cup olive oil½ cup cottage cheese¼ cup grated fresh Parmesan cheeseMETHOD1. Place basil leaves, garlic, lemon juiceand pine nuts into blender jug and blendusing speed 2 until finely chopped.2. With motor running, remove <strong>the</strong> innermeasuring cup, slowly pour in oil andblend until smooth.3. Remove mixture, stir in cheeses, coverand chill until ready to use. Serve withtoasted Turkish bread19
SOUPSCreamy Pumpkin SoupAdd ½ cup cream when adding <strong>the</strong> stock.Thai style Pumpkin SoupAdd 2 small fresh red chillies and 1tablespoon chopped lemon grass to <strong>the</strong>onion mixture. Add ½ cup/125ml coconutmilk before pureeing <strong>the</strong> mix.21
SAUCES & BATTERSRASPBERRY MAYONNAISEMakes approx. 2 cupsINGREDIENTS6 egg yolks1 teaspoon French mustard1 tablespoon Raspberry vinegar¾ cup grapeseed oil¾ cup peanut oilFreshly ground black pepper1 tablespoon boiling waterMETHOD1. Whisk toge<strong>the</strong>r egg yolks, mustard,lemon juice and vinegar.2. Pour mixture into blender jug, selectspeed 1, and blend until light and fluffy.3. With motor running, remove <strong>the</strong> innermeasuring cup, slowly pour combinedoils in and blend until mixture thickens.4. Season to taste with pepper and stirin water.5. Transfer to a sterilised, screw top jar. Coverwith lid and refrigerate until required.VariationsGarlic MayonnaiseAdd 6 cloves of peeled and chopped garliccloves to <strong>the</strong> egg yolk mixture and replacelemon juice with lime juice and raspberryvinegar with tarragon vinegar.BEER BATTERMakes approx. 2 cupsINGREDIENTS½ cup beer (such as Coopers)1 cup/250ml soda water1½ cups/375g plain flourMETHOD1. Place beer, soda water <strong>the</strong>n flour intoblender jug, select speed 3 and blenduntil smooth.2. Use to coat seafood or poultry.TEMPURA BATTERMakes approx. 2 cupsINGREDIENTS1 x 60g egg1 cup/250ml iced water1½ cups/225g plain or tempura flourMETHOD1. Place <strong>the</strong> egg and water into <strong>the</strong> blenderjug, mix on speed 3 to combine.2. Add <strong>the</strong> flour into <strong>the</strong> blender, mixusing <strong>the</strong> pulse function until almostcombined. Do not over-mix, as <strong>the</strong> batterwill not flake. The batter should havesome small lumps of flour remaining.Herbed MayonnaiseReplace lemon juice with raspberry vinegarwith ½ cup chopped mixed fresh herbs(such as basil, chives, parsley and thyme)and 1 clove garlic, peeled and chopped.Blend into prepared mayonnaise.22
SAUCES & BATTERSYORKSHIRE PUDDINGSMakes 6INGREDIENTS¼ cup/60ml water1⁄3 cup/75ml milk1 x 60g egg, lightly beaten¾ cup/112g plain flourFreshly ground black pepper1½ tablespoons beef dripping or oilMETHOD1. Place water, milk, egg, flour and pepperinto blender jug, select speed 4 andblend until smooth.2. Place 1 teaspoon beef dripping or oil ineach of six muffin pans and heat in ovenuntil dripping or oil is sizzling.3. Divide batter between muffin pans andcook at 220ºC for 10-15 minutes, oruntil puffed and golden. Serve as anaccompaniment for roast beef.PANCAKESMakes approx. 8-10 pancakesINGREDIENTS1 cup/150g plain flour¼ teaspoon salt1 x 60g egg1¼ cups/312ml milk2 tablespoons butter, softenedMETHOD1. Combine <strong>the</strong> flour, salt, egg and milkin <strong>the</strong> blender jug, mix on speed 4 with<strong>the</strong> lid firmly held in position, to form asmooth batter.2. Heat a small greased frying pan over amoderate heat; pour a small quantity ofbatter into frying pan to cover base of pan.3. Cook until bubbles come to <strong>the</strong> surfaceand break.4. Carefully turn <strong>the</strong> pancake over and cookuntil golden brown. Remove from pan.5. Repeat with remaining batter mixture.6. Serve with maple syrup and ice cream.23
SAUCES & BATTERSCRÊPESMakes approx. 10 – 12INGREDIENTS1¼ cups/312ml milk3 x 60g eggs, lightly beaten1½ cups/225g plain flour¼ teaspoon salt1 teaspoon vanilla essence2 tablespoons butter, melted1 tablespoon oil, for greasingMETHOD1. Add <strong>the</strong> milk, eggs, flour, salt, essence,eggs and butter to <strong>the</strong> blender jug, mixon speed 2 with <strong>the</strong> lid firmly held inposition, mix to form a smooth batter.2. <strong>Light</strong>ly grease a small crêpe pan. Heatpan over a moderate heat.3. Pour ¼ cup batter into <strong>the</strong> pan, swirlmixture to spread evenly over <strong>the</strong> pan.4. Cook over medium heat untilgolden brown.5. Turn crêpe over and cook for30 seconds longer.6. Repeat with remaining batter mixture.7. Serve with Raspberry Sauce.RASPBERRY SAUCEMakes approx. 1¼ cupsINGREDIENTS250g fresh or frozen raspberries¼ cup icing sugar2 tablespoons Grand Marnier or orange liqueur2 tablespoons waterMETHOD1. Place raspberries, icing sugar, GrandMarnier and water into <strong>the</strong> blender jug,select speed 3 and blend until smooth.2. Serve Raspberry Sauce drizzled overcrêpes or ice cream24
COCKTAILSSUGAR SYRUPMakes approx. 2 cupsINGREDIENTS1 cup white sugar1 cup/250mlwaterMETHOD1. Place sugar and water into a saucepanand bring to <strong>the</strong> boil. Allow to cool.2. Place <strong>the</strong> warm sugar syrup (also calledcocktail syrup) into a sterilized screwtopjar and refrigerate until required.This syrup is used to sweeten drinks andprovides a liquid to assist blending.MARGARITAServes 2INGREDIENTS¼ cup/60ml Tequila¼ cup/60ml Cointreau1 cup/250ml lime juice12 ice cubesLime slices for servingMETHOD1. Place Tequila, Cointreau, lime juiceand ice cubes into <strong>the</strong> blender jug,select speeds 4-5 and blend until wellcombined and ice is crushed.2. Serve in margarita glasses, garnish withsmall wedges of lime.DAIQUIRISGeneral recipeServes 2INGREDIENTSFruit (approximately 1 cup)½ cup/125ml white spirits (white rum, vodkaor kirsch)cup/75ml sugar syrup1 cup iceMETHOD1. Place all ingredients into <strong>the</strong> blender jugand puree using speed 5.2. Most fresh fruit and berries can be used.Frozen fruit should be defrosted.3. Fruit with hard skin or stones must have<strong>the</strong>m removed before pureeing.4. Large fruit should be diced.25
COCKTAILSWATERMELON ANDVODKA SLUSHIEServes 2INGREDIENTS2 cups watermelon, peeled and diced1½ tablespoons/30ml vodka1 cup ice cubesLime juice, for servingMETHOD1. Place watermelon, vodka and ice cubesinto <strong>the</strong> blender jug, select speeds 4-5and blend until thick.2. Serve in parfait glasses with drizzle offresh lime juice.PEAR AND VODKA FRAPPÉServes 2INGREDIENTS1 cup diced green pear, skin on1 cup ice¼ cup/60ml vodkaMETHOD1. Place all ingredients into <strong>the</strong> blender jug,select speed 3 and blend until combined.2. Serve in martini glassesBLOODY MARY FREEZERServes 2INGREDIENTS1 cup/250ml tomato juice¼ cup/60ml vodka¼ cup/60ml lemon juice1 egg whiteSalt and pepper¼ teaspoon Tabasco sauce¼ teaspoon Worcestershire sauce1 cup ice cubesCelery leaves optionalMETHOD1. Place all ingredients into <strong>the</strong> blenderjug, select speed 4-5 and blend until wellcombined and ice is crushed.2. Serve in tall glasses, garnished withcelery leaves.FLUFFY DUCKServes 2INGREDIENTS1½ tablespoons/30ml white rum1½ tablespoons/30ml advocaat¼ cup/60ml orange juice1½ tablespoons/30ml cream6 ice cubesOrange slices, cherries, optionalMETHOD1. Place all ingredients into <strong>the</strong> blender jug,select speeds 4-5 and blend until wellcombined and ice is crushed.2. Pour into tall glasses and garnish withorange slices and cherries.26
COCKTAILSBRANDY ALEXANDERServes 2INGREDIENTS½ cup/125ml brandy½ cup/125ml crème de cocoa2 scoops ice creamGround nutmegMETHOD1. Place all ingredients into <strong>the</strong> blenderjug, select speed 4 and blend until <strong>the</strong>ingredients are well mixed.2. Serve in martini glasses, dustedwith nutmeg.PINA COLADAServes 2MELON DREAMServes 2INGREDIENTS1 tablespoon/20ml Triple Sec1½ tablespoons/30ml Galliano1½ tablespoons/30ml cream1½ tablespoons/30ml orange juice1 cup chopped rockmelon1 cup ice cubesMelon slices for servingMETHOD1. Place all ingredients into <strong>the</strong> blenderjug, select speeds 4-5, blend until wellcombined and ice is crushed.2. Pour into tall glasses, garnish with smallslices of melon.INGREDIENTS½ cup/125ml pineapple juice¼ cup/60ml coconut cream¼ cup/60ml dark rum½ cup ice cubesPineapple leaves, optionalMETHOD1. Place all ingredients into <strong>the</strong> blenderjug, select speeds 4-5 and blend until <strong>the</strong>ingredients are well mixed.2. Serve in tall glasses garnished withpineapple leaves.27
NON-ALCOHOLIC DRINKSFRUIT COCKTAILServes 2INGREDIENTS1 cup/250ml pineapple juice1 banana, peeled and chopped1 orange, skin and pith removed, <strong>the</strong>n quartered1 cup/250ml soda water2 tablespoons passionfruit pulpMETHOD1. Place pineapple juice, banana andorange into <strong>the</strong> blender jug, selectspeeds 4-5 and blend until wellcombined.2. Stir in passionfruit pulp and soda waterand serve.CRANBERRY CRUSHERServes 2INGREDIENTS1 cup peeled and chopped pink grapefruit½ cup/125ml orange juice½ cup/125ml cranberry juice1 tablespoon caster sugar1 cup/250ml ginger aleMETHOD1. Place grapefruit, orange juice, cranberryjuice, sugar into blender jug, selectspeeds 4-5 and blend until wellcombined.2. Pour into chilled glasses and top withginger ale.ROCKMELON ANDPINEAPPLE FRAPPÉServes 2INGREDIENTS1 cup chopped rockmelon1 cup canned pineapple pieces1 cup iceMint leaves, to serveMETHOD1. Place all ingredients into blender jug,select speeds 4-5 and blend until allingredients are crushed and mixture isthick.2. Serve with chopped mint leaves.PEAR AND LEMON FRAPPÉServes 2INGREDIENTS1 cup canned pear1 cup ice1 tablespoon/20ml lemon juiceMETHOD1. Place all ingredients into <strong>the</strong> blenderjug, select speeds 4-5 and blend until allingredients are crushed and thick.2. Serve immediately.28
NON-ALCOHOLIC DRINKSPINEAPPLE COCONUTCREAM COOLERServes 2INGREDIENTS1 cup/250ml pineapple juice½ cup/125ml coconut cream½ cup iceMETHOD1. Place pineapple juice, coconut creamand ice into <strong>the</strong> blender jug, selectspeeds 4-5 and blend until wellcombined.2. Serve chilled.LIME CRUSHServes 2INGREDIENTS¼ cup/60ml fresh lime juice1 tablespoon white sugar1 cup/250ml mineral water1 cup ice1 lime, thinly slicedMETHOD1. Place lime juice, sugar, mineral waterand ice into <strong>the</strong> blender jug, select speed5, and blend until well combined.2. Serve with lime slices.29
NOTES31
<strong>Breville</strong> Customer Service CentreAustralian CustomersMail: PO Box 22Botany, NSW, 2019AUSTRALIAPhone: 1300 139 798Fax: (02) 9384 9601Email: Customer Service:askus@breville.com.auNew Zealand CustomersMail: Private Bag 94411Greenmount, AucklandNEW ZEALANDPhone: 0800 273 845Fax: 0800 288 513Email: Customer Service:askus@breville.com.auwww.breville.com.au<strong>Breville</strong> is a registered trademark of <strong>Breville</strong> Pty. Ltd. A.B.N. 98 000 092 928.Copyright <strong>Breville</strong> Pty. Ltd. 2010.Due to continued product improvement, <strong>the</strong> products illustrated/photographedin this booklet may vary slightly from <strong>the</strong> actual product.BBL100 Issue - A10


