TABLE OF CONTENTS - Robbins Instruments, Inc.
TABLE OF CONTENTS - Robbins Instruments, Inc.
TABLE OF CONTENTS - Robbins Instruments, Inc.

Create successful ePaper yourself
Turn your PDF publications into a flip-book with our unique Google optimized e-Paper software.
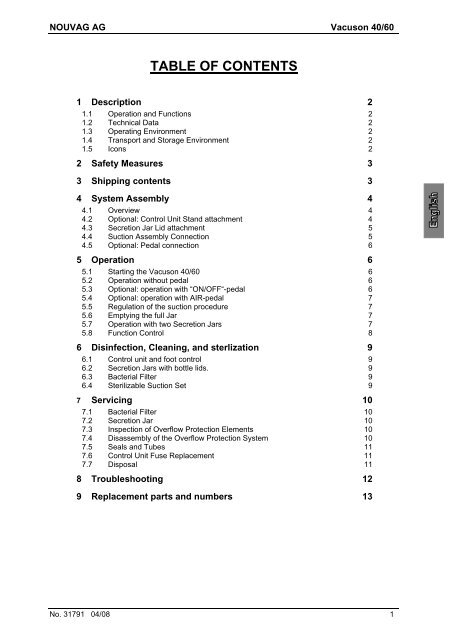
NOUVAG AG Vacuson 40/60<strong>TABLE</strong> <strong>OF</strong> <strong>CONTENTS</strong>1 Description 21.1 Operation and Functions 21.2 Technical Data 21.3 Operating Environment 21.4 Transport and Storage Environment 21.5 Icons 22 Safety Measures 33 Shipping contents 34 System Assembly 44.1 Overview 44.2 Optional: Control Unit Stand attachment 44.3 Secretion Jar Lid attachment 54.4 Suction Assembly Connection 54.5 Optional: Pedal connection 65 Operation 65.1 Starting the Vacuson 40/60 65.2 Operation without pedal 65.3 Optional: operation with “ON/<strong>OF</strong>F“-pedal 65.4 Optional: operation with AIR-pedal 75.5 Regulation of the suction procedure 75.6 Emptying the full Jar 75.7 Operation with two Secretion Jars 75.8 Function Control 86 Disinfection, Cleaning, and sterlization 96.1 Control unit and foot control 96.2 Secretion Jars with bottle lids. 96.3 Bacterial Filter 96.4 Sterilizable Suction Set 97 Servicing 107.1 Bacterial Filter 107.2 Secretion Jar 107.3 Inspection of Overflow Protection Elements 107.4 Disassembly of the Overflow Protection System 107.5 Seals and Tubes 117.6 Control Unit Fuse Replacement 117.7 Disposal 118 Troubleshooting 129 Replacement parts and numbers 13No. 31791 04/08 1
Vacuson 40/60NOUVAG AG1 Description1.1 Operation and FunctionsThe VACUSON Group can be used for the suction of fluids and secretions. The pump power can becontinuously regulated and monitored through the Manometer.The Vacuson can be used in the following areas:- Chemistry - Dental laboratory- Laboratory - Surgery- Medicine - Postoperative care- Intensive care1.2 Technical DataVoltage: ...................................................................... 115 V~ / 60 Hz or 230 V~ / 50 Hz (see unit label)Current consumption: ................................................................................ Vacuson 40 115 VAC:.... 2 A230 VAC:. 0.9 AVacuson 60115 VAC:. 2.5 A230 VAC:. 1.4 AFuses: ....................................................... 2 x T4A (for 115 V~ / 60 Hz) or 2 x T2A (for 230 V~ / 50 Hz)Dimensions (W x H x D): ......................................................................................... 290 x 280 x 360 mmWeight: .......................................................................................................................... 10 kg resp. 13 kgAccuracy Limit Manometer:................................................................................................................. 5%Suction Pump Capacity: ...................................................................................... 40 l/min resp. 60 l/ minSuction Motor Power: ............................................................................................. 185 VA resp. 250 VA1.3 Operating EnvironmentRelative Humidity:...................... max. 80 %Temperature: .............................. 5 to 35 °CBarometric Pressure:.........800 to1060 hPa1.4 Transport and Storage EnvironmentRelative Humidity:..............................max. 90 %Temperature: ......................................5 to 50 °CBarometric Pressure:................ 700 to1060 hPa1.5 Icons: Attention accompanying documents: Application of part Type BF1275 : Conforms to EU standards: Old electrical and electronic equipment must be disposed separately and may not beincluded in regular domestic waste.2 No. 31791 04/08
NOUVAG AG Vacuson 40/602 Safety MeasuresYour safety, the safety of your team, and, it goes without saying, the safety of your patients is forNouvag AG the first priority. It is therefore vital that the following measures be strictly observed:• The VACUSON 40/60 should be operated by qualified personnel only!• The VACUSON 40/60 control unit must be at least 1m from the floor whenoperating at the Operation Theatre!• Check the correct operation voltage on the rating plate!• Employ the designated cannula only!• Responsibility for the use of sub-units, accessories, parts or assemblies fromother manufacturers rests solely with the user!• In operating, storing or transporting the VACUSON 40/60 particular care shouldbe taken handling the Control Unit!• Repairs are to be carried out by authorized NOUVAG service technicians only!• Nouvag AG cannot be held liable for any malfunction of the VACUSON 40/60, orperformance failure and/or its designed or desired utility, nor can Nouvag AG beheld liable for any injuries to persons or animals, in any case when the VACUSON40/60 is miss-used or not operated, applied or maintained in strict accordancewith the user/owner instructions set out in the operating manual. In the event ofany doubt or question, the user is to contact Nouvag AG or its lawfulrepresentative for clarification or assistance!3 Shipping contentsCode Description QuantityVacuson 40 ((Code 4227-115 / 4227-230)4216........................... Control unit Vacuson 40 .............................................................................1 piece4246........................... Bacterial filter, ∅ 64mm, PTFE...............................................................10 piecesVacuson 60 ((Code 4237-115 / 4237-230)4217........................... Control unit Vacuson 60 .............................................................................1 piece4246........................... Bacterial filter, ∅ 64mm, PTFE...............................................................10 piecesoptional:4122........................... Stand Vacuson ...........................................................................................1 piece1410........................... Foot pedal On/Off .......................................................................................1 piece4242........................... Foot pedal AIR............................................................................................1 piece4052........................... Suction jar, 2 lt............................................................................................1 piece4245........................... Suction jar, 5 lt............................................................................................1 piece4058........................... Jar lid, complete .........................................................................................1 piece4035........................... Disposable liquid bag and jar lid for Monokit..........................................50 pieces4036........................... 2 lt jar autoclavable for Monokit..................................................................1 piece4037........................... Monokit holder for pump.............................................................................1 pieceNo. 31791 04/08 3
Vacuson 40/60NOUVAG AG4 System Assembly4.1 Overview1514131612171118109194 567832022111. Suction Tube2. Suction Cannula (not included)3. Mains cable4. Mains Connector (back panel)5. Fuse Box (back panel)6. Outflow “EXHAUST“ (back panel)7. Connection On/Off-pedal“ON/<strong>OF</strong>F PEDAL“ (back panel)8. Connection Air-pedal“AIR PEDAL“ (back panel)9. Quiver10. Quiver Holder11. Mains switch “ON / <strong>OF</strong>F“12. Manometer13. Vacuum Regulator “VACUUM“14. Bacterial filter15. Control unit16. Suction jar holder17. Suction jar lid18. Suction jar19. Stand, moveable20. Pedal cable21. Pedal4.2 Optional: Control Unit Stand attachment(Depending on each Vacuson model a moveable stand is also included)1) Slip washers on Phillips screws.2) Insert screws in holes and screw into Control unit threaded holes.3) Drive screws home gently with a screwdriver.4 No. 31791 04/08
NOUVAG AG Vacuson 40/60A longer tube is supplied together with the stand in order to connect the bacterial filterto the suction jar, so the suction jar can be hanged in front of the stand.4.3 Secretion Jar Lid attachment1) Place Jar in vertical position2) Insert lid with O-ring on Jar rim.3) Clear Spring Clamp from outer rim, allowing lid to drop in place4) Press Lid down firmly with handle.5) Turn Spring Clamp into position.6) Snap Spring Clamp down into holding position.When using the VACUSON 40/60, the Secretion Jars must be in their holders at alltimes! This is to avoid tipping and spillage which could destroy the pump!Please follow the separate Instructions for the use of the disposable Monokit bottles (not included).4.4 Suction Assembly Connection231) With Lid firmly secured, Hang Secretion Jar from supportmounting.12) Affix narrow Connector (1) onto Secretion Lid neck.3) Insert bacterial filter (3) into socket of main unit.4) Connect tube of baccterial filter (2) with bacterial filter andpush-on contact.Insure that the VACUSON 40/60 is never operated without the Bacterial Filter,otherwise the equipment could be destroyed!5) Hang Quiver (if included) on Stand holder.6) Affix Overflow Connector to Secretion Jar Lid..7) Affix Suction Tube to connector neck.Do not forget to check the correct operation voltage on the rating plate!8) Plug in Control Unit Mains.The System is Operational!Refer to Function Control of the device’s assembling, see 5.8 Function Control.No. 31791 04/08 5
Vacuson 40/60NOUVAG AG4.5 Optional: Pedal connection(According to each order an ON/ <strong>OF</strong>F pedal, an AIR-pedal or neither ON/ <strong>OF</strong>F pedal nor AIR-pedal areincluded)1 2ON/<strong>OF</strong>F – pedal connection:The ON/<strong>OF</strong>F – pedal (1) can be connected ordisconnected on the back panel of the ControlUnit.AIR – pedal connection:The AIR - pedal can be connected on the backpanel “AIR PEDAL“ (2).Inorder for the system to remain airtight, cover the connection spigot with the cap ifnot using the AIR - pedal.5 Operation5.1 Starting the Vacuson 40/60Press green ON/<strong>OF</strong>F Switch.5.2 Operation without pedalPress “ON/<strong>OF</strong>F“ to start pump action.Even after stopping the suction procedure, some vacuum will remain in the system!5.3 Optional: operation with “ON/<strong>OF</strong>F“-pedal(According to each order an “ON/<strong>OF</strong>F“ – pedal is included!)The “ON/<strong>OF</strong>F“ – pedal functions like a switch. Push pedal down to start suction procedure. To stop thesuction procedure push pedal down again.•If the ON/<strong>OF</strong>F pedal is connected, the suction procedure can be switched ON and<strong>OF</strong>F with the pedal only.• Even after stopping the suction procedure, some vacuum will remain in thesystem!6 No. 31791 04/08
NOUVAG AG Vacuson 40/605.4 Optional: operation with AIR-pedal(According to each order an “AIR“ – pedal is included!)The suction pressure can be regulated with the AIR-pedal. The more the pedal is pushed down, themore extraneous air will be suctioned by the AIR-pedal, the suction pressure in the cannula will be alsoreduced.5.5 Regulation of the suction procedureThe Vacuum Regulator “VACUUM“ regulates the Suction mode. The Manometer indicates the actualnegative, barometric, pressure (rarefaction) in Bars.Turn right: ...................................... rarefaction increasesTurn left: ......................................... negative pressure decreasesSetting the Desired Barometric Maximum:1) Set Vacuum Regulator ”VACUUM“ left to minimum.2) Press ”ON/<strong>OF</strong>F” button to start vacuum pump (if “ON/<strong>OF</strong>F” pedal is also connected, push downpedal to start vacuum pump).3) Crimp suction tube to achieve maximum system integrity4) Turn Vacuum regulator right to maximum.5) Wait till manometer indicates maximum negative pressure (> -0.8 bar).6) Set Regulator to desired maximum between 0 and 0.8 bar.If the system is not airtight (a defective seal, for example) the Manometer willindicate < -0.7 bar!5.6 Emptying the full JarThe Secretion Jar Lid has a mechanical Overflow Protection device. This preventsliquid backing up in the connecting Tube and, crucially, into the pump The OverflowProtection float closes the tube at the maximum secretion level.When the secretion level is too high and the Overflow Protection device closes, emptythe full Jar or replace it by an empty one:1) Turn Suction Pump off.2) Remove Tubings from Suction Jar.3) Remove full Jar from holder and dispose suctioned secretion in conformity with local laws andregulations.4) Secure Lid firmly and hang Secretion Jar on support mounting.5) Reconnect Tubes according to Secretion Jar’s instructions (see Chapter 4.6 Suction AssemblyConnection).Operation can be resumed with the empty and properly connected Secretion Jar.5.7 Operation with two Secretion JarsSecretion jars can be hung left and right on the Control Unit. When the first Secretion Jar is full, theVacuum Pump must be turned off and the connection tubes attached to the second Secretion Jarbefore the Vacuum Pump can be startet and the operation can be resumed.Even after closing, some liquid will still run into the Jar, subject to the negativepressure remaining in the bottle.No. 31791 04/08 7
Vacuson 40/60NOUVAG AG5.8 Function ControlAfter the Vacuson 40/60 has been set up, check the different operation functions in order to receiveoptimum performance and service from the device.General Function:1) Press “ON/<strong>OF</strong>F“ Mains Switch to start the unit Switch “ON/<strong>OF</strong>F“ will illuminate.2) Both Fans on the left and right of the unit will run.Suction Pump without Pedal:1) Press “ON/<strong>OF</strong>F“ Mains Switch to start the unit Switch “ON/<strong>OF</strong>F“ will illuminate.2) Both Fans on the left and right of the unit will run.3) Suction Pump is ON.4) Keep hand in front of the Air Exhauster „EXHAUST“ (Control Unit back panel) → Air Flowexhausts.5) Turn Vacuum Regulator “VACUUM“ completely right Maximum Suction Output.6) Verify Suction Intensity on Cannula’s end Pump suction increases7) Turn Vacuum Regulator “VACUUM“ completely left Minimum Suction Output.8) Verify Suction Intensity on Cannula’s end Pump suction decreases.9) Switch Off Control Unit with Mains Switch “ON/<strong>OF</strong>F Switch “ON/<strong>OF</strong>F“ not illuminated.Suction Pump with „ON/<strong>OF</strong>F“ – Pedal (optional):1) Press “ON/<strong>OF</strong>F“ Mains Switch to start the unit Switch “ON/<strong>OF</strong>F“ will illuminate.2) Both Fans on the left and right of the unit will run.3) Keep hand in front of the Air Exhauster „EXHAUST“ (Control Unit back panel) → Air Flowexhausts.4) Switch On Suction Pump with „ON/<strong>OF</strong>F“- Foot Pedal.5) Turn Vacuum Regulator “VACUUM“ completely right Maximum Suction Output.6) Verify Suction Intensity on Cannula’s end Pump suction increases7) Turn Vacuum Regulator “VACUUM“ completely left Minimum Suction Output.8) Verify Suction Intensity on Cannula’s end Pump suction decreases.9) Switch Off Suction Pump with „ON/<strong>OF</strong>F“- Foot Pedal.10) Switch Off Control Unit with Mains Switch “ON/<strong>OF</strong>F Switch “ON/<strong>OF</strong>F“ not illuminated.Suction Pump with AIR-Pedal (optional):1) Press “ON/<strong>OF</strong>F“ Mains Switch to start the unit Switch “ON/<strong>OF</strong>F“ will illuminate2) Both Fans on the left and right of the unit will run.3) Suction Pump is ON.4) Keep hand in front of the Air Exhauster „EXHAUST“ (Control Unit back panel) → Air Flowexhausts.5) Turn Vacuum Regulator “VACUUM“ completely right Maximum Suction Output.6) Verify Suction Intensity on Cannula’s end Pump suction increases.7) Push Foot Pedal Suction Output will decrease.8) Release Foot Pedal.9) Turn Vacuum Regulator “VACUUM“ completely left Minimum Suction Output.10) Verify Suction Intensity on Cannula’s end Pump suction decreases.11) Switch Off Control Unit with Mains Switch “ON/<strong>OF</strong>F Switch “ON/<strong>OF</strong>F“ not illuminated.Troubleshooting:See capitel 8. Troubleshooting8 No. 31791 04/08
NOUVAG AG Vacuson 40/606 Disinfection, Cleaning, and sterlizationPlease pay attention to the following important points for the maintenance of the material:• Do not use dissolving agents for cleaning, in particular agents with ingredientsas Methylene chloride and Trichloroethane!• Autoclave material in transparent packaging!• Autoclave at maximum 134C!• Sterilized material should be stored and tagged with sterilizing date!6.1 Control unit and foot controlThe control unit and the pedal do not come into contact with patients. Only clean the surface of the unit,do not use harsh cleaners or solvents for cleaning. Use 80% ethyl alcohol or microbiologically effectivedisinfectants.The Control Unit should be wiped with a clean, damp cloth only. No spray cleanersor disinfecting agents should be employed, as the Control Unit face is notwatertight!6.2 Secretion Jars with bottle lids.• Only use desinfectants and cleaning agents that are appropriate for polysulphone(no aldehydes, kethones and phenoles).• Follow the instructions of the producer of the cleaning and disinfection agentsconcerning the dilution and duration of use, particularly when using automaticcleaning and disinfection devices.After every use, Secretion Jars with bottle lids are to be emptied, rinsed and disinfected beforeautoclaving at maximum 134C.After Autoclaving, allow Micro-motor to dry in the sterilization bag for one hour with the paper side up atroom temperature.6.3 Bacterial FilterThe Bacteria-filter between the Secretion Jar and Control Unit Pump is a one-way device and Cannotbe cleaned. It should be replaced periodically every ~50h, or immediately should foam or bacterialsubstance appear.Inorder to protect the pump, the Bacterial filter closes when it comes in contact withliquid. So further suction procedure is not possible when the Bacterial filter issaturated.6.4 Sterilizable Suction Set1) Rinse Suction -Set well with disinfecting agent.2) Clean with damp cloth.3) Bag and autoclave the sterilization suction set at maximum 134C.To insure proper function of the Suction Pump, all tubes and seals must be periodically checked, andreplaced after at most 250 sterilizations or five years operation.No. 31791 04/08 9
Vacuson 40/60NOUVAG AG7 Servicing7.1 Bacterial FilterAs one-way element, the Bacterial Filter must be periodically changed, andimmediately when foam or infectious material is sucked in.(Art. Nr. see 9. Replacement parts and numbers)7.2 Secretion JarBecause the inflow of secretion material mixed with air produces a build-up of foam in the SecretionJar, an anti-foaming agent is required. Before operation, put anti-foaming agent in clean and drySecretion Jar. Do not add disinfecting agents, as they increase the build-up of foam.Check carefully that the Secretion Jar is in good condition. Make sure that there are no cracks or chipsand that the rim is unmarked. This is important to insure a properly sealed system, and enables theSuction Pump to function correctly.7.3 Inspection of Overflow Protection ElementsTo insure proper function, the Overflow Protection must be checked out from time to time:1) Connect Secretion Lid, without Jar, to the Bacteria Filter tube.2) Turn regulator „VACUUM“ on Control Unit clockwise to open.3) Turn Vacuum Suction Pump on.4) Press Overflow Protection float on Secretion Lid.5) Vacuum Meter should indicate increasing value, to a maximum of > -0.8bar.If the maximum vacuum is not indicated, the Overflow Protection must bedisassembled, cleaned, and seals replaced7.4 Disassembly of the Overflow Protection System1) Unscrew threaded Overflow Protection connector (1)from Secretion Jar connector.2) Remove connector seal (2).3) Install new seal.4) Clean Overflow Protection with float.5) Screw threaded Overflow Protection connector (3)back on.Float Check following disassembly:1) Hold lid vertical.2) Press float repeatedly against lid.3) Check that float falls back independently to normal position.If float does not fall back, cleaning must be repeated.31210 No. 31791 04/08
NOUVAG AG Vacuson 40/607.5 Seals and TubesTo insure proper function of the Suction Pump, all tubes and seals must be periodically checked, andreplaced after at most 250 sterilizations or five years operation. Only when in perfect order cansufficient vacuum be built up.Defective seals and tubes must be replaced!12 563741. Seal for connecting neck on Control Unit ...................................................... 2 pieces ........ (Art.4063)2. Connecting Tube between Bacteria Filter and Jar lid ...................................... 1 piece ........ (Art.4075)3. Seal for unscrew able connecting neck on Secretion Jar Lid ........................ 4 pieces ........ (Art.4064)4. Seal between Jar Lid and Jar .......................................................................... 1 piece ...... (Art.28957)5. Seal between wide unscrew able connector neck and Secretion Jar Lid ..... 4 pieces ........ (Art.4063)6. Seal in Overflow Protection .............................................................................. 1 piece ...... (Art.28958)7. Suction Tube ............................................................ 1piece (see 9. Replacement parts and numbers)7.6 Control Unit Fuse ReplacementA blown Fuse can be easily replaced by the operator. It is located on the back of the Control Unit:1) Disconnect mains.2) With screwdriver open fuse cover by turning counter clockwise.3) Replace defective fuse. (see 2.2 Technical Data)4) With Screwdriver close fuse case by turning clockwise.5) Reconnect mains.7.7 DisposalDisposal of device, components and accessories must strictly conform to local laws and regulations asset out by the relevant authorities.With regard to the preservation of the environment old equipment may be returned to the distributor ormanufacturer.No. 31791 04/08 11
Vacuson 40/60NOUVAG AG8 TroubleshootingProblem: Cause: Solution: Refer: Operating ManualDevice does notoperate at allPedal Fails toFunctionControl Unit not turned onTurn Main Switch „ON/<strong>OF</strong>F”ON4.1 OverviewWrong operating voltage Check mains voltage output 2.2 Technical DataMains not connectedConnect mains to ControlUnit4.1 OverviewDefective FuseCheck fuse and replace if 7.6 Control Unit Fuse Replacementindicated2.2 Technical DataFloor Pedal not connectedControl Unit not turned onImproper usePlug Floor Pedal Cable intorear of Control UnitTurn Main Switch „ON/<strong>OF</strong>F“ONRefer to Operating ManualPumps fail to run Trip plate not pressed down Press plate downPump suction powertoo weak:Vacuum leaksConnection cap is not onspigot(if AIR-Pedal is notconnected)Check all seals and hoses.Make sure Lid restssecurely on Jar.Put cap on pedal connection4.5 Optional: Pedal connection4.1 Overview5.2 Optional: operation with“ON/<strong>OF</strong>F“-pedal5.3 Optional: operation with AIRpedal5.2 Optional: operation with“ON/<strong>OF</strong>F“-pedal4.3 Secretion Jar Lid attachment7.5 Seals and Tubes4.5 Optional: Pedal connectionImproperly mounted hoses Inspect hose connections 4.4 Suction assembly connectionJar is full and OverflowProtection is closedReplace Jar4.3 Secretion Jar Lid attachmentImproper useVacuum regulator notcompletely openVacuum leaksRefer to Operating ManualTurn “VACUUM“ regulatorclockwise until the desiredsuction power is reachedCheck all seals and hoses.Make sure Lid restssecurely on Jar.5.4 Regulation of the suctionprocedure5.4 Regulation of the suctionprocedure7.5 Seals and TubesIn the event a problem cannot be solved, contact dealer or authorized service technicians, as listed onthe last page of your Operating Instruction Manual.12 No. 31791 04/08
NOUVAG AG Vacuson 40/609 Replacement parts and numbersSealing elements(siehe 7.5 Seals and Tubes)Art.-Nr.Connecting ElementsArt.-Nr.Wide Connector for Control Unit neck............................................................................................... 4056Narrow Connector for Jar Lid suction neck ....................................................................................... 4047Flow Connectors for for Jar Lid complete ....................................................................................... 28535Suction ElementsArt.-Nr.Filling tube; autoclaveable; 8 x 14mm; length 2m ............................................................................. 4076One-way Suction Set with Insertion Cannula, sterile; length 4 m; for Infiltration Pump.................... 6017One-way Suction Set, sterile; 4m long ; for Suction Pump ............................................................. 28966Sterilizable Suction Set; 4m long; for Suction Pump....................................................................... 28965ConnectingTube between Bacterial Filter and Jar Lid ...................................................................... 4075AccessoriesArt.-NrSuction Jar; Polysulfon, unbreakable, autoclavable; 2 Litre ............................................................. 4052Suction Jar; Polysulfon, unbreakable; autoclavable; 5 Litre ............................................................. 4245Bacterial filter for Suction Pump ........................................................................................................ 4246Jar Lid with Overflow protection for 2 / 5 Litre Jar............................................................................ 4058Quiver; (Rinsing Container), sterilizable ; length 30cm..................................................................... 4043Quiver; (Rinsing Container), sterilizable ; length 40cm..................................................................... 4044For ordering other parts, our customer service personnel are pleased to assist.No. 31791 04/08 13