2403AUF McKenzie Lateral File Cabinet - Whittier Wood Products
2403AUF McKenzie Lateral File Cabinet - Whittier Wood Products
2403AUF McKenzie Lateral File Cabinet - Whittier Wood Products

Create successful ePaper yourself
Turn your PDF publications into a flip-book with our unique Google optimized e-Paper software.
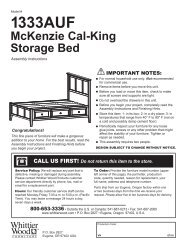
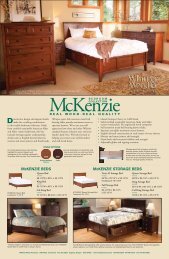
Model #<strong>2403AUF</strong><strong>McKenzie</strong> <strong>Lateral</strong><strong>File</strong> <strong>Cabinet</strong>Assembly InstructionsCongratulations!This fine piece of furniture will make a gorgeousaddition to your home. For the best results, read theAssembly Instructions and Finishing Hints beforeyou begin your project.Serious or fatal crushing injuries can occurfrom furniture tip-over. To help prevent tip-over:Place heaviest items in the bottom drawers.Unless specifically designed to accommodate,do not set TVs or other heavy objects on top ofthis product.Never allow children to climb or hang on drawers,doors or shelves.Never open more than one drawer at a time.Use of tip-over restraints may only reducebut not eliminate the risk of tip-over.IMPORTANT NOTES:For normal household use only. Not recommendedfor commercial use.Use a protective pad when using your furnitureas a writing surface.Do not climb, sit or stand on this piece of furniture.Do not overload the drawers.Unload items before you move this unit.Before you load or move this unit, check to makesure all screws and supports are tight.Before you begin your project, completely read theAssembly Instructions and Finishing Hints.Store this item: 1- in its box; 2- in a dry place; 3- in.temperatures that range from 40°F to 90°F (not on acold and possibly damp cement floor).Periodically inspect your furniture for any looseglue joints, screws or any other problem that mightaffect the stability of your furniture. Tighten orrepair as needed.CALL US FIRST! Do not return this item to the store.Service Policy: We will replace any part that isdefective, missing or damaged during assembly.For a replacement part, directly contact <strong>Whittier</strong><strong>Wood</strong> <strong>Products</strong> customer service department byphone, fax, mail or email.Hours: Our friendly customer service staff can bereached Monday-Friday 7:00 a.m. to 5:00 p.m. (PacificTime). You may leave a message 24 hours a day,seven days a week.To Order: Provide the furniture model number (upperportion of this page), the part letter, production code,quantity needed, reason for replacement and your fullname, address and telephone number.Parts ship from our Eugene, Oregon factory within oneor two business days from the time we receive yourrequest. Please allow five to ten business days for delivery.800-653-3336 • Outside the U.S. or Canada: 541-687-0213 • Fax: 541-687-2060www.whittierwood.com • P.O. Box 2827 • Eugene, Oregon 97402, U.S.A.Production Code:P.O. Box 2827Eugene, OR 97402 USAVN12/10
<strong>2403AUF</strong> <strong>McKenzie</strong> <strong>Lateral</strong> <strong>File</strong> <strong>Cabinet</strong> — Parts ListPlease identify the parts and check that quantities received match those on this list.If you need to replace a part, refer to the following letter and model name.Part Description QuantityA Case Assembly 1B Top Assembly (attached) 1C Back (attached)1D Drawer (inserted) 2E Upper Drawer Face (installed) 1F Lower Drawer Face (installed) 1G Drawer Divider (attached) 4H Lock (attached) 1I #6 x 5/8" Philtruss Screw (inserted) 16J Drawer Slides (installed) 2 setsK #6 x 3/4" Philtruss Screw (inserted) 20L #6 x 1/2" Philtruss Screw (inserted) 16M Knob (attached) 4N #8 x 1-1/2" Machine Screw (installed) 4O Plastic <strong>File</strong> Rail (attached)8P #8 x 7/8" LoProfile Screw (inserted)16Q #8 x 1-1/4" Pan Head Screw (inserted)15R #8 x 1-3/16" Pan Head Screw (inserted)8S #8 x 1-5/8" Black Screw (inserted)8TUV#8 x 1-1/4" Black Screw (inserted)#8 x 2-3/4" Black ScrewT-Nut (inserted)1032WSmall Adjustable Glide (installed) 2X Tack Glide (inserted) 2TR Tipping Restraint 2 sets<strong>2403AUF</strong> — Page 2 — 12/10
<strong>2403AUF</strong> <strong>McKenzie</strong> <strong>Lateral</strong> <strong>File</strong> <strong>Cabinet</strong>Assembly InstructionsTool Required: Phillips ScrewdriverFig. 1aDrawer Release LeverFig. 11. Remove the drawers from the Case (A). To do that, pull up on the left Drawer Release Leverwhile pushing down on the right Drawer Release Lever and pull out the drawer. See Figure 1a.Note where each drawer came from to make sure you place them back into their correct positions.2. Position the unit at the desired location. To level the unit, twist the Adjustable Glides(W) on the bottom two front corners. See Figure 3.There are three ways to help stabilize your file cabinet and reduce the risk of tip-over.WallChoice #1Ux 3Fig. 3UUW3.Place the cabinet against the wall. Using three #8 x 2-3/4" Black Screws (U), secure the unit tothe wall. See Figure 3.<strong>2403AUF</strong> — Page 3 — 12/10
WallChoice #2Ux 3Fig. 4U4. Using three #8 x 2-3/4" Black Screws (U), secure the file cabinet to the floor.Fig. 5aTighten the Nylon RestraintStrap (T2) so there is no slack.Fig. 5cT1T2T3T4T3T1Pull tightT4T1Fig. 5dFig. 5b5.Tipping restraint:Locate two studs in the wall behind the unit. Attach a Clip (T1) to the wall stud with two #8 x 2"Black Screws (T3). See Figure 5a. Attach a second clip to the unit with two #8 x 1" Pan HeadScrews (T4). See Figure 5b. Connect the two clips with the Nylon Restraint Strap (T2). Pull theNylon Restraint Strap (T2) tight so there is no slack. See Figures 5c and 5d. Repeat thisprocedure to attach the second tipping restraint. If you cannot locate two studs, purchase theproper wall attachment hardware for your type of wall and secure the unit.<strong>2403AUF</strong> — Page 4 — 12/10
GSFig. 7GSFig. 7aFig. 7bS7.SThe file drawers arrive configured to accommodate letter/letter sized files. But each drawerhas the flexibility to be configured as letter/letter, letter/legal or legal/legal. To set up a sectionto hold legal files, remove a drawer. Remove one #8 x 1-5/8" Black Screw (S) from the drawerback and one from the bottom. Move the Drawer Divider (G) to the center slot. Attach theDivider in place with two #8 x 1-5/8" Black Screws (S). See Figures 7, 7a and 7b. Repeatfor as many sections as you need.Fig. 88.Insert the Drawers into the cabinet.9. Use a protective pad when using your furniture as a writing surface.10. To attach the 2404 <strong>McKenzie</strong> <strong>Lateral</strong> <strong>File</strong> Hutch to this unit, carefully follow the instructions inthe 2404.<strong>2403AUF</strong> — Page 5 — 12/10
Finishing HintsChoosing the Finish:1. Choose a finish that will meet your expectations forthe product you are finishing. Are you matchingexisting furniture or do you want a “natural” finish?Is the piece to be functional, decorative or both?The answers to these questions may affect thetype of finish you choose.2. Use products of the same brand to ensure compatibilityof products.3. ALWAYS follow the stain manufacturer’s instructions.Alder is a porous hardwood and oftenlooks best when following the finishing directionsfor softwoods4. We recommend using a wood conditioner under oilbase stains.5. Work in a well ventilated and well lit area.Getting Started1. Assembly Instructions may contain specialfinishing information for that item. Read boththe Assembly Instructions and these FinishingHints completely before beginning.2. Sand the entire piece, using #220 grit sandpaper.Sand with the grain of the wood on flat surfacesand opposite the grain on turnings. Some partsare plywood. Be careful not to sand through theveneer. End grain (table top ends, seat edges,grooves on turnings, etc.) accepts more stain.Extra sanding in these areas with a #320 grit sandpaperwill reduce stain absorption, creating a moreevenly stained piece.3. When sanding is completed, wipe the surface ofyour furniture with a cloth or tack rag. Make surethe item is free of dust before proceeding.Staining1. Read and follow label directions. Stir stain wellbefore starting.2. Test stain on an inconspicuous spot on your project,or use the sample chip if one is provided. Thesample chip must be sanded in the same way asyour furniture kit to ensure the piece will accept thestain similarly. Put at least one coat of your top coatover the stain sample, as it also affects the look ofthe stain. Test every type of wood that is in yourkit. Some of our products include more than onetype of wood, which may react differently to thestain color. Sample chips for the different woodsmay be included. It may be necessary to add asecond coat of stain to lighter woods to match thedarker woods in your kit.RubberglovesRagsPaper towelsQ-tipsTack clothDrop clothPaint brushes(bristle andfoam)4. Q-tips are ideal for hard to reach areas.5. Allow to dry thoroughly before proceeding.#220 & #320sandpaperMineral spiritsMasking Tape3. Apply stain with a poly brush or lint-free cloth. Applystain over a small area and wipe off excess. Workingin small areas will make the color easier to control.Applying the Top Coat:No top coat is required if using paint.1. Always read and follow all label directions. Stiryour finish coat gently, do not shake. It will createbubbles that are hard to remove.2. All surfaces (including the underside of table topsand inside drawers) must be sealed with at leastone layer of a top coat. This will help minimizewood swelling, shrinkage, warping and cuppingdue to changes in moisture content or temperature.3. We recommend that you apply a minimum of twocoats when using polyurethane or varnish(especially on all table top and work surfaces).Sand lightly between coats using a #320 grit sandpaperor 00 steel wool for the smoothest possiblefinish.4. Some water-based finishes tend to raise the grainslightly. This can be easily controlled with this sandingstep. However, do not use steel wool when usingwater-based finishes. Strands of steel fiber caughtin the wood can cause rust spots when coated withany water-based product.Painting:1. For best results when painting, first coat the woodwith a primer. An oil based primer would be best fora smooth finish. If you do not wish to use a solventbased primer, a water based primer would workalmost as well.2. Buy a quality brand paint. You may use a satin,semi-gloss, or gloss sheen. Apply a second coatfor a smooth finish. Lightly sand between coatsusing a #320 grit sandpaper, so that the secondcoat will bond well. Repeat as desired.3. Since there is such a variation between paintmanufacturers, refer to your paint supplier for specificadvice on using the paint that you purchase.Rev. 8/07