Assembly Instructions - Whittier Wood Furniture
Assembly Instructions - Whittier Wood Furniture
Assembly Instructions - Whittier Wood Furniture

You also want an ePaper? Increase the reach of your titles
YUMPU automatically turns print PDFs into web optimized ePapers that Google loves.
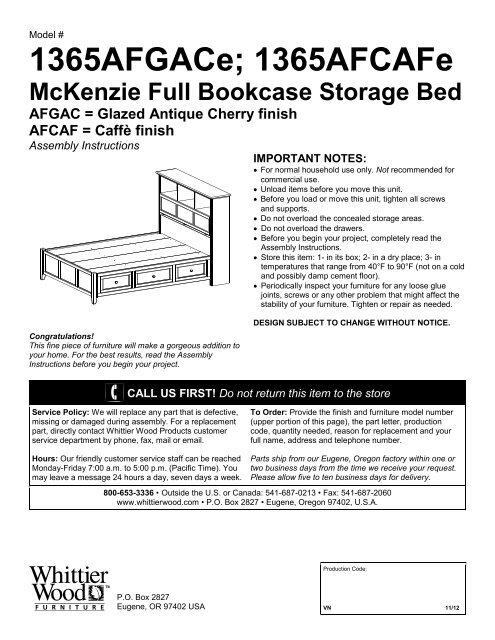
Model #1365AFGACe; 1365AFCAFeMcKenzie Full Bookcase Storage BedAFGAC = Glazed Antique Cherry finishAFCAF = Caffè finish<strong>Assembly</strong> <strong>Instructions</strong>IMPORTANT NOTES:For normal household use only. Not recommended forcommercial use.Unload items before you move this unit.Before you load or move this unit, tighten all screwsand supports.Do not overload the concealed storage areas.Do not overload the drawers.Before you begin your project, completely read the<strong>Assembly</strong> <strong>Instructions</strong>.Store this item: 1- in its box; 2- in a dry place; 3- intemperatures that range from 40°F to 90°F (not on a coldand possibly damp cement floor).Periodically inspect your furniture for any loose gluejoints, screws or any other problem that might affect thestability of your furniture. Tighten or repair as needed.Congratulations!This fine piece of furniture will make a gorgeous addition toyour home. For the best results, read the <strong>Assembly</strong><strong>Instructions</strong> before you begin your project.DESIGN SUBJECT TO CHANGE WITHOUT NOTICE.CALL US FIRST! Do not return this item to the storeService Policy: We will replace any part that is defective,missing or damaged during assembly. For a replacementpart, directly contact <strong>Whittier</strong> <strong>Wood</strong> Products customerservice department by phone, fax, mail or email.To Order: Provide the finish and furniture model number(upper portion of this page), the part letter, productioncode, quantity needed, reason for replacement and yourfull name, address and telephone number.Hours: Our friendly customer service staff can be reachedMonday-Friday 7:00 a.m. to 5:00 p.m. (Pacific Time). Youmay leave a message 24 hours a day, seven days a week.Parts ship from our Eugene, Oregon factory within one ortwo business days from the time we receive your request.Please allow five to ten business days for delivery.800-653-3336 • Outside the U.S. or Canada: 541-687-0213 • Fax: 541-687-2060www.whittierwood.com • P.O. Box 2827 • Eugene, Oregon 97402, U.S.A.Production Code:P.O. Box 2827Eugene, OR 97402 USAVN 11/12
1365AFGACe; 1365AFCAFe McKenzie Full Bookcase Storage BedParts ListPart Description QuantityZO #8 x 2-1/4" Black Screw (inserted) 6ZP #8 x 1" Black Screw (inserted) 16ZQ Left Bracket (attached) 2ZR Right Bracket (attached) 2ZS Wire Clip Screw (attached) 6ZT Tack Glide (attached) 4ZZ Corner Brace (attached) 21365AFGACe_1365AFCAFe — Page 3 —11/12
1365AFGACe; 1365AFCAFe McKenzie Full Bookcase Storage BedParts List1368AFGACb; 1368AFCAFb Footboard Kit (x1)Part Description QuantityBa Footboard <strong>Assembly</strong> 1Da Trestle With T-Nuts 7E #8 x 1-1/4" Black Screw33(9 inserted)F 1/4" x 1-3/4" Hex Bolt 26H Washer 26Ua Foot <strong>Assembly</strong> 3W Adjustable Glide (installed) 3YD #6 x 1/2" Philtruss Screw 8YH 90 o Bracket 2ZP #8 x 1" Black Screw (inserted) 16ZQ Left Bracket (attached) 2ZR Right Bracket (attached) 2ZU 1/4" T-Nut (inserted) 28ZV #8 x 20mm Pan Head Screw (inserted) 12ZX #8 x 1-5/8" Black Screw (inserted) 4ZY Foot Bracket (attached) 31365AFGACe_1365AFCAFe — Page 4 —11/12
1365AFGACe; 1365AFCAFe McKenzie Full Bookcase Storage BedParts List1308AFGACb; 1308AFCAFb Pedestal Kit (x2)Part Description QuantityE #8 x 1-1/4" Black Screw (inserted) 30Ib Pedestal Kit 1J Small Drawer Box (assembled) 1K Large Drawer Box (assembled) 2L Small Drawer Face (attached) 1M Large Drawer Face (attached) 2N #8 x 1-1/2" Machine Screw (installed) 3O Knob (attached) 3P Deckboard 1Q Drawer Slides (installed) 3 setsT #8 x 2" Black Screw (inserted) 12Y #8 x 7/8" Lo-Profile Screw (inserted) 16YD #6 x 1/2" Philtruss Screw (inserted) 18YE #6 x 3/4" Philtruss Screw (inserted) 18ZP #8 x 1" Black Screw (inserted) 16ZQ Left Bracket (attached) 2ZR Right Bracket (attached) 2ZX #8 x 1-5/8" Black Screw (inserted) 161365AFGACe_1365AFCAFe — Page 5 —11/12
1365AFGACe; 1365AFCAFe McKenzie Full Bookcase Storage Bed<strong>Assembly</strong> <strong>Instructions</strong>Tools Required: Phillips screwdriver, Slotted screwdriver, 7/16" open end or box end wrench andTape measure.1. Remove the Trestles (Da) and Foot Assemblies (Ua) from the backs of the Footboard (Ba) andplace them off to the side. See Figures 1 and 1a.DaBaUaUaShipping StrapsUaFig. 12. Place both Pedestals (Ib) approximately 57" apart as shown in Figure 2.57"IbIbFig. 21365AFGACe_1365AFCAFe — Page 6 —11/12
1365AFGACe; 1365AFCAFe McKenzie Full Bookcase Storage Bed<strong>Assembly</strong> <strong>Instructions</strong>3. To attach the Footboard (Ba) to the Pedestal <strong>Assembly</strong> (Ib), align the Brackets and slide thePedestal <strong>Assembly</strong> down on to the Footboard (Ba). See Figures 3 and 3a.BaIbFig. 3Fig. 3a4. Repeat step three for the left side.Fig. 4IbFig. 4a1365AFGACe_1365AFCAFe — Page 7 —11/12
1365AFGACe; 1365AFCAFe McKenzie Full Bookcase Storage Bed<strong>Assembly</strong> <strong>Instructions</strong>5. Align the Brackets on both sides and slide the Pedestal/Footboard assembly down on to theHeadboard (Ae). See Figure 5.AeFig. 51365AFGACe_1365AFCAFe — Page 8 —11/12
1365AFGACe; 1365AFCAFe McKenzie Full Bookcase Storage Bed<strong>Assembly</strong> <strong>Instructions</strong>6. Open the drawers. Face the Footboard and stand in between the first and second braces.Place a Trestle with T-Nuts (Da) on the outside surfaces of the first upper left and right bracesso that the T-Nuts (ZU) sit near the top. See Figure 6a. Line up the upper edges of the trestleand braces so they are nearly flush. Insert two 1/4" x 1-3/4" Hex Bolts (F) and Washers (H) andtighten. Repeat for the second upper brace.Place a Trestle with T-Nuts (Da) on the outside surface of the second lower brace so thatthe T-Nuts (ZU) sit near the bottom. Line up the bottom edges of the trestle and braces so theyare nearly flush. Insert two 1/4" x 1-3/4" Hex Bolts (F) and Washers (H) and tighten.See Figures 6 and 6a.BraceFHFig. 6aFHx 6x 6FootboardF HDaFirst braceDaDaSecond braceFig. 6Headboard removed for illustration purposes.1365AFGACe_1365AFCAFe — Page 9 —11/12
1365AFGACe; 1365AFCAFe McKenzie Full Bookcase Storage Bed<strong>Assembly</strong> <strong>Instructions</strong>7. Face the Headboard and stand in between the third and fourth braces. Place a Trestle withT-Nuts (Da) on the outside surfaces of the third upper left and right braces so the T-nuts sitnear the top. See Figures 7 and 7a. Line up the upper edges of the trestle and braces so theyare nearly flush. Insert two 1/4" x 1-3/4" Hex Bolts (F) and Washers (H) and tighten.Place a Trestle with T-Nuts on the outside surface of the third left and right lower braces so thatthe T-nuts sit near the bottom. Line up the bottom edges of the trestle and braces so they arenearly flush. Insert two 1/4" x 1-3/4" Hex Bolts (F) and Washers (H) and tighten. See Figures 7and 7a.Repeat for the fourth braces.BraceTrestle with T-Nuts (Da)FHx 8x 8FHFig. 7aFourth braceDaHDaFThird braceFig. 71365AFGACe_1365AFCAFe — Page 10 —11/12
1365AFGACe; 1365AFCAFe McKenzie Full Bookcase Storage Bed<strong>Assembly</strong> <strong>Instructions</strong>8. Facing the Headboard, place two Foot Assemblies (Ua) on the inside faces of the third andfourth upper and lower Trestles. Attach with Washers (H) and 1/4" x 1-3/4" Hex Bolts (F).See Figures 8 and 8a.FHx 8x 8Trestle with T-Nuts (Da)HFUaFig. 8aFourth setof TrestlesHFUaThirdsetofTrestlesUaFig. 81365AFGACe_1365AFCAFe — Page 11 —11/12
1365AFGACe; 1365AFCAFe McKenzie Full Bookcase Storage Bed<strong>Assembly</strong> <strong>Instructions</strong>9. Facing the Footboard, place a Foot <strong>Assembly</strong> (Ua) on the inside of the second set of Trestlesand attach with four Washers (H) and four 1/4" x 1-3/4" Hex Bolts (F). See Figures 9 and 9a.Adjust all three Glides (W) found at the bottoms of the Foot Assemblies so that the Glides justtouch the floor.IMPORTANT: Make sure the Glides touch the floor and carry weight.FHx 4x 4Fig. 9aFHUaSecond setof TrestlesHFWFig. 91365AFGACe_1365AFCAFe — Page 12 —11/12
1365AFGACe; 1365AFCAFe McKenzie Full Bookcase Storage Bed<strong>Assembly</strong> <strong>Instructions</strong>10. Facing the Footboard, attach a 90º Bracket (YH) to the Pedestal <strong>Assembly</strong> to the Footboardwith four #6 x 1/2" Philtruss Screws (YD). Repeat for the other side. See Figures 10 and 10a.YHYDx 2x 8Fig. 10aYHYDFig. 101365AFGACe_1365AFCAFe — Page 13 —11/12
1365AFGACe; 1365AFCAFe McKenzie Full Bookcase Storage Bed<strong>Assembly</strong> <strong>Instructions</strong>11. Place your bed in its final position. Adjust all three Glides (W) found at the bottoms of the FootAssemblies (Ua) so that the Glides just touch the floor. See Figure 11.To level the headboard, stand in the open area in between the two attached deckboards andreach through the front of the platform. See Figure 11. Using a slotted screwdriver, rotate theLarge Adjustable Glide (YA) clockwise until it bears weight. Repeat for the opposite side. SeeFigures 11a and 11b.This is important if the bookcase headboard sits upon a carpet tack strip.UaWFig. 11Drawers removed forillustration purposes.Fig. 11aFig. 11bYAZZThe top of the LargeAdjustable Glide (YA)is slotted.1365AFGACe_1365AFCAFe — Page 14 —11/12
1365AFGACe; 1365AFCAFe McKenzie Full Bookcase Storage Bed<strong>Assembly</strong> <strong>Instructions</strong>12. To make sure the bed is square, measure the distance between opposing corners. If one of themeasurements is larger, tap on a footboard leg until the measurement is equal. See Figure 12.Fig. 1213. Place the Deckboards (P) as shown in Figure 13 and secure with twenty-four #8x1-1/4" BlackScrews (E). There should be a small gap between each deckboard.E x 24PEFig. 131365AFGACe_1365AFCAFe — Page 15 —11/12