How to create Raster Braille using a laser engraver - Gravograph ...
How to create Raster Braille using a laser engraver - Gravograph ...
How to create Raster Braille using a laser engraver - Gravograph ...

Create successful ePaper yourself
Turn your PDF publications into a flip-book with our unique Google optimized e-Paper software.
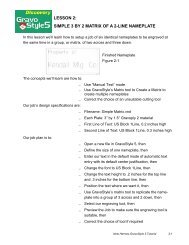
This resource has been provided <strong>to</strong> you by New Hermes, a <strong>to</strong>tal government engraving solutionsprovider. For more information, please contact us at:New Hermes2200 Northmont PkwyDuluth, GA 30096Phone Toll-Free: 1-800-843-7637Fax Toll Free: 1-800-533-7637Email:govbiz@gravograph-newhermes.com
<strong>Raster</strong> <strong>Braille</strong> - Using a Laser EngraverNote: This procedure will only work with 0.040” thick plastic material. It will not work with standard1/32” engraving s<strong>to</strong>ck.General Requirements and Instructions1. You will be vec<strong>to</strong>r cutting the holes for the <strong>Braille</strong>. Don't be confused by the <strong>laser</strong>'s “rastermode,” which is a means of engraving a bitmap, and the <strong>Raster</strong> trademark. The two havenothing <strong>to</strong> do with each other.2. Before you can <strong>create</strong> <strong>Braille</strong>, you need translation software and a <strong>Braille</strong> font. Both arecommercially available; we recommend Duxbury for its accuracy and simplicity.3. Many engraving programs with a <strong>Braille</strong> feature will set the size of the <strong>Braille</strong> au<strong>to</strong>matically.If yours does not, or if you are <strong>using</strong> Corel DRAW for <strong>laser</strong> engraving, you need <strong>to</strong> set thefont size <strong>to</strong> 25 points. Leave the character spacing at 100%. This will give you the correctsize/spacing for ANSI and ADAAG requirements.ProcedureGather the following materials and supplies:- One piece of 0.040” <strong>laser</strong>able engraving s<strong>to</strong>ck, with adhesive applied <strong>to</strong> the back- One piece of engraving s<strong>to</strong>ck (your choice) <strong>to</strong> use as a backer- Your <strong>Raster</strong> <strong>Braille</strong> kit- A small, pointed <strong>to</strong>ol (center punch or similar) for use in weeding the <strong>Braille</strong> holes1. Place the 0.040” s<strong>to</strong>ck face-down on the <strong>laser</strong> bed, adhesive facing up. You will be cutting the<strong>Braille</strong> holes from the backside of the material <strong>to</strong> eliminate any burrs or soft edges around theholes. A clean edge <strong>to</strong> the hole is key in making sure the <strong>Raster</strong>s stay put.Adjust focus and any other settings.2. At the computer, select the <strong>Braille</strong> and convert it <strong>to</strong> curves. If there is an“English” translation below the <strong>Braille</strong>, delete it. Select the remaining <strong>Braille</strong>object (now a group of curves) and make sure it has no fill and thethinnest outline possible.3. Send the file <strong>to</strong> the <strong>laser</strong>, making sure you send it “backwards” (mirrorimage). Remember, you're cutting from the backside of the material. Adjustpower and speed settings for the cleanest possible cut without leaving a burraround the hole. (We typically use 30% power and 10% speed on a 40-watt<strong>laser</strong>; however, since all machines vary slightly, you will have <strong>to</strong> find the rightsettings for your machine.)4. Once the holes are cut, remove the piece from the <strong>laser</strong> and poke out thecenters of the holes, being careful not <strong>to</strong> damage the edges of the holes.5. Peel the paper backing and adhere the 0.040” piece <strong>to</strong> your backer piece.The backer can be any relatively firm material.6. Using the press-fit <strong>to</strong>ol or the <strong>Raster</strong> Pen, insert <strong>Raster</strong>s in<strong>to</strong> the holes, fromthe front of the material. Test your first piece <strong>to</strong> make sure the <strong>Raster</strong>s stayin place. If not, decrease the size of the circles (NOT the point size of thefont) by 0.001” and try again. (NOTE: The Au<strong>to</strong>-<strong>Raster</strong> WILL NOT WORK withany <strong>laser</strong> <strong>engraver</strong>.)7. With the <strong>Braille</strong> completed, you can now add tactile text or other features <strong>to</strong> the sign.Accent Signage Systems, Inc.2322 Chestnut Ave. W. - Minneapolis, MN 55405 - (800) 215-9437