Trainee Manual - e-Log Book
Trainee Manual - e-Log Book
Trainee Manual - e-Log Book

Create successful ePaper yourself
Turn your PDF publications into a flip-book with our unique Google optimized e-Paper software.
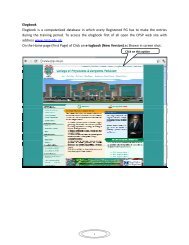
As soon as you will click on e‐logbook (New Version) option, control will be diverted to a newpage as show below. In the following screen shot, select the USER TYPE (Either <strong>Trainee</strong>/Supervisor) and then enter User Name and Password and the click on <strong>Log</strong>in Button. But if youare a New user then Select “Create New Account” Displayed at the bottom line.If you will click on Create New Account option following screen will be displayed, enter yourRTMC No. after selecting the User type(<strong>Trainee</strong>/ Supervisor) and press submit button.Once you have entered the RTMC Number you User Name & Password will be sent to youremail address. After receiving the User Name and Password open the CPSP web site again and2
Now Click on e‐logbook(New Version) option and then Select the user type(<strong>Trainee</strong>/Supervisor) and enter User Name and Password and press Submit button, you control will bediverted to e‐logbook home Page. Main Elogbook screen, gives comprehensive informationabout the user.Home Page provides you the facility to view complete profile and also make new logbookentries. Following are the list main functions user can perform:1. Profile Info: Contains your Personal Information as RTMC's record.2. Registration Info: Contains your registration information.3. Rotation Info: Contains your rotation registration information as per RTMC's record.4. Training : In this option your will be maintaining your Competency Training <strong>Log</strong> whichwill be sent to your Program Supervisor through e‐<strong>Log</strong> <strong>Book</strong> System)5. Rotational Training: this options will be used for maintaining your Rotational Training<strong>Log</strong> and these logs will be sent to your Rotational Supervisor and Program Supervisor.6. Journal Club: In this optional your will be maintaining your Journal Club logs.7. Paper / Poster Presented8. Paper Published3
1. Profile:Profile option gives the detailed personal profile of user as per RTMC record.2. Registration Info: This option gives the Program Registration information as shownbelow4
3. Rotation Info:Rotation info option is used to display the rotation registration information updatedaccording to the RTMC record.4. Training: this option is very important and day to day entries will be entered in thisform.Click here tomake new entryClick here toview detail5
5. Rotational Training: This option will display the rotational entries, entries can be filteredby applying time, status and diagnosis techniques.6. Journal Club: option will display the information about the general club entries and alsoprovides the option to make a new entry.Click here tomake new entry6
7. Paper / Poster Presented: This option is used to view the paper presented details, andalso provides the facility to filter the results on the basis of different Conditions.8. Paper Published in PMDC – Approved Journal, Int: Journal: If user have any paperpublished in Approved/ Recognized Journal, then these entries can be made andforwarded to Supervisor for Approval.7
CPSP e‐<strong>Log</strong> <strong>Book</strong> History:On the right side of the Main page of e‐log book, user can view the Summery of over allactivities in tabulated format.8
MAKE A NEW ENTRYThis is the main sheet which gives information about the elog book entries and provides thefacility to enter new cases, view existing cases and at the same filter out the report.If clicked, new form will beopened to make a new entry.1. Form type: In the first step of making a new entry user needs to select the form typefrom following categories:a. FORM A: Record of Operations/ Proceduresb. FORM B: Record of Emergency Proceduresc. FORM C: Cases Presented at Clinic/ Pathological Conference9
2. Date of admission: When user will click in “Date of Admission” text box, followingcalendar will be displayed, which enables the user to select patients admission date.Once date of admission is entered, user has to mention the Hospital Registration/Medical Record Number (MRN) with Patient Age & Gender selection.3. Competency Group: Once diagnosis has been mentioned, when user will click onCompetency Group, List of Competencies will be displayed. Select appropriateCompetency Group and then Competency Details.But if user is unable to find related Competency Group then click on “Other” option inthe bottom of list, a new text box will be opened, Enter required Competency Group.4. Level: At this stage User needs to identify his/ her status during the Case Examinationfrom listed options:a. Observerb. Assistant Satusc. Perform under direct Supervisiond. Perform under indirect Supervision10
5. Outcome: When User will click on outcome downward arrow, a list of possibleoutcomes will be displayed for selection, but if user want to add any other outcomethen click on “Other” and enter required outcome.Next to Outcome in brief Description area, user can enter his / her own observationsabout the Case. Before sending the case to Supervisor User needs to enter the Name ofSupervisor under which procedure/ Examination performed.6. SUBMIT: Submit is the Final Stage of a New Entry, after due verification/ review select“Yes/ No” from the “Send to Supervisor” option. If User will select “Yes”, case will beforwarded to Supervisor’s Account and then User is unable to make any sort of editsotherwise user can press Submit button with Choice “No” to Save the entry as draft thatcan be edited later on.THE END11