High Capacity Systems - EZ FLO
High Capacity Systems - EZ FLO
High Capacity Systems - EZ FLO

You also want an ePaper? Increase the reach of your titles
YUMPU automatically turns print PDFs into web optimized ePapers that Google loves.
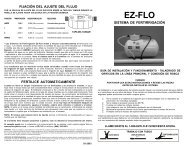
Fertilizing <strong>Systems</strong>Fertilize ResponsiblyTMINSTALLATION AND OPERATING GUIDEHC SYSTEMS* IMPORTANT *PLEASE READ INSTRUCTIONS AND VERIFY PARTSBEFORE INSTALLING THE SYSTEM.Do not connect to an irrigation system that is not protected by an approvedback flow prevention device such as a pressure vacuum breaker orreduced pressure zone back flow preventer.Do not install if pressure exceeds 100 PSIFollow all local plumbing codesUse only with non-hazardous productsMinimize exposure to direct sunlight to maximize service lifeProtect against impact from foreign objectsAll <strong>EZ</strong>-<strong>FLO</strong> systems have been specifically designed and engineered to be installed bya professional irrigation or landscape contractor. Improper installation or use couldcause risk of water contamination due to back flow or tank rupture. Failure to follow allsafety instructions and warnings could result in serious bodily injury. Improperinstallation or use of the system voids all warranties.FOR ASSISTANCE OR FERTILIZER AVAILABILITYCALL TOLL FREE 1-866-393-5601OR VISIT OUR WEBSITE ATwww.ezflofertilizing.com(Installer - Please leave this with property owner)© 2005, <strong>EZ</strong>-<strong>FLO</strong> Fertilizing <strong>Systems</strong>4
HC TANK ASSEMBLY & PARTS LISTFEED ADJUSTMENTKNOBGREENCONNECTORNUTPart # CNGTANK CAPPart # CAPHP (Fine Thread)FertilizerOutGREENSlow1 2FastWaterInBLUEBLUECONNECTORNUTPart # CNBLARGEO-RINGPart # LORFill ValveAir VentRelief ValveScreenPart # PUFDip tube with screenattaches to Fertilizer-Outconnection in cap.Agitation FittingPart # AGTAgitation tubeattaches to Water-Inconnection in cap.BottomDrainValve2 - Shut Off ValvesPart # SOV (with 2 washers)3 - Tubing ClampsPart # RTC (1 Extra)1 - Bypass ConnectorPart # BYP5- Feet 1/4” Black TubingPart # BT5Use <strong>EZ</strong>-<strong>FLO</strong> components only.© 2005, <strong>EZ</strong>-<strong>FLO</strong> Fertilizing <strong>Systems</strong>5- Feet 1/4’’ Clear TubingPart # CT51
System InstallationTypical installationThe system is normally installed in a valve box, connected to the main line of the irrigationsystem after the back flow preventer and before the sprinkler valves. One unit will feed bothdrip and sprinkler zones that are downstream from the connection point.To drip emittersBall ValveCouplingConnectionBack FlowPreventerTOP VIEWTo sprinklersTo subsurfaceWater FlowValve BoxTo back yard<strong>EZ</strong>-<strong>FLO</strong> UnitValve BoxStep 1 - Locate the installation point.Connection must be made after an approved back flow prevention device. It is preferable tohave the tank cap above the installation point in the sprinkler line if possible but it is notrequired for efficient operation. The connection can be made either vertically or horizontallyin the sprinkler main line.INSTALL BALL VALVE COUPLINGIN THIS AREASPRINKLERVALVEStep 2 - Shut off water by closing a valve at the back flow preventer or in the mainline upstream from the connection point. Relieve the pressure from the line at the exhaustvalve on the back flow preventer or by manually opening a sprinkler valve.SHUT OFFWATERRELIEVEPRESSUREOFF© 2005, <strong>EZ</strong>-<strong>FLO</strong> Fertilizing <strong>Systems</strong>2
FertilizerOutGREEN1 2WaterInBLUEStep 5 - Attach tubing to the ball valve coupling. Press the black tube over theblue fitting on the ball valve coupling. Press the clear tube over the green fittingon the ball valve coupling. Put tubing clamps over the tubing below the barbedend of the fitting and squeeze them until they are tightly secured.ATTACH TUBING& TUBING CLAMPS<strong>FLO</strong>WGREENBLUECLEAR TUBING TO GREEN FITTINGBLACK TUBING TO BLUE FITTINGConnect System to Irrigation LinesStep 6 - Connect tubing to tank cap by removing the blue and greenconnector nuts from the bypass fitting by turning them in a counter clockwisedirection. (Attach bypass fitting to tubing for later use). Connect the blueconnector nut to the water in side of the tank cap. Connect the green connectornut to the fertilizer out connection on the cap. Turn the water on to the system.GreenConnection14Fertilizer WaterOut InSlowFastBlueConnection3 1BypassFittingConnect tubing to cap1. Shut off valves in the off position2. Turn water on at back flow preventer3. Connect blue connector to water in connection on cap4. Connect green connector to fertilizer out connection on cap.© 2005, <strong>EZ</strong>-<strong>FLO</strong> Fertilizing <strong>Systems</strong>
FertilizerOutGREENSlow1 2FastWaterInBLUEFill Tank With FertilizerStep 7 - Fill tank with fertilizer. (For detailed instructions for refilling thesystem, please see the Quick Refill Guides.)The <strong>EZ</strong>-<strong>FLO</strong> system can be filled with any liquid or water soluble fertilizer.Before filling:Make sure the shut off valves are off. Open the fill valve on top of the tank andmake sure the drain valve on the bottom of the tank is closed.If you do not have a <strong>High</strong> <strong>Capacity</strong> Funnel Fill System, pour fertilizer directlyinto tank through the fill valve, adding water periodically by opening one of theshut off valves. When the tank is full of fertilizer, top it off with water until allair is gone from the tank.Model Tank Size Recommended Amount<strong>EZ</strong>010HC 10 Gallon 75-100 lbs dry or 10 gal. liquid<strong>EZ</strong>017HC 17.5 Gallon 125-175 lbs dry or 17.5 gal liquid<strong>EZ</strong>025HC 25 Gallon 200-250 lbs dry or 25 gal liquidIf you have a <strong>High</strong> <strong>Capacity</strong> Funnel Fill System, put the funnel in the fill valve.Disconnect one of the shut off valves from the cap and connect it to the tubing onthe funnel. Open the shut off valve and pour the fertilizer into the funnel untilthe tank is full of liquid - all air must be out of the tank.PremiumFertilizerHIGH CAPACITYFUNNEL FILL SYSTEMFILLVALVEAIR VENTSHUT OFFVALVEAIREAIRSHUT OFFVALVEDRAINVALVEAfter filling:Close the fill valve, the shut off valve and the drain/fill valve. Disconnect the shutoff valve from the funnel and connect it to tank cap. Remove the fill funnel andturn both shut off valves to the on position.5© 2005, <strong>EZ</strong>-<strong>FLO</strong> Fertilizing <strong>Systems</strong>
Set Flow AdjustmentStep 8 - Set the flow rate by adjusting the ball valve coupling and theadjustment knob on the tank cap. (The ball valve coupling will only requireadjustment at initial startup.)1. With the cap adjustment setting in the fast position, turn on thesprinkler or drip zone with the lowest gallons per minute flow rate.2. Slowly close the ball valve very slightly, until you can see fluidmovement or color in the clear fertilizer out line.3. Set the cap adjustment knob to the desired feed rate.4. Turn off the sprinkler or drip zone.Slow Setting - is used for normal maintenance in regions with high watering requirementssuch as hot dry climates or sandy soils.#1 Setting - is used for normal maintenance in regions with more moderate climates andmoderate watering schedules where soils have good moisture retention.#2 Setting - is used to encourage fast growth or to quickly improve the condition of alandscape in poor condition. The unit will empty more quickly and can be refilled more often.Fast Setting - is used to for periodic fertilization. The unit will empty more quickly and canbe refilled more often.Setting *Ratio OZ. of fertilizerper gal. of waterSlow 15000:1 .008 (1/20 tsp)1 8000:1 .017 (1/10 tsp)2 2000:1 .064 (2/5 tsp)Fast 400:1 .320 (2 tsp)Adjustment KnobFertilizerOutGreenSlow1 2FastWaterInBlue*Ratio refers to the amount of water mixed with the fertilizer. For example, a 400:1ratio means 400 gallons of water will be mixed with 1 gallon of fertilizer. Theadjustment knob can be set in between settings if desired.Gallons Of Water Required To Distribute FertilizerThe following table shows the gallons of water required to distribute the fertilizerfrom the <strong>EZ</strong>-<strong>FLO</strong> <strong>High</strong> <strong>Capacity</strong> System at the various flow settings.Model <strong>EZ</strong>010 <strong>EZ</strong>017 <strong>EZ</strong>025Slow 150,000 300,000 450,0001 80,000 160,000 240,0002 20,000 40,000 60,500Fast 4,000 8,000 12,000© 2005, <strong>EZ</strong>-<strong>FLO</strong> Fertilizing <strong>Systems</strong>6
Fertilizer OutWater InHow It WorksYour system is now ready to operate. Each time you water, the <strong>EZ</strong>-<strong>FLO</strong> systemwill proportion small amounts (micro doses) of fertilizer in the irrigation water. Thepatented flow process evenly meters fertilizer from start to finish. Fill based ondesired results.Fertilizer OutFertilizer & water mixedin the capWater InWaterSOCKETFertilizerWater with Fertilizer<strong>FLO</strong>WWaterWater entering the tank is layered over the top of the fertilizer that settles to thebottom of the tank. Fertilizer is drawn from the bottom of the tank, out the cleartubing and into the irrigation system. <strong>EZ</strong>-<strong>FLO</strong>’s patented technology ensuresconsistent metering from start to finish.Winterizing Your System** CAUTION - DO NOT USE AIR TO BLOW OUT YOUR SPRINKLER SYSTEM **** WITH THE <strong>EZ</strong>-<strong>FLO</strong> SYSTEM ATTACHED **If you live in a region where winter temperatures can drop below freezing it isnecessary to winterize your system.System with shut off valves1. Turn valves to off position2. Remove blue and green connectors from the tank cap3. Screw blue and green connectors onto bypass fitting4. Drain tank and return it to the valve box or store in garageIf you need assistance with the installation or operation of your system, or havefurther questions, please visit our web site at www.ezflofertilizing.com or call<strong>EZ</strong>-<strong>FLO</strong> toll free at (866)393-5601.For warranty provisions for this unit, please refer towww.ezflofertilizing.com/warranty.asp or call toll free at (866)393-5601.© 2005, <strong>EZ</strong>-<strong>FLO</strong> Fertilizing <strong>Systems</strong>7