- Page 1:
TheMemoirClass
- Page 4 and 5:
c○ 2001 — 2010 Peter R. Wilsonc
- Page 7 and 8:
Short contentsShort contents · vii
- Page 9 and 10: ContentsShort contentsContentsList
- Page 11 and 12: CONTENTSxi7 Pagination and headers
- Page 13 and 14: CONTENTSxiii15.1 Boxes . . . . . .
- Page 15 and 16: CONTENTSxvB Showcases 383B.1 Chapte
- Page 17 and 18: List of Figures2.1 LaTeX page layou
- Page 19 and 20: LIST OF FIGURESxix21.2 Example Arch
- Page 21 and 22: LIST OF TABLESxxi7.2 Mark macros fo
- Page 23: PrefaceFrom personal experience and
- Page 26 and 27: xxviINTRODUCTION TO THE EIGHTH EDIT
- Page 28 and 29: xxviiiINTRODUCTION TO THE EIGHTH ED
- Page 30 and 31: xxxINTRODUCTION TO THE EIGHTH EDITI
- Page 32 and 33: xxxiiINTRODUCTION TO THE EIGHTH EDI
- Page 35 and 36: TerminologyLike all professions and
- Page 37: UNITS OF MEASUREMENTxxxviiThe point
- Page 40 and 41: 2 CHAPTER 1. STARTING OFFTable 1.2:
- Page 42 and 43: 4 CHAPTER 1. STARTING OFF\provideco
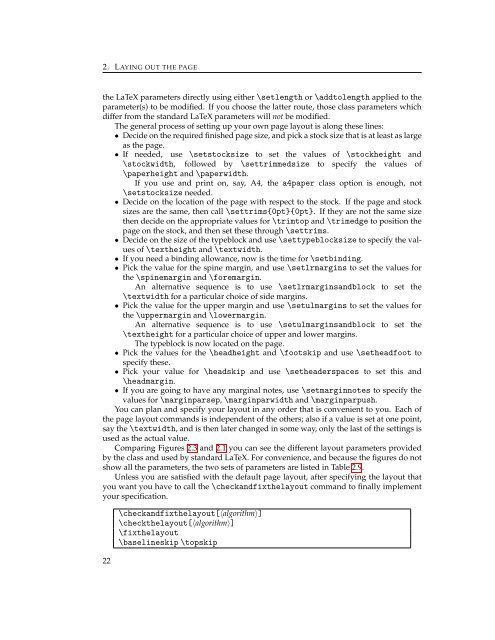
- Page 45 and 46: TwoLaying out the pageUp until this
- Page 47 and 48: 2.3. The pagewith respect to the to
- Page 49 and 50: 2.3. The pageDashed lines represent
- Page 51 and 52: 2.4. The typeblockwhich will set al
- Page 53 and 54: 2.4. The typeblockThe monospaced fo
- Page 55 and 56: 2.4. The typeblockTable 2.4: Argume
- Page 57 and 58: 2.4. The typeblockTable 2.6: Argume
- Page 59: 2.6. Putting it togetherTable 2.8:
- Page 63 and 64: 2.7. Side margins\setlength{\texthe
- Page 65 and 66: 2.9. Example\settrimmedsize{11in}{2
- Page 67 and 68: 2.10. Predefined layouts\documentcl
- Page 69 and 70: 2.10. Predefined layoutsFigure 2.9:
- Page 71 and 72: ThreeText and fontsPresumably you w
- Page 73 and 74: 3.1. FontsTable 3.2: Glyphs in the
- Page 75 and 76: 3.1. FontsITC Bookman was originall
- Page 77 and 78: 3.1. FontsTable 3.4: Font categoris
- Page 79 and 80: 3.1. FontsTypeset example 3.2: Some
- Page 81 and 82: 3.2. Font sizesTable 3.6: Standard
- Page 83 and 84: 3.2. Font sizesto the132ptsize45
- Page 85 and 86: 3.3. Spacessize).This extended rang
- Page 87 and 88: 3.3. Spacesin ‘double’ spacing.
- Page 89 and 90: 3.5. Sloppybottom. . . in experimen
- Page 91: 3.6. Text case\NoCaseChange has oth
- Page 94 and 95: 4. TITLESThe AuthorThe Big Book ofC
- Page 96 and 97: 4. TITLESTHE NEWFAMILY RECEIPT BOOK
- Page 98 and 99: 4. TITLESSomeConundrumsPuzzles for
- Page 100 and 101: 4. TITLESTypeset example 4.1: Examp
- Page 102 and 103: 4. TITLESnote reset the page number
- Page 104 and 105: 4. TITLES\continuousmarksThe \thank
- Page 106 and 107: 4. TITLESBy default, there is no ru
- Page 108 and 109: 5. ABSTRACTSThe normal format for a
- Page 111 and 112:
Document divisionsFor this chapter
- Page 113 and 114:
6.2. Sectional divisionsA \section
- Page 115 and 116:
6.3. NumberingThe appendices enviro
- Page 117 and 118:
6.4. Book and part headingsThe code
- Page 119 and 120:
6.4. Book and part headings\newcomm
- Page 121 and 122:
6.5. Chapter headings____ top of th
- Page 123 and 124:
6.5. Chapter headings\printchaptern
- Page 125 and 126:
6.5. Chapter headings\newcommand{\c
- Page 127 and 128:
6.5. Chapter headingsbrotherton A v
- Page 129 and 130:
6.5. Chapter headingsThe command \c
- Page 131 and 132:
6.6. Lower level headings. . . end
- Page 133 and 134:
6.6. Lower level headings\newcomman
- Page 135 and 136:
6.7. Fancy anonymous breaksTypeset
- Page 137 and 138:
6.7. Fancy anonymous breaksI used \
- Page 139 and 140:
6.9. Predefined heading stylesTable
- Page 141:
6.9. Predefined heading stylesdowdi
- Page 144 and 145:
7. PAGINATION AND HEADERS\pagestyle
- Page 146 and 147:
7. PAGINATION AND HEADERSTable 7.2:
- Page 148 and 149:
7. PAGINATION AND HEADERSThe \copyp
- Page 150 and 151:
7. PAGINATION AND HEADERSNow when t
- Page 152 and 153:
7. PAGINATION AND HEADERSis equival
- Page 154 and 155:
7. PAGINATION AND HEADERS\makeevenh
- Page 156 and 157:
7. PAGINATION AND HEADERS{\ifonlyfl
- Page 158 and 159:
7. PAGINATION AND HEADERS\global\fl
- Page 161 and 162:
EightParagraphs and listsWithin a s
- Page 163 and 164:
8.2. Flush and raggedto the next se
- Page 165 and 166:
8.4. Some less common paragraph sha
- Page 167 and 168:
8.4. Some less common paragraph sha
- Page 169 and 170:
8.5. Changing the textwidthTypeset
- Page 171 and 172:
8.6. Listsand the typeblock, respec
- Page 173 and 174:
8.6. ListsTypeset example 8.6: Smal
- Page 175 and 176:
8.6. ListsPreceding Text\topsep + \
- Page 177 and 178:
8.6. ListsTypeset example 8.7: Chan
- Page 179 and 180:
NineContents listsThis chapter desc
- Page 181 and 182:
9.1. General ToC methodsParts of a
- Page 183 and 184:
9.1. General ToC methodsAs \addcont
- Page 185 and 186:
9.2. The class ToC methodsTable 9.2
- Page 187 and 188:
9.2. The class ToC methods9.2.2 Typ
- Page 189 and 190:
9.2. The class ToC methods\cftKnumw
- Page 191 and 192:
9.2. The class ToC methodsvalue mus
- Page 193 and 194:
9.2. The class ToC methods\renewcom
- Page 195 and 196:
9.2. The class ToC methods\cftinser
- Page 197 and 198:
9.2. The class ToC methods\renewcom
- Page 199 and 200:
9.2. The class ToC methods\renewcom
- Page 201 and 202:
9.3. New ‘List of. . . ’ and en
- Page 203 and 204:
9.3. New ‘List of. . . ’ and en
- Page 205:
9.4. Chapter precis}This starts off
- Page 208 and 209:
10. FLOATS AND CAPTIONSThe \newfloa
- Page 210 and 211:
10. FLOATS AND CAPTIONSFRAMED FIGUR
- Page 212 and 213:
10. FLOATS AND CAPTIONSGRAPHIC 1Fig
- Page 214 and 215:
10. FLOATS AND CAPTIONSAligned to t
- Page 216 and 217:
10. FLOATS AND CAPTIONS\FloatBlock\
- Page 218 and 219:
10. FLOATS AND CAPTIONSA TOP FLOAT\
- Page 220 and 221:
10. FLOATS AND CAPTIONSb means: ‘
- Page 222 and 223:
10. FLOATS AND CAPTIONSThe 〈fonts
- Page 224 and 225:
10. FLOATS AND CAPTIONSTable 10.3RE
- Page 226 and 227:
10. FLOATS AND CAPTIONSTable 10.4:
- Page 228 and 229:
10. FLOATS AND CAPTIONSTable: Named
- Page 230 and 231:
10. FLOATS AND CAPTIONSdocument. If
- Page 232 and 233:
10. FLOATS AND CAPTIONSEXAMPLE FIGU
- Page 234 and 235:
10. FLOATS AND CAPTIONS\contsubcapt
- Page 236 and 237:
10. FLOATS AND CAPTIONSThe \hangsub
- Page 238 and 239:
10. FLOATS AND CAPTIONSTable 10.6:
- Page 240 and 241:
10. FLOATS AND CAPTIONS\def\caption
- Page 242 and 243:
10. FLOATS AND CAPTIONSA THOUSAND W
- Page 244 and 245:
10. FLOATS AND CAPTIONS10.13 THE CL
- Page 246 and 247:
11. ROWS AND COLUMNSlcrp{〈width
- Page 248 and 249:
11. ROWS AND COLUMNS\newcolumntype{
- Page 250 and 251:
11. ROWS AND COLUMNS11.2.2 Defining
- Page 252 and 253:
11. ROWS AND COLUMNS\[ \begin{array
- Page 254 and 255:
11. ROWS AND COLUMNSTable 11.2: Dem
- Page 256 and 257:
11. ROWS AND COLUMNS\toprule[〈wid
- Page 258 and 259:
11. ROWS AND COLUMNSTable 11.6: Exa
- Page 260 and 261:
11. ROWS AND COLUMNSFigure 11.1: Ex
- Page 262 and 263:
11. ROWS AND COLUMNS\newcolumntype{
- Page 264 and 265:
11. ROWS AND COLUMNS11.7.2 Special
- Page 266 and 267:
11. ROWS AND COLUMNSTable 11.7: Exa
- Page 268 and 269:
11. ROWS AND COLUMNSone, twothreefo
- Page 270 and 271:
12. PAGE NOTES...\footnote{...value
- Page 272 and 273:
12. PAGE NOTES\newfootnoteseries{
- Page 274 and 275:
12. PAGE NOTESwhere the #1 indicate
- Page 276 and 277:
12. PAGE NOTES\renewcommand*{\@fnsy
- Page 278 and 279:
12. PAGE NOTESWhich is a special co
- Page 280 and 281:
12. PAGE NOTES\setsidebarheight{15\
- Page 282 and 283:
12. PAGE NOTESdefault \normalfont\f
- Page 284 and 285:
12. PAGE NOTESThe 〈text〉 argume
- Page 286 and 287:
12. PAGE NOTESvalue of the pagenote
- Page 288 and 289:
12. PAGE NOTESThe scheme is set up
- Page 290 and 291:
13. DECORATIVE TEXTThe epigraphs en
- Page 292 and 293:
13. DECORATIVE TEXTThe \epigraphhea
- Page 294 and 295:
13. DECORATIVE TEXT13.3.1 Epigraphs
- Page 296 and 297:
14. POETRY\begin{alltt}\normalfontI
- Page 298 and 299:
14. POETRYThe verse environment pro
- Page 300 and 301:
14. POETRYTypeset example 14.1: Pha
- Page 302 and 303:
14. POETRYAs an alternative to the
- Page 304 and 305:
14. POETRY14.2.1 Main Poem Title la
- Page 306 and 307:
14. POETRY\end{verse}Note how the a
- Page 308 and 309:
14. POETRYAnother limerick, but thi
- Page 310 and 311:
14. POETRYMouse’s TaleFury said t
- Page 312 and 313:
15. BOXES, VERBATIMS AND FILES{\end
- Page 314 and 315:
15. BOXES, VERBATIMS AND FILESA fra
- Page 316 and 317:
15. BOXES, VERBATIMS AND FILESThis
- Page 318 and 319:
15. BOXES, VERBATIMS AND FILESThe \
- Page 320 and 321:
15. BOXES, VERBATIMS AND FILESWith
- Page 322 and 323:
15. BOXES, VERBATIMS AND FILES\newe
- Page 324 and 325:
15. BOXES, VERBATIMS AND FILESOn oc
- Page 326 and 327:
15. BOXES, VERBATIMS AND FILESThe c
- Page 328 and 329:
15. BOXES, VERBATIMS AND FILES\begi
- Page 330 and 331:
15. BOXES, VERBATIMS AND FILES\newc
- Page 332 and 333:
15. BOXES, VERBATIMS AND FILESThe a
- Page 334 and 335:
16. CROSS REFERENCINGIf you are def
- Page 336 and 337:
16. CROSS REFERENCINGTypeset exampl
- Page 338 and 339:
17. BACK MATTERThe macro \bibsectio
- Page 340 and 341:
17. BACK MATTERMany different BibTe
- Page 342 and 343:
17. BACK MATTERFollowing the declar
- Page 344 and 345:
17. BACK MATTER\item bridge, 2,3,7\
- Page 346 and 347:
17. BACK MATTER\begin{theindex}\ite
- Page 348 and 349:
17. BACK MATTER17.2.4 Controlling M
- Page 350 and 351:
17. BACK MATTER\pdfbookmark[0]{Anal
- Page 352 and 353:
17. BACK MATTER17.3.1 Controlling t
- Page 354 and 355:
17. BACK MATTER\changeglossnumforma
- Page 356 and 357:
17. BACK MATTER%%% memman.gst makin
- Page 359 and 360:
EighteenMiscellaneousIn which we ta
- Page 361 and 362:
18.3. Trim marks\newcommand*{\trimm
- Page 363 and 364:
18.5. Gatherings or signaturesHello
- Page 365 and 366:
18.8. Changing counters18.8 CHANGIN
- Page 367 and 368:
18.11. String arguments{ in spite o
- Page 369 and 370:
18.13. Moving to another page18.13
- Page 371 and 372:
18.14. Number formattingTypeset exa
- Page 373 and 374:
18.14. Number formattingTypeset exa
- Page 375 and 376:
18.16. Checking the processor\check
- Page 377 and 378:
18.19. Adding a periodOn occasions
- Page 379 and 380:
18.22. Two simple macrosFor example
- Page 381 and 382:
18.24. For package writersis, witho
- Page 383 and 384:
18.26. Documenting LaTeX commands\m
- Page 385 and 386:
NineteenFor package usersMany packa
- Page 387:
19.2. Support for bididirectional t
- Page 390 and 391:
such as when he is comparing font f
- Page 392 and 393:
20.4 SPECIFYING THE SECTIONAL TITLI
- Page 394 and 395:
Captionsand the ToC\put(\strip@pt\m
- Page 396 and 397:
Preamble orpackage?called, say, bri
- Page 398 and 399:
21. AN EXAMPLE THESIS DESIGN21.1.2
- Page 400 and 401:
21. AN EXAMPLE THESIS DESIGN21.1.5
- Page 402 and 403:
21. AN EXAMPLE THESIS DESIGN\usepac
- Page 404 and 405:
21. AN EXAMPLE THESIS DESIGN%% for
- Page 406 and 407:
21. AN EXAMPLE THESIS DESIGNWe have
- Page 408 and 409:
21. AN EXAMPLE THESIS DESIGN{\clear
- Page 410 and 411:
21. AN EXAMPLE THESIS DESIGNCONTINU
- Page 412 and 413:
21. AN EXAMPLE THESIS DESIGN\vfillG
- Page 414 and 415:
21. AN EXAMPLE THESIS DESIGNIf you
- Page 417 and 418:
APackages and macrosThe memoir clas
- Page 419 and 420:
A.2. MacrosThe command \Pcstyle pri
- Page 421 and 422:
BShowcasesThe memoir memoir class h
- Page 423 and 424:
B.1. Chapter stylesCHAPTER 4Demonst
- Page 425 and 426:
B.1. Chapter stylesChapter 8Demonst
- Page 427 and 428:
B.1. Chapter styles3Demonstration o
- Page 429 and 430:
B.1. Chapter styles7 Demonstration
- Page 431 and 432:
B.1. Chapter stylesChapter 10Demons
- Page 433 and 434:
B.1. Chapter stylesCHAPTER 4Demonst
- Page 435 and 436:
B.1. Chapter stylesB.1.2Demo, Demo2
- Page 437 and 438:
B.1. Chapter stylesB.1.5\renewcomma
- Page 439 and 440:
CSnipletsThis chapter is (over time
- Page 441 and 442:
Contents\else\newcommand{\draftnote
- Page 443 and 444:
ContentsEven though the list mentio
- Page 445 and 446:
Contents\cftinsertcode{start-\theto
- Page 447 and 448:
DPicturesThere are many freely avai
- Page 449 and 450:
D.2. Picture objects\begin{picture}
- Page 451 and 452:
D.2. Picture objectsTypeset example
- Page 453 and 454:
D.2. Picture objectsTypeset example
- Page 455 and 456:
D.2. Picture objectsTypeset example
- Page 457 and 458:
D.2. Picture objectsy✻✟✻ j❘
- Page 459 and 460:
D.2. Picture objectsTypeset example
- Page 461 and 462:
D.3. Repetitions1004208032006021010
- Page 463 and 464:
D.4. Bezier curvesTypeset example D
- Page 465:
D.4. Bezier curves(50,90) (10,5
- Page 468 and 469:
E. LATEX AND TEXas performing some
- Page 470 and 471:
E. LATEX AND TEX• Within the docu
- Page 472 and 473:
E. LATEX AND TEXHalf Dome in Yosemi
- Page 474 and 475:
E. LATEX AND TEXThe depth, height a
- Page 476 and 477:
E. LATEX AND TEX\newskip\myskipThe
- Page 478 and 479:
E. LATEX AND TEXAs shown in the las
- Page 480 and 481:
E. LATEX AND TEX\advance\@tempdima
- Page 482 and 483:
E. LATEX AND TEX\advance\fibtogo \m
- Page 485 and 486:
FThe terrors of errorsNo matter how
- Page 487 and 488:
F.1. TeX messages! Display math sho
- Page 489 and 490:
F.1. TeX messages! Illegal unit of
- Page 491 and 492:
F.1. TeX messages! Missing control
- Page 493 and 494:
F.1. TeX messages! That makes 100 e
- Page 495 and 496:
F.1. TeX messagesThe eror message s
- Page 497 and 498:
F.2. LaTeX errors\caption outside f
- Page 499 and 500:
F.2. LaTeX errors\RequirePackage or
- Page 501 and 502:
F.3. LaTeX warningsCitation ...unde
- Page 503 and 504:
F.4. Class errorsF.4 CLASS ERRORSTh
- Page 505 and 506:
F.4. Class errorsNot redefinable: .
- Page 507 and 508:
F.5. Class warningsCharacters dropp
- Page 509:
GCommentsG.1 ALGORITHMSOver time we
- Page 512 and 513:
NOTESScript There are some sixteen
- Page 514 and 515:
COMMAND SUMMARY\abslabeldelim{〈te
- Page 516 and 517:
COMMAND SUMMARY\arraycolsep Half th
- Page 518 and 519:
COMMAND SUMMARY\bottomsectionskip .
- Page 520 and 521:
COMMAND SUMMARY\cftKfont . . . . .
- Page 522 and 523:
COMMAND SUMMARY\cleartoevenpage[〈
- Page 524 and 525:
COMMAND SUMMARY\begin{description}
- Page 526 and 527:
COMMAND SUMMARY\begin{labelled}{〈
- Page 528 and 529:
COMMAND SUMMARY\begin{hangparas}{
- Page 530 and 531:
COMMAND SUMMARYlastpage . . . . . .
- Page 532 and 533:
COMMAND SUMMARY\MakeTextUppercase{
- Page 534 and 535:
COMMAND SUMMARY\mempostaddbooktotoc
- Page 536 and 537:
COMMAND SUMMARYentry, which may be
- Page 538 and 539:
COMMAND SUMMARY\openleft Force chap
- Page 540 and 541:
COMMAND SUMMARY\plainbreak*{〈num
- Page 542 and 543:
COMMAND SUMMARY\printpagenotes* . .
- Page 544 and 545:
COMMAND SUMMARY\russianpar . . . .
- Page 546 and 547:
COMMAND SUMMARY\setpagecc{〈height
- Page 548 and 549:
COMMAND SUMMARYshowtrims Class opti
- Page 550 and 551:
COMMAND SUMMARY\subsubsechook . . .
- Page 552 and 553:
COMMAND SUMMARY\tmarktl Trim mark f
- Page 554 and 555:
COMMAND SUMMARY\vrightskip . . . .
- Page 556 and 557:
BIBLIOGRAPHY[Car98c] David Carlisle
- Page 558 and 559:
BIBLIOGRAPHY[Mad06][Mad07][McD98]La
- Page 560 and 561:
BIBLIOGRAPHY[Wil00b][Wil00c][Wil00e
- Page 563 and 564:
IndexThe first page number is usual
- Page 565 and 566:
\addtoiargdefarticle (class)\addtoi
- Page 567 and 568:
BibTeX style\bvnumbersoutsideBibTeX
- Page 569 and 570:
\cftinserthook\chapterstyle\cftinse
- Page 571 and 572:
Computer Sansdcolumn (package)Compu
- Page 573 and 574:
endenvironmentendline, 415\end, 159
- Page 575 and 576:
fancybox (package)floatfancybox (pa
- Page 577 and 578:
\footnote\futureletstyling, 235mark
- Page 579 and 580:
\hskip\indexmarkstyle\hskip, 440\hs
- Page 581 and 582:
\leftlength\left, 213, 214, 449left
- Page 583 and 584:
line too long\makeheadfootstrutfreq
- Page 585 and 586:
\medievalpageMisplaced \noalign45 c
- Page 587 and 588:
\newleadpageoldfontcommands (option
- Page 589 and 590:
Option clash for ...packagetwoside,
- Page 591 and 592:
\pagemlargecrownvo \paperheight and
- Page 593 and 594:
pifont (package)\printchapternamefr
- Page 595 and 596:
\raggedyright\russianpar\raggedyrig
- Page 597 and 598:
\setSindent\sideparmargin\setSinden
- Page 599 and 600:
stock paper size optionsubheaddolla
- Page 601 and 602:
TeX capacity exceeded ...Times Roma
- Page 603 and 604:
type sizetypefaceDecorative, 474Did
- Page 605 and 606:
\vectorwidowslope, 419\vector, 419,
- Page 607:
Index of first linesBeautiful Railw


