
You also want an ePaper? Increase the reach of your titles
YUMPU automatically turns print PDFs into web optimized ePapers that Google loves.
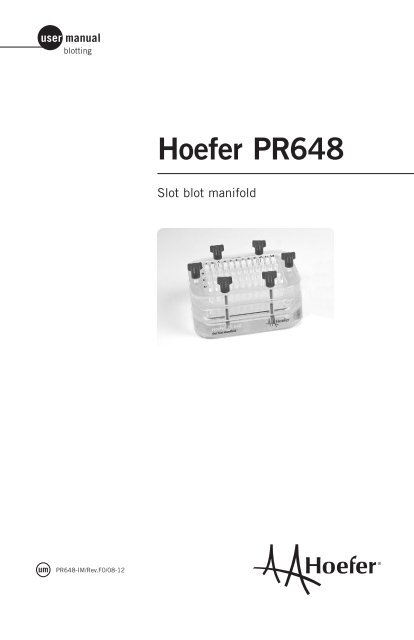
user manualblotting<strong>Hoefer</strong> <strong>PR648</strong>Slot blot manifoldum <strong>PR648</strong>-IM/Rev.F0/08-12
Page finderIntroduction...........................................................1Specifications........................................................2Procedure for standard use ofthe <strong>Hoefer</strong> <strong>PR648</strong> .................................................3Setting up the <strong>Hoefer</strong> <strong>PR648</strong> ............................3Applying your samples........................................5Removing your blot............................................5Care and maintenance............................................6Troubleshooting......................................................7Ordering information..............................................8• pi
IntroductionSlot-and dot-blotting techniques have been usedextensively in molecular biology to immobilizenucleic acids and proteins on membranes fordetermining nucleic acid homologies, quantifyingmRNA, studying hormone receptor binding,detecting protein-nucleic acid interactions, andscreening for specific proteins by activity orantibody. The slot-shaped blots produced bythe <strong>Hoefer</strong> ® <strong>PR648</strong> slot blot filtration manifoldare more reliably and accurately quantitatedby scanning densitometry than dot blots. For aseries of dots, the scan path must pass directlythrough the center of all the dots. Slots are notso demand ing in alignment and allow muchwider representative scan paths.The <strong>Hoefer</strong> <strong>PR648</strong> slot blot filtration manifoldis designed and manufactured to provide anefficient seal around each slot insuring a consistentshape and size. As little as 50 µl of sampleapplied to a membrane through the slot willyield a clearly defined band with evenly distributedsample.Each <strong>Hoefer</strong> <strong>PR648</strong> slot blot is comprised ofthree separate blocks. The upper block has48 labeled slots for samples, arranged in a4 × 12 array. The blotting membrane is placedin a recess on the top of the middle (membranesupport) block. The bottom block has a connectorfor the vacuum source.To assemble the <strong>Hoefer</strong> <strong>PR648</strong> slot blot, simplyplace the membrane in the membrane supportblock recess, stack the blocks together, andinsert and tighten the screws. Attach the connectoron the bottom block to a vacuum source andapply your samples in the slots.• p1
SpecificationsNumber of slots: 48Slot dimensions:Slot spacing:6 mm × 0.80 mm9.0 mm × 18 mm(from center to center)Slot membrane surface area: 4.8 mm 2Maximum well volume:Recess dimension:Unit dimensions:1 ml82 mm × 115 mm12 cm × 15.5 cm × 8 cmFig 1. The <strong>Hoefer</strong> <strong>PR648</strong> slot blotset up for standard use.top blockmembranemembrane recessmembranesupport blockorientationcornerquick disconnectbottom block• p2
Procedure for standard use ofthe <strong>Hoefer</strong> <strong>PR648</strong>The following procedure produces a well-definedblot with sharp edges with many types of samples.To determine the optimal load per slot for theparticular membrane and samples you are using,we suggest first blotting a set of serial dilutions.Setting up the <strong>Hoefer</strong> <strong>PR648</strong>1Place the bottom block on the lab bench. Place themembrane support block (middle block), with the0-ring facing down, on top of the bottom block.The membrane recess in the membrane support blockhas one curved corner. Orient the block with thiscorner on the lower right (see Fig 1).2Wear gloves to avoid leaving fingerprints on themembrane. Place the membrane cutting template,ridge side down, on the membrane. Exert slightpressure on the template to leave a mark on themembrane. Cut the membrane along the mark. Thetemplate has been sized to allow for swelling of alltypes of membrane.3Soak the membrane in appropriate buffer for a fewminutes to wet it thoroughly. (A dry membrane willdraw sample under the sealing ridge and away fromthe slot, resulting in a poorly defined slot image onthe membrane.)4Place the membrane completely within the recess,aligning the clipped corner of the membrane with theclipped corner of the recess.Make sure the membrane is flat and fits completelywithin the area, with edges parallel to the recessedges. If the membrane is not positioned correctly,lift it up and reposition it.• p3
Note: Do not use samplescontaining organic solvents.Applying your samples1Turn on the vacuum pump and adjust the pump orbleed valve until the vacuum is 13 <strong>–</strong>25 cm Hg.2Turn off the vacuum.3Carefully load a sample, at least 50 µl in volume, intoeach well. (A 50 µl size is necessary to distribute thesample evenly over the slot.) To prevent bubbles fromforming, pipet each sample against the bottom side-wallof the well. This is especially important it your samplecontains proteins or detergents. If bubbles should form,flush them out with the pipetter tip.4Turn on the vacuum and set it at 13 <strong>–</strong>25 cm Hg.When all of the sample liquid has been pulled throughthe membrane, add 1 ml of buffer to each slot,pipetting against the bottom-side wall. Adjust vacuumto 38<strong>–</strong>50 cm Hg. After all of the buffer is pulledthrough, repeat twice more for a total of three rinses.Removing your blot1With the vacuum still on, remove the screws andcarefully lift off the top block.2Using forceps, lift the membrane off and place it onclean, dry filter paper. Turn off the vacuum.3Process the membrane according to your protocol.4If you plan to scan the blot itself with a densitometer,dry the membrane flat by placing it on the smoothside of a porous polyethulene sheet. Dry it for severalminutes in a vacuum gel dryer without heat.• p5
Care and maintenance1If the slot blot is used with radioactive materials,decontaminate the 0-ring between uses. You may wishto purchase a second ring for non-radioactive work.(See Ordering information.)2Wash all blocks thoroughly in a mild water-basedlaboratory detergent, then rinse well in distilled water.Brief exposure to 5% bleach solutions can be used.Do not use ethanol or other organic solvents. Do notautoclave the slot blot or wash it at high temperatures.3Blot all blots dry immediately. Acrylic can absorbwater, which may cause it to warp.4Store the slot blot away from direct sunlight. If youstore it assembled, do not tighten the screws.5Store the <strong>PR648</strong> slot blot with the membrane cuttingtemplate, flat side-up, between the middle and topblocks. This will protect the sealing ridge surroundingthe slots.• p6
TroubleshootingproblemsolutionIf the sample area on the membrane islarger than the slot size, or if the solutionis leaking out of the slot…Screws are tightened too Carefully follow the tightening instructions in Steps 6 and 7far or not tightened far enough. in Setting up the <strong>Hoefer</strong> <strong>PR648</strong> slot blot.The membrane is not positionedcorrectly with the recess.The membrane is dry.Make sure the membrane is flat and fits completely withinthe recess with its edges parallel to the recess edges.Before blotting, be sure to soak the membrane in buffer towet it thoroughly.If small impressions show on themembrane around the blot…This is normal.The impressions, which indicate a tight seal, will not affectyour results if you scan the membrane in reflectance mode.Place the membrane flat on the smooth side of a porouspolyethylene sheet, and dry it for several minutes in a gel dryerwithout heat.If there are bubbles in the slot…There are proteins or detergent in thesample. Or, the sample was squirtedrapidly into the slot.To prevent bubbles from forming, be sure to pipet the sampleslowly and carefully against the bottom side-wall of the slot.If necessary, flush bubbles out with a pipette tip.• p7
Ordering informationproduct qty. code no.Basic Unit<strong>Hoefer</strong> <strong>PR648</strong> Slot blot manifold 1 <strong>PR648</strong>with Quick Fit connector andmembrane cutting template.Replacement Parts for the<strong>PR648</strong> Slot blotTop Block 1 PR654Membrane support block 1 PR659(middle block). <strong>Inc</strong>ludes O-ring.Bottom Block 1 PR656O-rings 1 PR657Screws 6 PR658Membrane cutting template 1 PR659• p8
<strong>Hoefer</strong>, <strong>Inc</strong>.84 October Hill RoadHolliston, MA 01746Toll Free: 1-800-227-4750Phone: 1-508-893-8999Fax: 1-508-893-0176E-mail: support@hoeferinc.comWeb: www.hoeferinc.com<strong>Hoefer</strong> is a registered trademarkof <strong>Hoefer</strong>, <strong>Inc</strong>.© 2012 <strong>Hoefer</strong>, <strong>Inc</strong>. —All rights reserved.Printed in the USA.• p9