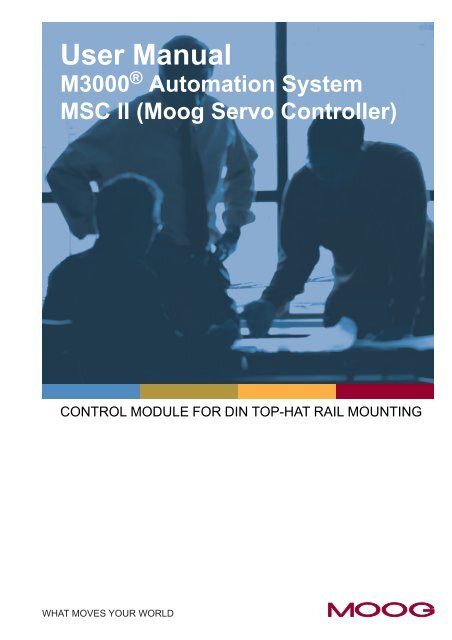
User Manual M3000® Automation System / MSC II (Moog Servo ...
User Manual M3000® Automation System / MSC II (Moog Servo ...
User Manual M3000® Automation System / MSC II (Moog Servo ...

You also want an ePaper? Increase the reach of your titles
YUMPU automatically turns print PDFs into web optimized ePapers that Google loves.
<strong>User</strong> <strong>Manual</strong><br />
M3000 ® <strong>Automation</strong> <strong>System</strong><br />
<strong>MSC</strong> <strong>II</strong> (<strong>Moog</strong> <strong>Servo</strong> Controller)<br />
CONTROL MODULE FOR DIN TOP-HAT RAIL MOUNTING
Copyright<br />
© 2008 <strong>Moog</strong> GmbH<br />
Hanns-Klemm-Strasse 28<br />
71034 Böblingen (Germany)<br />
Telephone: +49 7031 622-0<br />
Fax: +49 7031 622-100<br />
E-Mail: Info.germany@moog.com<br />
M3000-Support@moog.com<br />
Internet: http://www.moog.com/industrial<br />
All rights reserved.<br />
Neither this manual nor parts of it may be reproduced in any form (print, photocopy, microfilm, or any other<br />
process) or processed, duplicated, or distributed through the use of electronic systems without <strong>Moog</strong>'s written<br />
approval.<br />
Offenders will be held liable for the payment of damages.<br />
Subject to changes without prior notice.<br />
All <strong>M3000®</strong> modules comply with the standards specified in their relevant declaration of conformity.<br />
CE labeling of the <strong>M3000®</strong> modules is based on proper installation of the automation system with<br />
proven electromagnetic compatibility (EMC).<br />
© <strong>Moog</strong> GmbH <strong>User</strong> <strong>Manual</strong> M3000 ® and <strong>MSC</strong> <strong>II</strong> (CA65865-001; Version 1.1, 08/08) A
Table of Contents<br />
Table of Contents<br />
List of Tables .............................................................................................................................................vi<br />
List of Figures .......................................................................................................................................... viii<br />
1 General Information ..................................................................................1<br />
1.1 About this <strong>Manual</strong> ....................................................................................................................... 1<br />
1.1.1 Reservation of Changes and Validity ............................................................................. 1<br />
1.1.2 Exclusion of Liability....................................................................................................... 1<br />
1.1.3 Completeness ................................................................................................................ 1<br />
1.1.4 Place of Storage............................................................................................................. 1<br />
1.2 Selection and Qualification of Personnel.................................................................................. 2<br />
1.3 Proper Use ................................................................................................................................... 2<br />
1.3.1 Safety Related <strong>System</strong>s................................................................................................. 2<br />
1.4 Warranty and Liability ................................................................................................................. 3<br />
1.5 Inspection of Delivery ................................................................................................................. 3<br />
1.6 Environmental Protection........................................................................................................... 4<br />
1.6.1 Emissions....................................................................................................................... 4<br />
1.6.2 Disposal.......................................................................................................................... 4<br />
1.7 Standards ..................................................................................................................................... 4<br />
1.7.1 CE Labeling of M3000 ® Modules ................................................................................... 4<br />
1.7.2 IEC 61131-2 ................................................................................................................... 4<br />
1.7.3 Electromagnetic Compatibility (EMC)............................................................................. 4<br />
1.8 Trademarks .................................................................................................................................. 5<br />
1.9 Software Copyrights ................................................................................................................... 5<br />
2 Safety Instructions....................................................................................6<br />
2.1 Typographical Conventions ....................................................................................................... 6<br />
2.2 Safety Instructions ...................................................................................................................... 6<br />
2.2.1 Safety Related <strong>System</strong>s................................................................................................. 6<br />
2.2.2 Environmental Conditions .............................................................................................. 7<br />
2.2.3 ESD................................................................................................................................ 7<br />
2.2.4 Project Planning and Installation.................................................................................... 8<br />
2.2.5 Shutdown and Service ................................................................................................... 9<br />
2.2.6 Transportation and Storage.......................................................................................... 10<br />
2.2.7 Communication Between <strong>MSC</strong> <strong>II</strong> and MACS............................................................... 11<br />
2.2.8 License Key of the <strong>MSC</strong> <strong>II</strong>............................................................................................ 11<br />
2.2.9 Run/Stop/Reset............................................................................................................ 12<br />
2.2.10 Switching Back on or Resetting the <strong>MSC</strong> <strong>II</strong>.................................................................. 12<br />
2.2.11 'Outputs Enabled' Output of the <strong>MSC</strong> <strong>II</strong> ....................................................................... 12<br />
3 Short M3000 ® <strong>System</strong> Overview ............................................................13<br />
3.1 M3000 ® <strong>System</strong> Architecture.................................................................................................... 14<br />
3.2 <strong>MSC</strong> <strong>II</strong> Starter Kit ....................................................................................................................... 15<br />
3.3 M3000 ® Modules ........................................................................................................................ 16<br />
3.3.1 <strong>MSC</strong> I ........................................................................................................................... 16<br />
3.3.2 <strong>MSC</strong> <strong>II</strong> .......................................................................................................................... 17<br />
3.3.3 Q-Modules.................................................................................................................... 17<br />
3.3.4 R-Modules (Remote Modules) ..................................................................................... 19<br />
3.3.5 MSD Motion Controller ................................................................................................. 22<br />
3.3.6 MSD <strong>Servo</strong>drive ........................................................................................................... 23<br />
3.3.7 Identification ................................................................................................................. 23<br />
© <strong>Moog</strong> GmbH <strong>User</strong> <strong>Manual</strong> M3000 ® and <strong>MSC</strong> <strong>II</strong> (CA65865-001; Version 1.1, 08/08) i
Table of Contents<br />
3.4 License Key................................................................................................................................ 24<br />
3.5 Application Programs ............................................................................................................... 25<br />
3.6 MACS Development Environment ........................................................................................... 25<br />
3.6.1 MACS HMI Visualization Package ............................................................................... 26<br />
4 Environmental Conditions .....................................................................27<br />
4.1 Requirements of IEC 61131-2 ................................................................................................... 27<br />
4.2 Use in Special Environments ................................................................................................... 28<br />
5 Mechanical Installation...........................................................................29<br />
5.1 DIN Rail Modules ....................................................................................................................... 29<br />
5.1.1 Views of the Module..................................................................................................... 29<br />
5.1.2 Dimensions................................................................................................................... 30<br />
5.1.3 Arrangement on DIN Top-Hat Rails ............................................................................. 31<br />
5.1.4 Mounting and Removing .............................................................................................. 33<br />
6 Project Planning and Installation ..........................................................37<br />
6.1 Grounding Concept................................................................................................................... 38<br />
6.1.1 Front Panel Connectors' Grounding............................................................................. 38<br />
6.2 Power Supply............................................................................................................................. 39<br />
6.2.1 Power Supply Characteristics ...................................................................................... 39<br />
6.2.2 Power Consumption..................................................................................................... 40<br />
6.2.3 Connecting the Power Supply...................................................................................... 40<br />
6.2.4 Connecting Sensors..................................................................................................... 43<br />
6.3 Connecting Signal Cables ........................................................................................................ 46<br />
6.3.1 Plug-In Terminal Strips................................................................................................. 46<br />
7 Networking M3000 ® Modules .................................................................47<br />
7.1 Ethernet ...................................................................................................................................... 47<br />
7.1.1 Peer-to-Peer Connections............................................................................................ 47<br />
7.1.2 Networking of More Than 2 Network Stations.............................................................. 48<br />
7.1.3 Ethernet Interface Cables............................................................................................. 48<br />
7.2 EtherCAT .................................................................................................................................... 49<br />
7.2.1 Bus Topology ............................................................................................................... 49<br />
7.2.2 EtherCAT Interface Cables .......................................................................................... 49<br />
7.3 Profibus ...................................................................................................................................... 50<br />
7.3.1 Overview ...................................................................................................................... 50<br />
7.3.2 M3000 ® Modules with Profibus DP Interfaces ............................................................. 50<br />
7.3.3 Profibus Networks ........................................................................................................ 50<br />
7.3.4 Profibus Interface Cable............................................................................................... 52<br />
7.4 Serial TIA/EIA Interface Cables ................................................................................................ 54<br />
7.4.1 TIA/EIA 232 Interface Cables....................................................................................... 54<br />
7.5 CAN Bus and CANopen ............................................................................................................ 55<br />
7.5.1 CAN Bus....................................................................................................................... 55<br />
7.5.2 CAN Bus Characteristics.............................................................................................. 55<br />
7.5.3 CANopen...................................................................................................................... 56<br />
7.5.4 M3000 ® Modules with CAN Bus Interfaces.................................................................. 56<br />
7.5.5 CAN Bus Networks....................................................................................................... 57<br />
7.5.6 CAN Bus Interface Cable ............................................................................................. 59<br />
© <strong>Moog</strong> GmbH <strong>User</strong> <strong>Manual</strong> M3000 ® and <strong>MSC</strong> <strong>II</strong> (CA65865-001; Version 1.1, 08/08) ii
Table of Contents<br />
7.6 E-Bus .......................................................................................................................................... 60<br />
7.6.1 E-Bus Interface............................................................................................................. 60<br />
7.6.2 E-Bus Communication.................................................................................................. 61<br />
7.6.3 <strong>MSC</strong> <strong>II</strong> as E-Bus Master............................................................................................... 61<br />
7.7 Networking DIN Rail Modules................................................................................................... 64<br />
7.7.1 CAN and E-Bus Interfaces ........................................................................................... 64<br />
7.7.2 E-Bus Groups............................................................................................................... 65<br />
7.7.3 LocalCAN Bus Groups ................................................................................................. 66<br />
7.7.4 WideCAN Bus Groups.................................................................................................. 67<br />
8 Shutdown and Service............................................................................69<br />
8.1 Shutdown ................................................................................................................................... 69<br />
8.2 Service........................................................................................................................................ 70<br />
8.2.1 Maintenance/Servicing................................................................................................. 70<br />
8.2.2 Repair........................................................................................................................... 70<br />
9 Transportation and Storage ...................................................................71<br />
9.1 Environmental Conditions........................................................................................................ 71<br />
10 <strong>MSC</strong> <strong>II</strong> (<strong>Moog</strong> <strong>Servo</strong> Controller) .............................................................72<br />
10.1 Performance Characteristics.................................................................................................... 72<br />
10.1.1 Interfaces...................................................................................................................... 72<br />
10.1.2 I/Os (Inputs/ Outputs).................................................................................................... 73<br />
10.1.3 Safety Functions........................................................................................................... 73<br />
10.2 General Specifications.............................................................................................................. 73<br />
10.2.1 Dimensions................................................................................................................... 74<br />
10.2.2 Environmental Conditions ............................................................................................ 74<br />
10.3 Block Diagram ........................................................................................................................... 76<br />
10.4 View of the Module and Terminal Assignment ....................................................................... 77<br />
10.4.1 Terminal Assignment.................................................................................................... 78<br />
10.4.2 LEDs............................................................................................................................. 81<br />
10.5 Programming and Configuration ............................................................................................. 84<br />
10.5.1 Communication Between <strong>MSC</strong> <strong>II</strong> and MACS............................................................... 84<br />
10.6 License Key................................................................................................................................ 85<br />
10.6.1 Run-Time License and Accessible Libraries ................................................................ 85<br />
10.6.2 CANopen Node-ID and IP Address.............................................................................. 86<br />
10.6.3 Mounting and Removing .............................................................................................. 86<br />
10.7 Run/Stop/Reset Switch ............................................................................................................. 88<br />
10.8 Power Supply............................................................................................................................. 89<br />
10.8.1 Behavior at Switching on and Switching off ................................................................. 89<br />
10.9 Basetick...................................................................................................................................... 90<br />
10.9.1 Characteristics.............................................................................................................. 90<br />
10.9.2 Timing Diagram............................................................................................................ 91<br />
10.10 Digital I/Os.................................................................................................................................. 93<br />
10.10.1 Display of the Operational State................................................................................... 93<br />
10.10.2 Power Supply ............................................................................................................... 93<br />
10.10.3 Digital Outputs.............................................................................................................. 95<br />
10.10.4 Digital Inputs................................................................................................................. 97<br />
© <strong>Moog</strong> GmbH <strong>User</strong> <strong>Manual</strong> M3000 ® and <strong>MSC</strong> <strong>II</strong> (CA65865-001; Version 1.1, 08/08) iii
Table of Contents<br />
10.11 Profibus DP Interface .............................................................................................................. 100<br />
10.11.1 Profibus Termination .................................................................................................. 100<br />
10.11.2 Shielding..................................................................................................................... 100<br />
10.11.3 Profibus Slave Address.............................................................................................. 100<br />
10.11.4 Profibus Baud Rate .................................................................................................... 100<br />
10.12 EtherCAT .................................................................................................................................. 101<br />
10.13 Digital Sensor Interfaces ........................................................................................................ 101<br />
10.13.1 Termination Resistors ................................................................................................ 101<br />
10.13.2 Wire Fault Monitoring ................................................................................................. 102<br />
10.13.3 Connecting SSI Sensors ............................................................................................ 102<br />
10.13.4 Connecting Incremental Sensors ............................................................................... 105<br />
10.14 E-Bus Interface ........................................................................................................................ 108<br />
10.14.1 Configuration of the E-Bus Interface .......................................................................... 108<br />
10.15 CAN Bus Interfaces ................................................................................................................. 109<br />
10.15.1 CAN Bus Termination Resistor .................................................................................. 110<br />
10.15.2 Setting the CANopen Node-ID ................................................................................... 110<br />
10.15.3 Setting the CAN Bus Baud Rate ................................................................................ 110<br />
10.16 Serial Interfaces....................................................................................................................... 111<br />
10.17 Safety Functions...................................................................................................................... 111<br />
10.17.1 Watchdog ................................................................................................................... 111<br />
10.17.2 'Outputs Enabled' Output (LED «OutEN») ................................................................. 111<br />
10.17.3 Stopping the Application Program.............................................................................. 112<br />
10.18 Nameplate ................................................................................................................................ 113<br />
11 Product Range.......................................................................................114<br />
11.1 M3000 ® Starter Kits ................................................................................................................. 114<br />
11.2 M3000 ® Modules ...................................................................................................................... 115<br />
11.2.1 Controller.................................................................................................................... 115<br />
11.2.2 Q-Modules.................................................................................................................. 116<br />
11.2.3 R-Modules (Remote Modules) ................................................................................... 117<br />
11.3 Power Supply for M3000 ® Modules ....................................................................................... 117<br />
11.4 License Keys............................................................................................................................ 118<br />
11.5 Software ................................................................................................................................... 119<br />
11.5.1 MACS (<strong>Moog</strong> Axis Control Software)......................................................................... 119<br />
11.5.2 Software for R-Modules.............................................................................................. 119<br />
11.6 Interface Cables....................................................................................................................... 120<br />
11.7 CAN Bus Accessories............................................................................................................. 120<br />
11.8 Plug-In Terminal Strips ........................................................................................................... 121<br />
11.8.1 Number of Required Plug-In Terminal Strips ............................................................. 122<br />
11.9 Training Programs................................................................................................................... 123<br />
12 Appendix................................................................................................124<br />
12.1 Typographical Conventions ................................................................................................... 124<br />
12.2 Abbreviations........................................................................................................................... 125<br />
12.3 Quoted Standards ................................................................................................................... 127<br />
12.3.1 CiA DS........................................................................................................................ 127<br />
12.3.2 DIN ............................................................................................................................. 127<br />
12.3.3 DIN EN ....................................................................................................................... 127<br />
12.3.4 IEC ............................................................................................................................. 128<br />
12.3.5 ISO/DIS ...................................................................................................................... 128<br />
12.3.6 TIA/EIA....................................................................................................................... 129<br />
© <strong>Moog</strong> GmbH <strong>User</strong> <strong>Manual</strong> M3000 ® and <strong>MSC</strong> <strong>II</strong> (CA65865-001; Version 1.1, 08/08) iv
Table of Contents<br />
13 Index.......................................................................................................130<br />
A…C ...................................................................................................................................................... 130<br />
D…G...................................................................................................................................................... 131<br />
I…L ........................................................................................................................................................ 132<br />
M…O ..................................................................................................................................................... 133<br />
P…R ...................................................................................................................................................... 134<br />
S…S ...................................................................................................................................................... 135<br />
T…Z....................................................................................................................................................... 136<br />
© <strong>Moog</strong> GmbH <strong>User</strong> <strong>Manual</strong> M3000 ® and <strong>MSC</strong> <strong>II</strong> (CA65865-001; Version 1.1, 08/08) v
List of Tables<br />
List of Tables<br />
Table 1: Dimensions of DIN Rail Modules.................................................................................................... 30<br />
Table 2: Power Consumption ....................................................................................................................... 40<br />
Table 3: Power Supply Conditions of the Module's Internal Electronics and the Sensors ........................... 41<br />
Table 4: Connector Pin out........................................................................................................................... 52<br />
Table 5: Maximum Cable Lengths in Profibus Networks (Depending on the Transmission Rate) ............... 53<br />
Table 6: Maximum Permissible Stub Cable Length in Profibus Networks (Depending on the<br />
Transmission Rate) ........................................................................................................................ 53<br />
Table 7: Suitable Cables for Profibus Interface Cables................................................................................ 53<br />
Table 8: <strong>M3000®</strong> Modules with CAN Bus Interfaces ................................................................................... 56<br />
Table 9: Maximum Cable Lengths in CAN Bus Networks (Depending on the Transmission Rate).............. 59<br />
Table 10: Maximum Permissible Stub Cable Lengths in CAN Bus Networks ................................................ 59<br />
Table 11: Suitable Cables for CAN Bus Interface Cables .............................................................................. 60<br />
Table 12: Permissible Masters and Slaves in E-Bus Groups ......................................................................... 61<br />
Table 13: Update Rate of E-Bus Messages ................................................................................................... 62<br />
Table 14: Update Order for Inputs and Outputs of QDIO and QAIO 16/4 ...................................................... 63<br />
Table 15: DIN Rail Modules with CAN and E-Bus Interfaces ......................................................................... 64<br />
Table 16: Terminal Assignment of <strong>MSC</strong> <strong>II</strong>'s Connectors ................................................................................ 78<br />
Table 17: LEDs of the <strong>MSC</strong> <strong>II</strong> ........................................................................................................................ 81<br />
Table 18: LEDs for Displaying Elementary Operational States and Errors after Switching on or<br />
Resetting the <strong>MSC</strong> <strong>II</strong> ...................................................................................................................... 83<br />
Table 19: Behavior of the Run/Stop/Reset Switch ......................................................................................... 88<br />
Table 20: U/I Working Ranges of <strong>MSC</strong> <strong>II</strong> control module's Digital Inputs (Current Consuming) .................... 99<br />
Table 21: Designations of Incremental Sensor Terminals (<strong>MSC</strong> <strong>II</strong> and Incremental Sensors from<br />
Various Manufacturers) ................................................................................................................ 105<br />
Table 22: Timing of incremental encoders ................................................................................................... 106<br />
Table 23: Product Range – M3000 ® Starter Kits.......................................................................................... 114<br />
Table 24: Product Range Motion Controller ................................................................................................. 115<br />
Table 25: Product Range – Q-Modules ........................................................................................................ 116<br />
Table 26: Product Range – R-Modules (Remote Modules).......................................................................... 117<br />
Table 27: Product Range – Power Supply for M3000 ® Modules.................................................................. 117<br />
Table 28: Product Range – License Keys .................................................................................................... 118<br />
Table 29: Features Provided by the License Keys ....................................................................................... 118<br />
Table 30: Product Range – Software – MACS ............................................................................................. 119<br />
Table 31: Product Range – Software for R-Modules.................................................................................... 119<br />
Table 32: Product Range – Interface Cables ............................................................................................... 120<br />
Table 33: Product Range – CAN Bus Accessories ...................................................................................... 120<br />
Table 34: Product Range – Plug-In Terminal Strips ..................................................................................... 121<br />
Table 35: Number of Plug-In Terminal Strips ............................................................................................... 122<br />
© <strong>Moog</strong> GmbH <strong>User</strong> <strong>Manual</strong> M3000 ® and <strong>MSC</strong> <strong>II</strong> (CA65865-001; Version 1.1, 08/08) vi
List of Tables<br />
Table 36: Product Range – Training Programs ............................................................................................ 123<br />
Table 37: Abbreviations .............................................................................................................................. 125<br />
© <strong>Moog</strong> GmbH <strong>User</strong> <strong>Manual</strong> M3000 ® and <strong>MSC</strong> <strong>II</strong> (CA65865-001; Version 1.1, 08/08) vii
List of Figures<br />
List of Figures<br />
Figure 1: <strong>MSC</strong> <strong>II</strong> Starter Kit........................................................................................................................... 15<br />
Figure 2: <strong>MSC</strong> I Control Module ................................................................................................................... 16<br />
Figure 3: <strong>MSC</strong> <strong>II</strong> Control Module .................................................................................................................. 17<br />
Figure 4: QDIO 16/16 ................................................................................................................................... 18<br />
Figure 5: QAIO 2/2........................................................................................................................................ 18<br />
Figure 6: QAIO 16/4...................................................................................................................................... 18<br />
Figure 7: QEBUS-CAN Extension Module.................................................................................................... 19<br />
Figure 8: RDIO 16/16-0,5 Remote I/O Module ............................................................................................. 20<br />
Figure 9: RDISP 22 Display and Operating Terminal ................................................................................... 20<br />
Figure 10: DialogController............................................................................................................................. 21<br />
Figure 11: MSD Motion Controller .................................................................................................................. 22<br />
Figure 12: MSD <strong>Servo</strong>drive ............................................................................................................................ 23<br />
Figure 13: License Key ................................................................................................................................... 24<br />
Figure 14: Front View of DIN Rail Modules .................................................................................................... 29<br />
Figure 15: Side View of DIN Rail Modules...................................................................................................... 29<br />
Figure 16: Dimensions of DIN Rail Modules................................................................................................... 30<br />
Figure 17: Arrangement of DIN Rail Modules on a Vertical Mounting Plate................................................... 31<br />
Figure 18: Arrangement of DIN Rail Modules between Cable Conduits......................................................... 32<br />
Figure 19: Using a Shielding Bar when Connecting a Signal Cable to the <strong>MSC</strong> <strong>II</strong>......................................... 32<br />
Figure 20: Unlocking a DIN Rail Module......................................................................................................... 33<br />
Figure 21: Placing a DIN Rail Module onto a DIN Top-Hat Rail ..................................................................... 34<br />
Figure 22: Sliding a DIN Rail Module on a DIN Top-Hat Rail ......................................................................... 34<br />
Figure 23: DIN Rail Modules Joined Without Gaps on a DIN Top-Hat Rail.................................................... 34<br />
Figure 24: Fixing and Locking a DIN Rail Module .......................................................................................... 35<br />
Figure 25: Unlocking a DIN Rail Module......................................................................................................... 36<br />
Figure 26: Pulling apart DIN Rail Modules...................................................................................................... 36<br />
Figure 27: Lifting off a DIN Rail Module from the DIN Top-Hat Rail ............................................................... 36<br />
Figure 28: Grounding Concept ....................................................................................................................... 38<br />
Figure 29: Correct Connection of DIN Rail Modules to Several Power Supplies ........................................... 42<br />
Figure 30: Correct Connection of DIN Rail Modules to a Single Power Supply ............................................. 42<br />
Figure 31: Correct Power Supply Connection of Sensors via a QDIO ........................................................... 44<br />
Figure 32: Wrong Power Supply Connection of Sensors via a QDIO............................................................. 45<br />
Figure 33: Ethernet Network with exactly 2 Network Stations ........................................................................ 47<br />
Figure 34: Ethernet Network with more than 2 Network Stations ................................................................... 48<br />
Figure 35: 100BaseT Cable with Crossed Twisted Pair Wires (Crossover Cable)......................................... 48<br />
Figure 36: 100BaseT Cable with Non-Crossed Twisted Pair Wires (Patch Cable) ........................................ 48<br />
Figure 37: EtherCAT Bus Topology................................................................................................................ 49<br />
© <strong>Moog</strong> GmbH <strong>User</strong> <strong>Manual</strong> M3000 ® and <strong>MSC</strong> <strong>II</strong> (CA65865-001; Version 1.1, 08/08) viii
List of Figures<br />
Figure 38: 100BaseT Cable with Non-Crossed Twisted Pair Wires (Patch Cable) ........................................ 49<br />
Figure 39: Linear Structure of the Profibus with Termination Resistors ......................................................... 51<br />
Figure 40: 9 Pole D-sub Mating Connector with switchable termination according to<br />
IEC 61158/EN 50170..................................................................................................................... 52<br />
Figure 41: Profibus Interface - Connector with internal longitudinal inductivity according to<br />
IEC 61158/EN 50170..................................................................................................................... 52<br />
Figure 42: TIA/EIA 232 Null Modem Cable..................................................................................................... 54<br />
Figure 43: TIA/EIA 232 Interface Cable with 1:1 Connection ......................................................................... 54<br />
Figure 44: Linear Structure of the CAN Bus ................................................................................................... 58<br />
Figure 45: CAN Bus Interface Cable .............................................................................................................. 59<br />
Figure 46: E-Bus Group (<strong>MSC</strong> <strong>II</strong> as E-Bus Master)........................................................................................ 66<br />
Figure 47: E-Bus Group (RDIO as E-Bus Master).......................................................................................... 66<br />
Figure 48: LocalCAN Bus Group (<strong>MSC</strong> <strong>II</strong>s as CAN Bus Network Stations) ................................................... 67<br />
Figure 49: WideCAN Bus Group (<strong>MSC</strong> <strong>II</strong>s and R-Modules as CAN Bus Network Stations) .......................... 68<br />
Figure 50: Repair Seal.................................................................................................................................... 70<br />
Figure 51: Dimensions of the <strong>MSC</strong> <strong>II</strong>.............................................................................................................. 74<br />
Figure 52: Block Diagram of the <strong>MSC</strong> <strong>II</strong> ....................................................................................................... 76<br />
Figure 53: Front View of the <strong>MSC</strong> <strong>II</strong> ..................................................................................................... 77<br />
Figure 54: Front Panel of the <strong>MSC</strong> <strong>II</strong> ...................................................................................................... 77<br />
Figure 55: License Key of the <strong>MSC</strong> <strong>II</strong> control module with Attachment Screws ............................................. 86<br />
Figure 56: Timing diagram of the <strong>MSC</strong> <strong>II</strong> control module ............................................................................... 91<br />
Figure 57: Basic Wiring Diagram of a Digital Open Emitter/Collector Output of the <strong>MSC</strong> <strong>II</strong>........................... 95<br />
Figure 58: Basic Wiring Diagram of a Digital Input of the <strong>MSC</strong> <strong>II</strong> (Current Consuming)................................. 97<br />
Figure 59: U/I Working Ranges of <strong>MSC</strong> <strong>II</strong> control module's Digital Inputs (Current Consuming) ................... 99<br />
Figure 60: Profibus DP Interface of the <strong>MSC</strong> <strong>II</strong> ............................................................................................ 100<br />
Figure 61: Connection Diagram of the <strong>MSC</strong> <strong>II</strong> in Master Mode .................................................................... 103<br />
Figure 62: Connection Diagram of the <strong>MSC</strong> <strong>II</strong> in Slave Mode ...................................................................... 104<br />
Figure 63: Signals Between the <strong>MSC</strong> <strong>II</strong> and a 16 Bit SSI Sensor (Example) ............................................... 104<br />
Figure 64: Connection Diagram of the <strong>MSC</strong> <strong>II</strong> with an Incremental Sensor ................................................. 105<br />
Figure 65: Timing requirements of incremental encoder signals ................................................................ 106<br />
Figure 66: Timing of Standard Incremental Encoder .................................................................................. 106<br />
Figure 67: Timing of Pulse Train Incremental Encoder with positive logic ................................................... 107<br />
Figure 68: Timing of Pulse Train Incremental Encoder with negative logic .................................................. 107<br />
Figure 69: Timing of Frequency Modulation Incremental Encoder with positive logic .................................. 107<br />
Figure 70: Timing of Frequency Modulation Incremental Encoder with negative logic................................. 107<br />
Figure 71: CAN Bus Interfaces of the <strong>MSC</strong> <strong>II</strong> ............................................................................................... 109<br />
Figure 72: Position of the Nameplate on the <strong>MSC</strong> <strong>II</strong> .................................................................................... 113<br />
© <strong>Moog</strong> GmbH <strong>User</strong> <strong>Manual</strong> M3000 ® and <strong>MSC</strong> <strong>II</strong> (CA65865-001; Version 1.1, 08/08) ix
1 General Information About this <strong>Manual</strong><br />
1 General Information<br />
1.1 About this <strong>Manual</strong><br />
This manual is valid only for the M3000 ® automation system and M3000 ®<br />
modules. It contains most important instructions that must be observed in order<br />
to operate the M3000 ® automation system and M3000 ® modules in a<br />
safe manner.<br />
Every person responsible for machinery planning, mounting, and operation<br />
must read, understand, and follow all points covered in this manual. This applies<br />
especially to the safety instructions. Following the safety instructions<br />
helps to avoid accidents, faults, and material damage!<br />
The following items must be observed as fundamental elements of safety<br />
when using the M3000 ® automation system and M3000 ® modules:<br />
• All safety instructions contained in this manual<br />
• All safety instructions contained in the documentation of the M3000 ®<br />
modules<br />
• All safety instructions contained in the product related hardware and<br />
software documentation required for the relevant application<br />
• All relevant nationally and internationally applicable safety and accident<br />
prevention regulations and standards<br />
1.1.1 Reservation of Changes and Validity<br />
The information contained in this manual is valid at the time of this version's<br />
release. See footer for version number and release date of this manual.<br />
<strong>Moog</strong> reserves the right to make changes to this manual at any time without<br />
specified reasons.<br />
1.1.2 Exclusion of Liability<br />
This manual was prepared with great care and the contents reflect the authors'<br />
best knowledge. However, the possibility of error remains and improvements<br />
are possible.<br />
Please feel free to submit any comments regarding errors or incomplete information<br />
to <strong>Moog</strong>.<br />
<strong>Moog</strong> does not offer any guarantee that the contents conform to applicable<br />
legal regulations nor does <strong>Moog</strong> accept any liability for incorrect or incomplete<br />
information and the consequences thereof.<br />
1.1.3 Completeness<br />
This manual is complete only when used in conjunction with the product related<br />
hardware and software documentation required for the relevant application.<br />
1.1.4 Place of Storage<br />
This manual and all other associated documentation for hardware and software<br />
must always be kept in a location where they will be readily accessible<br />
and close to the M3000 ® automation system and M3000 ® modules or the<br />
equipment in which they are installed.<br />
About this <strong>Manual</strong><br />
Using M3000 ® Safely<br />
(Prerequisites)<br />
Reservation of Changes<br />
and Validity for this<br />
<strong>Manual</strong><br />
Exclusion of Liability for<br />
this <strong>Manual</strong><br />
Completeness of this<br />
<strong>Manual</strong><br />
Place of Storage<br />
for this <strong>Manual</strong><br />
© <strong>Moog</strong> GmbH <strong>User</strong> <strong>Manual</strong> M3000 ® and <strong>MSC</strong> <strong>II</strong> (CA65865-001; Version 1.1, 08/08) 1
1 General Information Selection and Qualification of Personnel<br />
1.2 Selection and Qualification of Personnel<br />
Only qualified users may work with and on the M3000 ® automation system<br />
or M3000 ® modules.<br />
Qualified users are properly trained experts with the required knowledge and<br />
experience. In particular, these experts must have the authorization to bring<br />
into operation, ground, and label devices, systems, and power circuits in accordance<br />
with safety engineering standards. Those people working on a<br />
project must be familiar with safety concepts common in automation.<br />
1.3 Proper Use<br />
The M3000 ® modular automation system is suitable for control applications in<br />
the medium to high end performance ranges.<br />
M3000 ® is designed for use within the overvoltage category defined by<br />
IEC 60364-4-44 for controlling machines and industrial processes in low voltage<br />
systems in which the rated supply voltage does not exceed 1,000 V alternating<br />
current (50/60 Hz) or 1,500 V direct current.<br />
Qualified project planning and design, proper transportation, storage, installation,<br />
and use are required to ensure fault-free, reliable, and safe operation of<br />
M3000 ® .<br />
M3000 ® and M3000 ® modules must not be brought into operation until it has<br />
been ensured that the equipment in which they are installed complies with the<br />
current version of the EU machinery directive.<br />
The M3000 ® automation system and M3000 ® modules may be used only under<br />
the conditions and situations specified in this manual and in the documentation<br />
of the M3000 ® modules.<br />
Any other or more extensive use is not permissible.<br />
The following are also required for proper use:<br />
• Compliance with the requirements detailed in this manual<br />
• Compliance with the requirements of individual M3000 ® module documentation<br />
• Compliance with all of the product related hardware and software documentation<br />
required for the relevant application<br />
• Compliance with the relevant nationally and internationally applicable<br />
regulations, standards, and directives, e.g., the regulations specified by<br />
a professional organization, such as TÜV or VDE<br />
1.3.1 Safety Related <strong>System</strong>s<br />
WARNING As with any electronic automation system, the failure of<br />
certain components when using M3000 ® or M3000 ® modules<br />
might lead to an uncontrolled and/ or unpredictable<br />
operational condition. The user should take into consideration<br />
the system level effects of all types of failures<br />
and implement corresponding safety measures.<br />
Special measures are required to use control technology in safety related<br />
systems.<br />
When planning to use control technology in a safety related system, the user<br />
should seek detailed advice in addition to any available standards or guidelines<br />
for safety installations.<br />
Qualified <strong>User</strong>s<br />
Proper Use<br />
Safety Related <strong>System</strong>s<br />
© <strong>Moog</strong> GmbH <strong>User</strong> <strong>Manual</strong> M3000 ® and <strong>MSC</strong> <strong>II</strong> (CA65865-001; Version 1.1, 08/08) 2
1 General Information Warranty and Liability<br />
1.4 Warranty and Liability<br />
<strong>Moog</strong>'s standard delivery and payment conditions apply. The owner/operator<br />
will have access to these by the time the contract is closed at the latest.<br />
Warranty and liability claims for personal and material damage will be excluded<br />
when they are the result of the following, among others:<br />
• Improper use of the M3000 ® automation system or M3000 ® modules<br />
�-"1.3-Proper Use" on page 2<br />
• Use of the M3000 ® automation system or M3000 ® modules<br />
in a technically imperfect condition<br />
• Use of the M3000 ® automation system or M3000 ® modules<br />
by unqualified users<br />
�-"1.2-Selection and Qualification of Personnel" on page 2<br />
• Failure to comply with this manual, the documentation of the<br />
M3000 ® -modules, or the product related hardware and software<br />
documentation required for the relevant application<br />
• Failure to comply with the relevant nationally and internationally<br />
applicable regulations such as the regulations of a professional<br />
association, the TÜV, or the VDE<br />
• Improper deployment of the M3000 ® automation system or<br />
M3000 ® -modules, such as in a potentially explosive, excessively<br />
warm, or excessively cold environment<br />
• Improper storage, transportation, mounting, removing, connection,<br />
bringing into operation, operation, cleaning, or maintenance of the<br />
M3000 ® automation system or M3000 ® modules<br />
• Storage or transportation of M3000 ® modules or accessories<br />
outside of the original packaging<br />
�-"9-Transportation and Storage" on page 71<br />
• Unauthorized or improperly executed structural changes to the<br />
M3000 ® automation system or M3000 ® modules<br />
• Unauthorized or improperly executed repairs on the M3000 ® automation<br />
system or M3000 ® modules<br />
�-"8.2.2-Repair" on page 70<br />
• Damage due to the intrusion of foreign objects or acts of God.<br />
1.5 Inspection of Delivery<br />
After receiving the delivery, please check the original packaging and its contents<br />
for any damage.<br />
If the packaging or contents exhibit any damage, do not bring the items into<br />
operation. In this case, immediately notify <strong>Moog</strong> or the responsible supplier.<br />
In addition, the packaging should be retained. The packaging might be<br />
needed to enforce damage compensation claims on the transport company.<br />
After taking the delivery, please check whether all items listed on the delivery<br />
docket are present. If anything is missing, immediately notify <strong>Moog</strong> or the responsible<br />
supplier.<br />
It is advisable to retain the original packaging for any future transport or storage<br />
needs.<br />
Exclusion of Warranty and<br />
Liability<br />
Inspection of Delivery<br />
Retain the Original<br />
Packaging<br />
© <strong>Moog</strong> GmbH <strong>User</strong> <strong>Manual</strong> M3000 ® and <strong>MSC</strong> <strong>II</strong> (CA65865-001; Version 1.1, 08/08) 3
1 General Information Environmental Protection<br />
1.6 Environmental Protection<br />
1.6.1 Emissions<br />
M3000 ® modules do not have any harmful emissions when used properly.<br />
1.6.2 Disposal<br />
The applicable disposal regulations must be observed when disposing of<br />
M3000 ® modules!<br />
1.7 Standards<br />
1.7.1 CE Labeling of M3000 ® Modules<br />
1.7.2 IEC 61131-2<br />
All M3000 ® modules comply with the standards specified in<br />
their relevant declaration of conformity.<br />
CE labeling of the M3000 ® modules is based on proper installation<br />
of the automation system with proven electromagnetic<br />
compatibility (EMC).<br />
The M3000 ® automation system and M3000 ® modules comply with the requirements<br />
of IEC 61131-2.<br />
Where technical requirements lead to deviations from the standard,<br />
these are specified in this manual or in the documentation of the relevant<br />
M3000 ® modules.<br />
1.7.3 Electromagnetic Compatibility (EMC)<br />
M3000 ® modules comply with the requirements and protection targets of the<br />
EU directive 89/336/EEC “Electromagnetic Compatibility” (EMC directive)<br />
and comply with the harmonized European standards (EN) that were published<br />
in the Official Journals of the European Union for programmable controllers.<br />
Especially important are the rules for proper EMC wiring in cabinets and<br />
buildings according to IEC 61131-4. Installation in metal, grounded cabinets<br />
is preferred.<br />
M3000 ® modules are designed for use under normal operating conditions in<br />
industrial environments and comply with the following standards:<br />
• DINEN61000-6-2<br />
• DINEN61000-6-4<br />
If suitable additional measures are taken, M3000 ® modules may also be employed<br />
in residential, commercial and light-industrial environments in compliance<br />
with the following standards:<br />
• DINEN61000-6-1<br />
• DINEN61000-6-3<br />
Suitable additional measures:<br />
�-"4.2-Use in Special Environments" on page 28<br />
Environmental Protection:<br />
Emissions<br />
Environmental Protection:<br />
Disposal<br />
CE Labeling of M3000 ®<br />
Modules<br />
M3000 ® and M3000 ®<br />
Modules Comply with<br />
IEC 61131-2<br />
Electromagnetic<br />
Compatibility (EMC)<br />
© <strong>Moog</strong> GmbH <strong>User</strong> <strong>Manual</strong> M3000 ® and <strong>MSC</strong> <strong>II</strong> (CA65865-001; Version 1.1, 08/08) 4
1 General Information Trademarks<br />
If the system does not comply with the requirements of DIN EN 61000-6-1<br />
and DIN EN 61000-6-3, despite the additional measures, M3000 ® modules<br />
must not be used in residential, commercial and light-industrial environments.<br />
EMC conformity may be presumed only under the following conditions:<br />
• Sufficient shielding<br />
• Mounting of the DIN rail module onto a DIN top-hat rail that is attached to<br />
an electrically conductive, grounded mounting plate<br />
� figure-17 on page 31<br />
<strong>MSC</strong> <strong>II</strong> and extension modules must be powered from a power supply with<br />
SELV (Safety Extra-Low Voltage) according to DIN EN 60950-1. Therefore<br />
the EU low voltage directive is not relevant for the M3000 ® automation system<br />
because the specified voltage levels lie below the limits.<br />
1.8 Trademarks<br />
<strong>Moog</strong> and <strong>Moog</strong> Authentic Repair are registered trademarks of <strong>Moog</strong> Inc.<br />
and its subsidiaries.<br />
M3000 ® is a trademark of <strong>Moog</strong> GmbH that is registered in the EU.<br />
All product and company names mentioned in this manual might be protected<br />
trademarks or brands of the relevant manufacturer.<br />
The absence of the symbols ® or does not indicate that the name is<br />
free from trademark protection.<br />
1.9 Software Copyrights<br />
The software that is installed on M3000 ® products at the time of delivery is<br />
the property of the manufacturer. At the time of delivery, every piece of installed<br />
software is covered by copyright protection. It may be reproduced only<br />
with the approval of the manufacturer or in accordance with the license<br />
agreements.<br />
Trademarks<br />
Software Copyrights<br />
© <strong>Moog</strong> GmbH <strong>User</strong> <strong>Manual</strong> M3000 ® and <strong>MSC</strong> <strong>II</strong> (CA65865-001; Version 1.1, 08/08) 5
2 Safety Instructions Typographical Conventions<br />
2 Safety Instructions<br />
This chapter summarizes the most important safety instructions. When handling<br />
the M3000 ® automation system or M3000 ® modules the safety instructions<br />
in the other chapters of this manual must be followed as well as the<br />
safety instructions in the product related hardware and software documentation<br />
required for the specific application.<br />
Following the safety instructions helps to avoid accidents, faults, and<br />
material damage!<br />
2.1 Typographical Conventions<br />
The following symbols and styles are used for identifying the different types of<br />
safety instructions:<br />
DANGER Identifies safety instructions that are intended to warn of<br />
an immediate and impending danger to life and limb or<br />
major property damage.<br />
Failure to observe these safety instructions will lead inevitably<br />
to death, serious personal injury (disablement)<br />
or major property damage!<br />
WARNING Identifies safety instructions that are intended to warn of<br />
potential danger to life and limb or the potential for major<br />
property damage.<br />
Failure to observe these safety instructions might lead<br />
to death, serious personal injury (disablement) or major<br />
property damage!<br />
CAUTION Identifies safety instructions that are intended to warn of<br />
slight personal injury or minor property damage.<br />
Failure to observe these safety instructions might lead to<br />
slight personal injury or minor property damage.<br />
Additional typographical conventions:<br />
�-"12.1-Typographical Conventions" on page 124<br />
2.2 Safety Instructions<br />
2.2.1 Safety Related <strong>System</strong>s<br />
WARNING As with any electronic automation system, the failure of<br />
certain components when using M3000 ® or M3000 ® modules<br />
might lead to an uncontrolled and/ or unpredictable<br />
operational condition. The user should take into consideration<br />
the system level effects of all types of failures<br />
and implement corresponding safety measures.<br />
More on this subject: �-"1.3.1-Safety Related <strong>System</strong>s" on page 2<br />
Safety Instructions:<br />
Typographical<br />
Conventions<br />
Safety Instructions: Safety<br />
Related <strong>System</strong>s<br />
© <strong>Moog</strong> GmbH <strong>User</strong> <strong>Manual</strong> M3000 ® and <strong>MSC</strong> <strong>II</strong> (CA65865-001; Version 1.1, 08/08) 6
2 Safety Instructions Safety Instructions<br />
2.2.2 Environmental Conditions<br />
WARNING Maintain under all circumstances the required environmental<br />
conditions specified for the M3000 ® automation<br />
system or M3000 ® modules.<br />
This ensures fault-free, reliable, and safe operation.<br />
WARNING The PC on which tools such as MACS development environment<br />
are installed must be suitable for the environmental<br />
conditions in which it will operate.<br />
This ensures fault-free, reliable, and safe operation.<br />
WARNING It is not permissible to operate the M3000 ® automation<br />
system or M3000 ® modules in a potentially explosive<br />
environment.<br />
WARNING The M3000 ® automation system and M3000 ® modules<br />
must not come into direct contact with liquids, except<br />
where explicitely specified. Danger of short-circuit!<br />
If they do come into direct contact with a liquid, immediately<br />
disconnect the power supply! Before bringing the system<br />
back into operation, it is essential that all affected components<br />
are completely dry and have been inspected by a suitably<br />
qualified technician.<br />
More on this subject:<br />
�-"4-Environmental Conditions" on page 27<br />
�-"10.2.2-Environmental Conditions" on page 74<br />
2.2.3 ESD<br />
WARNING Protect the M3000 ® automation system, M3000 ® modules,<br />
and the license key from electrostatic discharges!<br />
Electrostatic discharges might damage the device's internal<br />
components or delete the device's internal memory.<br />
Safety Instructions:<br />
Environmental Conditions<br />
Safety Instructions: ESD<br />
© <strong>Moog</strong> GmbH <strong>User</strong> <strong>Manual</strong> M3000 ® and <strong>MSC</strong> <strong>II</strong> (CA65865-001; Version 1.1, 08/08) 7
2 Safety Instructions Safety Instructions<br />
2.2.4 Project Planning and Installation<br />
WARNING The vent holes of M3000 ® modules facilitate convection<br />
cooling and must never be covered!<br />
Covered vent holes might result in overheating and fire.<br />
WARNING No work of any kind, such as mounting, removing, wiring,<br />
or repairs to the M3000 ® automation system or<br />
M3000 ® modules may be performed while the automation<br />
system or the modules are in operation!<br />
There is a danger of:<br />
• Uncontrolled movements<br />
• Permanent damage<br />
• Malfunctions<br />
Before performing any work on the M3000 ® automation system<br />
or M3000 ® modules, it is essential that the system is<br />
stopped and the power supply is disconnected.<br />
Therefore, all power supplies must be switched off, including<br />
those from attached peripherals such as externally supplied<br />
transmitters, programming devices, etc.!<br />
WARNING M3000 ® modules must be protected from overvoltages<br />
and/or reverse energization from the sensor to the module!<br />
There is a danger of:<br />
• Permanent damage by overheating or fire<br />
• Malfunctions<br />
M3000 ® modules must have the correct voltage, polarity, and<br />
terminal assignments.<br />
WARNING The internal electronics of M3000 ® modules and attached<br />
sensors must be supplied with power from a permanently<br />
connected (unswitched) power supply that<br />
cannot be individually switched off, without switching<br />
off the module's power supply.<br />
If a switched power supply is used, such as when there are<br />
intermediate switching devices (emergency stops, manual<br />
operators, etc.), the following problems might arise, depending<br />
on the state of the power supply for the internal electronics<br />
of the module and sensors (�-table-3 on page 41):<br />
• Reverse energization from sensor to module<br />
• Invalid sensor data<br />
Safety Instructions:<br />
Project Planning and<br />
Installation<br />
© <strong>Moog</strong> GmbH <strong>User</strong> <strong>Manual</strong> M3000 ® and <strong>MSC</strong> <strong>II</strong> (CA65865-001; Version 1.1, 08/08) 8
2 Safety Instructions Safety Instructions<br />
WARNING Sensors that are connected to digital inputs of M3000 ®<br />
modules with several I/O groups, such as <strong>MSC</strong> I, QDIO,<br />
or RDIO, must under all conditions be supplied from the<br />
same power supply as the corresponding I/O-group to<br />
which the sensor is connected!<br />
Otherwise, if the power supply for the internal electronics of<br />
the module is switched off, there might be reverse energization<br />
from the sensor to the module.<br />
There is a danger of:<br />
• Uncontrolled movements<br />
• Fault or failure of a manual control<br />
• Permanent damage to the module<br />
• Malfunctions<br />
Digital I/Os of <strong>MSC</strong> <strong>II</strong> and MSD Motion Controller are protected<br />
against reverse energization.<br />
More on these subjects:<br />
�-"5-Mechanical Installation" on page 29 or<br />
�-"6-Project Planning and Installation" on page 37<br />
2.2.5 Shutdown and Service<br />
WARNING To avoid damage to M3000 ® modules or accessories,<br />
cleaning, maintenance, and repair tasks may be performed<br />
only by <strong>Moog</strong> or <strong>Moog</strong>'s authorized service<br />
agents.<br />
Warranty and liability claims for personal and material damage<br />
are excluded when, among other reasons, they are due<br />
to unauthorized repairs or other unauthorized interventions.<br />
�-"1.4-Warranty and Liability" on page 3<br />
WARNING No work of any kind, such as mounting, removing, wiring,<br />
or repairs to the M3000 ® automation system or<br />
M3000 ® modules may be performed while the automation<br />
system or the modules are in operation!<br />
There is a danger of:<br />
• Uncontrolled movements<br />
• Permanent damage<br />
• Malfunctions<br />
Before performing any work on the M3000 ® automation system<br />
or M3000 ® modules, it is essential that the system is<br />
stopped and the power supply is disconnected.<br />
Therefore, all power supplies must be switched off, including<br />
those from attached peripherals such as externally supplied<br />
transmitters, programming devices, etc.!<br />
Safety Instructions:<br />
Shutdown and Service<br />
© <strong>Moog</strong> GmbH <strong>User</strong> <strong>Manual</strong> M3000 ® and <strong>MSC</strong> <strong>II</strong> (CA65865-001; Version 1.1, 08/08) 9
2 Safety Instructions Safety Instructions<br />
WARNING The M3000 ® automation system and M3000 ® modules<br />
must not come into direct contact with liquids, except<br />
where explicitely specified. Danger of short-circuit!<br />
If they do come into direct contact with a liquid, immediately<br />
disconnect the power supply! Before bringing the system<br />
back into operation, it is essential that all affected components<br />
are completely dry and have been inspected by a suitably<br />
qualified technician.<br />
WARNING If an M3000 ® module is to be taken out of operation, the<br />
entire system must always be shut down and disconnected<br />
from all power supplies.<br />
Therefore, all power supplies must be switched off, including<br />
those from attached peripherals such as externally<br />
supplied transmitters, programming devices, etc.!<br />
The M3000 ® module must be protected against unintentional<br />
restarting!<br />
If the M3000 ® module is connected to other devices and/ or<br />
facilities, always consider the full consequences and take appropriate<br />
precautions before switching off the module.<br />
More on these subjects:<br />
�-"8-Shutdown and Service" on page 69<br />
2.2.6 Transportation and Storage<br />
WARNING Maintain, under all circumstances, the required environmental<br />
conditions specified for transportation and storage<br />
of the M3000 ® automation system or M3000 ® modules.<br />
�-"9.1-Environmental Conditions" on page 71<br />
This ensures fault-free, reliable, and safe operation.<br />
More on this subject: �-"9-Transportation and Storage" on page 71<br />
Safety Instructions:<br />
Transportation<br />
and Storage<br />
© <strong>Moog</strong> GmbH <strong>User</strong> <strong>Manual</strong> M3000 ® and <strong>MSC</strong> <strong>II</strong> (CA65865-001; Version 1.1, 08/08) 10
2 Safety Instructions Safety Instructions<br />
2.2.7 Communication Between <strong>MSC</strong> <strong>II</strong> and MACS<br />
WARNING The <strong>MSC</strong> <strong>II</strong> control module's operational state can be altered<br />
with the MACS development environment when the<br />
<strong>MSC</strong> <strong>II</strong> control module is connected online with MACS.<br />
This can be done by means of the following actions, for example:<br />
• Stopping or resetting the program<br />
• Setting breakpoints<br />
• Activating the single step mode<br />
• Downloading application programs<br />
• Writing or forcing values<br />
Therefore, the operator must always consider the effects and<br />
take appropriate precautions before altering the operational<br />
state of the <strong>MSC</strong> <strong>II</strong> control module with MACS.<br />
More on this subject:<br />
�-"10.5-Programming and Configuration" on page 84<br />
2.2.8 License Key of the <strong>MSC</strong> <strong>II</strong><br />
WARNING The license key of the <strong>MSC</strong> <strong>II</strong> control module must be<br />
protected from electrostatic discharges!<br />
Electrical discharges might damage the license key or delete<br />
the contents of the license key's memory.<br />
WARNING The license key may be inserted or removed only when<br />
the <strong>MSC</strong> <strong>II</strong> control module is powered down!<br />
Attempting to insert or remove the license key during operation<br />
might damage the license key or the <strong>MSC</strong> <strong>II</strong> control module<br />
permanently.<br />
WARNING The license key must always remain inserted while the<br />
<strong>MSC</strong> <strong>II</strong> control module is in operation. Otherwise, the<br />
<strong>MSC</strong> <strong>II</strong> control module will not work.<br />
If the license key is removed during operation, the application<br />
program will stop after a few minutes. If the <strong>MSC</strong> <strong>II</strong> control<br />
module is connected online to the MACS development environment,<br />
a corresponding error message will appear in<br />
MACS.<br />
In addition, the digital output 'Outputs Enabled' will be<br />
switched to the 0 state, thereby disabling all of the <strong>MSC</strong> <strong>II</strong><br />
control module's digital outputs and terminating fieldbus communication<br />
and E-bus communication.<br />
�-"10.17.2-'Outputs Enabled' Output (LED «OutEN»)" on<br />
page 111<br />
After switching off the <strong>MSC</strong> <strong>II</strong> control module and inserting<br />
the license key, the <strong>MSC</strong> <strong>II</strong> control module can be brought<br />
back into operation.<br />
More on this subject: �-"10.6-License Key" on page 85<br />
Safety Instructions:<br />
Communication Between<br />
<strong>MSC</strong> <strong>II</strong> and MACS<br />
Safety Instructions:<br />
License Key of the<br />
<strong>MSC</strong> <strong>II</strong><br />
© <strong>Moog</strong> GmbH <strong>User</strong> <strong>Manual</strong> M3000 ® and <strong>MSC</strong> <strong>II</strong> (CA65865-001; Version 1.1, 08/08) 11
2 Safety Instructions Safety Instructions<br />
2.2.9 Run/Stop/Reset<br />
WARNING If the most recent status in the online mode (MACS<br />
logged in) was 'Run' before the <strong>MSC</strong> <strong>II</strong> control module<br />
was switched off or reset, the boot project will always be<br />
started after the <strong>MSC</strong> <strong>II</strong> control module is switched back<br />
on or reset.<br />
This will occur regardless of which application program was<br />
previously running.<br />
In other words, the application program that will be started<br />
automatically after the <strong>MSC</strong> <strong>II</strong> control module is switched on<br />
or reset might be different from the application program that<br />
was executing immediately prior.<br />
More on this subject: �-"10.7-Run/Stop/Reset Switch" on page 88<br />
2.2.10 Switching Back on or Resetting the <strong>MSC</strong> <strong>II</strong><br />
WARNING If the most recent status in the online mode (MACS<br />
logged in) was 'Run' before the <strong>MSC</strong> <strong>II</strong> control module<br />
was switched off or reset, the boot project will always be<br />
started after the <strong>MSC</strong> <strong>II</strong> control module is switched back<br />
on or reset.<br />
This will occur regardless of which application program was<br />
previously running.<br />
In other words, the application program that will be started<br />
automatically after the <strong>MSC</strong> <strong>II</strong> control module is switched on<br />
or reset might be different from the application program that<br />
was executing immediately prior.<br />
More on this subject:<br />
�-"10.8.1-Behavior at Switching on and Switching off" on page 89<br />
2.2.11 'Outputs Enabled' Output of the <strong>MSC</strong> <strong>II</strong><br />
WARNING If there is a defect in an output stage, the 'Outputs Enabled'<br />
signal will not necessarily shut down all of the<br />
outputs securely.<br />
More on this subject:<br />
�-"10.17.2-'Outputs Enabled' Output (LED «OutEN»)" on page 111<br />
Safety Instructions:<br />
Run/Stop/Reset<br />
Safety Instructions:<br />
Switching Back on or<br />
Resetting the <strong>MSC</strong> <strong>II</strong><br />
Safety Instructions:<br />
'Outputs Enabled' Output<br />
of the <strong>MSC</strong> <strong>II</strong><br />
© <strong>Moog</strong> GmbH <strong>User</strong> <strong>Manual</strong> M3000 ® and <strong>MSC</strong> <strong>II</strong> (CA65865-001; Version 1.1, 08/08) 12
3 Short M3000 ® <strong>System</strong> Overview<br />
3 Short M3000 ® <strong>System</strong> Overview<br />
The M3000 ® automation system comprises the following hardware and software<br />
components:<br />
• <strong>MSC</strong> <strong>II</strong> starter kit<br />
Complete package including everything needed to get started with<br />
<strong>MSC</strong> <strong>II</strong><br />
�-"3.2-<strong>MSC</strong> <strong>II</strong> Starter Kit" on page 15<br />
• M3000 ® modules<br />
– <strong>MSC</strong> I (<strong>Moog</strong> <strong>Servo</strong> Controller)<br />
Control module for DIN top-hat rail mounting<br />
�-"3.3.1-<strong>MSC</strong> I" on page 16<br />
– <strong>MSC</strong> <strong>II</strong> (<strong>Moog</strong> <strong>Servo</strong> Controller)<br />
Control module for DIN top-hat rail mounting<br />
�-"3.3.2-<strong>MSC</strong> <strong>II</strong>" on page 17<br />
– QDIO 16/16<br />
Digital I/O extension module for local extension of the inputs and<br />
outputs of <strong>MSC</strong> I or <strong>MSC</strong> <strong>II</strong> (connection over E-bus)<br />
�-"3.3.3.1-QDIO and QAIO" on page 18<br />
– QAIO 2/2<br />
Analog I/O extension module for local extension of the inputs and<br />
outputs of <strong>MSC</strong> I or <strong>MSC</strong> <strong>II</strong> (connection over E-bus)<br />
�-"3.3.3.1-QDIO and QAIO" on page 18<br />
– QAIO 16/4<br />
Analog I/O extension module for local extension of the inputs and<br />
outputs of <strong>MSC</strong> I or <strong>MSC</strong> <strong>II</strong> (connection over E-bus)<br />
�-"3.3.3.1-QDIO and QAIO" on page 18<br />
– QEBUS-CAN<br />
CAN extension module for <strong>MSC</strong> <strong>II</strong> which can be used to make available<br />
the LocalCAN bus of an E-bus group for external CAN bus network<br />
stations (over a D-sub front panel connector)<br />
�-"3.3.3.2-QEBUS-CAN" on page 19<br />
– RDIO<br />
Remote module with digital I/Os and CANopen interface (connection<br />
over CAN bus)<br />
�-"3.3.4.1-RDIO" on page 20<br />
– RDISP<br />
Display and operating terminal with TIA/EIA 232 and CANopen interface<br />
(connection over CAN bus)<br />
�-"3.3.4.2-RDISP" on page 20<br />
– DialogController<br />
Displays with TFT technology and touch screen. Programmable<br />
with MACS development environment. Data exchange via Ethernet<br />
with <strong>MSC</strong> <strong>II</strong> or MSD Motion Controller.<br />
�-"3.3.4.3-DialogController" on page 21<br />
– MSD Motion Controller<br />
Motion control module for MSD <strong>Servo</strong>drives<br />
�-"3.3.5-MSD Motion Controller" on page 22<br />
– MSD <strong>Servo</strong>drive<br />
Modular Multi-Axis Programmable Motion Control <strong>Servo</strong>drive<br />
�-"3.3.6-MSD <strong>Servo</strong>drive" on page 23<br />
• License keys<br />
Hardware keys necessary for the operation of the <strong>MSC</strong> I, <strong>MSC</strong> <strong>II</strong> and<br />
MSD Motion Controller.<br />
�-"3.4-License Key" on page 24<br />
Short M3000 ®<br />
<strong>System</strong> Overview<br />
© <strong>Moog</strong> GmbH <strong>User</strong> <strong>Manual</strong> M3000 ® and <strong>MSC</strong> <strong>II</strong> (CA65865-001; Version 1.1, 08/08) 13
3 Short M3000 ® <strong>System</strong> Overview M3000 ® <strong>System</strong> Architecture<br />
• MACS (<strong>Moog</strong> Axis Control Software)<br />
Development environment according to IEC 61131 for solving complex<br />
control tasks<br />
�-"3.5-Application Programs" on page 25<br />
• MACS HMI (<strong>Moog</strong> Axis Control Software Human Machine Interface)<br />
Visualization package which can be run without MACS<br />
�-"3.6.1-MACS HMI Visualization Package" on page 26<br />
The M3000 ® modules mentioned here represent only a part of <strong>Moog</strong>'s<br />
current product range. In addition to other M3000 ® modules, <strong>Moog</strong>'s<br />
product range includes a large variety of accessories.<br />
�-"11-Product Range" on page 114<br />
3.1 M3000 ® <strong>System</strong> Architecture<br />
The M3000 ® automation system has the hardware and software structure<br />
necessary for modular and flexible automation solutions with distributed intelligence.<br />
The <strong>MSC</strong> <strong>II</strong> control module can use an Ethernet connection (LAN, company<br />
network, peer-to-peer connection) to communicate with another controller,<br />
development environment, or visualization package.<br />
�-"7.1-Ethernet" on page 47<br />
�-"10.5.1-Communication Between <strong>MSC</strong> <strong>II</strong> and MACS" on page 84<br />
�-"10.5.1.1-Ethernet Communication Interface" on page 84<br />
To create real time capable applications, even in distributed systems and to<br />
give the application a better structure, M3000 ® can also be divided hierarchically.<br />
�-"7.5-CAN Bus and CANopen" on page 55<br />
WideCAN and LocalCAN are two equal, mutually independent CAN bus interfaces.<br />
In a typical application they are used as follows:<br />
• WideCAN can be used for networking of individual control groups or remote<br />
modules. Usually, WideCAN is used for synchronization and data<br />
exchange between the control groups and operating stations of a machine<br />
or system.<br />
�-"3.3.4-R-Modules (Remote Modules)" on page 19<br />
�-"7.7.4-WideCAN Bus Groups" on page 67<br />
In addition, the WideCAN network can integrate other components with<br />
a CAN bus or CANopen interface, such as motor controllers, hydraulic<br />
valves, and radial piston pumps.<br />
• LocalCAN connects the DIN rail modules within a LocalCAN bus group<br />
and, if applicable, the QEBUS-CAN to the connected LocalCAN bus<br />
groups or CAN sensors/actuators.<br />
�-"3.3.3.2-QEBUS-CAN" on page 19<br />
�-"7.7.3-LocalCAN Bus Groups" on page 66<br />
M3000 ® <strong>System</strong><br />
Architecture<br />
Ethernet<br />
CAN Bus<br />
WideCAN<br />
LocalCAN<br />
© <strong>Moog</strong> GmbH <strong>User</strong> <strong>Manual</strong> M3000 ® and <strong>MSC</strong> <strong>II</strong> (CA65865-001; Version 1.1, 08/08) 14
3 Short M3000 ® <strong>System</strong> Overview <strong>MSC</strong> <strong>II</strong> Starter Kit<br />
3.2 <strong>MSC</strong> <strong>II</strong> Starter Kit<br />
Figure 1: <strong>MSC</strong> <strong>II</strong> Starter Kit<br />
The <strong>MSC</strong> <strong>II</strong> starter kit is available in two versions:<br />
• <strong>MSC</strong> <strong>II</strong> with Profibus-DP slave<br />
• <strong>MSC</strong> <strong>II</strong> with dual EtherCAT master<br />
It includes everything needed to get started:<br />
• <strong>MSC</strong> <strong>II</strong><br />
• Power supply 24 V 10 A<br />
• License key, green<br />
• QDIO 16/16-0,5<br />
• MACS development environment<br />
• Software maintenance contract<br />
• Crossed Ethernet interface cable, 10 m (10.94 yd)<br />
• CAN bus interface cable, 3 m (3.28 yd)<br />
• 6 Plug-in terminal strips with screw terminals, 18 pole<br />
• 2 Plug-in terminal strip with screw terminals, 9 pole<br />
• 4 Plug-in terminal strips with spring power clamp, 10 pole<br />
The included DIN rail modules <strong>MSC</strong> <strong>II</strong> and QDIO are mounted (together with<br />
the power supply) on a single mounting plate.<br />
A suitable power cord is the only additional item required to facilitate connection<br />
to the power source.<br />
<strong>MSC</strong> <strong>II</strong> Starter Kit<br />
© <strong>Moog</strong> GmbH <strong>User</strong> <strong>Manual</strong> M3000 ® and <strong>MSC</strong> <strong>II</strong> (CA65865-001; Version 1.1, 08/08) 15
3 Short M3000 ® <strong>System</strong> Overview M3000 ® Modules<br />
3.3 M3000 ® Modules<br />
The M3000 ® modules mentioned here represent only a part of <strong>Moog</strong>'s<br />
current product range. In addition to other M3000 ® modules, <strong>Moog</strong>'s<br />
product range includes a large variety of accessories.<br />
�-"11-Product Range" on page 114<br />
3.3.1 <strong>MSC</strong> I<br />
Figure 2: <strong>MSC</strong> I Control Module<br />
The <strong>MSC</strong> I digital control module is a fully programmable multi-axis controller.<br />
The inputs and outputs of the <strong>MSC</strong> I can be extended locally by attaching<br />
Q-modules. The <strong>MSC</strong> I and the attached modules then form an E-bus group.<br />
<strong>MSC</strong> I and Q-modules within E-bus groups communicate over the internal<br />
E-bus.<br />
The <strong>MSC</strong> I is programmed and configured with the MACS development environment<br />
(complies with IEC 61131).<br />
�-"3.5-Application Programs" on page 25<br />
<strong>MSC</strong> I<br />
© <strong>Moog</strong> GmbH <strong>User</strong> <strong>Manual</strong> M3000 ® and <strong>MSC</strong> <strong>II</strong> (CA65865-001; Version 1.1, 08/08) 16
3 Short M3000 ® <strong>System</strong> Overview M3000 ® Modules<br />
3.3.2 <strong>MSC</strong> <strong>II</strong><br />
Figure 3: <strong>MSC</strong> <strong>II</strong> Control Module<br />
The <strong>MSC</strong> <strong>II</strong> digital control module is a fully programmable multi-axis controller.<br />
The inputs and outputs of the <strong>MSC</strong> <strong>II</strong> can be extended locally by attaching<br />
Q-modules. The <strong>MSC</strong> <strong>II</strong> and the attached modules then form an E-bus group.<br />
<strong>MSC</strong> <strong>II</strong>s and Q-modules within E-bus groups communicate over the internal<br />
E-bus.<br />
�-"7.7.2-E-Bus Groups" on page 65<br />
The <strong>MSC</strong> <strong>II</strong> is programmed and configured with the MACS development environment<br />
(complies with IEC 61131).<br />
�-"3.5-Application Programs" on page 25<br />
Detailed information about the <strong>MSC</strong> <strong>II</strong>:<br />
�-"10-<strong>MSC</strong> <strong>II</strong> (<strong>Moog</strong> <strong>Servo</strong> Controller)" on page 72<br />
3.3.3 Q-Modules<br />
Q-Modules are I/O extension modules for <strong>MSC</strong> I and <strong>MSC</strong> <strong>II</strong>.<br />
The following Q-modules are available from <strong>Moog</strong>:<br />
• QDIO 16/16 (digital I/O extension module)<br />
�-"3.3.3.1-QDIO and QAIO" on page 18<br />
• QAIO 2/2 (analog I/O extension module)<br />
�-"3.3.3.1-QDIO and QAIO" on page 18<br />
• QAIO 16/4 (analog I/O extension module)<br />
�-"3.3.3.1-QDIO and QAIO" on page 18<br />
• QEBUS-CAN (CAN extension module)<br />
�-"3.3.3.2-QEBUS-CAN" on page 19<br />
Q-modules can be used only as E-bus slaves within E-bus groups.<br />
�-"7.7.2-E-Bus Groups" on page 65<br />
When using an RDIO as E-bus master, only QDIOs can be used as E-bus<br />
slaves.<br />
�-"7.6.2.1-E-Bus Master and E-Bus Slaves" on page 61<br />
Refer to the Q-modules' documentation for more detailed information.<br />
<strong>MSC</strong> <strong>II</strong><br />
Q-Modules<br />
© <strong>Moog</strong> GmbH <strong>User</strong> <strong>Manual</strong> M3000 ® and <strong>MSC</strong> <strong>II</strong> (CA65865-001; Version 1.1, 08/08) 17
3 Short M3000 ® <strong>System</strong> Overview M3000 ® Modules<br />
3.3.3.1 QDIO and QAIO<br />
Figure 4: QDIO 16/16 Figure 5: QAIO 2/2<br />
Figure 6: QAIO 16/4<br />
QDIO and QAIO I/O extension modules can be used to locally extend the inputs<br />
and outputs of an <strong>MSC</strong> I or <strong>MSC</strong> <strong>II</strong>. They have no internal intelligence.<br />
Instead, the <strong>MSC</strong> I or <strong>MSC</strong> <strong>II</strong> actuates them via I/O operation directly over the<br />
internal E-bus.<br />
QDIO 16/16-0,5 is a digital I/O extension module with 16-digital inputs and<br />
16-individually configurable digital I/Os.<br />
QDIO 16/16-0,5 provides positive switching inputs and I/Os.<br />
QDIO 16/16-0,5N provides zero switching inputs and I/Os.<br />
QAIO 2/2 is an analog I/O extension module with 2 analog inputs (each configurable<br />
as ±10 V, ±10 mA, 4-20 mA) and 2 analog voltage outputs-(±10 V<br />
additionally each configurable as ±10 mA, 4-20 mA, ±50 mA).<br />
QAIO 16/4 is an analog I/O extension module with 16-analog inputs and<br />
4-analog voltage outputs-(±10 V).<br />
QAIO 16/4-V provides 16-voltage inputs (±10 V).<br />
QAIO 16/4-A provides 16-current inputs (0–20 mA).<br />
QDIO and QAIO<br />
QDIO 16/16-0,5<br />
QAIO 2/2<br />
QAIO 16/4<br />
© <strong>Moog</strong> GmbH <strong>User</strong> <strong>Manual</strong> M3000 ® and <strong>MSC</strong> <strong>II</strong> (CA65865-001; Version 1.1, 08/08) 18
3 Short M3000 ® <strong>System</strong> Overview M3000 ® Modules<br />
3.3.3.2 QEBUS-CAN<br />
Figure 7: QEBUS-CAN Extension Module<br />
QEBUS-CAN is a CAN extension module which can be used to make the<br />
LocalCAN bus of an E-bus group available for external CAN bus network stations<br />
(over a D-sub front panel connector).<br />
3.3.4 R-Modules (Remote Modules)<br />
R-Modules are extension modules with CANopen interface.<br />
The following R-modules are available from <strong>Moog</strong>:<br />
• RDIO (remote module with digital I/Os and CANopen interface)<br />
�-"3.3.4.1-RDIO" on page 20<br />
• RDISP (display and operating terminal)<br />
�-"3.3.4.2-RDISP" on page 20<br />
IEC 61131 application programs cannot run on R-modules.<br />
R-modules connect to other network stations over the CAN bus.<br />
�-"7.4.1-TIA/EIA 232 Interface Cables" on page 54<br />
Refer to the R-modules' documentation for more detailed information.<br />
QEBUS-CAN<br />
R-Modules<br />
(Remote Modules)<br />
© <strong>Moog</strong> GmbH <strong>User</strong> <strong>Manual</strong> M3000 ® and <strong>MSC</strong> <strong>II</strong> (CA65865-001; Version 1.1, 08/08) 19
3 Short M3000 ® <strong>System</strong> Overview M3000 ® Modules<br />
3.3.4.1 RDIO<br />
Figure 8: RDIO 16/16-0,5 Remote I/O Module<br />
RDIO is a remote module with digital I/Os and CANopen interface. RDIOs<br />
can be parameterized as a CANopen slave according to CiA DS 401.<br />
RDIO 16/16-0,5 provides 16-positive switching digital inputs and 16 positive<br />
switching digital I/Os.<br />
3.3.4.2 RDISP<br />
Figure 9: RDISP 22 Display and Operating Terminal<br />
RDISP is a versatile display and operating terminal with TIA/EIA 232 and<br />
CANopen interface as well as a graphical LCD display and function keys<br />
which can be labelled. A slip of paper can be inserted below the keys for labeling<br />
purposes.<br />
RDISP 22 provides 22-function keys and a display with max. 8 lines of<br />
40-characters each or random graphics.<br />
Dimensions of RDISP 22:<br />
187mm×120mm×56mm (7.36in×4.72in×2.2in)<br />
The CPRDISP software (needed to program and configure the RDISP)<br />
is not included with RDISP. CPRDISP is available from <strong>Moog</strong> as an accessory.<br />
�-"11.5.2-Software for R-Modules" on page 119<br />
© <strong>Moog</strong> GmbH <strong>User</strong> <strong>Manual</strong> M3000 ® and <strong>MSC</strong> <strong>II</strong> (CA65865-001; Version 1.1, 08/08) 20<br />
RDIO<br />
RDIO 16/16-0,5<br />
RDISP<br />
RDISP 22<br />
CPRDISP
3 Short M3000 ® <strong>System</strong> Overview M3000 ® Modules<br />
3.3.4.3 DialogController<br />
Figure 10: DialogController<br />
The DialogController is freely programmable with the <strong>Moog</strong> Axis Control Software<br />
(MACS) development environment. The predefined visualization elements<br />
such as buttons, bar graphs, meters, tables and histograms makes it<br />
easy to create visualization screens.<br />
In addition it offers TFT technology for brilliant colors, fanless operation,<br />
Ethernet communication for programming and operation.<br />
It is available in three sizes:<br />
• DialogController 5.7 "<br />
Color TFT, ¼ VGA resolution, 320 x 240 pixels with touch screen<br />
Dimensions: W x D x H: 194 x 172 x 52 mm / 7.6 x 6.8 x 2.0 inch<br />
• DialogController 10.4 "<br />
Color TFT, VGA resolution, 640 x 480 pixels with touch screen<br />
Dimensions: W x D x H: 360 x 260 x 77 mm / 14.2 x 10.2 x 3.0 inch<br />
• Display 12.1 "<br />
Color TFT, SVGA resolution, 800 x 600 pixels with touch screen<br />
Dimensions: W x D x H: 440 x 300 x 77 mm / 17.3 x 11.8 x 3.0 inch<br />
DialogController<br />
© <strong>Moog</strong> GmbH <strong>User</strong> <strong>Manual</strong> M3000 ® and <strong>MSC</strong> <strong>II</strong> (CA65865-001; Version 1.1, 08/08) 21
3 Short M3000 ® <strong>System</strong> Overview M3000 ® Modules<br />
3.3.5 MSD Motion Controller<br />
Figure 11: MSD Motion Controller<br />
Motion control module for MSD <strong>Servo</strong>drives.<br />
The MSD Motion Controller digital control module is a fully programmable<br />
multi-axis controller.<br />
It can coordinate and synchronize multiple axis e.g. of MSD <strong>Servo</strong>drives and<br />
handle the communication to host computers and other PLC's.<br />
The MSD Motion Controller is programmed and configured with the MACS<br />
development environment (complies with IEC 61131).<br />
MSD Motion Controller<br />
© <strong>Moog</strong> GmbH <strong>User</strong> <strong>Manual</strong> M3000 ® and <strong>MSC</strong> <strong>II</strong> (CA65865-001; Version 1.1, 08/08) 22
3 Short M3000 ® <strong>System</strong> Overview M3000 ® Modules<br />
3.3.6 MSD <strong>Servo</strong>drive<br />
Figure 12: MSD <strong>Servo</strong>drive<br />
Modular Multi-Axis Programmable Motion Control <strong>Servo</strong>drive.<br />
A family of electrical servo drives, available in 6 sizes for currents from 4 to<br />
170 A.<br />
Main features are:<br />
• Controls synchronous motors, asynchronous motors and linear motors.<br />
• Controls current loops (PWM frequencies: 4, 8, 12 and 16 kHz).<br />
• Can close velocity and position control loops.<br />
• Communicates with the MSD Motion Controller via EtherCAT.<br />
• Supports different sensor interfaces.<br />
• Digital I/O's.<br />
3.3.7 Identification<br />
M3000 ® modules can be identified by their nameplate.<br />
Nameplate of the <strong>MSC</strong> <strong>II</strong>: �-"10.18-Nameplate" on page 113<br />
The module's I/O designations are located on the front panel.<br />
Terminal assignment of the <strong>MSC</strong> <strong>II</strong>:<br />
�-"10.4-View of the Module and Terminal Assignment" on page 77<br />
Refer to the relevant documentation for detailed information about the<br />
nameplate and terminal assignment of the other M3000 ® modules.<br />
MSD <strong>Servo</strong>drive<br />
Identification of<br />
M3000 ® Modules<br />
© <strong>Moog</strong> GmbH <strong>User</strong> <strong>Manual</strong> M3000 ® and <strong>MSC</strong> <strong>II</strong> (CA65865-001; Version 1.1, 08/08) 23
3 Short M3000 ® <strong>System</strong> Overview License Key<br />
3.4 License Key<br />
Figure 13: License Key<br />
The license key has to be inserted into the license key slot «LK» of the<br />
<strong>MSC</strong> <strong>II</strong>.<br />
The <strong>MSC</strong> <strong>II</strong> control module does not work without license key.<br />
�-"10.6-License Key" on page 85<br />
The following information is saved in the license key:<br />
• Run-time license of the <strong>MSC</strong> <strong>II</strong> and list of accessible MACS libraries<br />
�-"10.6.1-Run-Time License and Accessible Libraries" on page 85<br />
• CANopen node-ID of the <strong>MSC</strong> <strong>II</strong>'s CAN bus interfaces<br />
�-"10.6.2-CANopen Node-ID and IP Address" on page 86<br />
• IP-address, subnet mask and gateway address of the <strong>MSC</strong> <strong>II</strong>'s Ethernet<br />
interface<br />
�-"10.6.2-CANopen Node-ID and IP Address" on page 86<br />
If the <strong>MSC</strong> <strong>II</strong> is replaced, this information will remain saved in the license key.<br />
If the license key is inserted into a different <strong>MSC</strong> <strong>II</strong>, the run-time license,<br />
CANopen node-ID and IP-address can be used from that <strong>MSC</strong> <strong>II</strong>.<br />
. The extent of the <strong>MSC</strong> <strong>II</strong>'s features depends on the license key used.<br />
�-"11.4-License Keys" on page 118<br />
License Key<br />
© <strong>Moog</strong> GmbH <strong>User</strong> <strong>Manual</strong> M3000 ® and <strong>MSC</strong> <strong>II</strong> (CA65865-001; Version 1.1, 08/08) 24
3 Short M3000 ® <strong>System</strong> Overview Application Programs<br />
3.5 Application Programs<br />
Application programs have to be downloaded onto the <strong>MSC</strong> <strong>II</strong> and started to<br />
be executed by the <strong>MSC</strong> <strong>II</strong>.<br />
The MACS development environment is needed to create executable<br />
IEC 61131 application programs for the <strong>MSC</strong> <strong>II</strong>. With MACS, the application<br />
program can be programmed, compiled, downloaded and started.<br />
�-"3.6-MACS Development Environment" on page 25<br />
�-"10.5.1-Communication Between <strong>MSC</strong> <strong>II</strong> and MACS" on page 84<br />
Application programs can be saved and executed in the <strong>MSC</strong> <strong>II</strong> in the following<br />
manner:<br />
• As a boot project in the flash EEPROM<br />
• In RAM<br />
An application program saved as a boot project will be loaded into RAM<br />
whenever the <strong>MSC</strong> <strong>II</strong>'s power supply is switched on or when the <strong>MSC</strong> <strong>II</strong> is reset.<br />
An application program that is only executed in RAM without being<br />
saved as a boot project will not be saved in the <strong>MSC</strong> <strong>II</strong> when it is<br />
switched off or when the power supply fails or the Run/Stop/Reset<br />
switch is moved to the Reset position.<br />
After the power supply is switched back on or the Run/Stop/Reset switch<br />
is released from the Reset position, the application program must be<br />
downloaded again from the MACS development environment!<br />
Behavior of the <strong>MSC</strong> <strong>II</strong> at switching on and switching off the power supply:<br />
�-"10.8.1-Behavior at Switching on and Switching off" on page 89<br />
3.6 MACS Development Environment<br />
WARNING The PC on which tools such as MACS development environment<br />
are installed must be suitable for the environmental<br />
conditions in which it will operate.<br />
This ensures fault-free, reliable, and safe operation.<br />
MACS must be installed on a personal computer (PC). This PC then represents<br />
the PADT (programming and diagnostic tool) specified in IEC 61131.<br />
Scope of functionality of MACS<br />
• Programming, testing, and optimization of IEC 61131 application<br />
programs<br />
• Documentation of IEC 61131 application programs<br />
• Visualization of IEC 61131 application programs<br />
• Hardware configuration of M3000 ® modules<br />
MACS supports the following programming languages:<br />
• Instruction List (IL)<br />
• Structured Text (ST)<br />
• Ladder Diagram (LD)<br />
• Function Block Diagram (FBD)<br />
• Sequential Function Chart (SFC)<br />
• Continuous Function Chart (CFC)<br />
Application Programs<br />
Scope of Functionality<br />
of MACS<br />
Programming Languages<br />
of MACS<br />
© <strong>Moog</strong> GmbH <strong>User</strong> <strong>Manual</strong> M3000 ® and <strong>MSC</strong> <strong>II</strong> (CA65865-001; Version 1.1, 08/08) 25
3 Short M3000 ® <strong>System</strong> Overview MACS Development Environment<br />
Refer to the documentation for the MACS development environment for<br />
more detailed information.<br />
The MACS development environment is available from <strong>Moog</strong> as an<br />
accessory.<br />
�-"11.5-Software" on page 119<br />
3.6.1 MACS HMI Visualization Package<br />
MACS is also available from <strong>Moog</strong> as a MACS HMI visualization package.<br />
�-"11.5-Software" on page 119<br />
MACS HMI can be used only for the visualization of an application program. It<br />
does not include any functionality for creating or editing application programs.<br />
MACS HMI<br />
Visualization Package<br />
© <strong>Moog</strong> GmbH <strong>User</strong> <strong>Manual</strong> M3000 ® and <strong>MSC</strong> <strong>II</strong> (CA65865-001; Version 1.1, 08/08) 26
4 Environmental Conditions Requirements of IEC 61131-2<br />
4 Environmental Conditions<br />
WARNING Maintain under all circumstances the required environmental<br />
conditions specified for the M3000 ® automation<br />
system or M3000 ® modules.<br />
This ensures fault-free, reliable, and safe operation.<br />
WARNING The PC on which tools such as MACS development environment<br />
are installed must be suitable for the environmental<br />
conditions in which it will operate.<br />
This ensures fault-free, reliable, and safe operation.<br />
WARNING It is not permissible to operate the M3000 ® automation<br />
system or M3000 ® modules in a potentially explosive<br />
environment.<br />
WARNING The M3000 ® automation system and M3000 ® modules<br />
must not come into direct contact with liquids, except<br />
where explicitely specified. Danger of short-circuit!<br />
If they do come into direct contact with a liquid, immediately<br />
disconnect the power supply! Before bringing the system<br />
back into operation, it is essential that all affected components<br />
are completely dry and have been inspected by a suitably<br />
qualified technician.<br />
4.1 Requirements of IEC 61131-2<br />
The M3000 ® automation system and M3000 ® modules comply with the requirements<br />
of IEC 61131-2.<br />
Where technical requirements lead to deviations from the standard,<br />
these are specified in this manual or in the documentation of the relevant<br />
M3000 ® modules.<br />
Environmental conditions for the <strong>MSC</strong> <strong>II</strong>:<br />
�-"10.2.2-Environmental Conditions" on page 74<br />
Refer to the relevant documentation for the specified environmental conditions<br />
for the other M3000 ® modules.<br />
Environmental<br />
Conditions:<br />
Safety Instructions<br />
Environmental<br />
Conditions: Requirements<br />
of IEC 61131-2<br />
© <strong>Moog</strong> GmbH <strong>User</strong> <strong>Manual</strong> M3000 ® and <strong>MSC</strong> <strong>II</strong> (CA65865-001; Version 1.1, 08/08) 27
4 Environmental Conditions Use in Special Environments<br />
4.2 Use in Special Environments<br />
In the following cases, M3000 ® modules must not be used without taking additional<br />
measures:<br />
• At sites with difficult operating conditions, like those caused by<br />
– Large amounts of dust<br />
– Elevated air humidity<br />
– Aggressive vapors or gases<br />
– Corrosive atmospheres<br />
– Potentially explosive environments<br />
In these cases, the suitable additional measures to be taken may include,<br />
for example, installation in specially designed cabinets.<br />
• In systems that require special monitoring, such as:<br />
–Elevators<br />
– Electrical systems located in particularly (potentially) hazardous<br />
environments<br />
– In residential, commercial, and light-industrial environments<br />
– In medical environments<br />
Examples of suitable additional measures in these cases may include:<br />
• Installation in grounded, shielded metal cabinets<br />
• Installation of filters in the power supply cables<br />
• Use of shielded cables outside of cabinets<br />
Limitations of Using<br />
M3000 ® Modules<br />
© <strong>Moog</strong> GmbH <strong>User</strong> <strong>Manual</strong> M3000 ® and <strong>MSC</strong> <strong>II</strong> (CA65865-001; Version 1.1, 08/08) 28
5 Mechanical Installation DIN Rail Modules<br />
5 Mechanical Installation<br />
M3000 ® modules are divided according to their mechanical construction into<br />
the following categories:<br />
• DIN rail modules (such as <strong>MSC</strong> I, <strong>MSC</strong> <strong>II</strong>, QAIO, or QDIO)<br />
• Other M3000 ® modules (such as RDISP)<br />
Information about the DIN rail modules:<br />
�-"5.1-DIN Rail Modules" on page 29<br />
Refer to the relevant documentation for the dimensions of the other<br />
M3000 ® modules and information about their mounting/removing.<br />
5.1 DIN Rail Modules<br />
5.1.1 Views of the Module<br />
Locking Slide<br />
Locating Pin<br />
Q-Connector<br />
(E-bus+LocalCAN Bus)<br />
Connectors<br />
for Plug-In<br />
Terminal Strips<br />
Connectors<br />
with Plug-In<br />
Terminal Strips<br />
Locking Slide<br />
Connectors<br />
with Plug-In<br />
Terminal Strips<br />
Figure 14: Front View of DIN Rail Modules<br />
Figure 15: Side View of DIN Rail Modules<br />
Connectors for Plug-In<br />
Terminal Strips<br />
Front Panel<br />
Q-Connector<br />
(E-bus+LocalCAN Bus)<br />
Locating Pin<br />
Locking Slide<br />
Q-Connector<br />
(E-bus+LocalCAN Bus)<br />
Locating Pin<br />
Categories of<br />
M3000 ® Modules<br />
Front View of<br />
DIN Rail Modules<br />
Side View of<br />
DIN Rail Modules<br />
© <strong>Moog</strong> GmbH <strong>User</strong> <strong>Manual</strong> M3000 ® and <strong>MSC</strong> <strong>II</strong> (CA65865-001; Version 1.1, 08/08) 29
5 Mechanical Installation DIN Rail Modules<br />
5.1.2 Dimensions<br />
Due to the lateral locating pins, the DIN rail module's installation width will depend<br />
on whether it will be installed as a single module, row module, or end<br />
module.<br />
Installation<br />
Width<br />
Individual Module<br />
Installed As<br />
Row Module End Module<br />
Module width +<br />
11 mm (0.43 in)<br />
(locating pins protrude<br />
at the left and right)<br />
Module width<br />
(locating pins disappear<br />
into the adjacent modules)<br />
Figure 16: Dimensions of DIN Rail Modules<br />
Module width +<br />
5.5 mm (0.22 in)<br />
(locating pins protrude<br />
on only one side)<br />
Height 170 mm (6.69 in)<br />
Depth 85.5 mm (3.37 in)<br />
(without accessories like mating connectors or plug-in terminal strips)<br />
When accessories like mating connectors or plug-in terminal strips<br />
are used, an installation depth of 50 mm (2 in) is usually required.<br />
Table 1: Dimensions of DIN Rail Modules<br />
Refer to the relevant documentation for the overall widths of the various<br />
DIN rail modules.<br />
Dimensions of the <strong>MSC</strong> <strong>II</strong>:<br />
�-"10.2-General Specifications" on page 73<br />
D = 85.5 mm (3.37 in)<br />
Overall Width<br />
Module Width<br />
5.5 mm (0.22 in)<br />
5.5 mm (0.22 in)<br />
Dimensions of<br />
DIN Rail Modules<br />
© <strong>Moog</strong> GmbH <strong>User</strong> <strong>Manual</strong> M3000 ® and <strong>MSC</strong> <strong>II</strong> (CA65865-001; Version 1.1, 08/08) 30<br />
H = 170 mm (6.69 in)
5 Mechanical Installation DIN Rail Modules<br />
5.1.3 Arrangement on DIN Top-Hat Rails<br />
WARNING The vent holes of DIN rail modules facilitate convection<br />
cooling and must never be covered!<br />
Covered vent holes might result in overheating and fire.<br />
DIN rail modules must be arranged next to each other on a DIN top-hat rail<br />
TH 35-7.5 in accordance with DIN EN 60715.<br />
X1 X3<br />
X2<br />
WCAN<br />
L1+ TRM I/O1 I/O2 I/O3 I/O4 WCAN LCAN EBus Rx Tx Aux1 Aux2 Aux3 Aux4 OutEN<br />
1 2 3 4 5 6 7 8 9<br />
L1+ L1+ M1 M1 L2+ L2+ M2 M2 M2 X2<br />
X1<br />
X3<br />
OutEn I/O1 I/O2 I/O3 I/O4 M2 M2 M2 M2 X4<br />
WCAN WCAN<br />
Run<br />
X13<br />
X14<br />
X15 X16<br />
Stop !<br />
LAN RT-ETH1 RT-ETH2<br />
Reset<br />
X11 X12<br />
USB1 USB2 Link 100MB/s Link 100MB/s Link 100MB/s<br />
LK<br />
SIO F-Bus<br />
1 2 3 4 5 6 7 8 9 10<br />
X6<br />
X7<br />
X5 CLK+ CLK- A+ A- B+ B- Z+ Z- +5V DGND X8<br />
X9<br />
X10<br />
A1 B1 Z1 A2 B2 Z2 A3 B3 Z3 A4 B4 Z4 LED1 LED2 LED3 Error<br />
Figure 17: Arrangement of DIN Rail Modules on a Vertical Mounting Plate<br />
The DIN top-hat rail must be attached to a vertical, metal mounting plate and<br />
connected to the protective earth conductor.<br />
Additional information about the grounding concept for DIN rail modules:<br />
�-"6.1-Grounding Concept" on page 38<br />
Information about mounting/removing DIN rail modules:<br />
�-"5.1.4-Mounting and Removing" on page 33<br />
Maintain the minimum distances shown in figure-18 on page 32 to ensure:<br />
• Sufficient room for connecting the supply and signal cables<br />
• Sufficient room for mounting or removing the DIN rail modules<br />
• Convection cooling<br />
If operational reasons force the selection of other arrangements, the performance<br />
ratings of the DIN rail modules will decrease or forced cooling measures<br />
will be needed.<br />
Additional information about arranging DIN rail modules:<br />
�-"7.7.2-E-Bus Groups" on page 65<br />
X4<br />
X5 S1<br />
X8<br />
X6 S2<br />
X7<br />
1<br />
1 1 10<br />
SIO F-Bus<br />
X9 X10<br />
WCAN<br />
1 10<br />
Off On<br />
S3<br />
S4<br />
Arrangement of<br />
DIN Rail Modules on a<br />
Vertical Mounting Plate<br />
© <strong>Moog</strong> GmbH <strong>User</strong> <strong>Manual</strong> M3000 ® and <strong>MSC</strong> <strong>II</strong> (CA65865-001; Version 1.1, 08/08) 31
5 Mechanical Installation DIN Rail Modules<br />
Cable Conduit<br />
X1 X3<br />
X2<br />
WCAN<br />
X4<br />
L1+ TRM I/O1 I/O2 I/O3 I/O4 WCAN LCAN EBus Rx Tx Aux1 Aux2 Aux3 Aux4 OutEN<br />
1 2 3 4 5 6 7 8 9<br />
L1+ L1+ M1 M1 L2+ L2+ M2 M2 M2 X2<br />
X1<br />
X3<br />
OutEn I/O1 I/O2 I/O3 I/O4 M2 M2 M2 M2 X4<br />
WCAN WCAN<br />
Run<br />
X13<br />
X14<br />
X15 X16<br />
Stop !<br />
LAN RT-ETH1 RT-ETH2<br />
Reset<br />
X11 X12<br />
USB1 USB2 Link 100MB/s Link 100MB/s Link 100MB/s<br />
LK<br />
SIO F-Bus<br />
1 2 3 4 5 6 7 8 9 10<br />
X6<br />
X7<br />
X5 CLK+ CLK- A+ A- B+ B- Z+ Z- +5V DGND X8<br />
X9<br />
X10<br />
A1 B1 Z1 A2 B2 Z2 A3 B3 Z3 A4 B4 Z4 LED1 LED2 LED3 Error<br />
X5 S1<br />
X8<br />
X6 S2<br />
X7<br />
1<br />
� 30 mm (1.18 in)<br />
WCAN<br />
1 10<br />
Off On<br />
S3<br />
S4<br />
SIO F-Bus<br />
1 1<br />
X9 X10<br />
10<br />
X1 X3<br />
X2<br />
WCAN<br />
X4<br />
L1+ TRM I/O1 I/O2 I/O3 I/O4 WCAN LCAN EBus Rx Tx Aux1 Aux2 Aux3 Aux4 OutEN<br />
1 2 3 4 5 6 7 8 9<br />
L1+ L1+ M1 M1 L2+ L2+ M2 M2 M2 X2<br />
X1<br />
X3<br />
OutEn I/O1 I/O2 I/O3 I/O4 M2 M2 M2 M2 X4<br />
WCAN WCAN<br />
Run<br />
X13<br />
X14<br />
X15 X16<br />
Stop !<br />
LAN RT-ETH1 RT-ETH2<br />
Reset<br />
X11 X12<br />
USB1 USB2 Link 100MB/s Link 100MB/s Link 100MB/s<br />
LK<br />
SIO F-Bus<br />
1 2 3 4 5 6 7 8 9 10<br />
X6<br />
X7<br />
X5 CLK+ CLK- A+ A- B+ B- Z+ Z- +5V DGND X8<br />
X9<br />
X10<br />
A1 B1 Z1 A2 B2 Z2 A3 B3 Z3 A4 B4 Z4 LED1 LED2 LED3 Error<br />
X5 S1<br />
X8<br />
X6 S2<br />
X7<br />
1<br />
� 30 mm (1.18 in)<br />
SIO F-Bus<br />
1 1<br />
X9 X10<br />
10<br />
Figure 18: Arrangement of DIN Rail Modules between Cable Conduits<br />
If shielding is required for the signal cables, make sure the distance between<br />
the DIN rail modules and the cable conduit is sufficiently large.<br />
Shielding Bar<br />
Detail Enlargement:<br />
� Figure 19<br />
Shield<br />
Insulating<br />
Bar Holder<br />
Figure 19: Using a Shielding Bar when Connecting a Signal Cable to the <strong>MSC</strong> <strong>II</strong><br />
(Detail from figure 18)<br />
WCAN<br />
1 10<br />
Off On<br />
S3<br />
S4<br />
X5 S1<br />
X8<br />
X6 S2<br />
X7<br />
1<br />
1 10<br />
Off On<br />
S3<br />
S4<br />
1 1 10<br />
SIO F-Bus<br />
X9 X10<br />
Signal Cable<br />
Cable Conduit<br />
Shield Connection Terminals<br />
(e.g.: Phoenix Type SK 8)<br />
Insulating<br />
Bar Holder<br />
Arrangement of<br />
DIN Rail Modules<br />
between Cable Conduits<br />
Using a Shielding Bar<br />
when Connecting a<br />
Signal Cable to the<br />
<strong>MSC</strong> <strong>II</strong><br />
© <strong>Moog</strong> GmbH <strong>User</strong> <strong>Manual</strong> M3000 ® and <strong>MSC</strong> <strong>II</strong> (CA65865-001; Version 1.1, 08/08) 32<br />
� 30 mm<br />
(1.18 in)<br />
� 30 mm<br />
(1.18 in)
5 Mechanical Installation DIN Rail Modules<br />
5.1.4 Mounting and Removing<br />
5.1.4.1 Mounting DIN Rail Modules<br />
WARNING No work of any kind, such as mounting, removing, wiring,<br />
or repairs to the M3000 ® automation system or DIN<br />
rail modules may be performed while the automation<br />
system or the modules are in operation!<br />
There is a danger of:<br />
• Uncontrolled movements<br />
• Permanent damage<br />
• Malfunctions<br />
Before performing any work on the M3000 ® automation system<br />
or DIN rail modules, it is essential that the system is<br />
stopped and the power supply is disconnected.<br />
Therefore, all power supplies must be switched off, including<br />
those from attached peripherals such as externally supplied<br />
transmitters, programming devices, etc.!<br />
No tools are needed to mount DIN rail modules.<br />
Procedure for mounting DIN rail modules:<br />
1. Unlock the module to be mounted by pulling out the two red locking<br />
slides.<br />
Figure 20: Unlocking a DIN Rail Module<br />
2. If you wish to attach the module next to the right of a previously mounted<br />
DIN top-hat rail, then follow step 1 to also unlock the module that is already<br />
located on DIN top-hat rail.<br />
Additional information about arranging the modules:<br />
�-"5.1.3-Arrangement on DIN Top-Hat Rails" on page 31<br />
�-"7.7.2-E-Bus Groups" on page 65<br />
CAUTION To avoid damaging the locating pins of the DIN rail modules,<br />
make sure the modules are at least 1 cm apart<br />
when placing them on the DIN top-hat rail.<br />
Mounting<br />
DIN Rail Modules:<br />
Safety Instructions<br />
Mounting<br />
DIN Rail Modules<br />
© <strong>Moog</strong> GmbH <strong>User</strong> <strong>Manual</strong> M3000 ® and <strong>MSC</strong> <strong>II</strong> (CA65865-001; Version 1.1, 08/08) 33
5 Mechanical Installation DIN Rail Modules<br />
3. Place the module to be mounted on the DIN top-hat rail and carefully<br />
push the module towards the DIN top-hat rail until the module engages.<br />
Do not yet push the red locking slides back into the module! If you<br />
do push them back in, you will no longer be able to slide the module<br />
on the DIN top-hat rail.<br />
DIN top-hat rails<br />
Metal mounting plate<br />
Figure 21: Placing a DIN Rail Module onto a DIN Top-Hat Rail<br />
4. Additional modules can be attached to the right as needed.<br />
Follow step 1 through step 3 to attach the additional modules.<br />
5. Slide the modules to the left on the DIN top-hat rail until the modules are<br />
joined with no gaps.<br />
This establishes contact between the Q-connectors and pushes the locating<br />
pins into their mating sockets.<br />
X1 X3<br />
X2<br />
WCAN<br />
X4<br />
L1+ TRM I/O1 I/O2 I/O3 I/O4 WCAN LCAN EBus Rx Tx Aux1 Aux2 Aux3 Aux4 OutEN<br />
1 2 3 4 5 6 7 8 9<br />
L1+ L1+ M1 M1 L2+ L2+ M2 M2 M2 X2<br />
X1<br />
X3<br />
OutEn I/O1 I/O2 I/O3 I/O4 M2 M2 M2 M2 X4<br />
WCAN WCAN<br />
Run<br />
X13<br />
X14<br />
X15 X16<br />
Stop !<br />
LAN RT-ETH1 RT-ETH2<br />
Reset<br />
X11 X12<br />
USB1 USB2 Link 100MB/s Link 100MB/s Link 100MB/s<br />
LK<br />
SIO F-Bus<br />
1 2 3 4 5 6 7 8 9 10<br />
X6<br />
X7<br />
X5 CLK+ CLK- A+ A- B+ B- Z+ Z- +5V DGND X8<br />
X9<br />
X10<br />
A1 B1 Z1 A2 B2 Z2 A3 B3 Z3 A4 B4 Z4 LED1 LED2 LED3 Error<br />
X5 S1<br />
X8<br />
X6 S2<br />
X7<br />
1<br />
1 1 10<br />
SIO F-Bus<br />
X9 X10<br />
WCAN<br />
1 10<br />
Off On<br />
S3<br />
S4<br />
Figure 22: Sliding a DIN Rail Module on a DIN Top-Hat Rail<br />
X1 X3<br />
X2<br />
WCAN<br />
X4<br />
L1+ TRM I/O1 I/O2 I/O3 I/O4 WCAN LCAN EBus Rx Tx Aux1 Aux2 Aux3 Aux4 OutEN<br />
1 2 3 4 5 6 7 8 9<br />
L1+ L1+ M1 M1 L2+ L2+ M2 M2 M2 X2<br />
X1<br />
X3<br />
OutEn I/O1 I/O2 I/O3 I/O4 M2 M2 M2 M2 X4<br />
WCAN WCAN<br />
Run<br />
X13<br />
X14<br />
X15 X16<br />
Stop !<br />
LAN RT-ETH1 RT-ETH2<br />
Reset<br />
X11 X12<br />
USB1 USB2 Link 100MB/s Link 100MB/s Link 100MB/s<br />
LK<br />
SIO F-Bus<br />
1 2 3 4 5 6 7 8 9 10<br />
X6<br />
X7<br />
X5 CLK+ CLK- A+ A- B+ B- Z+ Z- +5V DGND X8<br />
X9<br />
X10<br />
A1 B1 Z1 A2 B2 Z2 A3 B3 Z3 A4 B4 Z4 LED1 LED2 LED3 Error<br />
X5 S1<br />
X8<br />
X6 S2<br />
X7<br />
1<br />
1 1 10<br />
SIO F-Bus<br />
X9 X10<br />
WCAN<br />
1 10<br />
Off On<br />
S3<br />
S4<br />
Figure 23: DIN Rail Modules Joined Without Gaps on a DIN Top-Hat Rail<br />
Mounting<br />
DIN Rail Modules<br />
© <strong>Moog</strong> GmbH <strong>User</strong> <strong>Manual</strong> M3000 ® and <strong>MSC</strong> <strong>II</strong> (CA65865-001; Version 1.1, 08/08) 34
5 Mechanical Installation DIN Rail Modules<br />
6. Push the two red locking slides back into all of the modules. This fixes<br />
the modules onto the DIN top-hat rail, establishes an electrical connection<br />
with the top-hat rail, and locks the modules together with a secure<br />
contact.<br />
Figure 24: Fixing and Locking a DIN Rail Module<br />
5.1.4.2 Removing DIN Rail Modules<br />
WARNING No work of any kind, such as mounting, removing, wiring,<br />
or repairs to the M3000 ® automation system or DIN<br />
rail modules may be performed while the automation<br />
system or the modules are in operation!<br />
There is a danger of:<br />
• Uncontrolled movements<br />
• Permanent damage<br />
• Malfunctions<br />
Before performing any work on the M3000 ® automation system<br />
or DIN rail modules, it is essential that the system is<br />
stopped and the power supply is disconnected.<br />
Therefore, all power supplies must be switched off, including<br />
those from attached peripherals such as externally supplied<br />
transmitters, programming devices, etc.!<br />
No tools are needed to remove DIN rail modules.<br />
Mounting<br />
DIN Rail Modules<br />
Removing DIN Rail<br />
Modules:<br />
Safety Instructions<br />
© <strong>Moog</strong> GmbH <strong>User</strong> <strong>Manual</strong> M3000 ® and <strong>MSC</strong> <strong>II</strong> (CA65865-001; Version 1.1, 08/08) 35
5 Mechanical Installation DIN Rail Modules<br />
Procedure for removing DIN rail modules:<br />
1. Unlock the module to be removed and, if needed, adjacent modules, by<br />
pulling out the two red locking slides.<br />
Figure 25: Unlocking a DIN Rail Module<br />
2. Pull the modules at least 1 cm apart.<br />
CAUTION To avoid damaging the locating pins of the modules,<br />
make sure the DIN rail modules are at least 1 cm apart<br />
when removing them from the DIN top-hat rail.<br />
X1 X3<br />
X2<br />
WCAN<br />
L1+ TRM I/O1 I/O2 I/O3 I/O4 WCAN LCAN EBus Rx Tx Aux1 Aux2 Aux3 Aux4 OutEN<br />
1 2 3 4 5 6 7 8 9<br />
L1+ L1+ M1 M1 L2+ L2+ M2 M2 M2 X2<br />
X1<br />
X3<br />
OutEn I/O1 I/O2 I/O3 I/O4 M2 M2 M2 M2 X4<br />
WCAN WCAN<br />
Run<br />
X13<br />
X14<br />
X15 X16<br />
Stop !<br />
LAN RT-ETH1 RT-ETH2<br />
Reset<br />
X11 X12<br />
USB1 USB2 Link 100MB/s Link 100MB/s Link 100MB/s<br />
LK<br />
SIO F-Bus<br />
1 2 3 4 5 6 7 8 9 10<br />
X6<br />
X7<br />
X5 CLK+ CLK- A+ A- B+ B- Z+ Z- +5V DGND X8<br />
X9<br />
X10<br />
A1 B1 Z1 A2 B2 Z2 A3 B3 Z3 A4 B4 Z4 LED1 LED2 LED3 Error<br />
Figure 26: Pulling apart DIN Rail Modules<br />
3. Lift off the module from the DIN top-hat rail.<br />
X4<br />
X5 S1<br />
X8<br />
X6 S2<br />
X7<br />
1<br />
1 1 10<br />
SIO F-Bus<br />
X9 X10<br />
WCAN<br />
1 10<br />
Off On<br />
S3<br />
S4<br />
Figure 27: Lifting off a DIN Rail Module from the DIN Top-Hat Rail<br />
Removing<br />
DIN Rail Modules<br />
© <strong>Moog</strong> GmbH <strong>User</strong> <strong>Manual</strong> M3000 ® and <strong>MSC</strong> <strong>II</strong> (CA65865-001; Version 1.1, 08/08) 36
6 Project Planning and Installation<br />
6 Project Planning and Installation<br />
The following instructions must be observed in order to ensure that the<br />
M3000 ® automation system will be safely integrated into its application environment:<br />
• IEC 61131<br />
Especially the information contained in IEC 61131-4<br />
• Safety<br />
All safety and accident prevention regulations applicable to the specific<br />
application (such as machinery directives, safety instructions contained<br />
in documentation, etc.)<br />
• Emergency stop<br />
The emergency stop devices (DIN EN 60204) must remain in effect during<br />
all of the system's or facility's operational modes.<br />
• Restarting<br />
Unlocking of the emergency stop devices must not lead to uncontrolled<br />
or undefined restarting.<br />
Dangerous operational conditions of any kind must not arise following interruption<br />
or failure of the power supply.<br />
• Voltage<br />
Deviations and fluctuations of the supply and load voltages must not fall<br />
below or exceed the specified tolerances.<br />
Deviations outside the specified operating range might lead to dangerous<br />
conditions and functional disturbances in the automation system.<br />
• Power supply 24 V DC<br />
M3000 ® modules must be supplied only with 24 V DC SELV (Safety Extra-Low<br />
Voltage) according to DIN EN 60950-1.<br />
�-"6.2.1-Power Supply Characteristics" on page 39<br />
• Wire fault<br />
A cable or wire fault must not lead to undefined conditions. All necessary<br />
safety precautions must be taken in the hardware and software.<br />
• Connection<br />
All connection and signal cables must be installed in such a way that inductive<br />
or capacitive interferences will not impair the M3000 ® automation<br />
system.<br />
Project Planning<br />
and Installation<br />
© <strong>Moog</strong> GmbH <strong>User</strong> <strong>Manual</strong> M3000 ® and <strong>MSC</strong> <strong>II</strong> (CA65865-001; Version 1.1, 08/08) 37
6 Project Planning and Installation Grounding Concept<br />
6.1 Grounding Concept<br />
L1<br />
L2<br />
L3<br />
N<br />
PE<br />
L1 L2 L3 N PE<br />
Figure 28: Grounding Concept<br />
For reasons of functional safety, all circuits must be grounded at a centralized<br />
point.<br />
The DIN top-hat rail must have a low resistance connection to the protective<br />
earth conductor-(PE). It is essential that the DIN top-hat rail is<br />
grounded over a connection with the largest possible cross section.<br />
Every circuit must be fused (maximum 12 A).<br />
Load-controlled distribution of the circuits (U1…U3)<br />
6.1.1 Front Panel Connectors' Grounding<br />
AC<br />
AC<br />
DC<br />
DC<br />
Control Cabinet<br />
max. 12 A<br />
max. 12 A<br />
max. 12 A<br />
DIN Top-Hat Rail<br />
Grounding Bar within Control Cabinet<br />
The metal housings of all front panel connectors of the <strong>MSC</strong> <strong>II</strong> and the extension<br />
modules are connected internally to the grounding of the DIN top-hat rail.<br />
Grounding Concept<br />
Front Panel Connectors'<br />
Grounding<br />
© <strong>Moog</strong> GmbH <strong>User</strong> <strong>Manual</strong> M3000 ® and <strong>MSC</strong> <strong>II</strong> (CA65865-001; Version 1.1, 08/08) 38<br />
U1<br />
U2<br />
U3
6 Project Planning and Installation Power Supply<br />
6.2 Power Supply<br />
The internal electronics of M3000 ® modules is usually supplied with power<br />
via the power supply terminals of the connectors of the M3000 ® modules.<br />
Connecting the power supply for the internal electronics:<br />
�-"6.2.3-Connecting the Power Supply" on page 40<br />
Power supply terminals of the <strong>MSC</strong> <strong>II</strong>:<br />
�-"10.4.1-Terminal Assignment" on page 78<br />
Refer to the relevant documentation for the exact designations of the<br />
power supply terminals of the other M3000 ® modules.<br />
6.2.1 Power Supply Characteristics<br />
Output voltage<br />
Rated voltage: 24 V DC, operates at no-load<br />
SELV according to DIN EN 60950-1<br />
�-"6.2.1.1-Safety Extra-Low Voltage (SELV)"<br />
on page 39<br />
Run-up time (10–90 %): ≤ 0.2 sec.<br />
To ensure compatibility with other components, <strong>Moog</strong> recommends<br />
maintaining the power supply tolerance band specified in<br />
IEC 61131-2 (19.2 V to 30 V).<br />
Refer to the relevant documentation for the specified voltage<br />
ranges of the M3000 ® modules.<br />
Besides the specified voltage ranges, a total alternating voltage<br />
component with a peak value of 5 % of the rated voltage is also<br />
permitted.<br />
Output current<br />
If the output current of the power supply is greater than 12 A, the power<br />
cable to each M3000 ® module must be fused to ≤ 12 A or the current<br />
must be limited in another way.<br />
Maximum permissible duration of power interruptions<br />
Under full load (PS1 intensity): ≤ 1ms<br />
(duration of interruption during voltage drops and interruptions to the input<br />
voltage)<br />
During primary side voltage drops that are 1 ms or shorter in duration,<br />
the output voltage must not fall under 19.2 V when under full<br />
load. In addition, the interval between the primary side drops must<br />
not be shorter than 1 s.<br />
6.2.1.1 Safety Extra-Low Voltage (SELV)<br />
The safety extra-low voltage is a voltage that will not, under any operating<br />
conditions, exceed 25 V AC or 60 V DC peak or direct voltage as measured<br />
between conductors or between a conductor and ground. The circuit in which<br />
SELV is used must be separated from the mains power supply by a safety<br />
transformer or something of equal functionality. Always observe national regulations<br />
when choosing the rated insulation voltage.<br />
Power Supply for<br />
M3000 ® Modules<br />
Power Supply<br />
Characteristics of<br />
M3000 ® Modules<br />
Safety Extra-Low Voltage<br />
(SELV)<br />
© <strong>Moog</strong> GmbH <strong>User</strong> <strong>Manual</strong> M3000 ® and <strong>MSC</strong> <strong>II</strong> (CA65865-001; Version 1.1, 08/08) 39
6 Project Planning and Installation Power Supply<br />
6.2.2 Power Consumption<br />
Power Consumption 1)<br />
DIN Rail Module From 24 V DC (No-Load 2) ) From 24 V DC (Full Load)<br />
<strong>MSC</strong> <strong>II</strong> Internal<br />
Electronics<br />
about 0.3 A max. 0.8 A<br />
Digital Outputs - max. 2 A<br />
RDIO max. 0.3 A max. 10 A<br />
QDIO - max. 10 A<br />
QAIO 16/4 about 0.15 A max. 0.3 A<br />
Table 2: Power Consumption<br />
1) These values are provided only as guidelines for estimating the amount of current required.<br />
Refer to the relevant documentation for the exact power consumption by DIN rail modules.<br />
2) No-load, i.e., there are no loads, external to the module, drawing current.<br />
6.2.3 Connecting the Power Supply<br />
DANGER The 24 V power supply terminals of all M3000 ® modules are<br />
protected against reverse polarity.<br />
If the polarity of these power supply terminals is reversed, the<br />
modules will not work.<br />
WARNING No work of any kind, such as mounting, removing, wiring,<br />
or repairs to the M3000 ® automation system or<br />
M3000 ® modules may be performed while the automation<br />
system or the modules are in operation!<br />
There is a danger of:<br />
• Uncontrolled movements<br />
• Permanent damage<br />
• Malfunctions<br />
Before performing any work on the M3000 ® automation system<br />
or M3000 ® modules, it is essential that the system is<br />
stopped and the power supply is disconnected.<br />
Therefore, all power supplies must be switched off, including<br />
those from attached peripherals such as externally supplied<br />
transmitters, programming devices, etc.!<br />
WARNING M3000 ® modules must be protected from overvoltages<br />
and/or reverse energization from the sensor to the module!<br />
There is a danger of:<br />
• Permanent damage by overheating or fire<br />
• Malfunctions<br />
M3000 ® modules must have the correct voltage, polarity, and<br />
terminal assignments.<br />
Power Consumption<br />
Connecting the<br />
Power Supply:<br />
Safety Instructions<br />
© <strong>Moog</strong> GmbH <strong>User</strong> <strong>Manual</strong> M3000 ® and <strong>MSC</strong> <strong>II</strong> (CA65865-001; Version 1.1, 08/08) 40
6 Project Planning and Installation Power Supply<br />
WARNING The internal electronics of M3000 ® modules and attached<br />
sensors must be supplied with power from a permanently<br />
connected (unswitched) power supply that<br />
cannot be individually switched off, without switching<br />
off the module's power supply.<br />
If a switched power supply is used, such as when there are<br />
intermediate switching devices (emergency stops, manual<br />
operators, etc.), the following problems might arise, depending<br />
on the state of the power supply for the internal electronics<br />
of the module and sensors (�-table-3 on page 41):<br />
• Reverse energization from sensor to module<br />
• Invalid sensor data<br />
Power Supply<br />
Internal Electronics Sensors<br />
Module and sensors are in operation on on<br />
Reverse energization from sensor to module off on<br />
Invalid sensor data on off<br />
Module and sensors are not in operation off off<br />
Table 3: Power Supply Conditions of the Module's Internal Electronics and the Sensors<br />
Power supply terminals of the <strong>MSC</strong> <strong>II</strong>:<br />
�-"10.4.1-Terminal Assignment" on page 78<br />
Refer to the relevant documentation for information about the power<br />
supply terminals of the other M3000 ® modules.<br />
Internal module capacities might cause power spikes of up to 50 A when<br />
switching on the power supply for the internal electronics of the M3000 ®<br />
module. The duration of these spikes is strongly dependent on the internal<br />
resistance of the power supply.<br />
Power Supply for the<br />
Module's Internal<br />
Electronics and the<br />
Sensors<br />
© <strong>Moog</strong> GmbH <strong>User</strong> <strong>Manual</strong> M3000 ® and <strong>MSC</strong> <strong>II</strong> (CA65865-001; Version 1.1, 08/08) 41
6 Project Planning and Installation Power Supply<br />
6.2.3.1 Connecting to Several Power Supplies<br />
U1<br />
U2<br />
U3<br />
U4<br />
U5<br />
L1+ M1 L2+ M2<br />
L1+ M1<br />
Figure 29: Correct Connection of DIN Rail Modules to Several Power Supplies<br />
DIN rail modules do not have any protective earth conductor terminals.<br />
However they are conductively connected to the DIN top-hat rail after<br />
they are engaged and locked onto it. The DIN rail modules thereby receive<br />
signal grounding. �-"6.1-Grounding Concept" on page 38<br />
6.2.3.2 Connecting to a Single Power Supply<br />
L2+<br />
L4+<br />
L6+<br />
Assuming that the power limits are observed, the internal electronics of DIN<br />
rail modules and the attached sensors may also be supplied from a single<br />
power supply.<br />
U1<br />
+<br />
-<br />
+<br />
-<br />
+<br />
-<br />
+<br />
-<br />
+<br />
-<br />
+<br />
-<br />
L1+ M1 L2+ M2<br />
<strong>MSC</strong> <strong>II</strong> QDIO<br />
Figure 30: Correct Connection of DIN Rail Modules to a Single Power Supply<br />
M6<br />
L1+ M1<br />
L2+<br />
<strong>MSC</strong> <strong>II</strong> QDIO<br />
L4+<br />
L6+<br />
L3+<br />
L5+<br />
QAIO 16/4<br />
M+ L+<br />
DIN rail modules do not have any protective earth conductor terminals.<br />
However they are conductively connected to the DIN top-hat rail after<br />
they are engaged and locked onto it. The DIN rail modules thereby receive<br />
signal grounding. �-"6.1-Grounding Concept" on page 38<br />
M6<br />
L3+<br />
L5+<br />
QAIO 16/4<br />
M+ L+<br />
Correct Connection of<br />
DIN Rail Modules to<br />
Several Power Supplies<br />
Correct Connection of<br />
DIN Rail Modules to a<br />
Single Power Supply<br />
© <strong>Moog</strong> GmbH <strong>User</strong> <strong>Manual</strong> M3000 ® and <strong>MSC</strong> <strong>II</strong> (CA65865-001; Version 1.1, 08/08) 42
6 Project Planning and Installation Power Supply<br />
6.2.3.3 Maximum Admissible Current<br />
All of the power supply terminals of M3000 ® modules and the associated internal<br />
connections are designed for a maximum current of 12 A.<br />
If the current is greater than the maximum current, the following must be employed:<br />
• Several separately fused circuits or<br />
• Several separate power supplies in separated circuits<br />
6.2.4 Connecting Sensors<br />
WARNING The internal electronics of M3000 ® modules and attached<br />
sensors must be supplied with power from a permanently<br />
connected (unswitched) power supply that<br />
cannot be individually switched off, without switching<br />
off the module's power supply.<br />
If a switched power supply is used, such as when there are<br />
intermediate switching devices (emergency stops, manual<br />
operators, etc.), the following problems might arise, depending<br />
on the state of the power supply for the internal electronics<br />
of the module and sensors (�-table-3 on page 41):<br />
• Reverse energization from sensor to module<br />
• Invalid sensor data<br />
WARNING Sensors that are connected to digital inputs of M3000 ®<br />
modules with several I/O groups, such as <strong>MSC</strong> I, QDIO,<br />
or RDIO, must under all conditions be supplied from the<br />
same power supply as the corresponding I/O-group to<br />
which the sensor is connected!<br />
Otherwise, if the power supply for the internal electronics of<br />
the module is switched off, there might be reverse energization<br />
from the sensor to the module.<br />
There is a danger of:<br />
• Uncontrolled movements<br />
• Fault or failure of a manual control<br />
• Permanent damage to the module<br />
• Malfunctions<br />
Digital I/Os of <strong>MSC</strong> <strong>II</strong> and MSD Motion Controller are protected<br />
against reverse energization.<br />
Maximum Admissible<br />
Current for<br />
M3000 ® Modules<br />
Connecting Sensors:<br />
Safety Instructions<br />
© <strong>Moog</strong> GmbH <strong>User</strong> <strong>Manual</strong> M3000 ® and <strong>MSC</strong> <strong>II</strong> (CA65865-001; Version 1.1, 08/08) 43
6 Project Planning and Installation Power Supply<br />
U1<br />
+<br />
-<br />
I/O Group 1<br />
I/O1 I/O2<br />
2 37 2 20 38 3 21 39<br />
0V<br />
M1<br />
L2+ +24 V<br />
M1 0V<br />
L2+ +24 V<br />
I/O1 Signal<br />
M1 0V<br />
L2+ +24 V<br />
Sensor<br />
Actuator<br />
Signal<br />
I/O2<br />
IN5 I/O13<br />
1 6 24 42 32 14 32 50<br />
Figure 31: Correct Power Supply Connection of Sensors via a QDIO<br />
The attached sensors must be supplied with power from a permanently<br />
connected (unswitched) power supply that cannot be individually<br />
switched off, without switching off the module's power supply.<br />
Power must not, as shown in figure-32 on page 45, be supplied from<br />
switched power circuits!<br />
The sensors within an I/O group must always be supplied with power<br />
from the same power supply that supplies the relevant I/O group.<br />
They must not, as shown in figure-32 on page 45, be supplied from a<br />
separate power supply (due to the danger of reverse energization)!<br />
Outputs may be supplied with power from a switched power supply, for<br />
example with intermediate devices (emergency stop, manual operation,<br />
etc.).<br />
+24 V<br />
L1+<br />
0V<br />
M1<br />
+24 V<br />
L1+<br />
Sensor<br />
Signal<br />
IN5<br />
+24 V switched<br />
+24 V not switched<br />
Correct Power Supply<br />
Connection of Sensors via<br />
a QDIO<br />
© <strong>Moog</strong> GmbH <strong>User</strong> <strong>Manual</strong> M3000 ® and <strong>MSC</strong> <strong>II</strong> (CA65865-001; Version 1.1, 08/08) 44<br />
+24 V<br />
L3+<br />
0V<br />
QDIO 16/16-0,5<br />
I/O Group 2 I/O Group 3<br />
0V<br />
M1<br />
+24 V<br />
L3+<br />
Actuator<br />
Signal<br />
I/O13
6 Project Planning and Installation Power Supply<br />
U1<br />
+<br />
Not this Way!<br />
(Reverse<br />
Energization)<br />
U2<br />
-<br />
+<br />
-<br />
I/O Group 1<br />
I/O1 I/O2<br />
2 37 2 20 38 3 21 39<br />
0V<br />
M1<br />
L2+ +24 V<br />
M1 0V<br />
L2+ +24 V<br />
I/O1 Signal<br />
M1 0V<br />
L2+ +24 V<br />
Sensor<br />
+24 V switched<br />
+24 V not switched<br />
QDIO 16/16-0,5<br />
Figure 32: Wrong Power Supply Connection of Sensors via a QDIO<br />
The attached sensors must be supplied with power from a permanently<br />
connected (unswitched) power supply that cannot be individually<br />
switched off, without switching off the module's power supply.<br />
Power must not, as shown here, be supplied from switched power<br />
circuits!<br />
The sensors within an I/O group must always be supplied with power<br />
from the same power supply that supplies the relevant I/O group.<br />
They must not, as shown here, be supplied from a separate power supply<br />
(due to the danger of reverse energization)!<br />
0V<br />
Not this Way!<br />
(Switched Circuit)<br />
Actuator<br />
Wrong Power Supply<br />
Connection of Sensors via<br />
a QDIO<br />
© <strong>Moog</strong> GmbH <strong>User</strong> <strong>Manual</strong> M3000 ® and <strong>MSC</strong> <strong>II</strong> (CA65865-001; Version 1.1, 08/08) 45<br />
Signal<br />
I/O2
6 Project Planning and Installation Connecting Signal Cables<br />
6.3 Connecting Signal Cables<br />
WARNING No work of any kind, such as mounting, removing, wiring,<br />
or repairs to the M3000 ® automation system or<br />
M3000 ® modules may be performed while the automation<br />
system or the modules are in operation!<br />
There is a danger of:<br />
• Uncontrolled movements<br />
• Permanent damage<br />
• Malfunctions<br />
Before performing any work on the M3000 ® automation system<br />
or M3000 ® modules, it is essential that the system is<br />
stopped and the power supply is disconnected.<br />
Therefore, all power supplies must be switched off, including<br />
those from attached peripherals such as externally supplied<br />
transmitters, programming devices, etc.!<br />
The signal cables of M3000 ® modules are connected over plug-in terminal<br />
strips that are inserted into the relevant connectors on the front of the module.<br />
6.3.1 Plug-In Terminal Strips<br />
Plug-in terminal strips for the following methods are available from <strong>Moog</strong>:<br />
• Screw terminals<br />
• Spring loaded terminals<br />
All plug-in terminal strips are suitable for wire cross sections of up to 2.5 mm²<br />
(14 AWG).<br />
�-"11.8-Plug-In Terminal Strips" on page 121<br />
6.3.1.1 Spring Loaded Terminals<br />
CAUTION When connecting a wire, insert the screwdriver only into the<br />
rectangular opening of the spring loaded terminal.<br />
If a screwdriver is inserted into the round opening for the<br />
wire, the spring loaded terminal might be destroyed.<br />
Spring loaded terminals make it easy to rapidly connect supply and signal<br />
cables.<br />
Procedure for connecting a wire:<br />
1. Insert the tip of a screwdriver into the rectangular opening of the spring<br />
loaded terminal and press the screwdriver downward.<br />
2. Insert the wire into the corresponding round opening.<br />
3. Remove the screwdriver from the opening.<br />
The spring will hold the wire in place.<br />
Connecting Signal Cables:<br />
Safety Instructions<br />
Connecting Signal Cables<br />
over Plug-In Terminal<br />
Strips<br />
Connection Methods for<br />
Plug-In Terminal Strips<br />
of M3000 ® Modules<br />
Spring Loaded Terminals<br />
© <strong>Moog</strong> GmbH <strong>User</strong> <strong>Manual</strong> M3000 ® and <strong>MSC</strong> <strong>II</strong> (CA65865-001; Version 1.1, 08/08) 46
7 Networking M3000 ® Modules Ethernet<br />
7 Networking M3000 ® Modules<br />
7.1 Ethernet<br />
WARNING Do not connect EtherCAT to any other Ethernet networks.<br />
The high rate of telegrams which are transmitted by Ether-<br />
CAT will prevent other devices like computers and servers on<br />
the network from transmitting data.<br />
There is a danger of<br />
• Network overload/breakdown<br />
• Malfunction of connected devices<br />
• Data loss at connected devices<br />
It is strongly recommended to use cables of a special color<br />
only for EtherCAT connections.<br />
Refer to the following for information about using the Ethernet interface to facilitate<br />
communication between the <strong>MSC</strong> <strong>II</strong> control module and the MACS development<br />
environment:<br />
�-"3.1-M3000 ® <strong>System</strong> Architecture" on page 14<br />
�-"10.5.1-Communication Between <strong>MSC</strong> <strong>II</strong> and MACS" on page 84<br />
�-"10.5.1.1-Ethernet Communication Interface" on page 84<br />
7.1.1 Peer-to-Peer Connections<br />
To establish a peer-to-peer connection between 2-stations in an Ethernet network,<br />
100BaseT cables with twisted pair wires are needed.<br />
� Figure 35 on page 48<br />
Network Station 1<br />
(e.g.: PC)<br />
Network Station 2<br />
(e.g.: <strong>MSC</strong> <strong>II</strong>)<br />
Figure 33: Ethernet Network with exactly 2 Network Stations<br />
• 100BaseT patch or crossover cable with twisted pair<br />
wires for <strong>MSC</strong> <strong>II</strong> and MSD Motion Controller<br />
• 10BaseT crossover cable with twisted pair wires for<br />
<strong>MSC</strong> I<br />
Peer-to-Peer Connection<br />
of 2-Network Stations<br />
© <strong>Moog</strong> GmbH <strong>User</strong> <strong>Manual</strong> M3000 ® and <strong>MSC</strong> <strong>II</strong> (CA65865-001; Version 1.1, 08/08) 47
7 Networking M3000 ® Modules Ethernet<br />
7.1.2 Networking of More Than 2 Network Stations<br />
A hub or switch is needed for Ethernet networks that have more than 2 stations.<br />
The hub transfers the signals sent from one of the stations to every<br />
other station in the network.<br />
Figure 34: Ethernet Network with more than 2 Network Stations<br />
7.1.3 Ethernet Interface Cables<br />
RJ45 Mating<br />
Connector<br />
8<br />
1<br />
Figure 35: 100BaseT Cable with Crossed Twisted Pair Wires (Crossover Cable)<br />
with 8 Pole RJ45 Mating Connectors, Cable Category 5, Wire Cross Section > 0.22 mm² (24 AWG)<br />
RJ45 Mating<br />
Connector<br />
8<br />
1<br />
Hub/Switch<br />
1<br />
2<br />
3<br />
6<br />
1<br />
2<br />
3<br />
6<br />
Network Station 1<br />
(e.g.: PC)<br />
Network Station 2<br />
(e.g.: <strong>MSC</strong> <strong>II</strong>)<br />
Network Station N<br />
(e.g.: <strong>MSC</strong> <strong>II</strong>)<br />
• 100BaseT patch or crossover cable with twisted pair<br />
wires for <strong>MSC</strong> <strong>II</strong> and MSD Motion Controller<br />
• 10BaseT patch cable with twisted pair wires for <strong>MSC</strong> I<br />
TD+<br />
TD-<br />
RD+<br />
RD-<br />
TD+<br />
TD-<br />
RD+<br />
RD-<br />
Figure 36: 100BaseT Cable with Non-Crossed Twisted Pair Wires (Patch Cable)<br />
with 8 Pole RJ45 Mating Connectors, Cable Category 5, Wire Cross Section > 0.22 mm² (24 AWG)<br />
For the terminal assignment of the Ethernet front panel connector of the<br />
<strong>MSC</strong> <strong>II</strong> control module, see: � Ethernet connector on page 80<br />
Ethernet Network with<br />
more than 2 Network<br />
Stations<br />
100BaseT Cable<br />
with Crossed<br />
Twisted Pair Wires<br />
(Crossover Cable)<br />
100BaseT Cable<br />
with Non-Crossed<br />
Twisted Pair Wires<br />
(Patch Cable)<br />
© <strong>Moog</strong> GmbH <strong>User</strong> <strong>Manual</strong> M3000 ® and <strong>MSC</strong> <strong>II</strong> (CA65865-001; Version 1.1, 08/08) 48<br />
TD+<br />
TD-<br />
RD+<br />
RD-<br />
RD+<br />
RD-<br />
TD+<br />
TD-<br />
1<br />
2<br />
3<br />
6<br />
1<br />
2<br />
3<br />
6<br />
RJ45 Mating<br />
Connector<br />
1<br />
8<br />
RJ45 Mating<br />
Connector<br />
1<br />
8
7 Networking M3000 ® Modules EtherCAT<br />
7.2 EtherCAT<br />
WARNING Do not connect EtherCAT to any other Ethernet networks.<br />
The high rate of telegrams which are transmitted by Ether-<br />
CAT will prevent other devices like computers and servers on<br />
the network from transmitting data.<br />
There is a danger of<br />
• Network overload/breakdown<br />
• Malfunction of connected devices<br />
• Data loss at connected devices<br />
It is strongly recommended to use cables of a special color<br />
only for EtherCAT connections.<br />
Technical data:<br />
• 100 Mbit/s transfer rate<br />
• Maximal cable length between two devices: 100 m<br />
• Termination: device internally<br />
7.2.1 Bus Topology<br />
The network physical topology is line.<br />
The connection between two devices is a point to point connection. Thus<br />
each slave device has an input and an output connector which relays the data<br />
to the next slave device in the line.<br />
EtherCAT<br />
Master<br />
EtherCAT<br />
EtherCAT<br />
EtherCAT<br />
Slave 1<br />
Slave 2<br />
Slave 3<br />
in out in out in out<br />
Figure 37: EtherCAT Bus Topology<br />
7.2.2 EtherCAT Interface Cables<br />
RJ45 Mating<br />
Connector<br />
8<br />
1<br />
1<br />
2<br />
3<br />
6<br />
TD+<br />
TD-<br />
RD+<br />
RD-<br />
Figure 38: 100BaseT Cable with Non-Crossed Twisted Pair Wires (Patch Cable)<br />
with 8 Pole RJ45 Mating Connectors, Cable Category 5, Wire Cross Section > 0.22 mm² (24 AWG)<br />
For the terminal assignment of the EtherCAT front panel connector of the<br />
<strong>MSC</strong> <strong>II</strong> control module, see: � EtherCAT connector on page 81<br />
EtherCAT<br />
Bus Topology<br />
EtherCAT Bus Topology<br />
100BaseT Cable<br />
with Non-Crossed<br />
Twisted Pair Wires<br />
(Patch Cable)<br />
© <strong>Moog</strong> GmbH <strong>User</strong> <strong>Manual</strong> M3000 ® and <strong>MSC</strong> <strong>II</strong> (CA65865-001; Version 1.1, 08/08) 49<br />
RD+<br />
RD-<br />
TD+<br />
TD-<br />
1<br />
2<br />
3<br />
6<br />
RJ45 Mating<br />
Connector<br />
1<br />
8
7 Networking M3000 ® Modules Profibus<br />
7.3 Profibus<br />
7.3.1 Overview<br />
The Profibus is a differential two wire bus. The transmission physics of the<br />
serial bus system is defined by the TIA/EIA-485 specification. Shielded<br />
twisted pair copper cable with one conductor pair is typically used. The bus<br />
structure allows addition or removal of stations or the step-by-step commissioning<br />
of the system without influencing other stations.<br />
• Various transmission rates<br />
• Uniform speed for all devices on the bus<br />
• Connection of up to 32 stations without additional repeater possible<br />
7.3.2 M3000 ® Modules with Profibus DP Interfaces<br />
Information about the Profibus interface cable:<br />
�-"7.3.4-Profibus Interface Cable" on page 52<br />
Information about the Profibus interface of the <strong>MSC</strong> <strong>II</strong>:<br />
�-"10.11-Profibus DP Interface" on page 100<br />
The M3000 ® modules mentioned here represent only a part of <strong>Moog</strong>'s current<br />
product range. In addition to other M3000 ® modules, <strong>Moog</strong>'s product range<br />
includes a large variety of accessories.<br />
�-"11-Product Range" on page 114<br />
Refer to the relevant documentation for detailed information about the Profibus<br />
interfaces of the other M3000 ® modules.<br />
7.3.3 Profibus Networks<br />
7.3.3.1 Wiring<br />
Always observe the following when wiring Profibus networks:<br />
• EC 61158/EN 50170<br />
The cables, mating connectors, and termination resistors used in Profibus<br />
networks must comply with IEC 61158/EN 50170. It is recommended<br />
to use only connections of cable type A, to use the full bandwidth<br />
of 12 Mbaud.<br />
• Specifications for interface cables<br />
�-"7.3.4.4-Suitable Cables" on page 53<br />
• Linear structure of Profibus<br />
Avoid branching. Short stub cables with a T-adapter or special Profibus<br />
connectors with internal T-adapter are permitted.<br />
�-"7.3.3.2-Bus Structure of the Profibus" on page 51<br />
• Stub cables as short as possible<br />
Maximum length of all stub cables < 6.6 m at baud rates < 1500 kbit/s.<br />
No stub cables recommended at higher baud rates.<br />
• Profibus termination resistors<br />
At both ends of the Profibus network, termination resistors must be connected<br />
to guarantee specified signal levels.<br />
• Adapt transmission rate to cable length<br />
It is necessary to adapt the transmission rate to the length of the Profibus<br />
interface cable.<br />
�-"7.3.4.3-Cable Lengths" on page 53<br />
Overview<br />
M3000 ® Modules with<br />
Profibus DP Interfaces<br />
Wiring Profibus Networks<br />
© <strong>Moog</strong> GmbH <strong>User</strong> <strong>Manual</strong> M3000 ® and <strong>MSC</strong> <strong>II</strong> (CA65865-001; Version 1.1, 08/08) 50
7 Networking M3000 ® Modules Profibus<br />
• Sources of interference<br />
Do not lay Profibus interface cables in direct proximity to sources of interference.<br />
7.3.3.2 Bus Structure of the Profibus<br />
All devices are connected in a linear bus structure. Up to 32 stations (master<br />
or slaves) can be connected in a single segment. The beginning and the end<br />
of each segment is fitted with an active bus terminator. Both bus terminators<br />
have a permanent power supply to ensure error-free operation. The bus terminator<br />
is usually switched in the connectors. If more than 32 stations are implemented<br />
or there is a need to expand the network area, repeaters must be<br />
used to link the individual bus segments.<br />
Slave 1<br />
(Termination<br />
enabled)<br />
Active stations (master devices)<br />
Master 1<br />
Master 2<br />
Figure 39: Linear Structure of the Profibus with Termination Resistors<br />
D-sub connectors with Profibus termination resistors are available from<br />
<strong>Moog</strong>.<br />
Profibus networks with M3000 ® modules can include a maximum of<br />
126 Profibus network stations.<br />
�-"7.3.3.3-Number of Network Stations" on page 51<br />
Profibus interface cable<br />
�-"7.3.4-Profibus Interface Cable" on page 52<br />
7.3.3.3 Number of Network Stations<br />
Profibus DP<br />
Slave 2 Slave 3 Slave 4<br />
(Termination<br />
enabled)<br />
Passive stations (slave devices) are polled<br />
Profibus networks with M3000 ® modules can only include a maximum of<br />
32 Profibus network stations. With repeater stations the network can be expanded<br />
to a maximum of 126 stations within the address range of 0 to 125.<br />
Each repeater reduces the maximum number of network stations, as a repeater<br />
is a passive network station without any address.<br />
IEC 61158/EN 50170 specifies networks with up to 126 Profibus network stations.<br />
The performance to the Profibus master may limit the maximum number<br />
of slaves. The number of network stations also influences the reaction<br />
time that can be achieved by the bus.<br />
Linear Structure of the<br />
Profibus with Termination<br />
Resistors<br />
Number of Network<br />
Stations<br />
© <strong>Moog</strong> GmbH <strong>User</strong> <strong>Manual</strong> M3000 ® and <strong>MSC</strong> <strong>II</strong> (CA65865-001; Version 1.1, 08/08) 51
7 Networking M3000 ® Modules Profibus<br />
7.3.4 Profibus Interface Cable<br />
7.3.4.1 Terminal Assignment<br />
390 �<br />
220 �<br />
390 �<br />
DGND VP<br />
Figure 40: 9 Pole D-sub Mating Connector with switchable termination according to<br />
IEC 61158/EN 50170<br />
Figure 41: Profibus Interface - Connector with internal longitudinal inductivity according to<br />
IEC 61158/EN 50170<br />
Terminal assignment of the Profibus connectors on the front panel of the<br />
<strong>MSC</strong> <strong>II</strong> control module: �-"10.4.1-Terminal Assignment" on page 78<br />
7.3.4.2 Connector Pin out<br />
Connector<br />
5 6 3 8 Pin-No. of 9 Pole D-sub Con.<br />
DGND VP<br />
390 �<br />
220 �<br />
390 �<br />
Connector<br />
100 nH each<br />
5 6 3 8 Pin-No. of 9 Pole D-sub Con.<br />
1) These signals are mandatory and must be provided by the user.<br />
RxD/TxD-N<br />
RxD/TxD-P<br />
RxD/TxD-P<br />
RxD/TxD-N<br />
RxD/TxD-P<br />
RxD/TxD-N<br />
Pin No. Signal Function<br />
1 Shield Shield / grounding<br />
2 M24 24 V output voltage (ground)<br />
3 RxD/TxD-P 1) Receive / transmission data - positive potential<br />
4 CNTR-P Control signal for repeater (direction control)<br />
5 DGND Potential of transmission data (ground to 5 V)<br />
6 VP Power supply of the terminators (+5 V)<br />
7 P24 24 V output voltage<br />
8 RxD/TxD-N 1) Receive / transmission data - negative potential<br />
9 CNTR-N Control signal for repeater (direction control)<br />
Table 4: Connector Pin out<br />
9 Pole D-sub Mating<br />
Connector with switchable<br />
termination according to<br />
IEC 61158/EN 50170<br />
Profibus Interface -<br />
Connector with internal<br />
longitudinal inductivity<br />
according to<br />
IEC 61158/EN 50170<br />
Connector Pin out<br />
© <strong>Moog</strong> GmbH <strong>User</strong> <strong>Manual</strong> M3000 ® and <strong>MSC</strong> <strong>II</strong> (CA65865-001; Version 1.1, 08/08) 52
7 Networking M3000 ® Modules Profibus<br />
7.3.4.3 Cable Lengths<br />
Transmission Rate Maximum Cable Length<br />
12,000 kBit/s 100 m (109 yd)<br />
6,000 kBit/s 100 m (109 yd)<br />
3,000 kBit/s 100 m (109 yd)<br />
1,500 kBit/s 200 m (219 yd)<br />
500 kBit/s 400 m (437 yd)<br />
187.5 kBit/s 1,000 m (1,094 yd)<br />
93.75 kBit/s 1,200 m (1,312 yd)<br />
45.45 kBit/s 1,200 m (1,312 yd)<br />
19.2 kBit/s 1,200 m (1,312 yd)<br />
9.6 kBit/s 1,200 m (1,312 yd)<br />
Table 5: Maximum Cable Lengths in Profibus Networks (Depending on the Transmission Rate)<br />
The guiding values in table 5 are valid only for Profibus networks that<br />
were established in compliance with the requirements in "7.3.3.1-Wiring"<br />
on page 50.<br />
Transmission Rate Maximum Stub Cable Length<br />
12,000 kBit/s no stub cable allowed<br />
1,500 kBit/s < 1.5 m<br />
500 kBit/s < 6.6 m<br />
Table 6: Maximum Permissible Stub Cable Length in Profibus Networks (Depending on the<br />
Transmission Rate)<br />
7.3.4.4 Suitable Cables<br />
Parameters Cable Type A<br />
Loop resistance at 3-20 MHz 135-165 Ω (150 Ω ±10 %)<br />
Capacity 0.64 mm<br />
Wire Cross Section > 0.34 mm²<br />
Table 7: Suitable Cables for Profibus Interface Cables<br />
The selection of a suitable cable also depends on site conditions (towing application,<br />
environmental considerations, etc.)<br />
Maximum Cable Lengths<br />
in Profibus Networks<br />
Permissible Stub Cable<br />
Lengths in Profibus<br />
Networks<br />
Suitable Cables for<br />
Profibus Interface Cables<br />
© <strong>Moog</strong> GmbH <strong>User</strong> <strong>Manual</strong> M3000 ® and <strong>MSC</strong> <strong>II</strong> (CA65865-001; Version 1.1, 08/08) 53
7 Networking M3000 ® Modules Serial TIA/EIA Interface Cables<br />
7.4 Serial TIA/EIA Interface Cables<br />
The following variants of serial TIA/EIA interface cables are possible:<br />
• Null modem cables<br />
�-"7.4.1-TIA/EIA 232 Interface Cables" on page 54<br />
• Interface cables with 1:1 connection<br />
For example: when connecting terminals or displays<br />
�-"7.4.1-TIA/EIA 232 Interface Cables" on page 54<br />
7.4.1 TIA/EIA 232 Interface Cables<br />
A TIA/EIA 232 null modem cable can be used as a cable to connect the<br />
<strong>MSC</strong> <strong>II</strong> and PC.<br />
Mating Connector<br />
(socket contacts)<br />
1<br />
5<br />
Figure 42: TIA/EIA 232 Null Modem Cable<br />
with 9 Pole D-sub Mating Connectors according to DIN 41652<br />
TIA/EIA interface cables with 1:1 connection can be used to connect terminals<br />
or displays.<br />
1<br />
5<br />
<strong>MSC</strong> <strong>II</strong> PC<br />
6<br />
9<br />
2<br />
3<br />
5<br />
Rx<br />
Tx<br />
GND<br />
2<br />
Wire Cross Section > 0.22 mm (24 AWG)<br />
The other pins are not connected.<br />
Figure 43: TIA/EIA 232 Interface Cable with 1:1 Connection<br />
with 9 Pole D-sub Mating Connectors according to DIN 41652<br />
Serial TIA/EIA Interface<br />
Cables<br />
TIA/EIA 232<br />
Null Modem Cable<br />
TIA/EIA 232<br />
Interface Cable<br />
with 1:1 Connection<br />
© <strong>Moog</strong> GmbH <strong>User</strong> <strong>Manual</strong> M3000 ® and <strong>MSC</strong> <strong>II</strong> (CA65865-001; Version 1.1, 08/08) 54<br />
Rx<br />
Tx<br />
GND<br />
2<br />
3<br />
5<br />
Mating Connector<br />
(pin contacts)<br />
<strong>MSC</strong> <strong>II</strong> Display<br />
Mating Connector<br />
(socket contacts)<br />
6<br />
9<br />
2<br />
3<br />
5<br />
Rx<br />
Tx<br />
GND<br />
2<br />
Wire Cross Section > 0.22 mm (24 AWG)<br />
The other pins are not connected.<br />
Rx<br />
Tx<br />
GND<br />
2<br />
3<br />
5<br />
6<br />
9<br />
6<br />
9<br />
1<br />
5<br />
Mating Connector<br />
(pin contacts)<br />
1<br />
5
7 Networking M3000 ® Modules CAN Bus and CANopen<br />
7.5 CAN Bus and CANopen<br />
7.5.1 CAN Bus<br />
The CAN bus is a differential two wire bus that was originally developed to facilitate<br />
rapid and reliable networking of components in motor vehicles.<br />
The many advantages and high reliability of the CAN bus have also made it<br />
suitable for use in automation systems and have contributed to it becoming a<br />
widespread standard.<br />
7.5.2 CAN Bus Characteristics<br />
CAN bus exhibits the following characteristics:<br />
• Linear topology that can be structured hierarchically<br />
• Message oriented protocol<br />
• Prioritization of messages<br />
• Multi master capability<br />
• Zero loss bus arbitration<br />
• Short block length<br />
• High security of data transmission with very short error recovery times<br />
• Network data consistency<br />
• Detection and disconnection of defective network stations<br />
• Short reaction time for high priority messages<br />
• Standardization (ISO/DIS 11898)<br />
• Cost effective protocol implementation<br />
CAN bus network stations can exchange messages between each other in<br />
real time over the CAN bus. For example, set points, actual values, control<br />
messages, status messages, as well as configuration and parameter data<br />
can be transmitted over the CAN bus.<br />
Identifiers act as message labels in the CAN protocol. The messages can be<br />
received by all network stations simultaneously, which is very important for<br />
consistency of the data in the network and synchronization of the applications.<br />
The identifier determines the message's bus access priority.<br />
CAN bus is a multi master system, i.e., every station in the network can send<br />
messages. If several stations attempt to send messages at the same time,<br />
the highest priority messages will be sent first. This method guarantees bus<br />
assignment without destroying the contents of the messages.<br />
CAN Bus<br />
CAN Bus Characteristics<br />
© <strong>Moog</strong> GmbH <strong>User</strong> <strong>Manual</strong> M3000 ® and <strong>MSC</strong> <strong>II</strong> (CA65865-001; Version 1.1, 08/08) 55
7 Networking M3000 ® Modules CAN Bus and CANopen<br />
7.5.3 CANopen<br />
CANopen is a standardized communication profile that makes it easy to establish<br />
a network of CANopen compatible devices from a variety of manufacturers.<br />
CANopen is based on CAN bus. The communication profile complies with the<br />
standard CiA DS 301.<br />
Various device profiles have been defined by the CiA in order to facilitate the<br />
connection of various devices classes, such as drives, controllers, angle<br />
transmitters, valves, etc. These device profiles enable uniform control of several<br />
devices with the same functionality, regardless of manufacturer and<br />
model.<br />
7.5.4 M3000 ® Modules with CAN Bus Interfaces<br />
M3000 ® Module Number of Connectors<br />
MSD<br />
Motion<br />
Controller<br />
CAN 2 D-sub front panel connectors 1)<br />
Information about the CAN bus interface cable:<br />
�-"7.5.6-CAN Bus Interface Cable" on page 59<br />
Information about the CAN bus interfaces of the <strong>MSC</strong> <strong>II</strong>:<br />
�-"10.15-CAN Bus Interfaces" on page 109<br />
Number of<br />
CAN Bus<br />
Controllers<br />
CAN Bus<br />
Termination<br />
Resistor<br />
1 -<br />
<strong>MSC</strong> I and LocalCAN 2 Q-connectors (lateral) 1 switchable<br />
<strong>MSC</strong> <strong>II</strong><br />
WideCAN 2 D-sub front panel connectors 2) 1 -<br />
RDIO 2 D-sub front panel connectors 2) 1 -<br />
RDISP 1 D-sub connector (on the rear) 1 switchable<br />
QEBUS- LocalCAN 1 Q-connector (lateral)<br />
0 switchable<br />
CAN<br />
1 D-sub connector (front)<br />
Table 8: M3000 ® Modules with CAN Bus Interfaces<br />
1) The «WCAN» front panel connectors are connected internally 1:1 with each other. As a result,<br />
the <strong>MSC</strong> <strong>II</strong> control module can be connected directly to the CAN bus without a T-adapter.<br />
2) The «WCAN» or «CAN» front panel connectors are connected internally 1:1 with each other.<br />
As a result, the M3000 ® modules can be connected directly to the CAN bus without a<br />
T-adapter.<br />
The M3000 ® modules mentioned here represent only a part of <strong>Moog</strong>'s<br />
current product range. In addition to other M3000 ® modules, <strong>Moog</strong>'s<br />
product range includes a large variety of accessories.<br />
�-"11-Product Range" on page 114<br />
Refer to the relevant documentation for detailed information about the<br />
CAN bus interfaces of the other M3000 ® modules.<br />
CANopen<br />
CANopen Device Profiles<br />
M3000 ® Modules with<br />
CAN Bus Interfaces<br />
© <strong>Moog</strong> GmbH <strong>User</strong> <strong>Manual</strong> M3000 ® and <strong>MSC</strong> <strong>II</strong> (CA65865-001; Version 1.1, 08/08) 56
7 Networking M3000 ® Modules CAN Bus and CANopen<br />
7.5.5 CAN Bus Networks<br />
7.5.5.1 Wiring<br />
Always observe the following when wiring CAN bus networks:<br />
• ISO/DIS 11898<br />
The cables, mating connectors, and termination resistors used in CAN<br />
bus networks must comply with ISO/DIS 11898.<br />
• Specifications for interface cables<br />
When connecting CAN bus network stations, always use shielded cables<br />
with 4-twisted pair wires and an impedance of 120 Ω.<br />
�-"7.5.6-CAN Bus Interface Cable" on page 59<br />
• Linear structure of CAN bus<br />
Avoid branching. Short stub cables with a T-adapter are permitted.<br />
�-"7.5.5.2-Bus Structure of the CAN Bus" on page 58<br />
• Stub cables as short as possible<br />
Maximum stub cable length: �-table-10 on page 59<br />
• CAN bus termination resistors<br />
At both ends of the CAN bus, a termination resistor of 120 Ω ±10%<br />
must be connected between CAN_L and CAN_H.<br />
• Adapt transmission rate to cable length<br />
It is necessary to adapt the transmission rate to the length of the CAN<br />
bus interface cable.<br />
�-Table-9 on page 59<br />
• Sources of interference<br />
Do not lay CAN bus interface cables in direct proximity to sources of interference.<br />
If this cannot be avoided, double shielded interface cables<br />
must be used.<br />
• Potential equalization at only one point<br />
The CAN_GND and CAN_SHLD reference potential may be connected<br />
to the signal ground at only one point (at a CAN bus termination resistor,<br />
for example).<br />
� Figure 44 on page 58<br />
• Grounding<br />
The power supply for M3000 ® modules must be grounded at the same<br />
point as the CAN_GND wire.<br />
Wiring CAN Bus Networks<br />
© <strong>Moog</strong> GmbH <strong>User</strong> <strong>Manual</strong> M3000 ® and <strong>MSC</strong> <strong>II</strong> (CA65865-001; Version 1.1, 08/08) 57
7 Networking M3000 ® Modules CAN Bus and CANopen<br />
7.5.5.2 Bus Structure of the CAN Bus<br />
The CAN bus has a linear structure. Avoid branching. Short stub cables with<br />
a T-adapter are permitted.<br />
2<br />
7<br />
3<br />
6<br />
CAN Bus<br />
Network<br />
Station<br />
<strong>MSC</strong> <strong>II</strong><br />
WCAN<br />
CAN Bus Termination Resistor<br />
with Signal Grounding<br />
CAN Bus<br />
Network<br />
Station<br />
RDIO<br />
CAN<br />
(Additional<br />
CAN Bus Network<br />
Stations)<br />
Figure 44: Linear Structure of the CAN Bus<br />
with CAN Bus Termination Resistors and Potential Equalization<br />
D-sub connectors with CAN bus termination resistors are available from<br />
<strong>Moog</strong>.<br />
�-"11.7-CAN Bus Accessories" on page 120<br />
CAN bus networks with M3000 ® modules can include a maximum of<br />
64 CAN bus network stations.<br />
�-"7.5.5.3-Number of Network Stations" on page 58<br />
CAN bus interface cable<br />
�-"7.5.6-CAN Bus Interface Cable" on page 59<br />
7.5.5.3 Number of Network Stations<br />
CAN Bus<br />
Network<br />
Station<br />
CAN Bus Termination Resistor<br />
CAN Bus<br />
Network<br />
Station<br />
CAN bus networks with M3000 ® modules can include a maximum of 64 CAN<br />
bus network stations.<br />
ISO/DIS 11898 only specifies networks with up to 30 CAN bus network stations.<br />
As a result, when integrating other devices than M3000 ® modules into a CAN<br />
bus network with M3000 ® modules, the maximum number of CAN bus network<br />
stations might be limited by any existing, older CAN bus drivers.<br />
Linear Structure<br />
of the CAN Bus<br />
CAN Bus Networks with<br />
M3000 ® Modules:<br />
max. 64 Network Stations<br />
© <strong>Moog</strong> GmbH <strong>User</strong> <strong>Manual</strong> M3000 ® and <strong>MSC</strong> <strong>II</strong> (CA65865-001; Version 1.1, 08/08) 58<br />
RDIO<br />
CAN<br />
<strong>MSC</strong> <strong>II</strong><br />
WCAN<br />
2<br />
7<br />
3<br />
6
7 Networking M3000 ® Modules CAN Bus and CANopen<br />
7.5.6 CAN Bus Interface Cable<br />
7.5.6.1 Terminal Assignment<br />
Mating<br />
Connector<br />
(socket contacts)<br />
1<br />
5<br />
6<br />
9<br />
2<br />
7<br />
3<br />
6<br />
CAN_L<br />
CAN_H<br />
CAN_GND<br />
Figure 45: CAN Bus Interface Cable<br />
with 9 Pole D-sub Mating Connectors according to DIN 41652<br />
To ensure disturbance-free operation, it is required that a CAN_GND wire is<br />
used in the cable.<br />
Terminal assignment of the CAN connectors on the front panel of the <strong>MSC</strong> <strong>II</strong><br />
control module: �-"10.4.1-Terminal Assignment" on page 78<br />
7.5.6.2 Cable Lengths<br />
2<br />
Wire Cross Section � 0.22 mm (24 AWG)<br />
CAN_L<br />
CAN_H<br />
CAN_GND<br />
CAN_GND<br />
CAN_GND<br />
(optional) (optional)<br />
The other pins are not connected.<br />
The maximum expansion of a CAN bus network will be determined by a variety<br />
of variables, such as cable length, transmission rate, and resistance in the<br />
cable.<br />
Transmission Rate Maximum Cable Length<br />
1,000 kBit/s 25 m (27 yd)<br />
800 kBit/s 50 m (54 yd)<br />
500 kBit/s 100 m (109 yd)<br />
250 kBit/s 250 m (273 yd)<br />
125 kBit/s 500 m (546 yd)<br />
100 kBit/s 650 m (710 yd)<br />
50 kBit/s 1,000 m (1,093 yd)<br />
20 kBit/s 2,500 m (2,734 yd)<br />
10 kBit/s 5,000 m (5,468 yd)<br />
CAN Bus Interface Cable<br />
Maximum Cable Lengths<br />
in CAN Bus Networks<br />
Permissible Stub Cable<br />
Lengths in CAN Bus<br />
Networks<br />
© <strong>Moog</strong> GmbH <strong>User</strong> <strong>Manual</strong> M3000 ® and <strong>MSC</strong> <strong>II</strong> (CA65865-001; Version 1.1, 08/08) 59<br />
2<br />
7<br />
3<br />
6<br />
Mating<br />
Connector<br />
(pin contacts)<br />
Table 9: Maximum Cable Lengths in CAN Bus Networks (Depending on the Transmission Rate)<br />
Maximum Stub Cable Length<br />
Transmission Rate<br />
Maximum Cumulated<br />
1,000 kBit/s 2 m (2.1 yd) 20 m (21.8 yd)<br />
500 kBit/s 6 m (6.5 yd) 39 m (42.6 yd)<br />
250 kBit/s 6 m (6.5 yd) 78 m (85.3 yd)<br />
125 kBit/s 6 m (6.5 yd) 156 m (170.6 yd)<br />
Table 10: Maximum Permissible Stub Cable Lengths in CAN Bus Networks<br />
The guiding values in tables 9 and 10 are valid only for CAN bus networks<br />
that were established in compliance with the requirements in<br />
"7.5.5.1-Wiring" on page 57.<br />
6<br />
9<br />
1<br />
5
7 Networking M3000 ® Modules E-Bus<br />
7.5.6.3 Suitable Cables<br />
Parameters M3000 ® Recommendation Remarks<br />
Number of Wires ≥ 4, twisted pairs<br />
Wire Cross 0.22–0.34 mm²<br />
When the network is spread out over a<br />
Section (for Cu) (24–22 AWG)<br />
greater distance, a larger wire cross section<br />
will provide a better signal-to-noise ratio.<br />
Cable Structure 2 twisted pairs<br />
Electrically connect the shield to the mating<br />
with shielding<br />
connector's housing and the shielding<br />
shroud of the plug-in devices.<br />
Impedance 120 Ω If different cables are used, make sure they<br />
(1 MHz)<br />
have the same impedance.<br />
The selection of a suitable cable also depends on site conditions (towing application,<br />
environmental considerations, etc.)<br />
7.6 E-Bus<br />
Communication within E-bus groups is done over the E-bus.<br />
Notes on establishing E-bus groups:<br />
�-"7.7.2-E-Bus Groups" on page 65<br />
Examples of E-bus groups:<br />
�-"7.7.2.1-Examples" on page 66<br />
7.6.1 E-Bus Interface<br />
Table 11: Suitable Cables for CAN Bus Interface Cables<br />
For normal use <strong>Moog</strong> recommends the CAN bus data cable<br />
"UNITRONIC ® BUS LD“ supplied by LAPP KABEL (http://www.lapp.de)<br />
or "577 FlexLife Thin Cable“ or the "5710 FlexLife Mid Cable“ or the<br />
"575 FlexLife Thick Cable“ supplied by Hans Turck GmbH & Co. KG<br />
(http://www.turck.com).<br />
CAN bus interface cables are available from <strong>Moog</strong> as accessories, in a<br />
variety of lengths.<br />
�-"11.6-Interface Cables" on page 120<br />
The E-bus interface is set up as a serial cyclic shift register. Every communication<br />
cycle reserves for each extension module four bytes each in the send<br />
and receive messages.<br />
The 40 pole Q-connectors are located laterally on the DIN rail modules that<br />
have an E-bus interface.<br />
When the modules are joined with no gaps and are locked on the DIN top-hat<br />
rail, the E-bus connection will be properly established over the Q-connectors.<br />
Views of DIN rail modules:<br />
�-"5.1.1-Views of the Module" on page 29<br />
Mounting DIN rail modules:<br />
�-"5.1.4.1-Mounting DIN Rail Modules" on page 33<br />
E-bus interface of the <strong>MSC</strong> <strong>II</strong>:<br />
�-"10.14-E-Bus Interface" on page 108<br />
Suitable Cables for<br />
CAN Bus Interface Cables<br />
E-Bus<br />
E-Bus Interface<br />
Q-Connector<br />
© <strong>Moog</strong> GmbH <strong>User</strong> <strong>Manual</strong> M3000 ® and <strong>MSC</strong> <strong>II</strong> (CA65865-001; Version 1.1, 08/08) 60
7 Networking M3000 ® Modules E-Bus<br />
7.6.2 E-Bus Communication<br />
Communication within E-bus groups takes place exclusively between the<br />
E-bus master and the E-bus slaves.<br />
The master sends E-bus messages with output data to the slaves within its<br />
E-bus group and receives from the slaves E-bus messages with input data.<br />
Direct communication between the slaves of an E-bus group over the E-bus<br />
is not possible.<br />
7.6.2.1 E-Bus Master and E-Bus Slaves<br />
The following M3000 ® modules can be employed as E-bus master in an<br />
E-bus group:<br />
• <strong>MSC</strong> I and <strong>MSC</strong> <strong>II</strong><br />
• RDIO<br />
Permissible<br />
Masters<br />
Permissible Slaves<br />
<strong>MSC</strong> <strong>II</strong> 7 I/O extension modules, such<br />
as QAIO and QDIO<br />
(E-bus must be carried<br />
through on the Q-connector)<br />
Number Modules Remarks<br />
The duration of transmission of E-bus messages is not influenced by the<br />
number of DIN rail modules in the E-bus group.<br />
�-"7.6.3.3-Duration of Transmission of E-Bus Messages" on page 62<br />
7.6.3 <strong>MSC</strong> <strong>II</strong> as E-Bus Master<br />
7.6.3.1 Starting the E-Bus Communication<br />
E-bus groups with <strong>MSC</strong> <strong>II</strong>s as masters<br />
function as stand-alone groups.<br />
Configuration of the E-bus interface<br />
of the <strong>MSC</strong> <strong>II</strong> and the slaves:<br />
�-"10.14.1-Configuration of the<br />
E-Bus Interface" on page 108<br />
RDIO 6 QDIOs E-bus groups with RDIOs as master<br />
must be actuated over the CAN bus.<br />
Other M3000 ® modules<br />
must not be attached<br />
to an RDIO!<br />
Table 12: Permissible Masters and Slaves in E-Bus Groups<br />
At program download from the MACS development environment, the E-bus<br />
configuration contained in the PLC configuration will be transferred to the<br />
<strong>MSC</strong> <strong>II</strong>. If slaves are set in the E-bus configuration, the <strong>MSC</strong> <strong>II</strong> checks<br />
whether the configured slaves are actually attached. Communication over the<br />
E-bus is possible only when the slaves actually attached correspond with the<br />
arrangement set in the PLC configuration. Otherwise, an error message will<br />
be displayed in the MACS development environment.<br />
The E-bus communication will be started automatically after an application<br />
program is started. If communication over the E-bus is successful, the LED<br />
«EBus» will illuminate on the front panel of the <strong>MSC</strong> <strong>II</strong>.<br />
�-"10.4.2-LEDs" on page 81<br />
If an error occurs during the communication or if the digital output 'Outputs<br />
Enabled' of the <strong>MSC</strong> <strong>II</strong> is switched to the 0 state, the E-bus communication<br />
will be terminated and the LED «Ebus» will be turned off.<br />
�-"10.17.2-'Outputs Enabled' Output (LED «OutEN»)" on page 111<br />
E-Bus Communication<br />
Permissible Masters and<br />
Slaves in E-Bus Groups<br />
Starting the E-Bus<br />
Communication<br />
© <strong>Moog</strong> GmbH <strong>User</strong> <strong>Manual</strong> M3000 ® and <strong>MSC</strong> <strong>II</strong> (CA65865-001; Version 1.1, 08/08) 61
7 Networking M3000 ® Modules E-Bus<br />
7.6.3.2 Update Rate of E-Bus Messages<br />
WARNING The I/O extension modules QDIO and QAIO monitor the<br />
E-bus activity and disable their outputs if they do not receive<br />
an E-bus message more frequently than 50 ms.<br />
To avoid this, set the value of the system basetick or the<br />
value of 'UpdateRate' so that the product of the two values is<br />
less than 50 ms.<br />
The update rate setting of the E-bus depends on the system basetick. The<br />
system basetick is the time base for the operating system tasks, used in the<br />
application program. Task time bases of tasks can be set to integer multiples<br />
of the system basetick.<br />
The update rate is defined by setting the E-bus module parameter 'Update-<br />
Rate' in the PLC configuration of the MACS development environment.<br />
'UpdateRate' can be set so that an E-bus message will always be sent at the<br />
end of this task's cycle (or after 2, 3, 5, 10, 15 or 20 cycles).<br />
<strong>MSC</strong> <strong>II</strong> Module<br />
Parameter<br />
'Basetick'<br />
E-Bus Module Parameter<br />
'UpdateRate' Update Rate of E-Bus Messages<br />
1 ms 'every third cycle' An E-bus message is started cyclically every<br />
3 ms (1 ms * 3).<br />
3 ms 'every twentieth cycle' An E-bus message would be started cyclically<br />
every 60 ms (3 ms * 20).<br />
However, since no E-bus message is sent<br />
more frequently than 50 ms, the I/O extension<br />
modules will disable their outputs. The outputs<br />
will be re-enabled with the next E-bus<br />
message.<br />
Table 13: Update Rate of E-Bus Messages<br />
7.6.3.3 Duration of Transmission of E-Bus Messages<br />
The duration of transmission of the E-bus message, i.e., the length of time required<br />
to transmit the E-bus message, is determined by the E-bus clock frequency.<br />
The E-bus clock frequency is defined by setting the E-bus module<br />
parameter 'Frequency' in the PLC configuration of the MACS development<br />
environment.<br />
• Clock frequency = 10 MHz � Duration of transmission = 42 µs<br />
• Clock frequency = 5 MHz � Duration of transmission = 84 µs<br />
The selected E-bus clock frequency does not influence the time required to<br />
execute the tasks.<br />
When the E-bus group contains QAIOs 16/4, the clock frequency must<br />
be set to 5 MHz!<br />
When the E-bus group contains QAIOs 2/2, the clock frequency must be<br />
set to 10 MHz!<br />
The duration of transmission of E-bus messages is not influenced by the<br />
number of DIN rail modules in the E-bus group.<br />
E-Bus Communication:<br />
Message Update Rate<br />
E-Bus Communication:<br />
Duration of Message<br />
Transmission<br />
© <strong>Moog</strong> GmbH <strong>User</strong> <strong>Manual</strong> M3000 ® and <strong>MSC</strong> <strong>II</strong> (CA65865-001; Version 1.1, 08/08) 62
7 Networking M3000 ® Modules E-Bus<br />
7.6.3.4 Scope of E-Bus Messages<br />
The scope of the E-bus message depends on the slave types attached to the<br />
master.<br />
Communication with digital I/O extension modules (such as QDIO)<br />
All input and output data of every digital I/O extension module is transmitted<br />
during every E-bus cycle.<br />
Communication with analog I/O extension modules QAIO 16/4<br />
The data for one output and one input from each analog I/O extension<br />
module will be transmitted during every E-bus cycle. Only the input and<br />
output data that is used in the application program will be transmitted.<br />
Communication with analog I/O extension modules QAIO 2/2<br />
All input and output data of every analog I/O extension module is transmitted<br />
during every E-bus cycle.<br />
7.6.3.5 Example<br />
One analog and one digital I/O extension module is connected to an <strong>MSC</strong> <strong>II</strong>.<br />
The E-bus interface of the <strong>MSC</strong> <strong>II</strong> and the inputs and outputs of the I/O<br />
extension modules are configured in the PLC configuration of the MACS<br />
development environment.<br />
�-"10.14.1-Configuration of the E-Bus Interface" on page 108<br />
The following inputs and outputs are used in the application program.<br />
• QAIO 16/4: 7 analog inputs QAIO-IN1 to QAIO-IN7<br />
3 analog outputs QAIO-OUT1 to QAIO-OUT3<br />
• QDIO: 3 digital inputs QDIO-IN5 to QDIO-IN7<br />
3 digital outputs QDIO-I/O13 to QDIO-I/O15<br />
The basetick is set to 1 ms. The module parameter 'UpdateRate' is set to<br />
'each cycle'.<br />
Accordingly, the E-bus message starts cyclically every millisecond.<br />
�-"7.6.3.2-Update Rate of E-Bus Messages" on page 62<br />
The digital inputs and outputs of the QDIO are updated in every E-bus cycle;<br />
once every millisecond in this example.<br />
However, only one analog input and one analog output of the QAIO 16/4 will<br />
be updated with each E-bus cycle. For this reason, each analog input is updated<br />
only every 7 ms and every analog output is updated only every 3 ms in<br />
this example.<br />
Update<br />
Cycle No./<br />
Outputs Inputs<br />
Time Message No. QDIO QAIO 16/4 QDIO QAIO 16/4<br />
1ms 1 all OUT1 all IN1<br />
2ms 2 all OUT2 all IN2<br />
3ms 3 all OUT3 all IN3<br />
4ms 4 all OUT1 all IN4<br />
5ms 5 all OUT2 all IN5<br />
6ms 6 all OUT3 all IN6<br />
7ms 7 all OUT1 all IN7<br />
8ms 8 all OUT2 all IN1<br />
9ms 9 all OUT3 all IN2<br />
… … … … … …<br />
Table 14: Update Order for Inputs and Outputs of QDIO and QAIO 16/4<br />
E-Bus Communication:<br />
Scope of Messages<br />
E-Bus Communication:<br />
Example<br />
© <strong>Moog</strong> GmbH <strong>User</strong> <strong>Manual</strong> M3000 ® and <strong>MSC</strong> <strong>II</strong> (CA65865-001; Version 1.1, 08/08) 63
7 Networking M3000 ® Modules Networking DIN Rail Modules<br />
7.7 Networking DIN Rail Modules<br />
When networking DIN rail modules, a distinction is made between the following<br />
control groups:<br />
• E-Bus Groups<br />
�-"7.7.2-E-Bus Groups" on page 65<br />
• LocalCAN Bus Groups<br />
�-"7.7.3-LocalCAN Bus Groups" on page 66<br />
• WideCAN Bus Groups<br />
�-"7.7.4-WideCAN Bus Groups" on page 67<br />
7.7.1 CAN and E-Bus Interfaces<br />
The M3000 ® modules mentioned here represent only a part of <strong>Moog</strong>'s<br />
current product range. In addition to other M3000 ® modules, <strong>Moog</strong>'s<br />
product range includes a large variety of accessories.<br />
�-"11-Product Range" on page 114<br />
DIN Rail Module<br />
<strong>MSC</strong> <strong>II</strong><br />
E-bus<br />
LocalCAN<br />
QDIO<br />
CAN Bus<br />
E-bus<br />
QAIO 16/4<br />
CAN Bus<br />
E-bus<br />
<strong>MSC</strong> <strong>II</strong><br />
WCAN<br />
QDIO<br />
QAIO 16/4<br />
E-bus<br />
LocalCAN<br />
CAN Bus<br />
E-bus<br />
CAN Bus<br />
E-bus<br />
Number of<br />
Connectors and Controllers<br />
LocalCAN bus:<br />
2 Q-connectors (lateral)<br />
WideCAN bus:<br />
2 D-sub front panel<br />
connectors<br />
CAN bus controller:<br />
2<br />
E-bus:<br />
2 Q-connectors (lateral)<br />
CAN bus:<br />
2 Q-connectors (lateral)<br />
CAN bus controller:<br />
0<br />
E-bus:<br />
2 Q-connectors (lateral)<br />
CAN bus:<br />
2 Q-connectors (lateral)<br />
CAN bus controller:<br />
0<br />
E-bus:<br />
2 Q-connectors (lateral)<br />
Table 15: DIN Rail Modules with CAN and E-Bus Interfaces (Section 1 of 2)<br />
Networking<br />
DIN Rail Modules<br />
DIN Rail Modules with<br />
CAN and E-Bus<br />
Interfaces<br />
© <strong>Moog</strong> GmbH <strong>User</strong> <strong>Manual</strong> M3000 ® and <strong>MSC</strong> <strong>II</strong> (CA65865-001; Version 1.1, 08/08) 64
7 Networking M3000 ® Modules Networking DIN Rail Modules<br />
DIN Rail Module<br />
RDIO<br />
QEBUS-CAN<br />
CAN-Bus<br />
RDIO<br />
CAN<br />
QEBUS-CAN<br />
CAN<br />
7.7.2 E-Bus Groups<br />
E-bus<br />
CAN Bus<br />
Number of<br />
Connectors and Controllers<br />
CAN bus:<br />
2 D-sub front panel<br />
connectors<br />
CAN bus controller:<br />
1<br />
E-bus:<br />
1 Q-connector (right)<br />
CAN bus:<br />
2 Q-connectors (lateral)<br />
2 D-sub connector<br />
(front)<br />
CAN bus controller:<br />
0<br />
Table 15: DIN Rail Modules with CAN and E-Bus Interfaces (Section 2 of 2)<br />
E-bus groups are formed by joining DIN rail modules together at the Q-connectors.<br />
The modules within E-bus groups communicate over the internal<br />
E-bus.<br />
�-"7.6-E-Bus" on page 60<br />
Observe the following when establishing E-bus groups:<br />
• An E-bus group can have only one master to which the slaves attach.<br />
�-Table-12 on page 61<br />
• The module located farthest to the left of an E-bus group must be the<br />
master.<br />
• The number of slaves that may be attached to a master is limited.<br />
�-Table-12 on page 61<br />
• QEBUS-CANs can be attached only at the far right or far left.<br />
QEBUS-CANs are not slaves and may therefore be attached additionally<br />
at the left or right regardless of the number of slaves.<br />
• Only the master can communicate with the slaves.<br />
Direct communication between the slaves of an E-bus group over the<br />
E-bus is not possible.<br />
�-"7.6.2-E-Bus Communication" on page 61<br />
• Slaves must be attached to the master in direct succession.<br />
Modules that do not belong to this E-bus group must not be connected to<br />
this E-bus group by the Q-connector.<br />
• RDIOs are not permissible slaves in E-bus groups and therefore must<br />
not be attached to the right of an <strong>MSC</strong> <strong>II</strong>, Q-module, or R-module.<br />
• QAIO 16/4 and QAIO 2/2 can not be used on one E-bus group.<br />
• QAIO 2/2 must be connected directly to the E-bus master or an other<br />
QAIO 2/2 module.<br />
• Information about arranging DIN rail modules:<br />
�-"5.1.3-Arrangement on DIN Top-Hat Rails" on page 31<br />
E-Bus Groups<br />
© <strong>Moog</strong> GmbH <strong>User</strong> <strong>Manual</strong> M3000 ® and <strong>MSC</strong> <strong>II</strong> (CA65865-001; Version 1.1, 08/08) 65
7 Networking M3000 ® Modules Networking DIN Rail Modules<br />
7.7.2.1 Examples<br />
Master Slave Slave Slave<br />
<strong>MSC</strong> <strong>II</strong><br />
WCAN<br />
Figure 46: E-Bus Group (<strong>MSC</strong> <strong>II</strong> as E-Bus Master)<br />
Number of slaves that may be attached to the <strong>MSC</strong> <strong>II</strong>:<br />
�-Table-12 on page 61<br />
Master<br />
RDIO<br />
CAN<br />
Slave<br />
QDIO<br />
QAIO QAIO QDIO<br />
Slave<br />
QDIO<br />
Slave<br />
QDIO<br />
Figure 47: E-Bus Group (RDIO as E-Bus Master)<br />
7.7.3 LocalCAN Bus Groups<br />
Slave<br />
QDIO<br />
Slave<br />
QDIO<br />
Number of slaves that may be attached to the RDIO:<br />
�-Table-12 on page 61<br />
(Additional<br />
Slaves)<br />
(Additional<br />
Slaves)<br />
LocalCAN bus groups are formed by joining <strong>MSC</strong> <strong>II</strong>s together at the Q-connectors.<br />
The modules within LocalCAN bus groups communicate over the internal<br />
LocalCAN bus.<br />
Observe the following when establishing LocalCAN bus groups:<br />
• The number of modules in a LocalCAN bus group is limited to 64 because<br />
CAN bus networks can only include a maximum of 64-network<br />
stations.<br />
�-"7.5.5.3-Number of Network Stations" on page 58<br />
• The switchable CAN bus termination resistor of the <strong>MSC</strong> <strong>II</strong> can be used<br />
as a termination resistor for the LocalCAN bus group.<br />
�-"10.15.1-CAN Bus Termination Resistor" on page 110<br />
• If a QEBUS-CAN is attached to the right, then the LocalCAN bus can be<br />
made available (using the QEBUS-CAN) for other CAN bus network stations<br />
that do not belong to the LocalCAN bus group.<br />
• Information about arranging DIN rail modules:<br />
�-"5.1.3-Arrangement on DIN Top-Hat Rails" on page 31<br />
E-Bus Group<br />
(<strong>MSC</strong> <strong>II</strong> as E-Bus Master)<br />
E-Bus Group<br />
(RDIO as E-Bus Master)<br />
LocalCAN Bus Groups<br />
© <strong>Moog</strong> GmbH <strong>User</strong> <strong>Manual</strong> M3000 ® and <strong>MSC</strong> <strong>II</strong> (CA65865-001; Version 1.1, 08/08) 66<br />
Slave<br />
QDIO<br />
Slave<br />
QDIO
7 Networking M3000 ® Modules Networking DIN Rail Modules<br />
7.7.3.1 Example<br />
CAN Bus<br />
Network<br />
Station<br />
<strong>MSC</strong> <strong>II</strong><br />
WCAN<br />
CAN Bus<br />
Network<br />
Station<br />
<strong>MSC</strong> <strong>II</strong><br />
CAN Bus<br />
Network<br />
Station<br />
<strong>MSC</strong> <strong>II</strong><br />
CAN Bus<br />
Network<br />
Station<br />
<strong>MSC</strong> <strong>II</strong><br />
WCAN WCAN WCAN<br />
Figure 48: LocalCAN Bus Group (<strong>MSC</strong> <strong>II</strong>s as CAN Bus Network Stations)<br />
The internal CAN bus termination resistor is switched on for <strong>MSC</strong> <strong>II</strong>s that<br />
are used as the first or last CAN bus network station of a LocalCAN bus<br />
group.<br />
�-"10.15.1-CAN Bus Termination Resistor" on page 110<br />
The internal CAN bus termination resistor is not switched on for <strong>MSC</strong> <strong>II</strong>s<br />
that are located between the first and final CAN bus network stations of<br />
a LocalCAN bus group.<br />
CAN bus networks with M3000 ® modules can include a maximum of<br />
64 CAN bus network stations.<br />
�-"7.5.5.3-Number of Network Stations" on page 58<br />
7.7.4 WideCAN Bus Groups<br />
(Additional<br />
CAN Bus Network<br />
Stations)<br />
CAN Bus<br />
Network<br />
Station<br />
<strong>MSC</strong> <strong>II</strong><br />
WCAN<br />
WideCAN bus groups are formed by connecting the WideCAN terminal of the<br />
<strong>MSC</strong> <strong>II</strong> to additional CAN bus network stations. CAN bus network stations<br />
use the internal WideCAN bus to communicate within WideCAN bus groups.<br />
Observe the following when establishing WideCAN bus groups:<br />
• The switchable CAN bus termination resistor of the <strong>MSC</strong> <strong>II</strong> cannot be<br />
used as a termination resistor for the WideCAN bus group.<br />
Separate pluggable CAN termination resistors must be used for this.<br />
�-"10.15.1-CAN Bus Termination Resistor" on page 110<br />
• Notes on project planning for CAN bus networks:<br />
�-"7.5.5-CAN Bus Networks" on page 57<br />
LocalCAN Bus Group<br />
WideCAN Bus Groups<br />
© <strong>Moog</strong> GmbH <strong>User</strong> <strong>Manual</strong> M3000 ® and <strong>MSC</strong> <strong>II</strong> (CA65865-001; Version 1.1, 08/08) 67
7 Networking M3000 ® Modules Networking DIN Rail Modules<br />
7.7.4.1 Example<br />
2<br />
7<br />
3<br />
6<br />
CAN Bus<br />
Network<br />
Station<br />
<strong>MSC</strong> <strong>II</strong><br />
WCAN<br />
CAN Bus Termination Resistor<br />
with Signal Grounding<br />
CAN Bus<br />
Network<br />
Station<br />
RDIO<br />
CAN<br />
(Additional<br />
CAN Bus Network<br />
Stations)<br />
CAN Bus<br />
Network<br />
Station<br />
CAN Bus Termination Resistor<br />
CAN Bus<br />
Network<br />
Station<br />
Figure 49: WideCAN Bus Group (<strong>MSC</strong> <strong>II</strong>s and R-Modules as CAN Bus Network Stations)<br />
D-sub connectors with CAN bus termination resistors are available from<br />
<strong>Moog</strong>.<br />
�-"11.7-CAN Bus Accessories" on page 120<br />
CAN bus networks with M3000 ® modules can include a maximum of<br />
64 CAN bus network stations.<br />
�-"7.5.5.3-Number of Network Stations" on page 58<br />
CAN bus interface cable<br />
�-"7.5.6-CAN Bus Interface Cable" on page 59<br />
WideCAN Bus Group<br />
© <strong>Moog</strong> GmbH <strong>User</strong> <strong>Manual</strong> M3000 ® and <strong>MSC</strong> <strong>II</strong> (CA65865-001; Version 1.1, 08/08) 68<br />
RDIO<br />
CAN<br />
<strong>MSC</strong> <strong>II</strong><br />
WCAN<br />
2<br />
7<br />
3<br />
6
8 Shutdown and Service Shutdown<br />
8 Shutdown and Service<br />
WARNING To avoid damage to M3000 ® modules or accessories,<br />
cleaning, maintenance, and repair tasks may be performed<br />
only by <strong>Moog</strong> or <strong>Moog</strong>'s authorized service<br />
agents.<br />
Warranty and liability claims for personal and material damage<br />
are excluded when, among other reasons, they are due<br />
to unauthorized repairs or other unauthorized interventions.<br />
�-"1.4-Warranty and Liability" on page 3<br />
WARNING No work of any kind, such as mounting, removing, wiring,<br />
or repairs to the M3000 ® automation system or<br />
M3000 ® modules may be performed while the automation<br />
system or the modules are in operation!<br />
There is a danger of:<br />
• Uncontrolled movements<br />
• Permanent damage<br />
• Malfunctions<br />
Before performing any work on the M3000 ® automation system<br />
or M3000 ® modules, it is essential that the system is<br />
stopped and the power supply is disconnected.<br />
Therefore, all power supplies must be switched off, including<br />
those from attached peripherals such as externally supplied<br />
transmitters, programming devices, etc.!<br />
WARNING The M3000 ® automation system and M3000 ® modules<br />
must not come into direct contact with liquids, except<br />
where explicitely specified. Danger of short-circuit!<br />
If they do come into direct contact with a liquid, immediately<br />
disconnect the power supply! Before bringing the system<br />
back into operation, it is essential that all affected components<br />
are completely dry and have been inspected by a suitably<br />
qualified technician.<br />
8.1 Shutdown<br />
WARNING If an M3000 ® module is to be taken out of operation, the<br />
entire system must always be shut down and disconnected<br />
from all power supplies.<br />
Therefore, all power supplies must be switched off, including<br />
those from attached peripherals such as externally<br />
supplied transmitters, programming devices, etc.!<br />
The M3000 ® module must be protected against unintentional<br />
restarting!<br />
If the M3000 ® module is connected to other devices and/ or<br />
facilities, always consider the full consequences and take appropriate<br />
precautions before switching off the module.<br />
Shutdown and Service:<br />
Safety Instructions<br />
Shutdown:<br />
Safety Instructions<br />
© <strong>Moog</strong> GmbH <strong>User</strong> <strong>Manual</strong> M3000 ® and <strong>MSC</strong> <strong>II</strong> (CA65865-001; Version 1.1, 08/08) 69
8 Shutdown and Service Service<br />
8.2 Service<br />
WARNING To avoid damage to M3000 ® modules or accessories,<br />
cleaning, maintenance, and repair tasks may be performed<br />
only by <strong>Moog</strong> or <strong>Moog</strong>'s authorized service<br />
agents.<br />
Warranty and liability claims for personal and material damage<br />
are excluded when, among other reasons, they are due<br />
to unauthorized repairs or other unauthorized interventions.<br />
�-"1.4-Warranty and Liability" on page 3<br />
CAUTION To avoid damage to the internal components, never attempt<br />
to open M3000 ® modules!<br />
8.2.1 Maintenance/Servicing<br />
M3000 ® modules are maintenance-free. They do not contain any components<br />
(such as batteries) that must be maintained or replaced.<br />
8.2.2 Repair<br />
Only <strong>Moog</strong> and <strong>Moog</strong>'s authorized service stations perform <strong>Moog</strong> Authentic<br />
Repairs. Only <strong>Moog</strong> and <strong>Moog</strong>'s authorized service agents can access the<br />
required and most up-to-date specifications. These specifications make it<br />
possible to restore the M3000 ® modules' original performance and ensure<br />
the same high reliability and long service life of the M3000 ® modules after repairs<br />
are completed.<br />
Figure 50: Repair Seal<br />
<strong>Moog</strong>'s repair seal is the guarantee that a <strong>Moog</strong> Authentic Repair has been<br />
carried out.<br />
If <strong>Moog</strong> receives a repair order for defective M3000 ® modules, <strong>Moog</strong><br />
and <strong>Moog</strong>'s authorized service agents reserve the right to repair the defective<br />
module or, alternatively, to replace the defective module with a<br />
module of identical or compatible specifications.<br />
If <strong>Moog</strong> receives a repair order for defective M3000 ® modules, <strong>Moog</strong><br />
and <strong>Moog</strong>'s authorized service agents accept no liability for software and<br />
data installed by the customer. Like new modules, repaired modules or<br />
replacement modules are delivered only with a bootloader.<br />
Maintenance/Repair:<br />
Safety Instructions<br />
Maintenance/Servicing<br />
Repair<br />
Repair Seal<br />
© <strong>Moog</strong> GmbH <strong>User</strong> <strong>Manual</strong> M3000 ® and <strong>MSC</strong> <strong>II</strong> (CA65865-001; Version 1.1, 08/08) 70
9 Transportation and Storage Environmental Conditions<br />
9 Transportation and Storage<br />
WARNING Maintain, under all circumstances, the required environmental<br />
conditions specified for transportation and storage<br />
of the M3000 ® automation system or M3000 ® modules.<br />
�-"9.1-Environmental Conditions" on page 71<br />
This ensures fault-free, reliable, and safe operation.<br />
CAUTION To avoid condensation, do not start M3000 ® modules until<br />
they have reached ambient temperature.<br />
CAUTION To avoid damage, M3000 ® modules and accessories must<br />
be transported and stored in their original packaging.<br />
Warranty and liability claims for personal or material damage<br />
will be excluded when they are the result of, among other<br />
things, storing or transporting M3000 ® modules or accessories<br />
outside of their original packaging.<br />
�-"1.4-Warranty and Liability" on page 3<br />
9.1 Environmental Conditions<br />
Ambient temperature (IEC 61131-2)<br />
–25 °C to +70 °C (–13 °F to +158 °F)<br />
Relative air humidity (IEC 61131-2)<br />
5 % to 95 % non-condensing<br />
Contamination level (IEC 60664)<br />
2<br />
Resistance to corrosion (IEC 60068)<br />
No protection<br />
Air pressure (IEC 61131-2)<br />
≥ 70 kPa (corresponds to an elevation of ≤ 3,000 m (3,280 yd))<br />
Drop height (free fall in the original packaging) (IEC 60068-2-31)<br />
≤ 1m (39in)<br />
Transportation<br />
and Storage:<br />
Safety Instructions<br />
Transportation<br />
and Storage:<br />
Environmental Conditions<br />
© <strong>Moog</strong> GmbH <strong>User</strong> <strong>Manual</strong> M3000 ® and <strong>MSC</strong> <strong>II</strong> (CA65865-001; Version 1.1, 08/08) 71
10 <strong>MSC</strong> <strong>II</strong> (<strong>Moog</strong> <strong>Servo</strong> Controller) Performance Characteristics<br />
10 <strong>MSC</strong> <strong>II</strong> (<strong>Moog</strong> <strong>Servo</strong> Controller)<br />
The <strong>MSC</strong> <strong>II</strong> is a programmable multi-axis controller that facilitates rapid and<br />
precise control of process variables such as position, speed, and power. It is<br />
suitable for use with both electric and hydraulic drives.<br />
The <strong>MSC</strong> <strong>II</strong> is programmed and configured with the MACS development environment<br />
(complies with IEC 61131).<br />
�-"3.5-Application Programs" on page 25<br />
10.1 Performance Characteristics<br />
10.1.1 Interfaces<br />
The <strong>MSC</strong> <strong>II</strong> provides the following interfaces:<br />
• 1 Serial interface<br />
– «SIO» connector for use as a free user interface<br />
�-"10.16-Serial Interfaces" on page 111<br />
• 1 E-bus interface on both lateral Q-connectors<br />
(for establishing E-bus groups)<br />
�-"10.14-E-Bus Interface" on page 108<br />
• 2 CAN bus interfaces<br />
– WideCAN: 2 connectors «WCAN» (connected internally-1:1)<br />
– LocalCAN: 2 internally on both lateral Q-connectors<br />
�-"10.15-CAN Bus Interfaces" on page 109<br />
• 1 Ethernet interface on the front panel<br />
– «LAN» front panel connector<br />
�-"10.5.1.1-Ethernet Communication Interface" on page 84<br />
• 2 RT-ETH Real Time Ethernet interfaces (optional)<br />
– «RT-ETH1» and «RT-ETH2» front panel connectors<br />
• 2-USB 1.1 Host interfaces with USB-A connector<br />
– «USB1» and «USB2» connector<br />
• 1-Fieldbus interface<br />
– «F-Bus» connector<br />
(provided for optional fieldbus extension, such as Profibus)<br />
• 4 Digital sensor interfaces according to TIA/EIA 422/485 (previously<br />
RS 422/485) for position transducers or shaft encoders with SSI interface<br />
or incremental sensor signals<br />
�-"10.13-Digital Sensor Interfaces" on page 101<br />
<strong>MSC</strong> <strong>II</strong>: Programmable<br />
Multi-Axis Controller<br />
Interfaces of the <strong>MSC</strong> <strong>II</strong><br />
© <strong>Moog</strong> GmbH <strong>User</strong> <strong>Manual</strong> M3000 ® and <strong>MSC</strong> <strong>II</strong> (CA65865-001; Version 1.1, 08/08) 72
10 <strong>MSC</strong> <strong>II</strong> (<strong>Moog</strong> <strong>Servo</strong> Controller) General Specifications<br />
10.1.2 I/Os (Inputs/ Outputs)<br />
The <strong>MSC</strong> <strong>II</strong> provides the following I/Os:<br />
• 4 Digital I/Os<br />
each individually configurable as an input or an output<br />
�-"10.10-Digital I/Os" on page 93<br />
• 1 Digital output 'Outputs Enabled'<br />
�-"10.17.2-'Outputs Enabled' Output (LED «OutEN»)" on page 111<br />
The I/Os are configured in the PLC Configuration of the MACS development<br />
environment.<br />
10.1.3 Safety Functions<br />
The <strong>MSC</strong> <strong>II</strong> provides the following safety functions:<br />
• Watchdog for monitoring the functionality of the software<br />
�-"10.17.1-Watchdog" on page 111<br />
• Output 'Outputs Enabled' for signaling the activation of all outputs as well<br />
as EtherCAT communication<br />
�-"10.17.2-'Outputs Enabled' Output (LED «OutEN»)" on page 111<br />
10.2 General Specifications<br />
Dimensions<br />
Overall W × H × D in mm (in):<br />
124 × 170 × 85.5 (4.88 × 6.69 × 3.37)<br />
� Figure 51 on page 74<br />
Dimensions of the other DIN rail modules:<br />
�-"5.1.2-Dimensions" on page 30<br />
Weight<br />
Approx. 1 kg (2.2 lb) without plug-in terminal strips, with license key<br />
Processor<br />
PowerPC CPU 400 MHz, 32 Bit, RISC architecture with floating point<br />
unit<br />
Memory<br />
32 MB flash EEPROM<br />
128 MB RAM<br />
Data retention<br />
> 10 Years for all data that is saved in the flash EEPROM, i.e., boot<br />
project, error messages<br />
I/Os (Inputs/ Outputs)<br />
of the <strong>MSC</strong> <strong>II</strong><br />
Safety Functions<br />
of the <strong>MSC</strong> <strong>II</strong><br />
General Specifications<br />
of the <strong>MSC</strong> <strong>II</strong><br />
© <strong>Moog</strong> GmbH <strong>User</strong> <strong>Manual</strong> M3000 ® and <strong>MSC</strong> <strong>II</strong> (CA65865-001; Version 1.1, 08/08) 73
10 <strong>MSC</strong> <strong>II</strong> (<strong>Moog</strong> <strong>Servo</strong> Controller) General Specifications<br />
10.2.1 Dimensions<br />
102 mm (4.02 in)<br />
85.5 mm (3.37 in)<br />
Figure 51: Dimensions of the <strong>MSC</strong> <strong>II</strong><br />
10.2.2 Environmental Conditions<br />
124 mm (4.88 in) (Overall Width)<br />
113 mm (4.44 in) (Module Width)<br />
5.5 mm (0.22 in)<br />
USB1 USB2<br />
5.5 mm (0.22 in)<br />
L1+ TRM I/O1 I/O2 I/O3 I/O4 WCAN LCAN EBus Rx Tx Aux1 Aux2 Aux3 Aux4 OutEN<br />
1 2 3 4 5 6 7 8 9<br />
L1+ L1+ M1 M1 L2+ L2+ M2 M2 M2 X2<br />
X1<br />
X3<br />
OutEn I/O1 I/O2 I/O3 I/O4 M2 M2 M2 M2 X4<br />
WCAN WCAN<br />
!<br />
Run<br />
Stop<br />
Reset<br />
X13<br />
LAN<br />
X14<br />
RT-ETH1<br />
X15 X16<br />
RT-ETH2<br />
X11 X12<br />
Link 100MB/s Link 100MB/s Link 100MB/s<br />
LK<br />
SIO F-Bus<br />
1 2 3 4 5 6 7 8 9 10<br />
X6<br />
X7<br />
X5 CLK+ CLK- A+ A- B+ B- Z+ Z- +5V DGND X8<br />
X9<br />
X10<br />
A1 B1 Z1 A2 B2 Z2 A3 B3 Z3 A4 B4 Z4 LED1 LED2 LED3 Error<br />
WARNING Maintain under all circumstances the required environmental<br />
conditions specified for the M3000 ® automation<br />
system or M3000 ® modules.<br />
This ensures fault-free, reliable, and safe operation.<br />
WARNING It is not permissible to operate the M3000 ® automation<br />
system or M3000 ® modules in a potentially explosive<br />
environment.<br />
WARNING The M3000 ® automation system and M3000 ® modules<br />
must not come into direct contact with liquids, except<br />
where explicitely specified. Danger of short-circuit!<br />
If they do come into direct contact with a liquid, immediately<br />
disconnect the power supply! Before bringing the system<br />
back into operation, it is essential that all affected components<br />
are completely dry and have been inspected by a suitably<br />
qualified technician.<br />
Dimensions of the <strong>MSC</strong> <strong>II</strong><br />
Environmental<br />
Conditions:<br />
Safety Instructions<br />
© <strong>Moog</strong> GmbH <strong>User</strong> <strong>Manual</strong> M3000 ® and <strong>MSC</strong> <strong>II</strong> (CA65865-001; Version 1.1, 08/08) 74<br />
170 mm (6.69 in)
10 <strong>MSC</strong> <strong>II</strong> (<strong>Moog</strong> <strong>Servo</strong> Controller) General Specifications<br />
10.2.2.1 Climatic Conditions<br />
Ambient temperature (IEC 61131-2)<br />
For operation (when installed properly): +5 °C to +55 °C<br />
(+41 °F to +131 °F)<br />
Average temp. over 24 hours: max. +50 °C (+122 °F)<br />
For transportation and storage<br />
(in the original packaging): –25 °C to +70 °C<br />
(–13 °F to +158 °F)<br />
Relative air humidity (IEC 61131-2)<br />
For operation: 10 % to 95 % non-condensing<br />
For transportation and storage<br />
(in the original packaging): 5 % to 95 % non-condensing<br />
Contamination level (IEC 60664)<br />
2<br />
Resistance to corrosion (IEC 60068)<br />
No protection<br />
Operating Elevation (IEC 61131-2)<br />
≤ 2,000 m (2,187 yd) above MSL<br />
Air pressure for transportation (IEC 61131-2)<br />
≥ 70 kPa (corresponds to an elevation of ≤ 3,000 m (3,280 yd))<br />
10.2.2.2 Mechanical Conditions and Requirements<br />
Sinusoidal oscillations (IEC 60068-2-6)<br />
10 Hz ≤ f < 57 Hz: 0.0357 mm (0.0014 in) continuous amplitude<br />
0.075 mm (0.00295 in) random amplitude<br />
57 Hz ≤ f < 150 Hz: 0.5 g continuous constant acceleration<br />
1.0 g random constant acceleration<br />
f > 150 Hz: not defined<br />
Shock (IEC 60068-2-27)<br />
Random peaks up to 15 g longer than 11 ms, half-sine wave in each of<br />
the three orthogonal axes<br />
Drop height (free fall in the original packaging) (IEC 60068-2-31)<br />
≤ 1m (39in)<br />
Protection class (IEC 60529)<br />
IP20<br />
10.2.2.3 Electrical Conditions and Requirements<br />
Power supply<br />
24 V DC<br />
(Safety Extra-Low Voltage (SELV) according to DIN EN 60950-1)<br />
Specified voltage range: 18–36 V DC<br />
�-"6.2-Power Supply" on page 39<br />
Insulation resistance<br />
Rated voltage: 0–50 V DC<br />
Test voltage for 2,000 m (2,187 yd) operating elevation: 500 V DC<br />
Environmental<br />
Conditions:<br />
Climatic Conditions<br />
Environmental<br />
Conditions:<br />
Mechanical Conditions<br />
and Requirements<br />
Environmental<br />
Conditions:<br />
Electrical Conditions<br />
and Requirements<br />
© <strong>Moog</strong> GmbH <strong>User</strong> <strong>Manual</strong> M3000 ® and <strong>MSC</strong> <strong>II</strong> (CA65865-001; Version 1.1, 08/08) 75
10 <strong>MSC</strong> <strong>II</strong> (<strong>Moog</strong> <strong>Servo</strong> Controller) Block Diagram<br />
10.3 Block Diagram<br />
Profibus,<br />
EtherCAT<br />
optional<br />
1<br />
WCAN<br />
LAN-ETH<br />
Ethernet 1<br />
100 Mbit/s<br />
USB 1<br />
USB 2<br />
RS232<br />
License Key<br />
24VDC<br />
Fieldbus<br />
Interface<br />
32 MByte<br />
Flash<br />
128 MByte<br />
DDR RAM<br />
EEPROM<br />
CalData<br />
Power<br />
Supply<br />
PowerPC CPU<br />
MPC5200B<br />
400 MHz<br />
Figure 52: Block Diagram of the <strong>MSC</strong> <strong>II</strong><br />
1) Hardware option. When ordering the <strong>MSC</strong> <strong>II</strong>, the type of the fieldbus interface must be specified.<br />
© <strong>Moog</strong> GmbH <strong>User</strong> <strong>Manual</strong> M3000 ® and <strong>MSC</strong> <strong>II</strong> (CA65865-001; Version 1.1, 08/08) 76<br />
FPGA<br />
COP<br />
Debug<br />
LCAN<br />
Sensor 1<br />
Sensor 2<br />
Sensor 3<br />
Sensor 4<br />
DigI/O 1<br />
DigI/O 2<br />
DigI/O 3<br />
DigI/O 4<br />
Out-EN<br />
E-Bus
10 <strong>MSC</strong> <strong>II</strong> (<strong>Moog</strong> <strong>Servo</strong> Controller) View of the Module and Terminal Assignment<br />
10.4 View of the Module and Terminal Assignment<br />
Connectors<br />
for Plug-In<br />
Terminal Strips<br />
WideCAN X1 + X3<br />
(internally<br />
connected 1:1)<br />
Locating Pin<br />
Front Panel<br />
Q-Connector<br />
(E-Bus+LocalCAN Bus)<br />
Locking Slide<br />
Serial Interface<br />
(TIA/EIA 232)<br />
Connectors<br />
for Plug-In<br />
Terminal Sttrips<br />
Termination Resistor<br />
to LocalCAN<br />
L1+ and +5 V OK<br />
LAN and<br />
Programming<br />
Interface<br />
RJ45<br />
10/100 MBit/s<br />
Run/Stop/Reset<br />
Switch<br />
USB<br />
Interfaces<br />
Wire Fault Display for<br />
Digital Sensor Inputs<br />
!<br />
Run<br />
Stop<br />
Reset<br />
X11 X12<br />
USB1 USB2<br />
X1 X3<br />
X2<br />
WCAN<br />
X4<br />
L1+ TRM I/O1 I/O2 I/O3 I/O4 WCAN LCAN EBus Rx Tx Aux1 Aux2 Aux3 Aux4 OutEN<br />
1 2 3 4 5 6 7 8 9<br />
L1+ L1+ M1 M1 L2+ L2+ M2 M2 M2 X2<br />
X1<br />
X3<br />
OutEn I/O1 I/O2 I/O3 I/O4 M2 M2 M2 M2 X4<br />
WCAN WCAN<br />
Run<br />
X13<br />
X14<br />
X15 X16<br />
LAN RT-ETH1 RT-ETH2<br />
Stop !<br />
Reset<br />
X11 X12<br />
USB1 USB2<br />
Link 100MB/s Link 100MB/s Link 100MB/s<br />
LK<br />
SIO F-Bus<br />
1 2 3 4 5 6 7 8 9 10<br />
X6<br />
X5 CLK+ CLK- A+<br />
X9<br />
A- B+ B- Z+ Z-<br />
X7<br />
+5V DGND<br />
X10<br />
X8<br />
A1 B1 Z1 A2 B2 Z2 A3 B3 Z3 A4 B4 Z4 LED1 LED2 LED3 Error<br />
X5 S1<br />
X8<br />
X6 S2<br />
X7<br />
1<br />
1 1 10<br />
SIO F-Bus<br />
X9 X10<br />
Figure 53: Front View of the <strong>MSC</strong> <strong>II</strong><br />
Figure 54: Front Panel of the <strong>MSC</strong> <strong>II</strong><br />
WideCAN X1 + X3<br />
(internally<br />
connected 1:1)<br />
Terminal Assignment of<br />
Connectors X2, X4<br />
Q-Connector<br />
(E-Bus+LocalCAN Bus)<br />
Terminal Assignment of<br />
Connectors X6, X7, X9, X10<br />
Locating Pin<br />
Profibus (optional)<br />
Connectors<br />
for Plug-In<br />
Terminal Sttrips<br />
© <strong>Moog</strong> GmbH <strong>User</strong> <strong>Manual</strong> M3000 ® and <strong>MSC</strong> <strong>II</strong> (CA65865-001; Version 1.1, 08/08) 77<br />
WCAN<br />
1 10<br />
Off On<br />
S3<br />
S4<br />
WideCAN Transmission Activity E-Bus Transmission Activity<br />
State of<br />
Digital I/Os<br />
LocalCAN<br />
Transmission<br />
Activity<br />
L1+ TRM I/O1 I/O2 I/O3 I/O4 WCAN LCAN EBus Rx Tx Aux1 Aux2 Aux3 Aux4 OutEN<br />
1 2 3 4 5 6 7 8 9<br />
X1<br />
L1+ L1+ M1 M1 L2+ L2+ M2 M2 M2 X2<br />
X3<br />
OutEn I/O1 I/O2 I/O3 I/O4 M2 M2 M2 M2 X4<br />
WCAN WCAN<br />
X13<br />
X14<br />
X15 X16<br />
LAN RT-ETH1 RT-ETH2<br />
Link 100MB/s Link 100MB/s Link 100MB/s<br />
SIO Receiver Activity<br />
SIO Transmission Activity<br />
SIO F-Bus<br />
1 2 3 4 5 6 7 8 9 10<br />
X5<br />
X6<br />
CLK+ CLK-<br />
X9<br />
A+ A- B+ B- Z+ Z-<br />
X7<br />
+5V DGND<br />
X10<br />
X8<br />
A1 B1 Z1 A2 B2 Z2 A3 B3 Z3 A4 B4 Z4 LED1 LED2 LED3 Error<br />
LK<br />
Activated by<br />
Application Program<br />
Outputs Enabled<br />
Realtime Ethernet<br />
RJ45 10/100 MBit/s<br />
(optional)<br />
License<br />
Key Slot<br />
Ethernet Speed<br />
Ethernet Link/Activity<br />
Activated by<br />
Application Program<br />
or Error Display
10 <strong>MSC</strong> <strong>II</strong> (<strong>Moog</strong> <strong>Servo</strong> Controller) View of the Module and Terminal Assignment<br />
10.4.1 Terminal Assignment<br />
Connector No. Assignment Circuit<br />
X1 1<br />
2 CAN-L CAN-<br />
3<br />
4<br />
5<br />
6<br />
DGND Ground for the CAN bus interface<br />
WCAN<br />
7<br />
8<br />
9<br />
CAN-H CAN+<br />
X2 1 L1+ Power supply for the <strong>MSC</strong> <strong>II</strong>'s internal electronics (24 V DC SELV)<br />
�-"6.2-Power Supply" on page 39<br />
X3<br />
2 L1+ Power supply for the <strong>MSC</strong> <strong>II</strong>'s internal electronics (24 V DC SELV)<br />
3 M1 Ground for the internal electronics' power supply<br />
4 M1 Ground for the internal electronics' power supply<br />
5 L2+ Power supply for the <strong>MSC</strong> <strong>II</strong>'s digital I/Os (24 V DC SELV)<br />
�-"10.10.2-Power Supply" on page 93<br />
6 L2+ Power supply for the <strong>MSC</strong> <strong>II</strong>'s digital I/Os (24 V DC SELV)<br />
7 M2 Ground for the digital I/Os' power supply<br />
8 M2 Ground for the digital I/Os' power supply<br />
9 M2 Ground for the digital I/Os' power supply<br />
1<br />
2 CAN-L CAN-<br />
3<br />
4<br />
5<br />
6<br />
DGND Ground for the CAN bus interface<br />
WCAN<br />
7<br />
8<br />
9<br />
CAN-H CAN+<br />
X4 1 OutEN Digital output 'Outputs Enabled'<br />
�-"10.17.2-'Outputs Enabled' Output (LED «OutEN»)" on page 111<br />
2 I/O1 Digital I/O 1<br />
�-"10.10-Digital I/Os" on page 93<br />
3 I/O2 Digital I/O 2<br />
4 I/O3 Digital I/O 3<br />
5 I/O4 Digital I/O 4<br />
6 M2 Ground for the digital I/Os' power supply<br />
7 M2 Ground for the digital I/Os' power supply<br />
8 M2 Ground for the digital I/Os' power supply<br />
9 M2 Ground for the digital I/Os' power supply<br />
Table 16: Terminal Assignment of <strong>MSC</strong> <strong>II</strong>'s Connectors (Section 1 of 4)<br />
© <strong>Moog</strong> GmbH <strong>User</strong> <strong>Manual</strong> M3000 ® and <strong>MSC</strong> <strong>II</strong> (CA65865-001; Version 1.1, 08/08) 78<br />
WCAN (WideCAN)<br />
Power Supply<br />
Digital I/Os<br />
WCAN (WideCAN)<br />
Digital I/Os
10 <strong>MSC</strong> <strong>II</strong> (<strong>Moog</strong> <strong>Servo</strong> Controller) View of the Module and Terminal Assignment<br />
Connector No. Assignment Circuit<br />
X5<br />
SIO<br />
TIA/EIA 232<br />
X6<br />
Sensor 1<br />
X7<br />
Sensor 2<br />
X8<br />
F-Bus<br />
1<br />
2 Rx TIA/EIA 232 receive data<br />
3<br />
4<br />
Tx TIA/EIA 232 send data<br />
5<br />
6<br />
7<br />
8<br />
9<br />
DGND Ground for the TIA/EIA 232 interface<br />
1 CLK1+ TIA/EIA 485 output, SSI sensor signal 1 clock+<br />
�-"10.13-Digital Sensor Interfaces" on page 101<br />
2 CLK1- TIA/EIA 485 output, SSI sensor signal 1 clock-<br />
3 A1+ TIA/EIA 422 input, incremental sensor signal 1 A+ or SSI sensor signal 1 data+<br />
4 A1- TIA/EIA 422 input, incremental sensor signal 1 A- or SSI sensor signal 1 data-<br />
5 B1+ TIA/EIA 422 input, incremental sensor signal 1 B+ or SSI sensor signal 1 slave clock+<br />
6 B1- TIA/EIA 422 input, incremental sensor signal 1 B- or SSI sensor signal 1 slave clock-<br />
7 Z1+ TIA/EIA 422 input, incremental sensor signal 1 Z+<br />
8 Z1- TIA/EIA 422 input, incremental sensor signal 1 Z-<br />
9 +5V +5 V Power supply for sensor<br />
10 DGND Ground for the digital sensor interface<br />
1 CLK2+ TIA/EIA 485 output, SSI sensor signal 2 clock+<br />
�-"10.13-Digital Sensor Interfaces" on page 101<br />
2 CLK2- TIA/EIA 485 output, SSI sensor signal 2 clock-<br />
3 A2+ TIA/EIA 422 input, incremental sensor signal 2 A+ or SSI sensor signal 2 data+<br />
4 A2- TIA/EIA 422 input, incremental sensor signal 2 A- or SSI sensor signal 2 data-<br />
5 B2+ TIA/EIA 422 input, incremental sensor signal 2 B+ or SSI sensor signal 2 slave clock+<br />
6 B2- TIA/EIA 422 input, incremental sensor signal 2 B- or SSI sensor signal 2 slave clock-<br />
7 Z2+ TIA/EIA 422 input, incremental sensor signal 2 Z+<br />
8 Z2- TIA/EIA 422 input, incremental sensor signal 2 Z-<br />
9 +5V +5 V Power supply for sensor<br />
10 DGND Ground for the digital sensor interface<br />
1<br />
2<br />
3 RxD/TxD-P Receive / transmission data - positive potential<br />
4 CNTR-P Control signal for repeater (direction control)<br />
5 DGND Potential of transmission data (ground to 5 V)<br />
6<br />
7<br />
VP Power supply of the terminators (+5 V)<br />
8 RxD/TxD-N Receive / transmission data - negative potential<br />
9 CNTR-N Control signal for repeater (direction control)<br />
Table 16: Terminal Assignment of <strong>MSC</strong> <strong>II</strong>'s Connectors (Section 2 of 4)<br />
© <strong>Moog</strong> GmbH <strong>User</strong> <strong>Manual</strong> M3000 ® and <strong>MSC</strong> <strong>II</strong> (CA65865-001; Version 1.1, 08/08) 79<br />
SIO TIA/EIA 232<br />
Digital Sensor Interface 1<br />
Digital Sensor Interface 2<br />
Profibus (F-Bus)
10 <strong>MSC</strong> <strong>II</strong> (<strong>Moog</strong> <strong>Servo</strong> Controller) View of the Module and Terminal Assignment<br />
Connector No. Assignment Circuit<br />
X9<br />
Sensor 3<br />
X10<br />
Sensor 4<br />
X11<br />
USB 1<br />
X12<br />
USB 2<br />
X13<br />
LAN<br />
1 CLK3+ TIA/EIA 485 output, SSI sensor signal 3 clock+<br />
�-"10.13-Digital Sensor Interfaces" on page 101<br />
2 CLK3- TIA/EIA 485 output, SSI sensor signal 3 clock-<br />
3 A3+ TIA/EIA 422 input, incremental sensor signal 3 A+ or SSI sensor signal 3 data+<br />
4 A3- TIA/EIA 422 input, incremental sensor signal 3 A- or SSI sensor signal 3 data-<br />
5 B3+ TIA/EIA 422 input, incremental sensor signal 3 B+ or SSI sensor signal 3 slave clock+<br />
6 B3- TIA/EIA 422 input, incremental sensor signal 3 B- or SSI sensor signal 3 slave clock-<br />
7 Z3+ TIA/EIA 422 input, incremental sensor signal 3 Z+<br />
8 Z3- TIA/EIA 422 input, incremental sensor signal 3 Z-<br />
9 +5V +5 V Power supply for sensor<br />
10 DGND Ground for the digital sensor interface<br />
1 CLK4+ TIA/EIA 485 output, SSI sensor signal 4 clock+<br />
�-"10.13-Digital Sensor Interfaces" on page 101<br />
2 CLK4- TIA/EIA 485 output, SSI sensor signal 4 clock-<br />
3 A4+ TIA/EIA 422 input, incremental sensor signal 4 A+ or SSI sensor signal 4 data+<br />
4 A4- TIA/EIA 422 input, incremental sensor signal 4 A- or SSI sensor signal 4 data-<br />
5 B4+ TIA/EIA 422 input, incremental sensor signal 4 B+ or SSI sensor signal 4 slave clock+<br />
6 B4- TIA/EIA 422 input, incremental sensor signal 4 B- or SSI sensor signal 4 slave clock-<br />
7 Z4+ TIA/EIA 422 input, incremental sensor signal 4 Z+<br />
8 Z4- TIA/EIA 422 input, incremental sensor signal 4 Z-<br />
9 +5V +5 V Power supply for sensor<br />
10 DGND Ground for the digital sensor interface<br />
1 +5V +5 V Power supply for slaves<br />
2 D- Data-<br />
3 D+ Data+<br />
4 DGND Digital Ground<br />
1 +5V +5 V Power supply for slaves<br />
2 D- Data-<br />
3 D+ Data+<br />
4 DGND Digital Ground<br />
1 Tx+ Transmit data+<br />
2 Tx- Transmit data-<br />
3<br />
4<br />
5<br />
Rx+ Receive data+<br />
6<br />
7<br />
8<br />
Rx- Receive data-<br />
Table 16: Terminal Assignment of <strong>MSC</strong> <strong>II</strong>'s Connectors (Section 3 of 4)<br />
© <strong>Moog</strong> GmbH <strong>User</strong> <strong>Manual</strong> M3000 ® and <strong>MSC</strong> <strong>II</strong> (CA65865-001; Version 1.1, 08/08) 80<br />
Digital Sensor Interface 3<br />
Digital Sensor Interface 4<br />
USB 1<br />
USB 2<br />
Ethernet (LAN)
10 <strong>MSC</strong> <strong>II</strong> (<strong>Moog</strong> <strong>Servo</strong> Controller) View of the Module and Terminal Assignment<br />
Connector No. Assignment Circuit<br />
X14<br />
RT-ETH1<br />
X15<br />
RT-ETH2<br />
10.4.2 LEDs<br />
1 Tx+ Transmit data+<br />
2 Tx- Transmit data-<br />
3<br />
4<br />
5<br />
Rx+ Receive data+<br />
6<br />
7<br />
8<br />
Rx- Receive data-<br />
1 Tx+ Transmit data+<br />
2 Tx- Transmit data-<br />
3<br />
4<br />
5<br />
Rx+ Receive data+<br />
6<br />
7<br />
8<br />
Rx- Receive data-<br />
Table 16: Terminal Assignment of <strong>MSC</strong> <strong>II</strong>'s Connectors (Section 4 of 4)<br />
Area LED Display Explanation<br />
Status L1+ L1+/M1 and internal +5 V ok Illuminates when the power supply for the <strong>MSC</strong> <strong>II</strong>'s internal electronics<br />
is OK and the internal power pack is supplying +5 V.<br />
�-"6.2-Power Supply" on page 39<br />
TRM Termination resistor on LocalCAN Illuminates when the termination resistor of the LocalCAN interface is<br />
switched on.<br />
�-"10.15.1-CAN Bus Termination Resistor" on page 110<br />
I/O1 Internal status of the digital I/O-1 �-"10.10.1-Display of the Operational State" on page 93<br />
I/O2 Internal status of the digital I/O-2<br />
I/O3 Internal status of the digital I/O-3<br />
I/O4 Internal status of the digital I/O-4<br />
WCAN WideCAN transmission activity Flashes in synchronization with the data that the <strong>MSC</strong> <strong>II</strong> is sending over<br />
the WideCAN interface.<br />
�-"10.15-CAN Bus Interfaces" on page 109<br />
LCAN LocalCAN transmission activity Flashes in synchronization with the data that the <strong>MSC</strong> <strong>II</strong> is sending over<br />
the LocalCAN interface.<br />
�-"10.15-CAN Bus Interfaces" on page 109<br />
EBus E-bus transmission activity Illuminates when the <strong>MSC</strong> <strong>II</strong> is sending data over the E-bus.<br />
�-"7.6.3-<strong>MSC</strong> <strong>II</strong> as E-Bus Master" on page 61<br />
Rx SIO receiver activity Illuminates when the <strong>MSC</strong> <strong>II</strong> is receiving data over the SIO interface<br />
Tx SIO transmission activity Illuminates when the <strong>MSC</strong> <strong>II</strong> is sending data over the SIO interfaces.<br />
�-Table-18 on page 83<br />
<strong>User</strong> Aux1 Activated by application program Illuminates when the application program activates the LED.<br />
Aux2 Activated by application program<br />
Aux3 Activated by application program<br />
Aux4 Activated by application program<br />
Table 17: LEDs of the <strong>MSC</strong> <strong>II</strong> (Section 1 of 2)<br />
© <strong>Moog</strong> GmbH <strong>User</strong> <strong>Manual</strong> M3000 ® and <strong>MSC</strong> <strong>II</strong> (CA65865-001; Version 1.1, 08/08) 81<br />
Ethernet (RT-ETH1)<br />
Ethernet (RT-ETH2)
10 <strong>MSC</strong> <strong>II</strong> (<strong>Moog</strong> <strong>Servo</strong> Controller) View of the Module and Terminal Assignment<br />
Area LED Display Explanation<br />
OutEN Outputs enabled Illuminates when all outputs and the E-bus communication are under<br />
the control of the application program.<br />
�-"10.17.2-'Outputs Enabled' Output (LED «OutEN»)" on page 111<br />
Error A1 Wire fault in the digital sensor input-A1 Illuminates when no receiver is attached to the corresponding digital<br />
B1<br />
Z1<br />
Wire fault in the digital sensor input-B1<br />
Wire fault in the digital sensor input-Z1<br />
sensor interface or when there is a wire fault.<br />
�-"10.13.2.1-Wire Fault Display LEDs" on page 102<br />
A2 Wire fault in the digital sensor input-A2<br />
B2 Wire fault in the digital sensor input-B2<br />
Z2 Wire fault in the digital sensor input-Z2<br />
A3 Wire fault in the digital sensor input-A3<br />
B3 Wire fault in the digital sensor input-B3<br />
Z3 Wire fault in the digital sensor input-Z3<br />
A4 Wire fault in the digital sensor input-A4<br />
B4 Wire fault in the digital sensor input-B4<br />
Z4 Wire fault in the digital sensor input-Z4<br />
<strong>User</strong> LED1 Activated by application program or<br />
error display<br />
LED2 Activated by application program or<br />
error display<br />
LED3 Activated by application program or<br />
error display<br />
As long as LED «Error» does not illuminate, the application program<br />
can activate these LEDs (provided that the <strong>MSC</strong> <strong>II</strong> has successfully<br />
started and that the application program has started).<br />
The states that these LEDs will indicate while the application program<br />
is running are set in the application program.<br />
If «Error» illuminates or flashes in addition to these LEDs, this indicates<br />
<strong>MSC</strong> <strong>II</strong>'s elementary operational states or errors.<br />
�-Table-18 on page 83<br />
Error Error display Illuminates when there is an error. The type of error is specified in<br />
«LED1», «LED2», and «LED3».<br />
�-Table-18 on page 83<br />
Ethernet Link Ethernet link/activity Illuminates when the Ethernet link pulse is available and blinks at<br />
activity<br />
Speed On = 100 Mbit/s Ethernet connection speed<br />
Table 17: LEDs of the <strong>MSC</strong> <strong>II</strong> (Section 2 of 2)<br />
© <strong>Moog</strong> GmbH <strong>User</strong> <strong>Manual</strong> M3000 ® and <strong>MSC</strong> <strong>II</strong> (CA65865-001; Version 1.1, 08/08) 82
10 <strong>MSC</strong> <strong>II</strong> (<strong>Moog</strong> <strong>Servo</strong> Controller) View of the Module and Terminal Assignment<br />
10.4.2.1 Display of Elementary Operational States and Errors<br />
State Explanation<br />
Ready The <strong>MSC</strong> <strong>II</strong> was started successfully. The user LEDs «LED1», «LED2»<br />
and «LED3» are now available for the application program.<br />
<strong>User</strong> LEDs<br />
© <strong>Moog</strong> GmbH <strong>User</strong> <strong>Manual</strong> M3000 ® and <strong>MSC</strong> <strong>II</strong> (CA65865-001; Version 1.1, 08/08) 83<br />
LED1<br />
LED2<br />
LED3<br />
Error<br />
0 0 0 0<br />
Booting Boot process is running 1 0 0 0<br />
Firmware up- The update process of the firmware is running 1 1 blinking 0<br />
date running<br />
The firmware update process can take up to several minutes.<br />
The <strong>MSC</strong> <strong>II</strong> must not be switched off or reset during the update process.<br />
If it is switched off or reset during the update process, the firmware<br />
must be reloaded.<br />
Firmware update<br />
finished<br />
The update process of the firmware is finished blinking blinking blinking<br />
Error Error, no firmware loaded 1 0 0 1<br />
1: LED illuminates<br />
0: LED does not illuminate<br />
Table 18: LEDs for Displaying Elementary Operational States and Errors after Switching on or Resetting the <strong>MSC</strong> <strong>II</strong>
10 <strong>MSC</strong> <strong>II</strong> (<strong>Moog</strong> <strong>Servo</strong> Controller) Programming and Configuration<br />
10.5 Programming and Configuration<br />
The MACS development environment is needed to create IEC 61131 application<br />
programs and configure the <strong>MSC</strong> <strong>II</strong> control module.<br />
�-"3.5-Application Programs" on page 25<br />
10.5.1 Communication Between <strong>MSC</strong> <strong>II</strong> and MACS<br />
WARNING The <strong>MSC</strong> <strong>II</strong> control module's operational state can be altered<br />
with the MACS development environment when the<br />
<strong>MSC</strong> <strong>II</strong> control module is connected online with MACS.<br />
This can be done by means of the following actions, for example:<br />
• Stopping or resetting the program<br />
• Setting breakpoints<br />
• Activating the single step mode<br />
• Downloading application programs<br />
• Writing or forcing values<br />
Therefore, the operator must always consider the effects and<br />
take appropriate precautions before altering the operational<br />
state of the <strong>MSC</strong> <strong>II</strong> control module with MACS.<br />
The <strong>MSC</strong> <strong>II</strong> control module can use the following interface to communicate<br />
with the PC on which MACS is installed:<br />
• Ethernet interface<br />
with «LAN» front panel connector of the <strong>MSC</strong> <strong>II</strong> control module<br />
�-"7.1-Ethernet" on page 47<br />
�-"10.5.1.1-Ethernet Communication Interface" on page 84<br />
The Ethernet interface is configured in the PLC Configuration of the<br />
MACS development environment.<br />
Refer to the documentation of the MACS development environment for<br />
detailed information about this.<br />
10.5.1.1 Ethernet Communication Interface<br />
Settings in the MACS development environment<br />
(communication parameters)<br />
IP-address at delivery = 192.168.1.2 (identical for all <strong>MSC</strong> <strong>II</strong> control<br />
modules without license key!)<br />
Port = 1200<br />
Target-Id = 0<br />
Motorola Byteorder = Yes<br />
Each IP-address may be used only once within a network.<br />
Therefore, when operating the <strong>MSC</strong> <strong>II</strong> control module within a network,<br />
the IP-address should be changed only after consulting with<br />
the responsible system administrator.<br />
IP-address in the license key:<br />
�-"10.6-License Key" on page 85<br />
Interface cables<br />
�-"7.1.3-Ethernet Interface Cables" on page 48<br />
Programming and<br />
Configuration of the<br />
<strong>MSC</strong> <strong>II</strong> control module<br />
Communication Between<br />
<strong>MSC</strong> <strong>II</strong> and MACS<br />
Communication<br />
Parameters of the<br />
Ethernet Interface<br />
© <strong>Moog</strong> GmbH <strong>User</strong> <strong>Manual</strong> M3000 ® and <strong>MSC</strong> <strong>II</strong> (CA65865-001; Version 1.1, 08/08) 84
10 <strong>MSC</strong> <strong>II</strong> (<strong>Moog</strong> <strong>Servo</strong> Controller) License Key<br />
10.6 License Key<br />
WARNING The license key of the <strong>MSC</strong> <strong>II</strong> control module must be<br />
protected from electrostatic discharges!<br />
Electrical discharges might damage the license key or delete<br />
the contents of the license key's memory.<br />
WARNING The license key may be inserted or removed only when<br />
the <strong>MSC</strong> <strong>II</strong> control module is powered down!<br />
Attempting to insert or remove the license key during operation<br />
might damage the license key or the <strong>MSC</strong> <strong>II</strong> control module<br />
permanently.<br />
WARNING The license key must always remain inserted while the<br />
<strong>MSC</strong> <strong>II</strong> control module is in operation. Otherwise, the<br />
<strong>MSC</strong> <strong>II</strong> control module will not work.<br />
If the license key is removed during operation, the application<br />
program will stop after a few minutes. If the <strong>MSC</strong> <strong>II</strong> control<br />
module is connected online to the MACS development environment,<br />
a corresponding error message will appear in<br />
MACS.<br />
In addition, the digital output 'Outputs Enabled' will be<br />
switched to the 0 state, thereby disabling all of the <strong>MSC</strong> <strong>II</strong><br />
control module's digital outputs and terminating fieldbus communication<br />
and E-bus communication.<br />
�-"10.17.2-'Outputs Enabled' Output (LED «OutEN»)" on<br />
page 111<br />
After switching off the <strong>MSC</strong> <strong>II</strong> control module and inserting<br />
the license key, the <strong>MSC</strong> <strong>II</strong> control module can be brought<br />
back into operation.<br />
10.6.1 Run-Time License and Accessible Libraries<br />
The run-time license of the <strong>MSC</strong> <strong>II</strong> control module is saved in the license key.<br />
The accessible MACS libraries also depend on the license key. If the application<br />
program attempts to access a MACS library that is not released by the license<br />
key used, the application program will not be able to start.<br />
Detailed information about the MACS libraries accessible with the various<br />
license keys:<br />
�-Table-29 on page 118<br />
License Key of the <strong>MSC</strong> <strong>II</strong><br />
control module:<br />
Safety Instructions<br />
License Key of the <strong>MSC</strong> <strong>II</strong><br />
control module: Run-Time<br />
License and Accessible<br />
Libraries<br />
© <strong>Moog</strong> GmbH <strong>User</strong> <strong>Manual</strong> M3000 ® and <strong>MSC</strong> <strong>II</strong> (CA65865-001; Version 1.1, 08/08) 85
10 <strong>MSC</strong> <strong>II</strong> (<strong>Moog</strong> <strong>Servo</strong> Controller) License Key<br />
10.6.2 CANopen Node-ID and IP Address<br />
The CANopen node-ID of the <strong>MSC</strong> <strong>II</strong> control module's CAN bus interfaces<br />
and the IP-address of the <strong>MSC</strong> <strong>II</strong> control module's Ethernet interface are<br />
saved in the license key.<br />
The CANopen node-ID and IP-address can be set or modified in the following<br />
places:<br />
• In the application program<br />
• With the PLC Browser in the MACS development environment<br />
The IP-address is read from the license key only when the power supply is<br />
switched on or when the <strong>MSC</strong> <strong>II</strong> control module is reset.<br />
The default license key settings are:<br />
• IP address: 10.49.40.1<br />
• CANopen node-ID: 127<br />
10.6.3 Mounting and Removing<br />
Attachment Screw<br />
Figure 55: License Key of the <strong>MSC</strong> <strong>II</strong> control module with Attachment Screws<br />
10.6.3.1 Required Tool<br />
The following tool is required to mount and remove the license key:<br />
• 3 mm screwdriver<br />
10.6.3.2 Mounting the License Key<br />
Attachment Screw<br />
WARNING The license key may be inserted or removed only when<br />
the <strong>MSC</strong> <strong>II</strong> control module is powered down!<br />
Attempting to insert or remove the license key during operation<br />
might damage the license key or the <strong>MSC</strong> <strong>II</strong> control module<br />
permanently.<br />
WARNING If an M3000 ® module is to be taken out of operation, the<br />
entire system must always be shut down and disconnected<br />
from all power supplies.<br />
Therefore, all power supplies must be switched off, including<br />
those from attached peripherals such as externally<br />
supplied transmitters, programming devices, etc.!<br />
The M3000 ® module must be protected against unintentional<br />
restarting!<br />
If the M3000 ® module is connected to other devices and/ or<br />
facilities, always consider the full consequences and take appropriate<br />
precautions before switching off the module.<br />
CAUTION When using a screwdriver, use caution to avoid slipping and<br />
causing personal injury or damage to the <strong>MSC</strong> <strong>II</strong> control<br />
module.<br />
License Key of the <strong>MSC</strong> <strong>II</strong><br />
control module: CANopen<br />
Node-ID and IP Address<br />
License Key of the <strong>MSC</strong> <strong>II</strong><br />
control module with<br />
Attachment Screws<br />
License Key of the <strong>MSC</strong> <strong>II</strong><br />
control module: Tool<br />
required for Mounting and<br />
Removing<br />
Mounting the License<br />
Key: Safety Instructions<br />
© <strong>Moog</strong> GmbH <strong>User</strong> <strong>Manual</strong> M3000 ® and <strong>MSC</strong> <strong>II</strong> (CA65865-001; Version 1.1, 08/08) 86
10 <strong>MSC</strong> <strong>II</strong> (<strong>Moog</strong> <strong>Servo</strong> Controller) License Key<br />
Procedure for mounting the license key:<br />
1. Switch off the <strong>MSC</strong> <strong>II</strong> control module power supply.<br />
2. Insert the license key into the slot labeled «LK».<br />
3. Fix the license key in place by carefully tightening the attachment<br />
screws.<br />
Incorrectly tightened attachment screws might cause license key<br />
errors.<br />
10.6.3.3 Removing the License Key<br />
WARNING The license key may be inserted or removed only when<br />
the <strong>MSC</strong> <strong>II</strong> control module is powered down!<br />
Attempting to insert or remove the license key during operation<br />
might damage the license key or the <strong>MSC</strong> <strong>II</strong> control module<br />
permanently.<br />
WARNING If an M3000 ® module is to be taken out of operation, the<br />
entire system must always be shut down and disconnected<br />
from all power supplies.<br />
Therefore, all power supplies must be switched off, including<br />
those from attached peripherals such as externally<br />
supplied transmitters, programming devices, etc.!<br />
The M3000 ® module must be protected against unintentional<br />
restarting!<br />
If the M3000 ® module is connected to other devices and/ or<br />
facilities, always consider the full consequences and take appropriate<br />
precautions before switching off the module.<br />
CAUTION When using a screwdriver, use caution to avoid slipping and<br />
causing personal injury or damage to the <strong>MSC</strong> <strong>II</strong> control<br />
module.<br />
Procedure for removing the license key:<br />
1. If it is running, stop the application program in the MACS development<br />
environment.<br />
2. Switch off the power supply for the <strong>MSC</strong> <strong>II</strong> control module.<br />
3. Loosen the license key's attachment screws.<br />
4. Remove the license key from the slot labeled «LK».<br />
Mounting the License Key<br />
Removing the License<br />
Key: Safety Instructions<br />
Removing the<br />
License Key<br />
© <strong>Moog</strong> GmbH <strong>User</strong> <strong>Manual</strong> M3000 ® and <strong>MSC</strong> <strong>II</strong> (CA65865-001; Version 1.1, 08/08) 87
10 <strong>MSC</strong> <strong>II</strong> (<strong>Moog</strong> <strong>Servo</strong> Controller) Run/Stop/Reset Switch<br />
10.7 Run/Stop/Reset Switch<br />
The behavior of the Run/Stop/Reset switch controlling the Run state of the<br />
application program:<br />
MACS 1)<br />
Run/Stop/Reset switch Application program<br />
Stop Stop Stop<br />
Stop Run Stop<br />
Run Stop Stop<br />
Run Run Run<br />
Table 19: Behavior of the Run/Stop/Reset Switch<br />
1) Most recent state in the online mode (MACS logged on)<br />
Regardless of the logging in to the <strong>MSC</strong> <strong>II</strong> with MACS, if the Run/Stop/Reset<br />
switch is at "Stop" position, the application program does not run. If the switch<br />
is in position "Run", then the execution state depends on the last state when<br />
MACS was logged in.<br />
WARNING If a boot project is stored at the <strong>MSC</strong> <strong>II</strong> and you perform a<br />
reset or power up, then take care that the application<br />
program run state is not only influenced by the last state<br />
of MACS, but also by the Run/Stop/Reset switch. If you<br />
switch from "Stop" to "Run", then a previously stopped<br />
application program may start operating again.<br />
WARNING Moving the Run/Stop/Reset switch into position "Stop"<br />
stops a running application program of the <strong>MSC</strong> <strong>II</strong> control<br />
module.<br />
The application program will continue execution after switching<br />
back the Run/Stop/Reset switch to position "Run".<br />
Moving the Run/Stop/Reset switch into position "Reset" will reset the <strong>MSC</strong> <strong>II</strong>.<br />
The processor will stop as soon as the Run/Stop/Reset switch is moved to<br />
position "Reset". No variables will be saved at that time.<br />
When the Run/Stop/Reset switch is released from position "Reset", then the<br />
<strong>MSC</strong> <strong>II</strong> will behave as if the power supply has been switched on.<br />
�-"10.8.1.1-Switching on the Power Supply" on page 90<br />
In addition, the <strong>MSC</strong> <strong>II</strong> control module can be reset with the MACS development<br />
environment. Refer to the documentation of the MACS development environment<br />
for detailed information about this.<br />
Run/Stop/Reset Switch of<br />
the <strong>MSC</strong> <strong>II</strong><br />
© <strong>Moog</strong> GmbH <strong>User</strong> <strong>Manual</strong> M3000 ® and <strong>MSC</strong> <strong>II</strong> (CA65865-001; Version 1.1, 08/08) 88
10 <strong>MSC</strong> <strong>II</strong> (<strong>Moog</strong> <strong>Servo</strong> Controller) Power Supply<br />
10.8 Power Supply<br />
DANGER The 24 V power supply terminals of all M3000 ® modules are<br />
protected against reverse polarity.<br />
If the polarity of these power supply terminals is reversed, the<br />
modules will not work.<br />
WARNING M3000 ® modules must be protected from overvoltages<br />
and/or reverse energization from the sensor to the module!<br />
There is a danger of:<br />
• Permanent damage by overheating or fire<br />
• Malfunctions<br />
M3000 ® modules must have the correct voltage, polarity, and<br />
terminal assignments.<br />
Additional information about the power supply<br />
�-"10.2.2.3-Electrical Conditions and Requirements" on page 75<br />
�-"6.2-Power Supply" on page 39<br />
10.8.1 Behavior at Switching on and Switching off<br />
The following internal data resides in the flash EEPROM of the <strong>MSC</strong> <strong>II</strong> control<br />
module:<br />
• Boot projects<br />
• Error messages<br />
There is no battery buffered memory area. The <strong>MSC</strong> <strong>II</strong> control module is<br />
maintenance-free.<br />
WARNING If the most recent status in the online mode (MACS<br />
logged in) was 'Run' before the <strong>MSC</strong> <strong>II</strong> control module<br />
was switched off or reset, the boot project will always be<br />
started after the <strong>MSC</strong> <strong>II</strong> control module is switched back<br />
on or reset.<br />
This will occur regardless of which application program was<br />
previously running.<br />
In other words, the application program that will be started<br />
automatically after the <strong>MSC</strong> <strong>II</strong> control module is switched on<br />
or reset might be different from the application program that<br />
was executing immediately prior.<br />
Application programs can be saved and executed in the <strong>MSC</strong> <strong>II</strong> in the following<br />
manner:<br />
• As a boot project in the flash EEPROM<br />
• In RAM<br />
An application program saved as a boot project will be loaded into RAM<br />
whenever the <strong>MSC</strong> <strong>II</strong>'s power supply is switched on or when the <strong>MSC</strong> <strong>II</strong> is reset.<br />
Power Supply of the<br />
<strong>MSC</strong> <strong>II</strong> control module:<br />
Safety Instructions<br />
Contents of the<br />
Flash EEPROM<br />
Switching Back on or<br />
Resetting the <strong>MSC</strong> <strong>II</strong>:<br />
Safety Instructions<br />
© <strong>Moog</strong> GmbH <strong>User</strong> <strong>Manual</strong> M3000 ® and <strong>MSC</strong> <strong>II</strong> (CA65865-001; Version 1.1, 08/08) 89
10 <strong>MSC</strong> <strong>II</strong> (<strong>Moog</strong> <strong>Servo</strong> Controller) Basetick<br />
An application program that is only executed in RAM without being<br />
saved as a boot project will not be saved in the <strong>MSC</strong> <strong>II</strong> when it is<br />
switched off or when the power supply fails or the Run/Stop/Reset<br />
switch is moved to the Reset position.<br />
After the power supply is switched back on or the Run/Stop/Reset switch<br />
is released from the Reset position, the application program must be<br />
downloaded again from the MACS development environment!<br />
10.8.1.1 Switching on the Power Supply<br />
WARNING If the most recent status in the online mode (MACS<br />
logged in) was 'Run' before the <strong>MSC</strong> <strong>II</strong> control module<br />
was switched off or reset, the boot project will always be<br />
started after the <strong>MSC</strong> <strong>II</strong> control module is switched back<br />
on or reset.<br />
After the power supply for the <strong>MSC</strong> <strong>II</strong> control module's internal electronics is<br />
switched on, the <strong>MSC</strong> <strong>II</strong> control module will perform the following actions:<br />
1. The boot project (if one exists) is loaded into RAM.<br />
2. The values of the RETAIN variables are loaded (assuming that variables<br />
of this type are used).<br />
3. The boot project starts (if one exists and the most recent status in the online<br />
mode (MACS logged in) was 'Run').<br />
After these actions are complete, the <strong>MSC</strong> <strong>II</strong> control module is ready to communicate<br />
with the MACS development environment.<br />
10.9 Basetick<br />
This will occur regardless of which application program was<br />
previously running.<br />
In other words, the application program that will be started<br />
automatically after the <strong>MSC</strong> <strong>II</strong> control module is switched on<br />
or reset might be different from the application program that<br />
was executing immediately prior.<br />
10.9.1 Characteristics<br />
The basetick is the global clock source of the <strong>MSC</strong> <strong>II</strong> control module. All timings<br />
such as task cycle times or hardware access are directly derived from<br />
the adjusted basetick value.<br />
The basetick can be adjusted in steps of 1 µs within the range of<br />
100 microseconds up to 3 milliseconds. The cycle time of several application<br />
tasks must be a multiple of the adjusted basetick. The basetick value is also<br />
significantly involved in the timing of all hardware accesses.<br />
Basetick cycle time can be adjusted within the PLC Configuration of the<br />
MACS development environment. The module parameter “Basetick” (index 2<br />
of the root module) may be adjusted within the range of 100 to 3000. This<br />
value equals the basetick cycle time in µs. The default value is 1000 = 1 ms.<br />
Switching on the<br />
Power Supply:<br />
Safety Instructions<br />
<strong>MSC</strong> <strong>II</strong> control<br />
module's<br />
Behavior at<br />
Switching on the<br />
Power Supply<br />
Basetick<br />
© <strong>Moog</strong> GmbH <strong>User</strong> <strong>Manual</strong> M3000 ® and <strong>MSC</strong> <strong>II</strong> (CA65865-001; Version 1.1, 08/08) 90
10 <strong>MSC</strong> <strong>II</strong> (<strong>Moog</strong> <strong>Servo</strong> Controller) Basetick<br />
10.9.2 Timing Diagram<br />
Basetick<br />
interrupt<br />
E-bus<br />
protocol<br />
SSI Sensor<br />
Read inputs<br />
from process map<br />
start scheduler<br />
Calculate<br />
application task<br />
Write result to<br />
process map<br />
QAIO 2/2<br />
read inputs<br />
<strong>MSC</strong> / E-bus<br />
slaves<br />
write outputs<br />
t 3<br />
t 2<br />
t 6<br />
t 5<br />
t 1<br />
Figure 56: Timing diagram of the <strong>MSC</strong> <strong>II</strong> control module<br />
Desig. Kind of time period Value Explanation<br />
t1 Basetick cycle time 100...3000 µs<br />
t2 E-bus start time 42 / 84 µs<br />
t3 SSI Sensor start time 410 µs Depending on application<br />
t4 Task reaction time approx. 20 µs<br />
t5 Task calculation time Max. 70 % task cycle time Depending on application<br />
t6 QAIO 2/2 start sample<br />
inputs<br />
45 µs<br />
t 1 : Basetick cycle time<br />
Basetick cycle time can be adjusted within MACS development environment.<br />
The module parameter "Basetick" (index 2 of the root module)<br />
may be adjusted within the range of 100 to 3000. This value equals the<br />
basetick cycle time in µs.<br />
t 2 : E-bus start time<br />
Start of E-bus communication cycle depends on E-bus frequency. When<br />
QAIO 16/4 modules are used within the E-bus group, E-bus frequency is<br />
shifted down to 5 MHz. Then a single E-bus communication cycle takes<br />
84 µs. By default 10 MHz E-bus frequency is used which halves the<br />
communication cycle.<br />
t 3 : SSI Sensor start time<br />
Start of SSI sensor communication cycle depends on Sensor clock frequency<br />
and number of data bits. Sensor communication time must be<br />
smaller than basetick cycle time.<br />
Maximum time calculation: 32 bit at 78 kHz => 1/78000 * 32 = 410 µs<br />
t 4<br />
Timing diagram of the<br />
<strong>MSC</strong> <strong>II</strong> control module<br />
Basetick cycle time<br />
E-bus start time<br />
SSI Sensor start time<br />
© <strong>Moog</strong> GmbH <strong>User</strong> <strong>Manual</strong> M3000 ® and <strong>MSC</strong> <strong>II</strong> (CA65865-001; Version 1.1, 08/08) 91<br />
t 1
10 <strong>MSC</strong> <strong>II</strong> (<strong>Moog</strong> <strong>Servo</strong> Controller) Basetick<br />
SSI sensors need a recovery time of typically 10 µs to 20 µs. During<br />
this time no communication to with the sensor is possible. This<br />
should be considered when adjusting basetick and SSI sensor settings.<br />
t 4 : Task reaction time<br />
Time until the system has free resources to react on the interrupt (interrupt<br />
latency).<br />
Task reaction time<br />
© <strong>Moog</strong> GmbH <strong>User</strong> <strong>Manual</strong> M3000 ® and <strong>MSC</strong> <strong>II</strong> (CA65865-001; Version 1.1, 08/08) 92
10 <strong>MSC</strong> <strong>II</strong> (<strong>Moog</strong> <strong>Servo</strong> Controller) Digital I/Os<br />
10.10 Digital I/Os<br />
Each of the 4-digital terminals I/O1…I/O4 of the <strong>MSC</strong> <strong>II</strong> can be used as either<br />
an input or an output. Each digital output is internally connected back to a<br />
digital input.<br />
This enables the application program to read the status of the digital outputs<br />
and compare it to the requested value.<br />
Whether a terminal will be used as an input or an output is set in the<br />
PLC Configuration of the MACS development environment.<br />
The following digital output circuits are available:<br />
• Open emitter outputs, switches to +24 V (L2+)<br />
Basic wiring diagrams: � figure-57 on page 95<br />
10.10.1 Display of the Operational State<br />
The status LEDs «I/O1»…«I/O4» on the front panel of the <strong>MSC</strong> <strong>II</strong> control<br />
module show the internal operational state of the digital-I/Os. These status<br />
LEDs are activated only when the application program is running.<br />
If a terminal is configured to be an input, the associated LED will illuminate<br />
when it is internally detected that the input is in the 1 state and the input is<br />
used in the application program.<br />
When a terminal is configured to be an output, the associated LED will illuminate<br />
if the output in the application program is in the 1 state.<br />
As <strong>MSC</strong> <strong>II</strong> control modules have open emitter outputs, the LED will illuminate<br />
if the terminal is connected through to +24 V (L2+).<br />
Basic wiring diagrams of the digital outputs: � figure-57 on page 95<br />
The status LEDs «I/O1»…«I/O4» will illuminate also if L2+ or M2 are not<br />
connected.<br />
The operational state of the digital I/Os can be queried with the aid of<br />
function blocks in the application program.<br />
10.10.2 Power Supply<br />
DANGER The 24 V power supply terminals of all M3000 ® modules are<br />
protected against reverse polarity.<br />
If the polarity of these power supply terminals is reversed, the<br />
modules will not work.<br />
WARNING M3000 ® modules must be protected from overvoltages<br />
and/or reverse energization from the sensor to the module!<br />
There is a danger of:<br />
• Permanent damage by overheating or fire<br />
• Malfunctions<br />
M3000 ® modules must have the correct voltage, polarity, and<br />
terminal assignments.<br />
Digital I/Os I/O1…I/O4<br />
of the <strong>MSC</strong> <strong>II</strong> control<br />
module<br />
Status LEDs<br />
«I/O1»…«I/O4»<br />
Power Supply of the<br />
Digital I/Os of the <strong>MSC</strong> <strong>II</strong><br />
control module:<br />
Safety Instructions<br />
© <strong>Moog</strong> GmbH <strong>User</strong> <strong>Manual</strong> M3000 ® and <strong>MSC</strong> <strong>II</strong> (CA65865-001; Version 1.1, 08/08) 93
10 <strong>MSC</strong> <strong>II</strong> (<strong>Moog</strong> <strong>Servo</strong> Controller) Digital I/Os<br />
WARNING The internal electronics of M3000 ® modules and attached<br />
sensors must be supplied with power from a permanently<br />
connected (unswitched) power supply that<br />
cannot be individually switched off, without switching<br />
off the module's power supply.<br />
If a switched power supply is used, such as when there are<br />
intermediate switching devices (emergency stops, manual<br />
operators, etc.), the following problems might arise, depending<br />
on the state of the power supply for the internal electronics<br />
of the module and sensors (�-table-3 on page 41):<br />
• Reverse energization from sensor to module<br />
• Invalid sensor data<br />
WARNING Sensors that are connected to digital inputs of M3000 ®<br />
modules with several I/O groups, such as <strong>MSC</strong> I, QDIO,<br />
or RDIO, must under all conditions be supplied from the<br />
same power supply as the corresponding I/O-group to<br />
which the sensor is connected!<br />
Otherwise, if the power supply for the internal electronics of<br />
the module is switched off, there might be reverse energization<br />
from the sensor to the module.<br />
There is a danger of:<br />
• Uncontrolled movements<br />
• Fault or failure of a manual control<br />
• Permanent damage to the module<br />
• Malfunctions<br />
Digital I/Os of <strong>MSC</strong> <strong>II</strong> and MSD Motion Controller are protected<br />
against reverse energization.<br />
The power supply for the digital I/Os of the <strong>MSC</strong> <strong>II</strong> control module is independent<br />
of the power supply for the <strong>MSC</strong> <strong>II</strong> control module's internal electronics<br />
(L1+/M1) and is established over the terminals L2+ and M2.<br />
Power supply characteristics<br />
�-"6.2.1-Power Supply Characteristics" on page 39<br />
Connecting sensors to the power supply:<br />
�-"6.2.4-Connecting Sensors" on page 43<br />
Connecting the power supply for the internal electronics:<br />
�-"6.2.3-Connecting the Power Supply" on page 40<br />
© <strong>Moog</strong> GmbH <strong>User</strong> <strong>Manual</strong> M3000 ® and <strong>MSC</strong> <strong>II</strong> (CA65865-001; Version 1.1, 08/08) 94
10 <strong>MSC</strong> <strong>II</strong> (<strong>Moog</strong> <strong>Servo</strong> Controller) Digital I/Os<br />
10.10.3 Digital Outputs<br />
The following digital output circuits are available:<br />
• Open emitter outputs, switches to +24 V (L2+)<br />
Open Emitter Output<br />
<strong>MSC</strong> <strong>II</strong><br />
Figure 57: Basic Wiring Diagram of a Digital Open Emitter/Collector Output of the <strong>MSC</strong> <strong>II</strong><br />
A digital open emitter output in the 1 state (conductive) connects the attached<br />
load R L to the power supply terminal-L2+.<br />
10.10.3.1 Dependence on the 'Outputs Enabled' Signal<br />
If the digital output 'Outputs Enabled' is in the 0 state (LED «OutEN» does not<br />
illuminate), all other outputs are disabled.<br />
In this case, although the internal states of the digital outputs are shown on<br />
the front panel status LEDs «I/O1»…«I/O4» of the <strong>MSC</strong> <strong>II</strong> control module,<br />
they are not connected through to the output.<br />
�-"10.17.2-'Outputs Enabled' Output (LED «OutEN»)" on page 111<br />
10.10.3.2 Current Limiting and Overload Protection<br />
L2+<br />
I/Ox,<br />
OutEN<br />
All digital outputs are protected by an integrated power limiter and a thermal<br />
overload protection device.<br />
In an overload condition, the affected output will be automatically disabled.<br />
After the output stage has been finished thermal cooling it returns to normal<br />
operation. If the overload is still connected, then the disable will happen<br />
again.<br />
A protective circuit with a limiting voltage of 50 V with respect to +24 V (L2+)<br />
for open emitter outputs protects all outputs against induced voltage spikes<br />
when there are inductive loads.<br />
M2<br />
24 V DC<br />
Protective circuit with a limiting voltage of 50 V as protection against induced<br />
voltage spikes when there are inductive loads.<br />
�-"10.10.3.2-Current Limiting and Overload Protection" on page 95<br />
The output 'Outputs Enabled' is always an open emitter output.<br />
�-"10.17.2-'Outputs Enabled' Output (LED «OutEN»)" on page 111<br />
R L<br />
Digital Outputs of the<br />
<strong>MSC</strong> <strong>II</strong> control module<br />
Basic Wiring Diagram of a<br />
Digital Output of the<br />
<strong>MSC</strong> <strong>II</strong> control module<br />
Open Emitter Output<br />
Dependence of <strong>MSC</strong> <strong>II</strong><br />
control module's Digital<br />
Outputs on the 'Outputs<br />
Enabled' Signal<br />
Current Limiting and<br />
Overload Protection for<br />
Digital Outputs of the<br />
<strong>MSC</strong> <strong>II</strong> control module<br />
© <strong>Moog</strong> GmbH <strong>User</strong> <strong>Manual</strong> M3000 ® and <strong>MSC</strong> <strong>II</strong> (CA65865-001; Version 1.1, 08/08) 95
10 <strong>MSC</strong> <strong>II</strong> (<strong>Moog</strong> <strong>Servo</strong> Controller) Digital I/Os<br />
10.10.3.3 Specifications<br />
Number of digital outputs<br />
Maximum 4<br />
�-"10.10-Digital I/Os" on page 93<br />
Type of outputs<br />
Semiconductor, non-capacitive<br />
Protective circuitry for inductive loads<br />
Limiting voltage of 50 V (typ.) with respect to +24 V (L2+)<br />
Power dissipation of protection devices when limiting<br />
Max. 0.5 W per output<br />
Max. 2 W per <strong>MSC</strong> <strong>II</strong><br />
Status display<br />
One status LED per I/O<br />
�-"10.10.1-Display of the Operational State" on page 93<br />
Diagnosis function<br />
The operational state of the digital I/Os can be queried with the aid of<br />
function blocks in the application program.<br />
Power consumption for the internal control circuit (L2+/M2)<br />
≤ 100 mA<br />
10.10.3.4 Load Connection<br />
Total load (100 %)<br />
2 A (4 x 0.5 A), when all 4 terminals are used as outputs<br />
Overload protection<br />
Electronic current limiting and thermal overload protection<br />
Max. short-circuit current<br />
< 8 A<br />
Reverse energization protection<br />
Digital outputs are protected against reverse energization<br />
Output delay (hardware)<br />
From 0 to 1: max. 100 µs<br />
From 1 to 0: max. 100 µs<br />
Update time<br />
The update time corresponds to the task interval of the application program<br />
that actuates the output.<br />
The task interval (and thereby the update time of the outputs) is set<br />
in the task configuration of the MACS development environment.<br />
Output capacitance<br />
< 20 nF<br />
Rated voltage<br />
+24 V DC<br />
Voltage loss (at rated current)<br />
< 2 V<br />
Rated current in 1 state<br />
0.5 A<br />
Leakage current in 0 state<br />
Max. 0.1 mA<br />
Specifications of<br />
<strong>MSC</strong> <strong>II</strong> control<br />
module's Digital<br />
Outputs<br />
Load Connection of<br />
<strong>MSC</strong> <strong>II</strong> control<br />
module's Digital<br />
Outputs<br />
© <strong>Moog</strong> GmbH <strong>User</strong> <strong>Manual</strong> M3000 ® and <strong>MSC</strong> <strong>II</strong> (CA65865-001; Version 1.1, 08/08) 96
10 <strong>MSC</strong> <strong>II</strong> (<strong>Moog</strong> <strong>Servo</strong> Controller) Digital I/Os<br />
Parallel connection of outputs<br />
Not permissible<br />
10.10.3.5 Insulation Resistance<br />
Insulation resistance<br />
Rated voltage: 0–50 V DC<br />
Test voltage for 2,000 m (2,187 yd) operating elevation: 500 V DC<br />
10.10.4 Digital Inputs<br />
The digital inputs are current consuming inputs of the type 1 according to<br />
IEC 61131-2. They are designed for an input voltage rating of 24 V. The input<br />
values (0/1 state) are read cyclically. An open input is interpreted as the<br />
0state.<br />
10.10.4.1 Basic Wiring Diagram<br />
24 V DC<br />
Signal<br />
Source<br />
L2+<br />
I/Ox<br />
M2<br />
Opto-<br />
Decoupling<br />
<strong>MSC</strong> <strong>II</strong><br />
to Input Circuit<br />
Figure 58: Basic Wiring Diagram of a Digital Input of the <strong>MSC</strong> <strong>II</strong> (Current Consuming)<br />
10.10.4.2 Pulse Detection and Disturbance Suppression<br />
The digital inputs are read cyclically. The sampling time corresponds to the<br />
task interval of the application program that reads the input.<br />
The task interval (and thereby the sampling time of the inputs) is set in<br />
the task configuration of the MACS development environment.<br />
For input pulses to be reliably detected, they must be longer than the task interval<br />
specified in the application program.<br />
When defining the minimum pulse duration that can be detected by digital<br />
I/Os, the following differentiation is made:<br />
• Pulses that are never detected; pulse duration: ≤ 50 µs<br />
• Pulses that can be detected (if the system reads the input when the<br />
pulse appears); pulse duration: > 50 µs<br />
• Pulses that are always detected; pulse duration: > the set task interval<br />
The user may implement multiple sampling in the application program in order<br />
to suppress disturbance impulses. In doing so, the user must consider the<br />
tradeoff between the desired level of disturbance suppression and the required<br />
reaction time of the system.<br />
Insulation Resistance of<br />
<strong>MSC</strong> <strong>II</strong> control module's<br />
Digital Outputs<br />
Digital Inputs of the <strong>MSC</strong> <strong>II</strong><br />
control module<br />
Basic Wiring Diagram of a<br />
Digital Input of the <strong>MSC</strong> <strong>II</strong><br />
(Current Consuming)<br />
Pulse Detection and<br />
Disturbance Suppression<br />
of <strong>MSC</strong> <strong>II</strong>'s Digital Inputs<br />
© <strong>Moog</strong> GmbH <strong>User</strong> <strong>Manual</strong> M3000 ® and <strong>MSC</strong> <strong>II</strong> (CA65865-001; Version 1.1, 08/08) 97
10 <strong>MSC</strong> <strong>II</strong> (<strong>Moog</strong> <strong>Servo</strong> Controller) Digital I/Os<br />
10.10.4.3 Specifications<br />
Number of the digital inputs<br />
Maximum 4<br />
�-"10.10-Digital I/Os" on page 93<br />
Type<br />
Type 1 according to IEC 61131-2, current consuming<br />
Wire lengths<br />
In the control cabinet: The voltage drop must be taken into consideration<br />
when choosing the wire cross section; there are<br />
no other practical limitations.<br />
Field wiring: All relevant national regulations as well as the requirements<br />
of IEC 61131-3 must be fulfilled.<br />
Load rated voltage L2+<br />
24 V DC (safety extra-low voltage SELV according to DIN EN 60950-1)<br />
Reverse polarity protection<br />
Digital inputs are protected against reverse polarity<br />
Potential isolation<br />
Achieved with optocouplers<br />
Status display<br />
One status LED per I/O<br />
�-"10.10.1-Display of the Operational State" on page 93<br />
Alarms<br />
Can be implemented in the application program<br />
Input delay (hardware)<br />
From 0 to 1: max. 100 µs<br />
From 1 to 0: max. 100 µs<br />
Sampling time<br />
The sampling time corresponds to the task interval of the application<br />
program that reads the input.<br />
�-"10.10.4.2-Pulse Detection and Disturbance Suppression" on<br />
page 97<br />
The task interval (and thereby the sampling time of the inputs) is set<br />
in the task configuration of the MACS development environment.<br />
Input capacitance<br />
Max. 10 nF<br />
Power consumption for the internal control circuit (L2+/M2)<br />
≤ 100 mA<br />
Specifications of<br />
<strong>MSC</strong> <strong>II</strong> control<br />
module's Digital<br />
Inputs<br />
© <strong>Moog</strong> GmbH <strong>User</strong> <strong>Manual</strong> M3000 ® and <strong>MSC</strong> <strong>II</strong> (CA65865-001; Version 1.1, 08/08) 98
10 <strong>MSC</strong> <strong>II</strong> (<strong>Moog</strong> <strong>Servo</strong> Controller) Digital I/Os<br />
10.10.4.4 U/I Working Ranges<br />
Figure 59: U/I Working Ranges of <strong>MSC</strong> <strong>II</strong> control module's Digital Inputs (Current Consuming)<br />
Input voltage (DC) of the external power supply L2+ rated voltage Ue = 24 V<br />
upper limit Ue max = 36 V<br />
lower limit Ue min = 18 V<br />
Limits for the 1 state upper limit UHmax = 30 V<br />
IHmax = 15 mA<br />
lower limit UHmin = 15 V<br />
IHmin = 2 mA<br />
Limits for the 0 state upper limit ULmax = 15/5 V<br />
ILmax = 0.5/15 mA<br />
lower limit ULmin = -3 V<br />
ILmin = ND<br />
Table 20: U/I Working Ranges of <strong>MSC</strong> <strong>II</strong> control module's Digital Inputs (Current Consuming)<br />
10.10.4.5 Insulation Resistance<br />
Insulation resistance<br />
Rated voltage: 0–50 V DC<br />
Test voltage for 2,000 m (2,187 yd) operating elevation: 500 V DC<br />
U/I Working Ranges of<br />
<strong>MSC</strong> <strong>II</strong> control module's<br />
Digital Inputs (Current<br />
Consuming)<br />
Insulation Resistance<br />
of <strong>MSC</strong> <strong>II</strong> control<br />
module's Digital Inputs<br />
© <strong>Moog</strong> GmbH <strong>User</strong> <strong>Manual</strong> M3000 ® and <strong>MSC</strong> <strong>II</strong> (CA65865-001; Version 1.1, 08/08) 99
10 <strong>MSC</strong> <strong>II</strong> (<strong>Moog</strong> <strong>Servo</strong> Controller) Profibus DP Interface<br />
10.11 Profibus DP Interface<br />
The <strong>MSC</strong> <strong>II</strong> can optionally be equipped with a Profibus DP Slave interface.<br />
X8<br />
F-Bus<br />
Figure 60: Profibus DP Interface of the <strong>MSC</strong> <strong>II</strong><br />
The configuration of the Profibus interface is defined in the application program.<br />
Information about Profibus:<br />
�-"7.3-Profibus" on page 50<br />
Information about the Profibus interface cable:<br />
�-"7.3.4-Profibus Interface Cable" on page 52<br />
10.11.1 Profibus Termination<br />
At the beginning and the end of any Profibus network, termination resistors<br />
must be connected to guarantee specified signal levels. These termination<br />
resistors are integrated in most common connectors.<br />
10.11.2 Shielding<br />
When connecting the stations, always use shielded cables to ensure high interference<br />
immunity of the system against electromagnetic emissions. The<br />
shield should be grounded on both sides where possible.<br />
10.11.3 Profibus Slave Address<br />
The slave station address of the Profibus interface of the <strong>MSC</strong> <strong>II</strong> can be set in<br />
the application program.<br />
10.11.4 Profibus Baud Rate<br />
<strong>MSC</strong> <strong>II</strong><br />
Profibus-<br />
Controller<br />
The Profibus baud rate is defined by the Profibus master station. The <strong>MSC</strong> <strong>II</strong><br />
Profibus slave interface is able to detect the baud rate and synchronize to it.<br />
Profibus DP<br />
Interface of the<br />
<strong>MSC</strong> <strong>II</strong><br />
© <strong>Moog</strong> GmbH <strong>User</strong> <strong>Manual</strong> M3000 ® and <strong>MSC</strong> <strong>II</strong> (CA65865-001; Version 1.1, 08/08) 100<br />
CPU
10 <strong>MSC</strong> <strong>II</strong> (<strong>Moog</strong> <strong>Servo</strong> Controller) EtherCAT<br />
10.12 EtherCAT<br />
<strong>MSC</strong> <strong>II</strong> is optionally available with dual EtherCAT interface.<br />
The configuration of the network nodes is done in the PLC Configuration of<br />
the development environment MACS.<br />
WARNING Do not connect EtherCAT to any other Ethernet networks.<br />
The high rate of telegrams which are transmitted by Ether-<br />
CAT will prevent other devices like computers and servers on<br />
the network from transmitting data.<br />
There is a danger of<br />
• Network overload/breakdown<br />
• Malfunction of connected devices<br />
• Data loss at connected devices<br />
It is strongly recommended to use cables of a special color<br />
only for EtherCAT connections.<br />
10.13 Digital Sensor Interfaces<br />
The <strong>MSC</strong> <strong>II</strong> provides 4-digital sensor interfaces according to TIA/EIA 422/485<br />
(previously RS 422/485) that can be used with devices such as position<br />
transducers or shaft encoders with an SSI interface or incremental sensor<br />
signals in different formats, such as pulse train or frequency modulation.<br />
�-"10.13.3-Connecting SSI Sensors" on page 102<br />
�-"10.13.4-Connecting Incremental Sensors" on page 105<br />
The sensor interfaces are configured in the PLC configuration of the<br />
MACS development environment.<br />
Recommended cable types<br />
• Use only shielded cables.<br />
• The shield must be made of copper braiding with at least 80% coverage.<br />
• The wire must be made of copper with a cross section of at least<br />
0.25 mm2 (23 AWG).<br />
• In environments with a high amount of disturbance, use cables with<br />
twisted pair wires.<br />
10.13.1 Termination Resistors<br />
Each sensor interface of the <strong>MSC</strong> <strong>II</strong> is equipped with switchable termination<br />
resistors, one for each channel. The default state of the switches is ON. This<br />
means termination resistor is active for each differential pair. When using<br />
more sensor interfaces together with one sensor, the additional termination<br />
resistors need to be switched off (e.g. in SSI Slave mode).<br />
Activation/deactivation of the resistors, are controlled by the DIP switches on<br />
the <strong>MSC</strong> <strong>II</strong> mainboard.<br />
Digital Sensor Interfaces<br />
of the <strong>MSC</strong> <strong>II</strong><br />
Termination Resistors<br />
of <strong>MSC</strong> <strong>II</strong>'s Digital<br />
Sensor Interfaces<br />
© <strong>Moog</strong> GmbH <strong>User</strong> <strong>Manual</strong> M3000 ® and <strong>MSC</strong> <strong>II</strong> (CA65865-001; Version 1.1, 08/08) 101
10 <strong>MSC</strong> <strong>II</strong> (<strong>Moog</strong> <strong>Servo</strong> Controller) Digital Sensor Interfaces<br />
10.13.2 Wire Fault Monitoring<br />
The inputs A, B, and Z of the digital sensor interfaces of the <strong>MSC</strong> <strong>II</strong> are monitored<br />
for wire faults, regardless of which type of sensor is attached.<br />
The signals supplied by the wire fault monitoring function are available in the<br />
application program. The user is responsible for evaluating these signals and<br />
defining the appropriate reaction to the appearance of a wire fault.<br />
The status of wire fault monitoring is displayed by 12 front panel error LEDs<br />
of the <strong>MSC</strong> <strong>II</strong>. Each of the 12 TIA/EIA 422/485 inputs is assigned to one LED.<br />
�-"10.13.2.1-Wire Fault Display LEDs" on page 102<br />
10.13.2.1 Wire Fault Display LEDs<br />
The 12-front panel error LEDs «A1», «B1», «Z1», «A2», «B2», «Z2», «A3»,<br />
«B3», «Z3», «A4», «B4» and «Z4» of the <strong>MSC</strong> <strong>II</strong> will illuminate if:<br />
• No sensor is attached to the corresponding sensor interface input<br />
• There is a wire break<br />
10.13.3 Connecting SSI Sensors<br />
An SSI sensor supplies an absolute position signal or angle signal that can<br />
be read through the <strong>MSC</strong> <strong>II</strong>'s sensor interface. The current value is available<br />
in the application program continuously.<br />
If an SSI sensor is attached to the sensor interface of the <strong>MSC</strong> <strong>II</strong>, the <strong>MSC</strong> <strong>II</strong><br />
can be used as a master or a slave. The sensor interface must then be inserted<br />
and configured as a master or slave, respectively, in the PLC configuration<br />
of the MACS development environment.<br />
If the <strong>MSC</strong> <strong>II</strong> is used as a master, the terminal assignment of the SSI interface<br />
will be different than if it is used as a slave!<br />
<strong>MSC</strong> <strong>II</strong> connection diagram (master mode): � figure-61 on page 103<br />
<strong>MSC</strong> <strong>II</strong> connection diagram (slave mode): � figure-62 on page 104<br />
If the <strong>MSC</strong> <strong>II</strong> interface is used as a SSI master, the «Bx» and «Zx» wire<br />
fault LEDs of the relevant interface will illuminate even if the sensor is<br />
connected and no wire fault is existent.<br />
If the <strong>MSC</strong> <strong>II</strong> interface is used as a SSI slave, the «Zx» wire fault LEDs<br />
of the relevant interface will illuminate even if the sensor is connected<br />
and no wire fault is existent.<br />
Wire Fault Monitoring<br />
of <strong>MSC</strong> <strong>II</strong>'s Digital<br />
Sensor Interfaces<br />
Wire Fault Display LEDs<br />
of <strong>MSC</strong> <strong>II</strong>'s Digital<br />
Sensor interfaces<br />
Connecting SSI Sensors<br />
to the <strong>MSC</strong> <strong>II</strong><br />
© <strong>Moog</strong> GmbH <strong>User</strong> <strong>Manual</strong> M3000 ® and <strong>MSC</strong> <strong>II</strong> (CA65865-001; Version 1.1, 08/08) 102
10 <strong>MSC</strong> <strong>II</strong> (<strong>Moog</strong> <strong>Servo</strong> Controller) Digital Sensor Interfaces<br />
10.13.3.1 SSI Master Mode<br />
In SSI master mode, the <strong>MSC</strong> <strong>II</strong> generates the SSI clock internally (sensor 1:<br />
CLK1, sensor 2: CLK2, sensor 3: CLK3,sensor 4: CLK4) with adjustable frequencies<br />
in the range between 78 kHz and 5 MHz. The frequencies are set in<br />
the PLC configuration of the MACS development environment.<br />
The clock signal is generated synchronous to the adjusted basetick. <strong>MSC</strong> <strong>II</strong><br />
calculates duration of a SSI data transmission depending on frequency and<br />
number of data bits. SSI communication is started exact that necessary time<br />
before each basetick.<br />
Make sure That the SSI communication time does not exceed the basetick<br />
period.<br />
When idle, the clock signal will be in the 1 state. The first falling edge of the<br />
clock signal triggers the SSI sensor to hold its actual value. The clock signal's<br />
subsequent rising edge starts the data transmission of the SSI sensor. The<br />
output begins with the most significant bit (MSB). After a complete data set<br />
has been transmitted, the SSI sensor holds the data signal in the 0 state until<br />
the SSI sensor is ready for another transmission. The return of the data signal<br />
to the 1 state simultaneously fulfills the condition the SSI interface needs to<br />
trigger a new read-in cycle.<br />
<strong>MSC</strong> <strong>II</strong><br />
SSI Master<br />
Mode<br />
Ax+<br />
Ax-<br />
CLKx+<br />
CLKx-<br />
DGND<br />
Data Signal<br />
SSI Clock (CLK)<br />
DGND<br />
Figure 61: Connection Diagram of the <strong>MSC</strong> <strong>II</strong> in Master Mode<br />
SSI Sensor<br />
<strong>MSC</strong> <strong>II</strong> in SSI Master Mode<br />
Connection Diagram of<br />
the <strong>MSC</strong> <strong>II</strong> in Master<br />
Mode<br />
© <strong>Moog</strong> GmbH <strong>User</strong> <strong>Manual</strong> M3000 ® and <strong>MSC</strong> <strong>II</strong> (CA65865-001; Version 1.1, 08/08) 103
10 <strong>MSC</strong> <strong>II</strong> (<strong>Moog</strong> <strong>Servo</strong> Controller) Digital Sensor Interfaces<br />
10.13.3.2 SSI Slave Mode<br />
When in SSI slave mode, the <strong>MSC</strong> <strong>II</strong> does not generate its own SSI clock; instead,<br />
it reads the data in synchronization with an externally generated clock<br />
signal. The <strong>MSC</strong> <strong>II</strong> influences neither the SSI clock frequency nor the update<br />
rate with which new data is requested from the SSI sensor. In this mode, the<br />
<strong>MSC</strong> <strong>II</strong> reads the data signal with every falling edge of the clock.<br />
With a symmetrical clock, the sensor interface can evaluate signals in the frequency<br />
range of 78 kHz to 5 MHz.<br />
When the clock signal is asymmetrical, the width of the positive pulse must be<br />
smaller than 6.3 µs so that the sensor interface that is configured as an SSI<br />
slave will not perceive prematurely that the data transmission is concluded.<br />
The clock signal must be in the 1 state for longer than 6.5 µs so that the sensor<br />
interface will save the value that has been read.<br />
CLK<br />
Data<br />
Data Signal<br />
SSI Master SSI Sensor<br />
SSI Clock (CLK)<br />
DGND DGND<br />
Figure 62: Connection Diagram of the <strong>MSC</strong> <strong>II</strong> in Slave Mode<br />
Figure 63: Signals Between the <strong>MSC</strong> <strong>II</strong> and a 16 Bit SSI Sensor (Example)<br />
The signal levels comply with the standard TIA/EIA 422/485 (previously<br />
RS 422/485).<br />
SSI sensors can be used that supply either gray code or binary coded data.<br />
The maximum possible resolution is 32 bits.<br />
Coding of data and number of data bits can be adjusted in the PLC Configuration<br />
of the MACS development environment.<br />
Ax+<br />
Ax-<br />
Bx+<br />
Bx-<br />
DGND<br />
<strong>MSC</strong> <strong>II</strong><br />
SSI Slave<br />
Mode<br />
MSB D15 D14 D13 D12 D11 D10 D9 D8 D7 D6 D5 D4 D3 D2 LSB<br />
The external SSI master must be capable of driving two TIA/EIA 422/485<br />
inputs (including the termination resistors)!<br />
<strong>MSC</strong> <strong>II</strong> in SSI Slave Mode<br />
Connection Diagram of<br />
the <strong>MSC</strong> <strong>II</strong> in Slave<br />
Mode<br />
Signals Between the<br />
<strong>MSC</strong> <strong>II</strong> and a 16 Bit SSI<br />
Sensor (Example)<br />
© <strong>Moog</strong> GmbH <strong>User</strong> <strong>Manual</strong> M3000 ® and <strong>MSC</strong> <strong>II</strong> (CA65865-001; Version 1.1, 08/08) 104
10 <strong>MSC</strong> <strong>II</strong> (<strong>Moog</strong> <strong>Servo</strong> Controller) Digital Sensor Interfaces<br />
10.13.4 Connecting Incremental Sensors<br />
Incremental sensors supply a relative position or angle signal that the <strong>MSC</strong> <strong>II</strong><br />
can read. In doing so, it can detect and evaluate impulse sequences with frequencies<br />
up to 8 MHz. Three different interfaces are supported by <strong>MSC</strong> <strong>II</strong>:<br />
Standard, Pulse Train and Frequency Modulation interfaces. The adaptation<br />
for the application program is done in the MACS development environment.<br />
<strong>MSC</strong> <strong>II</strong><br />
Incremental<br />
Sensor Mode<br />
Ax+<br />
Ax-<br />
Bx+<br />
Bx-<br />
Zx+<br />
Zx-<br />
DGND<br />
Signal A<br />
Signal B<br />
Signal Z<br />
Figure 64: Connection Diagram of the <strong>MSC</strong> <strong>II</strong> with an Incremental Sensor<br />
10.13.4.1 Incremental Encoder (Standard)<br />
DGND<br />
Incremental<br />
Sensor<br />
The adjustable 32 bit actual value in the <strong>MSC</strong> <strong>II</strong> is varied dependent on the<br />
leading or lagging sequence of A and B signals. Only 4 edges evaluation is<br />
used for this.<br />
Example:<br />
With 4 edges evaluation, a sensor with 1.024 dashes per revolution will supply<br />
to the application program 4.096 increments per revolution.<br />
A check will be performed with every rising and falling edge of the A and<br />
B-signals to determine whether the B-signal is lagging behind the A-signal. If<br />
this is the case, the actual value will be increased by 1. If the A-signal lags<br />
behind the B-signal, the actual value will be decreased by 1.<br />
The signal levels comply with the standard TIA/EIA 422/485 (previously<br />
RS 422/485).<br />
The terminal designations will vary, depending on the manufacturer of the incremental<br />
sensor.<br />
Terminal Designation<br />
<strong>MSC</strong> <strong>II</strong> A+ A- B+ B- Z+ Z-<br />
Sensor supplied by Heidenhain<br />
Ua1 Ua1 Ua2 Ua2 Ua0 Ua0 Sensor supplied by Hengstler<br />
a a B B N N<br />
Sensor supplied by Stegmann<br />
a a B B M M<br />
Sensor supplied by Allen-Bradley<br />
a a B B Z Z<br />
Table 21: Designations of Incremental Sensor Terminals (<strong>MSC</strong> <strong>II</strong> and Incremental<br />
Sensors from Various Manufacturers)<br />
Figure 65 shows the signals to a standard incremental encoder interface. The<br />
given timings are valid for all operation modes.<br />
Connecting Incremental<br />
Sensors to the <strong>MSC</strong> <strong>II</strong><br />
Connection Diagram<br />
of the <strong>MSC</strong> <strong>II</strong> with an<br />
Incremental Sensor<br />
Designations of Incremental<br />
Sensor Terminals<br />
© <strong>Moog</strong> GmbH <strong>User</strong> <strong>Manual</strong> M3000 ® and <strong>MSC</strong> <strong>II</strong> (CA65865-001; Version 1.1, 08/08) 105
10 <strong>MSC</strong> <strong>II</strong> (<strong>Moog</strong> <strong>Servo</strong> Controller) Digital Sensor Interfaces<br />
A<br />
B<br />
Z<br />
t pl<br />
t pl<br />
t ph<br />
t ph<br />
Reversal Point<br />
t d<br />
Figure 65: Timing requirements of incremental encoder signals<br />
Time Minimum Description<br />
tpl 125 ns Minimum pulse high time<br />
tph 125 ns Minimum pulse low time<br />
td 1 ns Edge to edge minimum delay time<br />
The incremental encoder provides relative position information. The position<br />
value is incremented or decremented depending on the lead/lag relationship<br />
of the two signals (A and B) delivered by the incremental encoder. These signals<br />
may vary in frequency. The implemented interface can react on frequencies<br />
up to 8 MHz.<br />
The position data is counted in a 32 bit free running counter. Each A/B signal<br />
edge triggers a 32 bit counter. This counter is overflowing to 0x0000 0000 or<br />
underflowing to 0xFFFF FFFF, depending on direction.<br />
Each pulse on the Z input may reset the counter to zero. This function must<br />
be enabled by a MACS function block. By default the counter is free running<br />
and Z input is ignored.<br />
On the left side of the dotted line B signal is leading. On the right side of the<br />
dotted line, the direction of the incremental encoder has changed. Now A is<br />
leading.<br />
Following relations between counter update and lead/lag of signals is implemented:<br />
• while line A leads, the counter is incremented with every rising and falling<br />
edge of line A and line B<br />
• while line B leads, the counter is decremented with every rising and falling<br />
edge of line A and line B<br />
• if Z input is enabled, the counter is always reset to zero when a pulse occurs<br />
on Z input<br />
A<br />
B<br />
Counter: 5<br />
Table 22: Timing of incremental encoders<br />
Reversal Point<br />
3 2 1 0 -1 -2 -1 0 1 2 4 8 16 20 24 28 32 36 40<br />
Figure 66: Timing of Standard Incremental Encoder<br />
10.13.4.2 Incremental Encoder (Pulse Train positive logic)<br />
• On the left side of the dotted line, while B signal is low, the counter becomes<br />
decremented.<br />
• On the right side, while B signal is high, the direction has changed. Now<br />
the counter becomes incremented.<br />
Please make sure that any changes at B signal happen at least 100 ns<br />
before a rising edge at A signal.<br />
Timing requirements of<br />
incremental encoder<br />
signals<br />
Timing of Standard<br />
Incremental Encoder<br />
© <strong>Moog</strong> GmbH <strong>User</strong> <strong>Manual</strong> M3000 ® and <strong>MSC</strong> <strong>II</strong> (CA65865-001; Version 1.1, 08/08) 106<br />
t ph
10 <strong>MSC</strong> <strong>II</strong> (<strong>Moog</strong> <strong>Servo</strong> Controller) Digital Sensor Interfaces<br />
A<br />
B<br />
Reversal Point<br />
Counter: 6 5 6 7 8 10 11 12 13 14 15 16<br />
Figure 67: Timing of Pulse Train Incremental Encoder with positive logic<br />
10.13.4.3 Incremental Encoder (Pulse Train negative logic)<br />
• On the left side of the dotted line, while B signal is high, the counter becomes<br />
decremented.<br />
• On the right side, while B signal is low, the direction has changed. Now<br />
the counter becomes incremented.<br />
A<br />
B<br />
Please make sure that any changes at B signal happen at least 100 ns<br />
before a rising edge at A signal.<br />
Reversal Point<br />
Counter 6 5 6 7 8 10 11 12 13 14 15 16<br />
Figure 68: Timing of Pulse Train Incremental Encoder with negative logic<br />
10.13.4.4 Incremental Encoder (Frequency Modulation positive logic)<br />
• On the left side of the dotted line, while B signal is low, any rising edges<br />
of A signal decrements the counter state.<br />
• On the right side, while A signal is low, the direction has changed. Now<br />
any rising edges of B signal increments the counter state.<br />
A<br />
B<br />
Counter 6<br />
5<br />
Reversal Point<br />
6 7 8 9 10 11 12 13 14 15<br />
Figure 69: Timing of Frequency Modulation Incremental Encoder with positive logic<br />
10.13.4.5 Incremental Encoder (Frequency Modulation negative logic)<br />
• On the left side of the dotted line, while B signal is high, any falling edges<br />
of A signal decrements the counter state.<br />
• On the right side, while A signal is high, the direction has changed. Now<br />
any falling edges of B signal increments the counter state.<br />
A<br />
B<br />
Reversal Point<br />
Counter 6<br />
5 6 7 8 9 10 11 12 13 14 15<br />
Figure 70: Timing of Frequency Modulation Incremental Encoder with negative logic<br />
Timing of Pulse Train<br />
Incremental Encoder<br />
with positive logic<br />
Timing of Pulse Train<br />
Incremental Encoder<br />
with negative logic<br />
Timing of Frequency<br />
Modulation Incremental<br />
Encoder with positive<br />
logic<br />
Timing of Frequency<br />
Modulation Incremental<br />
Encoder with negative<br />
logic<br />
© <strong>Moog</strong> GmbH <strong>User</strong> <strong>Manual</strong> M3000 ® and <strong>MSC</strong> <strong>II</strong> (CA65865-001; Version 1.1, 08/08) 107
10 <strong>MSC</strong> <strong>II</strong> (<strong>Moog</strong> <strong>Servo</strong> Controller) E-Bus Interface<br />
10.14 E-Bus Interface<br />
The <strong>MSC</strong> <strong>II</strong>'s inputs and outputs can be extended locally by establishing an<br />
E-bus group (by attaching up to 7 E-bus slaves to the E-bus interface).<br />
Examples:<br />
• After 7-QDIO 16/16-0,5 extension modules are attached, an additional<br />
112-digital inputs and 112-individually configurable digital I/Os will be<br />
available.<br />
• After attaching 4-QAIO 16/4 extension modules and 3-QDIO 16/16-0,5<br />
extension modules, an additional 64-analog inputs, 16-analog outputs,<br />
48-digital inputs, and 48-individually configurable digital I/Os will be<br />
available.<br />
Additional information about the E-bus interface and E-bus groups:<br />
�-"7.6.1-E-Bus Interface" on page 60<br />
�-"7.6.2-E-Bus Communication" on page 61<br />
�-"7.7.2-E-Bus Groups" on page 65<br />
10.14.1 Configuration of the E-Bus Interface<br />
The E-bus interface of the <strong>MSC</strong> <strong>II</strong> is configured in the PLC configuration of<br />
the MACS development environment. The number and type of attached<br />
E-bus slaves must be specified in the configuration.<br />
The inputs and outputs of the attached E-bus slaves are also configured in<br />
the PLC configuration.<br />
E-Bus Interface<br />
of the <strong>MSC</strong> <strong>II</strong><br />
Configuration of the<br />
E-Bus Interface<br />
© <strong>Moog</strong> GmbH <strong>User</strong> <strong>Manual</strong> M3000 ® and <strong>MSC</strong> <strong>II</strong> (CA65865-001; Version 1.1, 08/08) 108
10 <strong>MSC</strong> <strong>II</strong> (<strong>Moog</strong> <strong>Servo</strong> Controller) CAN Bus Interfaces<br />
10.15 CAN Bus Interfaces<br />
The <strong>MSC</strong> <strong>II</strong> is equipped with the following independent CAN bus interfaces<br />
that can be operated within CAN bus networks:<br />
• WideCAN (2 «WCAN» front panel connectors of the <strong>MSC</strong> <strong>II</strong>)<br />
• LocalCAN (2 internally on the lateral Q-connectors of the <strong>MSC</strong> <strong>II</strong>)<br />
A separate CAN bus controller is included for every CAN bus interface.<br />
X3<br />
WCAN<br />
X1<br />
WCAN<br />
Q-Connector<br />
Q-Connector<br />
WideCAN<br />
LocalCAN<br />
<strong>MSC</strong> <strong>II</strong><br />
CAN Bus<br />
Controller<br />
CAN Bus<br />
Controller<br />
Figure 71: CAN Bus Interfaces of the <strong>MSC</strong> <strong>II</strong><br />
Although both CAN bus interfaces are equally fast and have equal priority,<br />
WideCAN is typically used for communication between all the network stations<br />
of a wide area automation system, while LocalCAN is preferred for rapid<br />
local communication between fewer network stations.<br />
The «WCAN» front panel connectors are connected internally 1:1 with each<br />
other. As a result, the <strong>MSC</strong> <strong>II</strong> control module can be connected directly to the<br />
CAN bus without a T-adapter.<br />
The functionality of the CAN bus interfaces is defined in the application<br />
program.<br />
Information about CAN bus and CANopen:<br />
�-"7.5-CAN Bus and CANopen" on page 55<br />
Information about the CAN bus interface cable:<br />
�-"7.5.6-CAN Bus Interface Cable" on page 59<br />
CAN Bus Interfaces<br />
of the <strong>MSC</strong> <strong>II</strong> control<br />
module<br />
CAN Bus Interfaces<br />
of the <strong>MSC</strong> <strong>II</strong><br />
Status LEDs «WCAN» and<br />
«LCAN» of the<br />
<strong>MSC</strong> <strong>II</strong><br />
© <strong>Moog</strong> GmbH <strong>User</strong> <strong>Manual</strong> M3000 ® and <strong>MSC</strong> <strong>II</strong> (CA65865-001; Version 1.1, 08/08) 109<br />
CPU<br />
The «WCAN» and «LCAN» front panel status LEDs of the <strong>MSC</strong> <strong>II</strong> flash<br />
synchronously to the flow of data that the <strong>MSC</strong> <strong>II</strong> is sending over the<br />
WideCAN or LocalCAN interface, respectively.
10 <strong>MSC</strong> <strong>II</strong> (<strong>Moog</strong> <strong>Servo</strong> Controller) CAN Bus Interfaces<br />
10.15.1 CAN Bus Termination Resistor<br />
The LocalCAN interface of the <strong>MSC</strong> <strong>II</strong> is equipped with a switchable CAN bus<br />
termination resistor. The termination resistor can be switched on by a MACS<br />
function block in the application project.<br />
The «TRM» front panel status LED of the <strong>MSC</strong> <strong>II</strong> illuminates when the<br />
termination resistor of the LocalCAN interface is switched on.<br />
�-"10.4.2-LEDs" on page 81<br />
The switchable CAN bus termination resistor of the <strong>MSC</strong> <strong>II</strong> can be used as a<br />
termination resistor only on LocalCAN bus groups.<br />
�-"7.7.3-LocalCAN Bus Groups" on page 66<br />
In WideCAN bus groups, the switchable CAN bus termination resistor of the<br />
<strong>MSC</strong> <strong>II</strong> cannot be used as a termination resistor! Separate pluggable CAN<br />
termination resistors must be used for this.<br />
�-"7.7.4-WideCAN Bus Groups" on page 67<br />
D-sub connectors with CAN bus termination resistors are available from<br />
<strong>Moog</strong>.<br />
�-"11.7-CAN Bus Accessories" on page 120<br />
10.15.2 Setting the CANopen Node-ID<br />
The CANopen node-ID of the CAN bus interface of the <strong>MSC</strong> <strong>II</strong> control module<br />
can be set or modified in the following places:<br />
• In the application program<br />
• With the PLC Browser in the MACS development environment<br />
The CANopen node-ID is saved in the license key.<br />
�-"10.6.2-CANopen Node-ID and IP Address" on page 86<br />
10.15.3 Setting the CAN Bus Baud Rate<br />
The CAN bus baud rate is set in the application program.<br />
CAN Bus Termination<br />
Resistor of the <strong>MSC</strong> <strong>II</strong><br />
Setting/Modifying <strong>MSC</strong> <strong>II</strong><br />
control module's<br />
CANopen Node-ID<br />
© <strong>Moog</strong> GmbH <strong>User</strong> <strong>Manual</strong> M3000 ® and <strong>MSC</strong> <strong>II</strong> (CA65865-001; Version 1.1, 08/08) 110
10 <strong>MSC</strong> <strong>II</strong> (<strong>Moog</strong> <strong>Servo</strong> Controller) Serial Interfaces<br />
10.16 Serial Interfaces<br />
The <strong>MSC</strong> <strong>II</strong> provides the following serial interface:<br />
• SIO interface with «SIO» front panel connector<br />
SIO interface according to TIA/EIA 232 (previously RS 232):<br />
The SIO interface's communication parameters are set in the application<br />
program.<br />
Terminal assignment of the serial interfaces:<br />
�-"10.4.1-Terminal Assignment" on page 78<br />
Serial interface cables:<br />
�-"7.4-Serial TIA/EIA Interface Cables" on page 54<br />
10.17 Safety Functions<br />
10.17.1 Watchdog<br />
The <strong>MSC</strong> <strong>II</strong> control module provides a function for monitoring whether the<br />
software is working properly. When there is a fault, this function switches all<br />
digital outputs to zero potential condition and stops fieldbus communication.<br />
As a result, the user can set up systems that have a greatly reduced risk of<br />
fatal malfunctions.<br />
In the <strong>MSC</strong> <strong>II</strong> control module, this function is implemented in the<br />
M_WATCHDOG function block, which can be used in the application program<br />
to be monitored. If this function block is used, it must be enabled and triggered<br />
cyclically in order to keep the outputs enabled.<br />
When there is a fault (when the application program can no longer trigger the<br />
function block within the set time period), the outputs will be disabled.<br />
If the M_WATCHDOG function block is not used in the application program,<br />
the <strong>MSC</strong> <strong>II</strong> control module's watchdog will not operate. In this case, the outputs<br />
will always be enabled and they will output the value calculated in the<br />
application program.<br />
The digital output 'Outputs Enabled' indicates the enabled state of all<br />
digital outputs and the <strong>MSC</strong> <strong>II</strong>’s E-bus and fieldbus communication.<br />
10.17.2 'Outputs Enabled' Output (LED «OutEN»)<br />
WARNING If there is a defect in an output stage, the 'Outputs Enabled'<br />
signal will not necessarily shut down all of the<br />
outputs securely.<br />
The digital output 'Outputs Enabled' indicates the enabled state of all digital<br />
outputs and the <strong>MSC</strong> <strong>II</strong>’s E-bus and fieldbus communication. It can be used<br />
to signalize another controller that all of the <strong>MSC</strong> <strong>II</strong> control module's outputs<br />
were disabled.<br />
Serial Interfaces<br />
of the <strong>MSC</strong> <strong>II</strong><br />
Watchdog of the <strong>MSC</strong> <strong>II</strong><br />
control module<br />
'Outputs Enabled' Output<br />
(LED «OutEN») of the<br />
<strong>MSC</strong> <strong>II</strong> control module<br />
© <strong>Moog</strong> GmbH <strong>User</strong> <strong>Manual</strong> M3000 ® and <strong>MSC</strong> <strong>II</strong> (CA65865-001; Version 1.1, 08/08) 111
10 <strong>MSC</strong> <strong>II</strong> (<strong>Moog</strong> <strong>Servo</strong> Controller) Safety Functions<br />
As long as the 'Outputs Enabled' output is in the 1 state, the application program<br />
will control all outputs, the E-bus communication and the fieldbus communication.<br />
If the 'Outputs Enabled' output is switched to the 0 state (LED «OutEN» does<br />
not illuminate), all outputs will be disabled, the E-bus communication and the<br />
fieldbus communication will be stopped.<br />
In this case, although the internal states of the digital outputs are shown on<br />
the front panel status LEDs «I/O1»…«I/O4» of the <strong>MSC</strong> <strong>II</strong> control module,<br />
they are not connected through to the output.<br />
The digital output 'Outputs Enabled' will be switched to the 1 state only if the<br />
following conditions are fulfilled simultaneously:<br />
• An error-free application program has been loaded onto the <strong>MSC</strong> <strong>II</strong> control<br />
module and will be started once after every reset of the <strong>MSC</strong> <strong>II</strong> control<br />
module<br />
• A valid license key is inserted<br />
• The M_WATCHDOG function block is not used<br />
or the M_WATCHDOG function block is used in the application program,<br />
enabled and triggered cyclically within the set time<br />
If any one of these conditions is not fulfilled, the 'Outputs Enabled' output will<br />
be switched to the 0 state, thereby disabling all of the <strong>MSC</strong> <strong>II</strong> control module's<br />
other outputs. In addition, the E-bus and the fieldbus communication will be<br />
stopped.<br />
10.17.2.1 «OutEN» LED<br />
The front panel LED «OutEN», located of the <strong>MSC</strong> <strong>II</strong> control module, indicates<br />
the status of the 'Outputs Enabled' output. The LED «OutEN» illuminates<br />
when the 'Outputs Enabled' output is in the 1 state.<br />
10.17.3 Stopping the Application Program<br />
An application program (executed in the <strong>MSC</strong> <strong>II</strong> control module) can be<br />
stopped in the MACS development environment.<br />
After an application program stops, all analog and digital outputs will automatically<br />
be switched to a secure state. This secure value can be set for each<br />
output individually by modifying the 'Secure' channel parameter in the<br />
PLC Configuration.<br />
If the «OutEN» LED does not illuminate (when the 'Outputs Enabled'<br />
output is in the 0 state), this secure value will not be at the outputs because<br />
the outputs will be disabled.<br />
�-"10.17.2-'Outputs Enabled' Output (LED «OutEN»)" on page 111<br />
«OutEN» LED of the<br />
<strong>MSC</strong> <strong>II</strong> control module<br />
Stopping the<br />
Application Program<br />
© <strong>Moog</strong> GmbH <strong>User</strong> <strong>Manual</strong> M3000 ® and <strong>MSC</strong> <strong>II</strong> (CA65865-001; Version 1.1, 08/08) 112
10 <strong>MSC</strong> <strong>II</strong> (<strong>Moog</strong> <strong>Servo</strong> Controller) Nameplate<br />
10.18 Nameplate<br />
<strong>Moog</strong> GmbH D-71034 Böblingen<br />
Made in Germany.<br />
Mod: D136-002-002<br />
a<br />
S/N:<br />
ID:<br />
D101<br />
Date: 0108<br />
Figure 72: Position of the Nameplate on the <strong>MSC</strong> <strong>II</strong><br />
Part number<br />
Serial number<br />
Revision<br />
Date in the format<br />
MM YY (month year)<br />
Nameplate of the <strong>MSC</strong> <strong>II</strong><br />
© <strong>Moog</strong> GmbH <strong>User</strong> <strong>Manual</strong> M3000 ® and <strong>MSC</strong> <strong>II</strong> (CA65865-001; Version 1.1, 08/08) 113
11 Product Range M3000 ® Starter Kits<br />
11 Product Range<br />
The following chapter describes only a small part of <strong>Moog</strong>'s extensive<br />
product range. In addition to the many different M3000 ® modules,<br />
<strong>Moog</strong>'s current product range includes a large variety of accessories.<br />
11.1 M3000 ® Starter Kits<br />
Item Designation Remarks Part Number<br />
<strong>MSC</strong> I starter kit, including<br />
<strong>MSC</strong> I with Profibus-DP slave<br />
<strong>MSC</strong> <strong>II</strong> starter kit, including<br />
<strong>MSC</strong> <strong>II</strong> with Profibus-DP<br />
slave interface<br />
<strong>MSC</strong> <strong>II</strong> starter kit, including<br />
<strong>MSC</strong> <strong>II</strong> with dual EtherCAT<br />
master interface<br />
MSD starter kit including one<br />
MSD Motion Controller and<br />
one 4A MSD <strong>Servo</strong>drive<br />
Complete package including everything<br />
needed to get started<br />
Complete package including everything<br />
needed to get started<br />
�-"3.2-<strong>MSC</strong> <strong>II</strong> Starter Kit" on page 15<br />
Complete package including everything<br />
needed to get started<br />
�-"3.2-<strong>MSC</strong> <strong>II</strong> Starter Kit" on page 15<br />
Complete package including everything<br />
needed to get started<br />
�-"3.2-<strong>MSC</strong> <strong>II</strong> Starter Kit" on page 15<br />
Table 23: Product Range – M3000 ® Starter Kits<br />
D147-001-005<br />
D147-002-001<br />
D147-002-002<br />
Ordering number<br />
not assigned yet<br />
Product Range:<br />
M3000 ® Starter Kits<br />
© <strong>Moog</strong> GmbH <strong>User</strong> <strong>Manual</strong> M3000 ® and <strong>MSC</strong> <strong>II</strong> (CA65865-001; Version 1.1, 08/08) 114
11 Product Range M3000 ® Modules<br />
11.2 M3000 ® Modules<br />
11.2.1 Controller<br />
Item Designation Remarks Part Number<br />
<strong>MSC</strong> <strong>II</strong> Multi-axis high performance motion controller<br />
with PLC functionality<br />
128 MB RAM / 32 MB Flash<br />
4 Digital I/O<br />
4 Position transducer interfaces<br />
2 USB, 1 Ethernet, 2 CAN,<br />
1 TIA/EIA 232<br />
�-"3.3.2-<strong>MSC</strong> <strong>II</strong>" on page 17<br />
D136-002-002<br />
<strong>MSC</strong> <strong>II</strong> with Profibus-DP interface<br />
<strong>MSC</strong> <strong>II</strong> with EtherCAT interface<br />
As D136-002-002, additional Profibus-DP<br />
slave interface<br />
�-"3.3.2-<strong>MSC</strong> <strong>II</strong>" on page 17<br />
As D136-002-002, additional dual Ether-<br />
CAT master interface<br />
�-"3.3.2-<strong>MSC</strong> <strong>II</strong>" on page 17<br />
MSD Motion Controller Multi-axis high performance motion controller<br />
with PLC functionality<br />
128 MB RAM / 32 MB Flash<br />
4 Digital I/O<br />
1 USB, 1 Ethernet, 1 CAN, 2 EtherCAT<br />
master<br />
�-"3.3.5-MSD Motion Controller" on<br />
page 22<br />
MSD Motion Controller with<br />
Profibus-DP interface<br />
As G391-001-001, additional Profibus-DP<br />
slave interface<br />
�-"3.3.5-MSD Motion Controller" on<br />
page 22<br />
<strong>MSC</strong> I Motion Controller Multi-axis high performance motion controller<br />
with PLC functionality<br />
4MB RAM / 4MB Flash<br />
8 Digital I/O<br />
8 Analog In (16bit), 2 Analog Out (16bit)<br />
2 Position transducer interface<br />
2 CAN Controller, 1 TIA/EIA 232<br />
<strong>MSC</strong> I Motion Controller with<br />
Profibus-DP interface<br />
As D136-001-008, additional Profibus-<br />
DP slave interface<br />
Table 24: Product Range – Controller<br />
D136-002-001<br />
D136-002-003<br />
G391-001-001<br />
G391-001-002<br />
D136-001-008<br />
D136-001-007<br />
The plug-in terminal strips, that may be needed for connection of power<br />
and signal cables, are not included in delivery. The plug-in terminal strips<br />
are available from <strong>Moog</strong> as accessories. Only the MSD Motion<br />
Controller is delivered with the necessary plug-in terminal strips for<br />
power supply and digital I/O.<br />
�-"11.8-Plug-In Terminal Strips" on page 121<br />
The <strong>MSC</strong> <strong>II</strong> control module does not work without license key. This license<br />
key is not included in the standard delivery. It is available from<br />
<strong>Moog</strong> as an accessory.<br />
�-"11.4-License Keys" on page 118<br />
Product Range: Controller<br />
© <strong>Moog</strong> GmbH <strong>User</strong> <strong>Manual</strong> M3000 ® and <strong>MSC</strong> <strong>II</strong> (CA65865-001; Version 1.1, 08/08) 115
11 Product Range M3000 ® Modules<br />
11.2.2 Q-Modules<br />
Item Designation Remarks Part Number<br />
QDIO 16/16-0,5 Digital I/O extension module for local<br />
extension of the inputs and outputs of<br />
<strong>MSC</strong> I, <strong>MSC</strong> <strong>II</strong> or RDIO (connection<br />
over E-bus)<br />
16 inputs and 16 I/Os<br />
Positive switching<br />
�-"3.3.3-Q-Modules" on page 17<br />
D137-001-005<br />
QDIO 16/16-0,5N Digital I/O extension module for local<br />
extension of the inputs and outputs of<br />
<strong>MSC</strong> I or <strong>MSC</strong> <strong>II</strong> (connection over<br />
E-bus)<br />
16-inputs and 16-I/Os<br />
Zero switching<br />
�-"3.3.3-Q-Modules" on page 17<br />
QAIO 2/2-AV Analog I/O extension module for local extension<br />
of the inputs and outputs of<br />
<strong>MSC</strong> I or <strong>MSC</strong> <strong>II</strong> (connection over E-bus)<br />
2 inputs (±10 V/ ±10 mA/ 4–20 mA)<br />
2 outputs (±10 V/ ±10 mA/ 4–20 mA/<br />
±50 mA)<br />
�-"3.3.3-Q-Modules" on page 17<br />
QAIO 16/4-V Analog I/O extension module for local<br />
extension of the inputs and outputs of<br />
<strong>MSC</strong> I or <strong>MSC</strong> <strong>II</strong> (connection over<br />
E-bus)<br />
16-voltage inputs (±10 V)<br />
4-voltage outputs (±10 V)<br />
�-"3.3.3-Q-Modules" on page 17<br />
QAIO 16/4-A Analog I/O extension module for local<br />
extension of the inputs and outputs of<br />
<strong>MSC</strong> I or <strong>MSC</strong> <strong>II</strong> (connection over<br />
E-bus)<br />
16-current inputs (0–20 mA)<br />
4-voltage outputs (±10 V)<br />
�-"3.3.3-Q-Modules" on page 17<br />
QEBUS-CAN CAN extension module which can be<br />
used to make available the LocalCAN<br />
bus of an E-bus group for external CAN<br />
bus network stations (over a D-sub front<br />
panel connector)<br />
�-"3.3.3.2-QEBUS-CAN" on page 19<br />
Table 25: Product Range – Q-Modules<br />
D137-001-004<br />
D137-001-011<br />
D137-001-007<br />
D137-001-006<br />
D137-001-010<br />
The plug-in terminal strips, that may be needed for connection of power<br />
and signal cables, are not included in delivery. The plug-in terminal strips<br />
are available from <strong>Moog</strong> as accessories. Only the MSD Motion<br />
Controller is delivered with the necessary plug-in terminal strips for<br />
power supply and digital I/O.<br />
�-"11.8-Plug-In Terminal Strips" on page 121<br />
Product Range:<br />
Q-Modules<br />
© <strong>Moog</strong> GmbH <strong>User</strong> <strong>Manual</strong> M3000 ® and <strong>MSC</strong> <strong>II</strong> (CA65865-001; Version 1.1, 08/08) 116
11 Product Range Power Supply for M3000 ® Modules<br />
11.2.3 R-Modules (Remote Modules)<br />
Item Designation Remarks Part Number<br />
RDIO 16/16-0,5 Remote module with digital I/Os and<br />
CANopen interface<br />
(connection over CAN bus)<br />
16-inputs and 16-I/Os<br />
Positive switching<br />
�-"3.3.4-R-Modules (Remote Modules)"<br />
on page 19<br />
D137-002-001<br />
RDISP 22 Display and operating terminal with<br />
TIA/EIA 232 and CANopen interface and<br />
22 keys (connection over CAN bus)<br />
�-"3.3.4-R-Modules (Remote Modules)"<br />
on page 19<br />
D137-004-001<br />
The CPRDISP software (needed<br />
to program and configure the<br />
RDISP) is not included with<br />
RDISP. CPRDISP is available<br />
from <strong>Moog</strong> as an accessory.<br />
�-"11.5.2-Software for R-Modules"<br />
on page 119<br />
DialogController Displays with TFT technology and touch<br />
screen. Programmable with MACS development<br />
environment. Data exchange<br />
via Ethernet with <strong>MSC</strong> or MSD Motion<br />
Controller<br />
Display 5.7" D137-004-004<br />
Display 10.4" D137-004-005<br />
Display 12.1" D137-004-006<br />
Table 26: Product Range – R-Modules (Remote Modules)<br />
The plug-in terminal strips, that may be needed for connection of power<br />
and signal cables, are not included in delivery. The plug-in terminal strips<br />
are available from <strong>Moog</strong> as accessories. Only the MSD Motion<br />
Controller is delivered with the necessary plug-in terminal strips for<br />
power supply and digital I/O.<br />
�-"11.8-Plug-In Terminal Strips" on page 121<br />
11.3 Power Supply for M3000 ® Modules<br />
Item Designation Remarks Part Number<br />
Power supply 24 V 10 A Power-supply for mounting on<br />
DIN top-hat rails<br />
with short-circuit protection<br />
D137-003-001<br />
Input: 230 V AC or 115 V AC<br />
Output: 24 V DC, 10 A max.<br />
Table 27: Product Range – Power Supply for M3000 ® Modules<br />
Product Range:<br />
R-Modules<br />
(Remote Modules)<br />
Product Range:<br />
Power Supply for<br />
M3000 ® Modules<br />
© <strong>Moog</strong> GmbH <strong>User</strong> <strong>Manual</strong> M3000 ® and <strong>MSC</strong> <strong>II</strong> (CA65865-001; Version 1.1, 08/08) 117
11 Product Range License Keys<br />
11.4 License Keys<br />
Item Designation Remarks Part Number<br />
License key Controls gray D138-002-001<br />
License key Motion green D138-002-002<br />
Table 28: Product Range – License Keys<br />
License Key<br />
Product Range:<br />
License Keys<br />
License Keys: Features<br />
© <strong>Moog</strong> GmbH <strong>User</strong> <strong>Manual</strong> M3000 ® and <strong>MSC</strong> <strong>II</strong> (CA65865-001; Version 1.1, 08/08) 118<br />
Controls<br />
(Gray)<br />
Motion<br />
(Green)<br />
Feature<br />
Run-time license of the <strong>MSC</strong> <strong>II</strong> • •<br />
CoDeSys operators and standard IEC 61131 library • •<br />
Library with hardware-related functions: M_HW_<strong>MSC</strong> <strong>II</strong>.Lib • •<br />
Library for control engineering: M_Control.Lib • •<br />
Library for the TIA/EIA 232 and CAN bus interface: M_SIO.Lib • •<br />
Support for OPC and DDE interfaces • •<br />
Ethernet and TIA/EIA 232 communication with the MACS development<br />
environment<br />
• •<br />
Library for motion control according to PLCopen: M_PLCopen.Lib •<br />
Library with transfer functions (Z-functions): M_Transfer_Functions.Lib •<br />
Libraries for CANopen, Profibus DP •<br />
• Feature included<br />
Table 29: Features Provided by the License Keys<br />
The <strong>MSC</strong> <strong>II</strong> control module does not work without license key.<br />
�-"3.4-License Key" on page 24<br />
�-"10.6-License Key" on page 85
11 Product Range Software<br />
11.5 Software<br />
11.5.1 MACS (<strong>Moog</strong> Axis Control Software)<br />
Item Designation Remarks Part Number<br />
MACS development<br />
environment<br />
Development environment according to<br />
IEC 61131 for solving complex control<br />
tasks (1-license)<br />
�-"3.5-Application Programs" on<br />
page 25<br />
11.5.2 Software for R-Modules<br />
D138-001-001<br />
1 additional license D138-001-002<br />
5 licenses D138-001-005<br />
10 licenses D138-001-010<br />
MACS HMI Visualization package which can be run<br />
without MACS<br />
Run-time license for 1-system<br />
�-"3.6.1-MACS HMI Visualization Package"<br />
on page 26<br />
D138-003-001<br />
Software maintenance<br />
contract<br />
Run-time license for 10-systems D138-003-010<br />
Run-time license for 50-systems D138-003-050<br />
Support and MACS updates for 1 year<br />
(for 1-license)<br />
B95914-001-001<br />
1 additional license B95914-001-002<br />
5 licenses B95914-001-005<br />
10 licenses B95914-001-010<br />
Table 30: Product Range – Software – MACS<br />
Item Designation Remarks Part Number<br />
CPRDISP Software for programming and configuring<br />
RDISP<br />
�-"3.3.4.2-RDISP" on page 20<br />
D138-006-001<br />
Table 31: Product Range – Software for R-Modules<br />
Product Range:<br />
Software – MACS<br />
Product Range:<br />
Software for R-Modules<br />
© <strong>Moog</strong> GmbH <strong>User</strong> <strong>Manual</strong> M3000 ® and <strong>MSC</strong> <strong>II</strong> (CA65865-001; Version 1.1, 08/08) 119
11 Product Range Interface Cables<br />
11.6 Interface Cables<br />
Item Designation Remarks Part Number<br />
Crossed TIA/EIA 232<br />
interface cable, 5 m (5.47 yd)<br />
Crossed Ethernet interface<br />
cable, 10 m (10.94 yd)<br />
Non-crossed Ethernet<br />
interface cable,<br />
1m(1.09yd)<br />
Non-crossed Ethernet<br />
interface cable,<br />
10 m (10.94 yd)<br />
CAN bus interface cable,<br />
3m(3.28yd)<br />
CAN bus interface cable,<br />
10 m (10.94 yd)<br />
Null modem cable which can be used as<br />
programming cable for connecting the<br />
<strong>MSC</strong> I and PC (MACS)<br />
with 9 pole D-sub mating connectors<br />
� figure-42 on page 54<br />
100BaseT Cable with Crossed Twisted<br />
Pair Wires (Crossover Cable)<br />
with 8 pole RJ45 mating connectors<br />
� figure-35 on page 48<br />
100BaseT Cable with Non-Crossed<br />
Twisted Pair Wires (Patch Cable)<br />
with 8 pole RJ45 mating connectors<br />
� figure-36 on page 48<br />
100BaseT Cable with Non-Crossed<br />
Twisted Pair Wires (Patch Cable)<br />
with 8 pole RJ45 mating connectors<br />
� figure-36 on page 48<br />
�-"7.5.6-CAN Bus Interface Cable" on<br />
page 59<br />
�-"7.5.6-CAN Bus Interface Cable" on<br />
page 59<br />
Table 32: Product Range – Interface Cables<br />
11.7 CAN Bus Accessories<br />
B95884-001<br />
B95909-001<br />
B95909-004<br />
B95909-002<br />
B95863-001<br />
B95863-002<br />
Item Designation Remarks Part Number<br />
USB CAN adapter<br />
(for PC only)<br />
CAN bus termination resistor<br />
120 Ω<br />
CAN bus termination resistor<br />
120 Ω /GND<br />
Adapter (USB1.1 to CAN bus) with<br />
9 pole D-sub mating connector with pin<br />
contacts<br />
9 pole D-sub mating connector with<br />
socket contacts<br />
9 pole D-sub mating connector with pin<br />
contacts; CAN_GND internally connected<br />
to signal ground<br />
Table 33: Product Range – CAN Bus Accessories<br />
C43094-001<br />
B95864-001<br />
B95865-001<br />
Product Range:<br />
Interface Cables<br />
Product Range:<br />
CAN Bus Accessories<br />
© <strong>Moog</strong> GmbH <strong>User</strong> <strong>Manual</strong> M3000 ® and <strong>MSC</strong> <strong>II</strong> (CA65865-001; Version 1.1, 08/08) 120
11 Product Range Plug-In Terminal Strips<br />
11.8 Plug-In Terminal Strips<br />
Item Designation Remarks Part Number<br />
Plug-in terminal strip with<br />
screw terminals<br />
Plug-in terminal strip with<br />
spring loaded terminals<br />
Labels for plug-in terminal<br />
strips<br />
2 pole (up to max. 2.5 mm² (14 AWG)<br />
wire cross section)<br />
8 pole (up to max. 2.5 mm² (14 AWG)<br />
wire cross section)<br />
9 pole (up to max. 2.5 mm² (14 AWG)<br />
wire cross section)<br />
18 pole (up to max. 2.5 mm² (14 AWG)<br />
wire cross section)<br />
2 pole (up to max. 2.5 mm² (14 AWG)<br />
wire cross section)<br />
8 pole (up to max. 2.5 mm² (14 AWG)<br />
wire cross section)<br />
9 pole (up to max. 2.5 mm² (14 AWG)<br />
wire cross section)<br />
18 pole (up to max. 2.5 mm² (14 AWG)<br />
wire cross section)<br />
For labeling plug-in terminal strips<br />
Printed with the numbers 1–108<br />
Includes six labels<br />
Insertion bridge For connecting adjoining terminals of the<br />
plug-in terminal strips<br />
VK055-002<br />
VK055-008<br />
VK055-009<br />
VK055-018<br />
B95907-002<br />
B95907-008<br />
B95907-009<br />
B95907-018<br />
B95885-001<br />
A69102<br />
Coding tab For coding plug-in terminal strips C43145-001<br />
Coding profile For coding plug-in terminal strip connectors<br />
of M3000 ® modules<br />
C43146-001<br />
Spring power clamp 10-pins Spring latch terminal for max 0,5 mm²<br />
wires (20 AWG)<br />
Connector kit for MSD Motion<br />
Controller<br />
2 x FMC 1,5/7-ST-3,5GY<br />
2 x MSTB 2,5/2-ST GY<br />
Mating connectors for the MSD Motion<br />
Controller X3, X9 and X10<br />
Table 34: Product Range – Plug-In Terminal Strips<br />
CA45260-010<br />
CA65115-001<br />
The various DIN rail modules require different numbers of plug-in terminal<br />
strips.<br />
�-"11.8.1-Number of Required Plug-In Terminal Strips" on page 122<br />
Product Range:<br />
Plug-In Terminal Strips<br />
for DIN Rail Modules<br />
© <strong>Moog</strong> GmbH <strong>User</strong> <strong>Manual</strong> M3000 ® and <strong>MSC</strong> <strong>II</strong> (CA65865-001; Version 1.1, 08/08) 121
11 Product Range Plug-In Terminal Strips<br />
11.8.1 Number of Required Plug-In Terminal Strips<br />
Number of Plug-In Terminal Strips Required<br />
DIN Rail Module<br />
2 Poles 9 Poles 10 Poles 18 Poles<br />
<strong>MSC</strong> I - 1 - 5<br />
<strong>MSC</strong> <strong>II</strong> - 2 4 -<br />
MSD Motion Controller - - - -<br />
QDIO - - - 6<br />
QAIO 2/2 - 1 - 2<br />
QAIO 16/4 - - - 6<br />
QEBUS-CAN 1 - - -<br />
RDIO - - - 6<br />
RDISP - - - -<br />
DialogController - - - -<br />
Table 35: Number of Plug-In Terminal Strips<br />
The MSD Motion Controller is delivered with the necessary plug-in terminal<br />
strips for power supply and digital I/O.<br />
Number of Required<br />
Plug-In Terminal Strips<br />
© <strong>Moog</strong> GmbH <strong>User</strong> <strong>Manual</strong> M3000 ® and <strong>MSC</strong> <strong>II</strong> (CA65865-001; Version 1.1, 08/08) 122
11 Product Range Training Programs<br />
11.9 Training Programs<br />
Item Designation Remarks Part Number<br />
Software training, English<br />
MACS and IEC 61131<br />
Software training, German<br />
MACS and IEC 61131<br />
Hardware training, English<br />
<strong>MSC</strong> <strong>II</strong> and extension modules<br />
Hardware training, German<br />
<strong>MSC</strong> <strong>II</strong> and extension modules<br />
Hardware and Software<br />
training, English<br />
MSD <strong>Servo</strong>drives and MSD<br />
Motion Controller<br />
Hardware and Software<br />
training, German<br />
MSD <strong>Servo</strong>drives and MSD<br />
Motion Controller<br />
Content of the training:<br />
• Programming, testing, optimizing,<br />
and documenting IEC 61131 application<br />
programs<br />
• Visualization of IEC 61131 application<br />
programs<br />
Content of the training:<br />
• Programming, testing, optimizing,<br />
and documenting IEC 61131 application<br />
programs<br />
• Visualization of IEC 61131 application<br />
programs<br />
Content of the training:<br />
• Configuring and using <strong>MSC</strong> <strong>II</strong> and<br />
extension modules<br />
• Using control-engineering libraries<br />
Knowledge about creating IEC 61131 application<br />
programs is required to participate<br />
in the hardware training. This knowledge<br />
is imparted in the MACS and<br />
IEC 61131 software training.<br />
Content of the training:<br />
• MSD <strong>Servo</strong> Drive Hardware<br />
• MSD <strong>Servo</strong> Drive Software<br />
• MSD Motion Controller<br />
Knowledge about creating IEC 61131 application<br />
programs is recommended to<br />
participate in the hardware training. This<br />
knowledge is imparted in the MACS and<br />
IEC 61131 software training.<br />
Content of the training:<br />
• MSD <strong>Servo</strong>drive Hardware<br />
• MSD <strong>Servo</strong>drive Software<br />
• MSD Motion Controller<br />
Knowledge about creating IEC 61131 application<br />
programs is recommended to<br />
participate in the hardware training. This<br />
knowledge is imparted in the MACS and<br />
IEC 61131 software training.<br />
Table 36: Product Range – Training Programs<br />
B95992<br />
B95993<br />
B95994<br />
B95995<br />
CA67627<br />
CA67628<br />
Product Range:<br />
Training Programs<br />
© <strong>Moog</strong> GmbH <strong>User</strong> <strong>Manual</strong> M3000 ® and <strong>MSC</strong> <strong>II</strong> (CA65865-001; Version 1.1, 08/08) 123
12 Appendix Typographical Conventions<br />
12 Appendix<br />
12.1 Typographical Conventions<br />
DANGER Identifies safety instructions that are intended to warn of<br />
an immediate and impending danger to life and limb or<br />
major property damage.<br />
Failure to observe these safety instructions will lead inevitably<br />
to death, serious personal injury (disablement)<br />
or major property damage!<br />
WARNING Identifies safety instructions that are intended to warn of<br />
potential danger to life and limb or the potential for major<br />
property damage.<br />
Failure to observe these safety instructions might lead<br />
to death, serious personal injury (disablement) or major<br />
property damage!<br />
CAUTION Identifies safety instructions that are intended to warn of<br />
slight personal injury or minor property damage.<br />
Failure to observe these safety instructions might lead to<br />
slight personal injury or minor property damage.<br />
• / – Identifies listings<br />
� Identifies references to another chapter, another page, table<br />
or figure in this manual<br />
blue text Identifies a hyperlink within the PDF file<br />
Identifies important information<br />
1., 2., … Identifies steps in a procedure that should be performed in<br />
consecutive order<br />
, , …<br />
Identifies items in a figure that are explained separately<br />
«WCAN» Identifies terminals or connectors (such as: «WCAN») and<br />
light emitting diodes (such as: «I/O1») of an M3000 ® module<br />
'Frequency' Identifies parameters of the MACS development environment<br />
(such as: 'Frequency') and outputs of M3000 ® modules (such<br />
as: 'Outputs Enabled')<br />
Typographical<br />
Conventions<br />
© <strong>Moog</strong> GmbH <strong>User</strong> <strong>Manual</strong> M3000 ® and <strong>MSC</strong> <strong>II</strong> (CA65865-001; Version 1.1, 08/08) 124
12 Appendix Abbreviations<br />
12.2 Abbreviations<br />
Abbreviation Explanation<br />
AC Alternating Current<br />
ADC Analog to Digital Converter<br />
CAL CAN Application Layer according to CiA DS 201–207<br />
CAN Controller Area Network<br />
CAN_GND CAN Ground<br />
CAN_H CAN High (CAN bus signal (dominant high))<br />
CAN_L CAN Low (CAN bus signal (dominant low))<br />
CAN_SHLD CAN Shield (optional shield)<br />
CFC Continuous Function Chart (random-graphics functional chart editor;<br />
programming language for creating PLC programs)<br />
CiA CAN in <strong>Automation</strong> e. V. (international organization of manufacturers and<br />
users for CAN users; http://www.can-cia.org)<br />
CLK Clock<br />
CPU Central Processing Unit<br />
DAC Digital to Analog Converter<br />
DC Direct Current<br />
DGND Digital Ground (Ground for the digital I/Os' power supply of the <strong>MSC</strong> <strong>II</strong>)<br />
DIN Deutsches Institut für Normung e. V.<br />
(German Institute for Standardization; http://www.din.de)<br />
DIS Draft International Standard (preliminary standard)<br />
DS Draft Standard (draft standard)<br />
E-bus Extension bus of DIN rail modules<br />
EEPROM Electrically Erasable Programmable Read Only Memory<br />
EIA Electronic Industries Alliance (http://www.eia.org)<br />
EMC Electromagnetic Compatibility<br />
EN Europa-Norm (European Standard)<br />
EPROM Erasable Programmable Read Only Memory<br />
ESD Electrostatic Discharge<br />
EtherCAT Ethernet-based industrial real-time communication system<br />
FBD Function Block Diagram<br />
(programming language for creating PLC programs)<br />
F-Bus Fieldbus, an industrial communication system such as Profibus<br />
Flash EEPROM High speed EEPROM<br />
FPGA Field Programmable Gate Array (programmable logic component)<br />
GUI Graphical <strong>User</strong> Interface<br />
HF High Frequency<br />
HMI Human Machine Interface (MACS HMI: Visualization package which can<br />
be run without MACS)<br />
ID Identifier<br />
IEC International Electrotechnical Commission (http://www.iec.ch)<br />
IEEE Institute of Electrical and Electronics Engineers, Inc. (http://www.ieee.org)<br />
IL Instruction List (programming language for creating PLC programs)<br />
I/O Input/Output<br />
IP International Protection (protection type)<br />
IP Internet Protocol<br />
ISO International Organization for Standardizing (http://www.iso.org)<br />
LAN Local Area Network<br />
Table 37: Abbreviations (Section 1 of 3)<br />
Table 37: Abbreviations<br />
© <strong>Moog</strong> GmbH <strong>User</strong> <strong>Manual</strong> M3000 ® and <strong>MSC</strong> <strong>II</strong> (CA65865-001; Version 1.1, 08/08) 125
12 Appendix Abbreviations<br />
Abbreviation Explanation<br />
LCD Liquid Crystal Display<br />
LD Ladder Diagram (programming language for creating PLC programs)<br />
LED Light Emitting Diode<br />
LSB Least Significant Bit<br />
M3000 ® <strong>Moog</strong> <strong>Automation</strong> <strong>System</strong><br />
MACS <strong>Moog</strong> Axis Control Software (Development environment according to<br />
IEC 61131 for solving complex control tasks)<br />
Mbit/s Megabits per second<br />
MSB Most Significant Bit<br />
<strong>MSC</strong> I <strong>Moog</strong> <strong>Servo</strong> Controller I (Control module for DIN top-hat rail mounting)<br />
<strong>MSC</strong> <strong>II</strong> <strong>Moog</strong> <strong>Servo</strong> Controller <strong>II</strong> (Control module for DIN top-hat rail mounting)<br />
MSD Modular Multi-Axis Programmable Motion Control <strong>Servo</strong>drive<br />
MSD Motion<br />
Controller<br />
Multi-Axis High Performance Motion Controller<br />
MSD <strong>Servo</strong>drive A modular family of electrical servo drives to run permanent magnet synchronous,<br />
linear and asynchronous motors<br />
MSL Mean Sea Level<br />
NC Not Connected<br />
ND Not Defined<br />
PADT Programming And Diagnostic Tool<br />
(programming and diagnostic tool in IEC 61131, here: PC on which the<br />
MACS development environment is installed)<br />
PC Personal Computer<br />
PE Protective Earth<br />
PLC Programmable Logic Control(ler)<br />
Q-Modules DIN rail modules for local extension of <strong>MSC</strong> <strong>II</strong>s (connected over E-bus)<br />
Q-Connector 40 pole lateral connector of DIN rail modules<br />
QAIO Analog I/O extension module for local extension of the inputs and outputs<br />
of <strong>MSC</strong> I or <strong>MSC</strong> <strong>II</strong> (connection over E-bus)<br />
QEBUS-CAN CAN extension module which can be used to make available the<br />
LocalCAN bus of an E-bus group for external CAN bus network stations<br />
(over a D-sub front panel connector)<br />
QDIO Digital I/O extension module for local extension of the inputs and outputs<br />
of <strong>MSC</strong> I or <strong>MSC</strong> <strong>II</strong> (connection over E-bus)<br />
R-Modules Remote modules such as RDIO and RDISP<br />
(connection over CAN bus)<br />
RAM Random Access Memory<br />
(read and write memory that loses its contents when power is removed)<br />
RDIO Remote module with digital I/Os and CANopen interface<br />
(connection over CAN bus)<br />
RDISP Remote Display (display and operating terminal with TIA/EIA 232 and<br />
CANopen interface (connection over CAN bus))<br />
REF Reference voltage<br />
RISC Reduced Instruction Set Computer<br />
RT-ETH Real Time Ethernet Interface<br />
Rx Receive Data<br />
SELV Safety Extra-Low Voltage (according to DIN EN 60950-1)<br />
SFC Sequential Function Chart<br />
(programming language for creating PLC programs)<br />
SHLD Shield<br />
SIO Serial l/O (serial interface of the <strong>MSC</strong> <strong>II</strong>)<br />
Table 37: Abbreviations (Section 2 of 3)<br />
Table 37: Abbreviations<br />
© <strong>Moog</strong> GmbH <strong>User</strong> <strong>Manual</strong> M3000 ® and <strong>MSC</strong> <strong>II</strong> (CA65865-001; Version 1.1, 08/08) 126
12 Appendix Quoted Standards<br />
Abbreviation Explanation<br />
SSI Synchronous Serial Interface (digital interface for transferring positioning<br />
information, like with position transducers)<br />
ST Structured Text (programming language for creating PLC programs)<br />
TIA Telecommunications Industry Association (http://www.tiaonline.org)<br />
TPU Time Processing Unit (programmable microprocessor that processes time<br />
functions independently of the CPU)<br />
TÜV Technischer Überwachungsverein<br />
(German agency performing technical inspections)<br />
Tx Transmit Data<br />
USB Universal Serial Bus<br />
VDC Volt Direct Current (unit of direct voltage)<br />
VDE Verband der Elektrotechnik Elektronik Informationstechnik (Association<br />
for Electrical, Electronic & Information Technologies; http://www.vde.de)<br />
VDMA Verband Deutscher Maschinen- und Anlagenbau e. V.<br />
(Federation of Engineering Industries; http://www.vdma.org)<br />
WCAN WideCan<br />
WF Wire Fault<br />
12.3 Quoted Standards<br />
12.3.1 CiA DS<br />
CiA DS 201–207<br />
CiA Draft Standard: CAN Application Layer (CAL)<br />
CiA DS 301<br />
CiA Draft Standard: CANopen Communication Profile for Industrial<br />
<strong>System</strong>s – Based on CAL<br />
CiA DS 401<br />
CiA Draft Standard: CANopen Device Profile for Generic I/O Modules<br />
12.3.2 DIN<br />
DIN 41652<br />
Rack and Panel Connectors, Trapezoidal, Round Contacts 1 mm<br />
12.3.3 DIN EN<br />
Table 37: Abbreviations (Section 3 of 3)<br />
DINEN60715<br />
Dimensions of Low Voltage Switchgear and Controlgear – Standardized<br />
Mounting on Rails for Mechanical Support of Electrical Devices in<br />
Switchgear and Controlgear Installations<br />
DIN EN 60950-1<br />
Information Technology Equipment – Safety – Part 1: General Requirements<br />
DIN EN 61000-6-1<br />
Electromagnetic Compatibility (EMC) – Part 6-1: Generic Standards; Immunity<br />
for Residential, Commercial and Light-Industrial Environments<br />
Table 37: Abbreviations<br />
Quoted Standards: CiA DS<br />
Quoted Standards: DIN<br />
Quoted Standards: DIN EN<br />
© <strong>Moog</strong> GmbH <strong>User</strong> <strong>Manual</strong> M3000 ® and <strong>MSC</strong> <strong>II</strong> (CA65865-001; Version 1.1, 08/08) 127
12 Appendix Quoted Standards<br />
DIN EN 61000-6-2<br />
Electromagnetic Compatibility (EMC) – Part 6-2: Generic Standards: Immunity<br />
for Industrial Environments<br />
DIN EN 61000-6-3<br />
Electromagnetic Compatibility (EMC) – Part 6-3: Generic Standards;<br />
Emission Standard for Residential, Commercial and Light-Industrial<br />
Environments<br />
DIN EN 61000-6-4<br />
Electromagnetic Compatibility (EMC) – Part 6-4: Generic Standards;<br />
Emission Standard for Industrial Environments<br />
DINEN60204<br />
Safety of Machinery – Electrical Equipment of Machines<br />
12.3.4 IEC<br />
IEC 60068<br />
Environmental Testing<br />
IEC 60068-2-6<br />
Environmental Testing – Part 2: Tests; Test Fc: Vibration (Sinusoidal)<br />
IEC 60068-2-27<br />
Environmental Testing – Part 2: Tests; Test Ea and Guidance: Shock<br />
IEC 60068-2-31<br />
Environmental Testing – Part 2: Tests; Test Ec: Drop and Topple,<br />
Primarily for Equipment-Type Specimens<br />
IEC 60364-4-44<br />
Electrical Installations of Buildings – Part 4-44: Protection for Safety –<br />
Protection against Voltage Disturbances and Electromagnetic Disturbances<br />
IEC 60529<br />
Degrees of Protection Provided by Enclosures (IP Code)<br />
IEC 60664<br />
Insulation Coordination for Equipment within Low Voltage <strong>System</strong>s<br />
IEC 60801-2<br />
Electromagnetic Compatibility for Industrial-Process Measurement and<br />
Control Equipment – Part 2: Electrostatic Discharge Immunity Requirements<br />
IEC 61131<br />
Programmable Controllers<br />
IEC 61131-1<br />
Programmable Controllers – Part 1: General Information<br />
IEC 61131-2<br />
Programmable Controllers – Part 2: Equipment Requirements and Tests<br />
IEC 61131-3<br />
Programmable Controllers – Part 3: Programming Languages<br />
IEC 61131-4<br />
Programmable Controllers – Part 1: <strong>User</strong> Guidelines<br />
12.3.5 ISO/DIS<br />
ISO/DIS 11898<br />
Road Vehicles – Controller Area Network (CAN)<br />
Quoted Standards: IEC<br />
Quoted Standards:<br />
ISO/DIS<br />
© <strong>Moog</strong> GmbH <strong>User</strong> <strong>Manual</strong> M3000 ® and <strong>MSC</strong> <strong>II</strong> (CA65865-001; Version 1.1, 08/08) 128
12 Appendix Quoted Standards<br />
12.3.6 TIA/EIA<br />
TIA/EIA 232 (previously RS 232)<br />
Interface Between Data Terminal Equipment and Data Circuit – Terminating<br />
Equipment Employing Serial Binary Data Interchange<br />
TIA/EIA 422 (previously RS 422)<br />
Electrical Characteristics of Balanced Voltage Digital Interface Circuits<br />
TIA/EIA 485 (previously RS 485)<br />
Electrical Characteristics of Generators and Receivers for Use in Balanced<br />
Digital Multipoint <strong>System</strong>s<br />
Quoted Standards:<br />
TIA/EIA<br />
© <strong>Moog</strong> GmbH <strong>User</strong> <strong>Manual</strong> M3000 ® and <strong>MSC</strong> <strong>II</strong> (CA65865-001; Version 1.1, 08/08) 129
13 Index<br />
13 Index<br />
A<br />
«A1»…«A4», see LEDs of the <strong>MSC</strong> <strong>II</strong><br />
Abbreviations used •125<br />
Accessories, see product range<br />
Air humidity, relative<br />
permissible for operating the <strong>MSC</strong> <strong>II</strong> •75<br />
permissible for transportation and storage<br />
M3000 ® modules •71<br />
<strong>MSC</strong> <strong>II</strong> •75<br />
Air pressure, permissible<br />
for transportation and storage<br />
M3000 ® modules •71<br />
<strong>MSC</strong> <strong>II</strong> •75<br />
Ambient temperature<br />
permissible for operating the <strong>MSC</strong> <strong>II</strong> •75<br />
permissible for transportation and storage<br />
M3000 ® modules •71<br />
<strong>MSC</strong> <strong>II</strong> •75<br />
Application programs<br />
creating with MACS •25<br />
Arrangement of DIN rail modules<br />
between cable conduits •32<br />
minimum distances between control groups •32<br />
on a vertical mounting plate •31<br />
Attachment screws for the license key, see license key<br />
attachment screws<br />
«Aux1»…«Aux4», see LEDs of the <strong>MSC</strong> <strong>II</strong><br />
B<br />
«B1»…«B4», see LEDs of the <strong>MSC</strong> <strong>II</strong><br />
Basetick • 90–92<br />
cycle time •91<br />
E-bus start time •91<br />
SSI sensor start time •91<br />
task reaction time •92<br />
timing diagram •91<br />
Basic wiring diagram<br />
digital input of the <strong>MSC</strong> <strong>II</strong> •97<br />
digital output of the <strong>MSC</strong> <strong>II</strong> •95<br />
Block diagrams<br />
Block Diagram of the <strong>MSC</strong> <strong>II</strong> •76<br />
Booting the <strong>MSC</strong> <strong>II</strong>, see resetting the <strong>MSC</strong> <strong>II</strong><br />
Brands, see trademarks<br />
C<br />
CAN bus • 55–60<br />
characteristics •55<br />
linear structure •58<br />
CAN bus accessories<br />
part numbers • 120<br />
CAN bus interface cables,<br />
see interface cables: CAN bus interface cables<br />
CAN bus interfaces<br />
<strong>MSC</strong> <strong>II</strong> • 56, 64, 109–110<br />
CANopen node-ID • 86, 110<br />
«LCAN» (LED of the <strong>MSC</strong> <strong>II</strong> for displaying LocalCAN<br />
transmission activity • 81, 109<br />
«WCAN» (LED of the <strong>MSC</strong> <strong>II</strong> for displaying WideCAN<br />
transmission activity • 81, 109<br />
«WCAN» (<strong>MSC</strong> <strong>II</strong> front panel connectors) • 77, 109<br />
terminal assignment •78<br />
Q-modules • 56, 64<br />
R-modules • 56, 64<br />
CAN bus network node, see CAN bus network stations<br />
CAN bus networks<br />
permissible cable lengths •59<br />
permissible number of network stations •58<br />
permissible stub cable lengths •59<br />
potential equalization • 57, 58<br />
suitable cables •60<br />
wiring •57<br />
CAN bus network stations<br />
permissible number of network stations •58<br />
CAN bus termination resistors • 57, 58<br />
part numbers • 120<br />
termination resistor of the <strong>MSC</strong> <strong>II</strong><br />
switchable termination resistor of the LocalCAN<br />
interface • 110<br />
«TRM» (LED of the <strong>MSC</strong> <strong>II</strong>) (indicates that the<br />
resistor is switched on) •81<br />
CAN extension module, see Q-modules: QEBUS-CAN<br />
CANopen •56<br />
CANopen node-ID of the <strong>MSC</strong> <strong>II</strong> • 86, 110<br />
profiles for various device classes •56<br />
CE labeling of the M3000 ® modules •A,4<br />
Cleaning<br />
safety instructions •9,69<br />
Communication between <strong>MSC</strong> <strong>II</strong> and MACS •84<br />
MACS communication parameters<br />
Ethernet interface •84<br />
safety instructions • 11, 84<br />
Configuration of the <strong>MSC</strong> <strong>II</strong> •84<br />
Connector assignment, see terminal assignment<br />
Contamination level<br />
M3000 ® modules •71<br />
<strong>MSC</strong> <strong>II</strong> •75<br />
Control groups<br />
E-bus groups •65<br />
LocalCAN bus groups •66<br />
WideCAN bus groups •67<br />
Control module, see <strong>MSC</strong> <strong>II</strong><br />
Control system, see M3000 ®<br />
Copying prohibition for this manual •A<br />
Copyright<br />
for software that is installed on M3000 ® products •5<br />
for this manual •A<br />
Corrosion, insensitivity to see insensitivity to corrosion<br />
CPRDISP, see R-modules: software for R-modules<br />
Current, maximum admissible current for the power supply<br />
terminals of M3000 ® modules •43<br />
Cycle time • 90–92<br />
© <strong>Moog</strong> GmbH <strong>User</strong> <strong>Manual</strong> M3000 ® and <strong>MSC</strong> <strong>II</strong> (CA65865-001; Version 1.1, 08/08) 130
13 Index<br />
D<br />
Data retention of the <strong>MSC</strong> <strong>II</strong> •73<br />
Development environment, see MACS<br />
Dialog Controller •21<br />
Dimensions<br />
DIN rail modules •30<br />
<strong>MSC</strong> <strong>II</strong> • 73, 74<br />
DIN rail modules<br />
arrangement<br />
between cable conduits •32<br />
on a vertical mounting plate •31<br />
dimensions •30<br />
front view •29<br />
minimum distances between control groups •32<br />
mounting on DIN top-hat rails •33<br />
networking • 64–68<br />
control groups<br />
E-bus groups •65<br />
LocalCAN bus groups •66<br />
WideCAN bus groups •67<br />
removing from the DIN top-hat rail •36<br />
views of the module •29<br />
DIN top-hat rail TH 35-7.5 •31<br />
Disclaimer<br />
liability, see liability: exclusion of liability<br />
warranty, see warranty: exclusion of warranty<br />
Display and operating terminal, see R-modules: RDISP<br />
Disposing M3000 ® modules •4<br />
Disturbance suppression of digital inputs •97<br />
Drop height, permissible<br />
M3000 ® modules •71<br />
<strong>MSC</strong> <strong>II</strong> •75<br />
Duplication prohibition for this manual •A<br />
E<br />
E-bus • 60–63<br />
clock frequency •62<br />
configuration in the PLC configuration of MACS •108<br />
«EBus», see LEDs of the <strong>MSC</strong> <strong>II</strong><br />
E-bus communication<br />
duration of message transmission •62<br />
example •63<br />
message update rate •62<br />
safety instructions •62<br />
scope of the E-bus messages •63<br />
starting the communication within E-bus groups •61<br />
E-bus groups •65<br />
permissible masters •61<br />
permissible slaves •61<br />
E-bus interfaces<br />
<strong>MSC</strong> <strong>II</strong> • 64, 108<br />
«EBus» (LED of the <strong>MSC</strong> <strong>II</strong> for displaying E-bus<br />
transmission activity) •81<br />
Q-modules •64<br />
R-modules •64<br />
E-bus start time •91<br />
Electromagnetic Compatibility •4<br />
EMC •4<br />
Emissions, see environmental protection<br />
Environmental conditions<br />
for operating M3000 ® modules •27<br />
for operating the <strong>MSC</strong> <strong>II</strong> •75<br />
climatic conditions •75<br />
electrical conditions and requirements •75<br />
mechanical conditions and requirements •75<br />
for transporting and storing M3000 ® modules •71<br />
limitations of using M3000 ® modules •28<br />
requirements from IEC 61131-2 •27<br />
safety instructions • 7, 27, 74<br />
Environmental protection<br />
disposing M3000 ® modules •4<br />
no harmful emissions from M3000 ® modules (when used<br />
properly) •4<br />
«Error», see LEDs of the <strong>MSC</strong> <strong>II</strong><br />
ESD<br />
safety instructions •7<br />
EtherCAT •49<br />
Bus topology •49<br />
interface cable •49<br />
Ethernet<br />
communication between <strong>MSC</strong> <strong>II</strong> and MACS<br />
communication parameters of the Ethernet<br />
interface •84<br />
Ethernet interface of the <strong>MSC</strong> <strong>II</strong> •72<br />
communication parameters •84<br />
terminal assignment •80<br />
IP address of the <strong>MSC</strong> <strong>II</strong> • 84, 86<br />
LEDs of the <strong>MSC</strong> <strong>II</strong><br />
«Link» (displays Ethernet link pulse and activity) •82<br />
«Speed» (displays Ethernet connection speed) •82<br />
networks<br />
with exactly 2 network stations •47<br />
with more than 2 network stations •48<br />
Ethernet interface cables,<br />
see interface cables: Ethernet interface cables<br />
Ethernet LAN connector •80<br />
Ethernet RT-ETH1 connector •81<br />
Ethernet RT-ETH2 connector •81<br />
Extension modules<br />
CAN extension module, see Q-modules: QEBUS-CAN<br />
I/O extension modules, see Q-modules: QAIO and QDIO<br />
© <strong>Moog</strong> GmbH <strong>User</strong> <strong>Manual</strong> M3000 ® and <strong>MSC</strong> <strong>II</strong> (CA65865-001; Version 1.1, 08/08) 131<br />
F<br />
«F-Bus» (front panel connector of the <strong>MSC</strong> <strong>II</strong>),<br />
see fieldbus interface of the <strong>MSC</strong> <strong>II</strong>: «F-Bus»<br />
Fieldbus interface of the <strong>MSC</strong> <strong>II</strong> •72<br />
«F-Bus» (<strong>MSC</strong> <strong>II</strong> front panel connectors) •77<br />
Figures, list of •viii<br />
Front panel<br />
DIN rail modules •29<br />
<strong>MSC</strong> <strong>II</strong> •77<br />
Front view<br />
DIN rail modules •29<br />
<strong>MSC</strong> <strong>II</strong> •77<br />
G<br />
Grounding<br />
CAN bus networks •57<br />
CAN bus termination resistor with signal grounding • 57, 58<br />
grounding concept •38<br />
signal grounding of DIN rail modules • 38, 42
13 Index<br />
I<br />
Identification of M3000 ® modules •23<br />
Incremental sensors<br />
connecting to the <strong>MSC</strong> <strong>II</strong> • 105–107<br />
connection diagram of the <strong>MSC</strong> <strong>II</strong> with an incremental<br />
sensor • 105<br />
incremental encoder (frequency modulation negative<br />
logic) •107<br />
incremental encoder (frequency modulation positive<br />
logic) •107<br />
incremental encoder (pulse train negative logic) • 107<br />
incremental encoder (pulse train positive logic) • 106<br />
incremental encoder (standard) •105<br />
terminal designations on sensors of various<br />
manufacturers • 105<br />
Inputs of the <strong>MSC</strong> <strong>II</strong>, see I/Os of the <strong>MSC</strong> <strong>II</strong><br />
Insensitivity to corrosion<br />
M3000 ® modules •71<br />
<strong>MSC</strong> <strong>II</strong> •75<br />
Installation •37<br />
safety instructions • 8, 31, 33, 35, 40, 43<br />
Insulation resistance<br />
digital inputs of the <strong>MSC</strong> <strong>II</strong> •97<br />
digital outputs of the <strong>MSC</strong> <strong>II</strong> •99<br />
<strong>MSC</strong> <strong>II</strong> •75<br />
Interface cables<br />
CAN bus interface cables •59<br />
part numbers • 120<br />
permissible cable lengths in CAN bus networks •59<br />
permissible stub cable lengths in CAN bus<br />
networks •59<br />
suitable cables •60<br />
EtherCAT interface cables •49<br />
Ethernet interface cables •48<br />
part numbers • 120<br />
Null Modem Cable •54<br />
Profibus interface cables •52<br />
maximum cable lengths in Profibus networks •53<br />
permissible stub cable lengths in Profibus networks •53<br />
suitable cables •53<br />
serial interface cables •54<br />
Interfaces of the <strong>MSC</strong> <strong>II</strong> •72<br />
CAN bus interfaces, see CAN bus interfaces: <strong>MSC</strong> <strong>II</strong><br />
E-bus interfaces, see E-bus interfaces: <strong>MSC</strong> <strong>II</strong><br />
Ethernet interface,<br />
see Ethernet: Ethernet interface of the <strong>MSC</strong> <strong>II</strong><br />
fieldbus interface, see fieldbus interface of the <strong>MSC</strong> <strong>II</strong><br />
sensor interfaces, digital,<br />
see sensor interfaces of the <strong>MSC</strong> <strong>II</strong>, digital<br />
serial interfaces, see interfaces of the <strong>MSC</strong> <strong>II</strong>, serial<br />
terminal assignment • 78–81<br />
Interfaces of the <strong>MSC</strong> <strong>II</strong>, serial • 111<br />
MACS interface • 111<br />
«MACS» (<strong>MSC</strong> <strong>II</strong> front panel connector) •77<br />
SIO interface • 111<br />
«Rx» and «Tx» (LEDs for displaying<br />
receive/transmission activity) •81<br />
«SIO» (<strong>MSC</strong> <strong>II</strong> front panel connector) •77<br />
terminal assignment •79<br />
I/O extension modules, see Q-modules: QAIO and QDIO<br />
«I/O1»…«I/O4», see LEDs of the <strong>MSC</strong> <strong>II</strong><br />
I/Os of the <strong>MSC</strong> <strong>II</strong> •73<br />
digital I/Os, see I/Os of the <strong>MSC</strong> <strong>II</strong>, digital<br />
'Outputs Enabled' output • 111<br />
«OutEN» (LED of the <strong>MSC</strong> <strong>II</strong> for displaying the states of<br />
all outputs and E-bus communication) • 82, 112<br />
safety instructions • 12, 111<br />
I/Os of the <strong>MSC</strong> <strong>II</strong>, digital • 73, 93–99<br />
digital inputs • 97–99<br />
basic wiring diagram •97<br />
disturbance suppression •97<br />
insulation resistance •99<br />
pulse detection •97<br />
specifications •98<br />
U/I working ranges •99<br />
digital outputs • 95–97<br />
basic wiring diagram •95<br />
insulation resistance •97<br />
load connection •96<br />
open collector outputs •95<br />
open emitter outputs •95<br />
overload protection •95<br />
specifications •96<br />
«I/O1»…«I/O4» (LEDs of the <strong>MSC</strong> <strong>II</strong> for displaying the<br />
operational state of the digital I/Os) • 81, 93<br />
power supply •93<br />
terminal assignment •78<br />
IP address of the <strong>MSC</strong> <strong>II</strong> • 84, 86<br />
Item number, see part numbers<br />
© <strong>Moog</strong> GmbH <strong>User</strong> <strong>Manual</strong> M3000 ® and <strong>MSC</strong> <strong>II</strong> (CA65865-001; Version 1.1, 08/08) 132<br />
L<br />
«L1+», see LEDs of the <strong>MSC</strong> <strong>II</strong><br />
LAN<br />
LAN interface of the <strong>MSC</strong> <strong>II</strong><br />
terminal assignment of the «LAN» connector •80<br />
«LAN», see LEDs of the <strong>MSC</strong> <strong>II</strong><br />
«LCAN», see LEDs of the <strong>MSC</strong> <strong>II</strong><br />
«LED1»…«LED3», see LEDs of the <strong>MSC</strong> <strong>II</strong><br />
LEDs of the <strong>MSC</strong> <strong>II</strong> • 77, 81–82<br />
«A1»…«A4» (wire fault display for digital sensor<br />
interfaces) • 82, 102<br />
«Aux1»…«Aux4» (activated by application program) •81<br />
«B1»…«B4» (wire fault display for digital sensor<br />
interfaces) • 82, 102<br />
«EBus» (displays E-bus transmission activity) •81<br />
«Error» (error display) • 82, 83<br />
«I/O1»…«I/O4» (display the operational state of the digital<br />
I/Os) • 81, 93<br />
«L1+» (displays the state of the power supply for the internal<br />
electronics) •81<br />
«LCAN» (displays LocalCAN transmission activity) • 81, 109<br />
«LED1»…«LED3» (activated by application program or<br />
error display) • 82, 83<br />
«Link» (displays Ethernet link pulse and activity) •82<br />
«OutEN» (displays the states of all outputs and E-bus<br />
communication) •82<br />
«Rx» and «Tx» (displays receive/transmission activity of the<br />
SIO interface) •81<br />
«Speed» (displays Ethernet connection speed) •82<br />
«TRM» (indicates that the LocalCAN interface’s termination<br />
resistor is switched on) • 81, 110<br />
«Tx» and«Rx» (displays receive/transmission activity of the<br />
SIO interface) •81<br />
«WCAN» (displays WideCAN transmission<br />
activity) • 81, 109<br />
«Z1»…«Z4» (wire fault display for digital sensor<br />
interfaces) • 82, 102<br />
Liability<br />
exclusion of liability •3<br />
exclusion of liability for this manual •1
13 Index<br />
License key of the <strong>MSC</strong> <strong>II</strong> • 24, 85–86<br />
attachment screws •86<br />
features provided by the various license keys • 118<br />
license key slot «LK» • 77, 87<br />
mounting •87<br />
required tool •86<br />
part numbers • 118<br />
removing •87<br />
required tool •86<br />
run-time license •85<br />
safety instructions • 11, 85, 86, 87<br />
«Link», see LEDs of the <strong>MSC</strong> <strong>II</strong><br />
List of figures • viii<br />
List of tables •vi<br />
«LK» (on the front panel of the <strong>MSC</strong> <strong>II</strong>),<br />
see license key of the <strong>MSC</strong> <strong>II</strong>: license key slot «LK»<br />
Load connection of digital outputs •96<br />
LocalCAN •14<br />
LocalCAN bus groups •66<br />
LocalCAN bus interface of the <strong>MSC</strong> <strong>II</strong> • 56, 64, 109<br />
make LocalCAN bus available over QEBUS-CAN •19<br />
Locating pin<br />
DIN rail modules •29<br />
<strong>MSC</strong> <strong>II</strong> •77<br />
Locking slide<br />
DIN rail modules •29<br />
<strong>MSC</strong> <strong>II</strong> •77<br />
M<br />
M_WATCHDOG, see watchdog of the <strong>MSC</strong> <strong>II</strong><br />
M3000 ®<br />
M3000 ® modules, see M3000 ® modules<br />
network topology with CAN bus •14<br />
system architecture •14<br />
system overview •13<br />
M3000 ® modules<br />
DIN rail modules, see DIN rail modules<br />
identification •23<br />
I/O extension modules, see Q-modules: QAIO and QDIO<br />
<strong>MSC</strong> <strong>II</strong>, see <strong>MSC</strong> <strong>II</strong><br />
networking • 64–68<br />
QAIO 16/4, see Q-modules: QAIO 16/4<br />
QDIO, see Q-modules: QDIO<br />
QEBUS-CAN, see Q-modules: QEBUS-CAN<br />
Q-modules, see Q-modules<br />
RDIO, see R-modules: RDIO<br />
RDISP, see R-modules: RDISP<br />
remote modules, see R-modules<br />
R-modules, see R-modules<br />
M3000 ® modules • 16–21<br />
M3000 ® Starter Kits • 114<br />
MACS •25<br />
communication between <strong>MSC</strong> <strong>II</strong> and MACS •84<br />
communication parameters<br />
Ethernet interface •84<br />
configuration of the <strong>MSC</strong> <strong>II</strong> •84<br />
MACS HMI (visualization package) • 26, 119<br />
part number • 119<br />
programming languages •25<br />
programming the <strong>MSC</strong> <strong>II</strong> •84<br />
scope of functionality •25<br />
software maintenance contract • 119<br />
MACS HMI, see MACS: MACS HMI<br />
Maintenance •70<br />
safety instructions •9,69<br />
Maintenance contract for MACS,<br />
see MACS: software maintenance contract<br />
<strong>Manual</strong>, see user manual M3000 ® and <strong>MSC</strong> <strong>II</strong><br />
Maximum admissible current for the power supply<br />
terminals of M3000 ® modules •43<br />
Memory of the <strong>MSC</strong> <strong>II</strong> •73<br />
Module width of an M3000 ® module, see dimensions<br />
<strong>Moog</strong> Authentic Repairs, see repair: <strong>Moog</strong> Authentic Repairs<br />
<strong>Moog</strong> Authentic Repair seal, see repair: repair seal<br />
Mounting<br />
DIN rail modules on DIN top-hat rails •33<br />
license key of the <strong>MSC</strong> <strong>II</strong> •87<br />
required tool •86<br />
<strong>MSC</strong> I •16<br />
<strong>MSC</strong> <strong>II</strong> • 17, 72–113<br />
as master of E-bus groups •61<br />
dimensions • 73, 74<br />
environmental conditions for operation •75<br />
climatic conditions •75<br />
electrical conditions and requirements •75<br />
mechanical conditions and requirements •75<br />
front panel •77<br />
front view •77<br />
part numbers • 115<br />
view of the module •77<br />
<strong>MSC</strong> <strong>II</strong> Starter Kit •15<br />
MSD Motion Controller •22<br />
part numbers • 115<br />
MSD <strong>Servo</strong>drive •23<br />
© <strong>Moog</strong> GmbH <strong>User</strong> <strong>Manual</strong> M3000 ® and <strong>MSC</strong> <strong>II</strong> (CA65865-001; Version 1.1, 08/08) 133<br />
N<br />
Nameplate<br />
M3000 ® modules •23<br />
<strong>MSC</strong> <strong>II</strong> • 113<br />
Networking M3000 ® modules<br />
CAN bus networks, see CAN bus networks<br />
Ethernet networks, see Ethernet: networks<br />
networking DIN rail modules,<br />
see DIN rail modules: networking<br />
Network nodes, see CAN bus network stations<br />
Networks<br />
CAN bus networks, see CAN bus networks<br />
Ethernet networks, see Ethernet: networks<br />
networking DIN rail modules,<br />
see DIN rail modules: networking<br />
Profibus networks, see Profibus<br />
O<br />
Open collector output of the <strong>MSC</strong> <strong>II</strong>,<br />
see I/Os of the <strong>MSC</strong> <strong>II</strong>, digital: digital outputs<br />
Open emitter output of the <strong>MSC</strong> <strong>II</strong>,<br />
see I/Os of the <strong>MSC</strong> <strong>II</strong>, digital: digital outputs<br />
Operating elevation •75<br />
Operating instructions, see user manual M3000 ® and <strong>MSC</strong> <strong>II</strong><br />
Order number, see part numbers<br />
Original packaging is to be retained! •3<br />
Oscillations, permissible for <strong>MSC</strong> <strong>II</strong> •75<br />
«OutEN», see LEDs of the <strong>MSC</strong> <strong>II</strong><br />
'Outputs Enabled',<br />
see I/Os of the <strong>MSC</strong> <strong>II</strong>: 'Outputs Enabled' output<br />
Outputs of the <strong>MSC</strong> <strong>II</strong>, see I/Os of the <strong>MSC</strong> <strong>II</strong><br />
Overall width of an M3000 ® module, see dimensions<br />
Overload protection of digital outputs •95
13 Index<br />
P<br />
Packaging<br />
Original packaging is to be retained! •3<br />
Part number<br />
<strong>MSC</strong> <strong>II</strong> Starter Kit • 114<br />
MSD Motion Controller Starter Kit • 114<br />
Part numbers<br />
CAN bus accessories • 120<br />
CAN bus termination resistors • 120<br />
interface cables • 120<br />
license key of the <strong>MSC</strong> <strong>II</strong> • 118<br />
M3000 ® Starter Kits • 114<br />
<strong>MSC</strong> <strong>II</strong> • 115<br />
MSD Motion Controller • 115<br />
plug-in terminal strips for DIN rail modules • 121<br />
power supply device • 117<br />
Q-modules • 116<br />
R-modules • 117<br />
software<br />
MACS • 119<br />
software for R-modules • 119<br />
software maintenance contract • 119<br />
training programs • 123<br />
Peer-to-peer connection of 2 network stations<br />
(Ethernet) •47<br />
Performance characteristics of the <strong>MSC</strong> <strong>II</strong> •73<br />
interfaces, see interfaces of the <strong>MSC</strong> <strong>II</strong><br />
I/Os, see I/Os of the <strong>MSC</strong> <strong>II</strong><br />
’Outputs Enabled’ output,<br />
see I/Os of the <strong>MSC</strong> <strong>II</strong>: ’Outputs Enabled’ output<br />
watchdog, see watchdog of the <strong>MSC</strong> <strong>II</strong><br />
Personnel, selection and qualification<br />
only qualified users may work with and on M3000 ® ! •2<br />
Pin assignment, see terminal assignment<br />
Place of storage for manuals •1<br />
Plug assignment, see terminal assignment<br />
Plug-in terminal strips for DIN rail modules<br />
connection methods •46<br />
connectors for plug-in terminal strips<br />
front view of the DIN rail module •29<br />
«X2», «X4», «X6», «X7», «X9», «X10» connectors of<br />
the <strong>MSC</strong> <strong>II</strong> •77<br />
part numbers • 121<br />
required number • 122<br />
side view of DIN rail modules with plug-in terminal strips •29<br />
spring loaded terminals •46<br />
Potential equalization in CAN bus networks,<br />
see CAN bus networks: potential equalization<br />
Power consumption by DIN rail modules •40<br />
Power supply • 39–45<br />
characteristics •39<br />
connecting M3000 ® modules •41<br />
digital I/Os of the <strong>MSC</strong> <strong>II</strong> •93<br />
maximum admissible current •43<br />
<strong>MSC</strong> <strong>II</strong> • 75, 89–90<br />
«L1+» (LED for displaying the state of the power supply<br />
for the internal electronics) •81<br />
power supply device<br />
part number • 117<br />
rated voltage •39<br />
safety extra-low voltage SELV •39<br />
sensors • 43–45<br />
switching on/off the power supply<br />
behavior of the <strong>MSC</strong> <strong>II</strong> •89<br />
terminal assignment •78<br />
Processor of the <strong>MSC</strong> <strong>II</strong> •73<br />
Product range • 114–123<br />
Profibus • 50–53<br />
9 pole D-sub connector •52<br />
connector with internal logitudinal inductivity •52<br />
connector with switchable termination •52<br />
maximum cable lengths •53<br />
modules with Profibus DP interface •50<br />
number of network stations •51<br />
permissible stub cable lengths •53<br />
Profibus interface of the <strong>MSC</strong> <strong>II</strong><br />
terminal assignment of the «F-Bus» connector •79<br />
suitable cables •53<br />
topology •51<br />
wiring •50<br />
Profibus DP interface<br />
<strong>MSC</strong> <strong>II</strong> • 100<br />
Programming languages in MACS •25<br />
Programming the <strong>MSC</strong> <strong>II</strong> •84<br />
Project planning •37<br />
safety instructions • 8, 40, 43<br />
Proper operation, see proper use<br />
Proper use •2<br />
safety related systems •2<br />
Protection class of the <strong>MSC</strong> <strong>II</strong> •75<br />
Pulse detection of digital inputs •97<br />
© <strong>Moog</strong> GmbH <strong>User</strong> <strong>Manual</strong> M3000 ® and <strong>MSC</strong> <strong>II</strong> (CA65865-001; Version 1.1, 08/08) 134<br />
Q<br />
QAIO 16/4, see Q-modules: QAIO 16/4<br />
Q-connector<br />
40 pole connector of the E-bus interface •60<br />
front and side views of DIN rail modules •29<br />
front view of the <strong>MSC</strong> <strong>II</strong> •77<br />
QDIO, see Q-modules: QDIO<br />
QEBUS-CAN, see Q-modules: QEBUS-CAN<br />
Q-modules •17<br />
part numbers • 116<br />
power consumption •40<br />
QAIO 16/4 •18<br />
QDIO •18<br />
QEBUS-CAN •19<br />
Qualified users, see personnel, selection and qualification<br />
R<br />
Rated voltage of the power supply •39<br />
RDIO, see R-modules: RDIO<br />
RDISP, see R-modules: RDISP<br />
Rebooting the <strong>MSC</strong> <strong>II</strong>, see resetting the <strong>MSC</strong> <strong>II</strong><br />
Release date of this manual •1<br />
Remote modules, see R-modules<br />
Removing<br />
DIN rail modules from the DIN top-hat rail •36<br />
license key of the <strong>MSC</strong> <strong>II</strong> •87<br />
required tool •86<br />
Repair •70<br />
<strong>Moog</strong> Authentic Repairs •70<br />
repair seal •70<br />
safety instructions •9,69<br />
Reproduction prohibition for this manual •A<br />
Reservation of changes for this manual •A,1<br />
Reset button of the <strong>MSC</strong> <strong>II</strong> • 77, 88<br />
safety instructions • 12, 88<br />
Resetting the <strong>MSC</strong> <strong>II</strong> •88<br />
reset button, see reset button of the <strong>MSC</strong> <strong>II</strong><br />
safety instructions • 12, 89<br />
Restarting the <strong>MSC</strong> <strong>II</strong>, see resetting the <strong>MSC</strong> <strong>II</strong>
13 Index<br />
Retain the original packaging! •3<br />
Reverse energization is to be avoided! • 40, 43, 45, 93<br />
R-modules •19<br />
part numbers • 117<br />
power consumption •40<br />
RDIO •20<br />
as master of E-bus groups •61<br />
RDISP •20<br />
software for R-modules<br />
CPRDISP • 20, 119<br />
part numbers • 119<br />
RT-ETH<br />
RT-ETH interface of the <strong>MSC</strong> <strong>II</strong><br />
terminal assignment of the «RT-ETH1» connector •81<br />
terminal assignment of the «RT-ETH2» connector •81<br />
Run-time license of the <strong>MSC</strong> <strong>II</strong> (in license key) •85<br />
«Rx», see LEDs of the <strong>MSC</strong> <strong>II</strong><br />
S<br />
Safety extra-low voltage SELV •39<br />
Safety instructions<br />
arrangement of DIN rail modules •31<br />
cleaning •9,69<br />
communication between <strong>MSC</strong> <strong>II</strong> and MACS • 11, 84<br />
environmental conditions • 7, 27, 74<br />
ESD •7<br />
installation • 8, 31, 33, 35, 40, 43<br />
license key of the <strong>MSC</strong> <strong>II</strong> • 11, 85, 86, 87<br />
maintenance •9,69<br />
mounting<br />
DIN rail modules •33<br />
license key of the <strong>MSC</strong> <strong>II</strong> •86<br />
'Outputs Enabled' output of the <strong>MSC</strong> <strong>II</strong> • 12, 111<br />
project planning • 8, 40, 43<br />
removing<br />
DIN rail modules •35<br />
license key of the <strong>MSC</strong> <strong>II</strong> •87<br />
repair •9,69<br />
reset button of the <strong>MSC</strong> <strong>II</strong> • 12, 88<br />
resetting the <strong>MSC</strong> <strong>II</strong> • 12, 89<br />
safety related systems •2,6<br />
service •9,69<br />
shutdown •9,69<br />
storing M3000 ® modules • 10, 71<br />
transporting M3000 ® modules • 10, 71<br />
typographical conventions • 6, 124<br />
update rate of E-bus messages •62<br />
Safety related systems •2<br />
safety instructions •2,6<br />
SELV, see safety extra-low voltage SELV<br />
Sensor interfaces of the <strong>MSC</strong> <strong>II</strong>, digital • 101–107<br />
connecting incremental sensors • 105–107<br />
connecting SSI sensors • 102–104<br />
connection diagram<br />
<strong>MSC</strong> <strong>II</strong> in master mode • 103<br />
<strong>MSC</strong> <strong>II</strong> in slave mode • 104<br />
terminal assignment • 79, 80<br />
wire fault monitoring • 102<br />
wire fault display LEDs • 82, 102<br />
Sensor interfaces of the <strong>MSC</strong> <strong>II</strong>, termination resistors • 101<br />
Sensors<br />
connecting incremental sensors to the <strong>MSC</strong> <strong>II</strong> • 105–107<br />
termination resistors • 101<br />
wire fault monitoring • 102<br />
connecting signal cables over plug-in terminal strips •46<br />
connecting SSI sensors to the <strong>MSC</strong> <strong>II</strong> • 102–104<br />
termination resistors • 101<br />
wire fault monitoring • 102<br />
connecting to the power supply • 43–45<br />
incremental encoder (frequency modulation negative<br />
logic) • 107<br />
incremental encoder (frequency modulation positive<br />
logic) • 107<br />
incremental encoder (pulse train negative logic) • 107<br />
incremental encoder (pulse train positive logic) • 106<br />
incremental encoder (standard) • 105<br />
Service<br />
cleaning, see cleaning<br />
maintenance, see maintenance<br />
repair, see repair<br />
safety instructions •9,69<br />
servicing, see maintenance<br />
Servicing, see maintenance<br />
Shock, permissible for <strong>MSC</strong> <strong>II</strong> •75<br />
Shutdown<br />
safety instructions •9,69<br />
Signal cables<br />
connection over plug-in terminal strips •46<br />
connection to <strong>MSC</strong> <strong>II</strong> •32<br />
Signal grounding<br />
CAN bus termination resistor with signal grounding,<br />
see grounding: CAN bus termination resistor with signal<br />
grounding<br />
DIN rail modules,<br />
see grounding: signal grounding of DIN rail modules<br />
«SIO» (front panel connector of the <strong>MSC</strong> <strong>II</strong>),<br />
see interfaces of the <strong>MSC</strong> <strong>II</strong>, serial: SIO interface<br />
SIO interface of the <strong>MSC</strong> <strong>II</strong>,<br />
see interfaces of the <strong>MSC</strong> <strong>II</strong>, serial: SIO interface<br />
Software<br />
copyright •5<br />
development environment MACS, see MACS<br />
MACS, see MACS<br />
software for R-modules,<br />
see R-modules: software for R-modules<br />
Software maintenance contract for MACS,<br />
see MACS: software maintenance contract<br />
Spring loaded terminals,<br />
see plug-in terminal strips for DIN rail modules<br />
SSI sensor<br />
connecting to the <strong>MSC</strong> <strong>II</strong> • 102–104<br />
connection diagram<br />
<strong>MSC</strong> <strong>II</strong> in master mode • 103<br />
<strong>MSC</strong> <strong>II</strong> in slave mode • 104<br />
SSI sensor start time •91<br />
Standards<br />
overview of quoted standards • 127–129<br />
Starter kit, see <strong>MSC</strong> <strong>II</strong><br />
starter kit<br />
Storing M3000 ® modules<br />
environmental conditions •71<br />
air pressure, permissible •71<br />
ambient temperature, permissible •71<br />
contamination level • 71, 75<br />
insensitivity to corrosion • 71, 75<br />
relative air humidity, permissible •71<br />
safety instructions • 10, 71<br />
Storing manuals<br />
place of storage •1<br />
© <strong>Moog</strong> GmbH <strong>User</strong> <strong>Manual</strong> M3000 ® and <strong>MSC</strong> <strong>II</strong> (CA65865-001; Version 1.1, 08/08) 135
13 Index<br />
Symbols and styles used in this manual,<br />
see typographical conventions<br />
<strong>System</strong>, see M3000 ®<br />
<strong>System</strong> architecture, see M3000 ® : system architecture<br />
<strong>System</strong> overview, see M3000 ® : system overview<br />
T<br />
Table of Contents •i<br />
Tables, list of •vi<br />
Task reaction time •92<br />
Terminal assignment<br />
M3000 ® modules •23<br />
<strong>MSC</strong> <strong>II</strong> • 78–81<br />
Termination resistors, see CAN bus termination resistors<br />
TIA/EIA *** interface cable,<br />
see interface cables: serial interface cables<br />
Timing diagram •91<br />
Top-hat rail, see DIN top-hat rail TH 35-7.5<br />
Trademarks •5<br />
Training programs, part numbers • 123<br />
Transporting M3000 ® modules<br />
environmental conditions •71<br />
air pressure, permissible •71<br />
ambient temperature, permissible •71<br />
contamination level • 71, 75<br />
insensitivity to corrosion • 71, 75<br />
relative air humidity, permissible •71<br />
safety instructions •10,71<br />
«TRM», see LEDs of the <strong>MSC</strong> <strong>II</strong><br />
«Tx», see LEDs of the <strong>MSC</strong> <strong>II</strong><br />
Type plate, see nameplate<br />
Typographical conventions •124<br />
U<br />
U/I working ranges of digital inputs •99<br />
USB<br />
USB interface of the <strong>MSC</strong> <strong>II</strong><br />
terminal assignment of the «USB1» connector •80<br />
terminal assignment of the «USB2» connector •80<br />
<strong>User</strong> manual M3000 ® and <strong>MSC</strong> <strong>II</strong><br />
abbreviations used, see abbreviations used<br />
copyright •A<br />
date of release •1<br />
duplication prohibition •A<br />
exclusion of liability •1<br />
place of storage •1<br />
reproduction prohibition •A<br />
reservation of changes •A,1<br />
styles and symbols used, see typographical conventions<br />
typographical conventions, see typographical conventions<br />
version number •1<br />
<strong>User</strong>s, qualified, see personnel, selection and qualification<br />
V<br />
Version number of this manual •1<br />
View of the module<br />
DIN rail modules •29<br />
<strong>MSC</strong> <strong>II</strong> •77<br />
Visualization package, see MACS: MACS HMI<br />
© <strong>Moog</strong> GmbH <strong>User</strong> <strong>Manual</strong> M3000 ® and <strong>MSC</strong> <strong>II</strong> (CA65865-001; Version 1.1, 08/08) 136<br />
W<br />
Warranty<br />
exclusion of warranty •3<br />
Watchdog of the <strong>MSC</strong> <strong>II</strong> • 111<br />
«WCAN» (front panel connectors of the <strong>MSC</strong> <strong>II</strong>),<br />
see CAN bus interfaces: <strong>MSC</strong> <strong>II</strong><br />
«WCAN» (LED), see LEDs of the <strong>MSC</strong> <strong>II</strong><br />
Weight of the <strong>MSC</strong> <strong>II</strong> •73<br />
WideCAN •14<br />
WideCAN bus groups •67<br />
WideCAN bus interface of the <strong>MSC</strong> <strong>II</strong> • 56, 64, 109<br />
terminal assignment of the «WCAN» connectors •78<br />
Wire fault display LEDs of the <strong>MSC</strong> <strong>II</strong><br />
«A1», «B1», «Z1»…«A4», «B4», «Z4» (wire fault display<br />
LEDs for digital sensor interfaces) • 82, 102<br />
Wire fault monitoring<br />
sensor interfaces, digital • 102<br />
wire fault display LEDs • 82, 102<br />
Wiring of CAN bus networks •57<br />
X<br />
«X2», «X4», «X6», «X7», «X9», «X10» (Plug-in terminal strip<br />
connectors of the <strong>MSC</strong> <strong>II</strong>)<br />
front view of the <strong>MSC</strong> <strong>II</strong> with plug-in terminal-strip<br />
connectors •77<br />
Z<br />
«Z1»…«Z4», see LEDs of the <strong>MSC</strong> <strong>II</strong>
MOOG.COM/INDUSTRIAL<br />
For the location nearest you, contact<br />
moog.com/industrial/globallocator<br />
Argentina +54 11 4326 5916 info.argentina@moog.com<br />
Australia +61 3 9561 6044 info.australia@moog.com<br />
Austria +43 664 144 65 80 info.austria@moog.com<br />
Brazil +55 11 5523 8011 info.brazil@moog.com<br />
China +86 21 2893 1600 info.china@moog.com<br />
Finland +358 9 2517 2730 info.finland@moog.com<br />
France +33 1 4560 7000 info.france@moog.com<br />
Germany +49 7031 622 0 info.germany@moog.com<br />
Hong Kong +852 2 635 3200 info.hongkong@moog.com<br />
India +91 80 4120 8799 info.india@moog.com<br />
Ireland +353 21 451 9000 info.ireland@moog.com<br />
Italy +39 0332 421 111 info.italy@moog.com<br />
Japan +81 463 55 3615 info.japan@moog.com<br />
Korea +82 31 764 6711 info.korea@moog.com<br />
Luxembourg +352 40 46 401 info.luxembourg@moog.com<br />
Netherlands +31 252 462 000 info.netherlands@moog.com<br />
Norway +47 64 94 19 48 info.norway@moog.com<br />
Russia +7 31713 1811 info.russia@moog.com<br />
Singapore +65 6773 6238 info.singapore@moog.com<br />
South Africa +27 12 653 6768 info.southafrica@moog.com<br />
Spain +34 902 133 240 info.spain@moog.com<br />
Sweden +46 31 680 060 info.sweden@moog.com<br />
Switzerland +41 71 394 5010 info.switzerland@moog.com<br />
United Kingdom +44 1684 296600 info.unitedkingdom@moog.com<br />
USA +1 716 652 2000 info.usa@moog.com<br />
© <strong>Moog</strong> GmbH<br />
<strong>User</strong> <strong>Manual</strong> M3000 ® and <strong>MSC</strong> <strong>II</strong><br />
CA65865-001; Version 1.1, 08/08<br />
All rights reserved.<br />
Subject to change without notice.