
You also want an ePaper? Increase the reach of your titles
YUMPU automatically turns print PDFs into web optimized ePapers that Google loves.
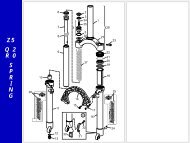
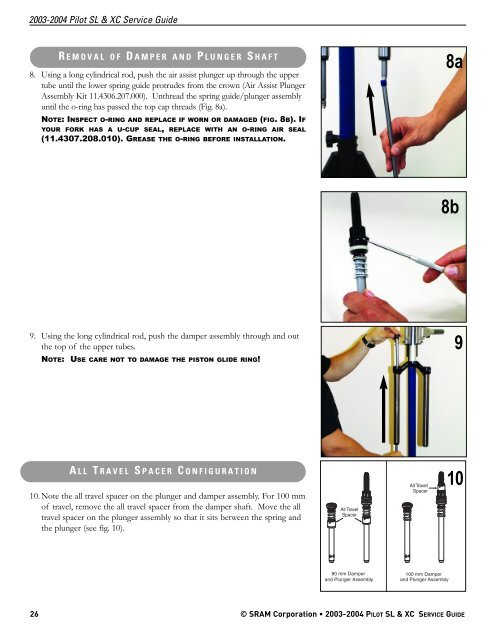
2003-2004 <strong>Pilot</strong> <strong>SL</strong> & <strong>XC</strong> <strong>Service</strong> GuideR EMOVAL OF D AMPER AND P LUNGER S HAFT8. Using a long cylindrical rod, push the air assist plunger up through the uppertube until the lower spring guide protrudes from the crown (Air Assist PlungerAssembly Kit 11.4306.207.000). Unthread the spring guide/plunger assemblyuntil the o-ring has passed the top cap threads (Fig. 8a).NOTE: INSPECT O-RING AND REPLACE IF WORN OR DAMAGED (FIG. 8B). IFYOUR FORK HAS A U-CUP SEAL, REPLACE WITH AN O-RING AIR SEAL(11.4307.208.010). GREASE THE O-RING BEFORE INSTALLATION.8a8b9. Using the long cylindrical rod, push the damper assembly through and outthe top of the upper tubes.NOTE: USE CARE NOT TO DAMAGE THE PISTON GLIDE RING!9A LL T RAVEL S PACER C ONFIGURATION10. Note the all travel spacer on the plunger and damper assembly. For 100 mmof travel, remove the all travel spacer from the damper shaft. Move the alltravel spacer on the plunger assembly so that it sits between the spring andthe plunger (see fig. 10).All TravelSpacerAll TravelSpacer1080 mm Damperand Plunger Assembly100 mm Damperand Plunger Assembly26 © SRAM Corporation • 2003-2004 PILOT <strong>SL</strong> & <strong>XC</strong> SERVICE GUIDE