Access the User Management Application
Access the User Management Application
Access the User Management Application
- No tags were found...

You also want an ePaper? Increase the reach of your titles
YUMPU automatically turns print PDFs into web optimized ePapers that Google loves.
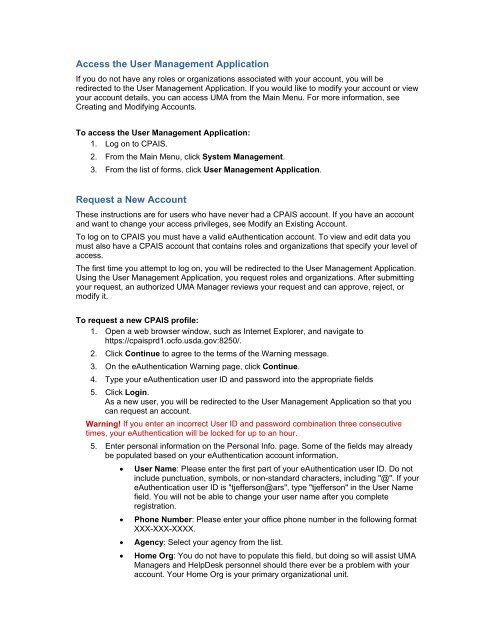
<strong>Access</strong> <strong>the</strong> <strong>User</strong> <strong>Management</strong> <strong>Application</strong>If you do not have any roles or organizations associated with your account, you will beredirected to <strong>the</strong> <strong>User</strong> <strong>Management</strong> <strong>Application</strong>. If you would like to modify your account or viewyour account details, you can access UMA from <strong>the</strong> Main Menu. For more information, seeCreating and Modifying Accounts.To access <strong>the</strong> <strong>User</strong> <strong>Management</strong> <strong>Application</strong>:1. Log on to CPAIS.2. From <strong>the</strong> Main Menu, click System <strong>Management</strong>.3. From <strong>the</strong> list of forms, click <strong>User</strong> <strong>Management</strong> <strong>Application</strong>.Request a New AccountThese instructions are for users who have never had a CPAIS account. If you have an accountand want to change your access privileges, see Modify an Existing Account.To log on to CPAIS you must have a valid eAu<strong>the</strong>ntication account. To view and edit data youmust also have a CPAIS account that contains roles and organizations that specify your level ofaccess.The first time you attempt to log on, you will be redirected to <strong>the</strong> <strong>User</strong> <strong>Management</strong> <strong>Application</strong>.Using <strong>the</strong> <strong>User</strong> <strong>Management</strong> <strong>Application</strong>, you request roles and organizations. After submittingyour request, an authorized UMA Manager reviews your request and can approve, reject, ormodify it.To request a new CPAIS profile:1. Open a web browser window, such as Internet Explorer, and navigate tohttps://cpaisprd1.ocfo.usda.gov:8250/.2. Click Continue to agree to <strong>the</strong> terms of <strong>the</strong> Warning message.3. On <strong>the</strong> eAu<strong>the</strong>ntication Warning page, click Continue.4. Type your eAu<strong>the</strong>ntication user ID and password into <strong>the</strong> appropriate fields5. Click Login.As a new user, you will be redirected to <strong>the</strong> <strong>User</strong> <strong>Management</strong> <strong>Application</strong> so that youcan request an account.Warning! If you enter an incorrect <strong>User</strong> ID and password combination three consecutivetimes, your eAu<strong>the</strong>ntication will be locked for up to an hour.5. Enter personal information on <strong>the</strong> Personal Info. page. Some of <strong>the</strong> fields may alreadybe populated based on your eAu<strong>the</strong>ntication account information.• <strong>User</strong> Name: Please enter <strong>the</strong> first part of your eAu<strong>the</strong>ntication user ID. Do notinclude punctuation, symbols, or non-standard characters, including "@". If youreAu<strong>the</strong>ntication user ID is "tjefferson@ars", type "tjefferson" in <strong>the</strong> <strong>User</strong> Namefield. You will not be able to change your user name after you completeregistration.• Phone Number: Please enter your office phone number in <strong>the</strong> following formatXXX-XXX-XXXX.• Agency: Select your agency from <strong>the</strong> list.• Home Org: You do not have to populate this field, but doing so will assist UMAManagers and HelpDesk personnel should <strong>the</strong>re ever be a problem with youraccount. Your Home Org is your primary organizational unit.
• Supervisor Name: Please type your supervisor's first and last name in <strong>the</strong>field.6. Click Save.• Remarks: You do not have to populate this field. If you would like to includespecial instructions or information about your personal information.• Provide as much additional information as possible.7. Click <strong>the</strong> View and Request Changes sub tab.8. Select an application from <strong>the</strong> <strong>Application</strong> Name list.9. Select <strong>the</strong> role you want to request from <strong>the</strong> Role Name list. For more information, seeCPAIS <strong>User</strong> Roles.10. Select your agency from <strong>the</strong> Agency list.11. From <strong>the</strong> Available Orgs box, select an organization number from <strong>the</strong> Filter list todisplay organizations that you want to add to your account.12. Select <strong>the</strong> organizations you want to assign to <strong>the</strong> role and click Move or Move All topass <strong>the</strong>m to <strong>the</strong> Requested Orgs box.13. Click Add Selected Orgs to add <strong>the</strong> role/organization combination to your request.The request displays in <strong>the</strong> My Roles and Orgs table. To cancel a request in <strong>the</strong> MyRoles and Orgs table, select it and click Cancel. You can cancel requests that have notbeen acted upon by an UMA Manager.14. Click Save.Your request is sent to an UMA Manager for review and approval. You cannot log on toCPAIS and edit data until your request is reviewed and approved. Once <strong>the</strong> UMAManager acts on your request, you will receive an email.15. Repeat Steps 8 through 14 for o<strong>the</strong>r roles, if necessary.Modify an Existing AccountThis topic guides you through <strong>the</strong> process for requesting role and organization privileges for anexisting CPAIS account. Account modification requests must be reviewed by an UMA Managerbefore <strong>the</strong> changes take effect. You will receive an email notifying you of <strong>the</strong> UMA Manager'sactions.To add roles and organizations to an existing account:1. <strong>Access</strong> <strong>the</strong> <strong>User</strong> <strong>Management</strong> <strong>Application</strong> (UMA).When UMA displays it will default to <strong>the</strong> Personal Info page and show basic informationabout your profile.2. Verify that <strong>the</strong> information is correct. If you make any changes, click Save.3. Click <strong>the</strong> View and Request Changes sub tab.All roles that currently are part of your profile appear in <strong>the</strong> My Roles and Orgs table.For each role, you can see <strong>the</strong> following:• Organizations you have requested to add that are pending approval;• Organizations you have requested to remove that are pending approval; or,• Organizations that have been approved by an UMA Manager and assigned toyour account.4. Select an application from <strong>the</strong> <strong>Application</strong> Name list.
Modify an Existing Account5. Select <strong>the</strong> role you want to add to your account from <strong>the</strong> Role Name list. If you alreadyhave <strong>the</strong> role, but would like to add additional organizations, you still need to select <strong>the</strong>role.6. Select your agency from <strong>the</strong> Agency list.7. From <strong>the</strong> Available Orgs box, use <strong>the</strong> Filter list to search for organizations.8. Select <strong>the</strong> organizations you want to add.9. Click <strong>the</strong> Move or Move All links to pass those organizations to <strong>the</strong> Requested Orgsbox.10. Click Add Selected Orgs to request that <strong>the</strong> role and organizations be added to youraccount.11. Click Save.An UMA Manager will review your request. You will receive an email notification when<strong>the</strong> UMA Manager has acted upon your request.To remove roles and organizations from an existing account:1. <strong>Access</strong> <strong>the</strong> <strong>User</strong> <strong>Management</strong> <strong>Application</strong> (UMA).When UMA displays it will default to <strong>the</strong> Personal Info page and show basic informationabout your profile.2. Verify that <strong>the</strong> information on <strong>the</strong> Personal Info page is correct. If you make anychanges, click Save.3. Click <strong>the</strong> View and Request Changes sub tab.4. Select an application from <strong>the</strong> <strong>Application</strong> Name list.5. Select <strong>the</strong> role you want to modify from <strong>the</strong> Role Name list.6. Select your agency from <strong>the</strong> Agency list.7. From <strong>the</strong> Available Orgs box, use <strong>the</strong> Filter list to search for organizations.8. Select <strong>the</strong> organizations you want to remove.9. Click <strong>the</strong> Move or Move All links to pass those organizations to <strong>the</strong> Requested Orgsbox.10. Click Remove Selected Orgs to request that <strong>the</strong> role and organizations be removedfrom your account. If you request that all organizations be removed from <strong>the</strong> role, <strong>the</strong>role will be removed from your account as well.11. Click Save.An UMA Manager will review your request. You will receive an email notification when<strong>the</strong> UMA Manager has acted upon your request. If you have made a mistake and donot wish to modify your account, select <strong>the</strong> request in <strong>the</strong> My Roles and Orgs table andclick Cancel Request. You can only cancel a new request.
CPAIS <strong>User</strong> RolesTo access CPAIS and view or edit data, you need a valid user account and password. Youraccount has roles that let you work with certain types of data. When you apply for a useraccount and password, you will request <strong>the</strong> roles and organizations that you need access to.Speak with your manager or your agency's CPAIS HelpDesk point of contact if you are not surewhich roles or organizations you need to request. For more information, see Request a NewAccount or Modify an Existing Account.Real Property Accounting RolesRoleRPA StreamManagerRPA DisposalManagerRPA LocalManagerRECON_USERRPA ReconciliationManagerDescriptionRole allows user to create or update current year adjustmenttransactions using <strong>the</strong> Value Stream screen. AssumesRPA_DISPOSAL_MGR, as needed, to perform responsibilities. Limitednumber of access privileges for this role in each agency. <strong>User</strong>s havingthis access should be limited to one primary and a backup. <strong>User</strong>s inthis role are also allowed to place an asset in service.Role allows <strong>the</strong> user to create or update subledger accounts, andcreate write-off transactions for disposed assets using <strong>the</strong> ValueStream screen. Assumes <strong>the</strong> RPA_LOCAL_MGR role, as needed, toperform responsibilities. ** If write-offs are performed at <strong>the</strong>Department level, this role may not be needed at <strong>the</strong> agency level.Role provides access to create and maintain subledgers, and setdevelopment status. <strong>User</strong>s having this access are normally operationalaccountants who deal with real propertyRole provides access to query records related to a rejected transactionand edit any missing or incorrect data in <strong>the</strong> recordRole provides access to query records related to a rejected transactionand approve records that have been edited.Real Property <strong>Management</strong> RolesRoleRPM LeaseManagerRPM PropertyManagerRPM Work ItemManagerRPM OccupancyManagerRPM CollocationManagerDescriptionRole allows <strong>the</strong> user to create, update, and delete lease records and<strong>the</strong> authority to issue GSA OA billing adjustment requests. AssumesRPM_PROPERTY_MGR role, if needed, to perform responsibilities. AProperty Manager is normally assigned this role.Role allows <strong>the</strong> user to create, update, and delete assets and link <strong>the</strong>assets to GSA sites. This role can be assigned to a facility engineer,fiscal manager, or property manager.Role allows user to enter and update deferred maintenance work itemsand facility master plan information. This role can be assigned to afacility engineer, fiscal manager, or property manager.Role allows <strong>the</strong> user to enter occupancy information for assignedproperties or <strong>the</strong> collocation property managed by o<strong>the</strong>r agencies.Role allows <strong>the</strong> user to manage collocation agreements.
Generic RolesRoleContact ManagerFRPP ManagerRead OnlyDescriptionRole allows <strong>the</strong> user to enter different type of contact data into CPAIS.This role is already inherited by all RPA/RPM roles.Role allows an agency user to certify agency data by re-calculating <strong>the</strong>summary data and updating <strong>the</strong> status for accuracy and completion.Role allows <strong>the</strong> user to select all objects for viewing and/or reporting.Super <strong>User</strong> RolesRoleHeadquarters ManagerSECURITY_ADMN_MGRDescriptionRole assumes all RPA/RPM/Generic roles, as needed, toperform responsibilities. <strong>User</strong>s having this role should be limitedto <strong>the</strong> Agency Real Property <strong>Management</strong> POC and RealProperty Accounting POC with one back-up person. <strong>User</strong>sassigned this role will also run security reports for quarterlycertifications. May also have limited Department-level personnel(i.e. COD-PRB) assigned to this role for high-level transactions.Role allows <strong>the</strong> user to extract <strong>the</strong> CPAIS user informationobtained from <strong>the</strong> <strong>User</strong> <strong>Access</strong> Form. Using a Discoverer reportthis user can identify all CPAIS users and <strong>the</strong>ir level of access tocreate a security report. This role is only assigned by a systemdatabase administrator.