INSTALLATION MANUAL - Daikin AC
INSTALLATION MANUAL - Daikin AC
INSTALLATION MANUAL - Daikin AC
- No tags were found...
Create successful ePaper yourself
Turn your PDF publications into a flip-book with our unique Google optimized e-Paper software.
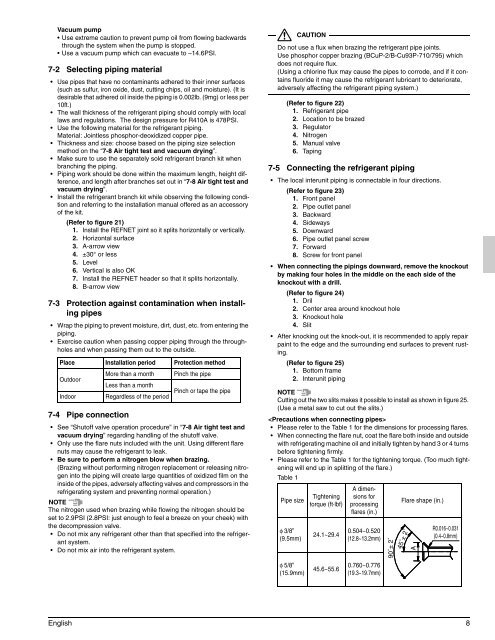
Vacuum pump• Use extreme caution to prevent pump oil from flowing backwardsthrough the system when the pump is stopped.• Use a vacuum pump which can evacuate to –14.6PSI.7-2 Selecting piping material• Use pipes that have no contaminants adhered to their inner surfaces(such as sulfur, iron oxide, dust, cutting chips, oil and moisture). (It isdesirable that adhered oil inside the piping is 0.002lb. (9mg) or less per10ft.)• The wall thickness of the refrigerant piping should comply with locallaws and regulations. The design pressure for R410A is 478PSI.• Use the following material for the refrigerant piping.Material: Jointless phosphor-deoxidized copper pipe.• Thickness and size: choose based on the piping size selectionmethod on the “7-8 Air tight test and vacuum drying”.• Make sure to use the separately sold refrigerant branch kit whenbranching the piping.• Piping work should be done within the maximum length, height difference,and length after branches set out in “7-8 Air tight test andvacuum drying”.• Install the refrigerant branch kit while observing the following conditionand referring to the installation manual offered as an accessoryof the kit.(Refer to figure 21)1. Install the REFNET joint so it splits horizontally or vertically.2. Horizontal surface3. A-arrow view4. ±30° or less5. Level6. Vertical is also OK7. Install the REFNET header so that it splits horizontally.8. B-arrow view7-3 Protection against contamination when installingpipes• Wrap the piping to prevent moisture, dirt, dust, etc. from entering thepiping.• Exercise caution when passing copper piping through the throughholesand when passing them out to the outside.Place Installation period Protection methodOutdoorIndoor7-4 Pipe connectionMore than a monthLess than a monthRegardless of the periodPinch the pipePinch or tape the pipe• See “Shutoff valve operation procedure” in “7-8 Air tight test andvacuum drying” regarding handling of the shutoff valve.• Only use the flare nuts included with the unit. Using different flarenuts may cause the refrigerant to leak.• Be sure to perform a nitrogen blow when brazing.(Brazing without performing nitrogen replacement or releasing nitrogeninto the piping will create large quantities of oxidized film on theinside of the pipes, adversely affecting valves and compressors in therefrigerating system and preventing normal operation.)NOTEThe nitrogen used when brazing while flowing the nitrogen should beset to 2.9PSI (2.8PSI: just enough to feel a breeze on your cheek) withthe decompression valve.• Do not mix any refrigerant other than that specified into the refrigerantsystem.• Do not mix air into the refrigerant system.CAUTIONDo not use a flux when brazing the refrigerant pipe joints.Use phosphor copper brazing (BCuP-2/B-Cu93P-710/795) whichdoes not require flux.(Using a chlorine flux may cause the pipes to corrode, and if it containsfluoride it may cause the refrigerant lubricant to deteriorate,adversely affecting the refrigerant piping system.)(Refer to figure 22)1. Refrigerant pipe2. Location to be brazed3. Regulator4. Nitrogen5. Manual valve6. Taping7-5 Connecting the refrigerant piping• The local interunit piping is connectable in four directions.(Refer to figure 23)1. Front panel2. Pipe outlet panel3. Backward4. Sideways5. Downward6. Pipe outlet panel screw7. Forward8. Screw for front panel• When connecting the pipings downward, remove the knockoutby making four holes in the middle on the each side of theknockout with a drill.(Refer to figure 24)1. Dril2. Center area around knockout hole3. Knockout hole4. Slit• After knocking out the knock-out, it is recommended to apply repairpaint to the edge and the surrounding end surfaces to prevent rusting.(Refer to figure 25)1. Bottom frame2. Interunit pipingNOTECutting out the two slits makes it possible to install as shown in figure 25.(Use a metal saw to cut out the slits.)• Please refer to the Table 1 for the dimensions for processing flares.• When connecting the flare nut, coat the flare both inside and outsidewith refrigerating machine oil and initially tighten by hand 3 or 4 turnsbefore tightening firmly.• Please refer to the Table 1 for the tightening torque. (Too much tighteningwill end up in splitting of the flare.)Table 1Pipe sizeφ 3/8”(9.5mm)φ 5/8”(15.9mm)Tighteningtorque (ft·lbf)24.1~29.445.6~55.6A dimensionsforprocessingflares (in.)0.504~0.520(12.8~13.2mm)0.760~0.776(19.3~19.7mm)90˚± 2˚45˚± 2˚Flare shape (in.)AR0.016~0.031(0.4~0.8mm)English 8


