KASTOR KARHU - sarjan puukiukaiden asennus- ja käyttöohje
KASTOR KARHU - sarjan puukiukaiden asennus- ja käyttöohje
KASTOR KARHU - sarjan puukiukaiden asennus- ja käyttöohje

Create successful ePaper yourself
Turn your PDF publications into a flip-book with our unique Google optimized e-Paper software.
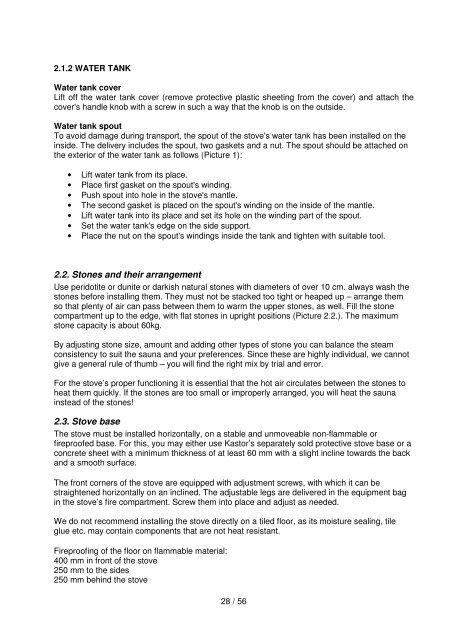
2.1.2 WATER TANKWater tank coverLift off the water tank cover (remove protective plastic sheeting from the cover) and attach thecover's handle knob with a screw in such a way that the knob is on the outside.Water tank spoutTo avoid damage during transport, the spout of the stove's water tank has been installed on theinside. The delivery includes the spout, two gaskets and a nut. The spout should be attached onthe exterior of the water tank as follows (Picture 1):• Lift water tank from its place.• Place first gasket on the spout's winding.• Push spout into hole in the stove's mantle.• The second gasket is placed on the spout's winding on the inside of the mantle.• Lift water tank into its place and set its hole on the winding part of the spout.• Set the water tank's edge on the side support.• Place the nut on the spout's windings inside the tank and tighten with suitable tool.2.2. Stones and their arrangementUse peridotite or dunite or darkish natural stones with diameters of over 10 cm. always wash thestones before installing them. They must not be stacked too tight or heaped up – arrange themso that plenty of air can pass between them to warm the upper stones, as well. Fill the stonecompartment up to the edge, with flat stones in upright positions (Picture 2.2.). The maximumstone capacity is about 60kg.By adjusting stone size, amount and adding other types of stone you can balance the steamconsistency to suit the sauna and your preferences. Since these are highly individual, we cannotgive a general rule of thumb – you will find the right mix by trial and error.For the stove’s proper functioning it is essential that the hot air circulates between the stones toheat them quickly. If the stones are too small or improperly arranged, you will heat the saunainstead of the stones!2.3. Stove baseThe stove must be installed horizontally, on a stable and unmoveable non-flammable orfireproofed base. For this, you may either use Kastor’s separately sold protective stove base or aconcrete sheet with a minimum thickness of at least 60 mm with a slight incline towards the backand a smooth surface.The front corners of the stove are equipped with adjustment screws, with which it can bestraightened horizontally on an inclined. The adjustable legs are delivered in the equipment bagin the stove’s fire compartment. Screw them into place and adjust as needed.We do not recommend installing the stove directly on a tiled floor, as its moisture sealing, tileglue etc. may contain components that are not heat resistant.Fireproofing of the floor on flammable material:400 mm in front of the stove250 mm to the sides250 mm behind the stove28 / 56